Have You Checked Your Spam Folder Lately? No Need to if You Whitelist Key Domains
In today’s fast-paced digital environment, missing important emails because they land in your Spam folder can lead to significant issues. For Gmail users, especially in business, this can mean lost client communications, critical updates, or security alerts slipping through the cracks.
It’s easy to forget to check your Spam folder regularly—after all, it’s labelled ‘Spam’ for a reason, right? Unless you’re actively expecting an important message, days or even weeks might go by before you skim through the folder. But by then, you could already be missing time-sensitive emails like flight status changes, banking notifications, or cybersecurity warnings. The consequences of these oversights are clear.
Why You Should Whitelist Important Domains in Gmail
Whitelisting domains ensures that crucial emails bypass the Spam filter and land directly in your inbox. This is especially important for business users who deal with numerous communications daily. By whitelisting, you’re essentially telling Gmail which senders are trustworthy—balancing the risk of missing important emails while keeping out irrelevant ones.
How to whitelist a domain in Gmail?
1.Log into your Gmail account.
Make sure you’re using an account with administrative privileges if you’re managing emails for your company.
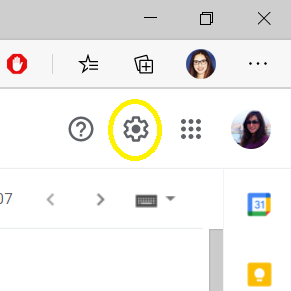
2. Click on the gear icon at the top right corner to access your settings.

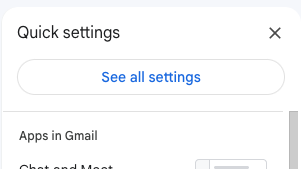
3. Select “See all settings.”

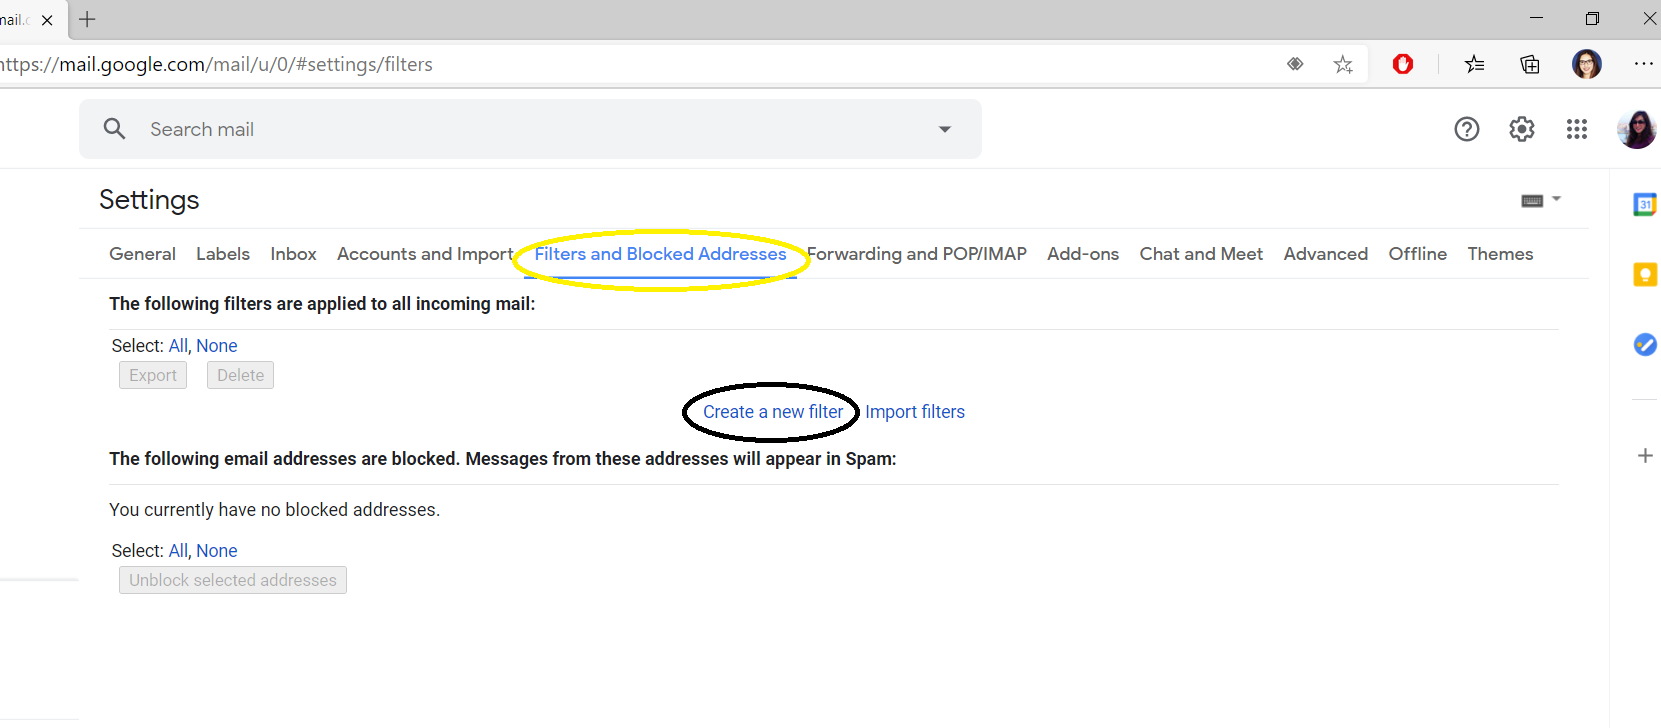
4. Navigate to the “Filters and Blocked Addresses” tab and click on “Create a new filter.”

5. Now, go to the ‘From’ box and type in the domain or email address you’d like to whitelist, then click ‘Create filter’ at the bottom.

6. Check the box “Never send it to Spam” followed by the “Create filter” button. This will ensure emails from that domain never go to spam.

You may also want to check “Always mark it as important”.
8. Categorize the emails by setting them to land in the “Primary” tab, ensuring that important communications are not buried under the Promotions or Social tabs.

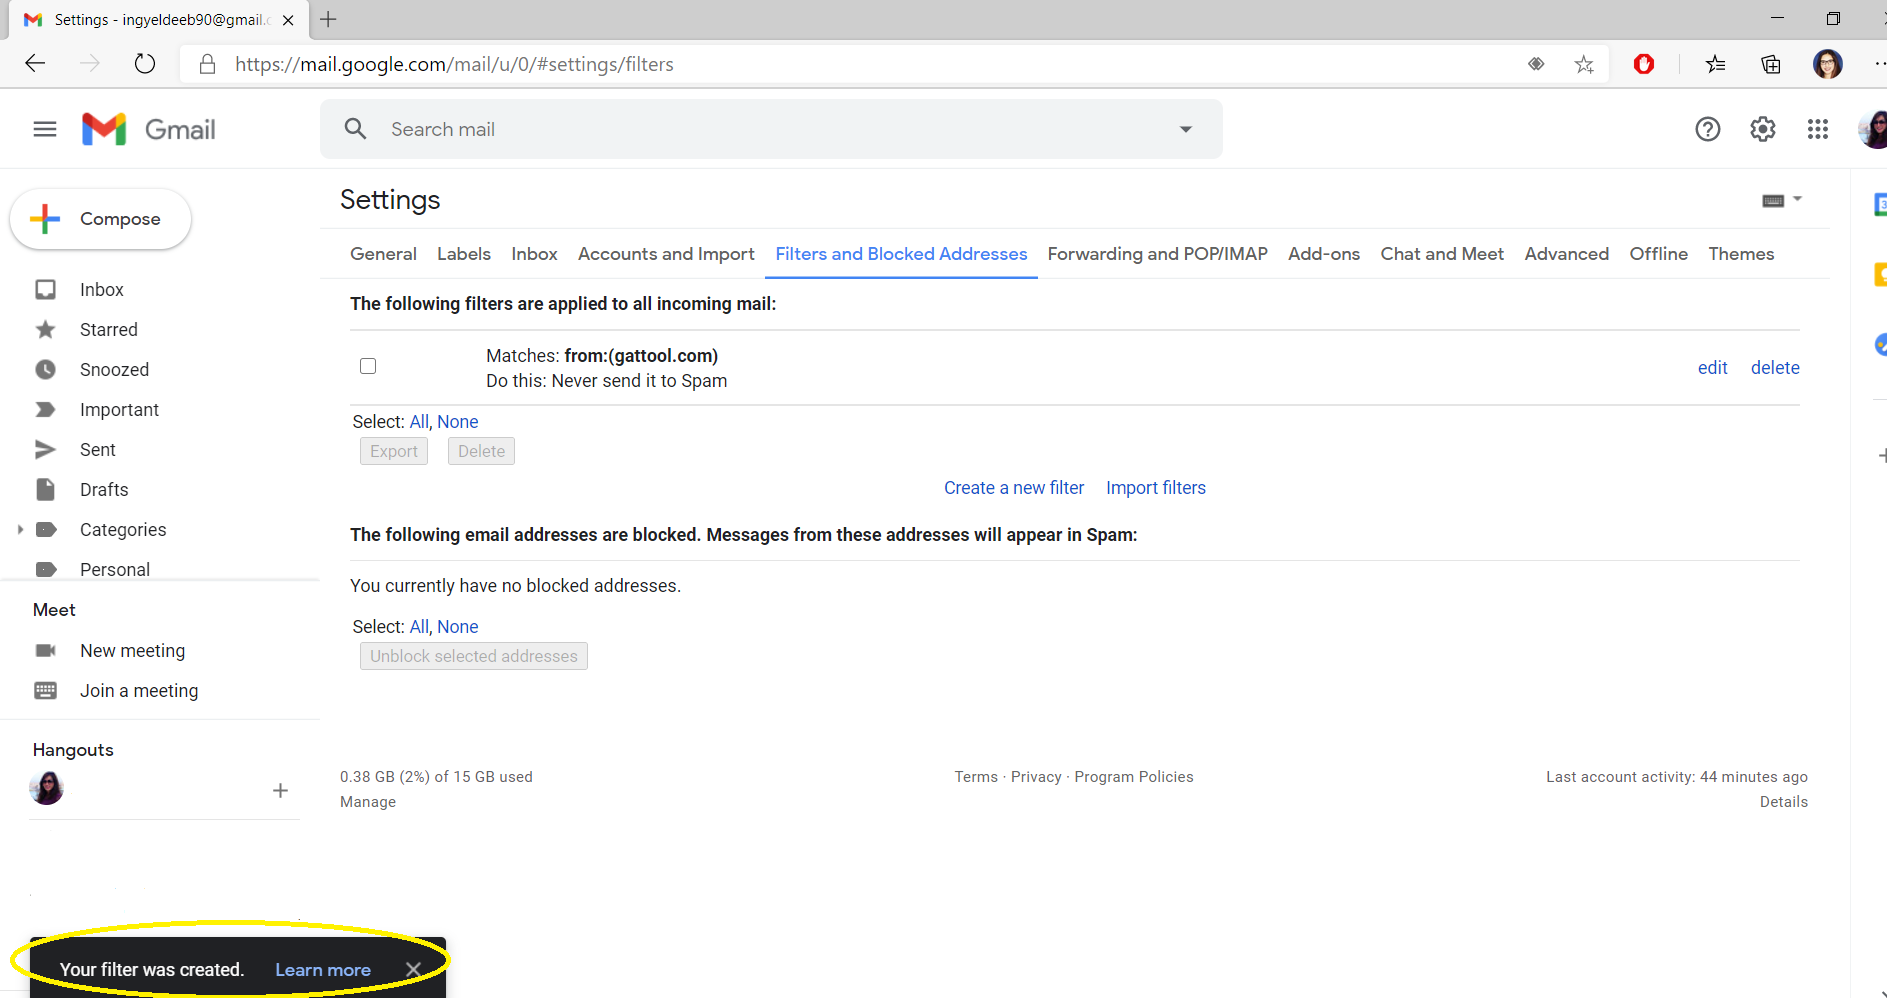
9. You’ll see a confirmation pop-up: “Your filter was created.” You can also view the filter under your settings for future adjustments.
And that’s it! Gmail will now make sure emails from your trusted domains always reach your inbox, bypassing the Spam folder entirely 📨

Bonus Tip for Gmail Users
If you’re managing emails for a larger team using Google Workspace, consider setting organization-wide email filters via the Google Admin console. This helps enforce company-wide email policies and ensures that critical communications reach the right people without delay.

Was this post helpful? Share it with your network and help others improve their email management with Gmail!
Insights That Matter. In Your Inbox.
Join our newsletter for practical tips on managing, securing, and getting the most out of Google Workspace, designed with Admins and IT teams in mind.


