

Proactive Threat Remediation: Why use GAT+ Email Deletion? #
In a modern digital workspace, a single phishing email reaching an inbox can lead to a full-scale security breach. While standard filters catch most threats, sophisticated “Zero-Day” or spear-phishing attacks often slip through.
GAT+ Email Deletion gives Administrators a powerful “Undo” button for the entire domain.
The Core Benefits: #
- Zero-Hour Response: Once the malicious email is identified, you can remove it from every single mailbox in your domain simultaneously.
- Precision Targeting: Use deep-dive filters (Subject, Message ID, Sender, or Keywords) to ensure you only remove the threat without affecting legitimate business communication.
- Neutralize Before the Click: By scanning the domain and deleting emails in bulk, you neutralize the threat while it is still sitting unread in the user’s inbox, preventing the initial “hook” from ever being clicked.
- Compliance & Accountability: Every deletion action is recorded in an immutable Admin Log. This provides a clear audit trail of who deleted what and when, ensuring your security operations remain transparent and compliant with internal policies.
- Operational Efficiency: Instead of sending domain-wide “Warning” emails (which some users inevitably miss), you take direct action to secure the environment, freeing up your IT team to focus on investigating the source of the attack.
Why use this? #
- Speed: Neutralize phishing attacks domain-wide in seconds.
- Precision: Use Message IDs or specific keywords to target only the malicious mail.
- Scope Control: Search the entire domain or just a specific user, group, or org. units of users.
How to Delete Emails with GAT+ #
- Navigate to GAT+ > Email > Delete emails.
- Use the Gmail Filter to locate the specific emails. You can search by:
- Sender/Recipient (From, To)
- Subject Line
- Keywords (Includes/Doesn’t include)
- Date Range (Last X days)
- Scope (Choose specific accounts to scan)
- Review the results and delete directly from the tool.
In the example below:
We search for the subject: URGENT: Security Alert for your Google Account – for emails received in the last 1 day over every user of the domain (scope all users).

How to Delete emails #
When the filter is applied to scan the users for the email, shortly, the emails found will be displayed.
The emails found will be displayed.
Select the emails you want to delete (by selecting the check mark beside each email) or delete all emails in bulk.

Select the “red” button and delete the found emails from the user’s inbox.
A warning message will be displayed that you are about to delete the emails. As a default, the “Messages will be transferred into users’ email trash bin.”
You can also select an option to remove permanently.

When proceeding, the emails will be deleted.
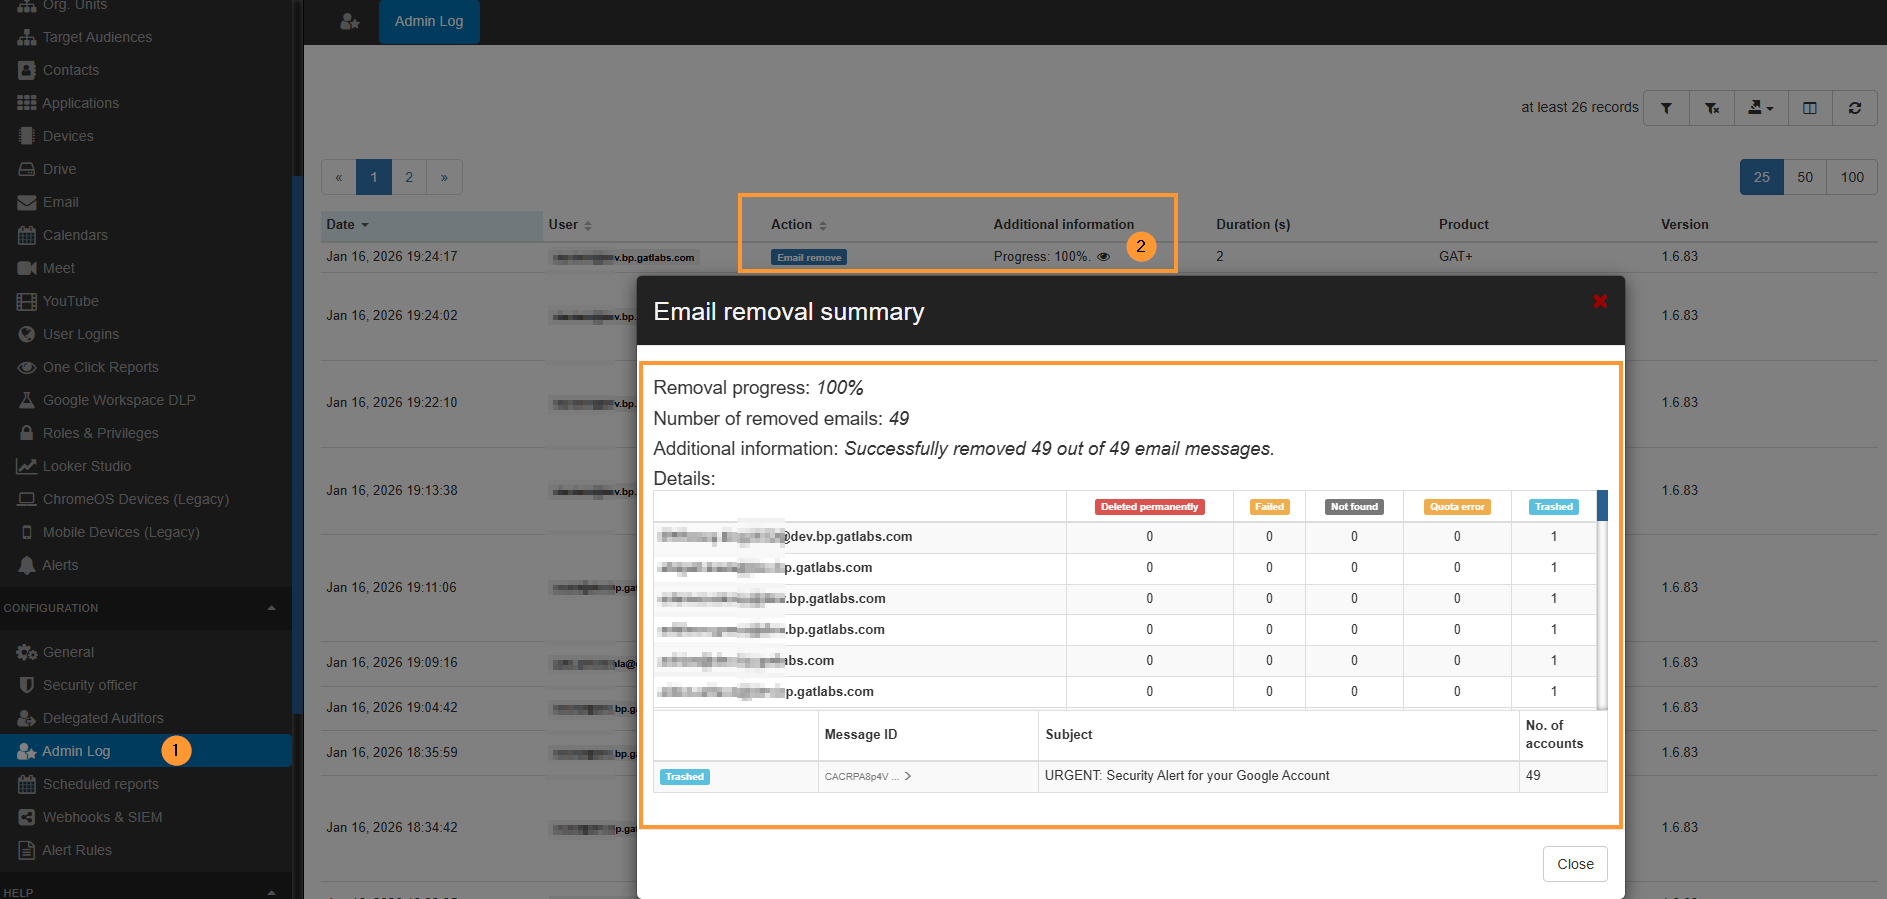
Admin log result #
By default, an immutable log will be created in the Admin log for the removal of the emails.
Navigate to GAT+ > Configuration> Admin log. It will show a log of the action that occurred.
Important note #
This page is designed to allow Admins to search for phishing, spam, or offensive emails quickly and across all email boxes in the domain. Once found, the Admin can then delete the emails from every mailbox without further approval. Admin can search for emails with one or more of the search fields below. For speed, it is recommended to keep the lookback period as short as possible.
After reviewing the returned emails, the Admin can then select all that need to be deleted.
Note: deleting emails CAN NOT be undone. Proceed after checking and with caution
FAQ’s #
1. What is the benefit of using Delete Emails in GAT+? #
It lets admins search across mailboxes using advanced filters and remove malicious emails in bulk. This reduces the time a threat remains active in your environment and avoids manual cleanup across multiple accounts.
2. Can I track who deleted emails and which messages they removed? #
Yes. GAT+ records deletions in an immutable Admin Log. Go to Configuration > Admin Log to see who initiated the deletion, what was deleted, and the timestamp.


