

GAT Flow allows admins to directly manage users. This direct access to the user account enables the Admin to view the current state of the User account and allows them to perform actions such as Setting the user Signature, Changing the users account details, Adding and Removing, Groups, Aliases, Phones, Addresses, and more
The Users module allows the admin to update the user data in real time as well as create or delete the user’s data.
Users audit #
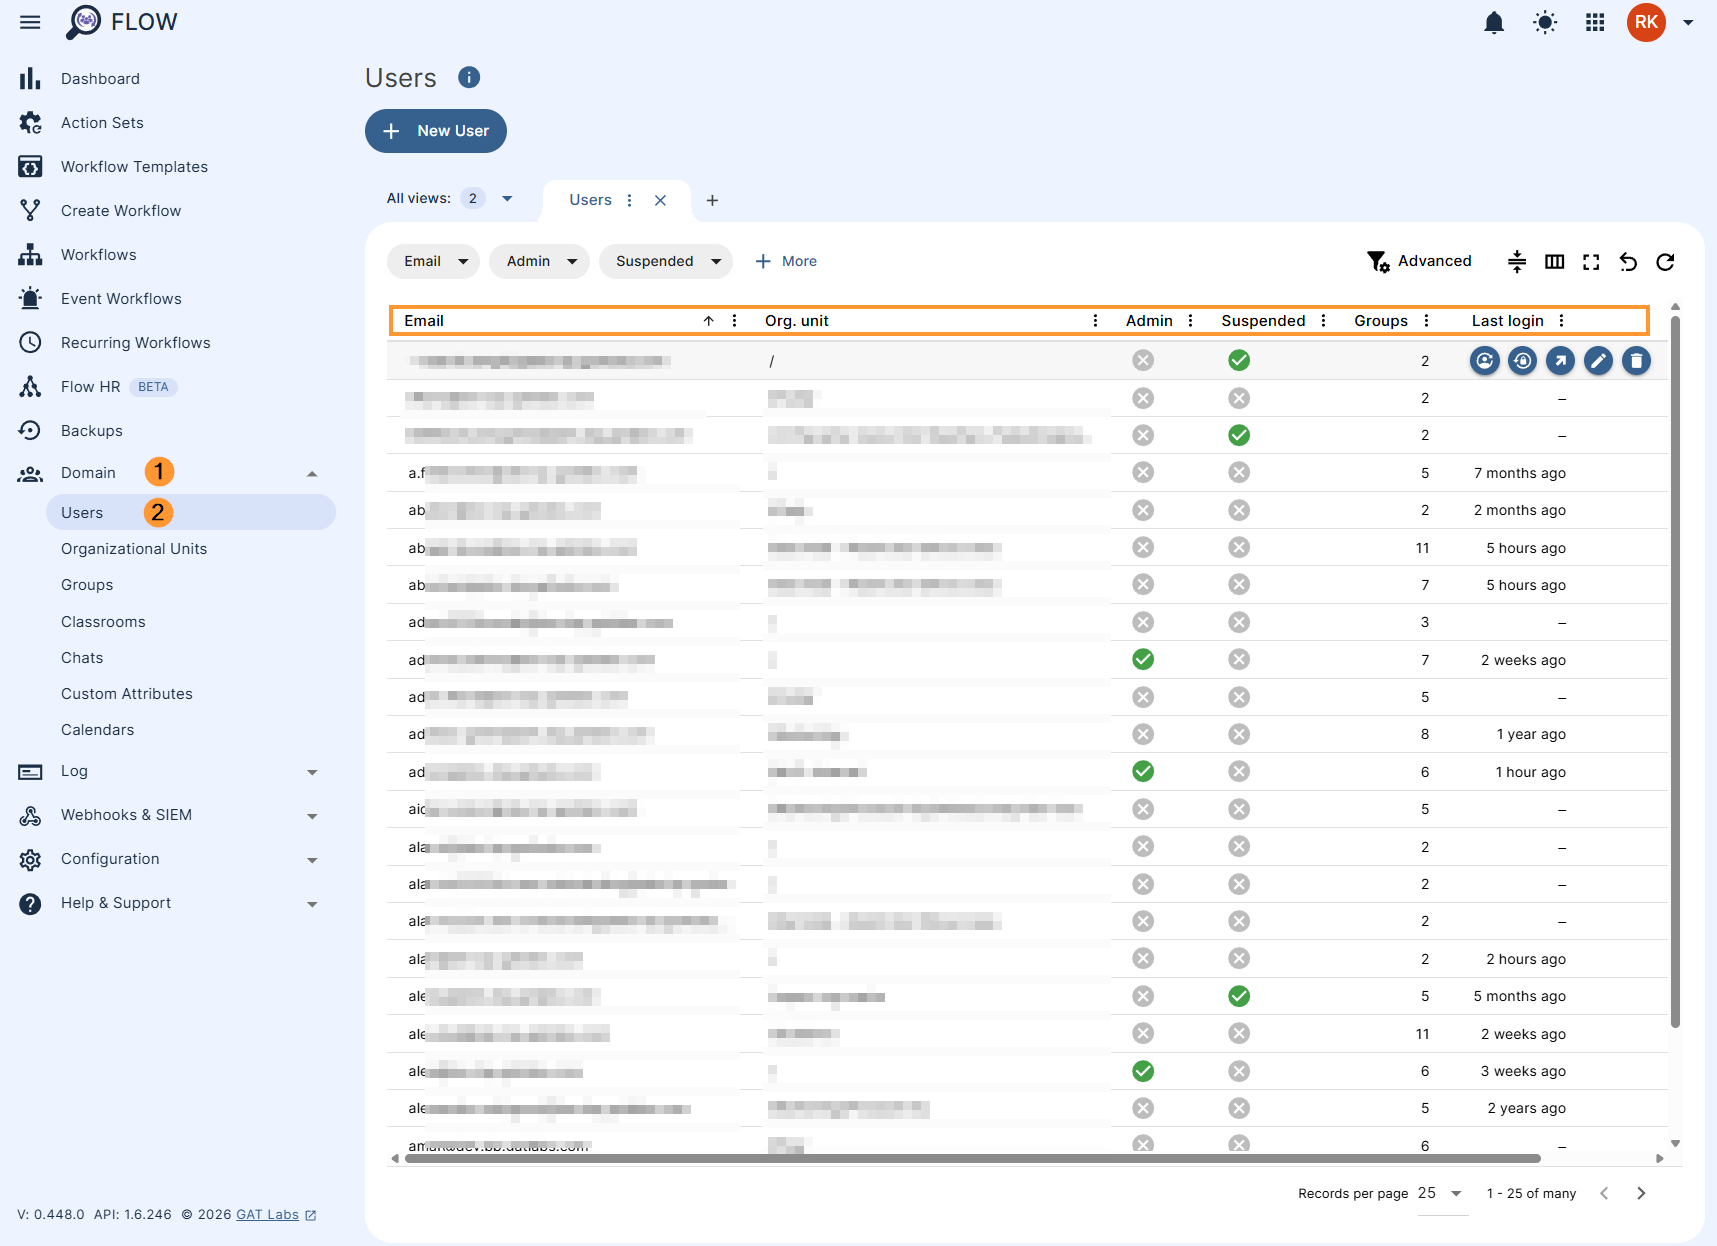
In Flow navigate to the Domain > Users
The “Users” tab will display a view of all the users of the domain.
The default view will show the User email, Org. Unit, If the user is Admin or Suspended, Number of Groups and the Last login date.
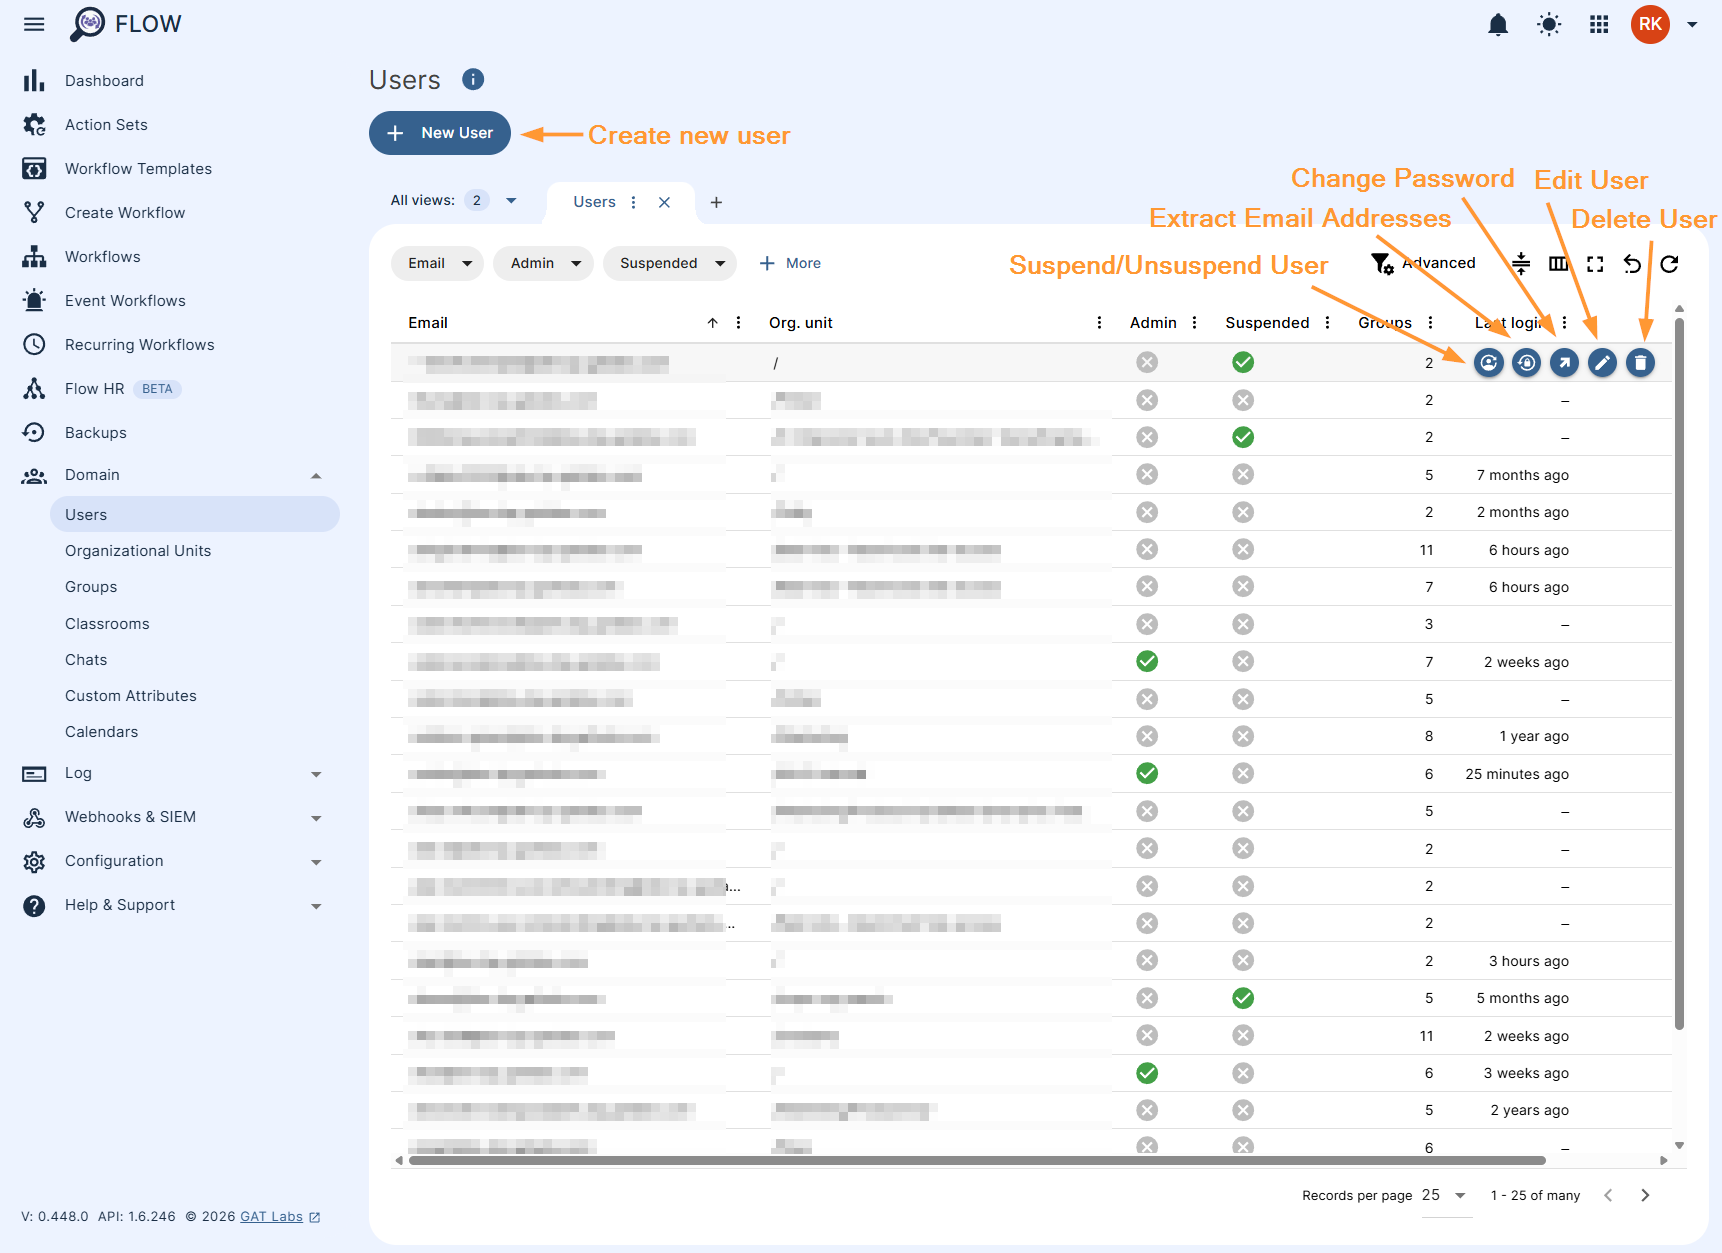
Actions available under Users tab #
In the Users tab an Admin can:
- use the ‘New Users’ button to create/onboard a single user into the domain
- use the ‘Suspend/Unsuspend User’ icon on the right-hand side to suspend/unsuspend user’s profile
- use the ‘Change Password’ icon on the right-hand side to change the user’s password
- use the ‘Extract email addresses’ icon on the right-hand side to extract all email addresses in the inbox for the defined parameters
- use the ‘Pencil’ icon on the right-hand side to edit the existing user’s profile
- use the ‘Trash’ symbol on the right-hand side to delete the existing user’s profile
Take action to edit the existing user’s details #
The Admin can search for a particular user or apply a filter to find the user’s details, then click on the “pencil” icon on the right side to be able to view and edit the information.
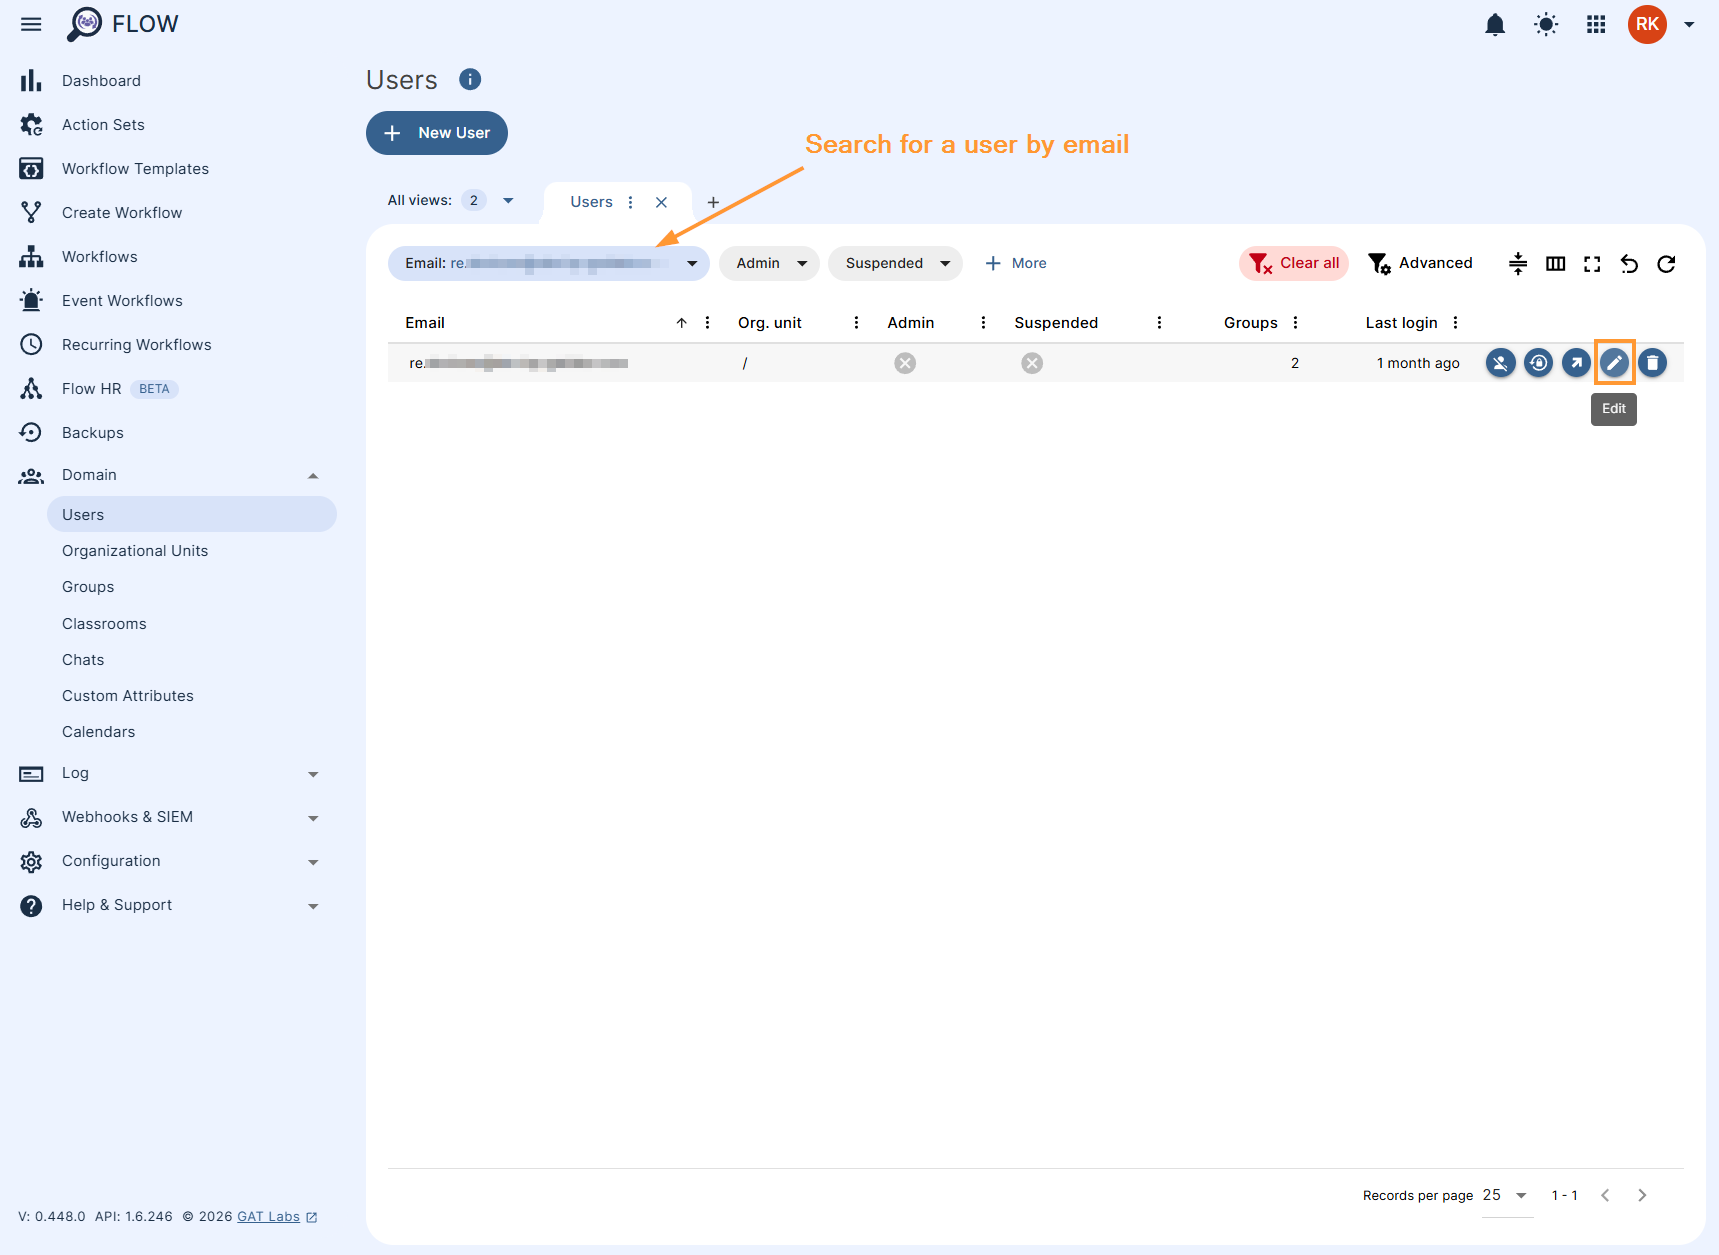
This will show all the details for the user.
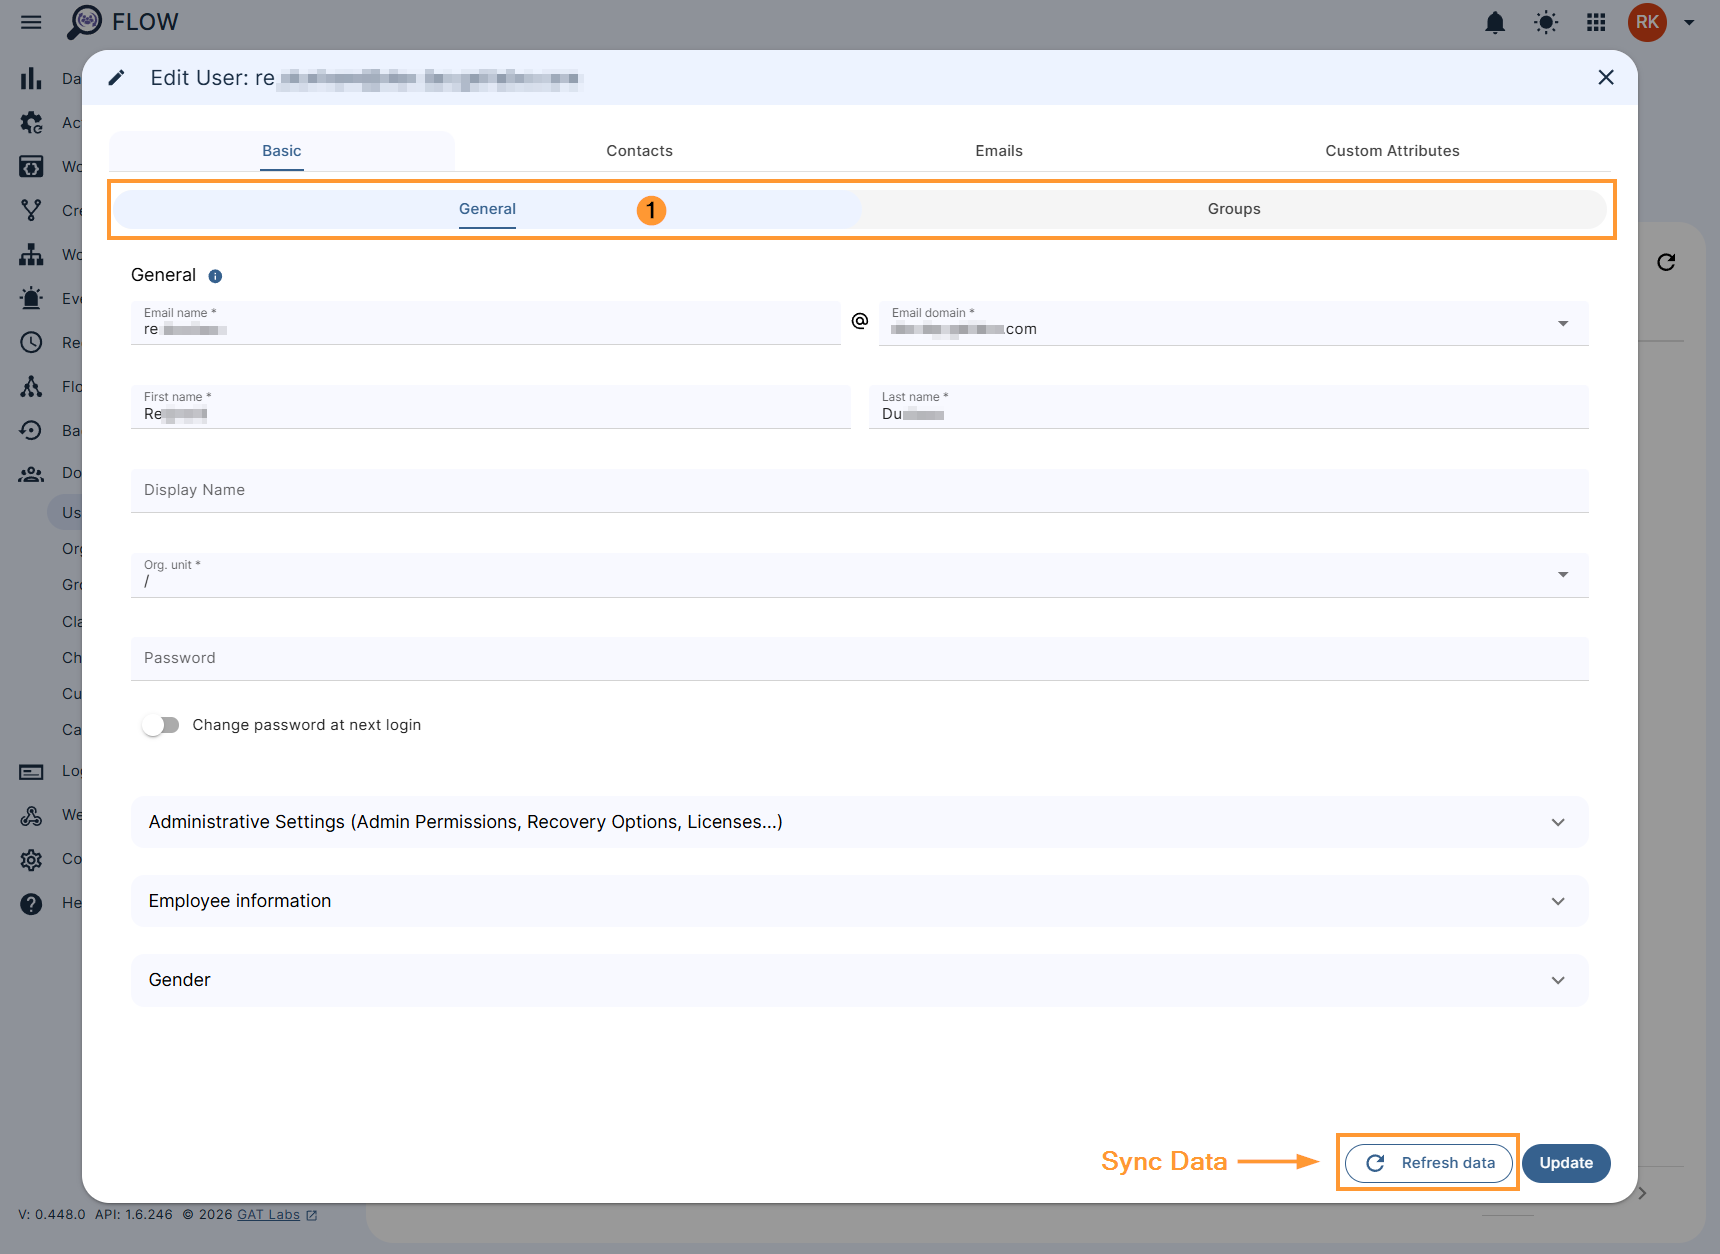
The ‘edit user’ section is divided into 4 general tabs and each of them contains several sub-tabs:
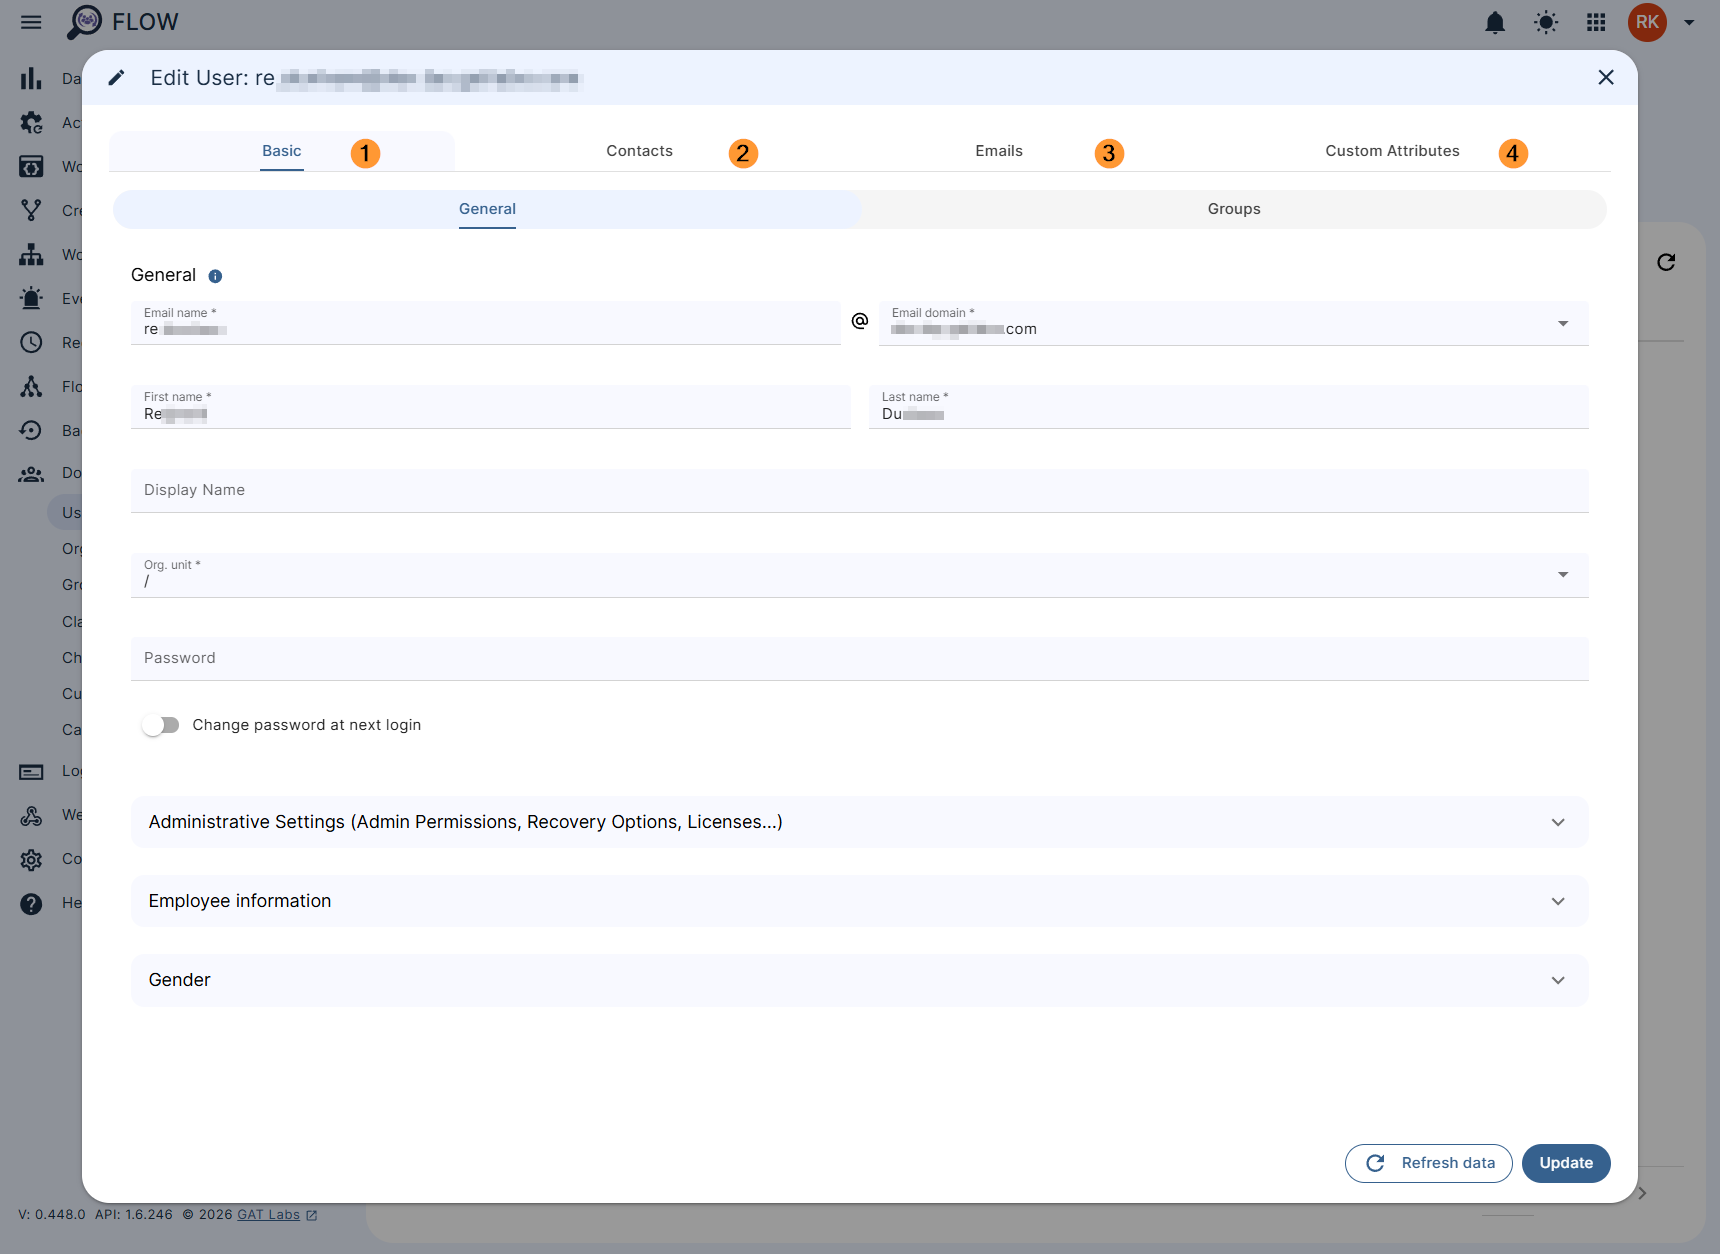
- Basic:
- General
- Groups
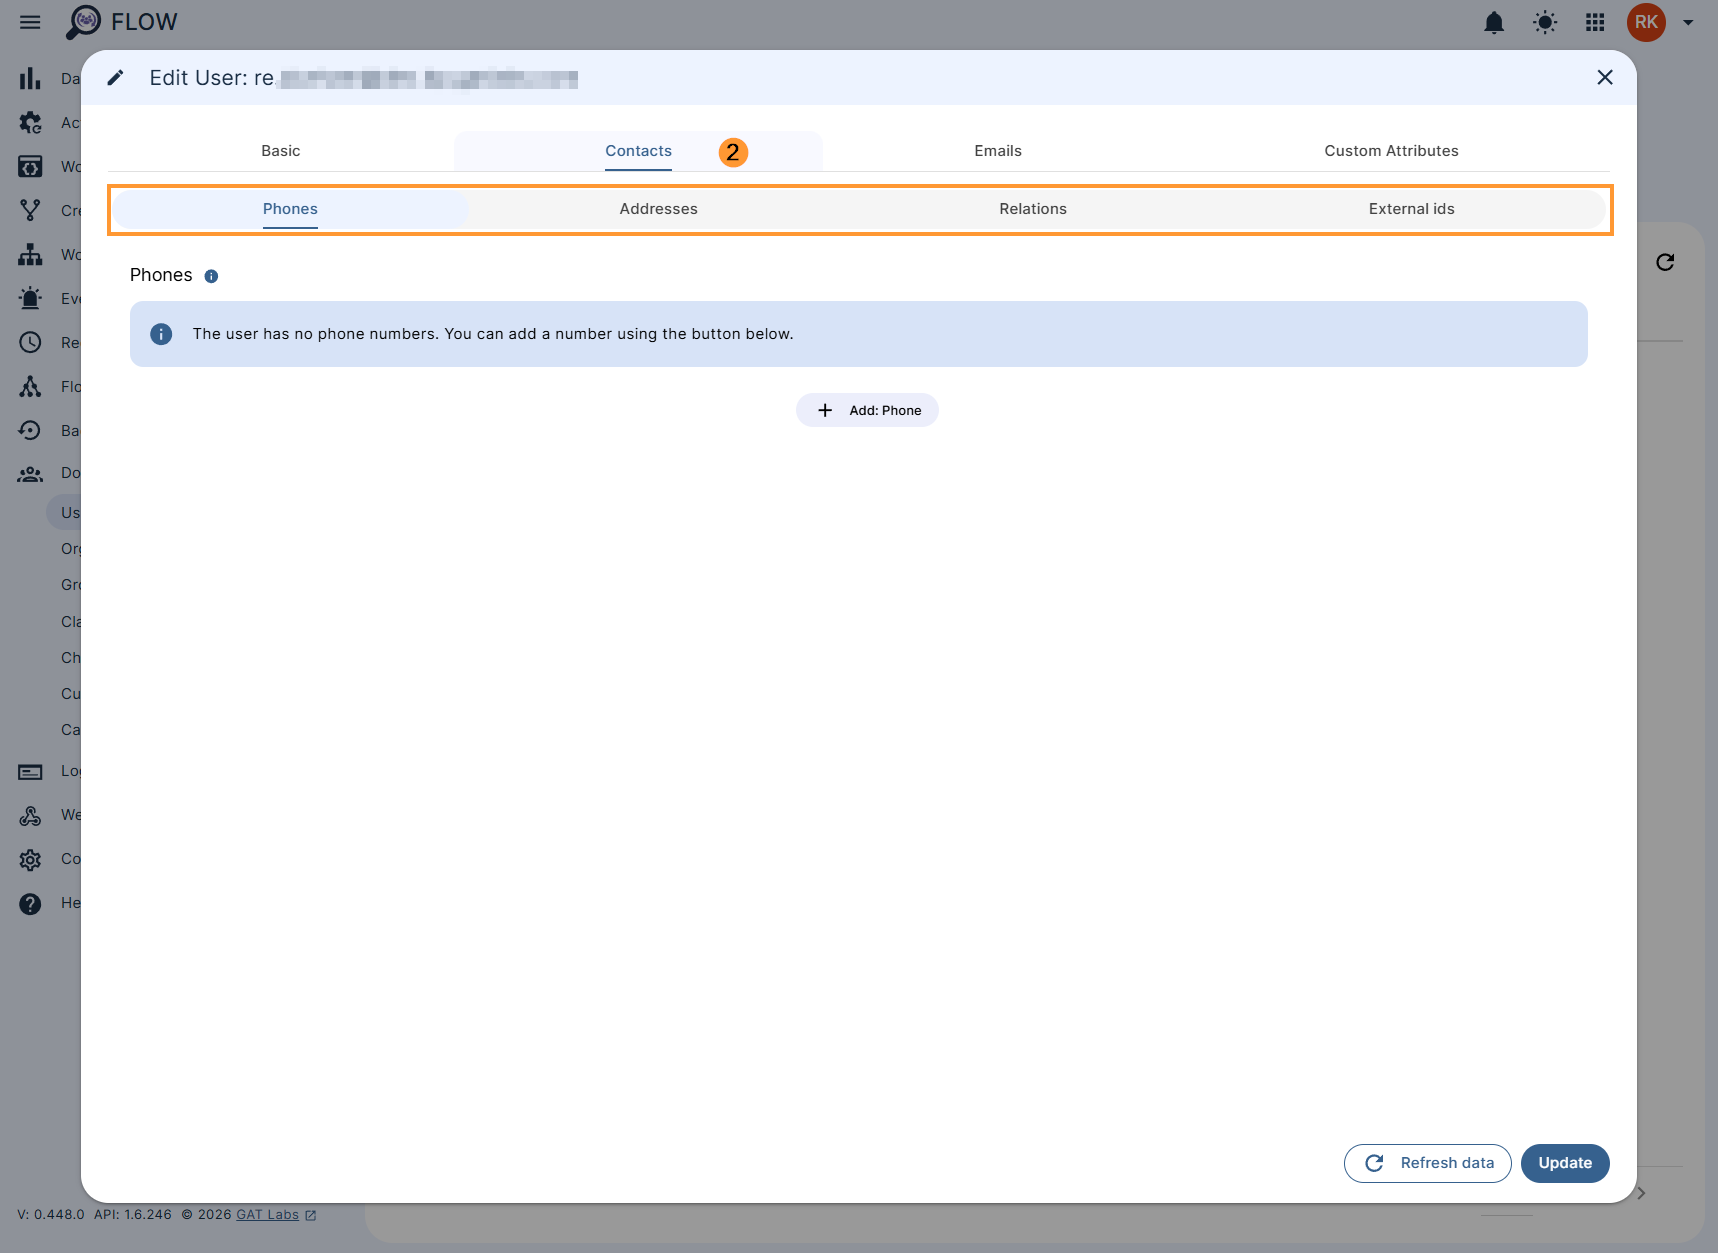
- Contacts
- Phones
- Addresses
- Relations
- External ids
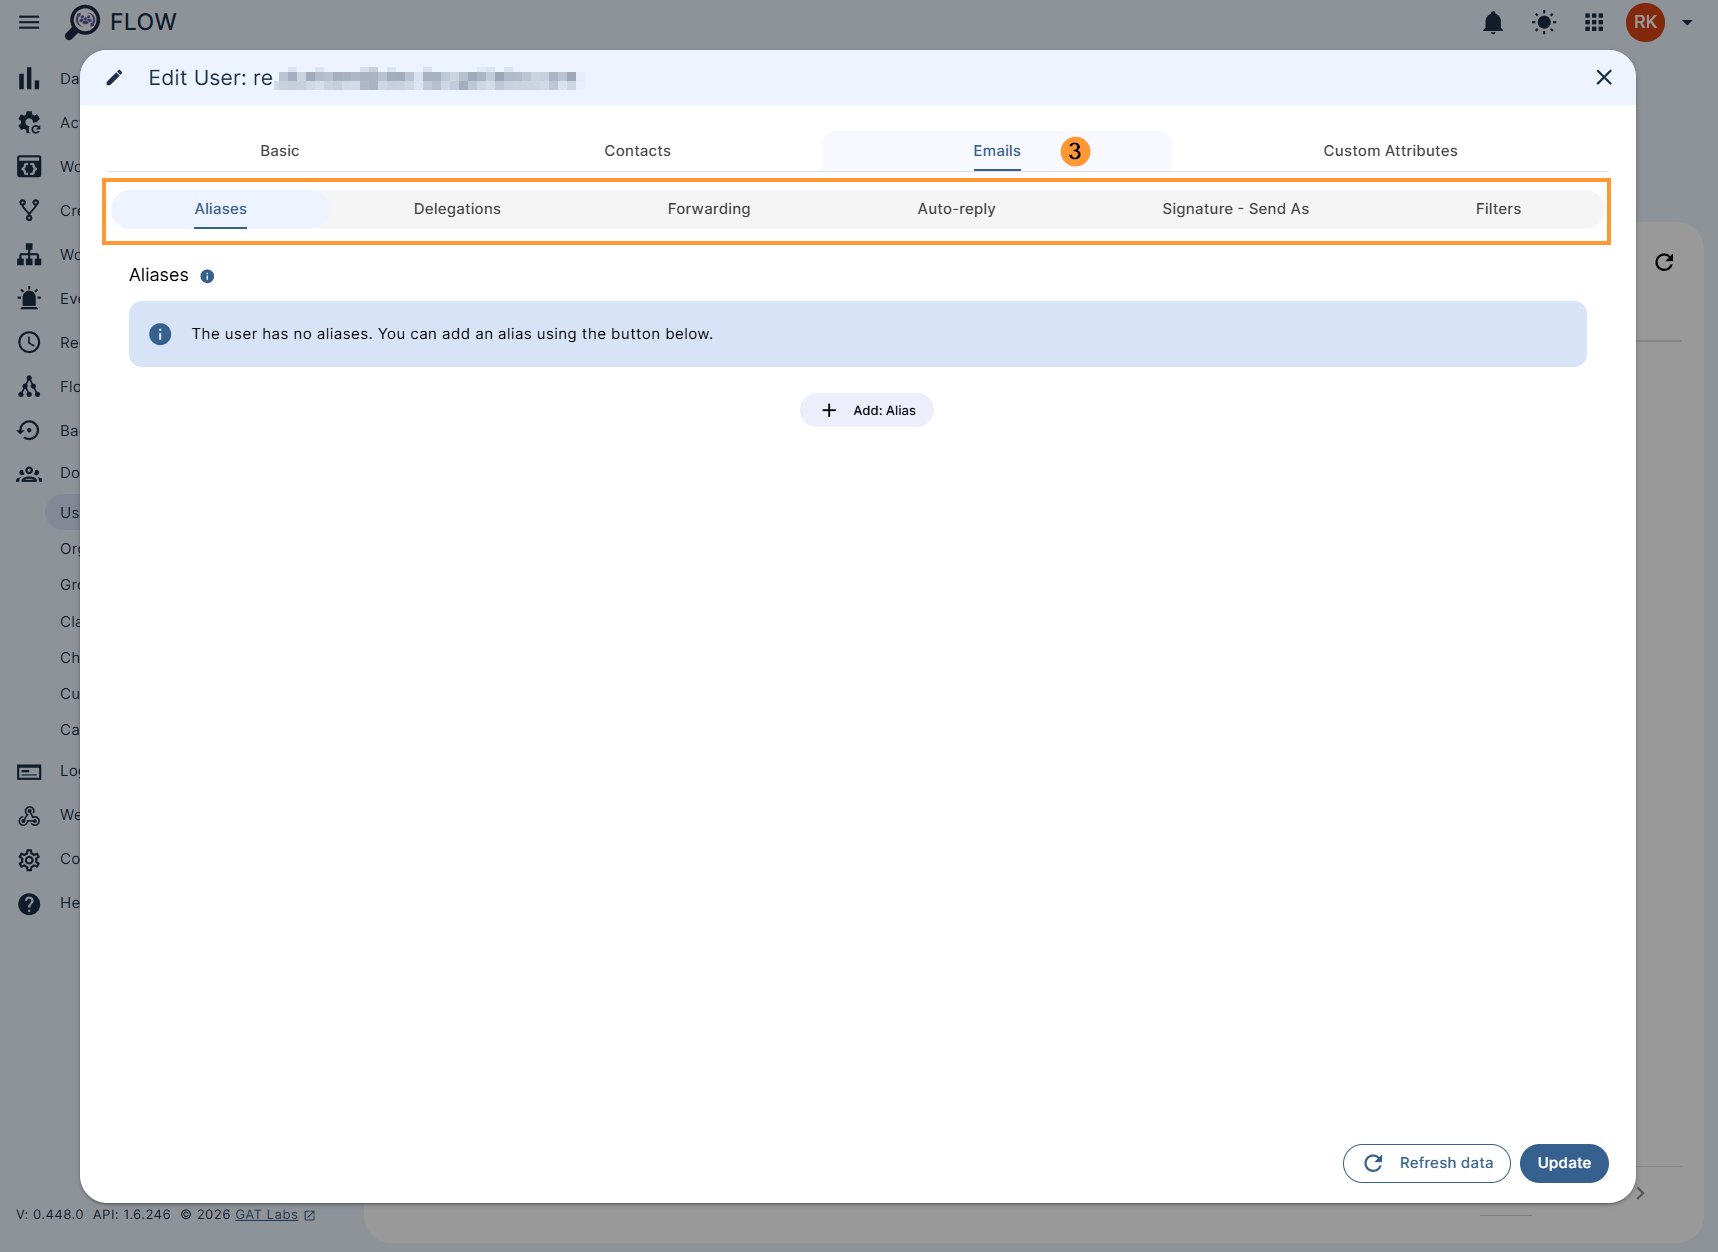
- Email
- Aliases
- Delegation
- Forwarding
- Auto-reply
- Signature – Send as
- Filters
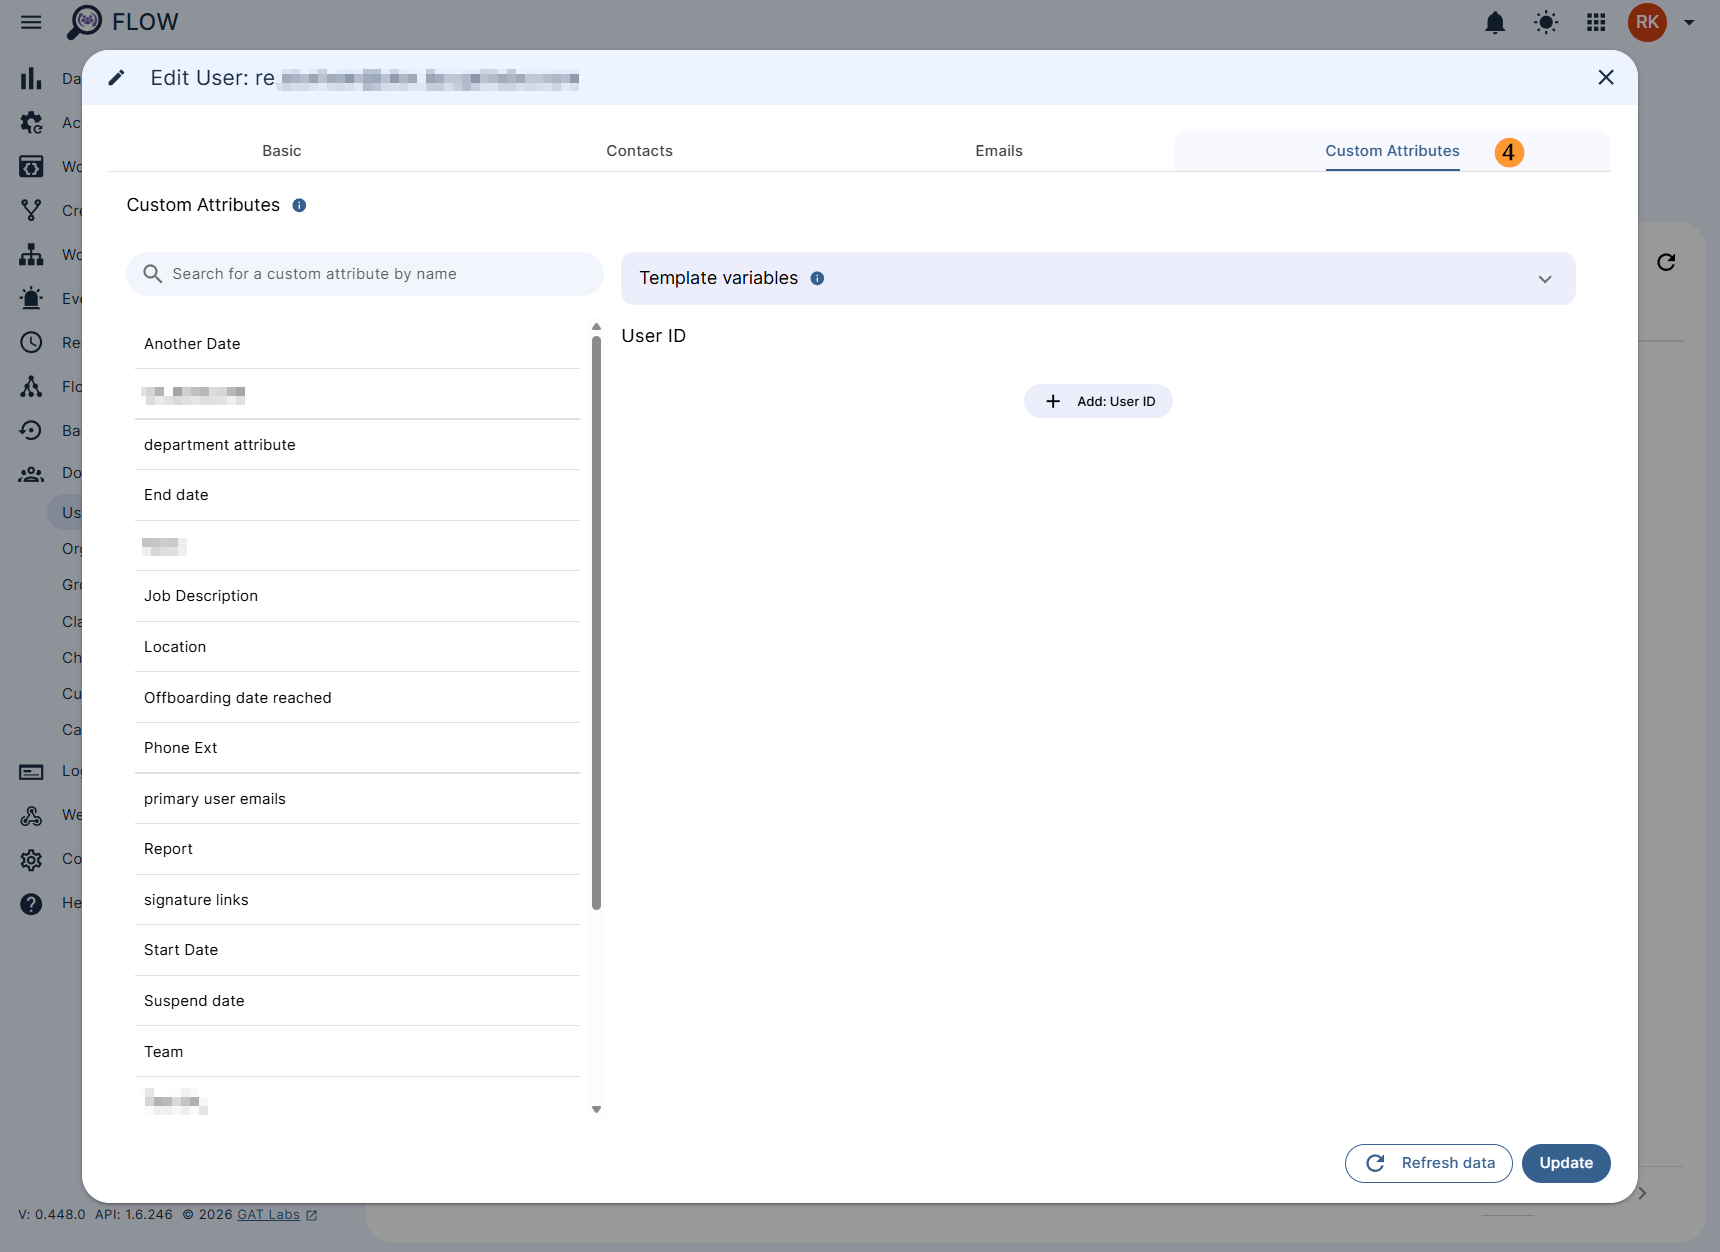
- Custom attributes
Each section under each tab is editable:
Basic section #
- Basic > General
- Email name – change the user’s email address
- Email domain – select a domain from the dropdown to apply to the user
- First and Last name – add, edit or remove the First name and Last name of the use
- Display Name – add, edit or remove the user’s display name
- Org. Unit – change the user Organization unit
- Password – set and change the user password
- Change password at next login – this will automatically prompt the user to change their password at next login
- Administrative Settings
- Admin – set the user as Admin or remove those privileges
- Suspended – set the user as Suspended or Unsuspended
- Show in a global directory – enable the User to be visible or not in the Global directory
- Private email – add, edit or remove the private email
- Recovery phone – add, remove or edit the recovery phone number
- Recovery email – add, remove or edit a recovery email address
- Licences – assign the user licence type, the license must be available
- example: when attempting to assign an archived license, the user must already be archived
- NOTE: Licences data is refreshed once per day
- Employee Information
- Organization name – add, remove or edit the organization name
- Job title – add, remove or edit the job title for the selected user
- Employee type – add, remove or edit the employee type
- Department – add, remove or edit department for the selected user
- Cost center – add, remove or edit the employee type
- Building ID – add, remove or edit the building id
- Area – add, remove or edit the area
- Floor name – add, remove or edit the floor name
- Floor section – add, remove or edit the floor section
- Gender
- Address me as – enter how would you like to be addressed
- Gender – set up the gender
- Female
- Male
- Other – enter custom gender
- Rather not say
- Basic > Groups – Add and Remove users from the chosen Groups. Select the Group email and add the users’ role for the chosen group
- Member – add the user as a member of the chosen group
- Owner – add the user as an owner of the chosen group
- Manager – add the user as a manager of the chosen group
Contact section #
- Contact > Phones – Add or Remove the user’s phone number
- Grand Central – enter the grand central phone number
- Home – enter the home phone number
- Mobile – enter the mobile phone number
- Work – enter the work phone number
- Assistant
- Callback
- Car
- Company main
- Home fax
- ISDN
- Main
- Other
- Other fax
- Pager
- Radio
- Telex
- TTY, TDD
- Work fax
- Work mobile
- Work pager
- Contact > Addresses – Add or Remove user Addresses
- Home – enter the home address
- Other – enter the other address
- Work – enter the work address
- Contact > Relations – Add relations to the user
- Contact > External Id – add, remove or edit external id
Email section #
- Email > Aliases – Add or Remove user Aliases
- Email > Delegation – Add or remove email delegation
- Email > Forwarding – Enable email auto-forwarding
- Auto-Forwarding – on/off option
- Deposition – select an option
- Keep a copy in the inbox
- Mark copy as read
- Archive copy
- Delete copy
- Auto-forward (in use) – enter any of the added (accepted) forwarding addresses
- Deposition – select an option
- Forwarding List – list of accepted or pending Email forwardings
- Auto-Forwarding – on/off option
- Email > Auto-reply – set up auto-reply message directly from the Users module, enable or disable according to the needs
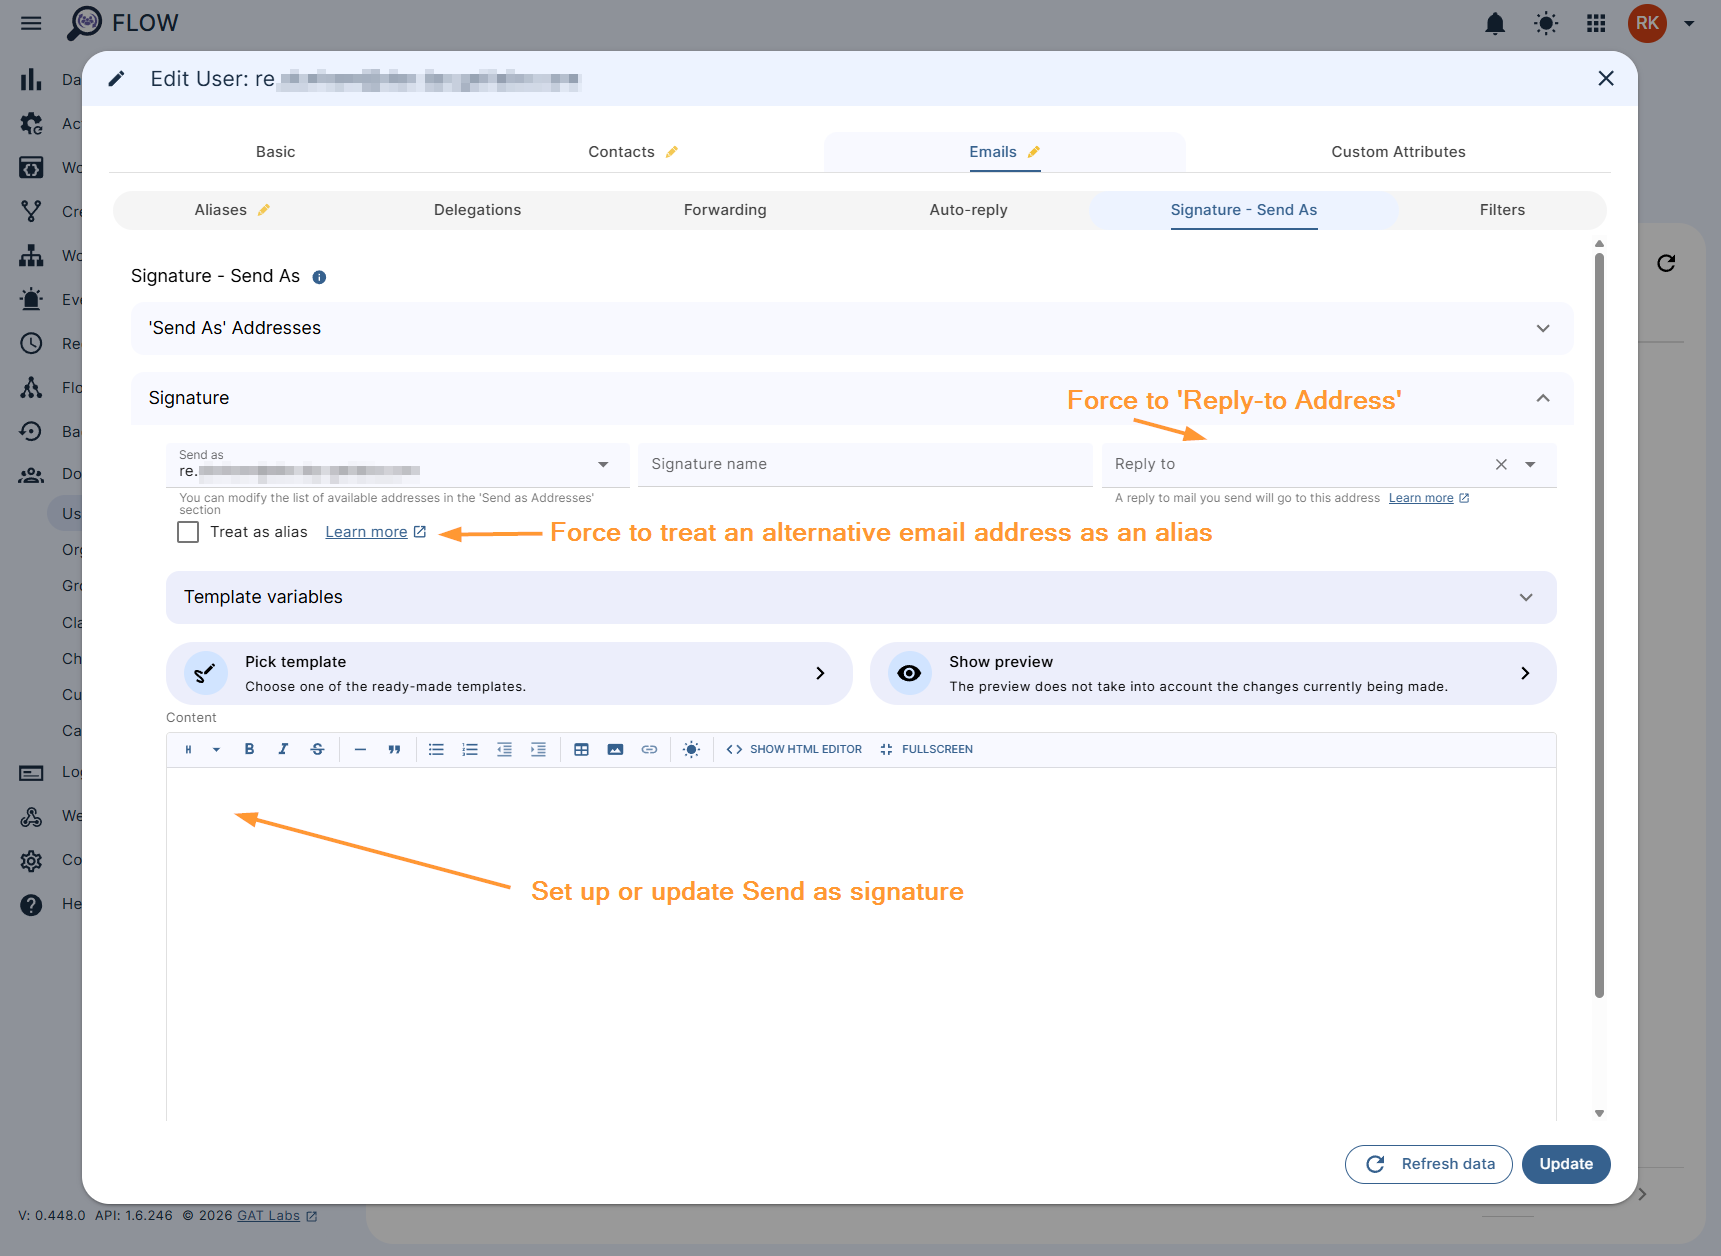
- Email > Signature – Send as – This allows the Admin to view the current signatures of the users and manage them. Using this option the Admin can directly:
- add or remove Send as email address
- select the ‘Default’ email address
- Signature
- add and update the Signature for every Send as email address set up,
- force to treat an alternative email address as an alias by toggling ‘Treat as an alias’ option,
- force to ‘Reply-to address’
- Email > Filters – set up Gmail filters
Custom attributes section #
-
Custom attributes – add custom attributes to the selected user
Result of editing #
The user details will be updated right away and reflected in the Google Workspace Admin console.
The email signature change will be reflected in the User’s Gmail after refresh.
Refresh user data #
There is an option to “Refresh data” (scan now). If any details are not up to date or any recent changes were made in the Google Workspace Admin console, the Refresh button will sync the data with the Google Admin console.


