

GAT Flow is a User Management tool for Google Workspace Admins to take a single or bulk action to Onboard (create), Offboard (delete), or Modify (update) users.
Creating a Workflow #
Selecting the Workflow Type #
In GAT Flow, you can create different types of Workflow as per your organization’s requirement that contains action sets. You can also create multiple workflows at the same time. Every department in your organization can have its own unique workflow, and every workflow can be fed individual user names or a list from a sheet.
An admin can set this up by clicking ‘Create workflow’, giving it a name, and selecting the type of workflow – ‘Onboarding’, ‘Offboarding’, or ‘Modify’.
NOTE: Offboarding will either archive, suspend or delete the selected User, Group or Organizational Unit depending on the last offboarding action you choose.
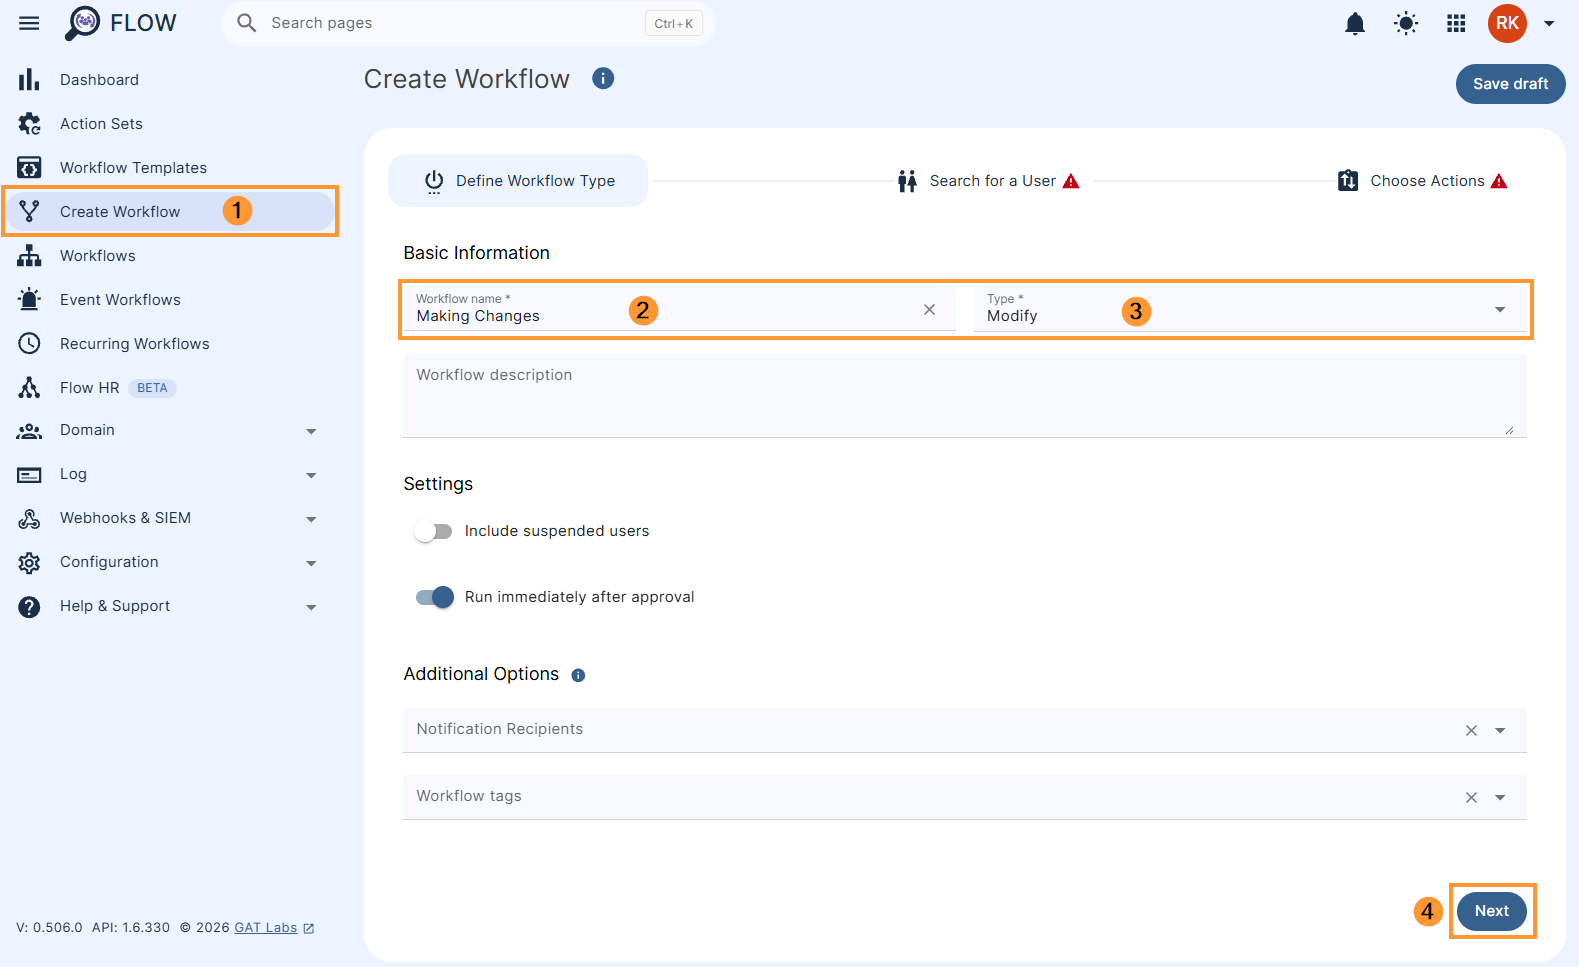
- Notification Recipients – use to designate a specific person or group of users to be notified when the workflow is completed
- Workflow tags – use to apply your customized tags for easier workflow identification. How to Create Workflow Tags in GAT Flow
Once you are ready, click ‘Next’
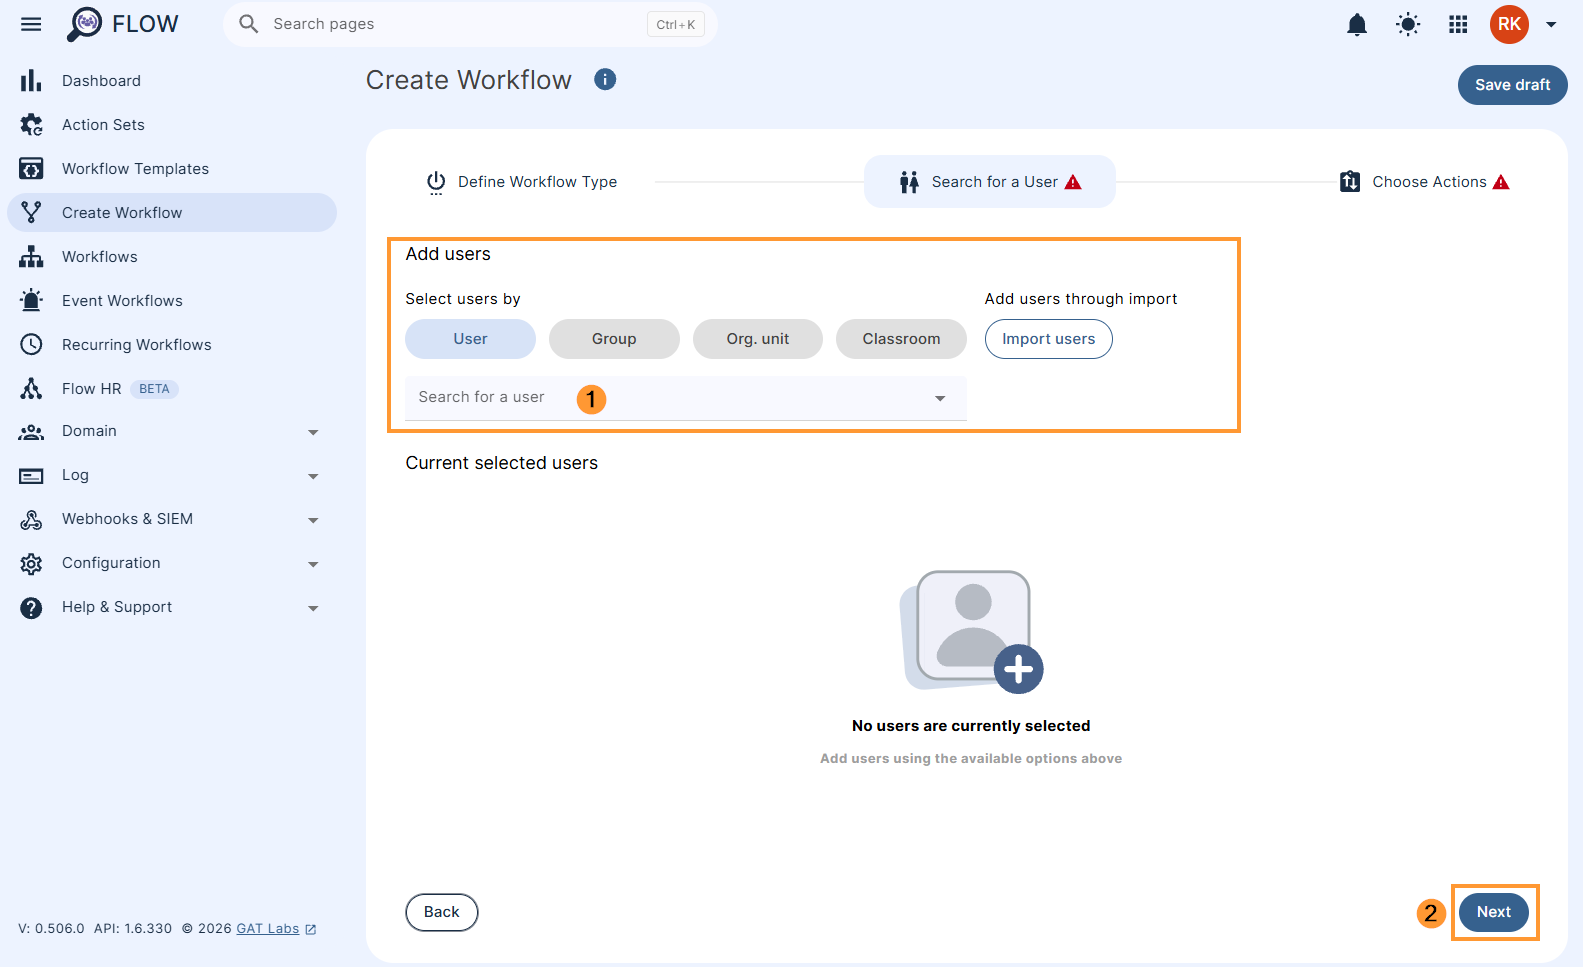
Search for a User, Group or OU #
Select the User, Group, or Organisational Unit, you want the actions to affect.
When you are finished select ‘Next’
Choose Actions #
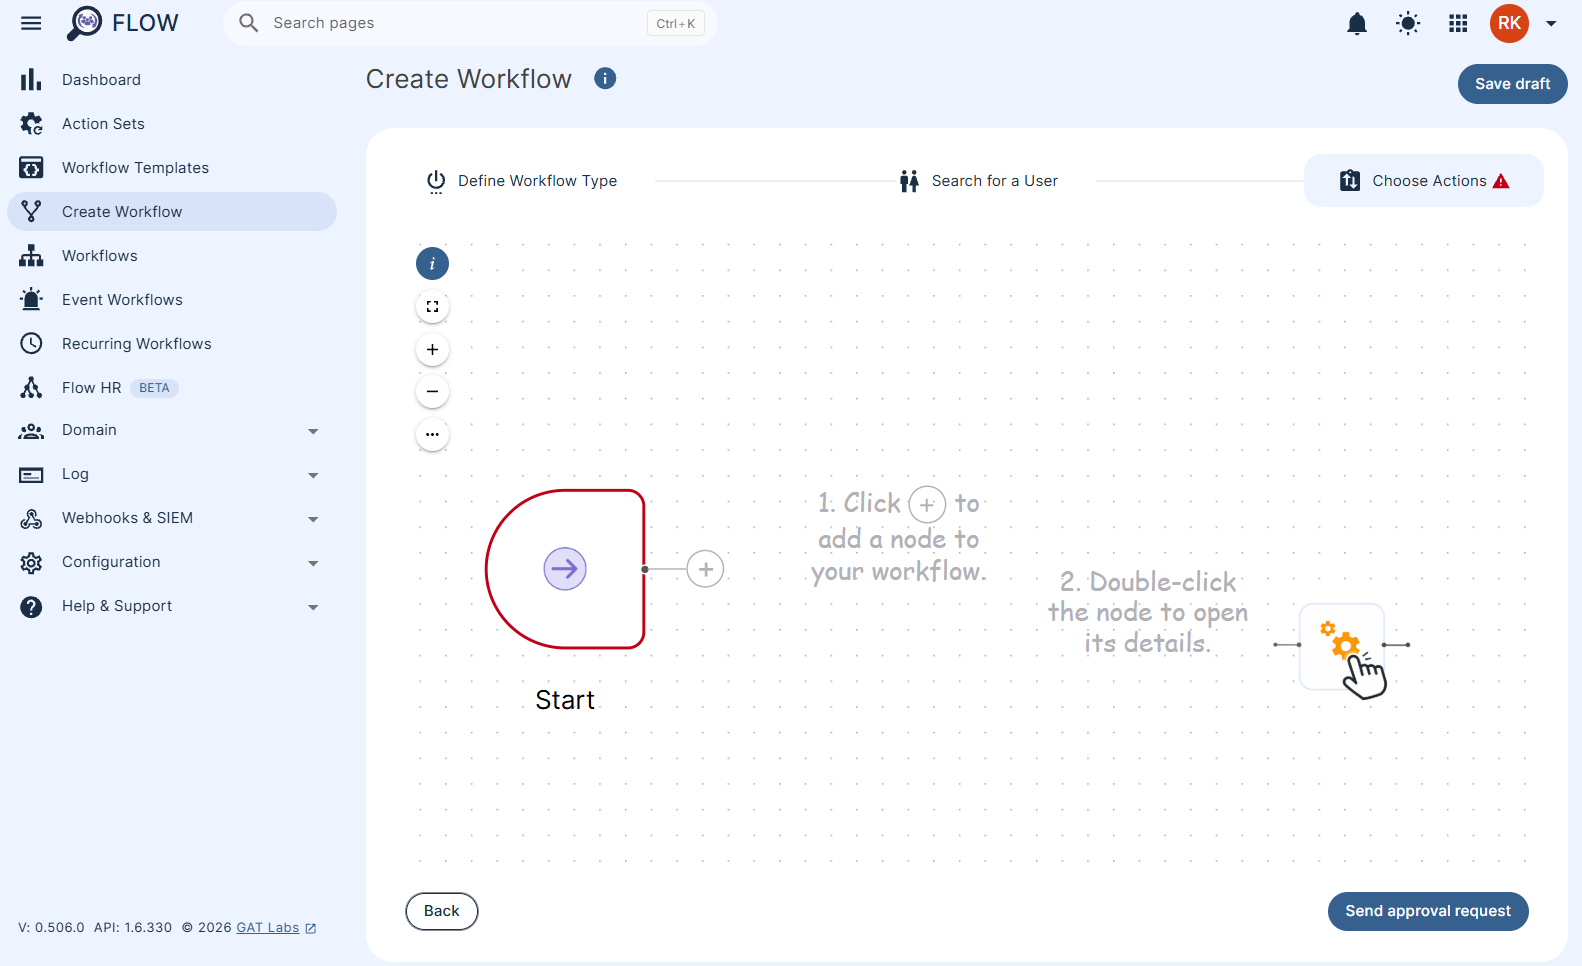
The next screen will allow you to choose what actions you would like to take on the selected users.
Click the + icon to add an action node to your workflow. Double click the action node to open it’s details and configure the settings.
When you click the + icon, you can then either select one of the following:
- Add action – Choose from the available actions and add it to the workflow.
- Add actions set – Select pre-defined sets of actions and insert them into the workflow at the chosen location.
- Add condition – Add a condition that determines which of two paths to follow: one if the condition is met, and the other if it is not.
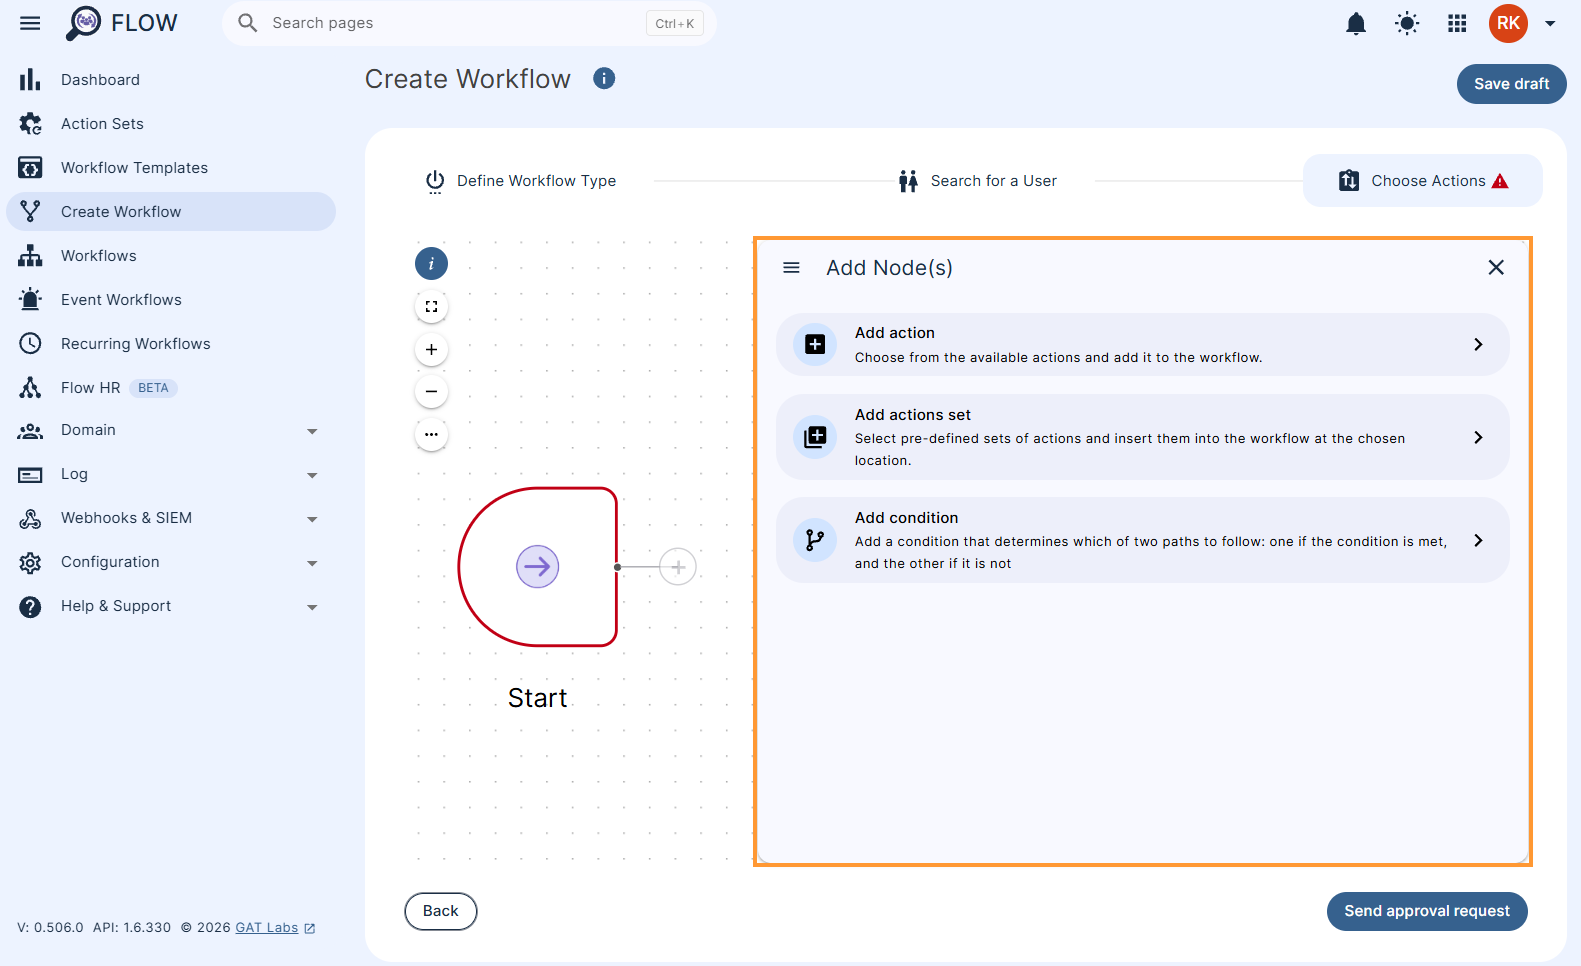
You can then start to add actions to your workflow
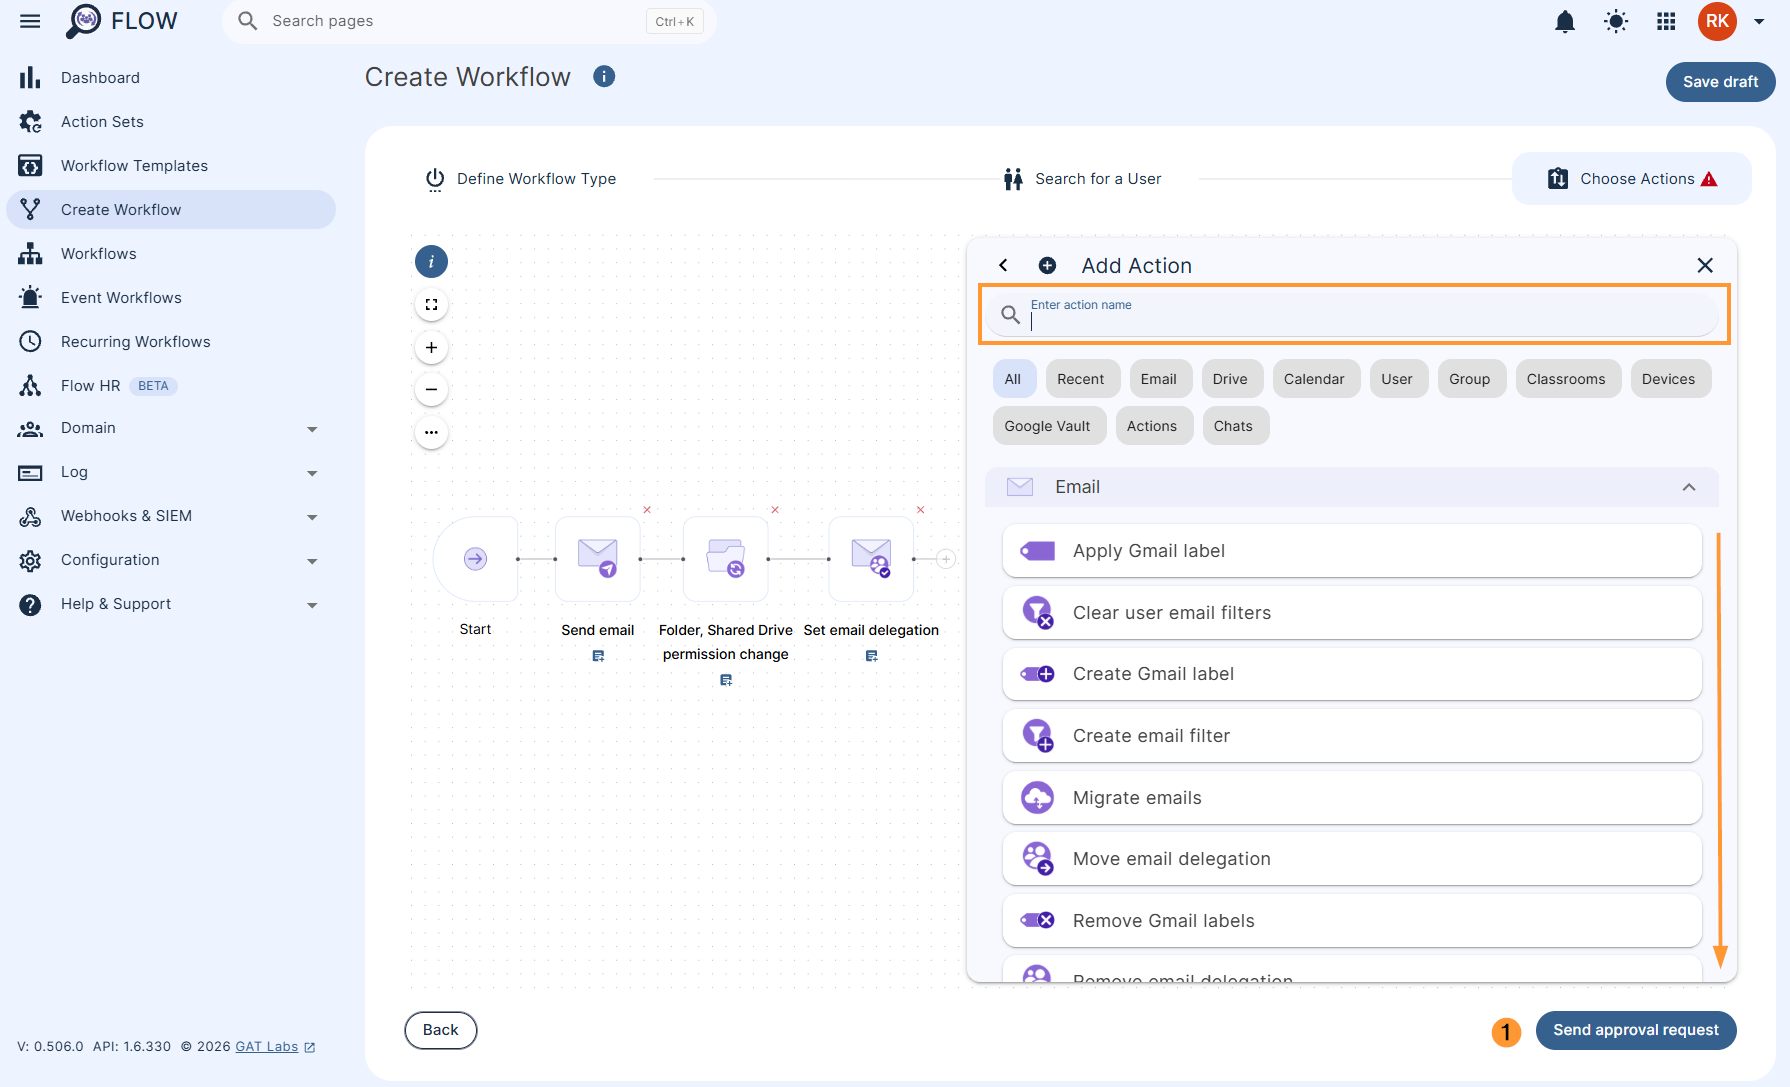
Once you have chosen the specific actions and configured each action, you can click ‘Send approval request’
The request will then be sent to the Security Officer via email. The workflow will start running once they have been approved by the officer.


