View Categories

Alert Rules – Location

2 min read

Overview #

GAT Shield supports the use of Location maps to provide alerting and/or access control for Admins.

The alerts can be set up in Shield.

Open Shield and click on Alert rules under Alerts.

Alert rule Location #

Select ‘+ Add New Rule’.

A pop-up window will be displayed.

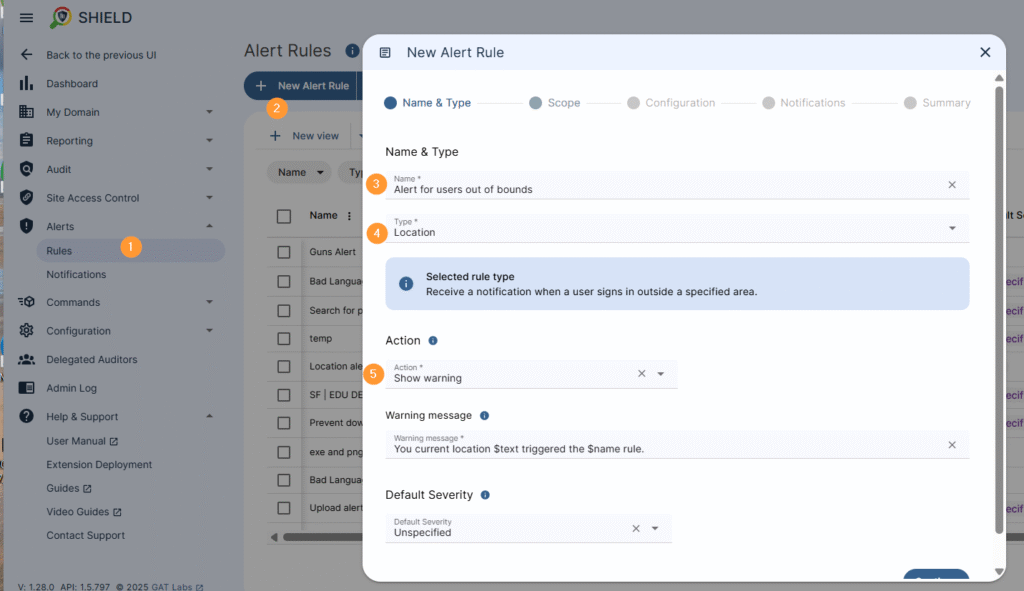
Add alert rule Location #

  • Set up a Name for the Rule
  • Select Type to be Location.
  • Select the Action to take when the alert is triggered:
    • Show warning
    • No action
  • Warning message – Users will see this message when the alert rule is triggered. Adjust the warning message if needed.
  • Select the alert Severity to enrich the reporting of the alert:
    • None
    • High
    • Low

The image describes the process of creating an alert rule for users outside of a location. Navigate to the Alerts module on the left hand panel and expand it. Select the Rules submodule. To create a new alert rule select new alert rule. a pop up window is displayed with a Name & Type tab. Name the alert. Select the type of the alert as location. Select the Action to take when the alert is triggered. A warning message can be customised. Default severity can be adjusted to assign a benchmark for the alert triggered in reporting.

Continue to the Scope tab.

Here, a Scope can be set to be applied to users.

  • User
  • Group
  • OU
  • All users

Rule exclusions and Time restrictions can also be set.
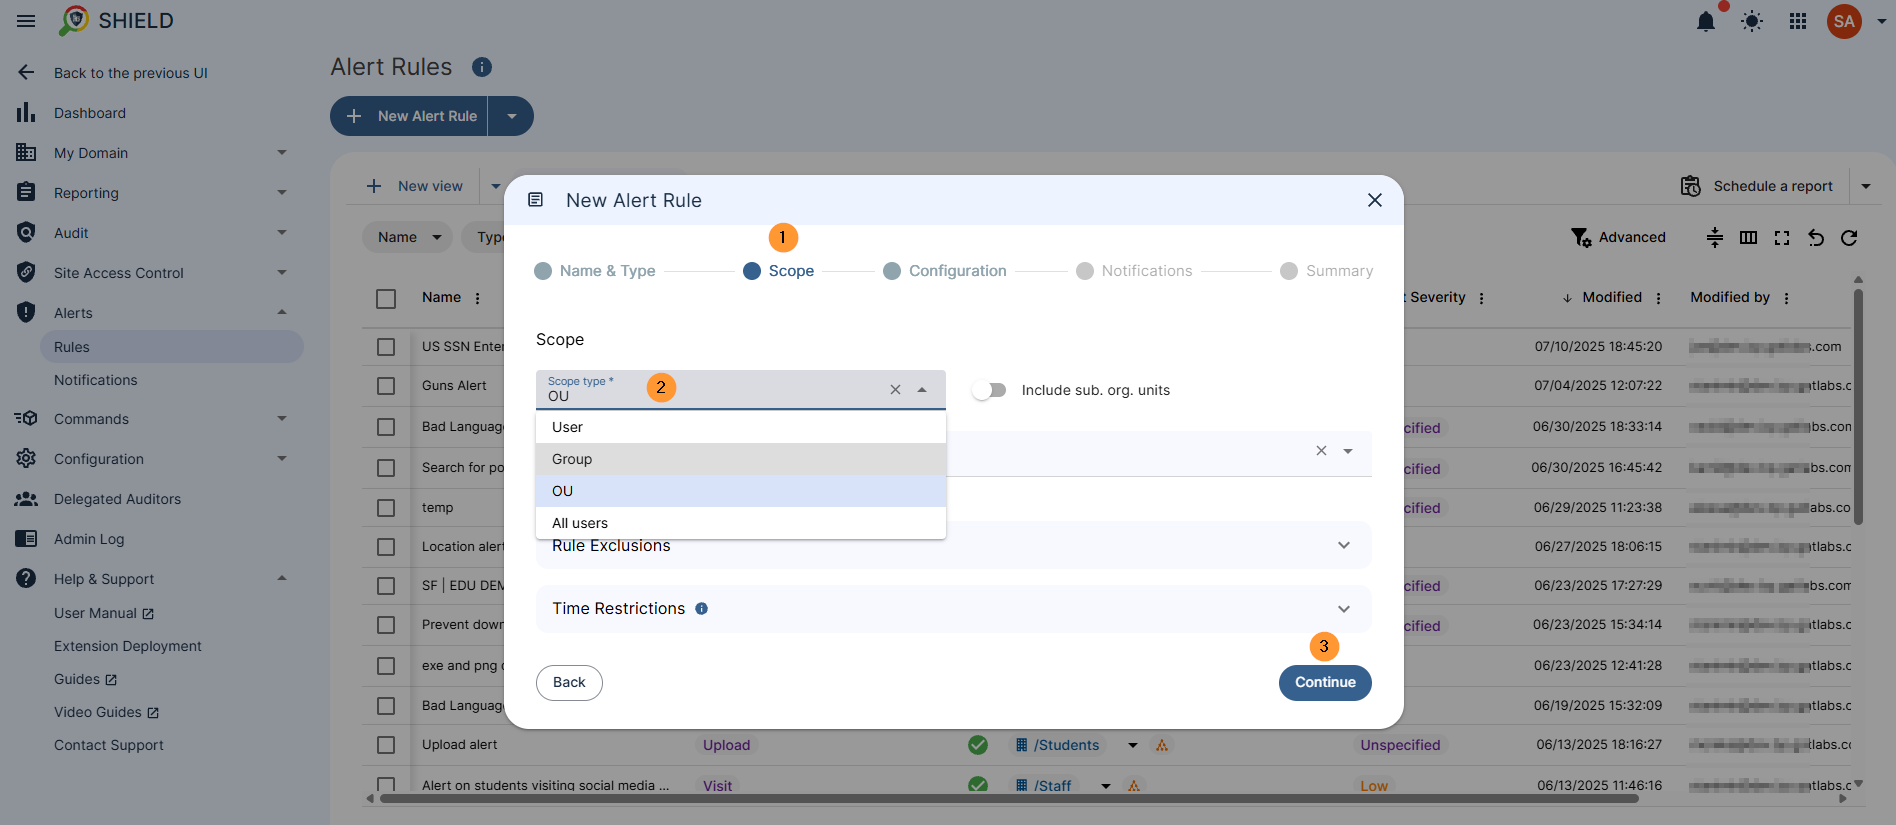
The image describes the process to select the scope of users the alert rule should apply to. In the alert rule pop up window, the scope tab should be selected which will then present the options of Scope to be wither User, Group, OU, All. Other options for rule scope exclusions and time restrictions are also available.

Continue to the Configuration tab:

  • Inside selected area – Triggers when a user signs in inside the selected area. NOTE: This feature requires Shield extension version 39.0.0 or later.
  • Outside selected area – Triggers when a user signs in outside the selected area.

Here, the location bounds can be adjusted for where users should be (alert from outside selected area) OR shouldn’t be (alert from inside selected area).

The map can be dragged to fit the selection area. You can also zoom in and out. The coordinate box itself may also be changed in shape.

Adjust the map where you want to alert to be triggered for.
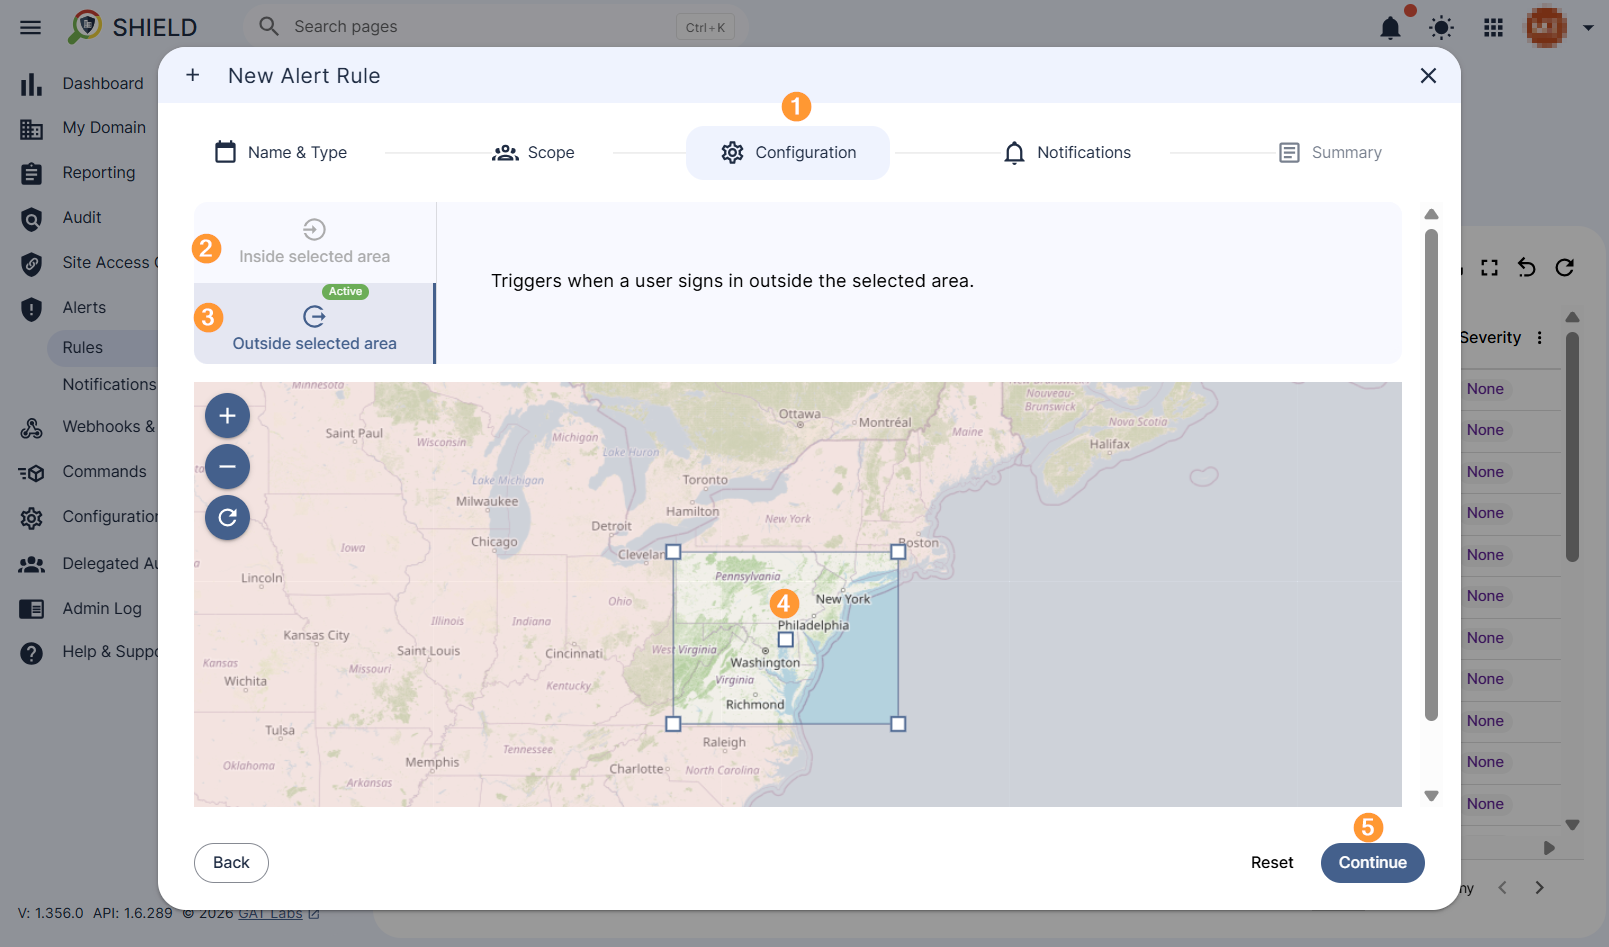
The world map is shown in the alert rule pop up window, in the configuration tab where users can select the boundaries of the location alert. The map can be dragged to fit the selection area. You can also zoom in and out. The coordinate box itself may also be changed in shape. The alert can be set to be triggered INSIDE selected area OR OUTSIDE selected area.

Continue to the Notifications tab

Here, recipients can be added who will receive the alert by email.

If left blank, the alert will be shown only in the Shield console Alerts > Notifications 
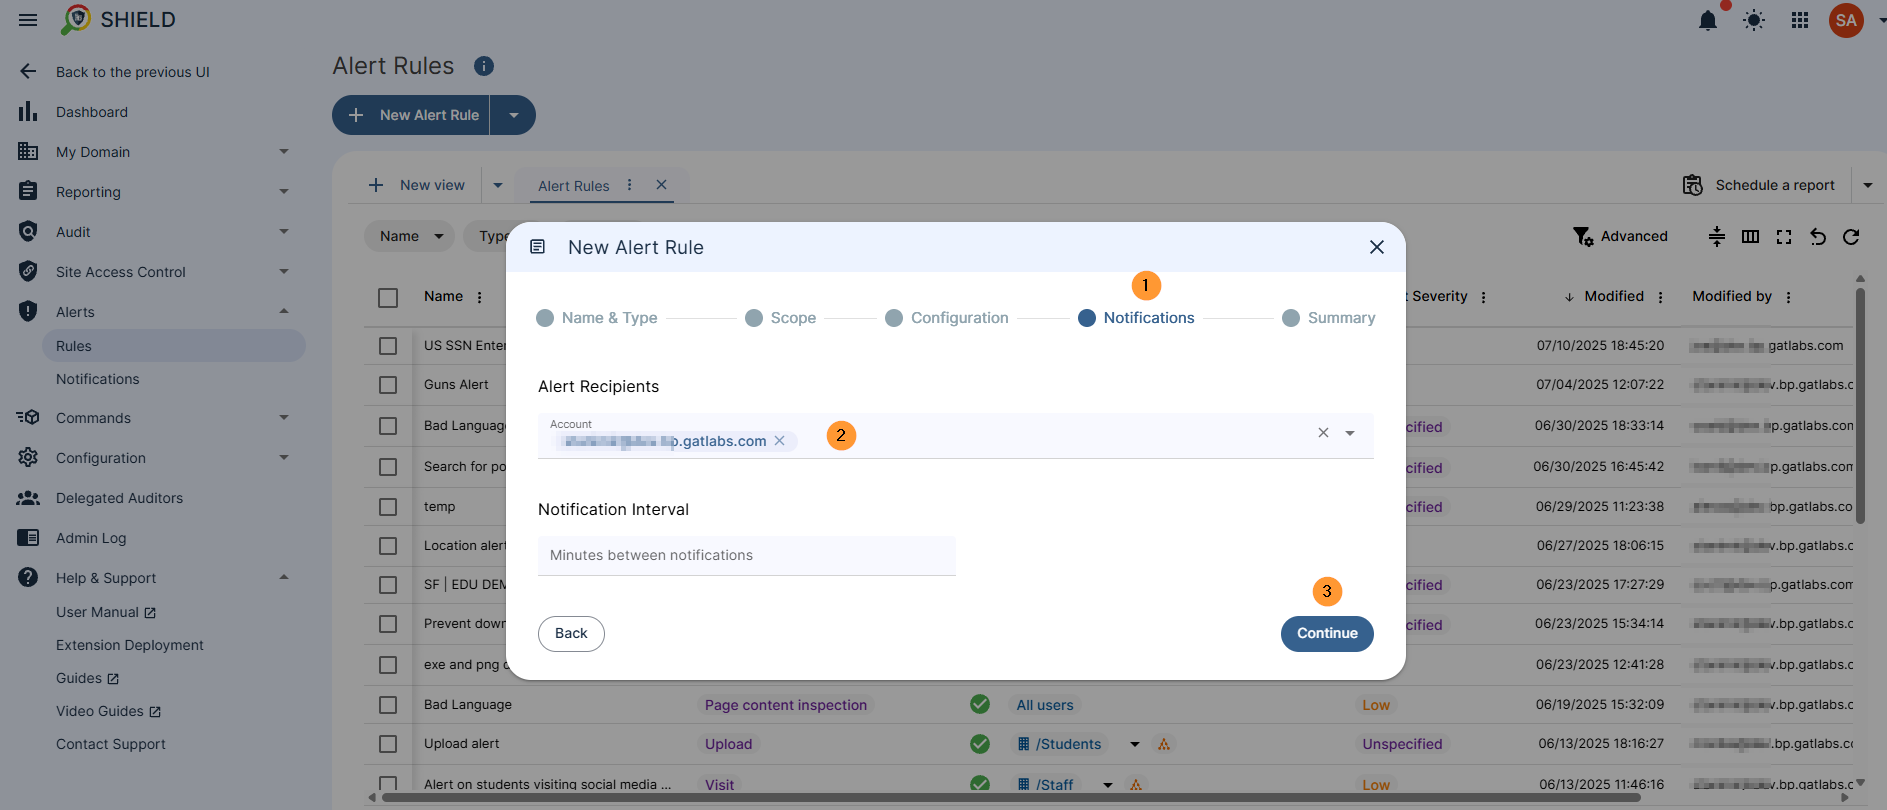
new alert rule pop up window in the notifications tab is shown. Alert rule recipients field is shown. notification interval field is shown where users can configure a threshold until the next same alert rule violation trigger

Continue to the Summary tab

Once the summary is satisfactory, select Create to create and enable the rule.
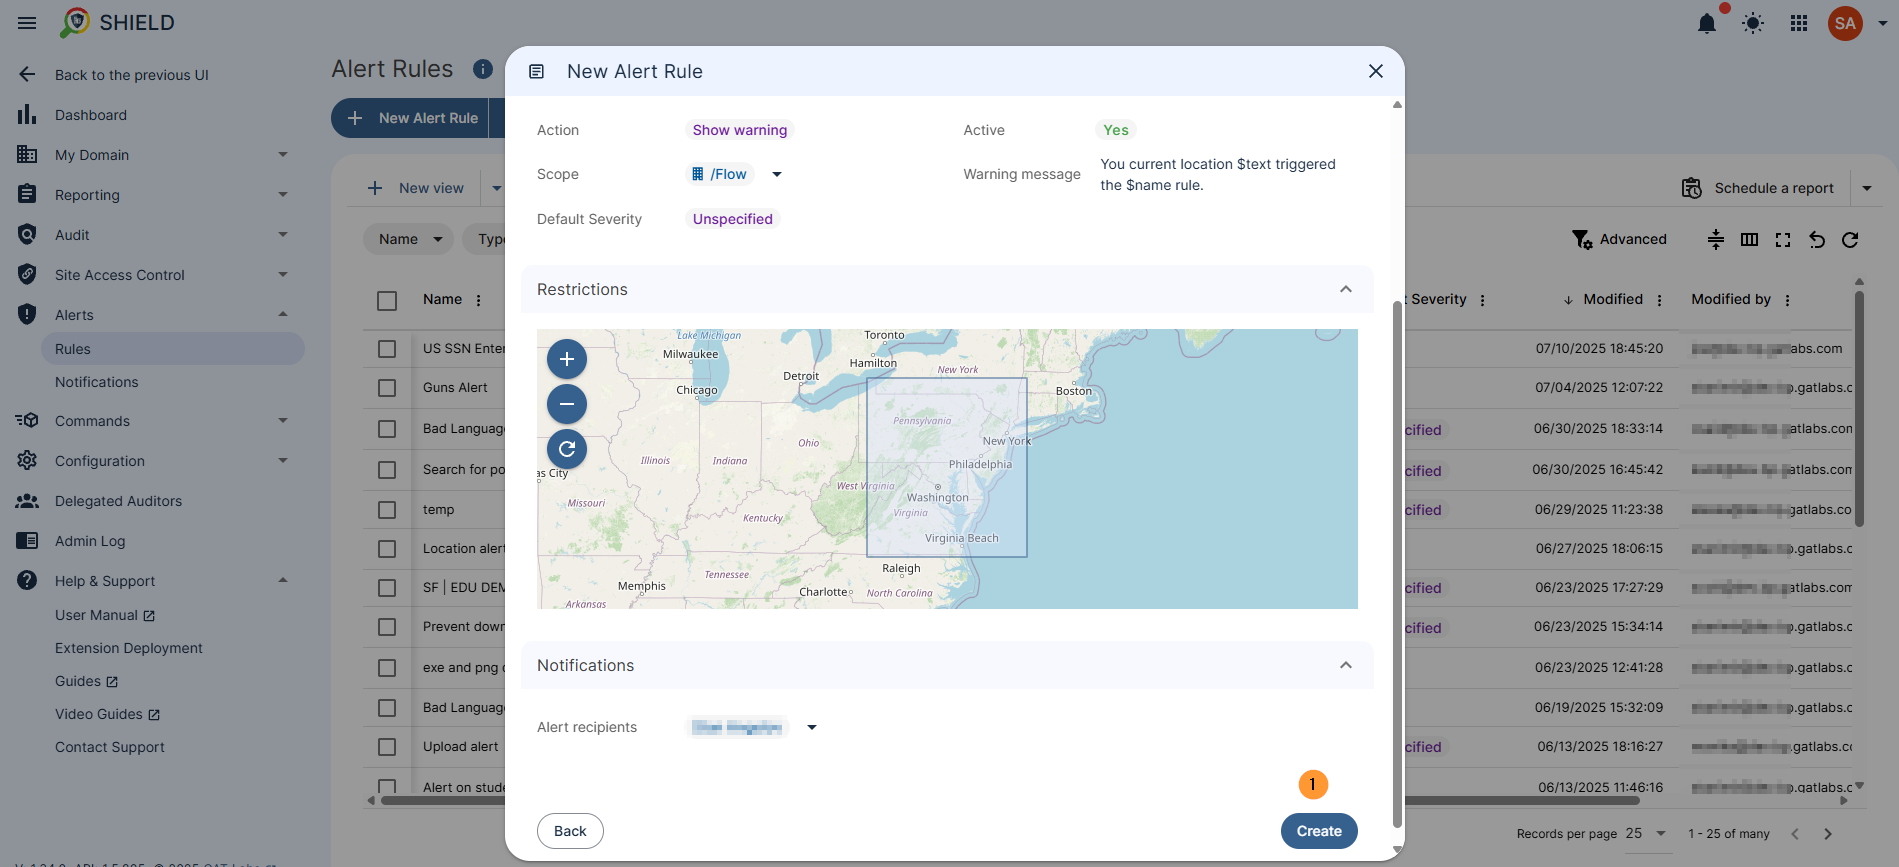
In the alert rule pop up window in the summary tab. A summary of the configurations of the alert rule is shown. Selecting create will create and enable the alert rule.

Result #

When the alert is triggered, the recipients will be notified, and all alerts will be displayed in Shield alerts > Notifications

All the alerts will be displayed here and additional details can be seen. The default data is in the last 24 hours.

Filters can be applied to search for any alerts.
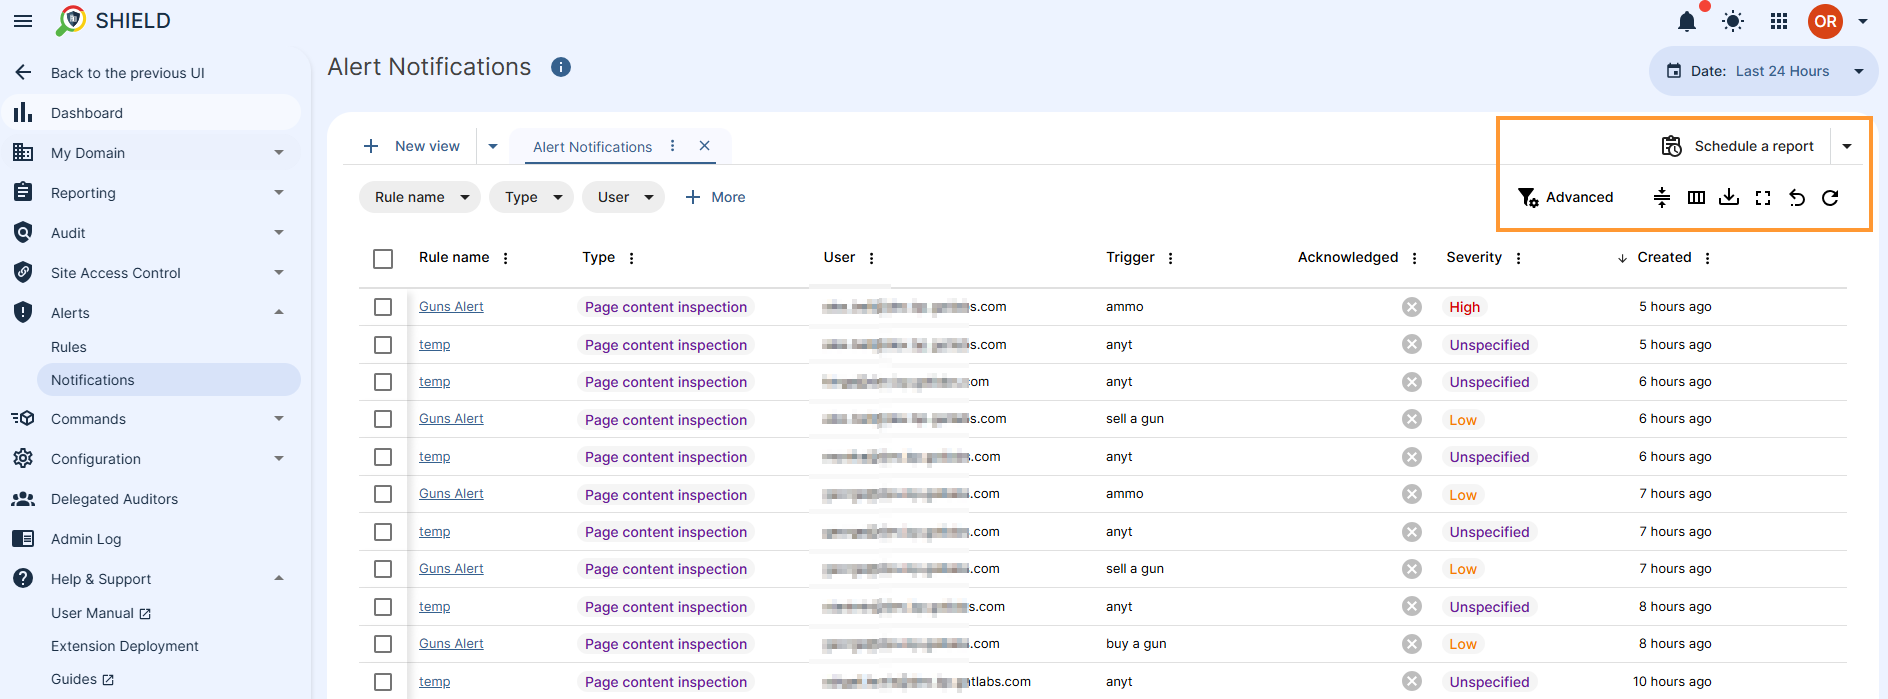
in the Shield panel of modules. Alerts module is selected and the notifications submodule is selected. Here alert rule violations in the past 24hrs are shown by default. Filtering options can be found in the top left hand side of the console.

Relevant posts #

This website uses cookies to ensure you get the best experience on our website