

Add Delay For New And Existing Workflows in GAT Flow #
Why Use Workflow Delays?
GAT Flow’s Delay Workflow feature allows Google Workspace admins to pause actions for a specified duration before automatically executing the next step. Instead of managing temporary changes manually, you can automate entire user lifecycles in a single workflow.
Key Benefits:
- Automate Temporary Access: Set actions like email forwarding or temporary privileges to automatically revert, eliminating the risk of human error.
- Streamline Offboarding: Create grace periods (e.g., forward a departed employee’s email for 30 days before deleting the account).
- Phased Onboarding: Stagger account creation, training group invites, and tool access over a new hire’s first few weeks.
- Prevent Leftover Access: Automatically revoke a short-term contractor’s or vendor’s access as soon as their project ends, keeping your domain secure without extra manual work.
Video #
Delay on workflows #
The Admins can add “delay workflow” before and after any of the Actions available.
This delay is used to separate the actions and when they are run.
Example:
- Add email forwarding to the selected delay for a few days, then remove the forwarding
- Add users to the Shared Drive, delay for 2 weeks, and then remove access to the Shared Drive
- Add an auto-reply for the user, delay for 1 month, and then remove the auto-reply
Create workflow #
Navigate to Flow > Create workflow
Note: This delay can be used for Event and Recurring workflows too.
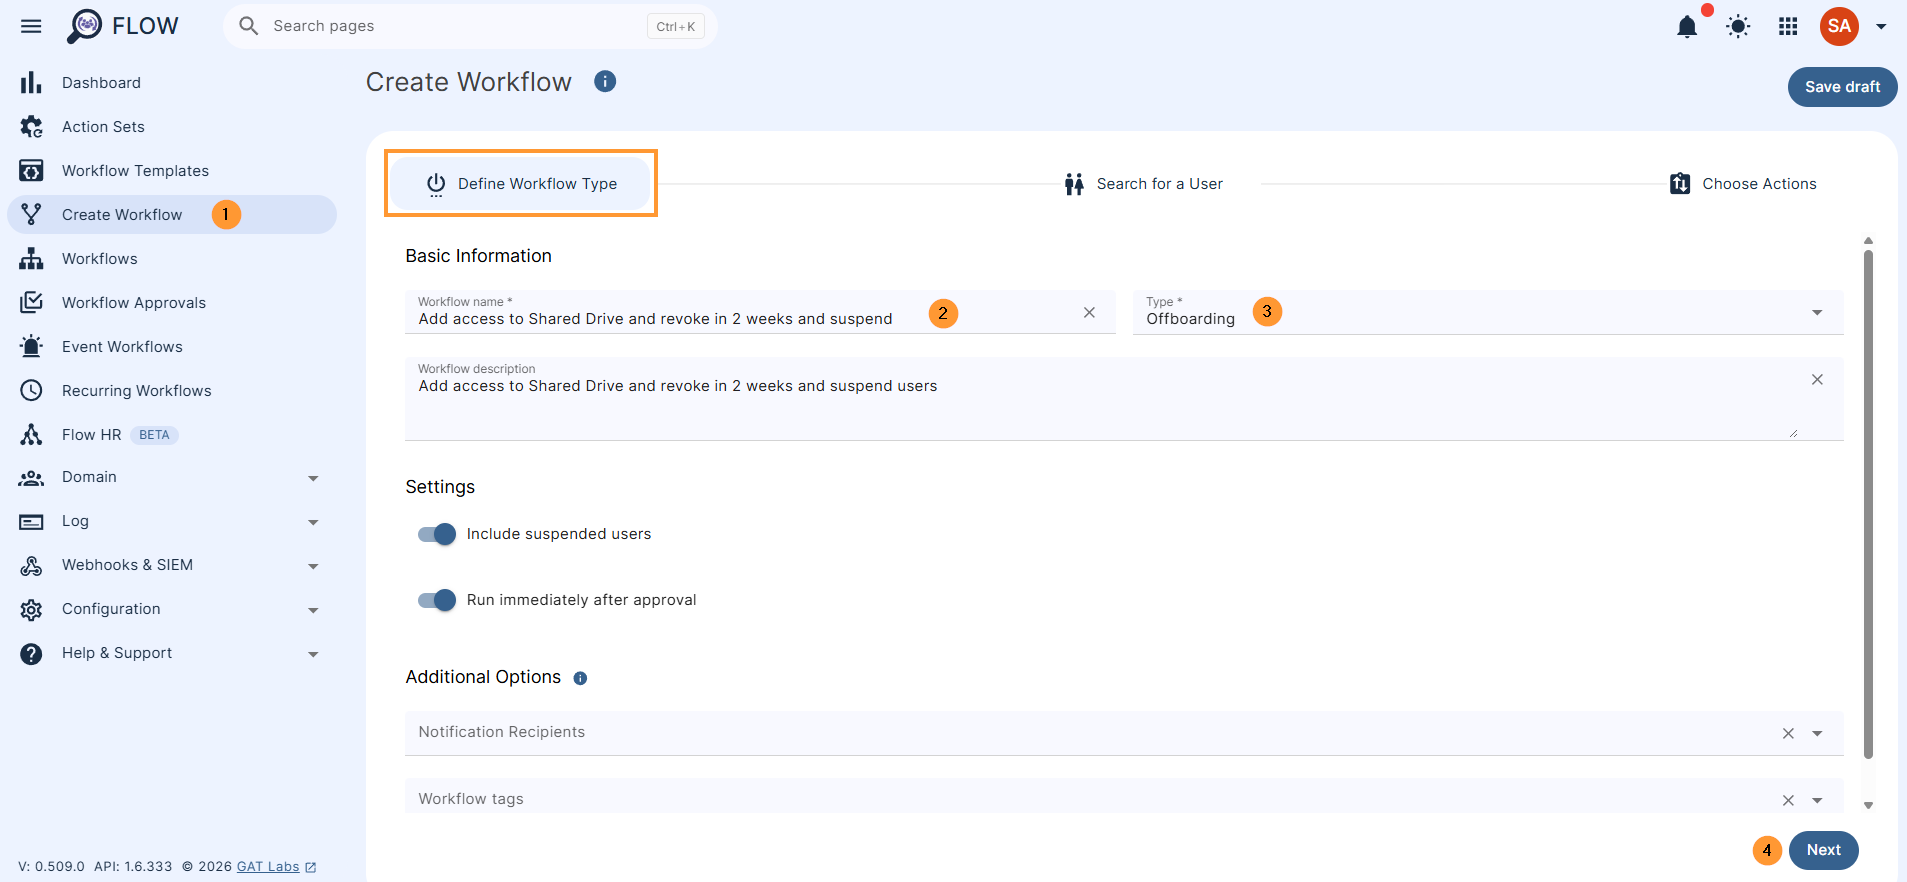
Fill in the details for the Define Workflow type
- Name – enter a name for the workflow
- Description (optional) – enter a description for the workflow
- Type of workflow – Offboard
- Modify and Onboard can also be selected
- Next – click to proceed and select the users
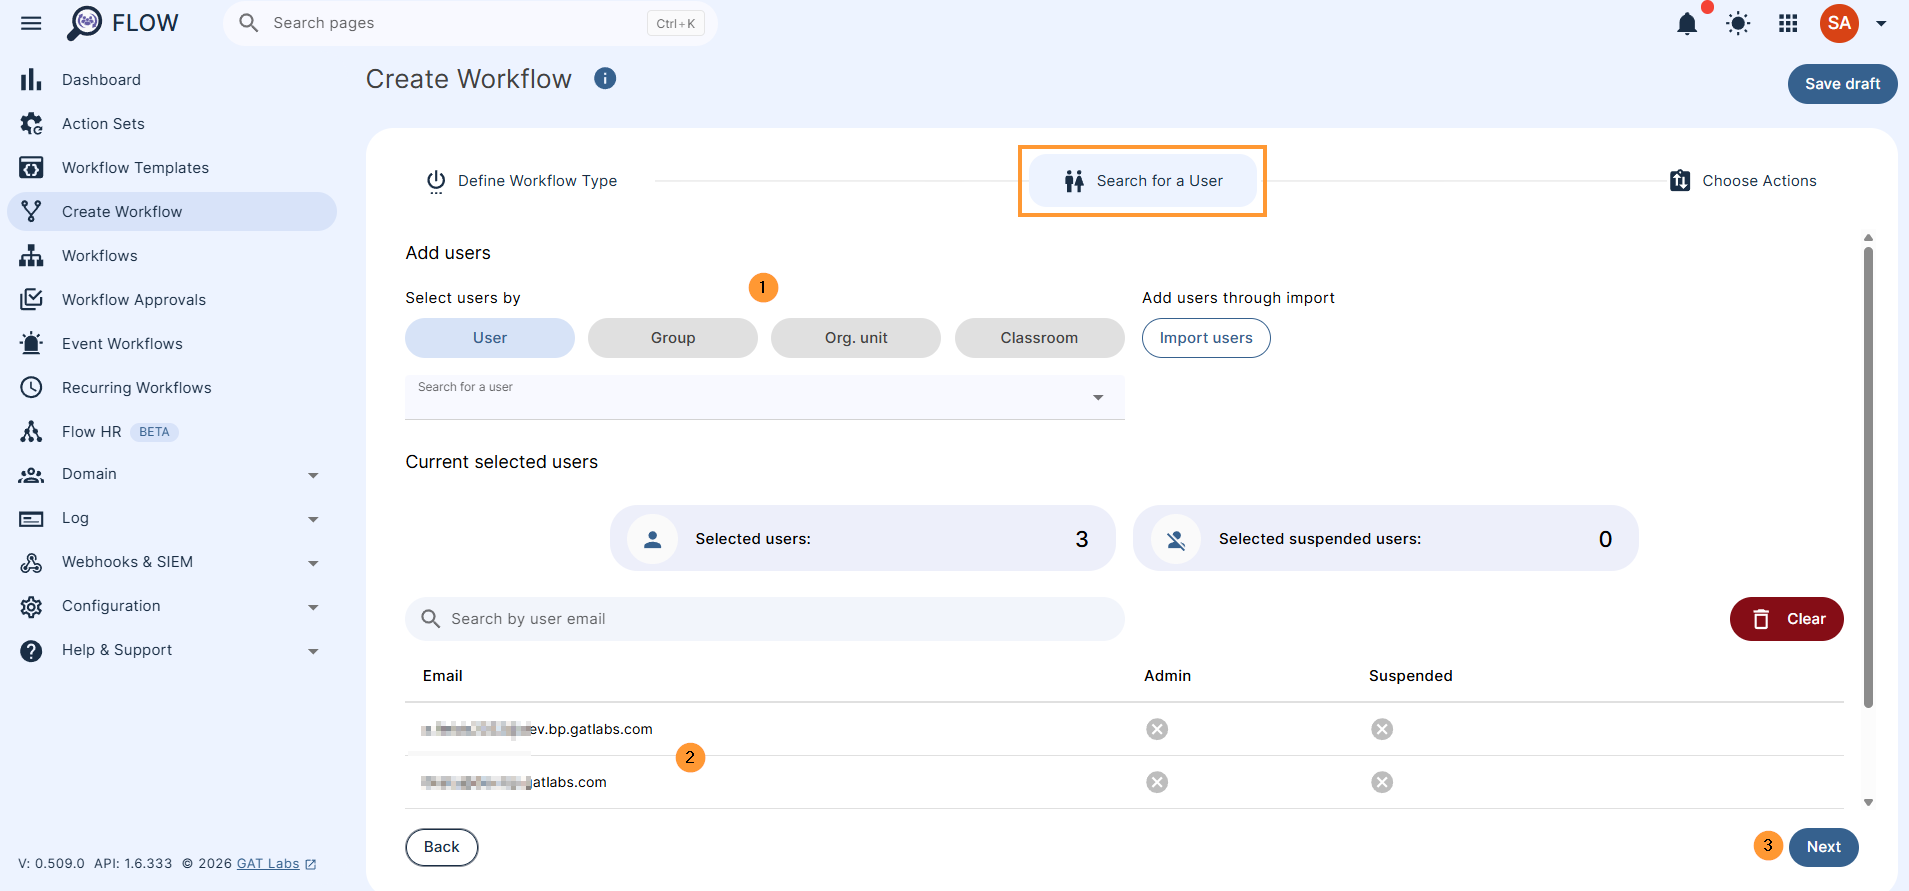
In the next step, Search for a user – search for the user (or users) you’d like to set the forwarding for.
- Enter the users individually, by group, or as part of an Org. Unit, or import them directly via spreadsheet.
- Next – click to proceed and take actions on the chosen users
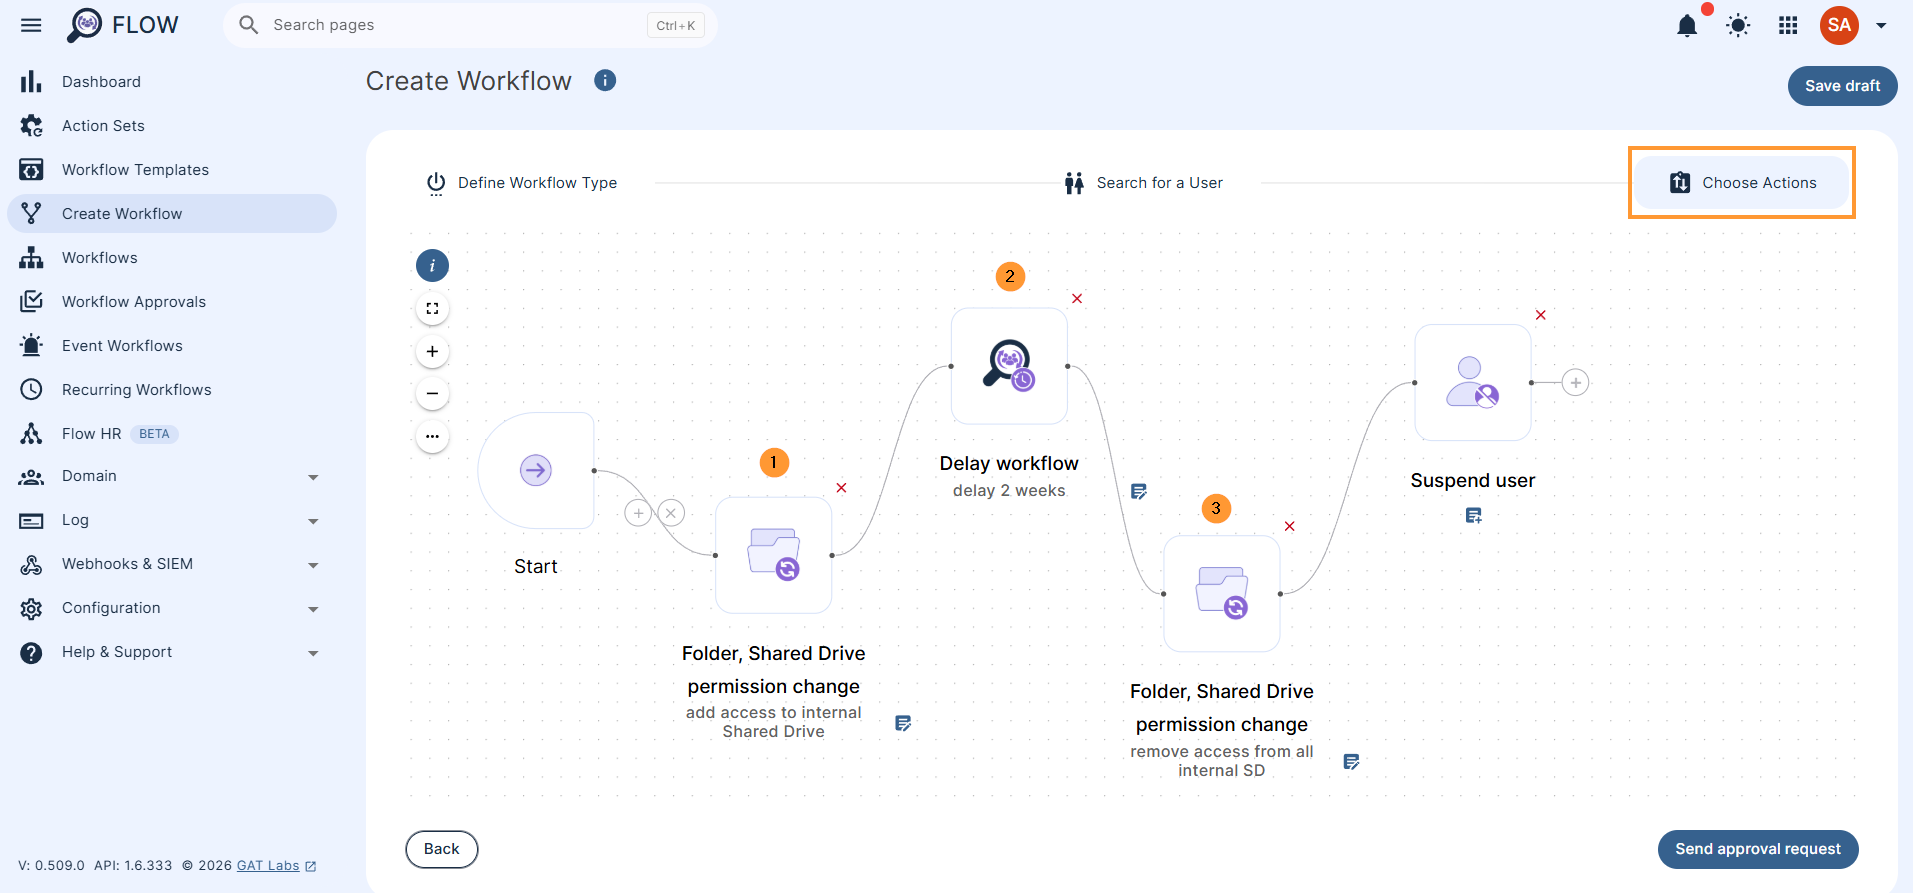
Next, in Choose actions, select the actions you want to take.
Click on the + button (1), then Add action (2)
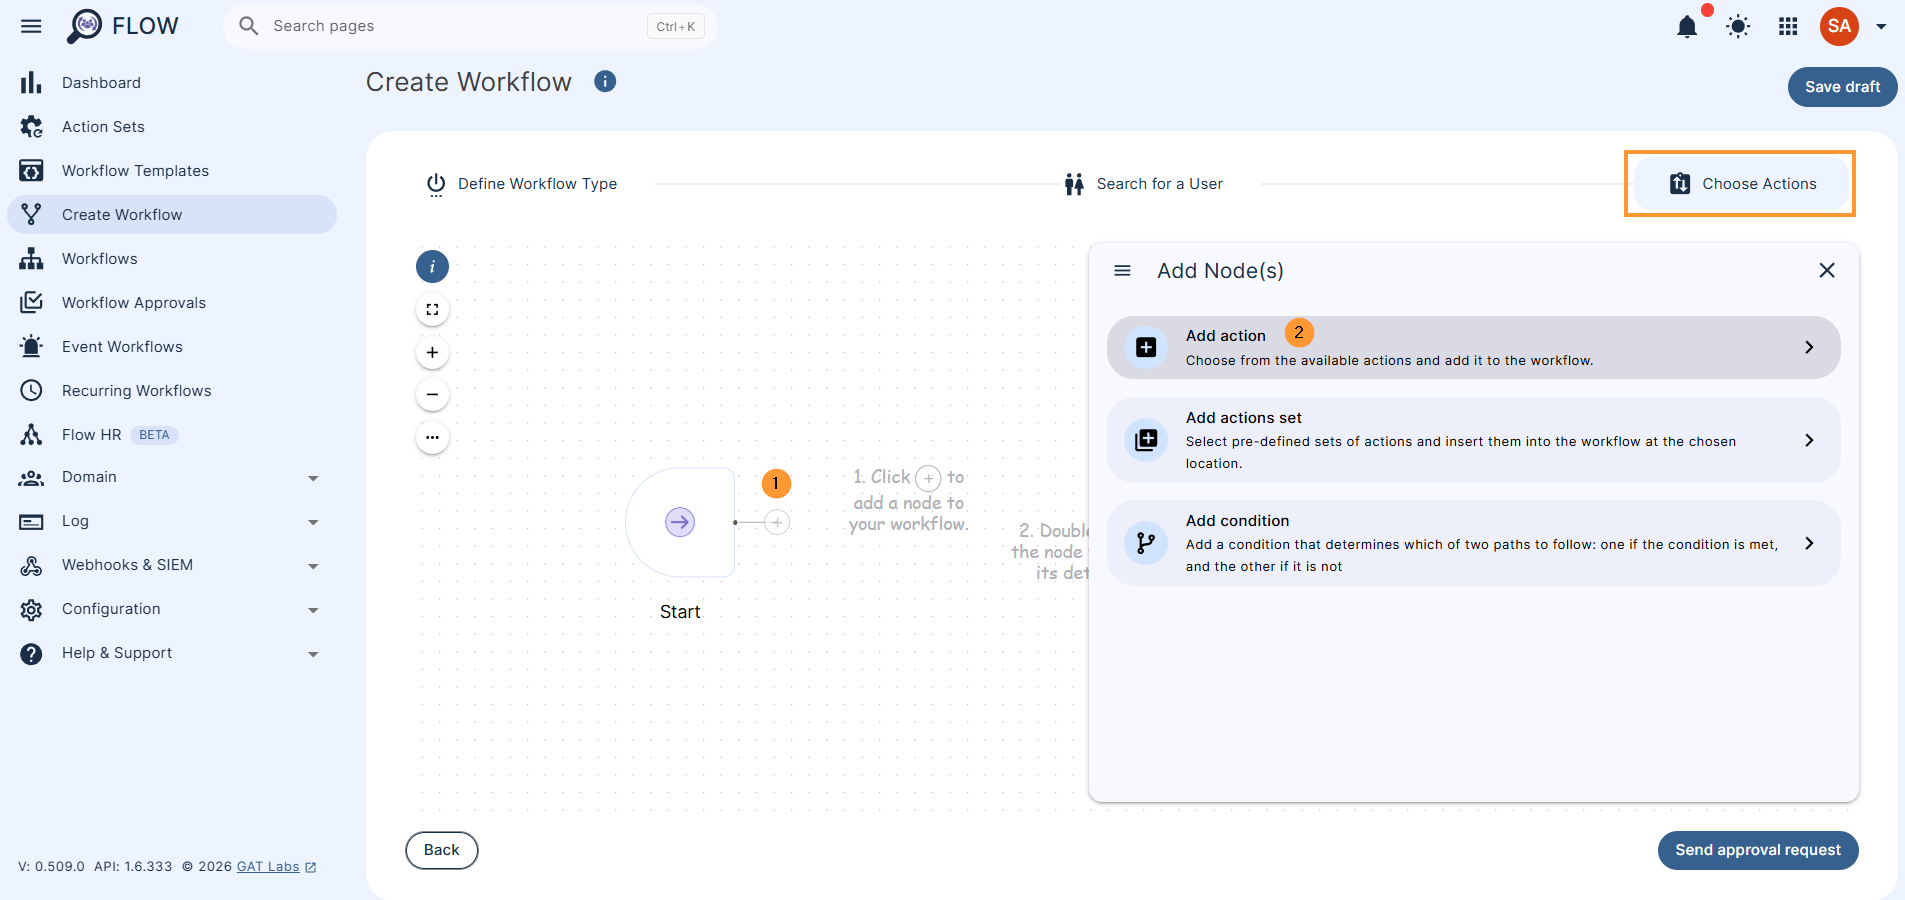
Search and select the action you want.
Delay workflow #
The delay workflow can be set for any time needed.
Note: Delay workflow – Delays workflow for the specified time. You should also expect a marginal time delay for processing after the delay action.
Double-click (1) to open and fill in its details (2)
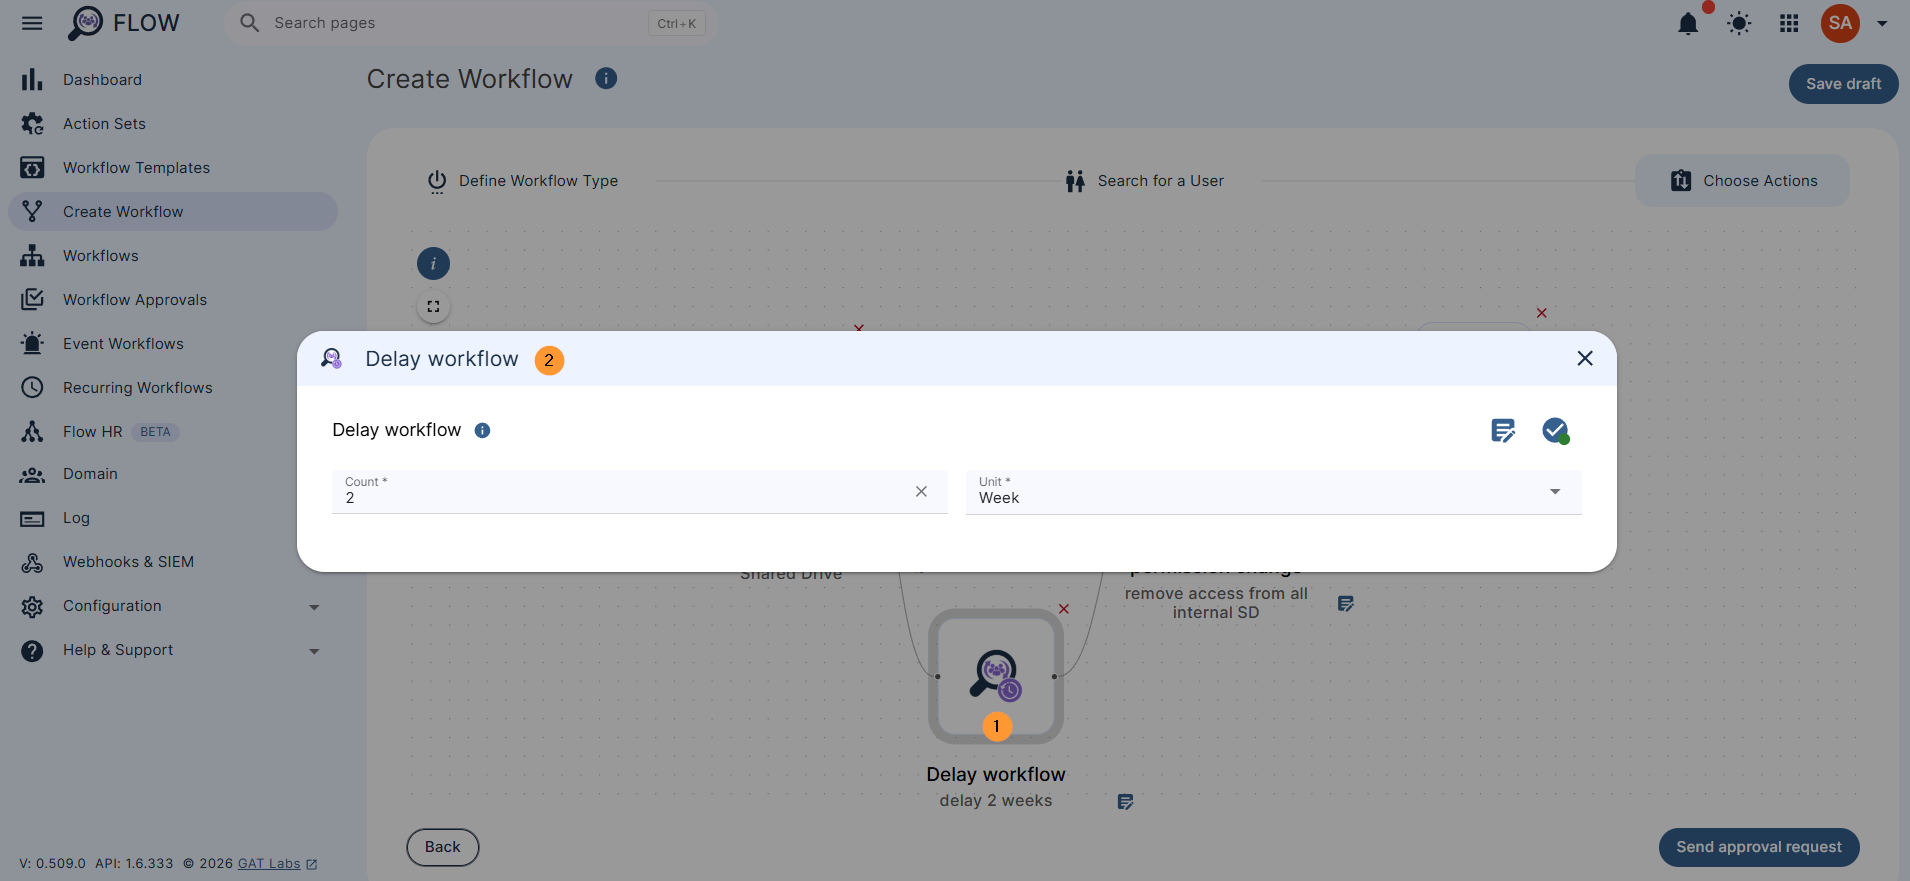
- Count – enter the value you need
- Unit – select any of the units available
- Minutes – enter the minutes for the delay
- Hours – enter the hours for the delay
- Days – enter the days for the delay
- Weeks – enter the weeks for the delay
- Months – enter the months for the delay
- Custom – select a specific time when the workflow resumes.
Double-click to open and fill in its details for all actions.
Send approval request #
When the actions are selected, send a request for approval.
Note: If pre-approval is enabled, no approval will be required.
Click on Send approval request
Note: This workflow can be saved as an action set for use again at any time.
Result #
The workflow will run.
- The first part will be executed.
- The delay will kick off
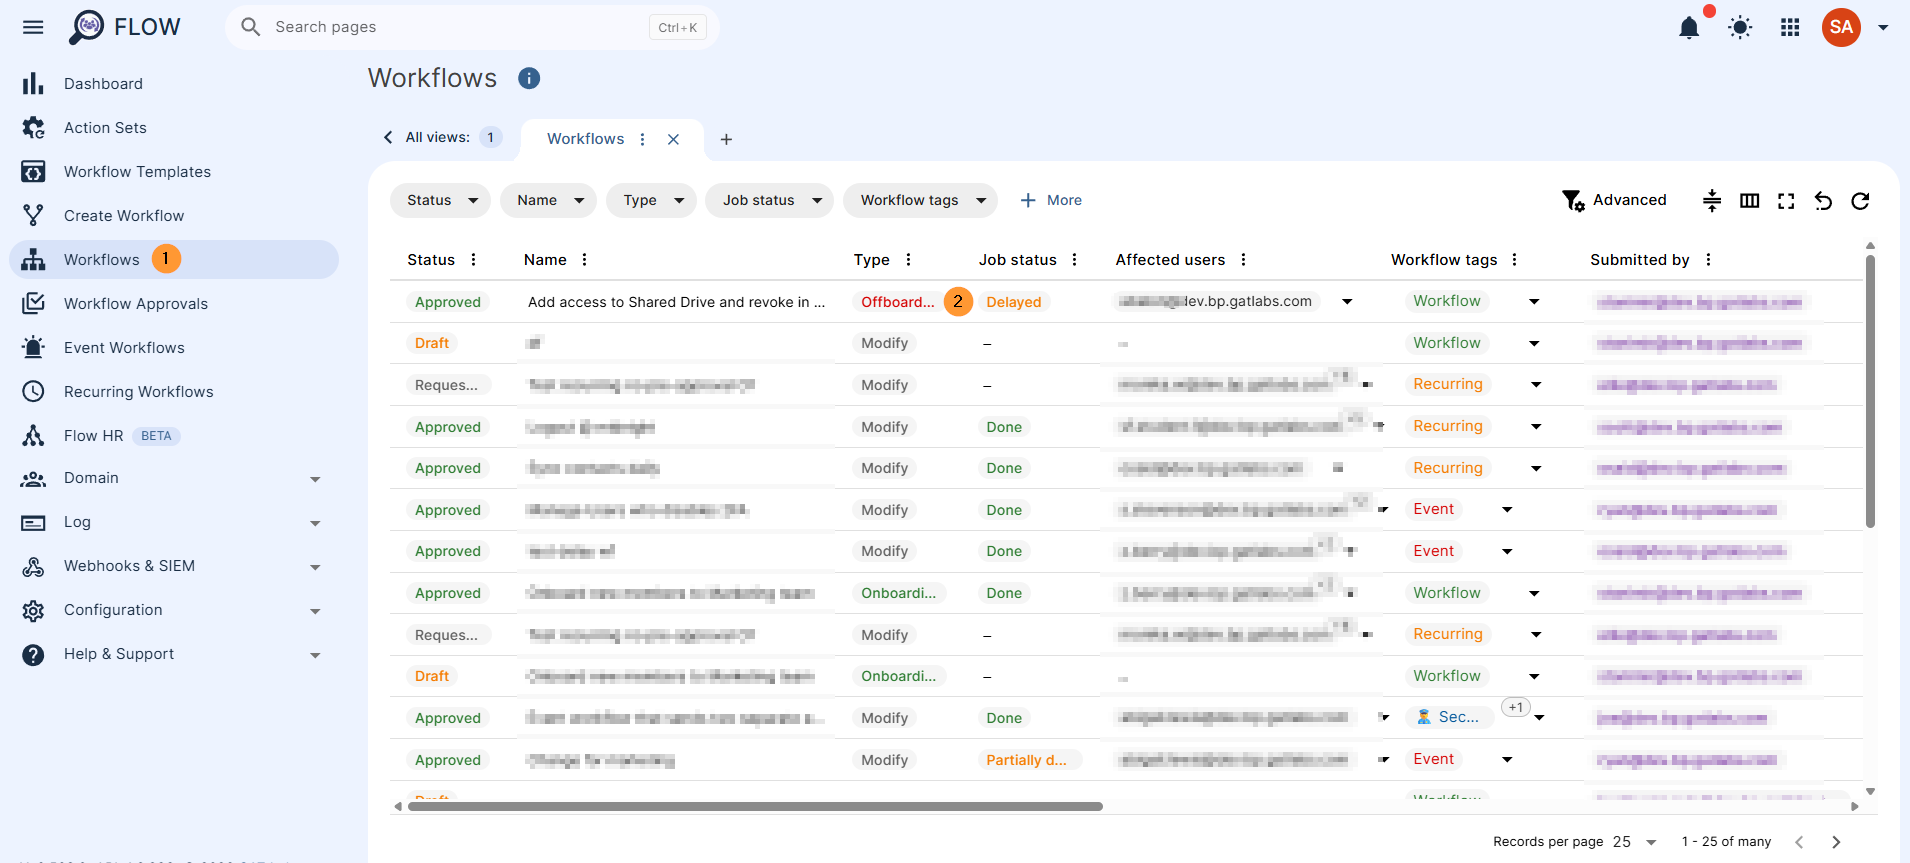
- The status of the workflow will be “delayed”.
- Will be resumed when the time comes
- The workflow will continue automatically
This can be viewed in Workflow > Job status will be delayed
Conclusion #
The Delay Workflow feature in GAT Flow transforms routine, multi-step user management into a hands-off, automated process. By removing the need for manual tracking, calendar reminders, and second-stage interventions, Google Workspace admins can confidently schedule complex user lifecycles from start to finish.
Whether you are implementing a phased onboarding sequence, a secure offboarding grace period, or setting up temporary project access, adding a delay ensures your domain remains secure, compliant, and efficient with minimal effort.


