

How to Onboard multiple Google Workspace users in bulk using GAT Flow #
GAT Flow is a user management tool that allows Google Workspace Admins to take bulk actions on multiple users.
The type of actions is for Onboarding, Offboarding, and Modifying users of the domain.
Create onboarding workflow #
Navigate to Flow > Create workflow
Define workflow type #
In the Define Workflow type, fill in the details
- Name – enter workflow name
- Description – enter workflow description
- Type – select Onboarding
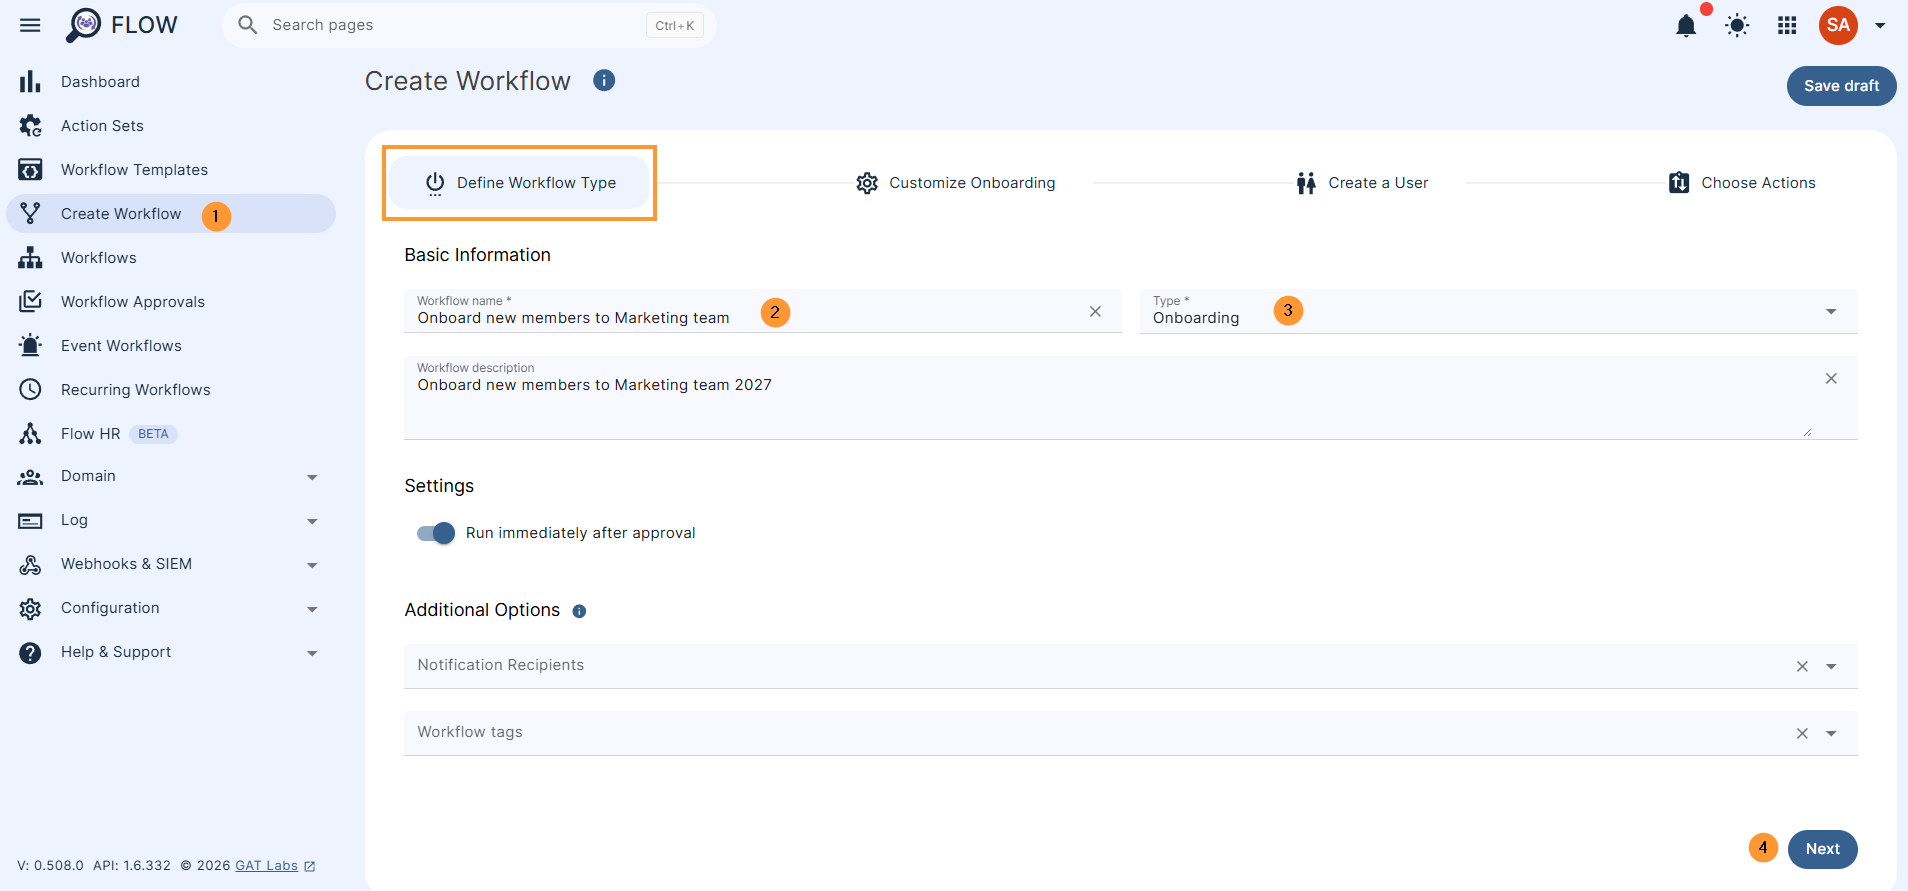
Run immediately after approval allows the workflow to be done at a future time. More details can be found here
Click on Next to proceed.
Customize onboarding #
In the Customize onboarding, fill in the details
- Domain – The provided template will be used to automatically generate email addresses in the next step
- Select email elements – Select an email template option to add it to the template below.
-
- Password settings – You can enable automatic password generation for new users here. Passwords can be sent to the specified email address
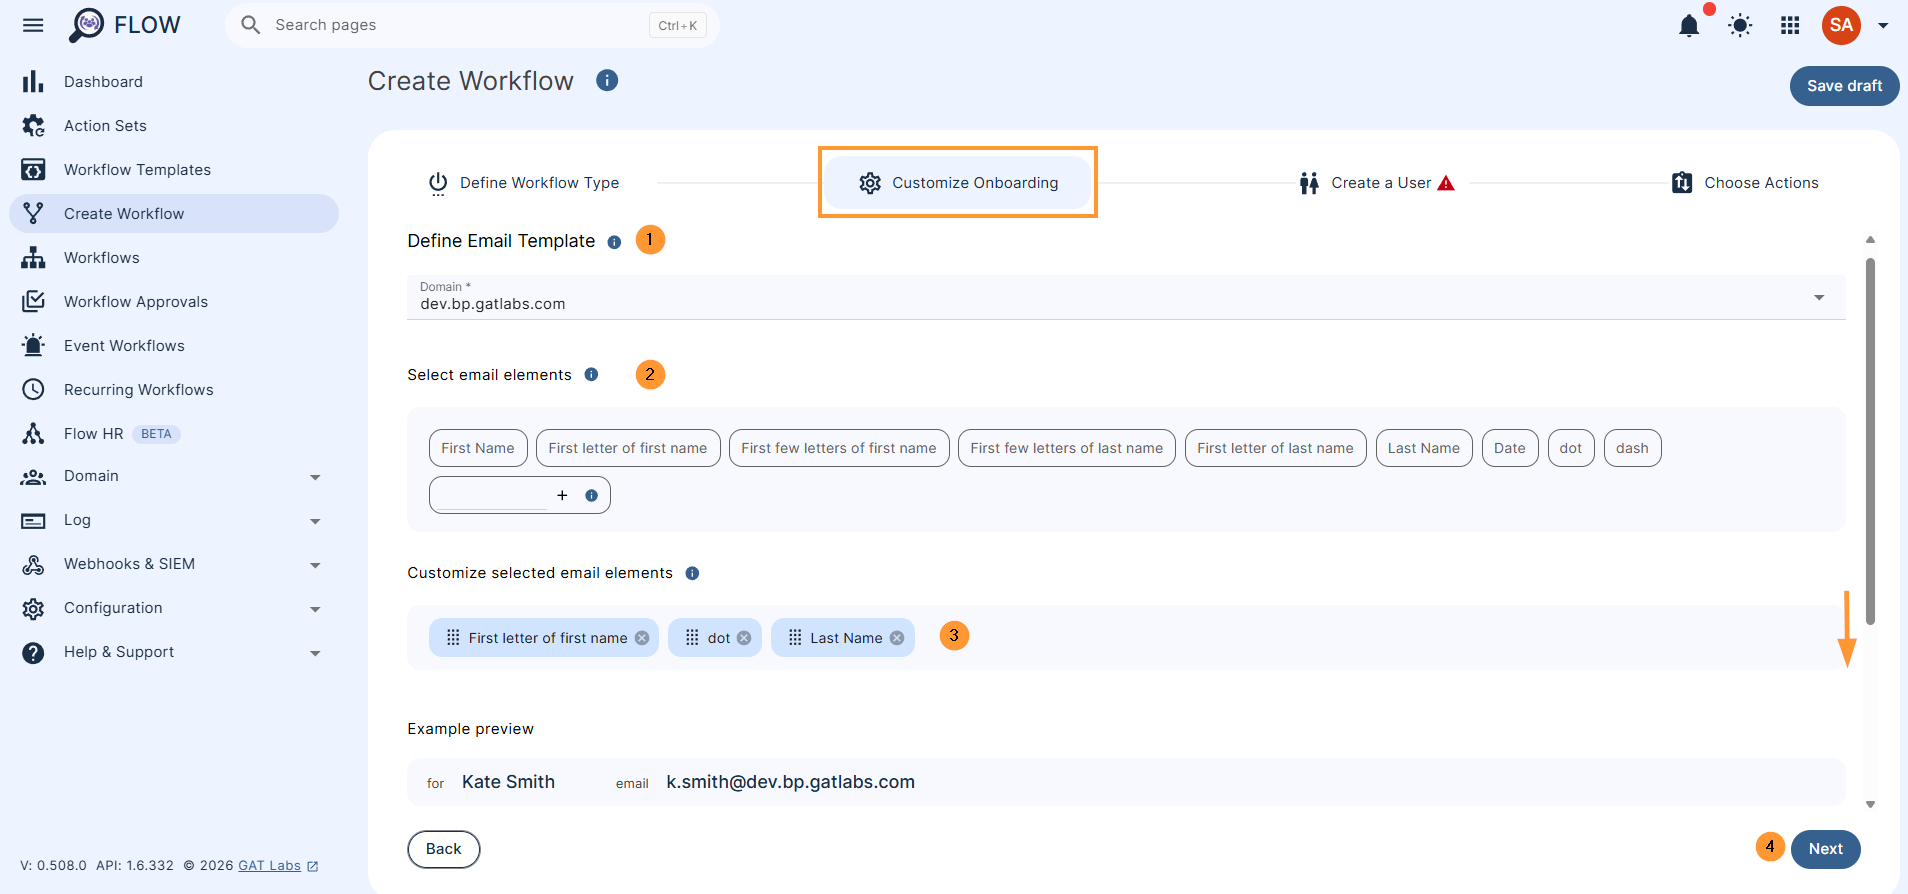
Click on next to proceed.
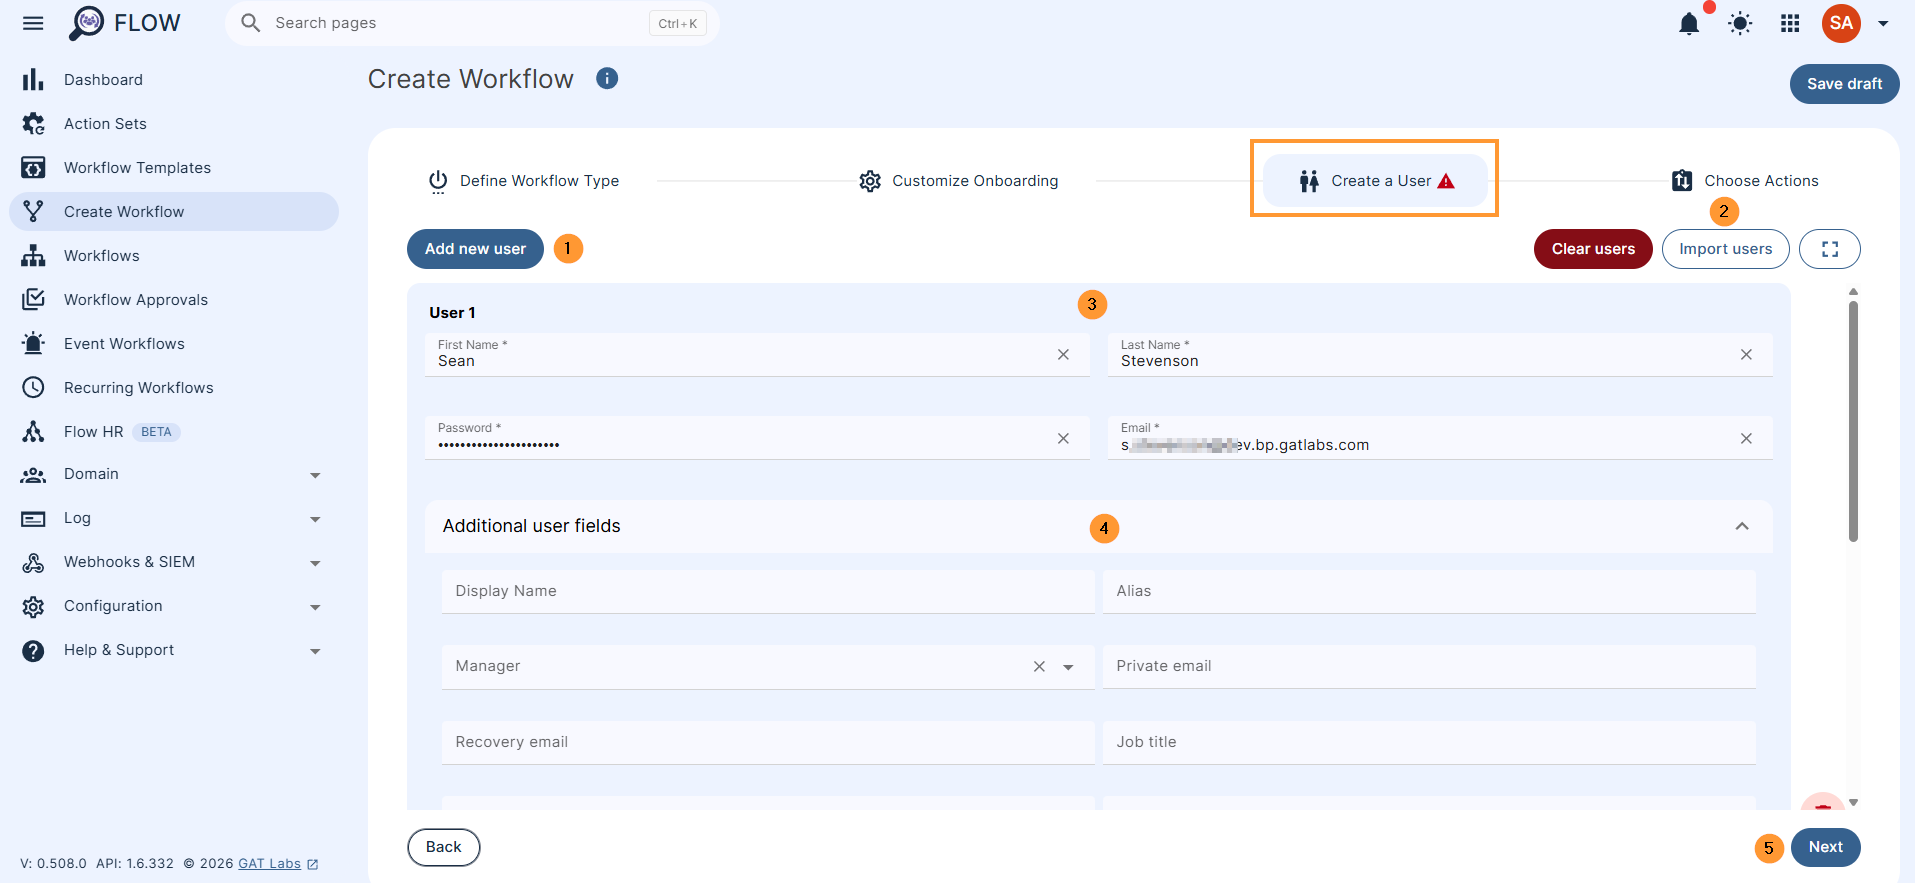
Create a user #
Under Create a user
Add user manually by clicking on Add new user or Import users via Google spreadsheet.
In Add new user (1) fill in the user details
- First name – enter first name
- Last name – enter last name
- Password – enter password
- Email – will be auto-filled in based on the “Customize onboarding” option selected
- Additional user fields – expand and fill in any date you need
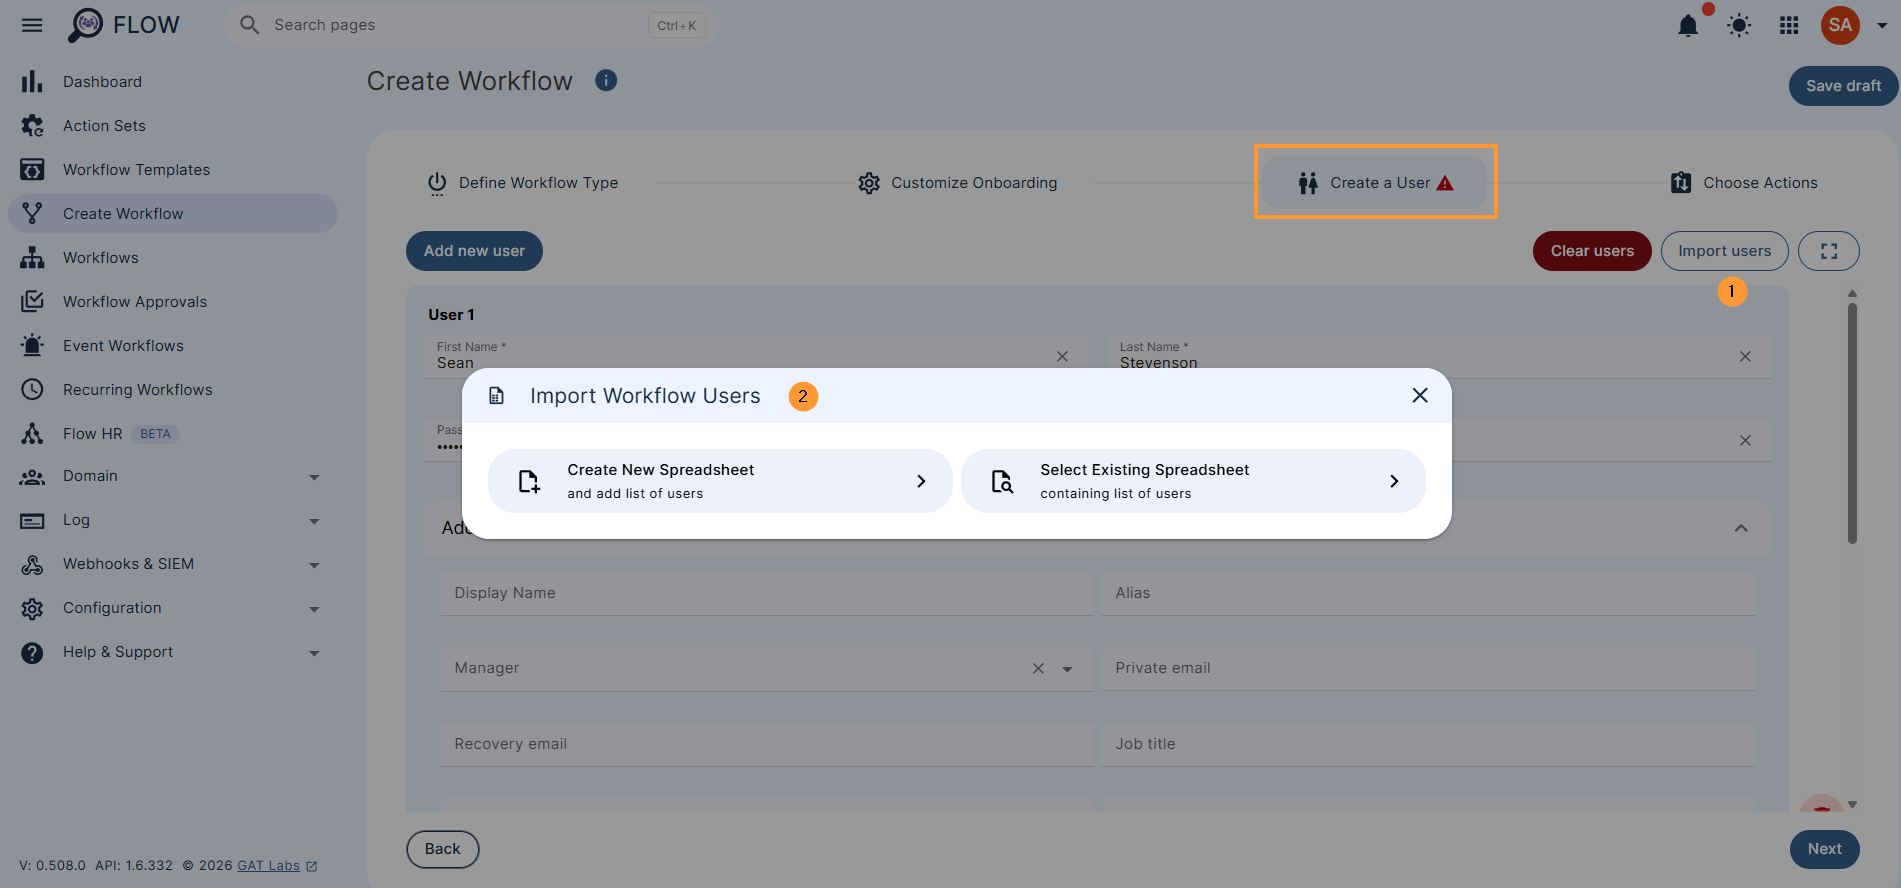
Import users #
Click on Import users and fill in the details for each user.
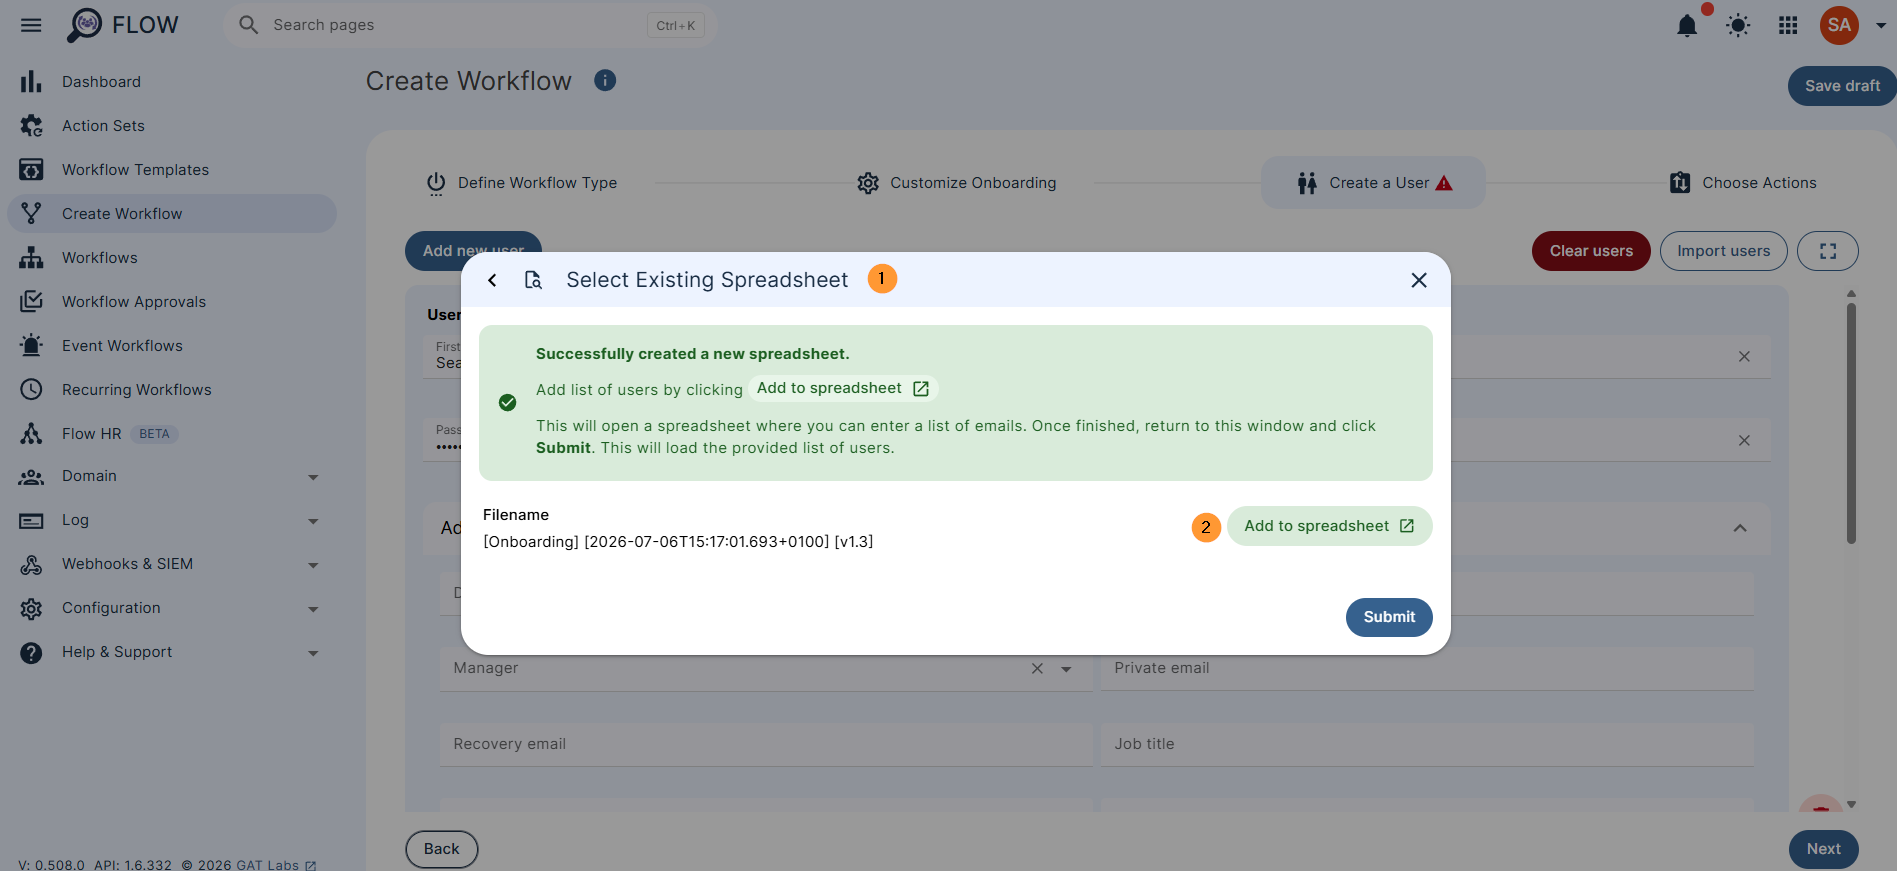
- Select Create new spreadsheet
- Select the existing spreadsheet.
When a spreadsheet is selected, fill in the details for the users in bulk.
When you click on “Create new spreadsheet,” select Add to spreadsheet
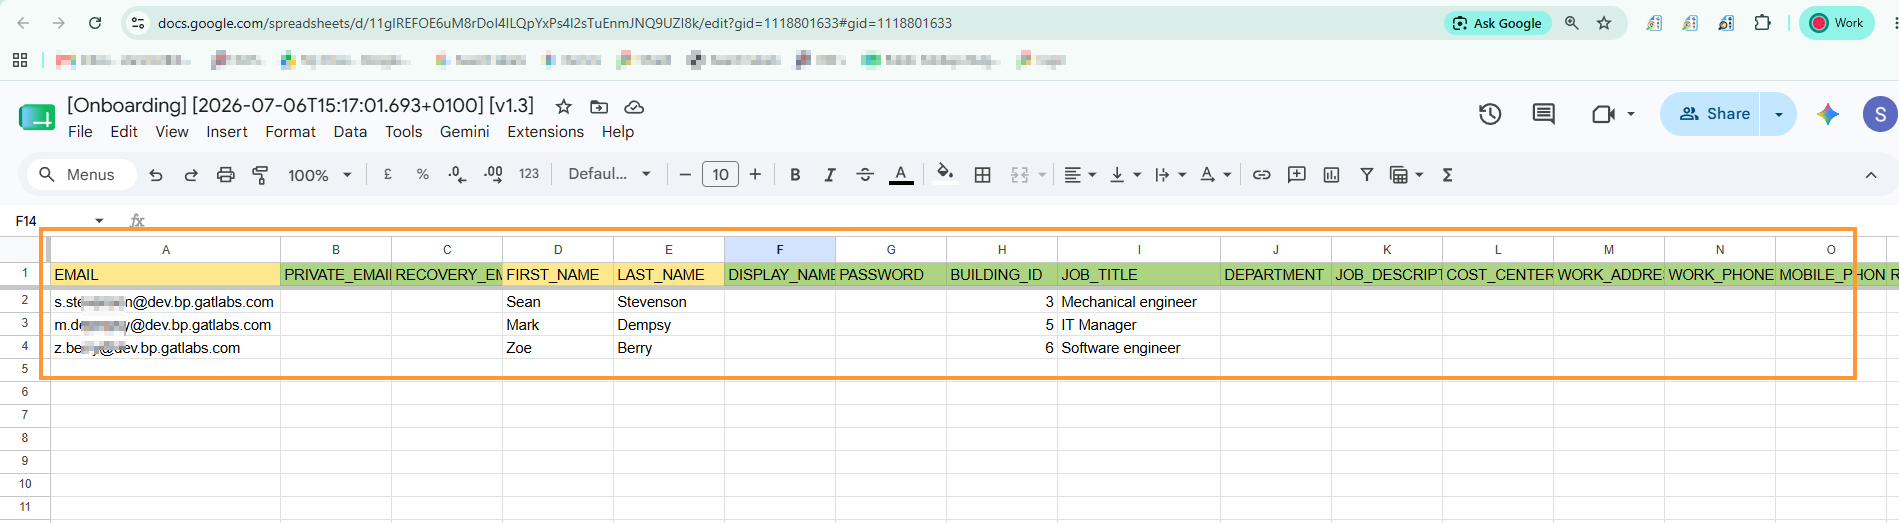
In the spreadsheet, fill in the details for the users.
- Yellow fields are mandatory – Email, First and Last name.
- Green fields are optional – Recovery email, display name, building_id, job_title, department, addresses etc.
When the users are added, save the Google file and close.
In Flow, click on Import users > Select existing spreadsheet > Import users from spreadsheet
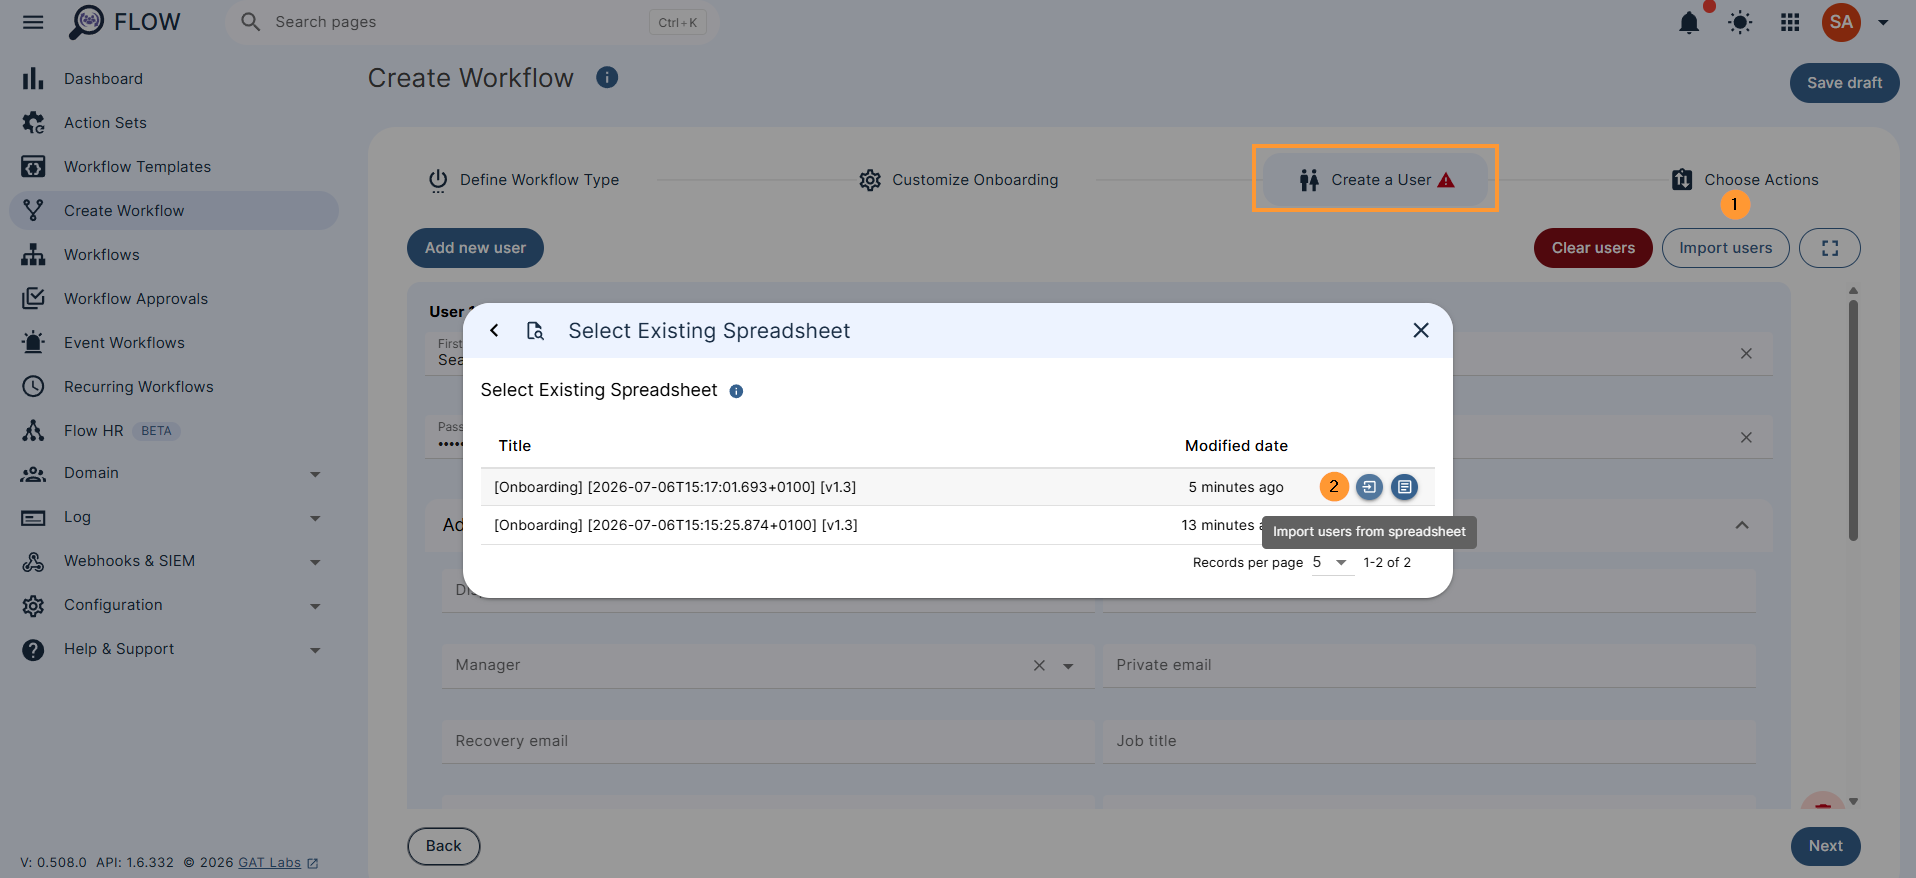
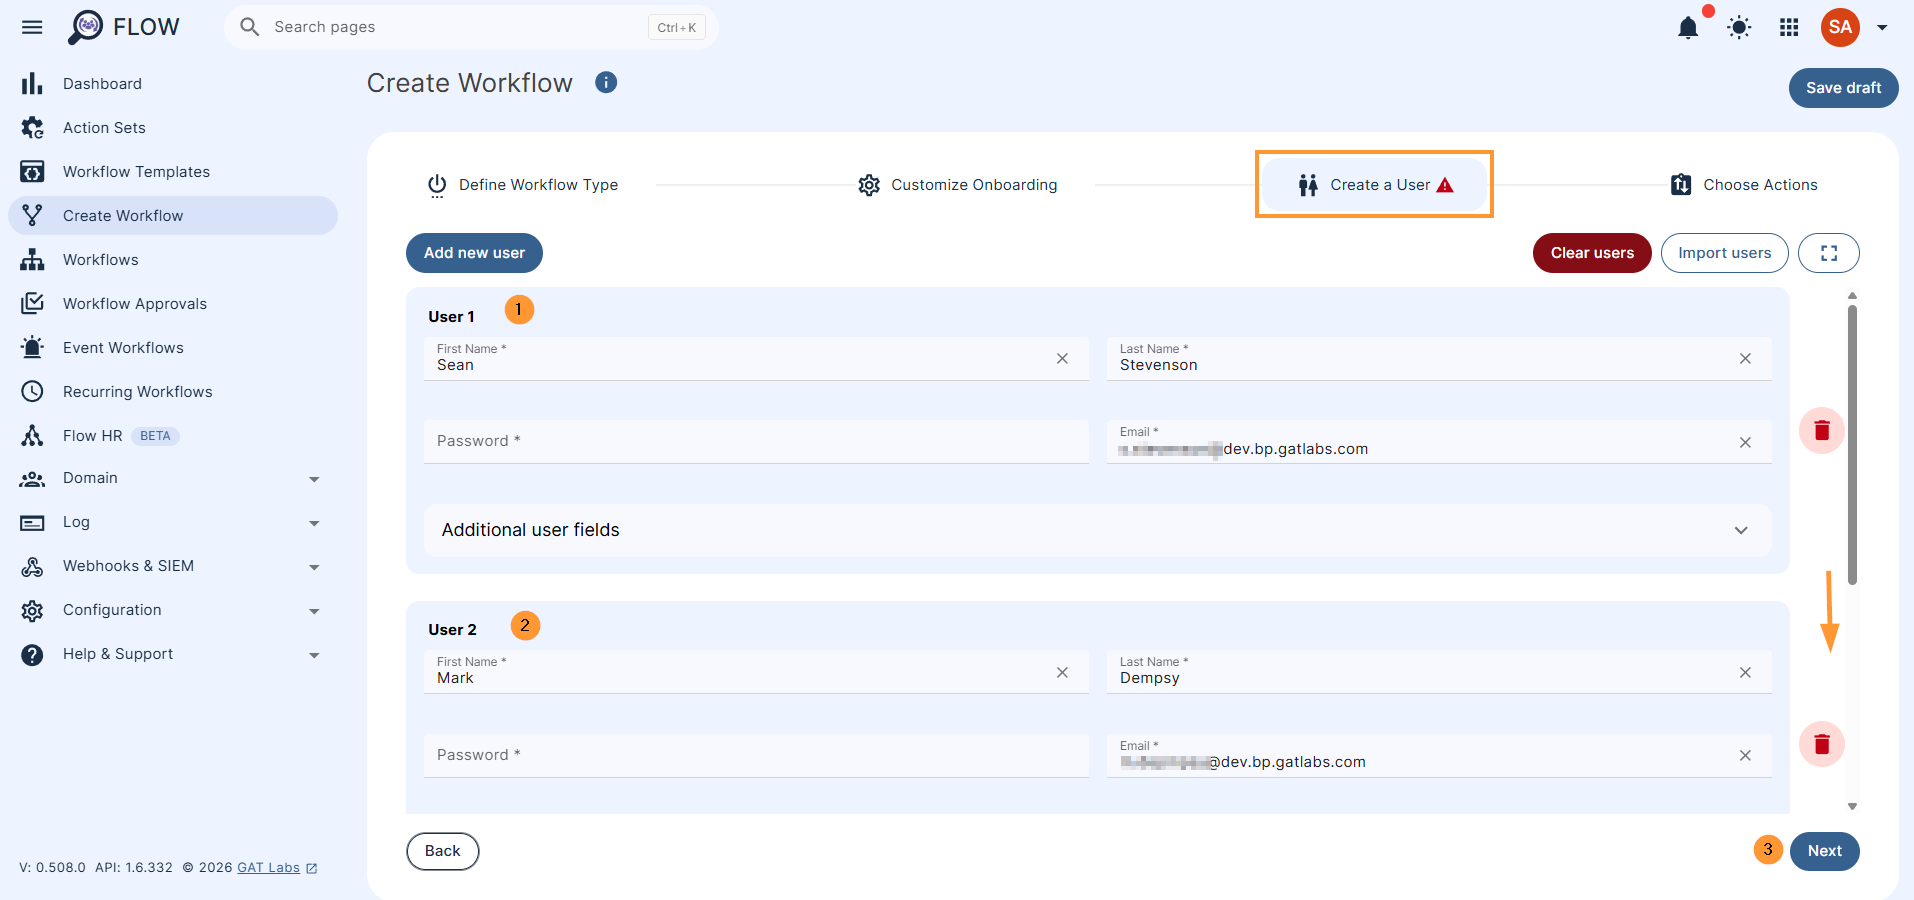
The users will be added to the List of users in Create a user.
Additional data can be added to each user before onboarding.
Click on next to proceed.
Choose action #
In Choose action, select any action you want to add to the user alongside creating them.
Click on the + button to add an action.
Double-click to open the action and fill in details for it.
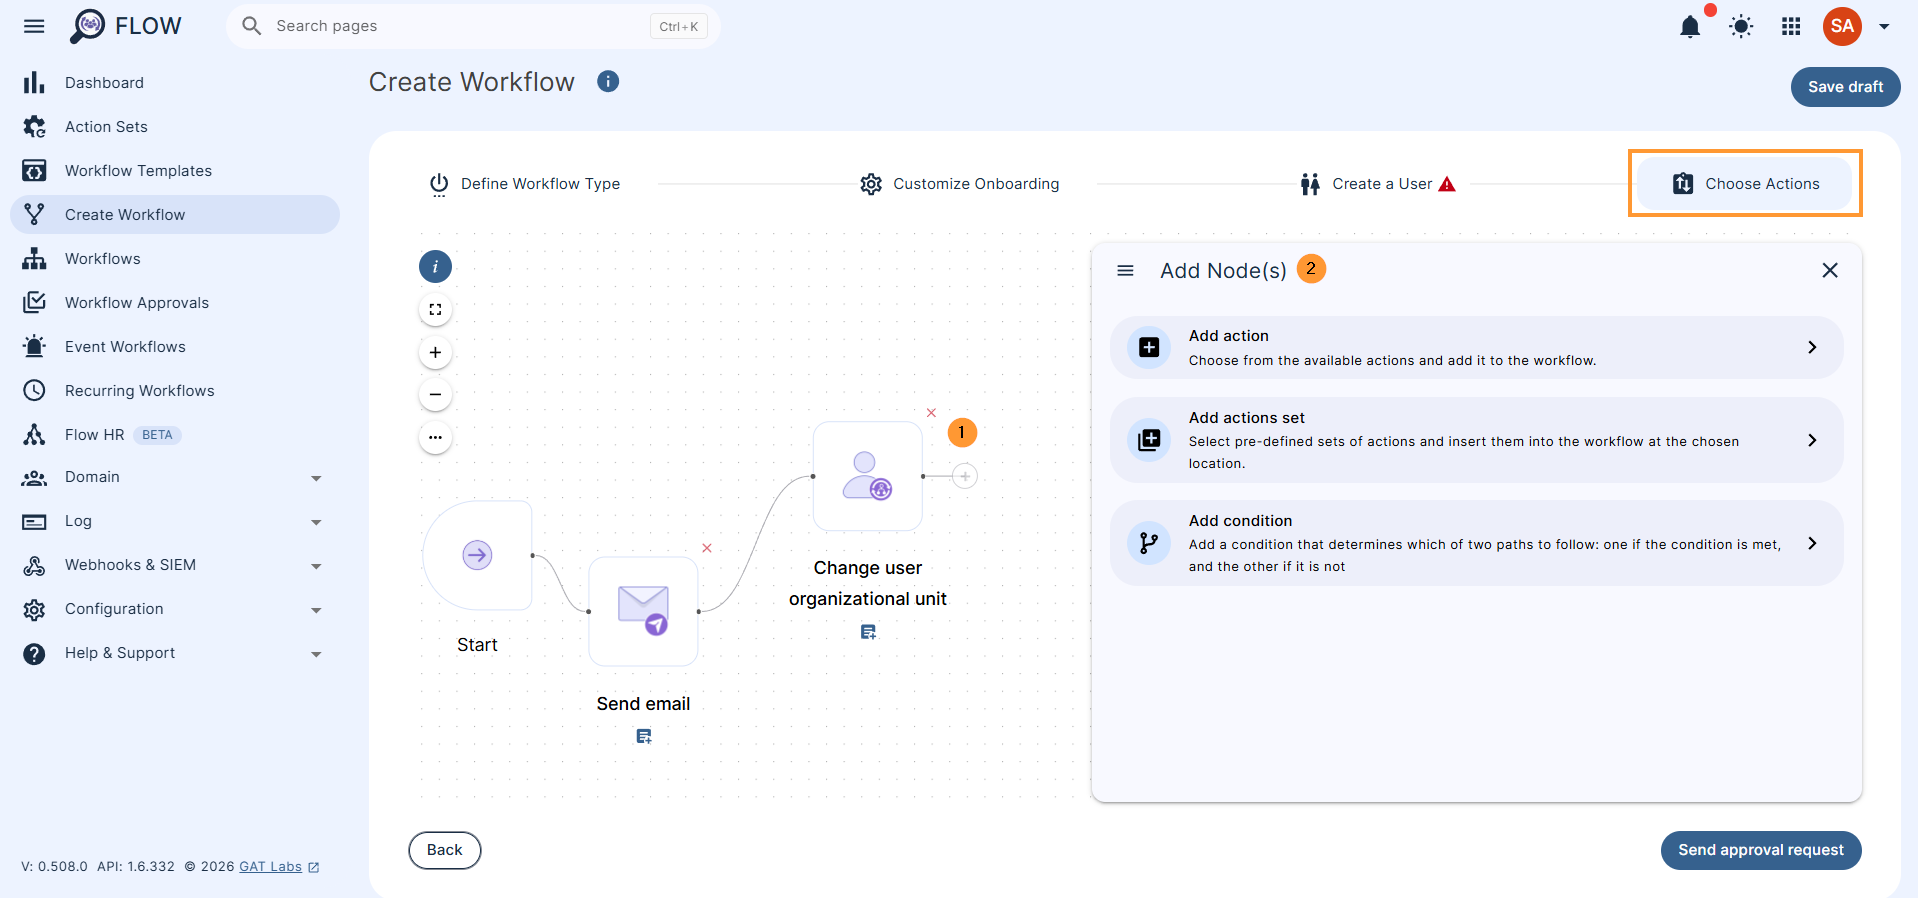
When actions are selected, click on Send approval request
Security Officer approval #
This will trigger an email to the Security Officer to be approved.
The Security officer will receive an email notification with the request to be approved.

The Security Officer will be navigated to Flow > Approval
Click on Approve or Deny
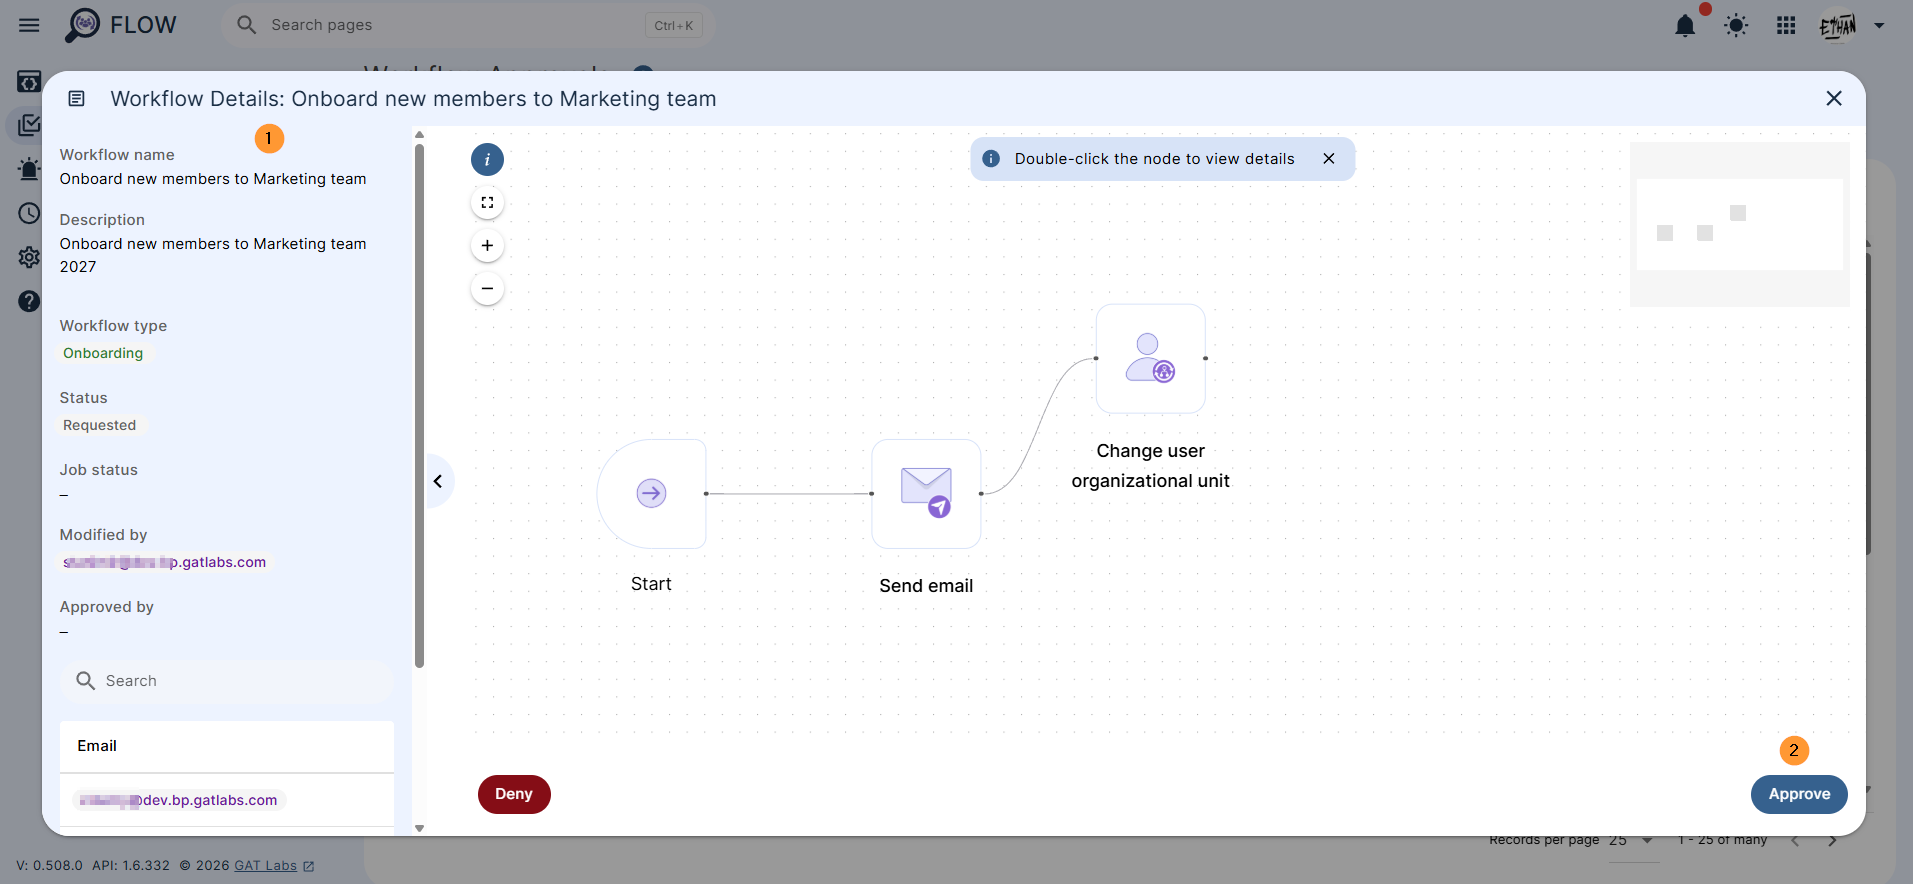
Note: If there is a pre-approval set up, a second message will be displayed; proceed right away. Check for more details
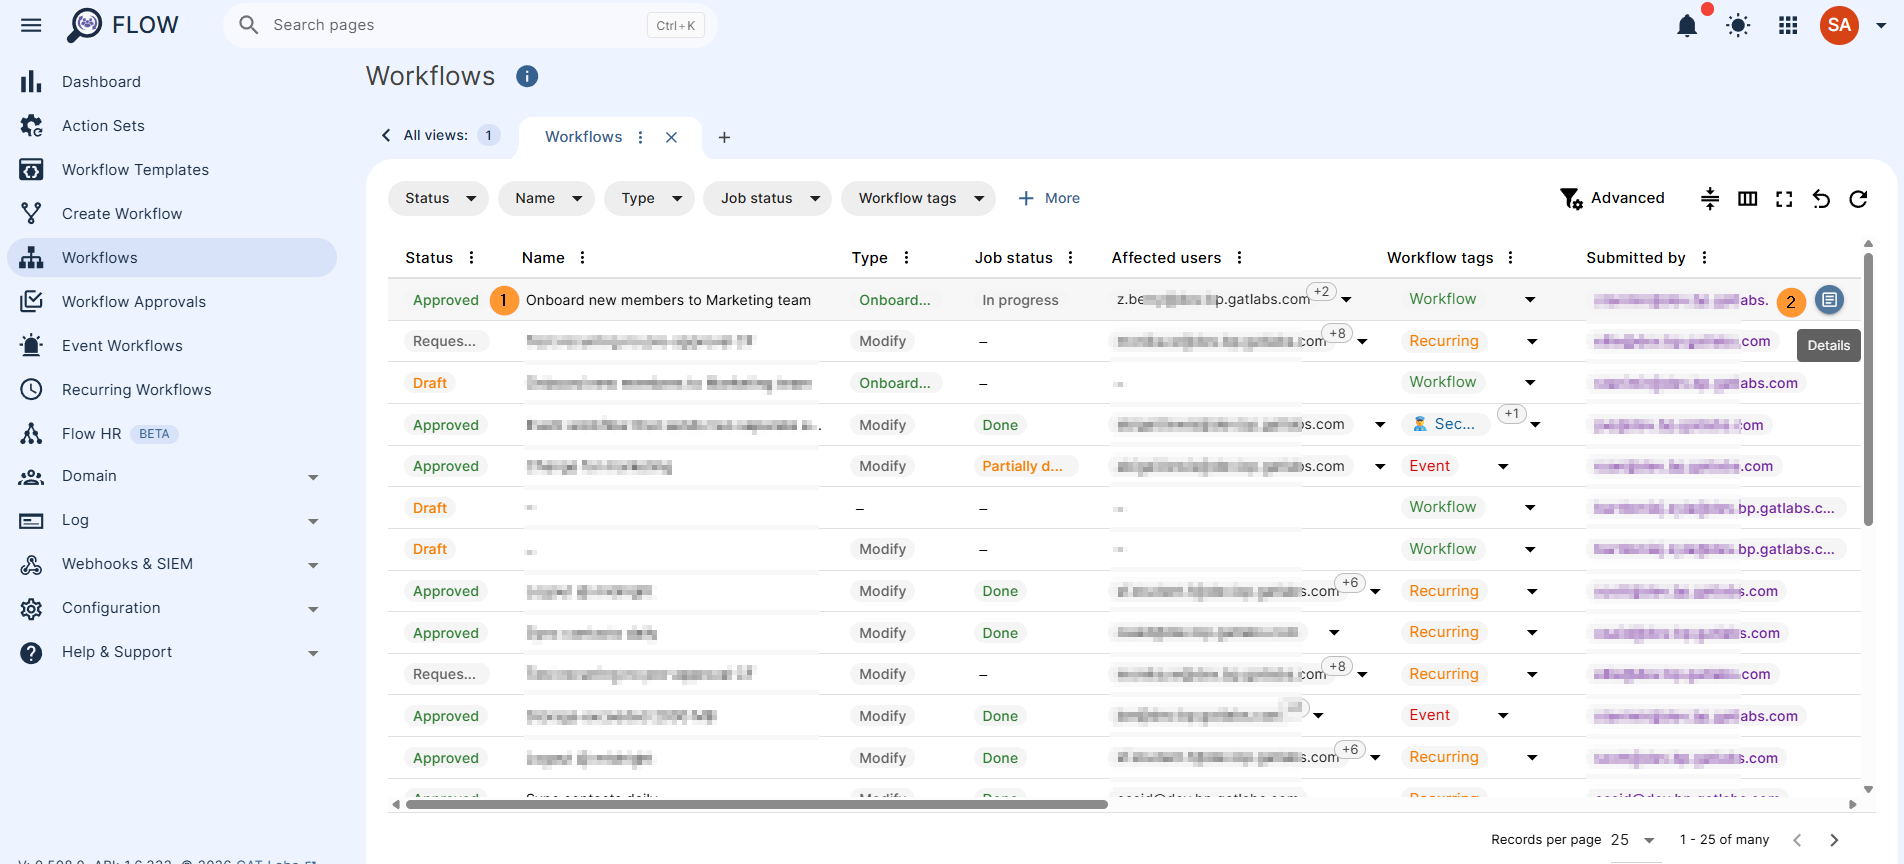
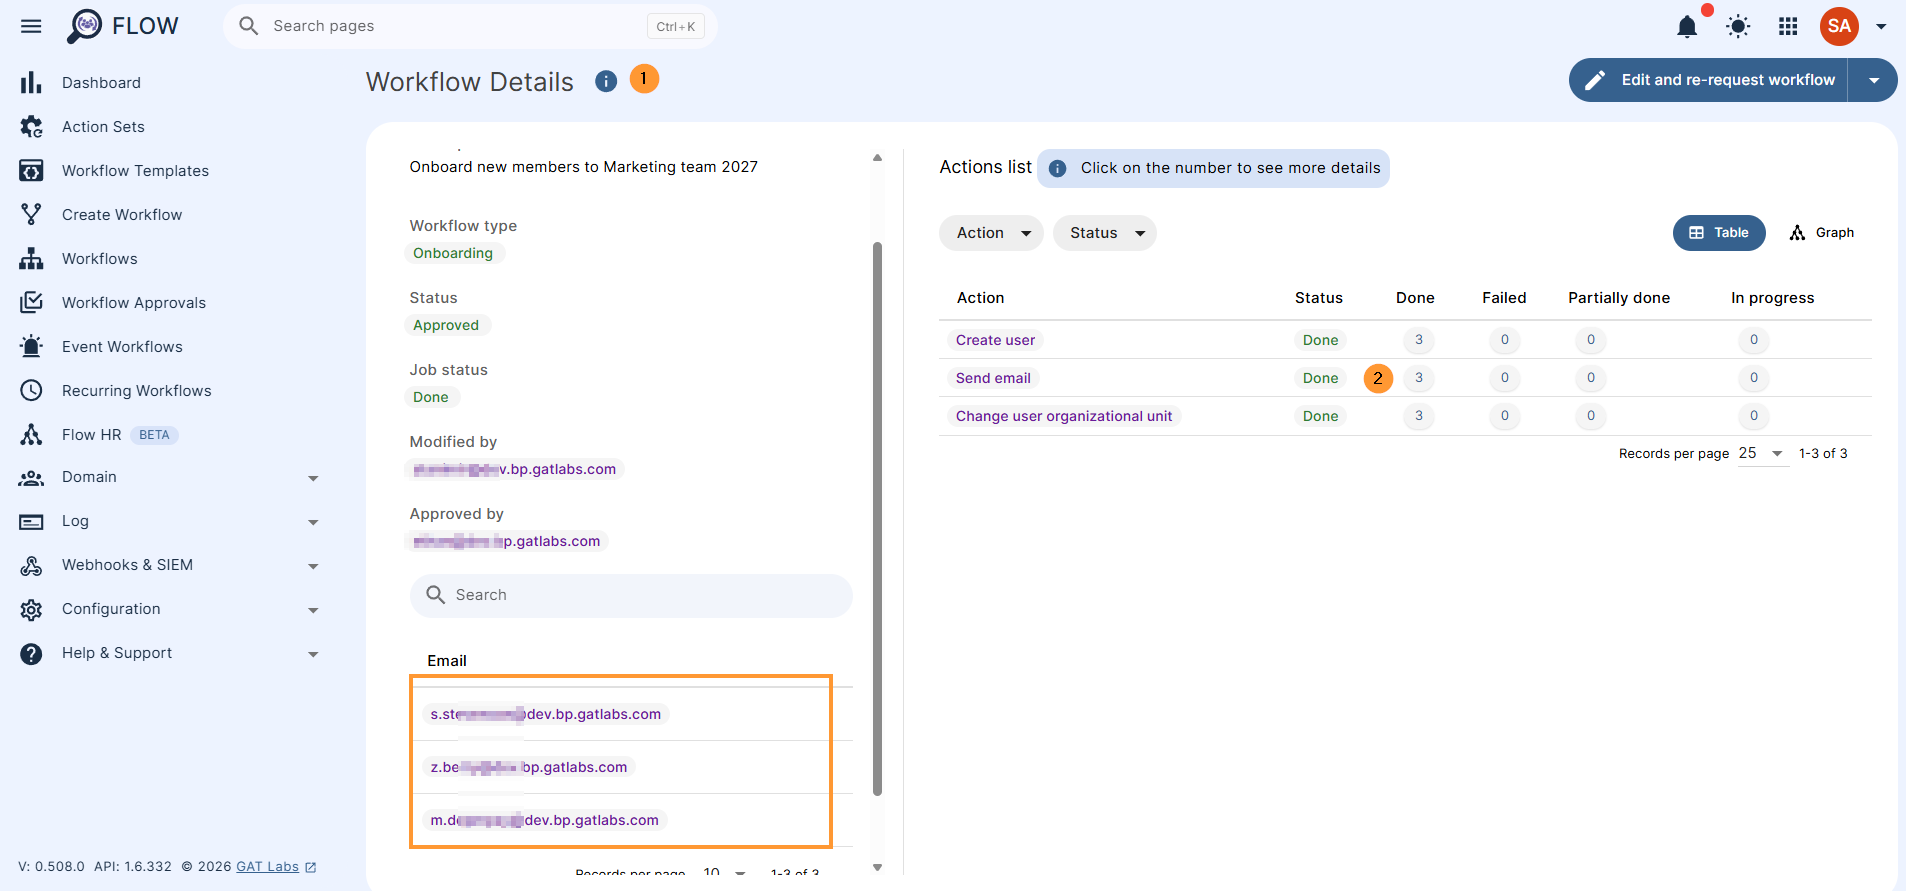
Result #
The result can be seen in the Workflow tab by the Admin
The status of the job will be Approved or Denied based on the Security officer’s decision.
Click on the Details button to see more.
The user will be created and added to the domain. They can be found in GAT Flow and the Google Admin console as newly created users.
Conclusion #
Onboarding multiple Google Workspace users in bulk with GAT Flow transforms what is traditionally a tedious administrative chore into a highly efficient, secure, and automated process.
By utilizing Google Spreadsheet integration, admins can effortlessly stage dozens or hundreds of new hires simultaneously, eliminating the need for repetitive manual data entry. The true power of GAT Flow lies in its ability to handle complex onboarding ecosystems in a single sweep – allowing you to pre-configure passwords, map custom organizational fields, and chain additional automated actions right from the start. Wrapped in a secure approval layer that keeps Security Officers in the loop, the platform ensures that mass provisioning is both lightning-fast and compliant.
Ultimately, GAT Flow provides a seamless, “set-and-forget” experience that saves IT departments hours of manual labor while ensuring new team members have everything they need from day one.


