Introduction #
GAT Flow tool allows Google Workspace Super Admins or Delegated Auditors (Delegate in Flow) to add and remove users from Google Classrooms. This can be done for individual students or groups of students in bulk.
Note: This requires GAT Unlock to be enabled.
Startup #
In GAT+ navigate and click to open Flow

When Flow is launched it will be loaded on a new tab on your browser.
Set up the workflow #
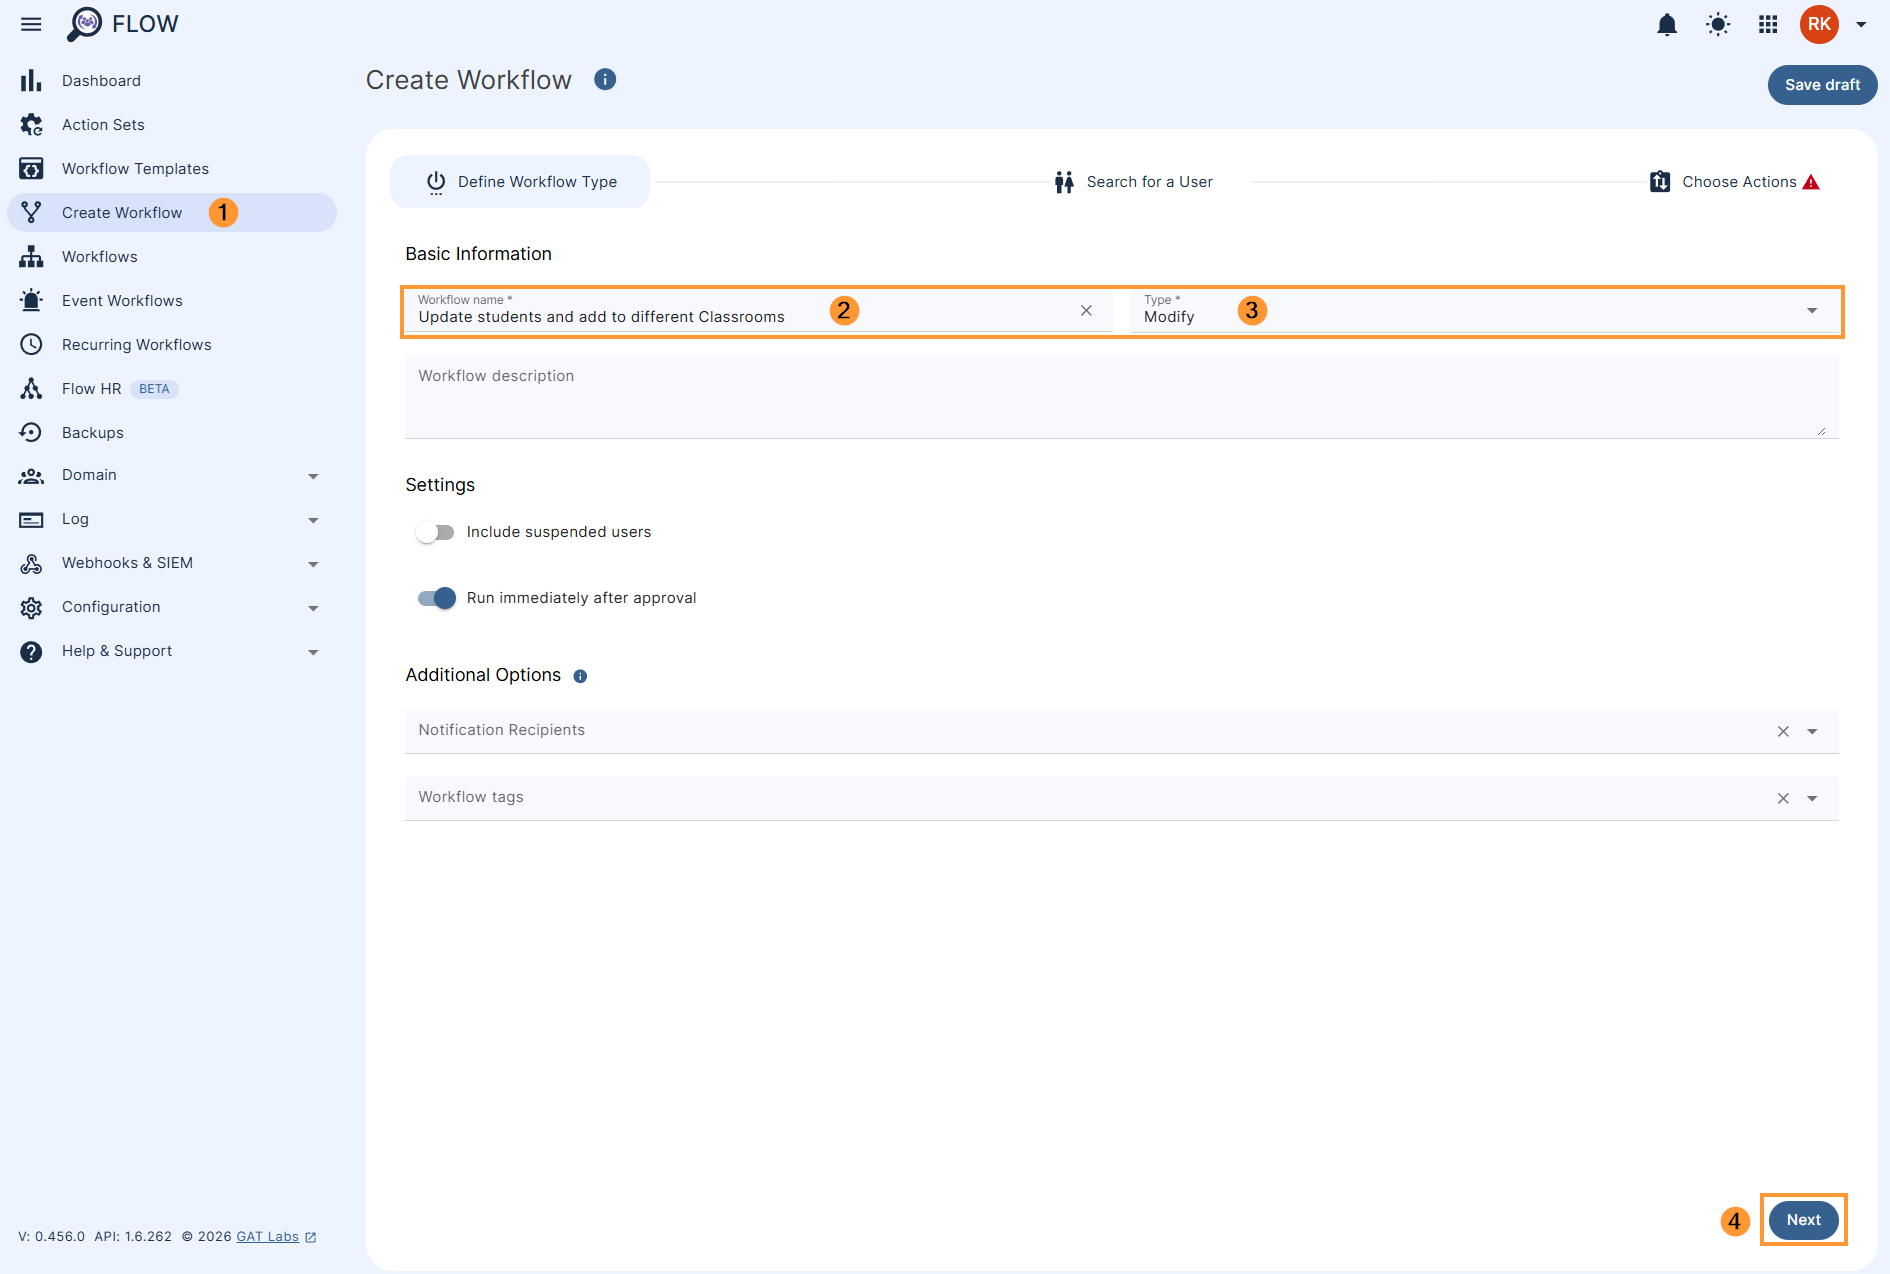
Navigate to Flow → Create workflow
Workflow type #
In the Workflow fill in the details. You can set it up also as an Event workflow or Recurring workflow.
- Name – enter the name of the workflow (2)
- Description – enter a description for the workflow (optional)
- Type – select what workflow type you would like to run
- Modify – modify existing users (3)
- Include suspended users – enable or disable to allow you to select users who are currently suspended:
- If enabled – you will be able to select even users who are suspended
- If disabled – you will be able to select only users who are active
- Run immediately after approval – provides an option to schedule the workflow to run in a selected future time (optional)
Later click Next (4) to proceed.
Click on Next to proceed.
Search for a user #
In “Search for a user” enter the users that need to be added to different classrooms
- Search for a user
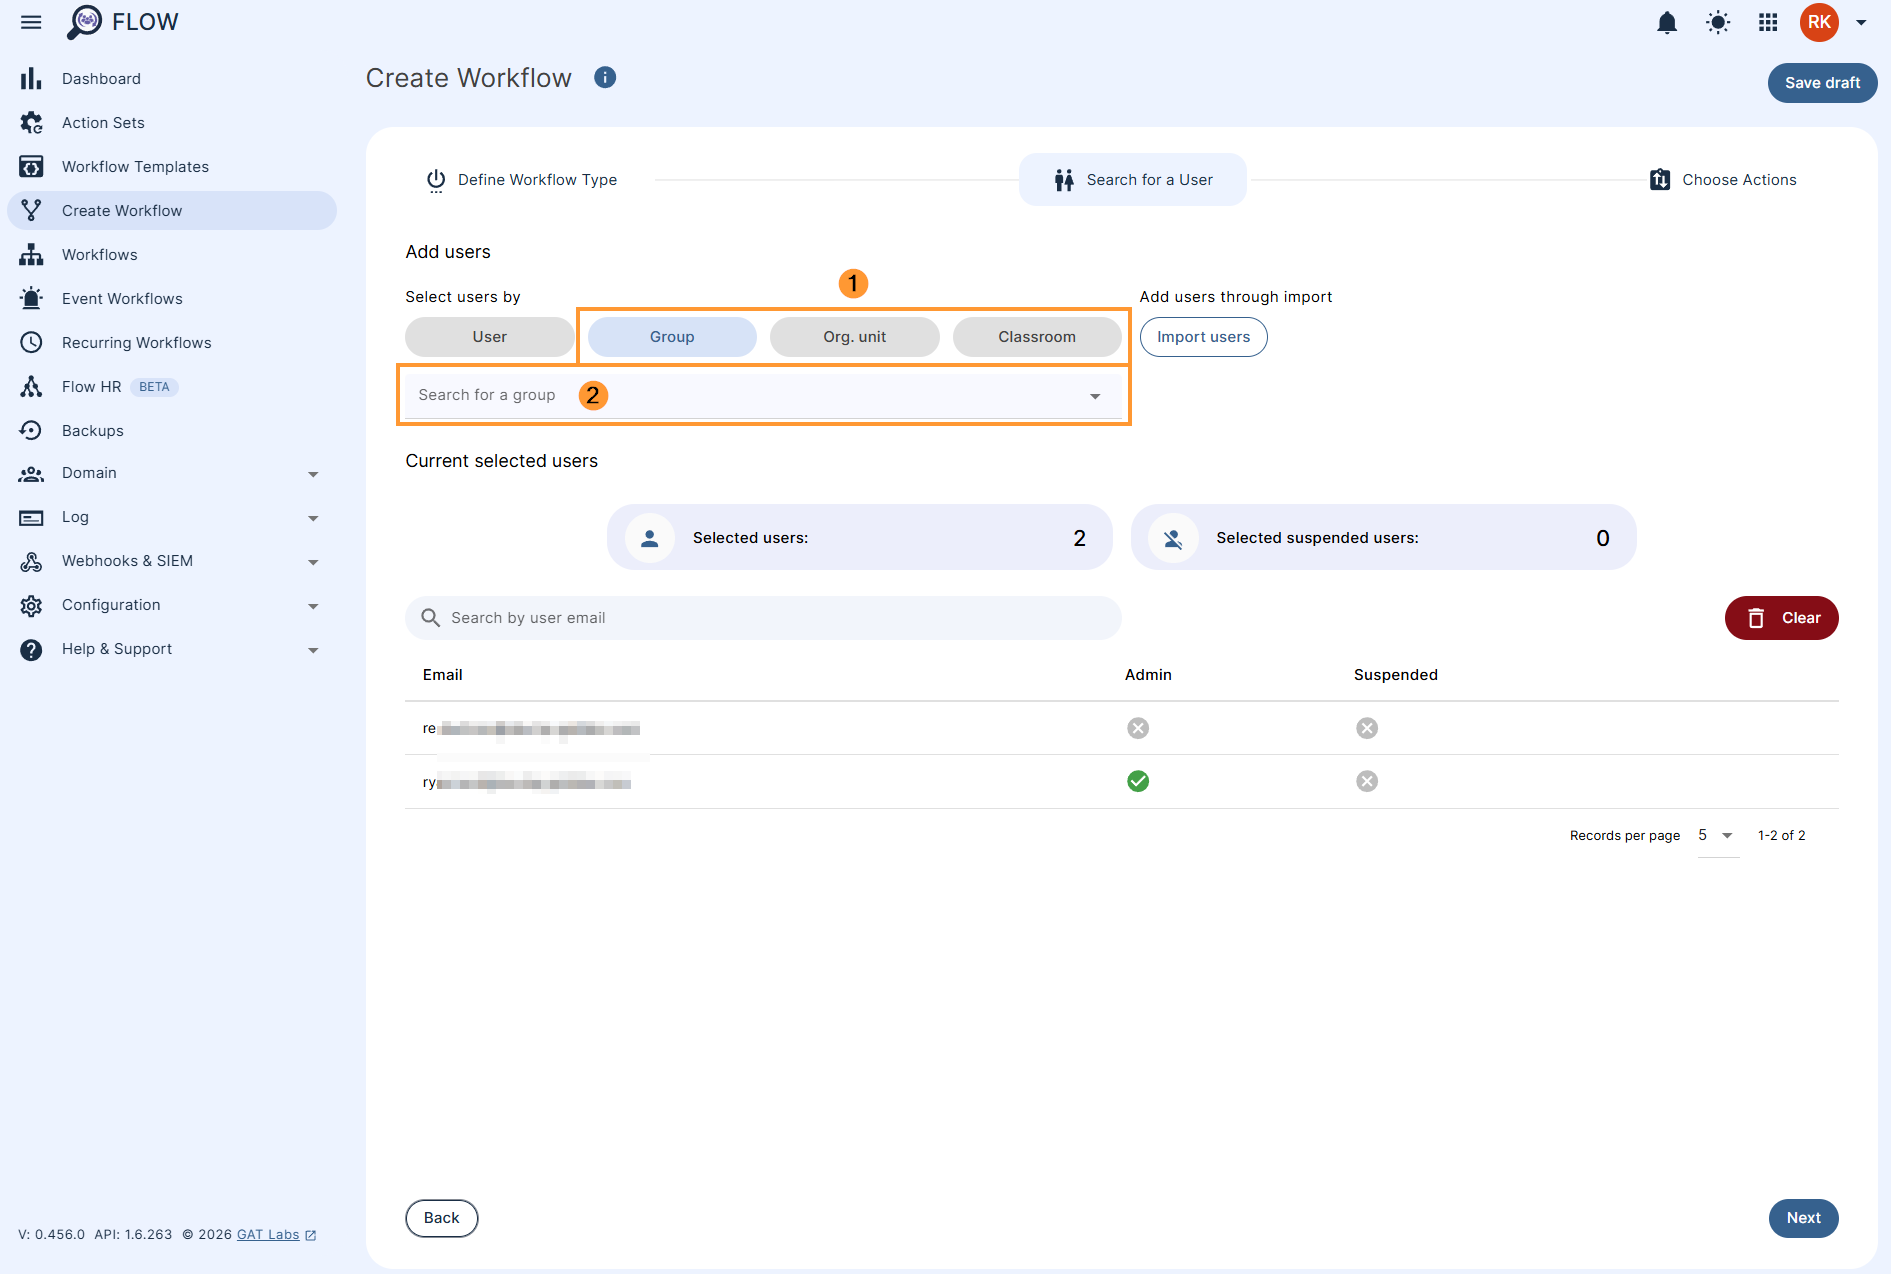
- Search for a group
- Search for an OU
- Search for a classroom
- Import users
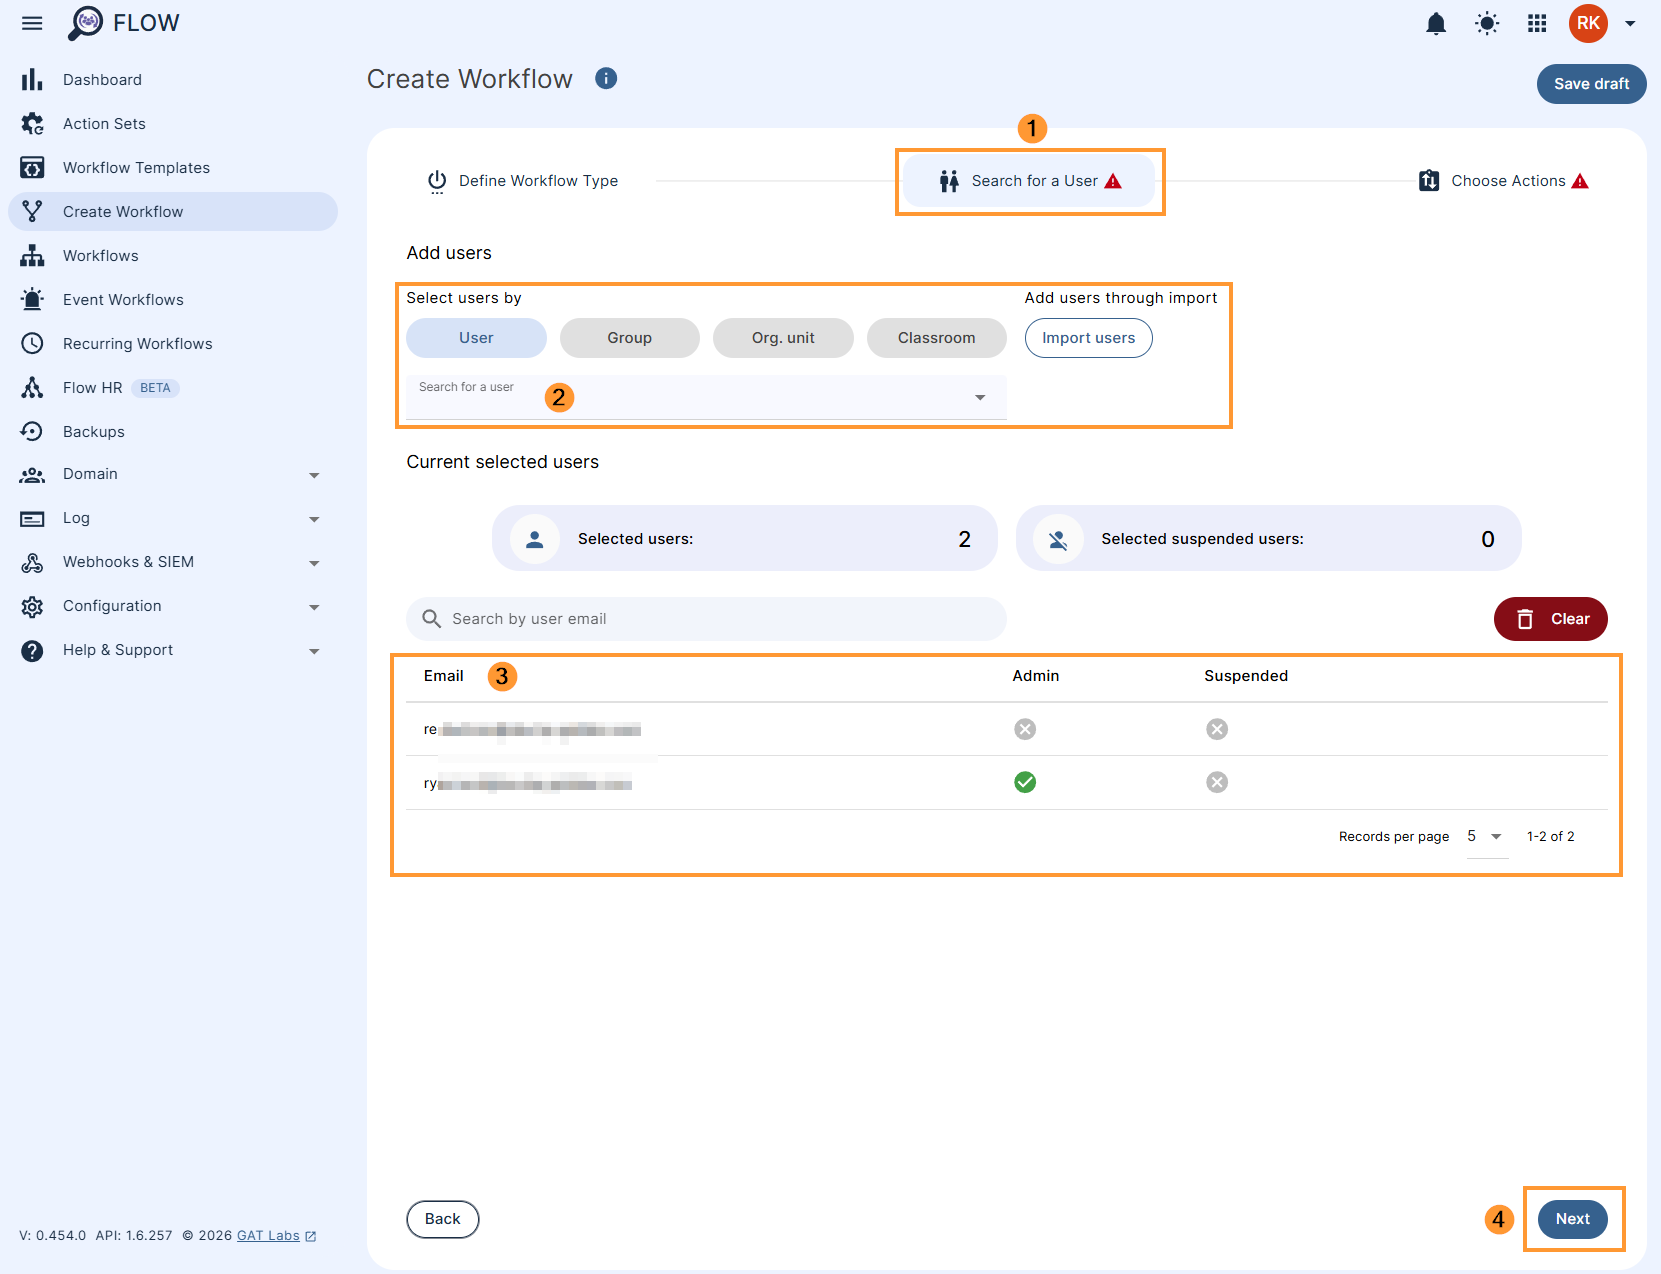
Click on the “Group”, “OU” or “Classroom” and search for the group, OU, or Classroom where the users you want to add belong to.
You can also search for users individually if they are part of different groups or org. units. Select the checkmark on each user to add or remove the user from the list.

Click on the Submit button
The list of users will be added to the workflow. Individual users can still be removed by clicking on the ‘Remove’ icon beside the name on the right-hand side.
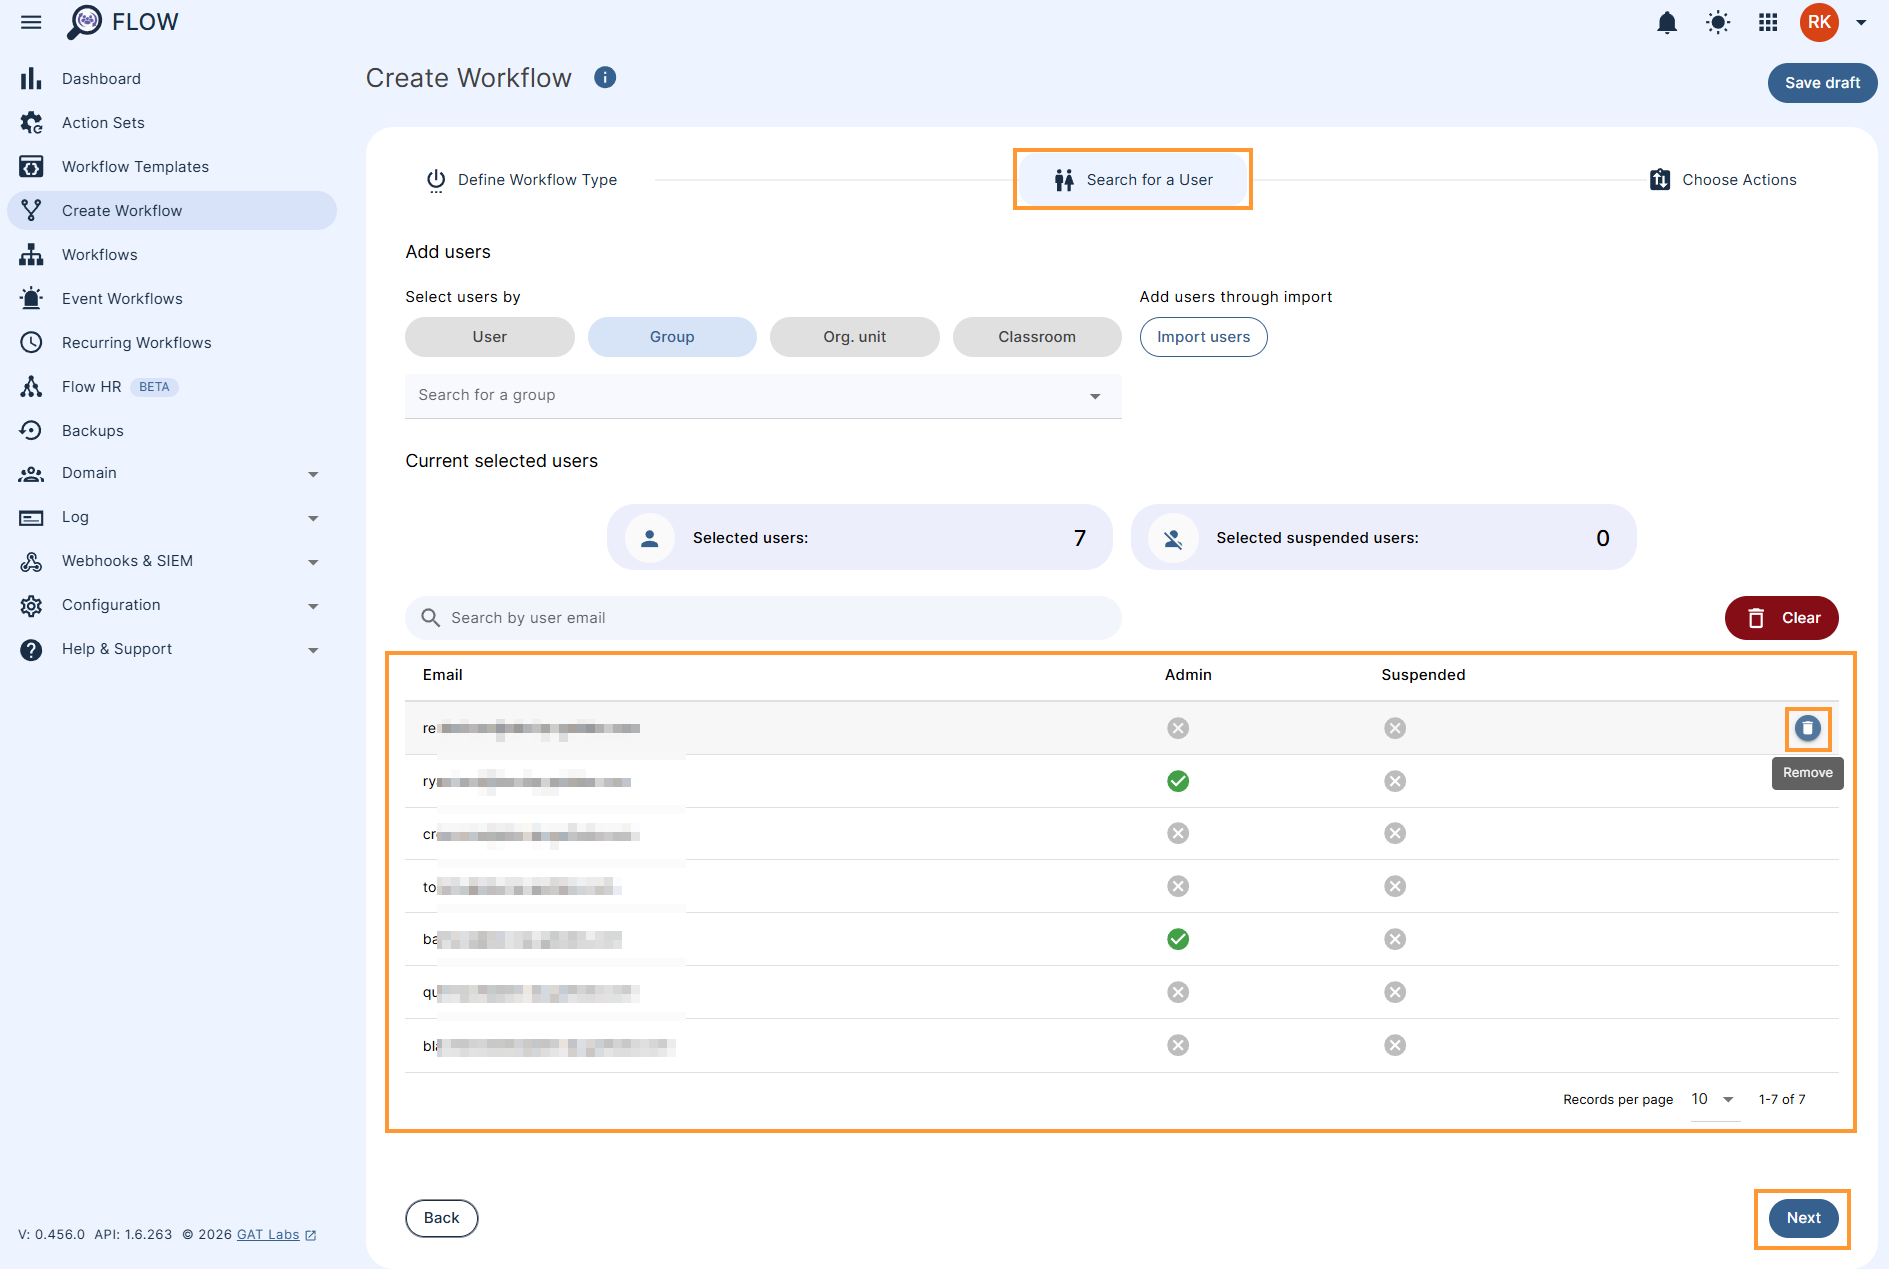
Click on the “Next” button
Choose actions #
In the Choose actions click on the (+) button (1) and then click the Add action button (2)
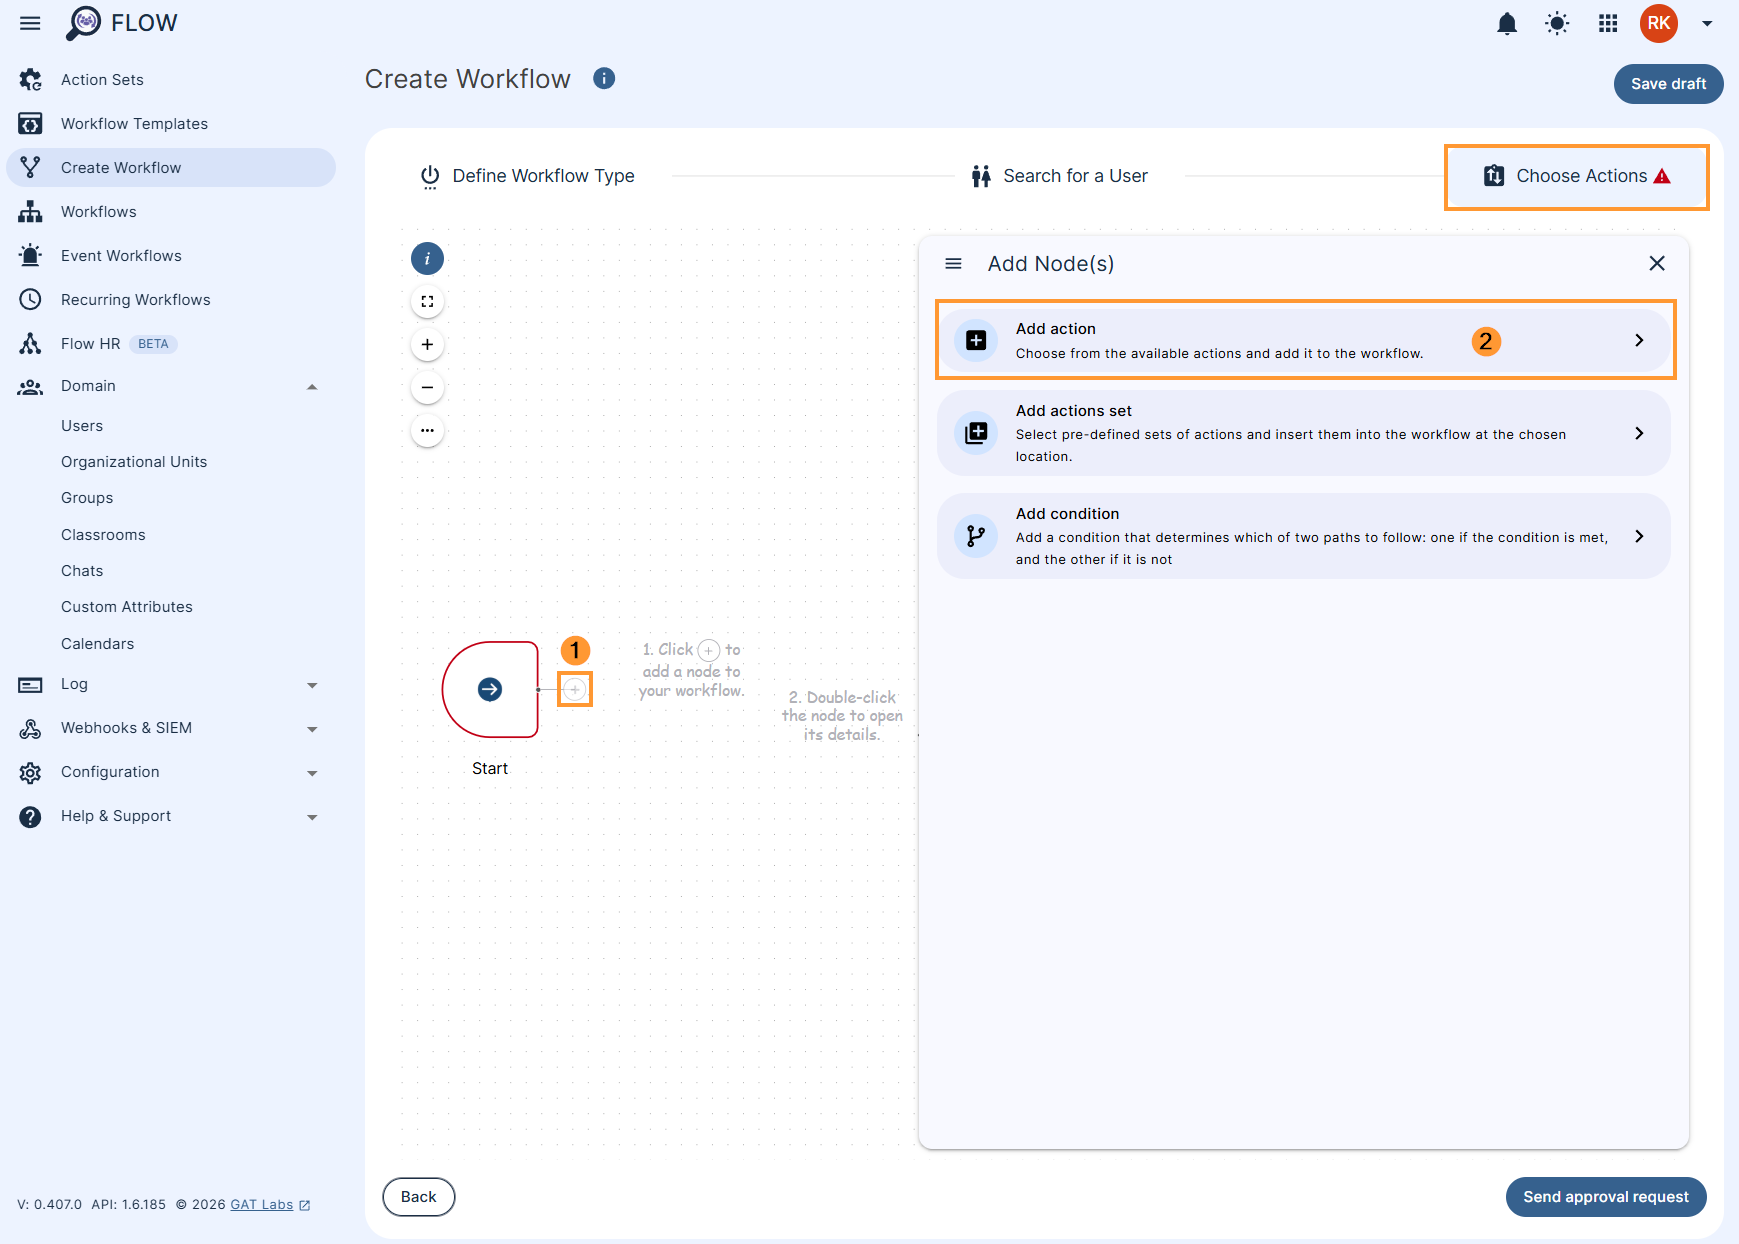
When selecting Add action, a menu with different options will be displayed.
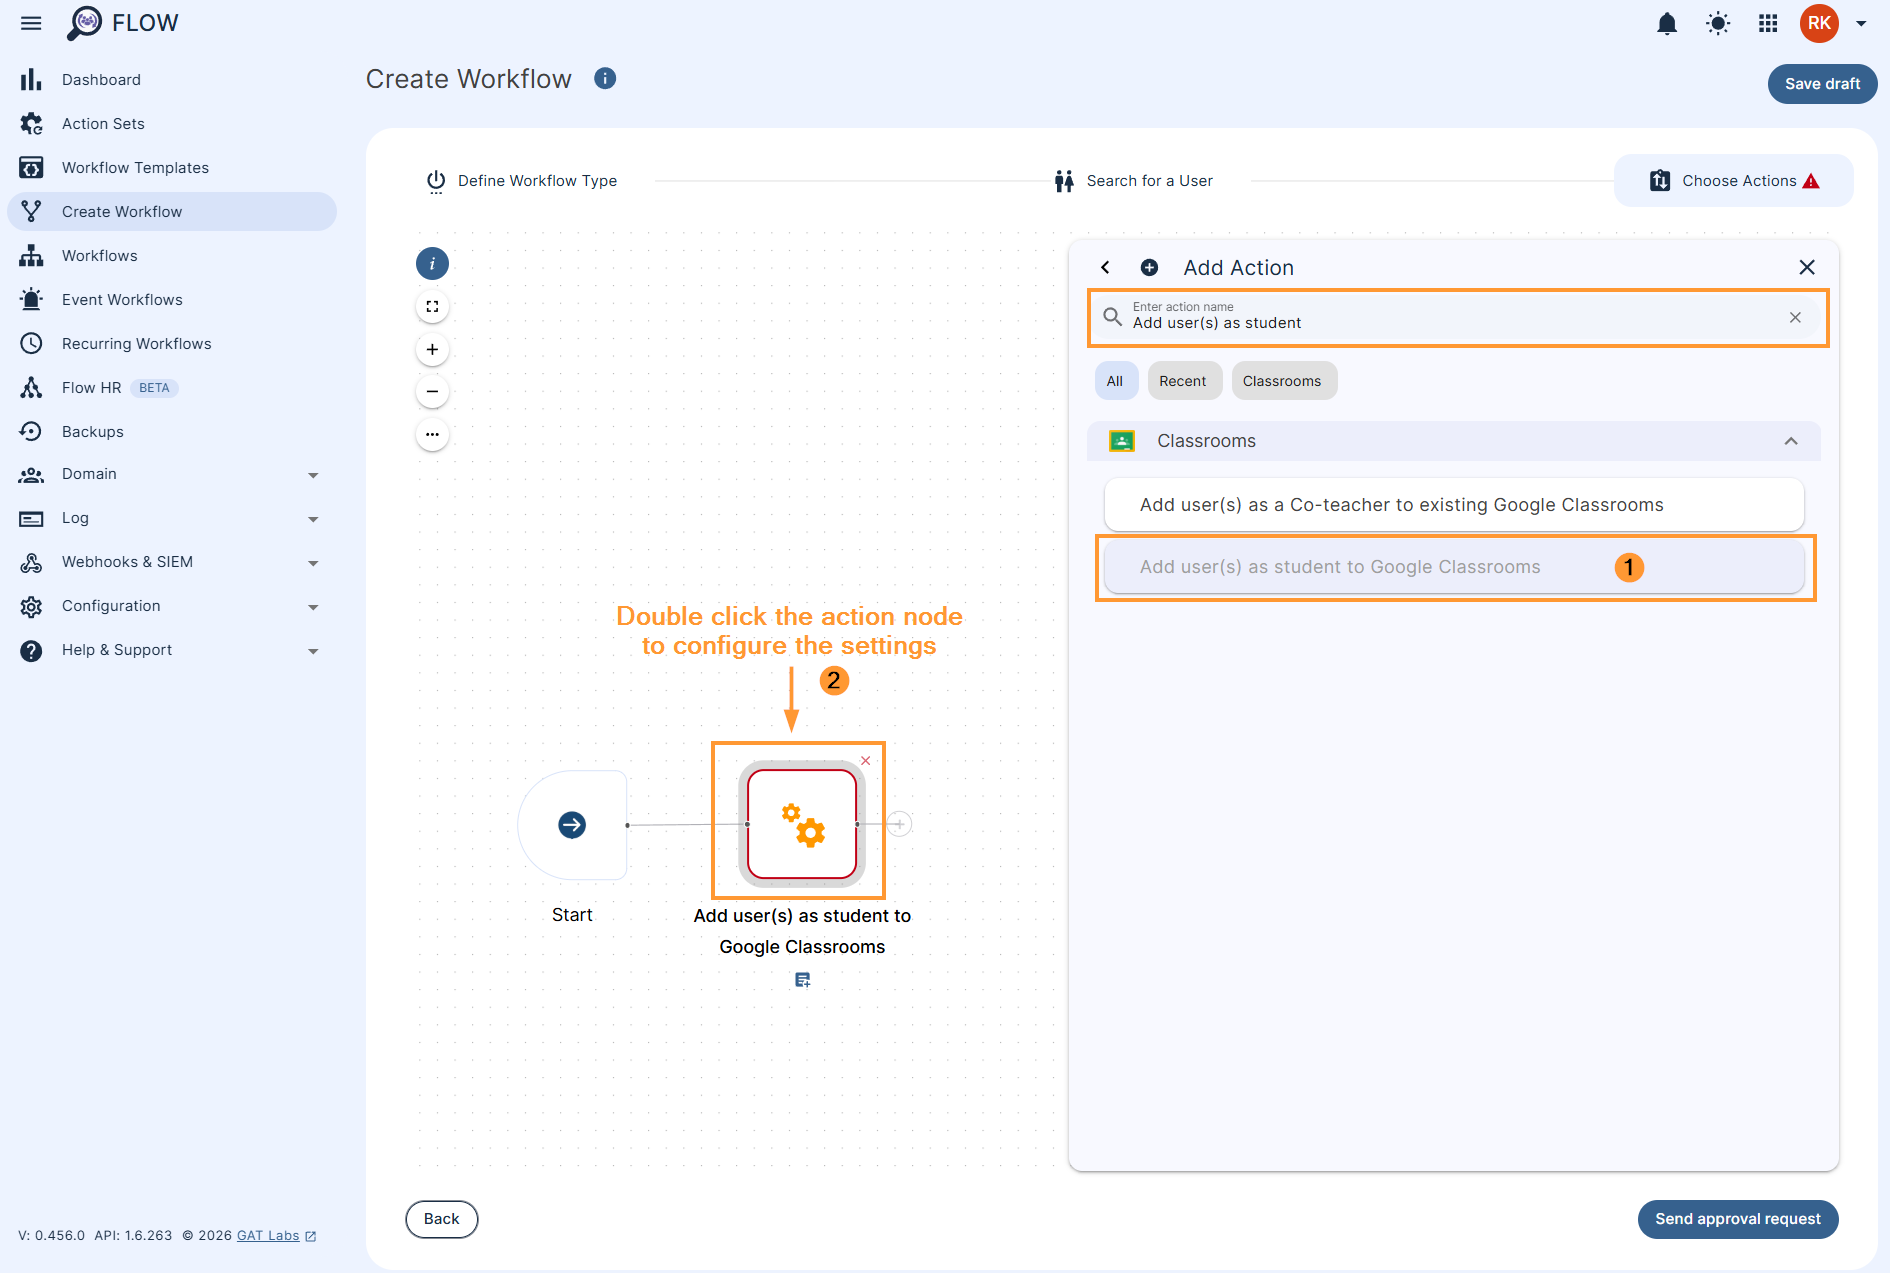
Select and click on Add user(s) as students to Google Classrooms from the menu on the right (1). Double click the ‘Add user(s) as student to Google Classrooms’ action node to configure the settings (2).
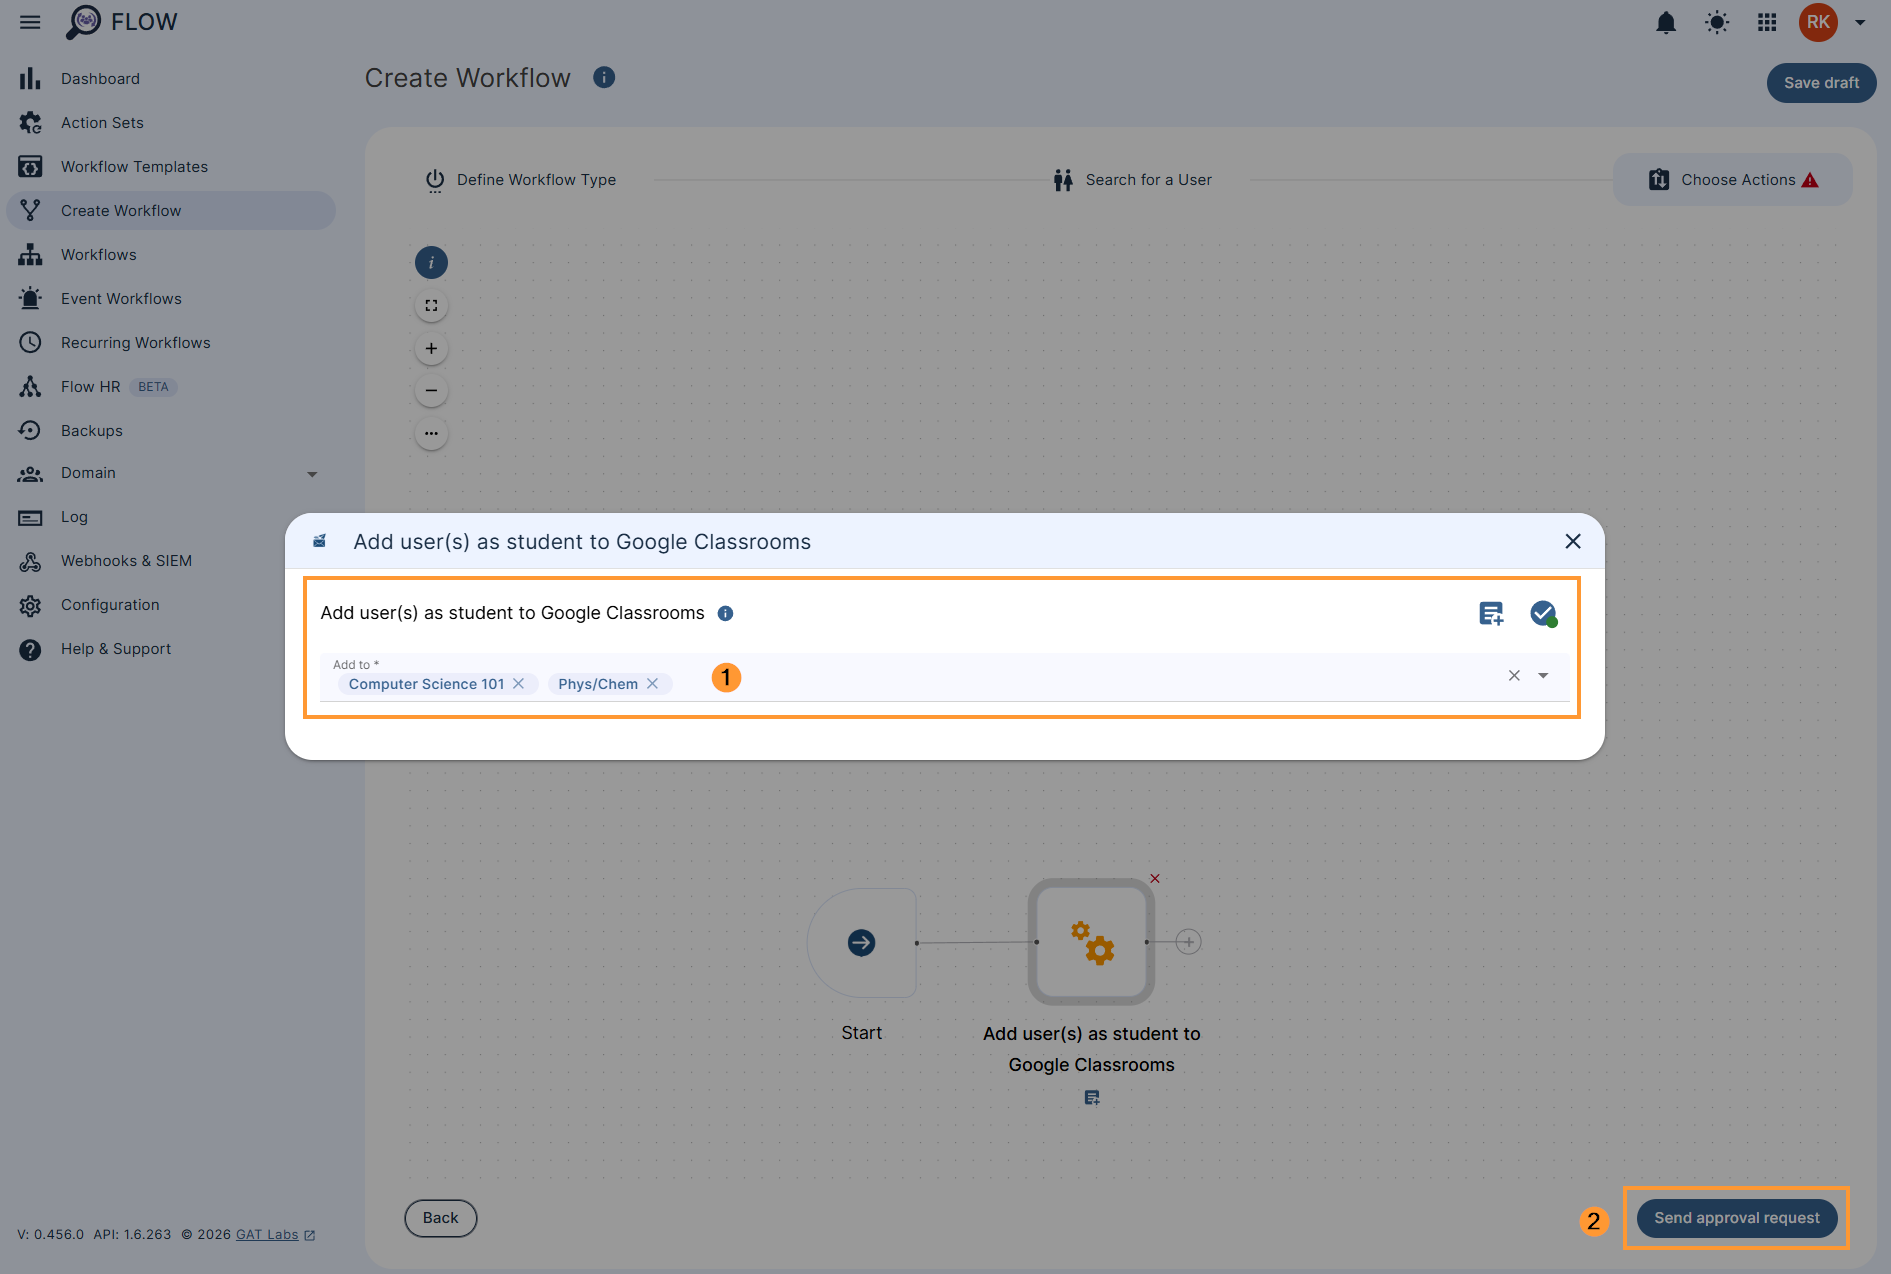
Search and add all classrooms to which you want to add the selected students into.
Enter the classrooms where you want to add the students into
Note: There are a few options for Google Classrooms.
- Add student(s) to Google Classroom
- Add teacher(s) to Google Classroom
- Remove student(s) from all Classrooms
- Remove teacher(s) from all Classrooms
Request #
Click on “Send approval request” when ready
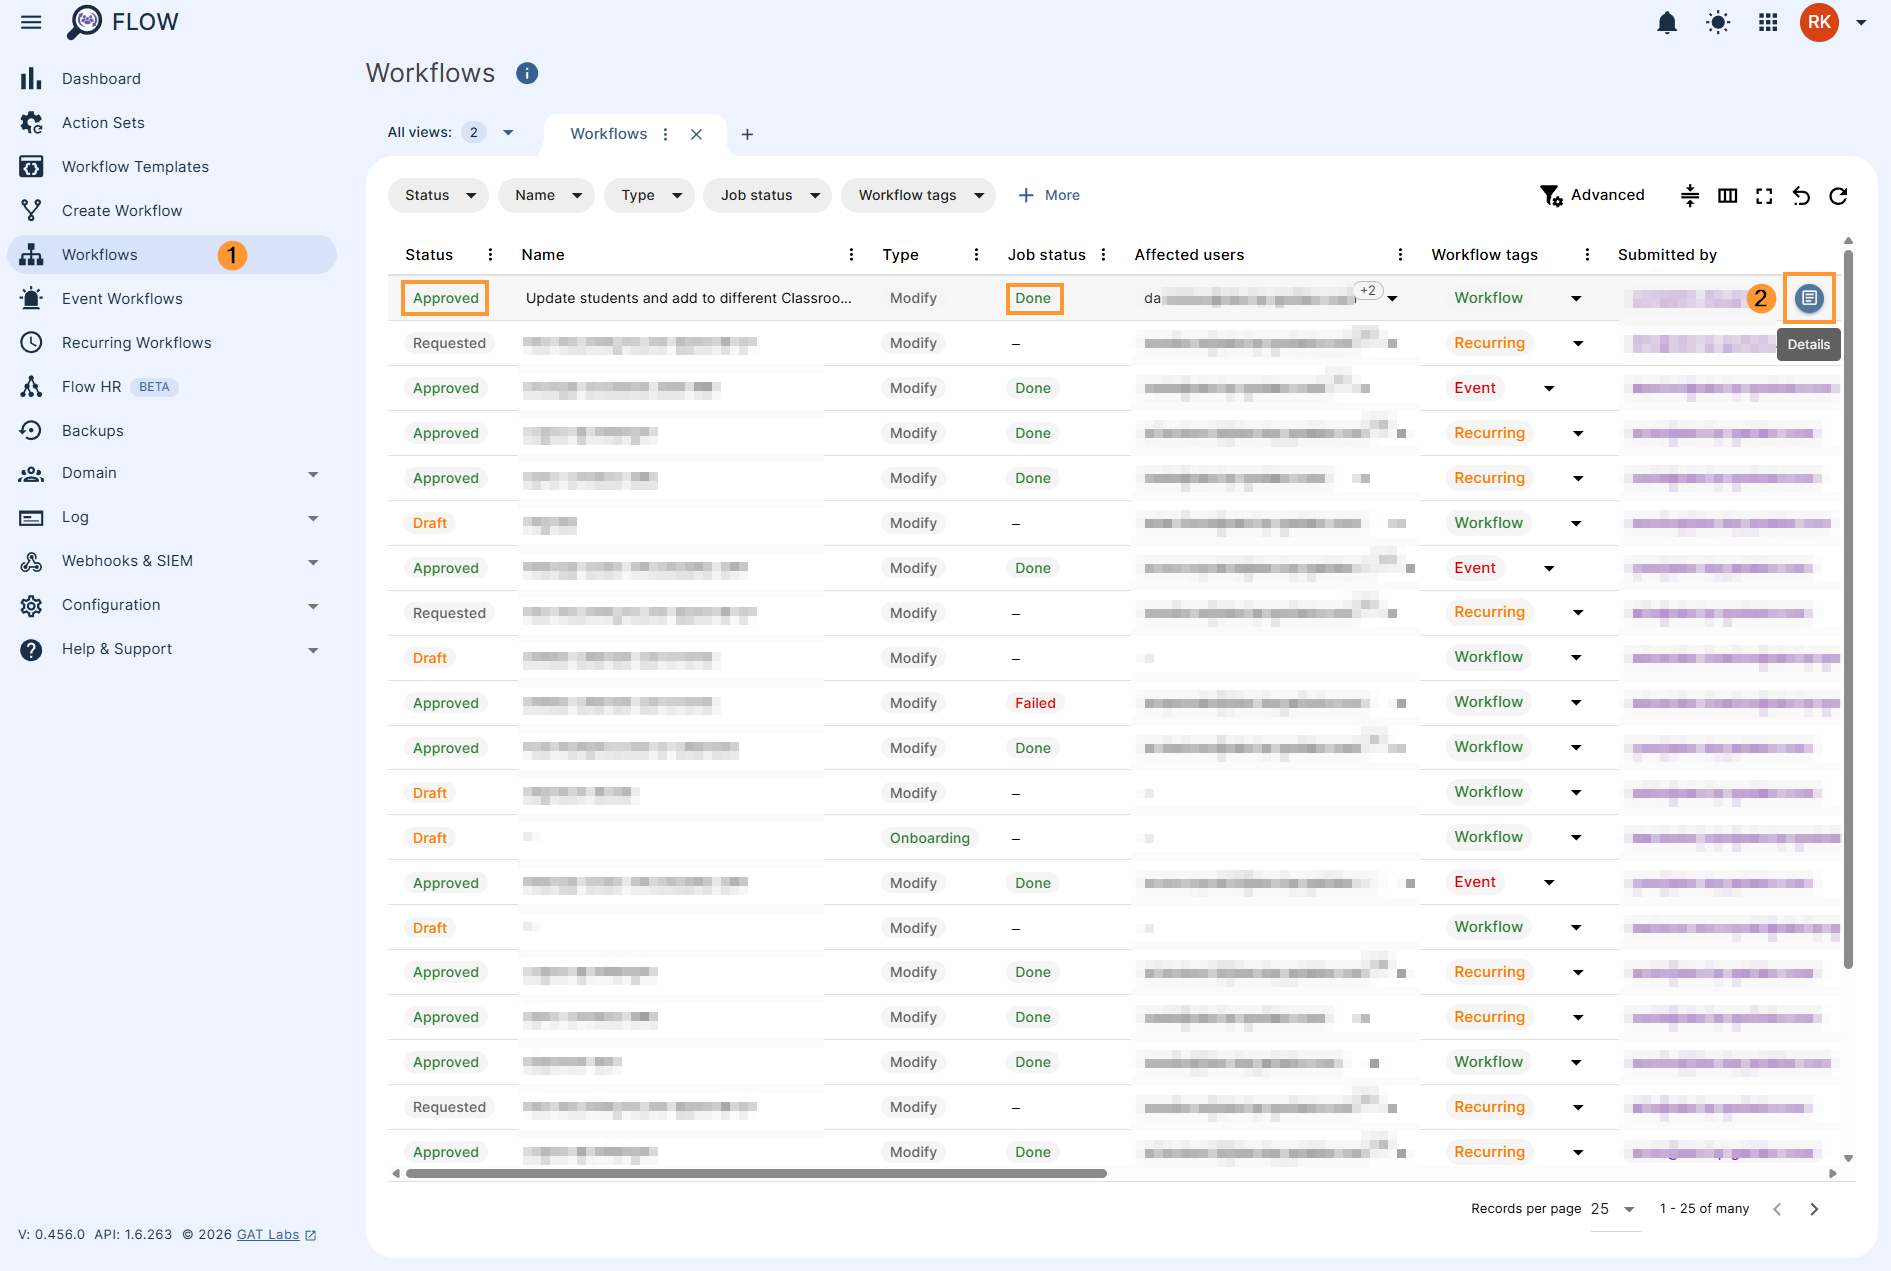
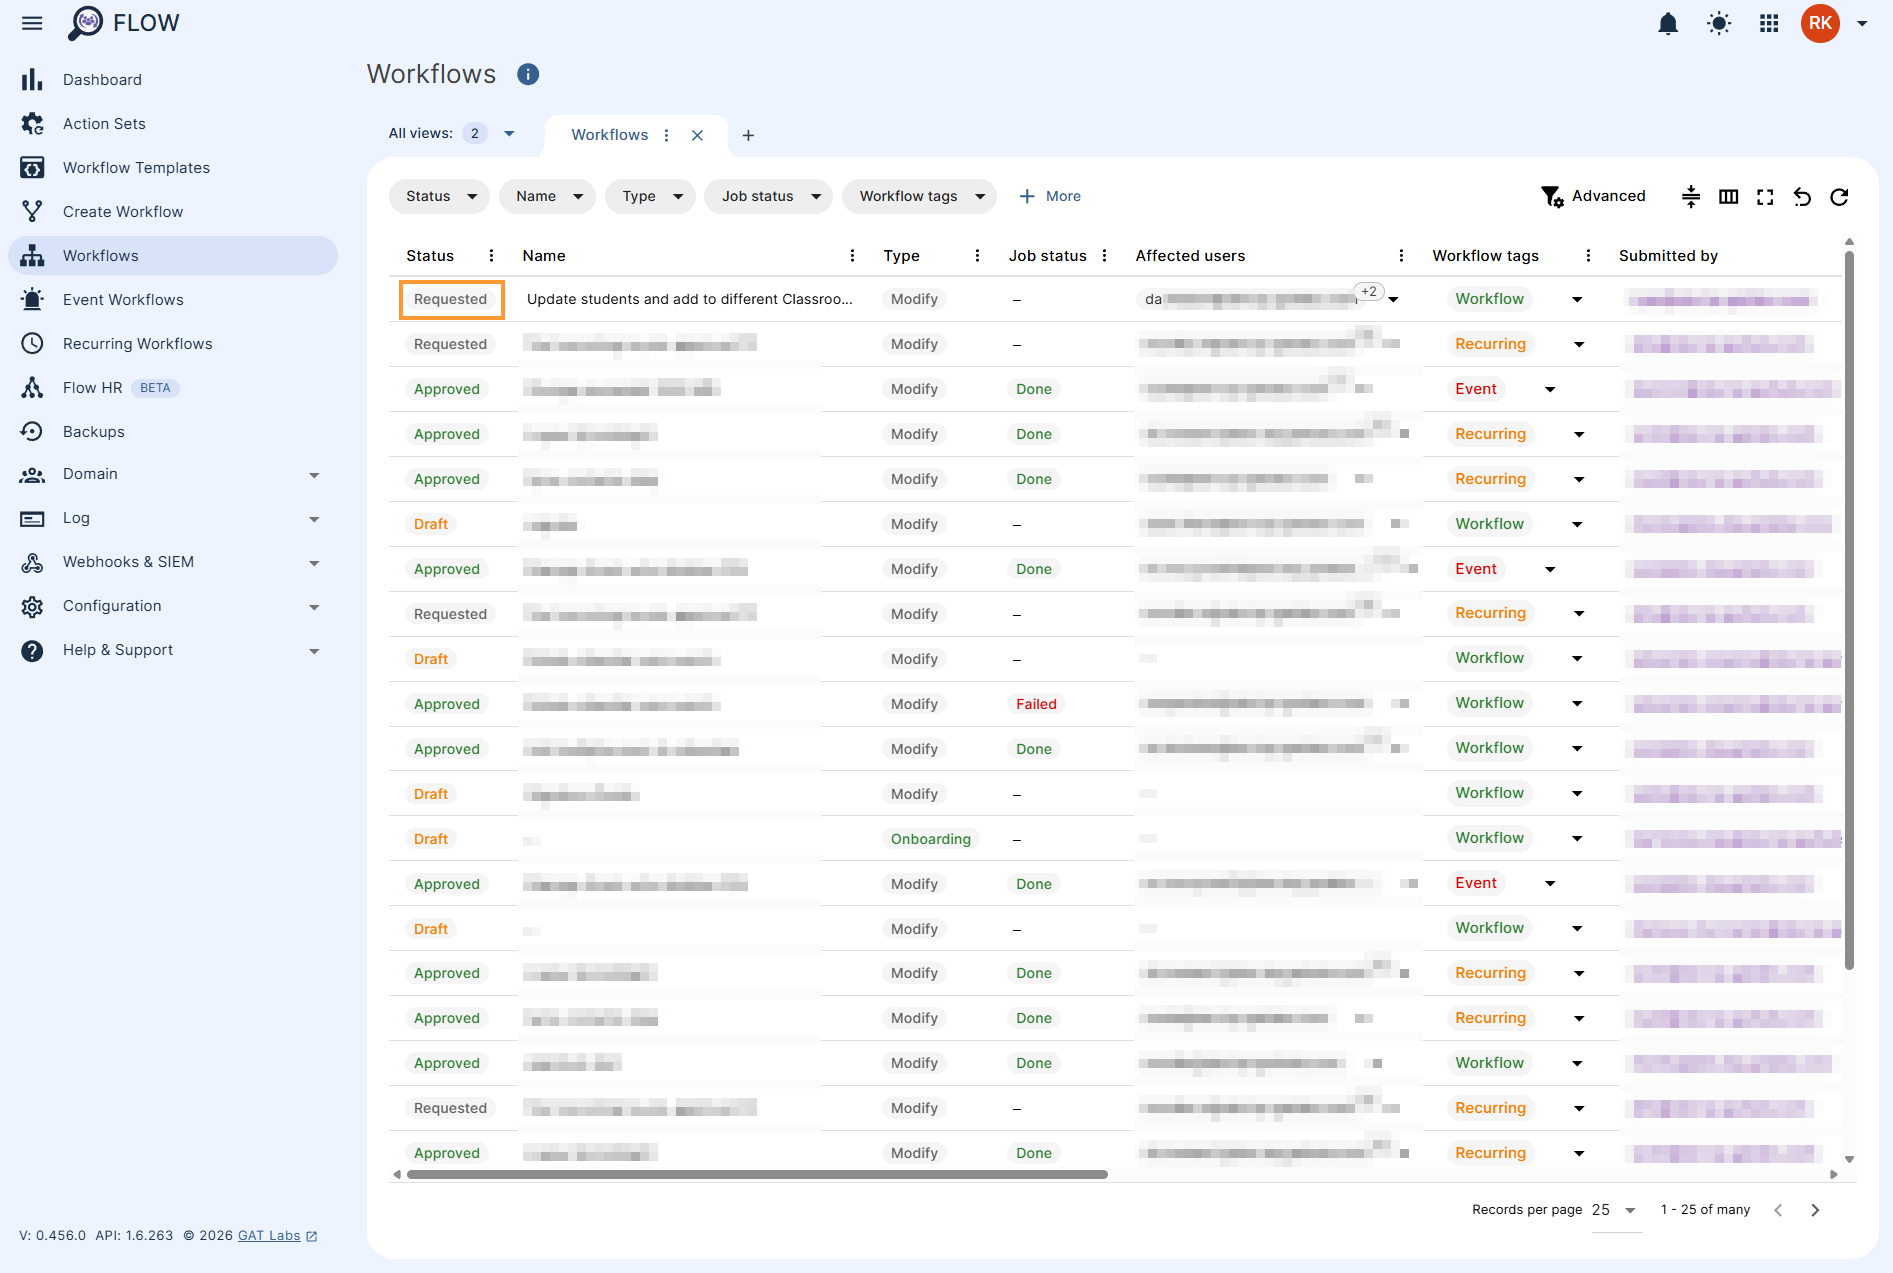
The request will be visible in Workflows
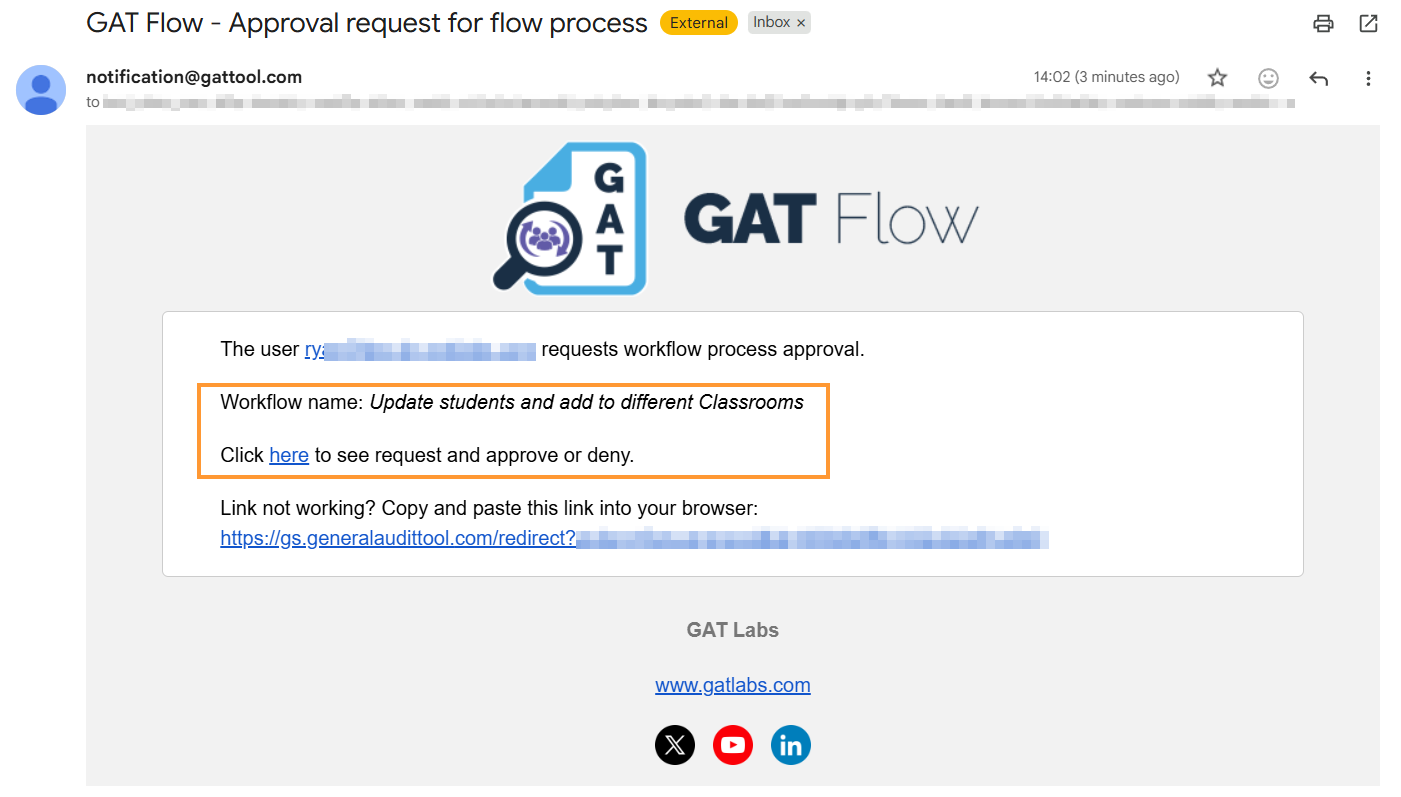
The Security officer will receive an email notification, with details on how this request can be approved.
When approved, the action will take an effect and all passwords will be changed.
Result #
The result will be visible in Workflows or Approval by clicking on the Page icon on the right side
Note: If students are already members of the classroom, they will not be added, but the remaining users will be.
Click on the Page icon to see more details about who are the users affected by this rule and the status of the job.