

GAT Flow allows Google Workspace Admins to take actions on the users on their domain in bulk. They can also automate user onboarding with this tool by creating and running the workflow and saving the action set to be used in the future.
Create Workflow and Save Action Sets #
An Admin can use Create workflow feature and create a new user(s), then set the jobs required to run during the onboarding process.
Step 1: Create workflow #
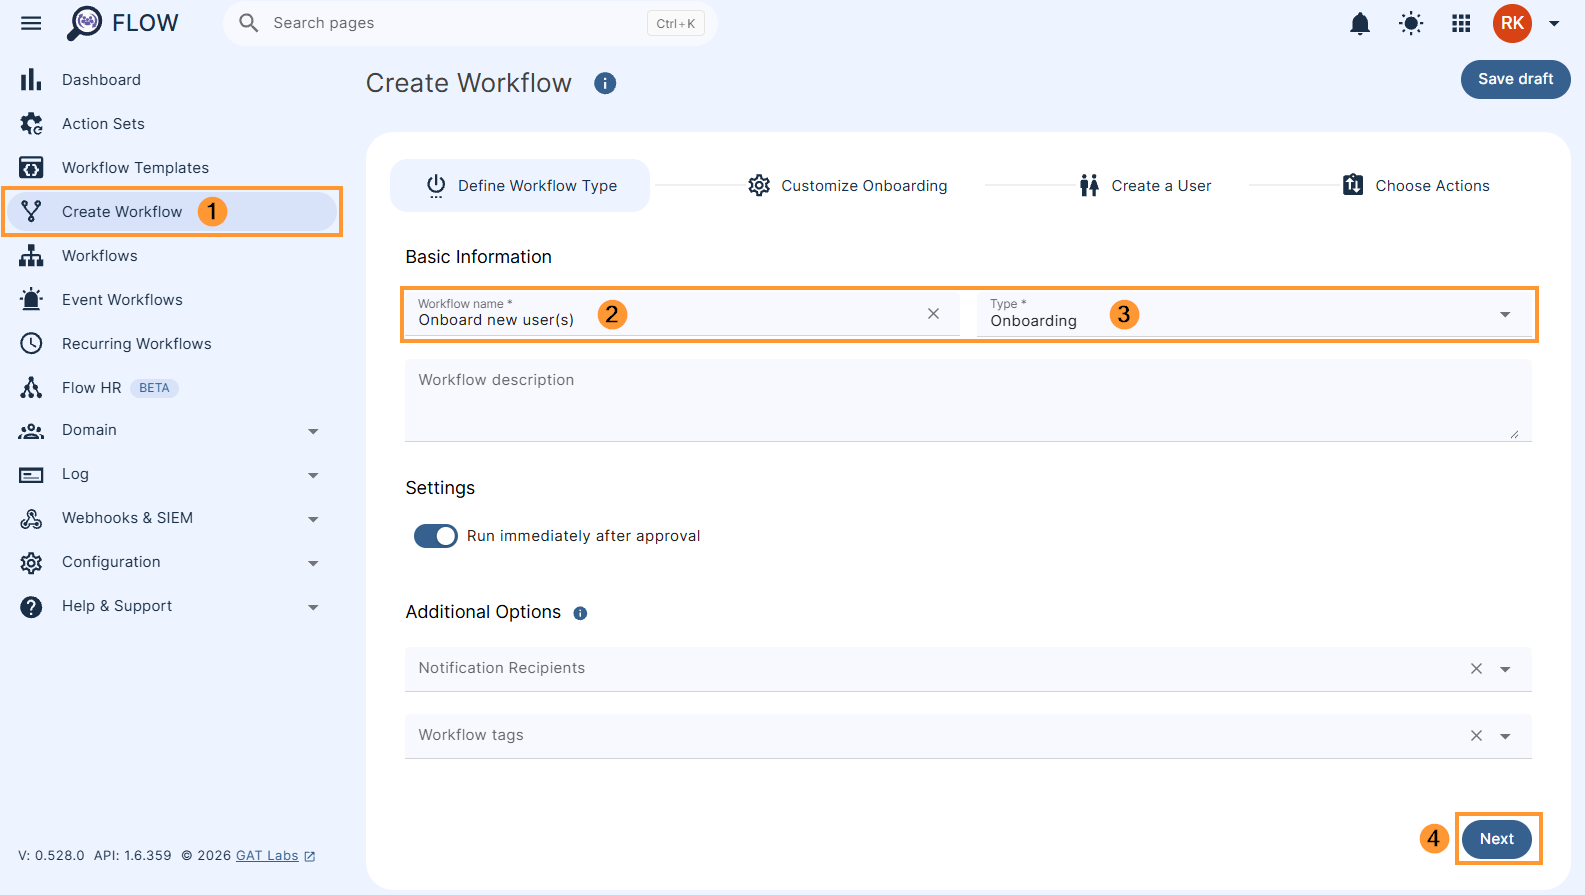
To onboard a new user(s) navigate to Flow-> Create workflow, fill in the title and set the type to Onboarding, then click on Next.
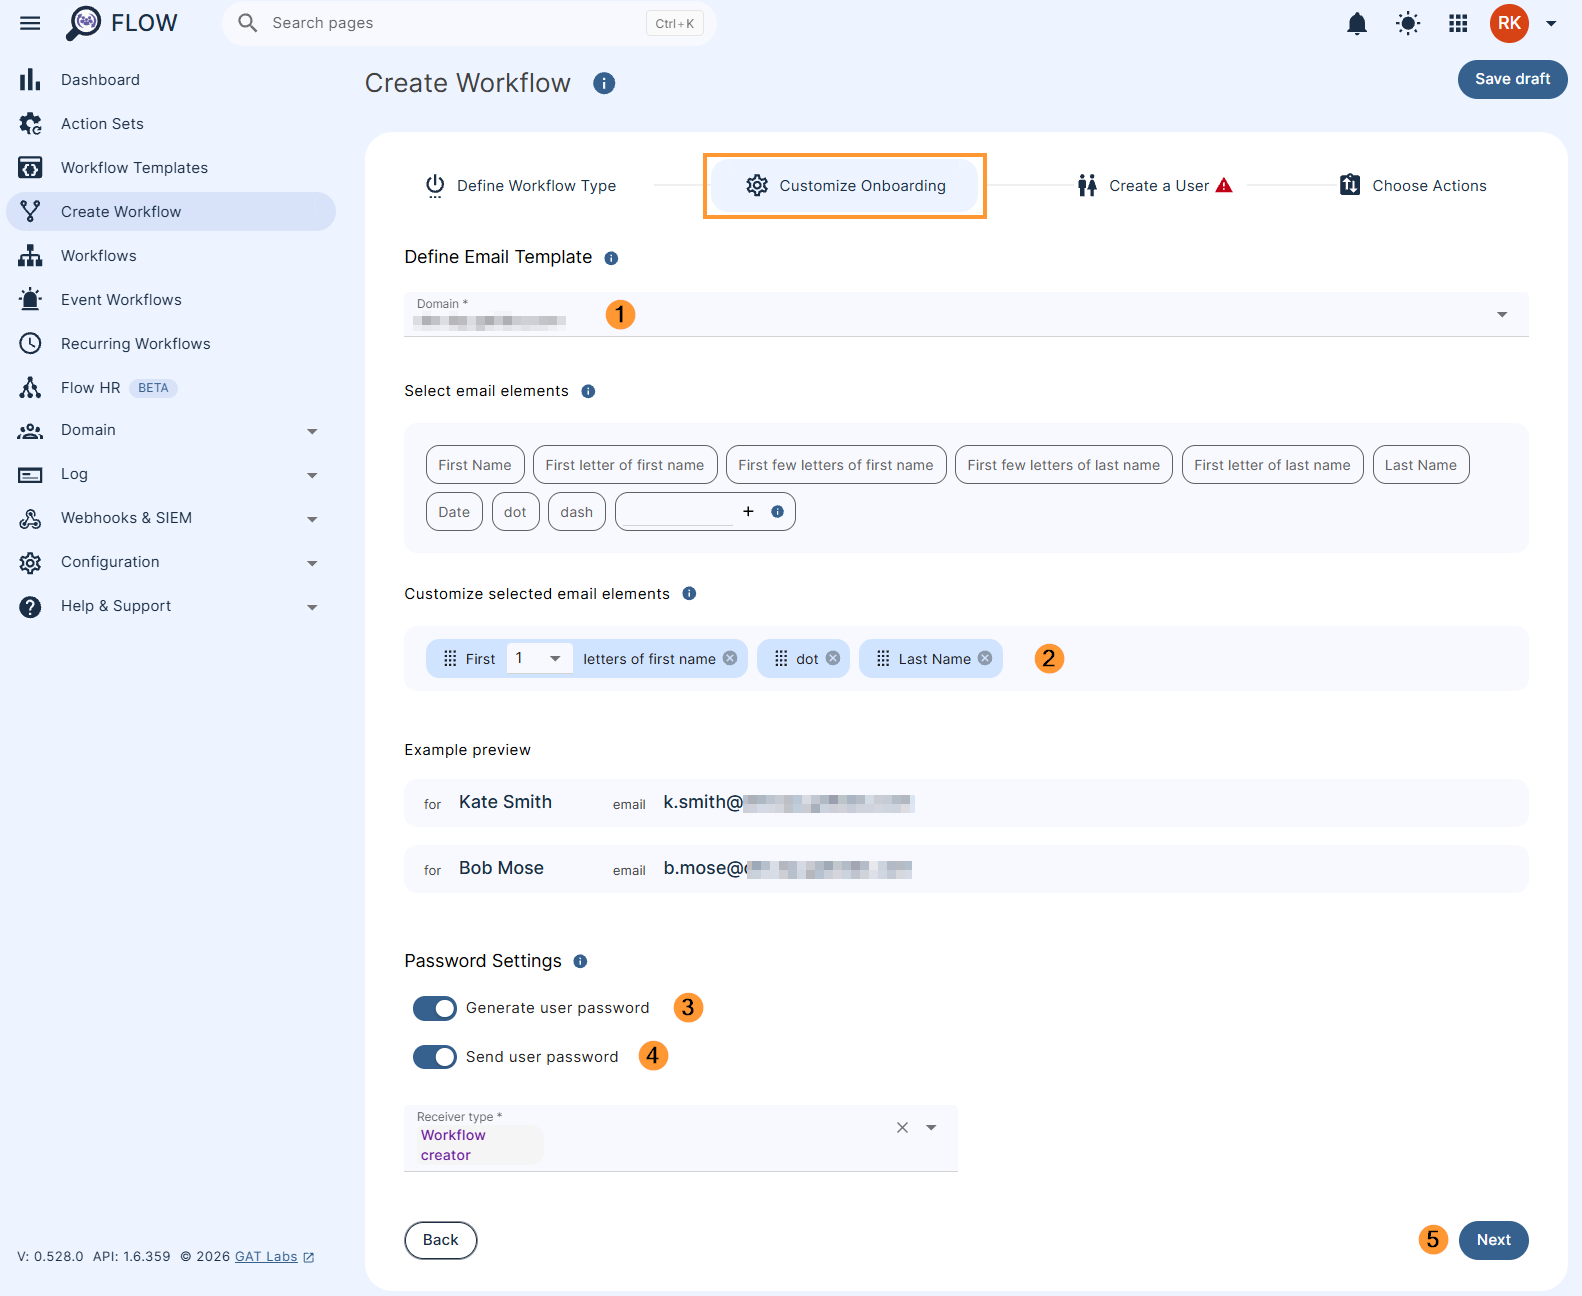
Next, fill in all necessary fields in the Customize Onboarding window.
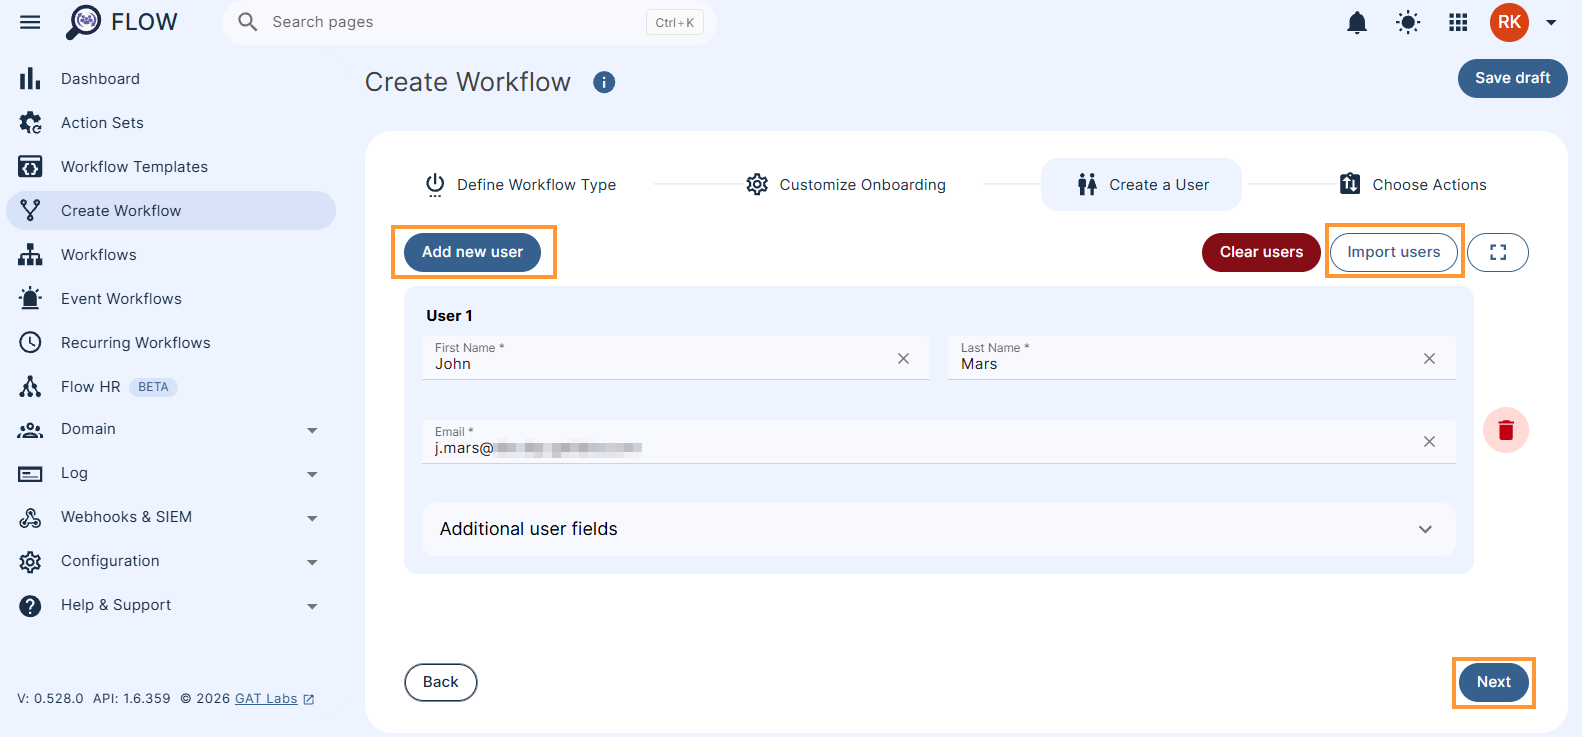
We can now add our users in the ‘Create a User’ section. For a large number of users, Admin can add the information separately or upload the user details from a spreadsheet.
When ready, click on Next.
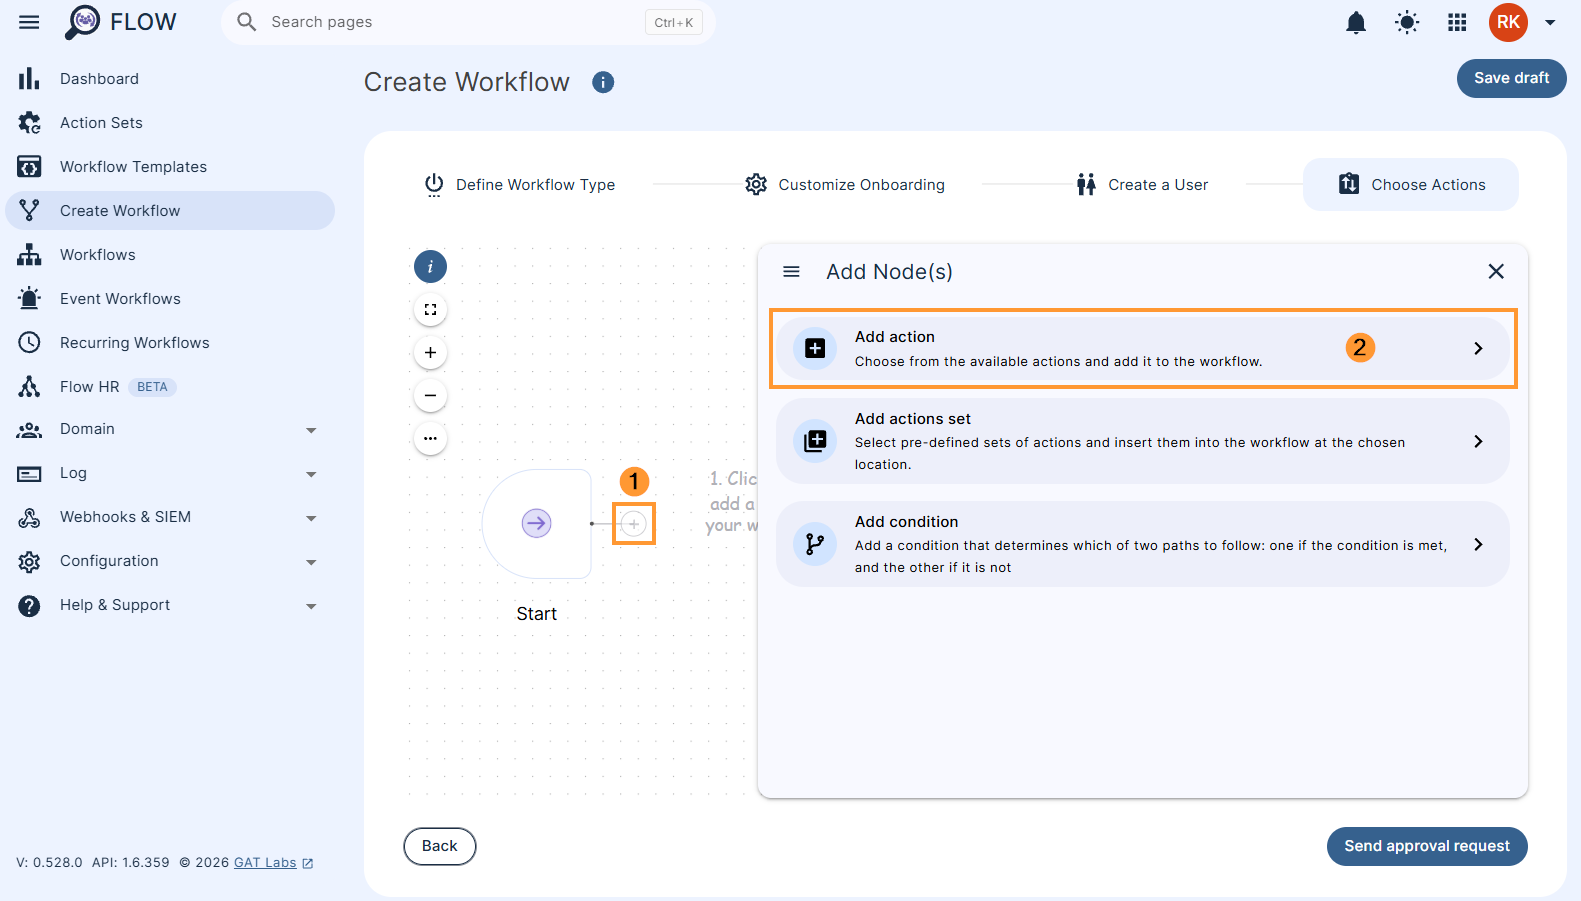
Then, to choose actions, click on the (+) button and click the Add action option.
Next, choose actions that must run during the onboarding process. For this example we will be adding a ‘Send email’ action.
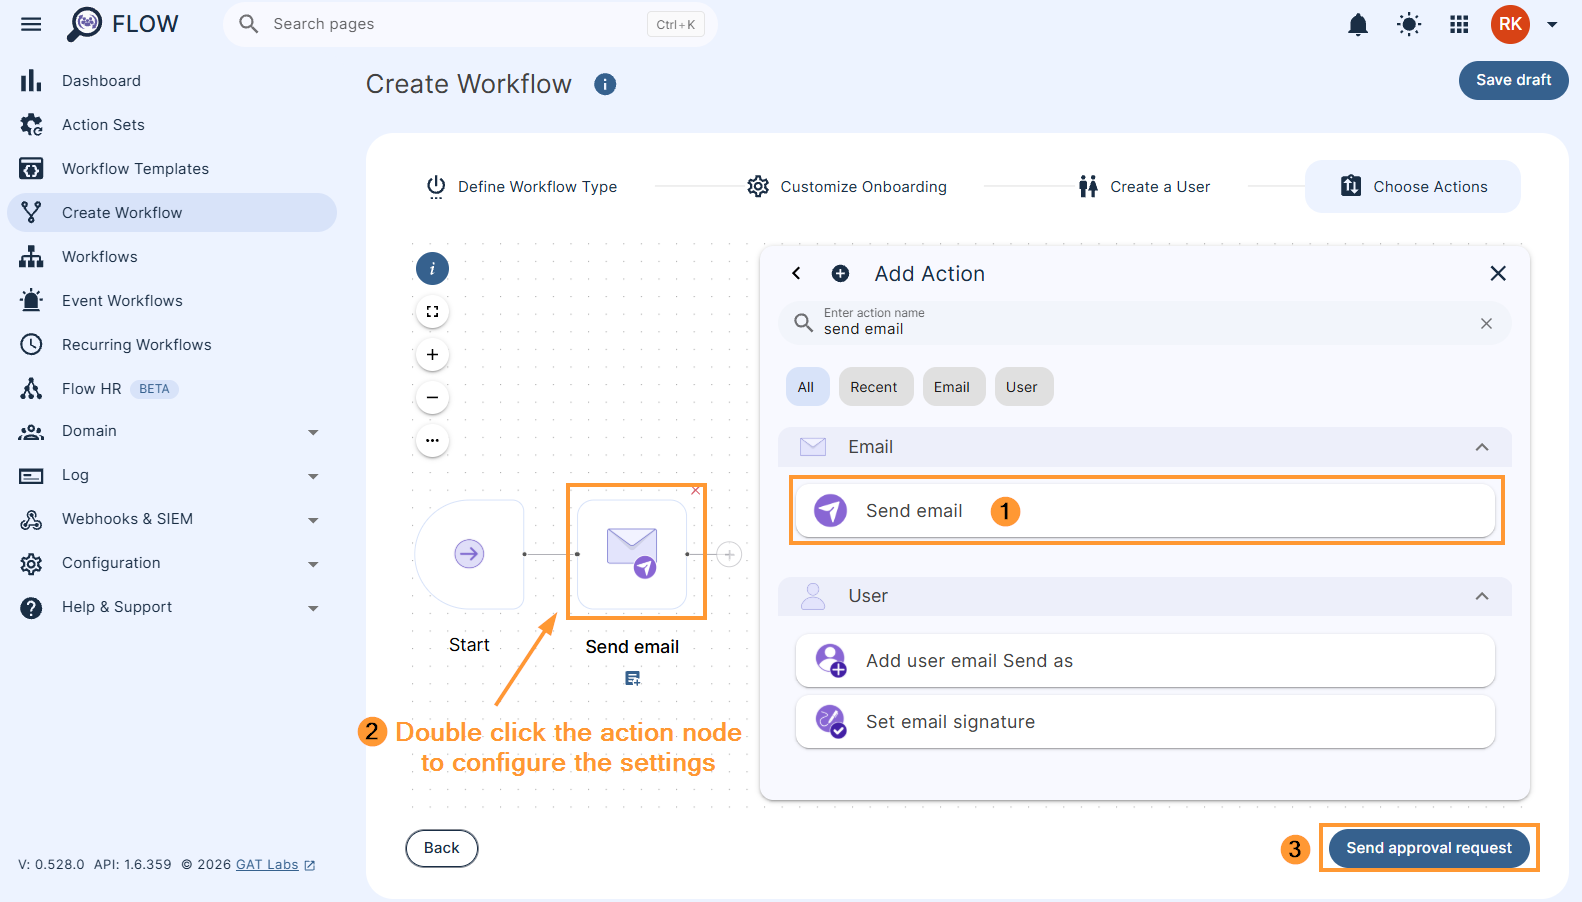
When ready, Send approval request. The request is sent to the Security Officer for approval.
Step 2: Save action sets #
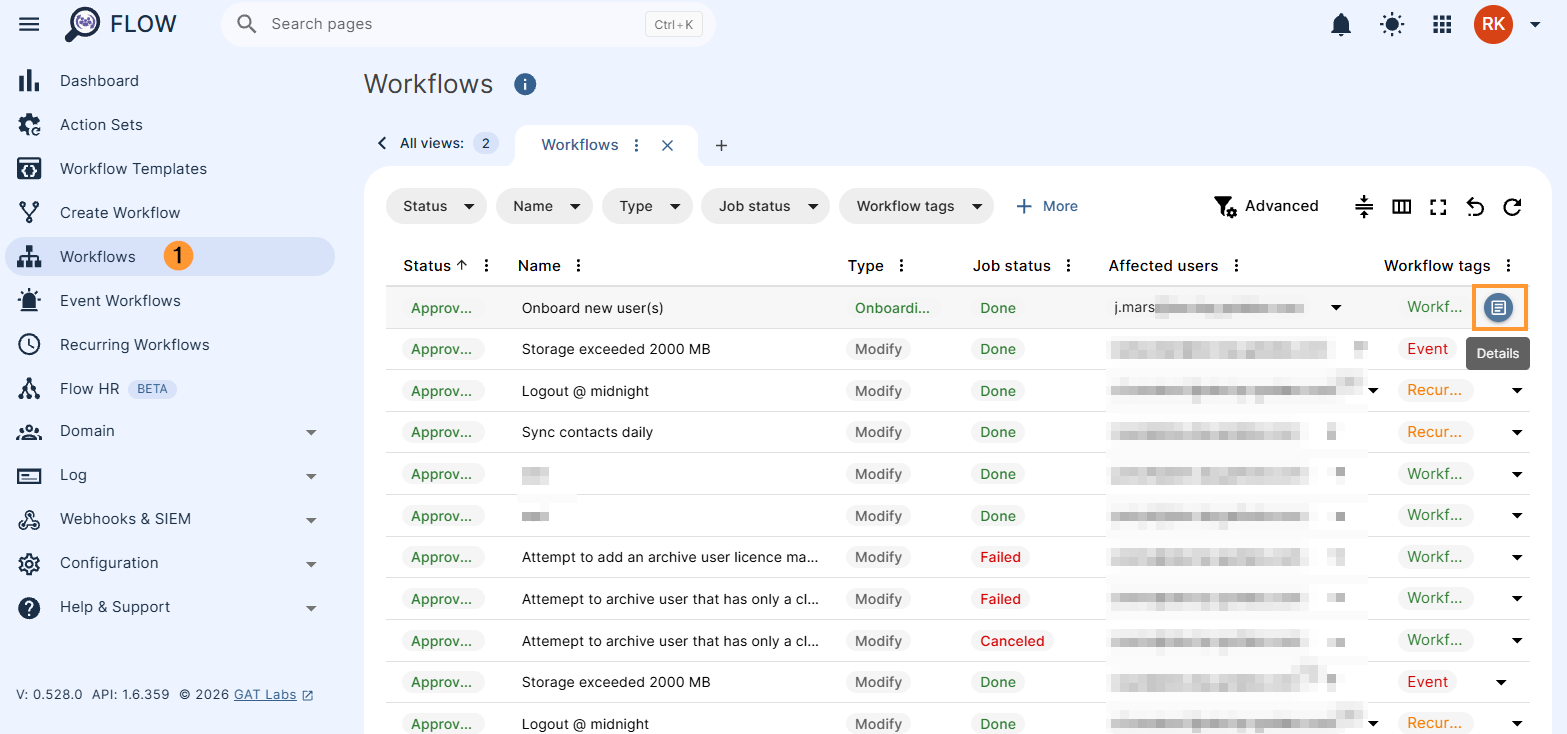
To search for the existing workflow, navigate to Workflow, find a previously created workflow whose action set is to be copied (or search via name set), then click on the ‘page’ icon to see further details.
Click on Save as action set after reviewing the details.
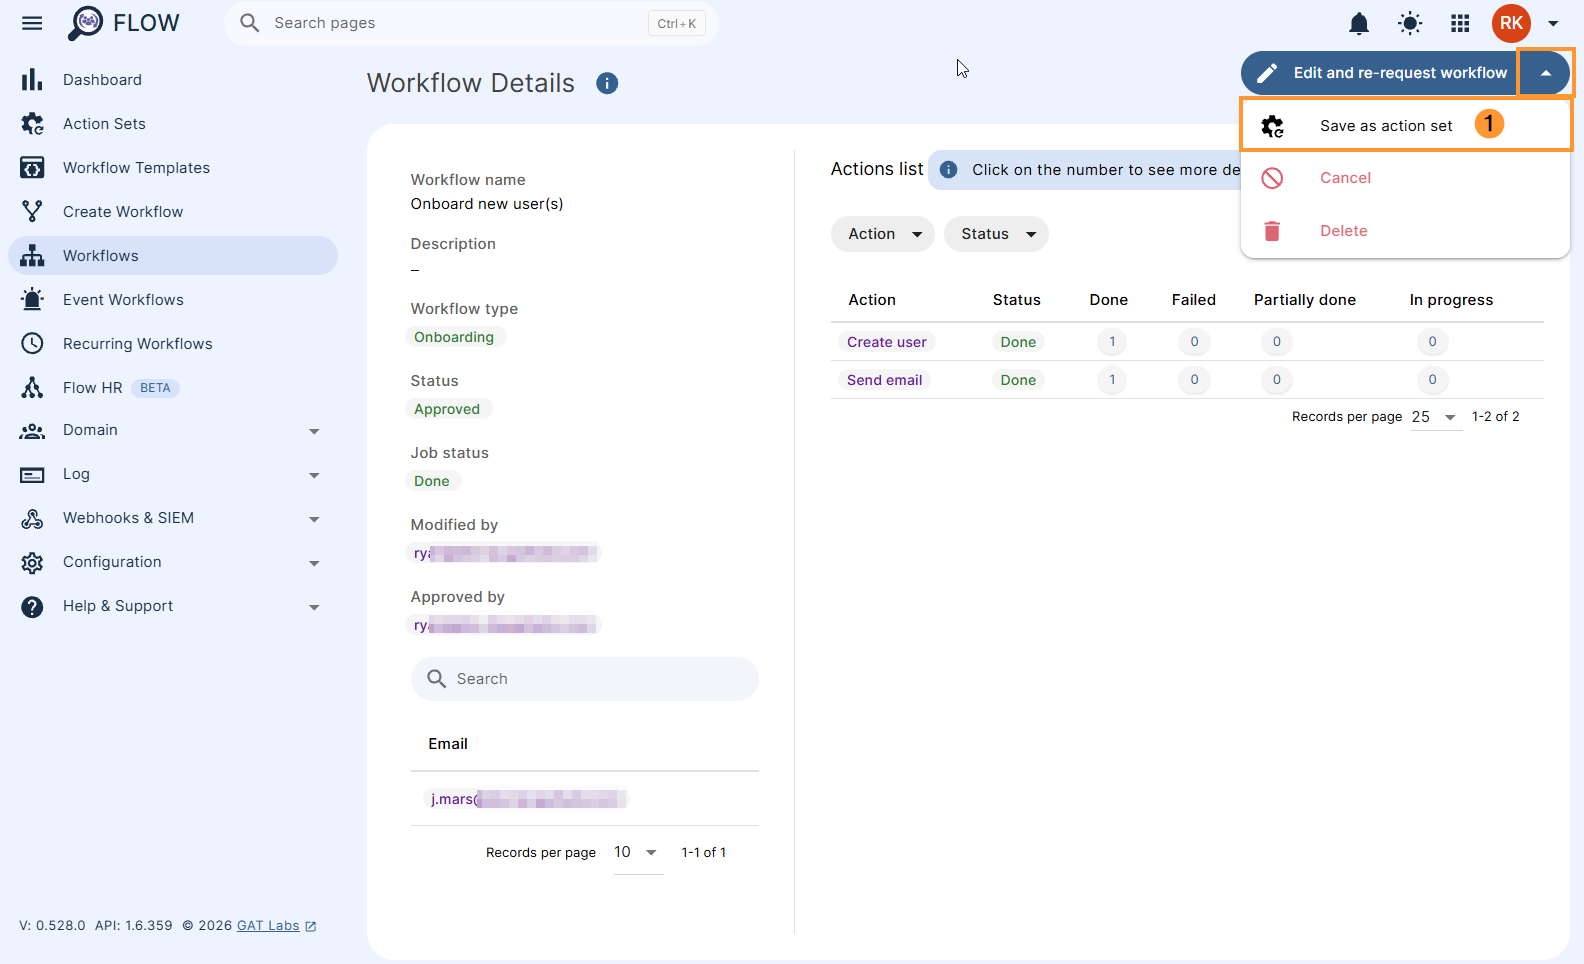
That set of actions can be used for the next onboarding process if applicable.
The saved action set can be used in the new workflow by clicking on Add actions set.

Previously set actions are automatically included in the workflow.
Saved Action Sets and Event Workflow #
GAT Flow also provides an alternative method to speed up the new user(s) onboarding process. It consists of two steps:
- Saved Action sets
- Event Workflow
In this method, the admin first creates and saves a set of actions for onboarding new users. Then, they create an Event triggered workflow where the saved set of actions will be used. This 2 step process will help Admins to automate onboarding in any organization including schools or colleges.
Step 1: Saved action sets – Modify #
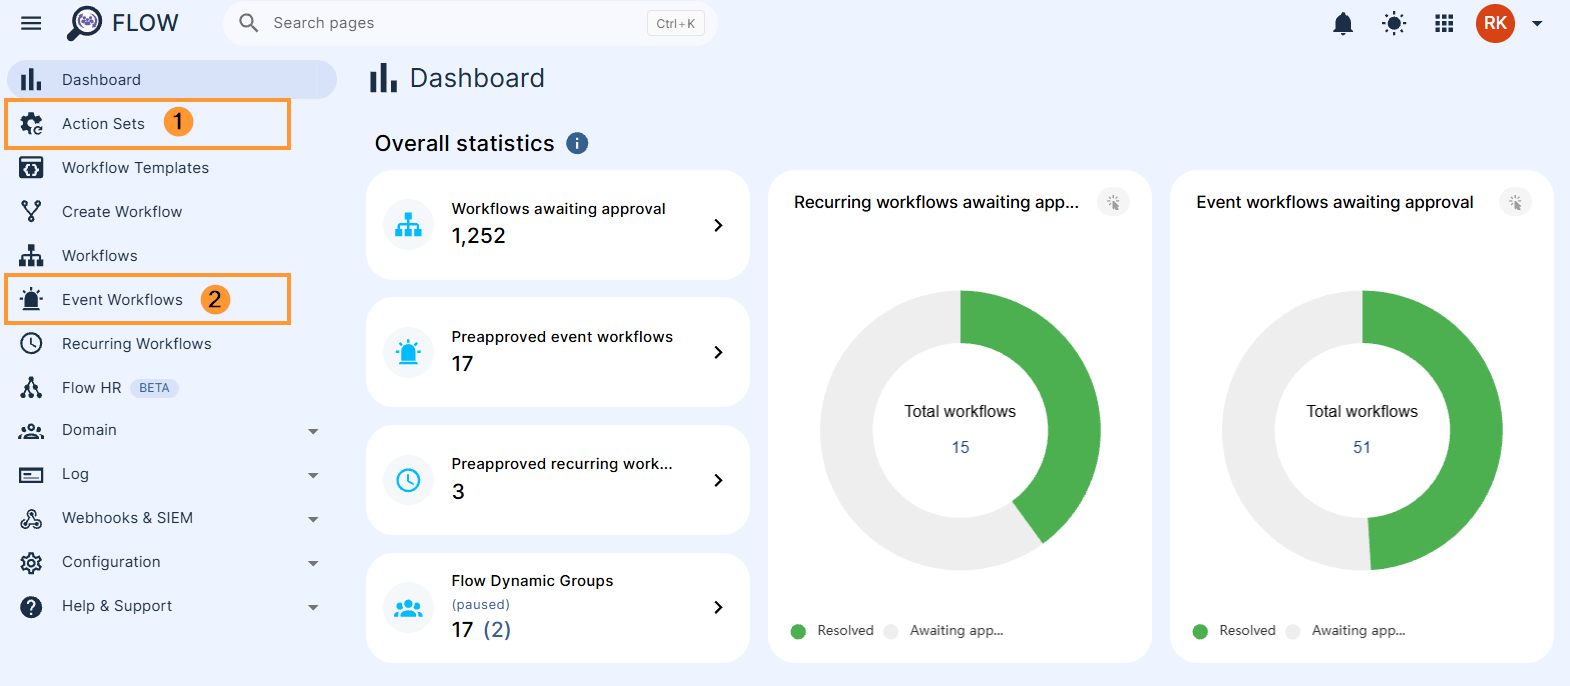
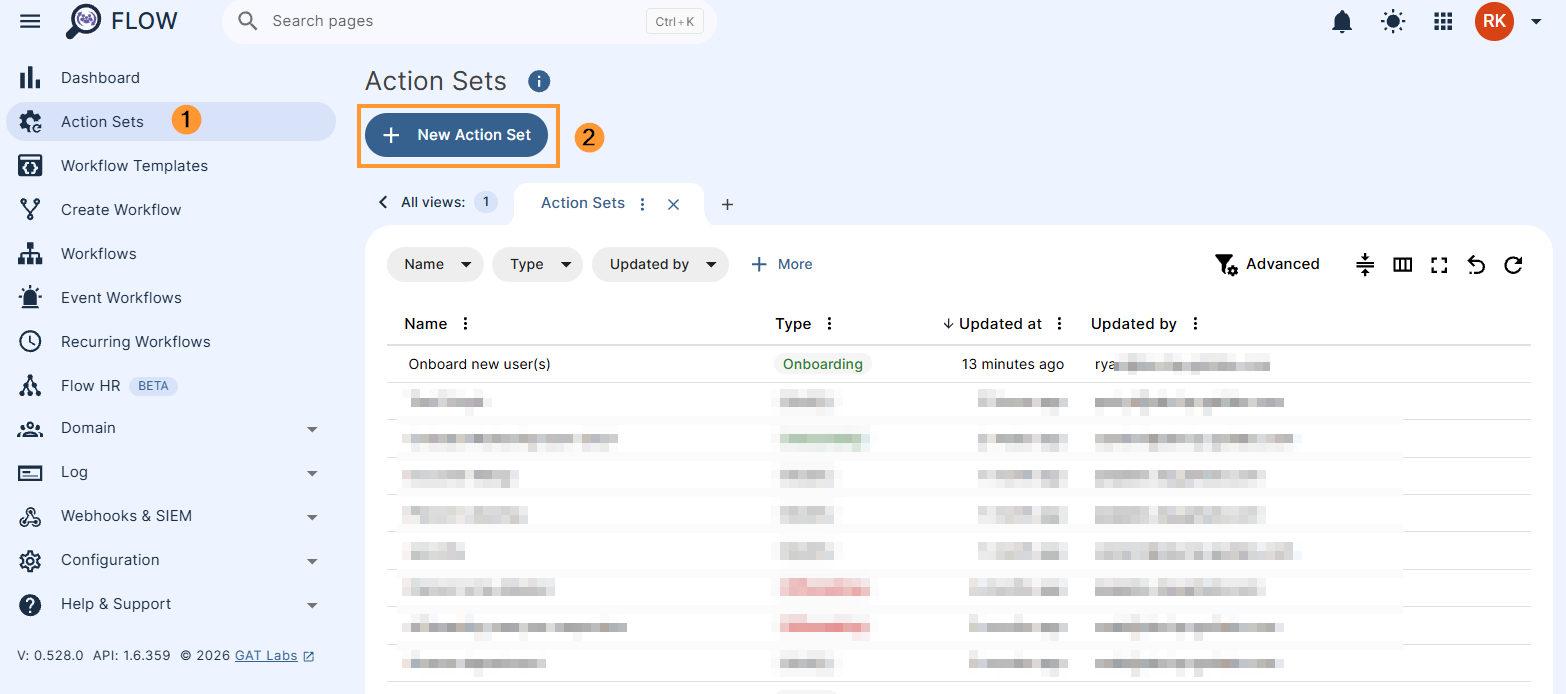
To create a new set of actions that can be used for further workflows, navigate to GAT Flow -> Saved action sets -> Create action set
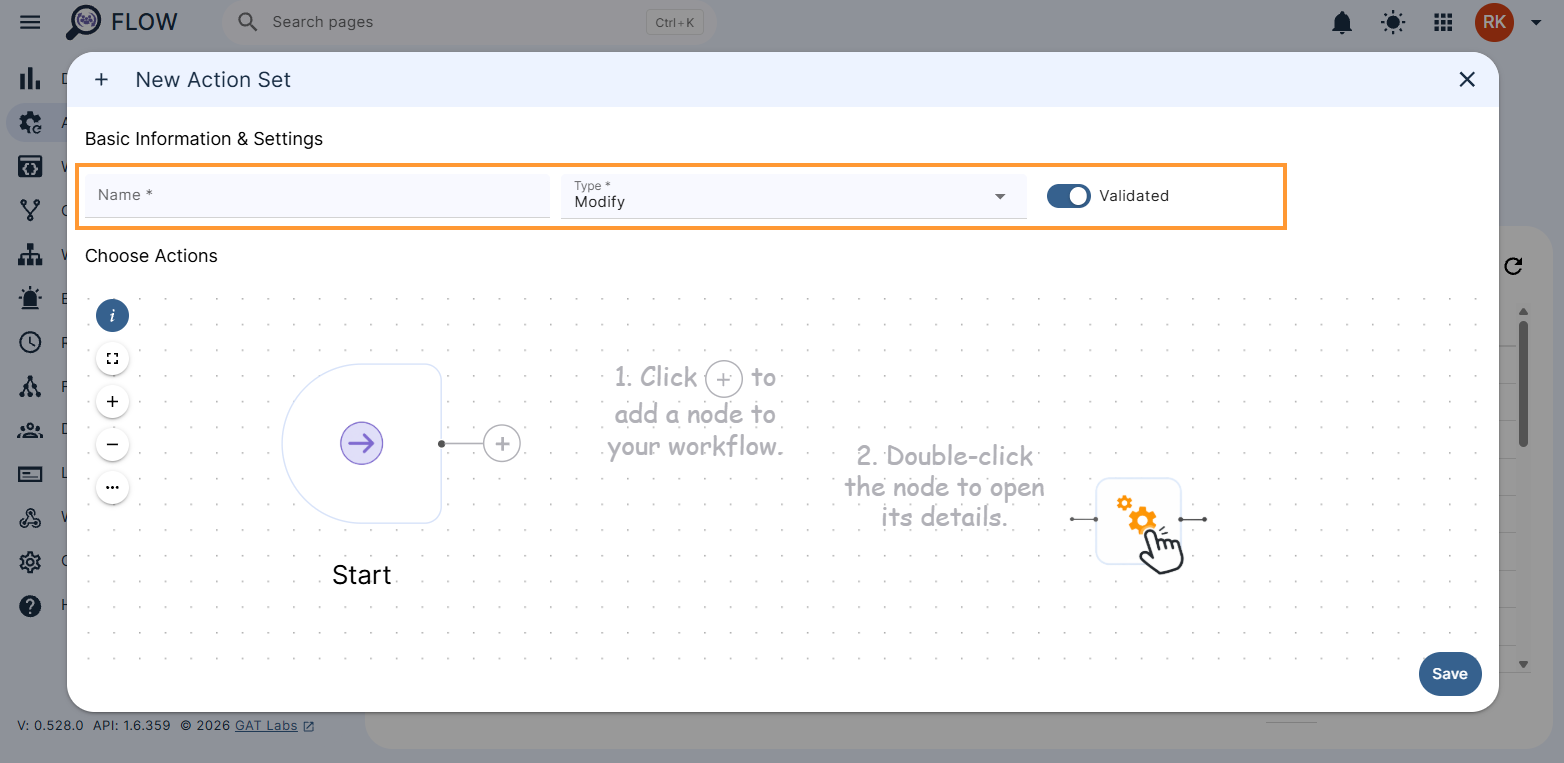
On the next window, enter the actions set name, select the type of the workflow: MODIFY, and if applicable, switch on the following option ‘Validated’.
- The validated option allows choosing whether all mandatory fields need to be filled in right away in the workflow, or they can be left empty and be filled in at a later stage during the workflow creation – depending on the business/project needs
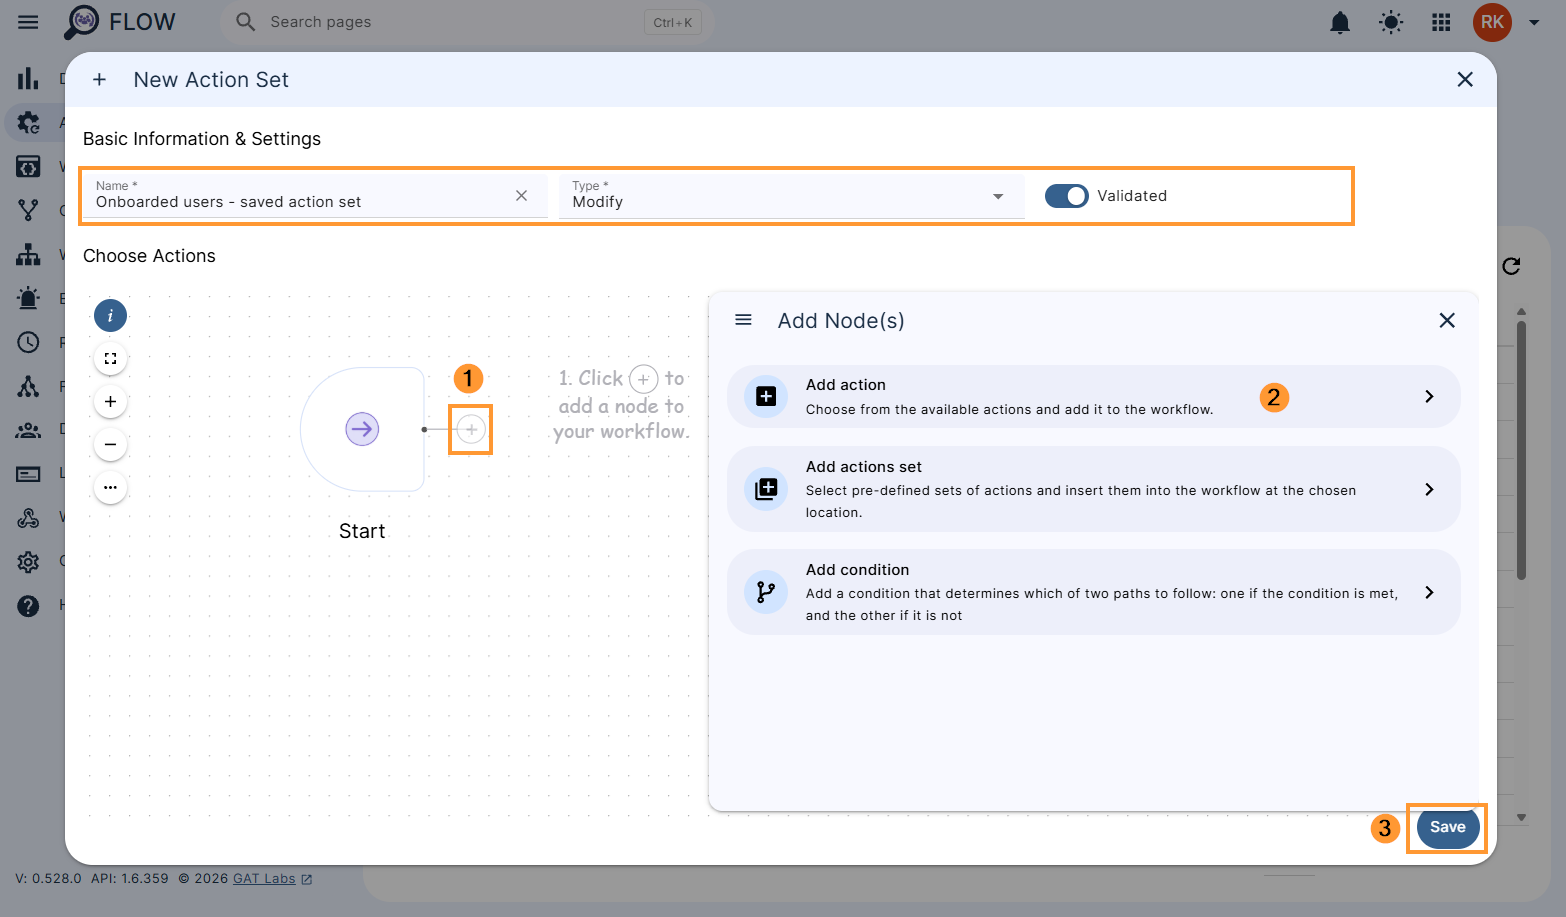
When the name and type of the workflow are filled in, select the ‘+’ button beside the start node to begin to Add actions. Continue adding as many new actions as necessary to be executed on onboarded users in your organization, and once all is set up, click on Save. A new Action set is created and ready to be used.
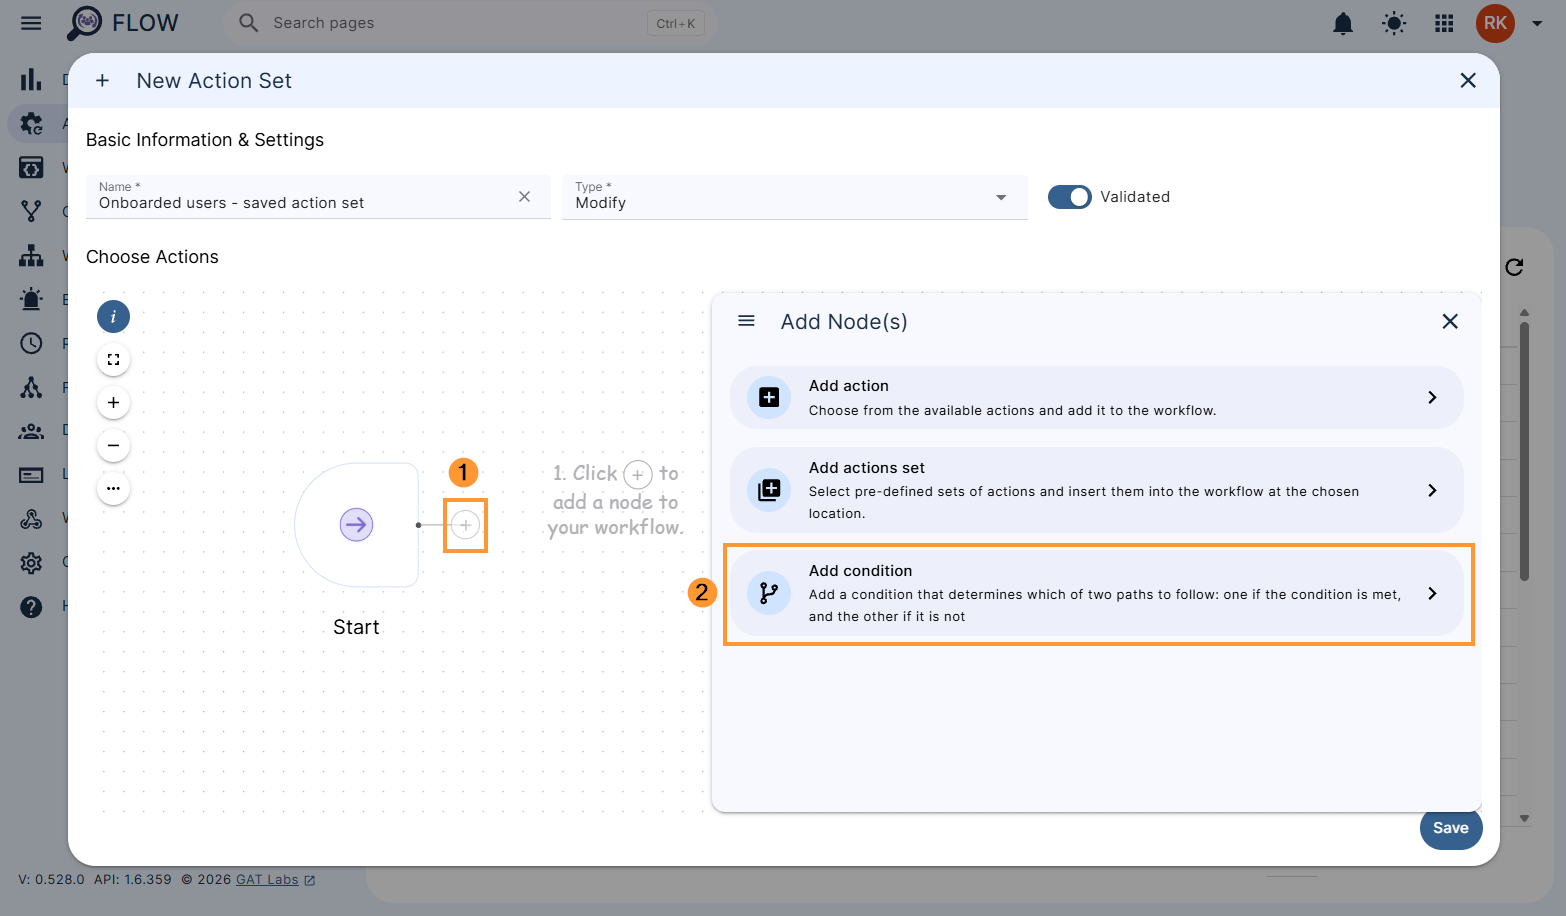
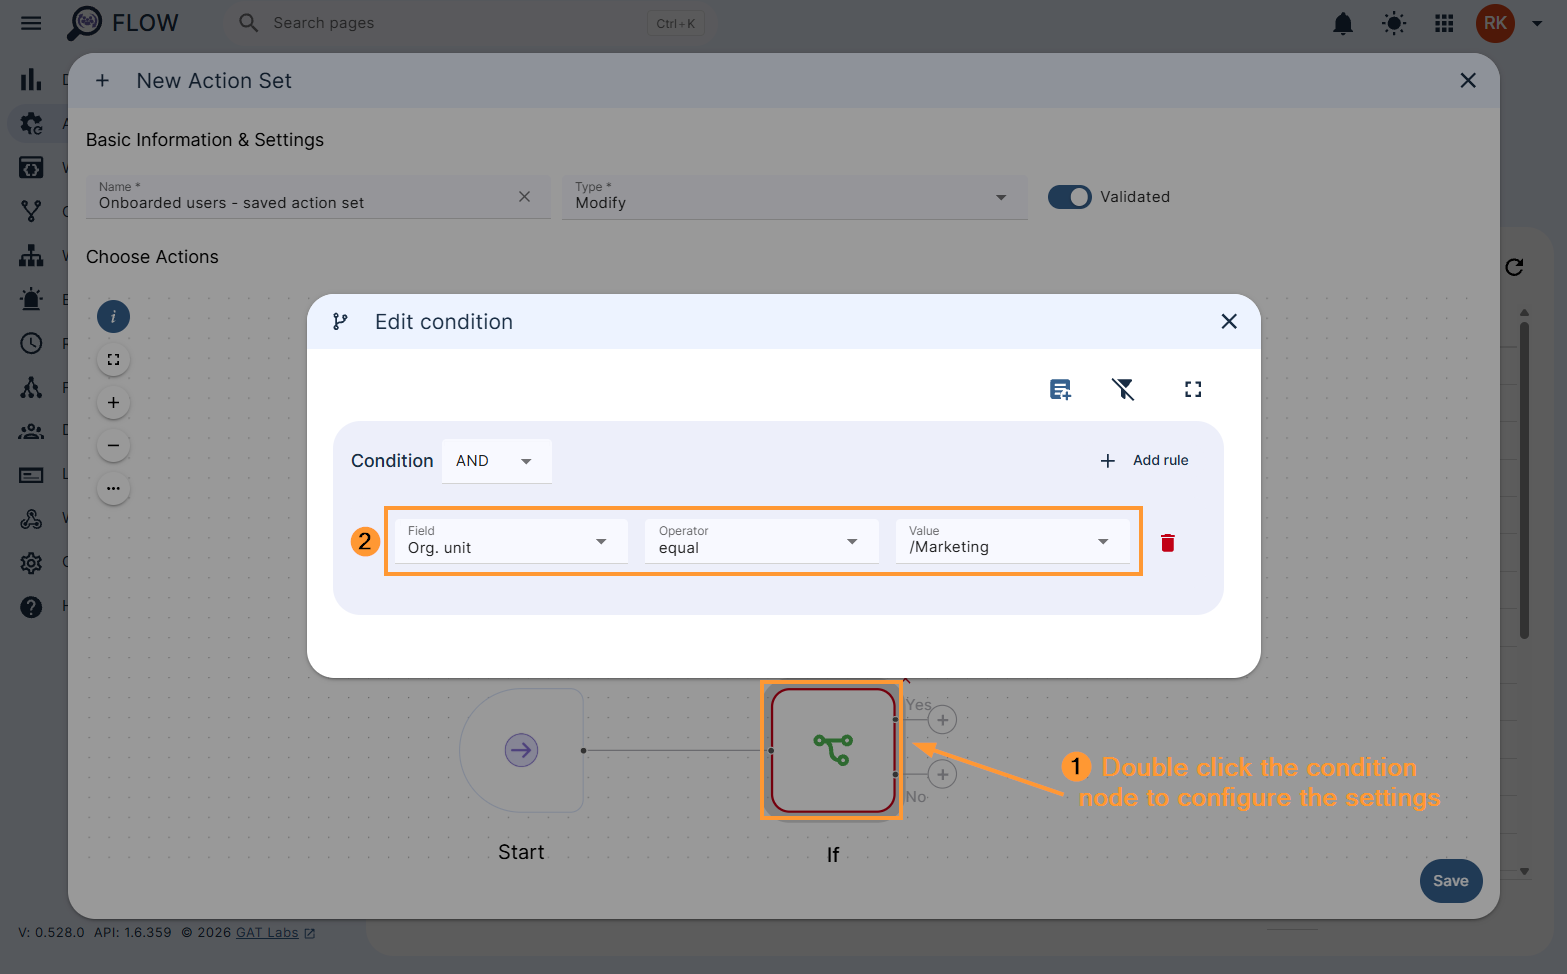
Conditional flow
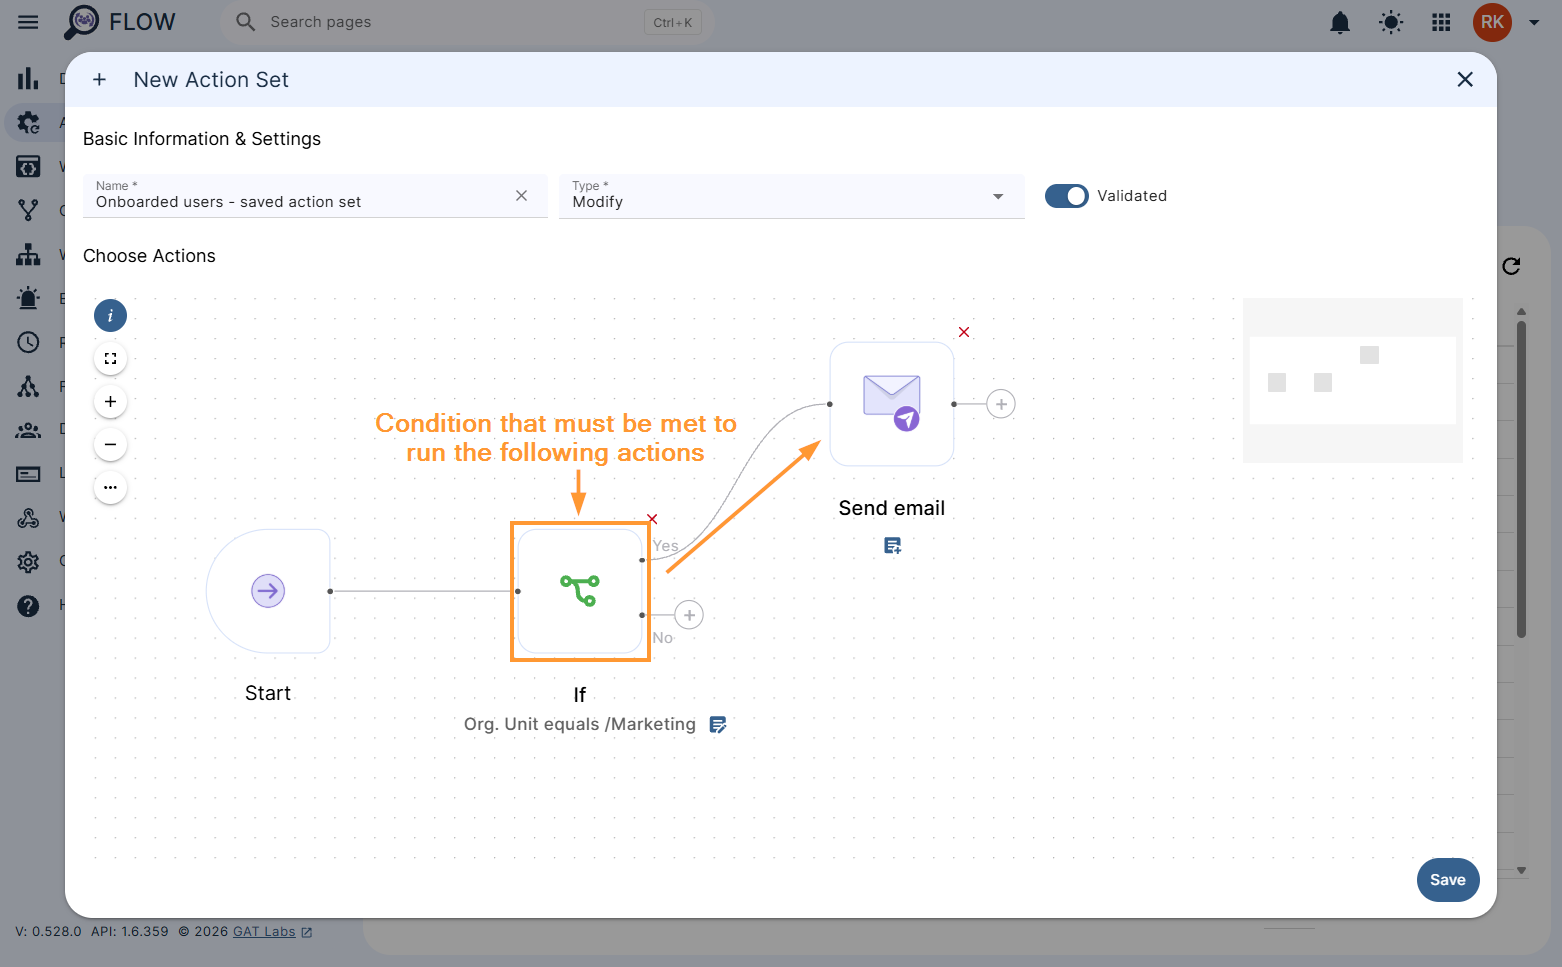
An Admin can set up the conditional flow based on the requirements set in the workflow, as per an example below:
You can also create complex conditions that contains several rules by clicking the Add rule button, as shown below. Once applied, several specified conditions need to be met to trigger the job(s) set.
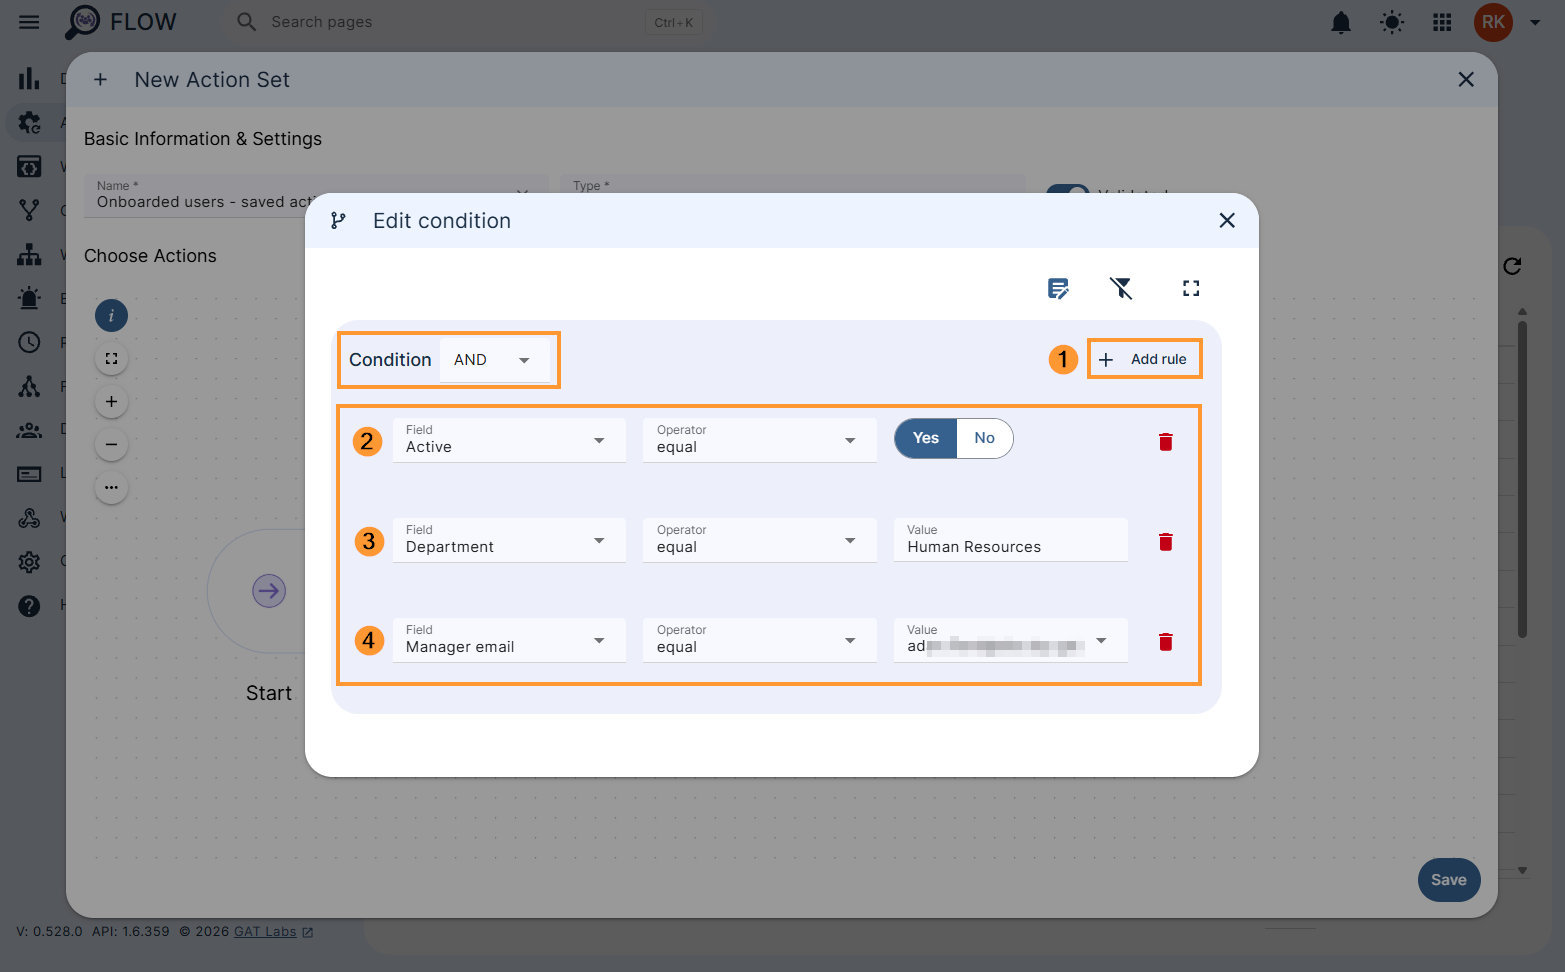
- Group, Email, Org. unit, Active, Suspended, Archived, Admin, License, Files Count, Last Login, Created At, Employee ID, Employee Title, Employee Type, Organization name, Is manager, Manager Email, Department, Cost Centre, Building ID, Floor Name, Floor Section, Work Phone
- Custom Attributes
How the complex setup would look like:
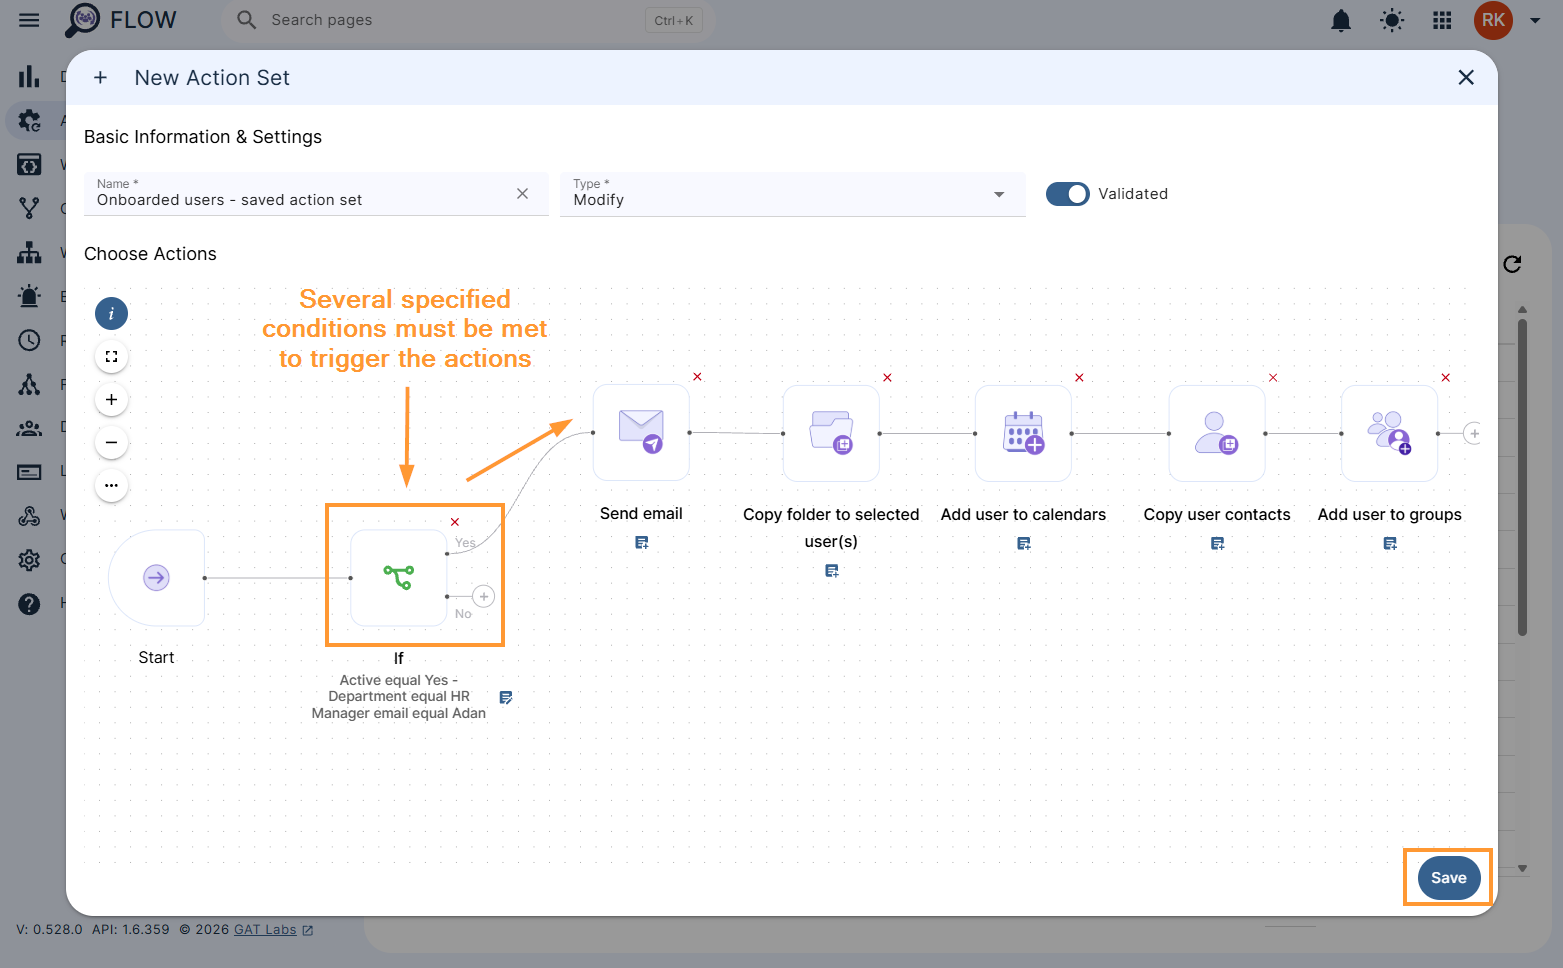
When everything is ready, click on Save to record the whole setup in Flow for future usage.
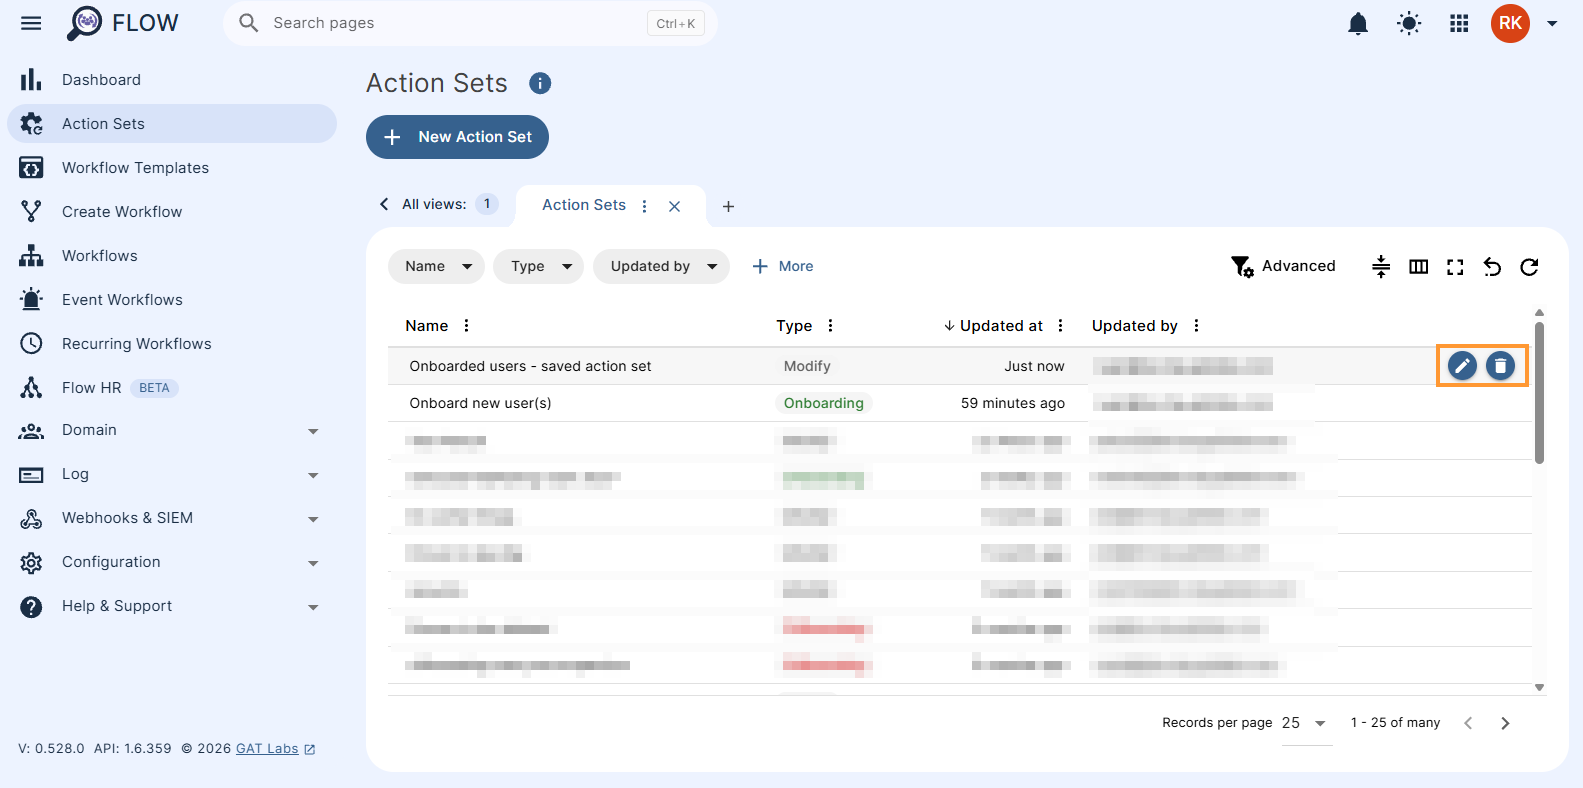
A set of actions for the onboarded user(s) based on the complex conditions (several rules to be met to trigger the whole workflow) is now saved in the GAT Flow dashboard and can be found under Saved action sets.
The setup of actions can be edited or deleted here.
Validated
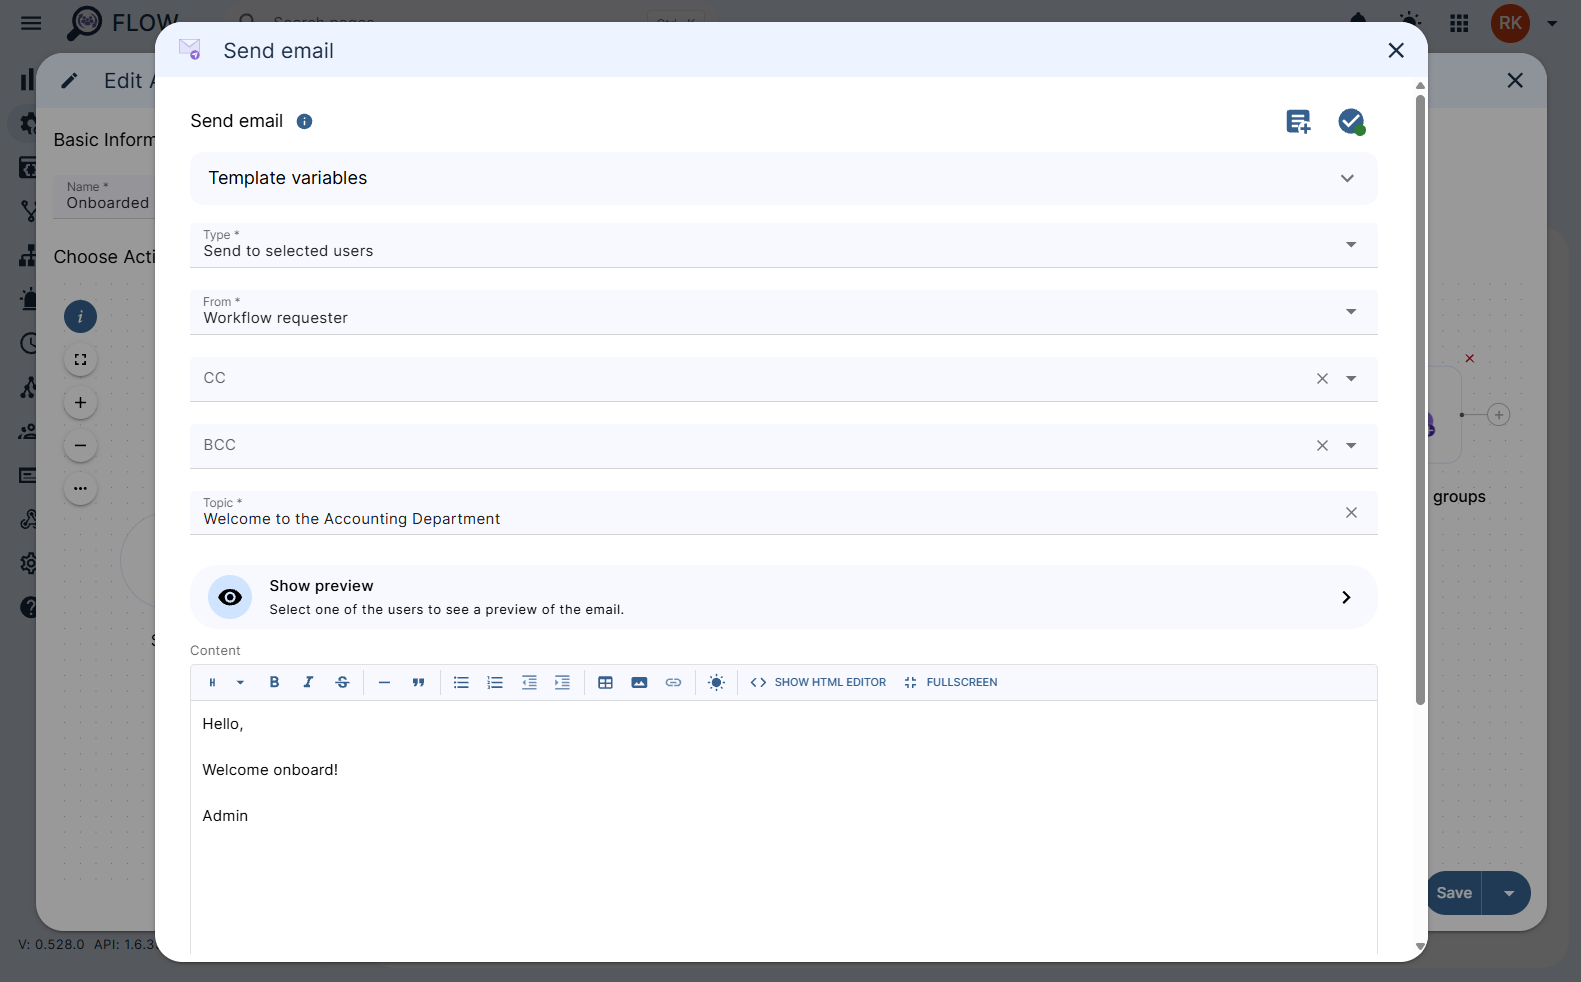
If Validated is switched ON all the jobs’ fields set up in the workflow will necessarily have to be filled in, for example, Send email job must be configured as shown below:
If Validated is switched OFF, the jobs’ fields can be left empty and be configured at a later stage when using Saved action sets in the future workflow. This depends on the user’s needs.
Step 2: Event trigger workflow – Start when the user has been created #
In GAT Flow the actions can be set to run automatically based on different Events.
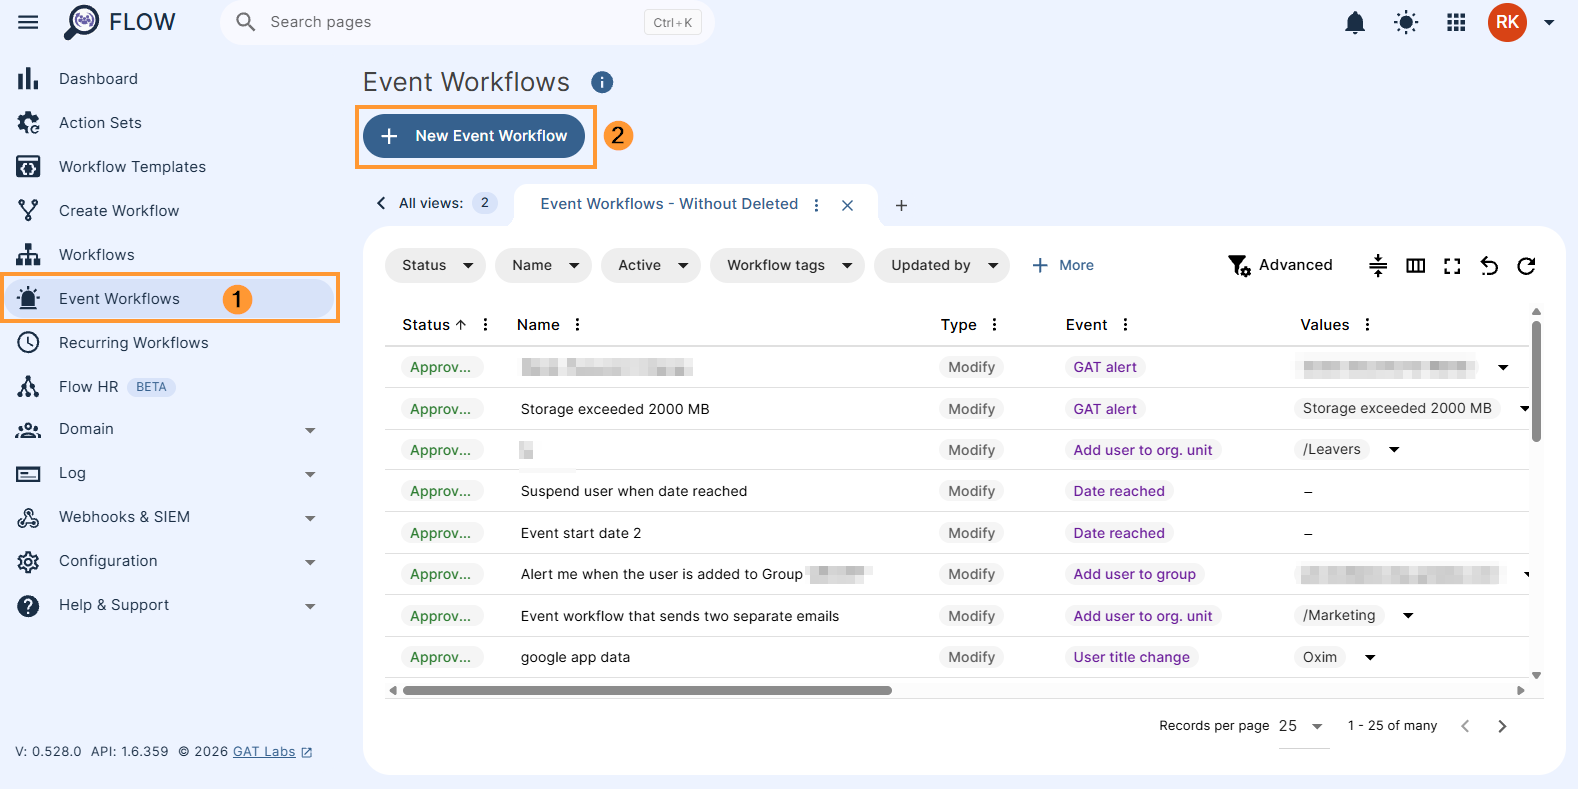
Navigate to Event workflow and click the + New Event Workflow button
Specify the Name of the workflow, Type: Modify, and Event: Start when user is created
The user needs to be already onboarded/created for this event workflow to kick off. Every time a new user is onboarded into the domain, the workflow will run.
Other options in this setup are:
- Active – activate or deactivate the Event workflow using this switch
- Pre-approved – when on the workflow does not need to be approved, when off the whole workflow (actions after the user is created) has to be approved again by the Security Officer.
- Include suspended users – allows the workflow to run on suspended users however not all actions can be used on a suspended user.
- Include archived users – allows the workflow to run on archived users however not all actions can be used.
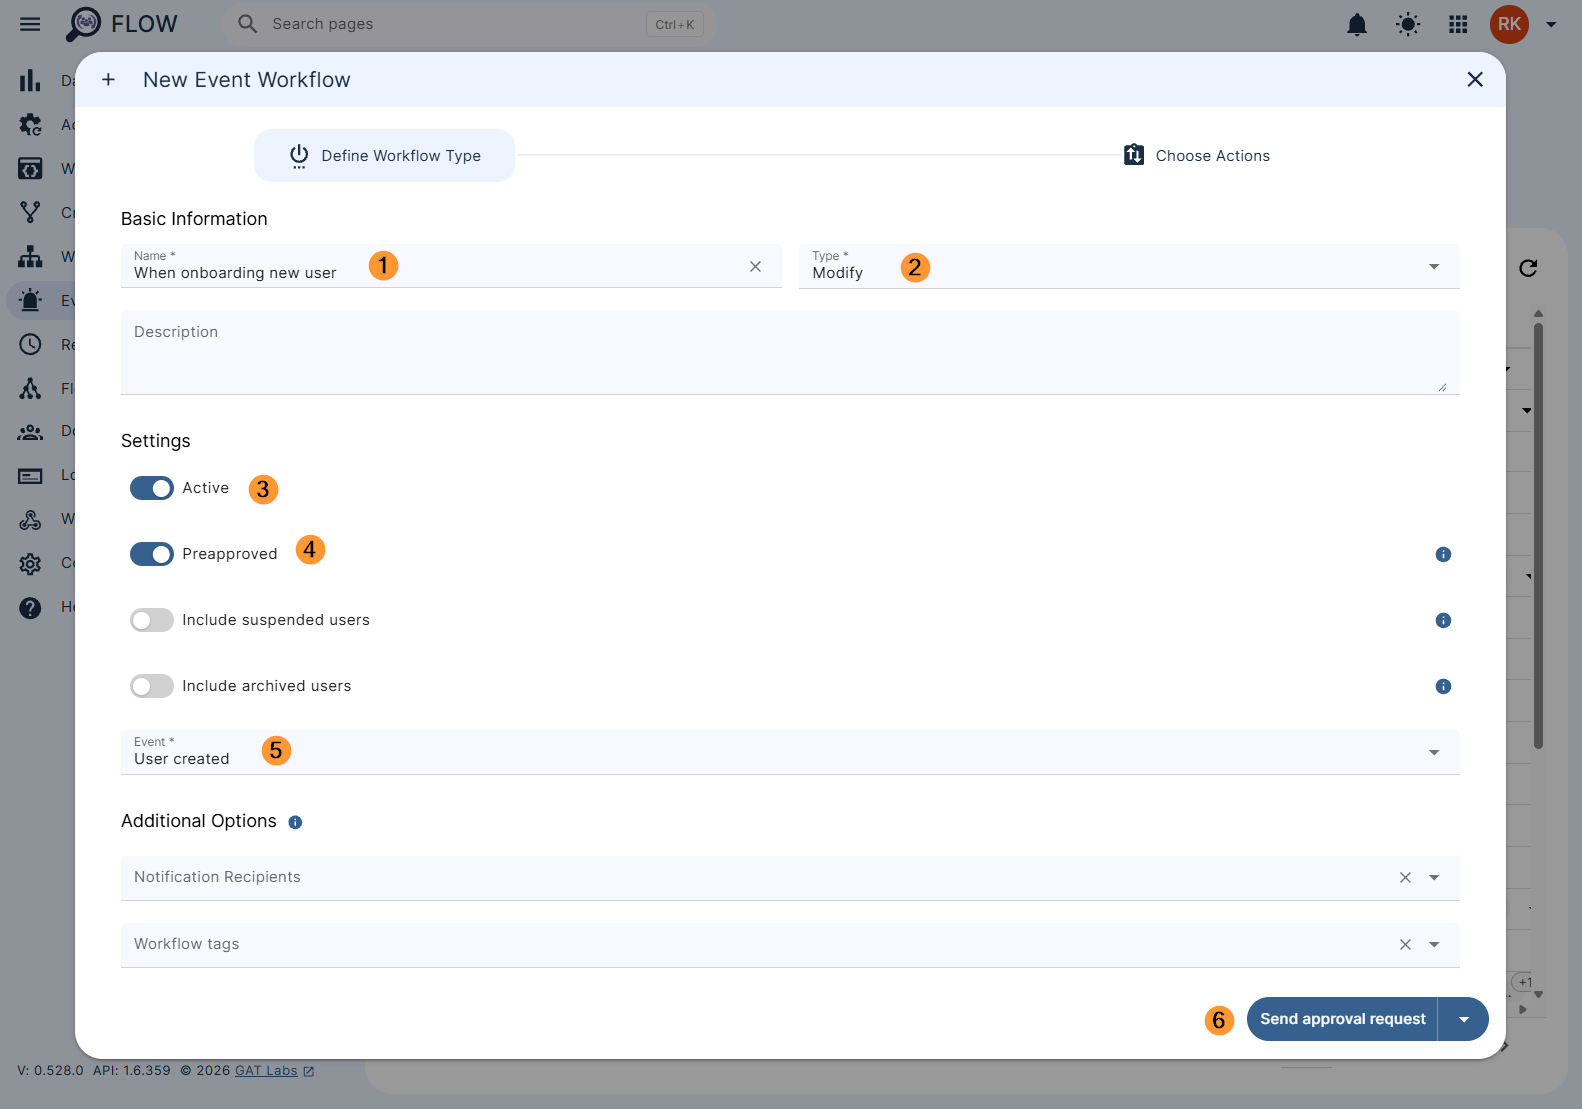
When ready, click on Send approval request to continue to the choose actions section.
Add a set of actions configured before #
When choosing the actions, click the + (1) beside the start node and choose the ‘Add actions set’ (2) option
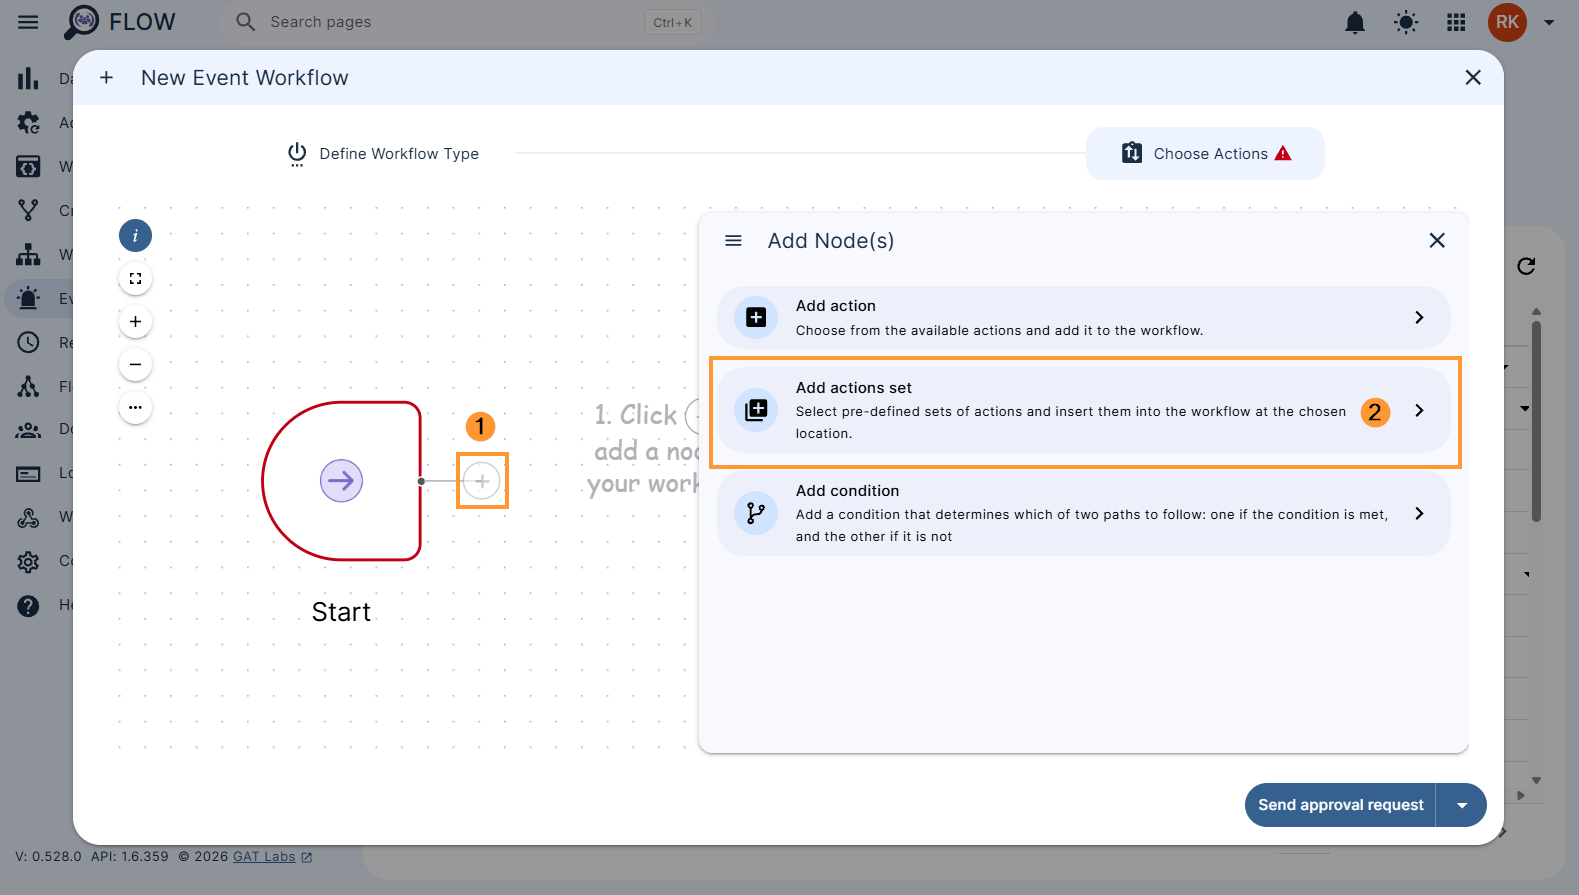
Once clicked on the Add actions set, previously set and saved action sets become available.

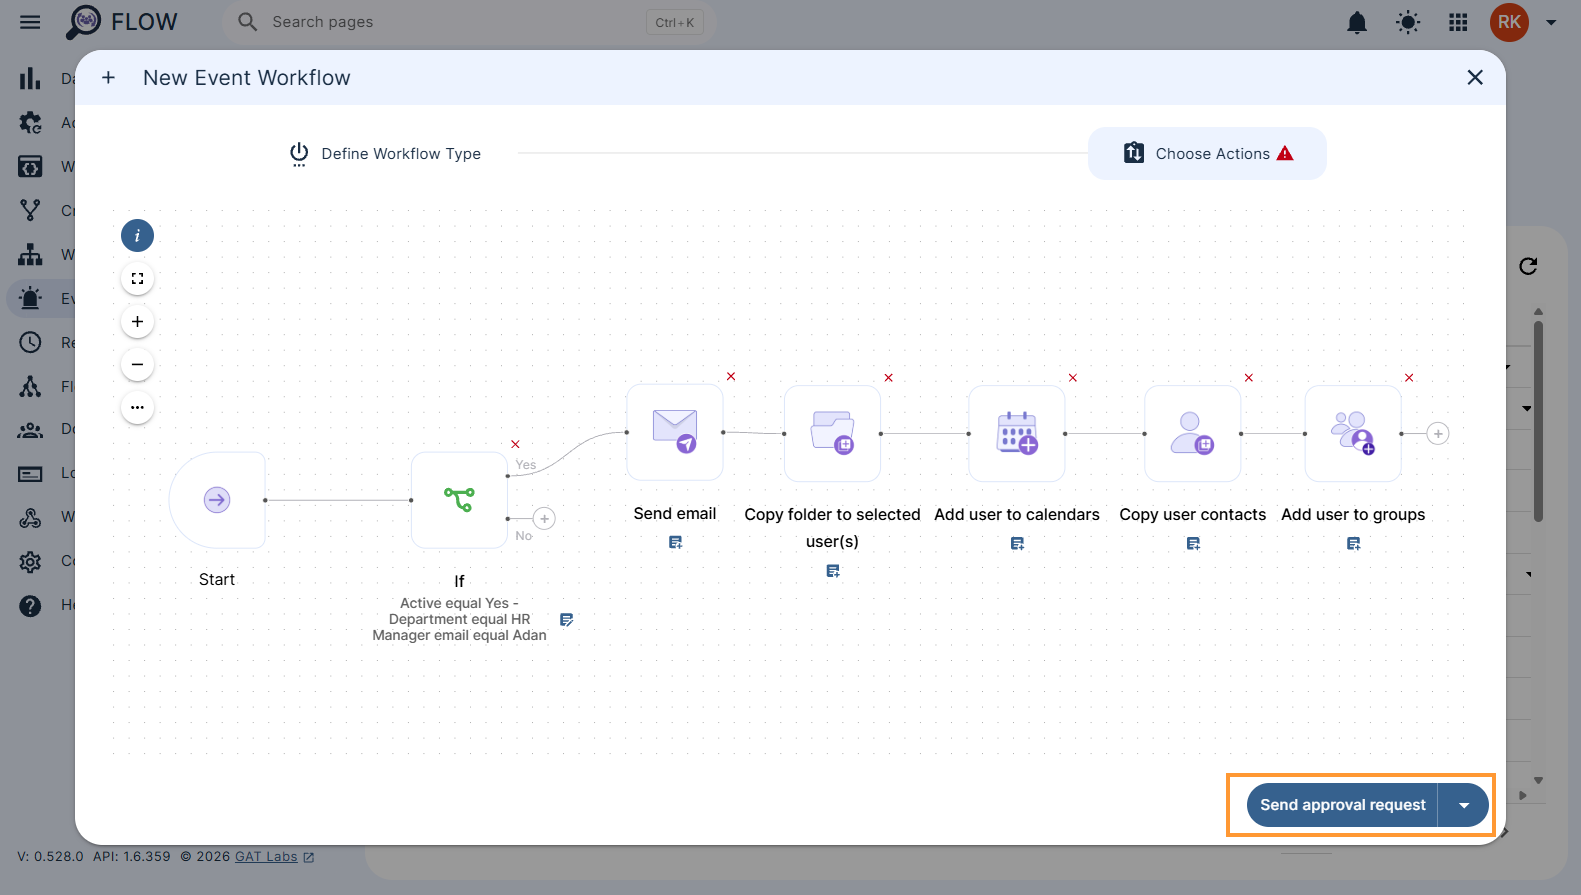
Select the designated action set by clicking on the ‘+’ button to build up the Event triggered workflow with one mouse click.
Next, click on Send approval request.
Security Officer Approval #
Security Officer needs to approve the workflow only once if the Pre-approved option was toggled on during the process of creating the workflow. If the Pre-approved option was not enabled for this workflow, Security Officer needs to approve the request every time when a new user is added.
Results #
The set of actions will become available and will run automatically every time when a new user is added to the organization.


