Manage Google Groups in GAT Flow #
GAT Flow is a user management tool. It allows Google Workspace Admins to create multiple different and automated workflows to manage users. The Admins can onboard (add users to the domain), offboard (remove users from the domain), and modify (existing) users. With GAT Flow, Google admins can also manage Google Groups; they can create, delete, or update Google Groups.
Groups management #
Manage all the Google Groups of the domain.
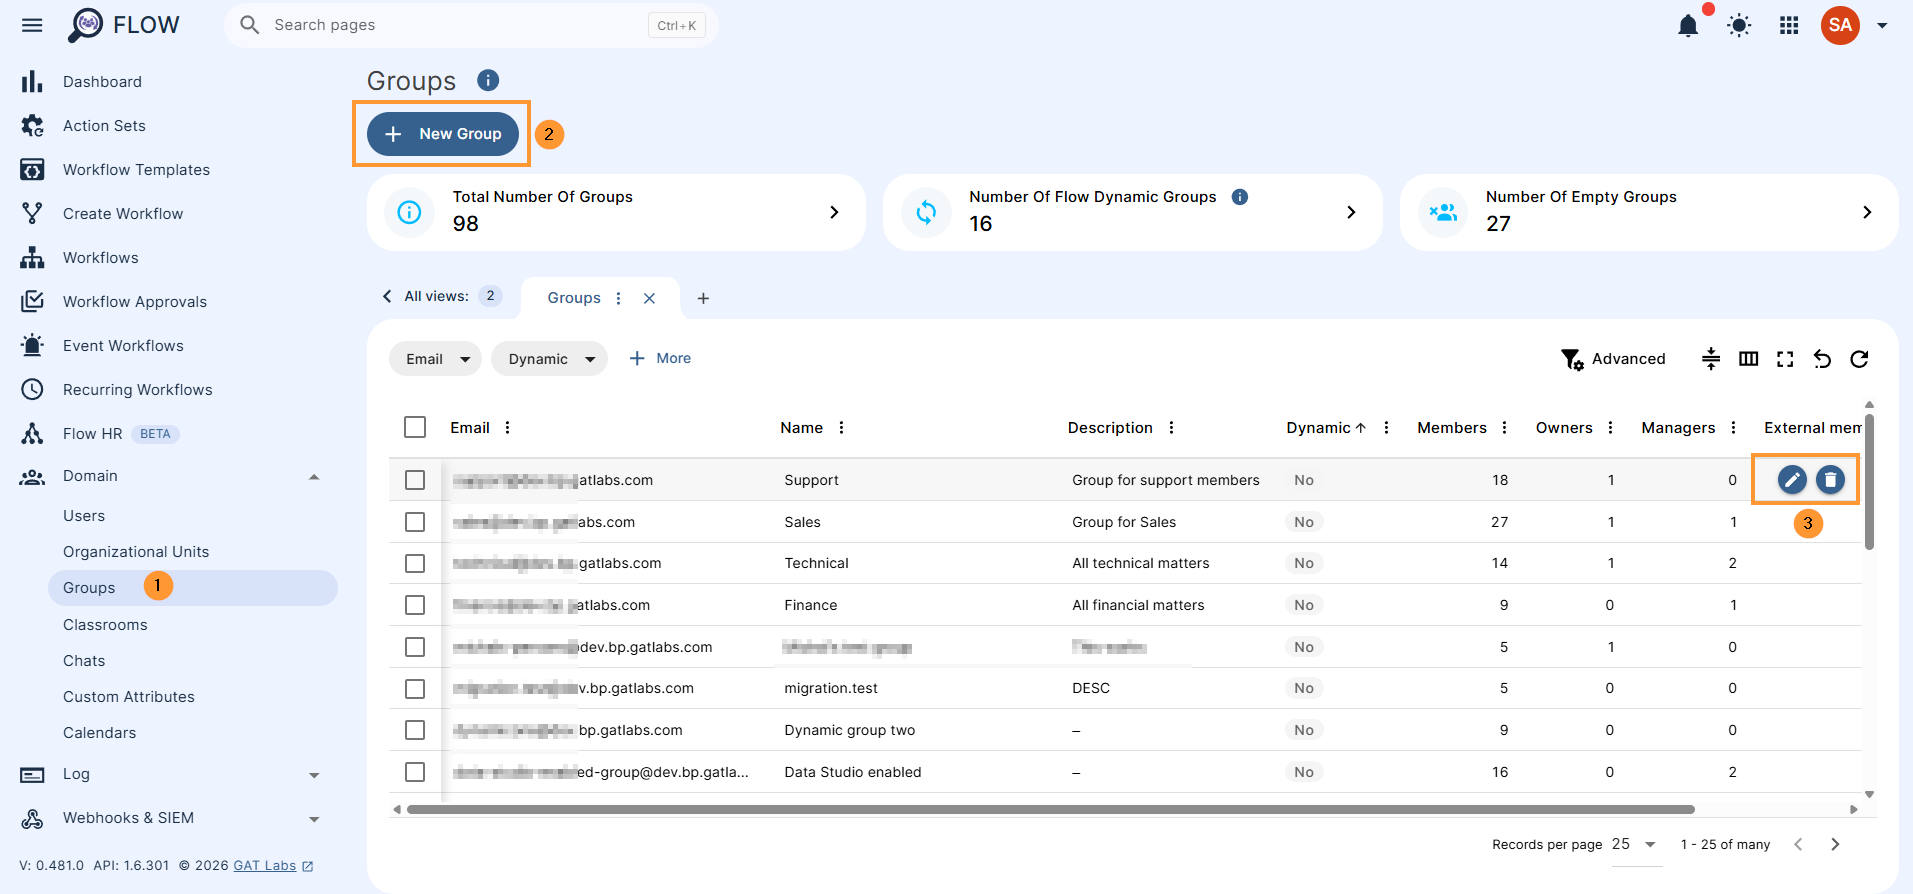
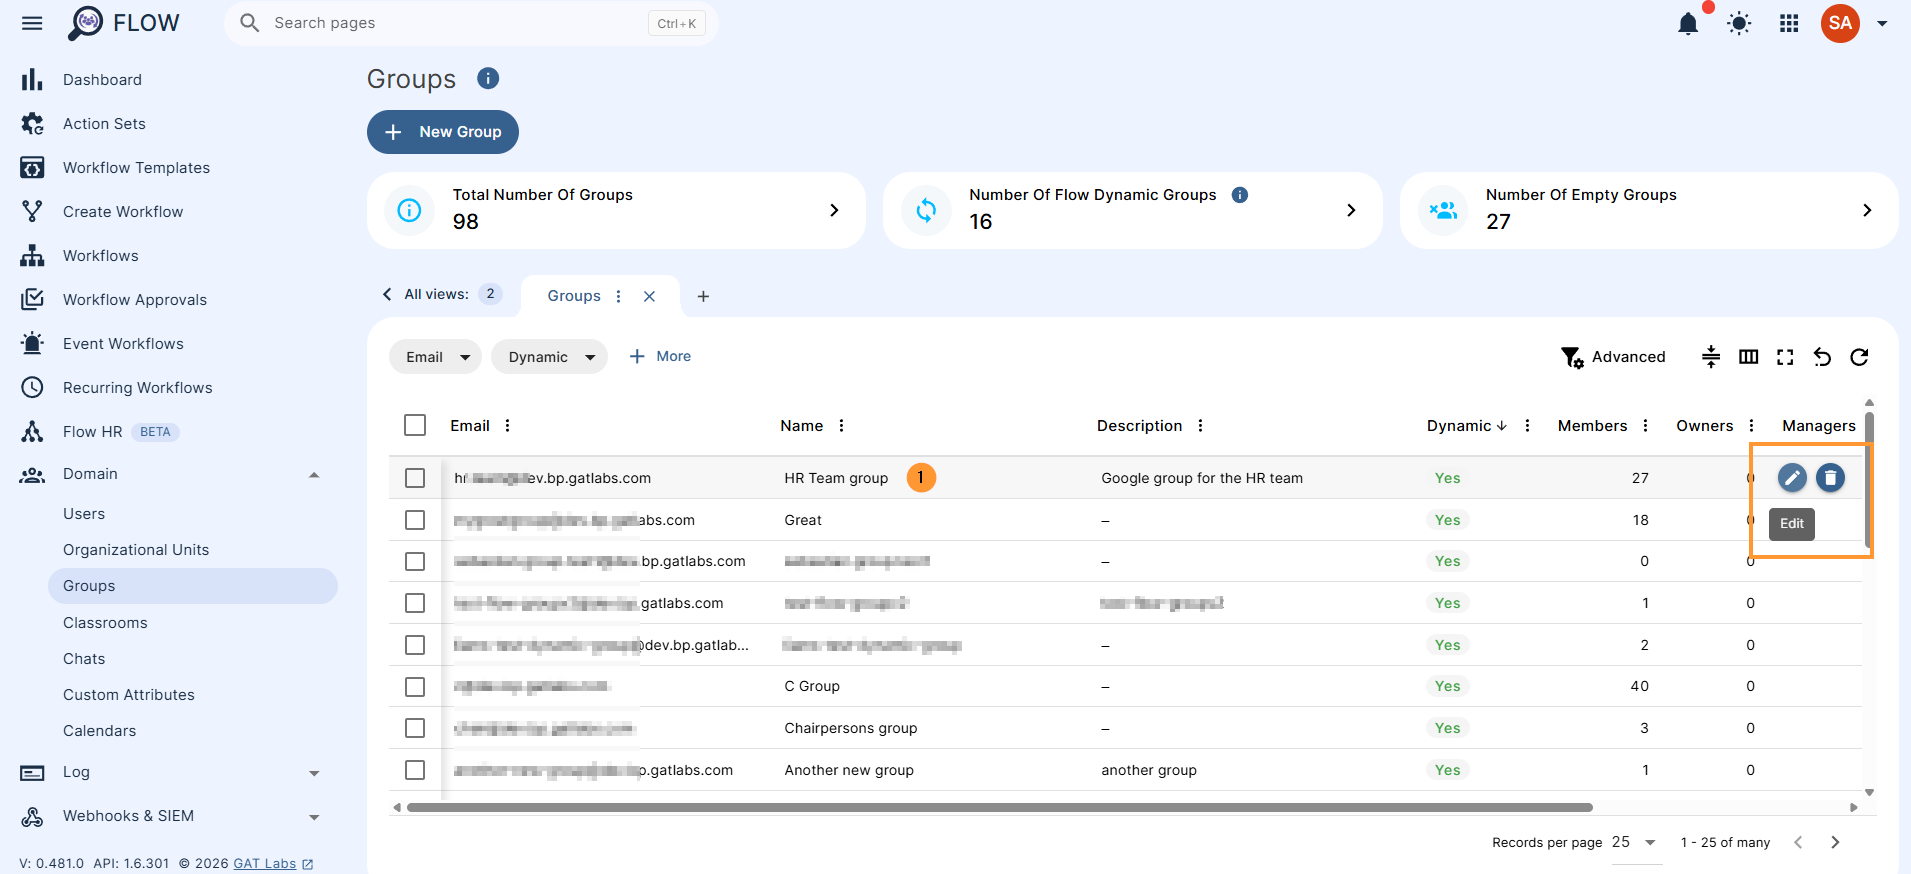
Navigate to GAT Flow > Domain > Groups
Create Group #
Create a group by clicking on the + New group button.
Edit the group by hovering on it and editing by clicking on the pen icon on the right side.
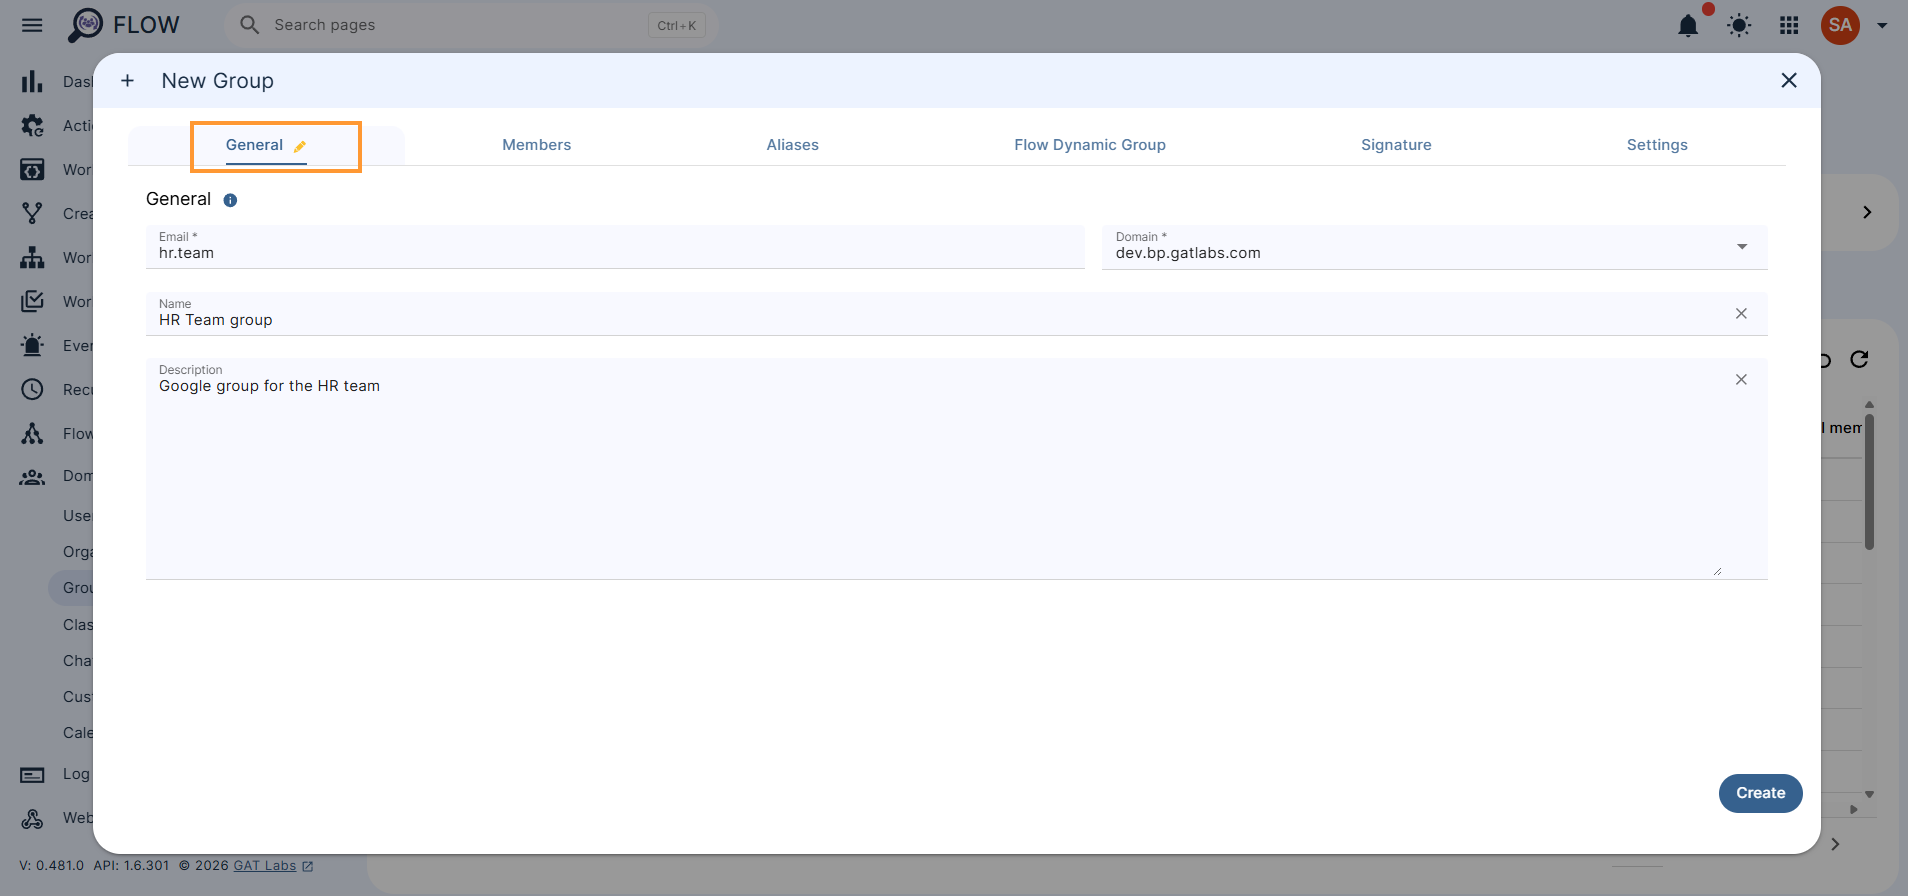
When selecting New group, a new window will be displayed, fill in the required details.
General – enter the details for the group
- Email – enter the email for the group
- Domain – pick the domain
- Name – enter a name for the group
- Description – enter a description for the group
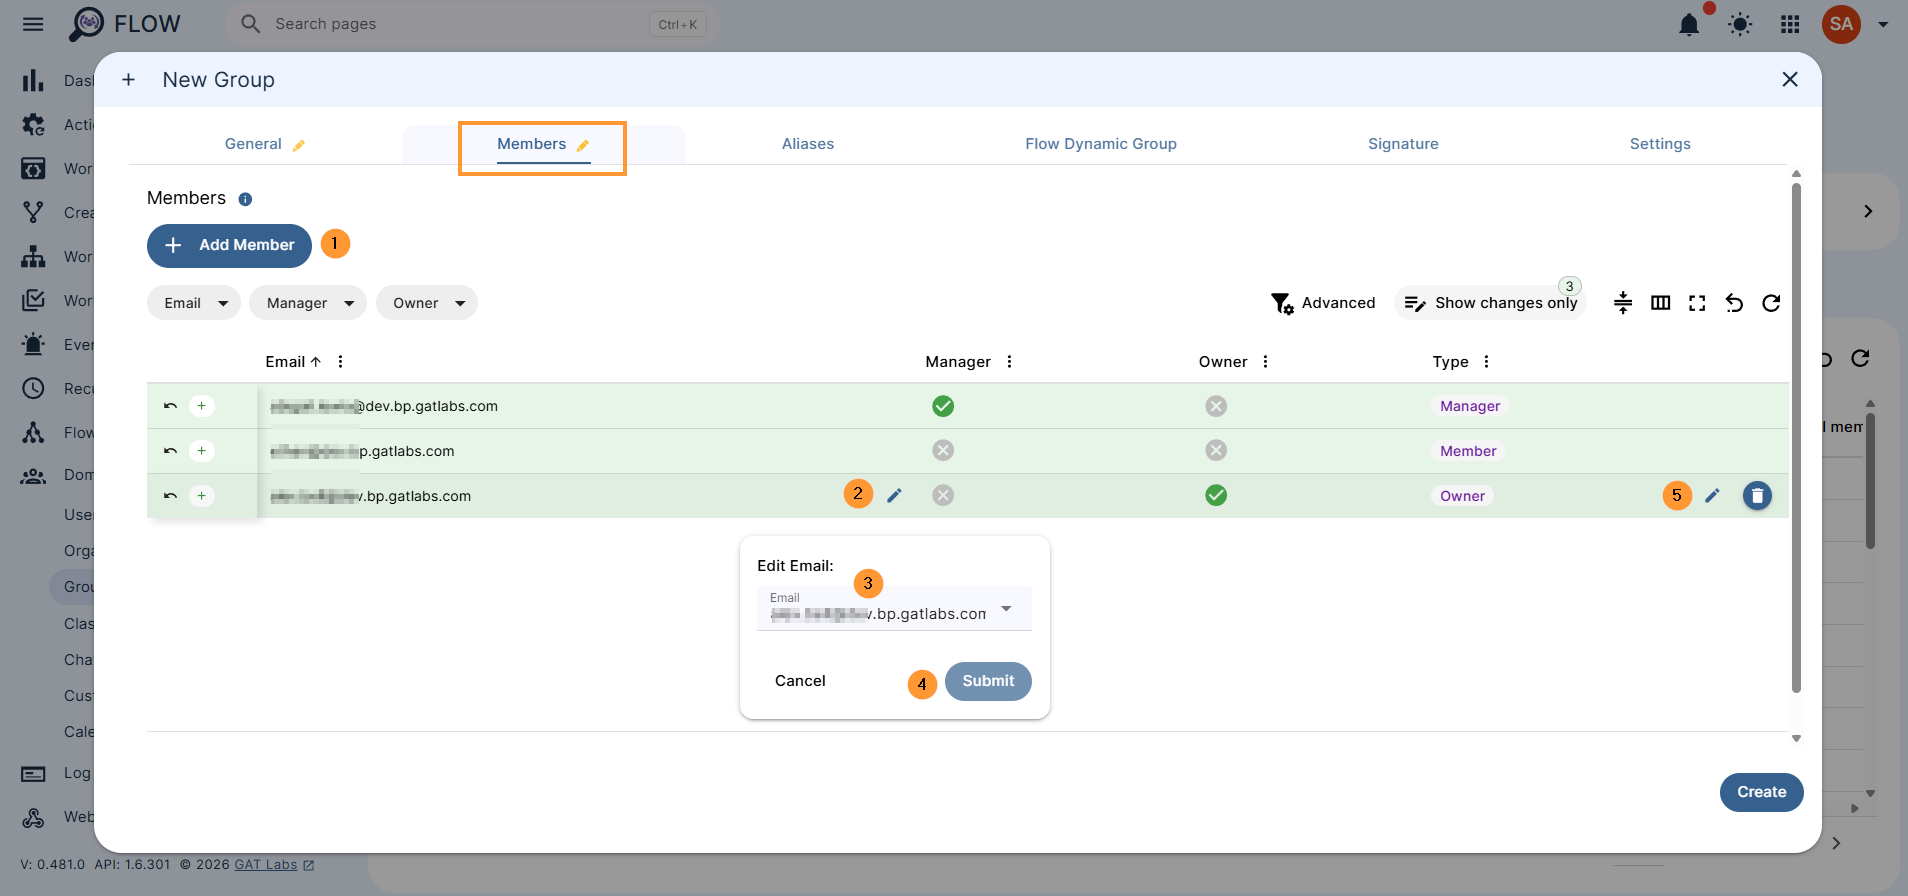
Members – enter the members of the group
Select the members tab and fill in the details there.
Click on the + Add member (1), in the field below, click on the red pen icon (2), search for and enter the email address (3), click to submit (4), to add the member to the group.
On the right side, hover over and under “type – member”, click on the pen icon (5), and change the user access to the group to be Member, Owner, or Manager for the group.
Aliases – enter the members of the group
Select Aliases and add an alias (optional)
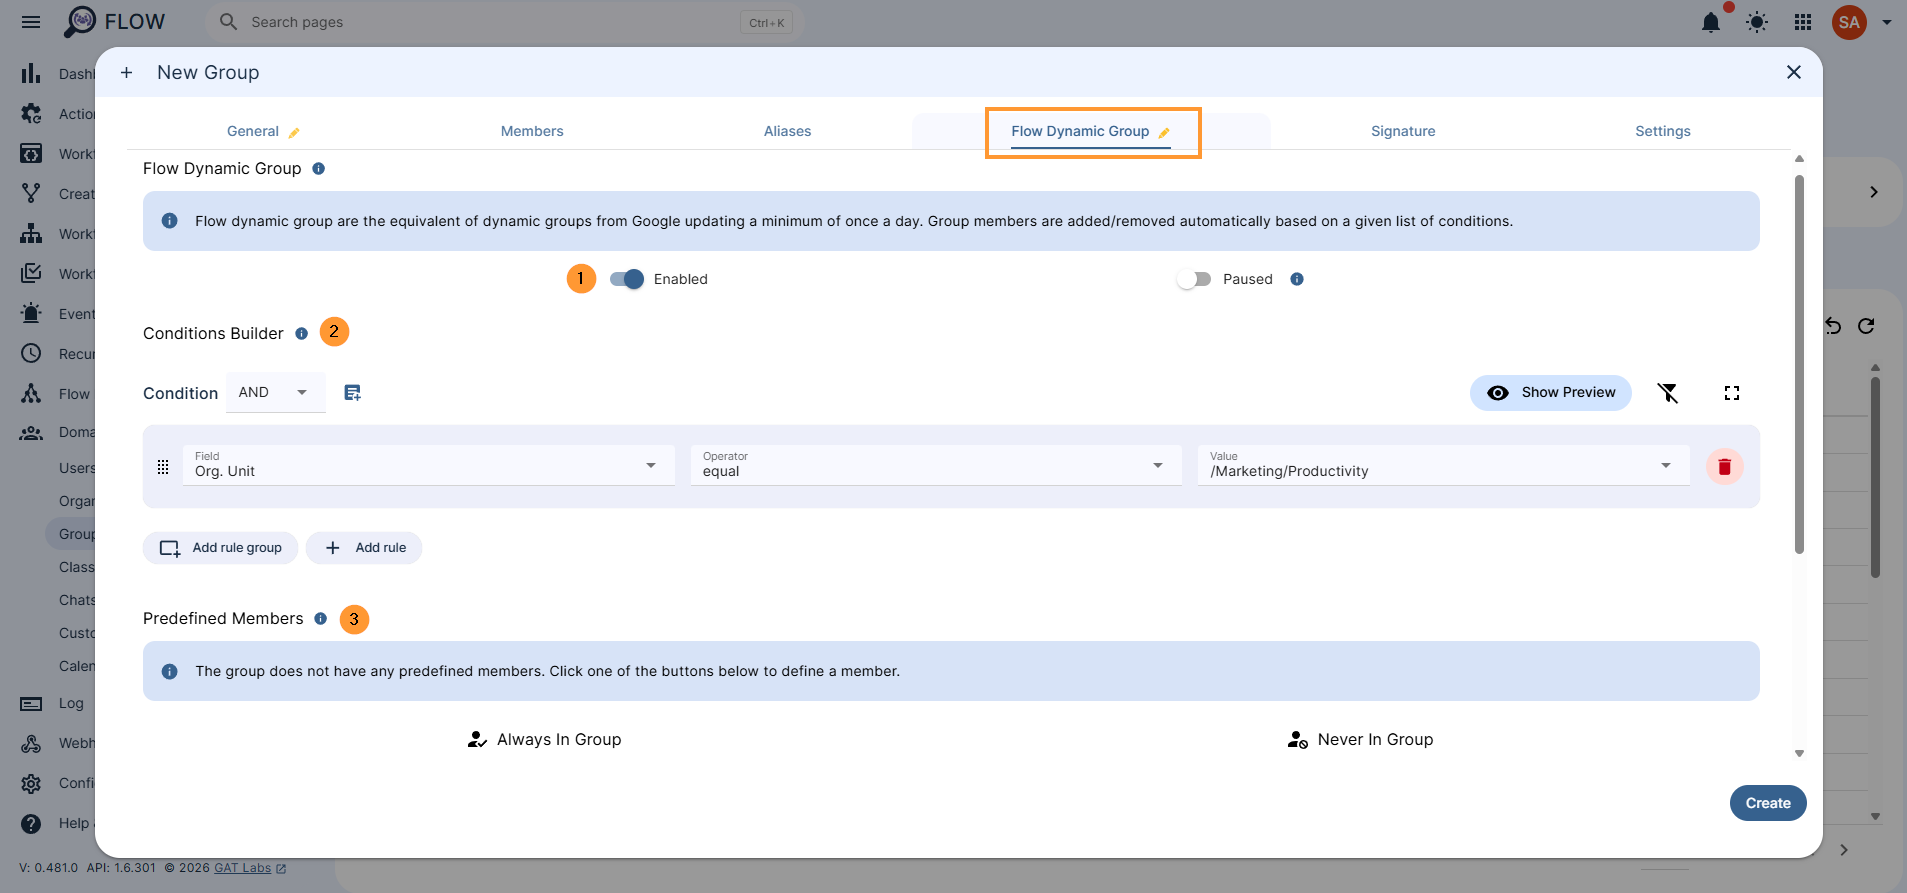
Flow dynamic group – enable and make the group dynamic. Convert the group to a Dynamic group
Flow dynamic groups are the equivalent of dynamic groups from Google, updating a minimum of once a day. Group members are added/removed automatically based on a given list of conditions.
Click on the button to Enable (1)
- Conditions builder – Define the conditions under which group members are added or removed. You can combine multiple conditions using AND/OR operators. The conditions are based on user attributes such as department, location, job title, etc.
- Predefined members – Specify users who should consistently remain part of a group and those who should never join it.
- Always in group – enter the emails of users who will always be in the group
- Never in group – enter emails of users who will never be in the group
- Safety settings – Define a safeguard that pauses automatic member updates when the number of changes exceeds your threshold. If this happens, processing is paused and a notification is sent to the addresses you specify.
- Percentage threshold – pauses processing when the number of members to add/remove exceeds the selected percentage of the current group size.
- Numeric threshold – pauses processing when the number of members to add/remove exceeds the selected absolute value.
Group signature – fill in and enter the group signature. The tab allows you to manage the group signature.
The Admin can create a group signature using the HTML editor, using the template variables, or use and pick a pre-prepared template.
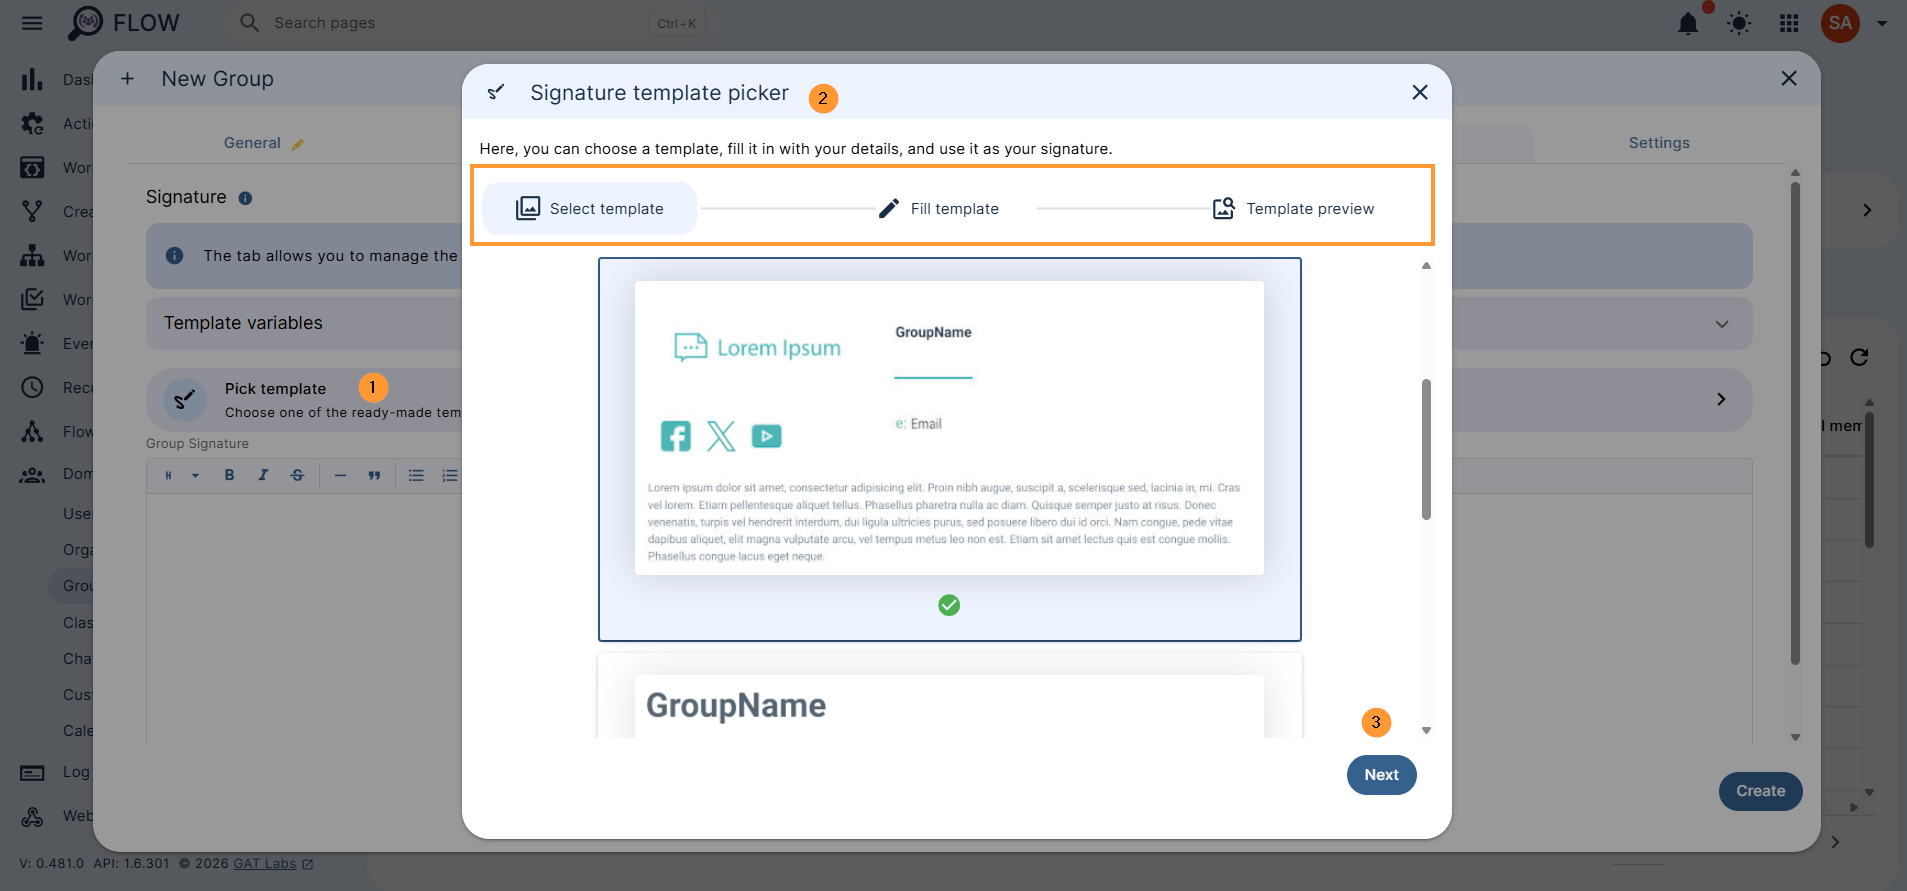
Click on the “Next” button and fill in all the details for the signature.
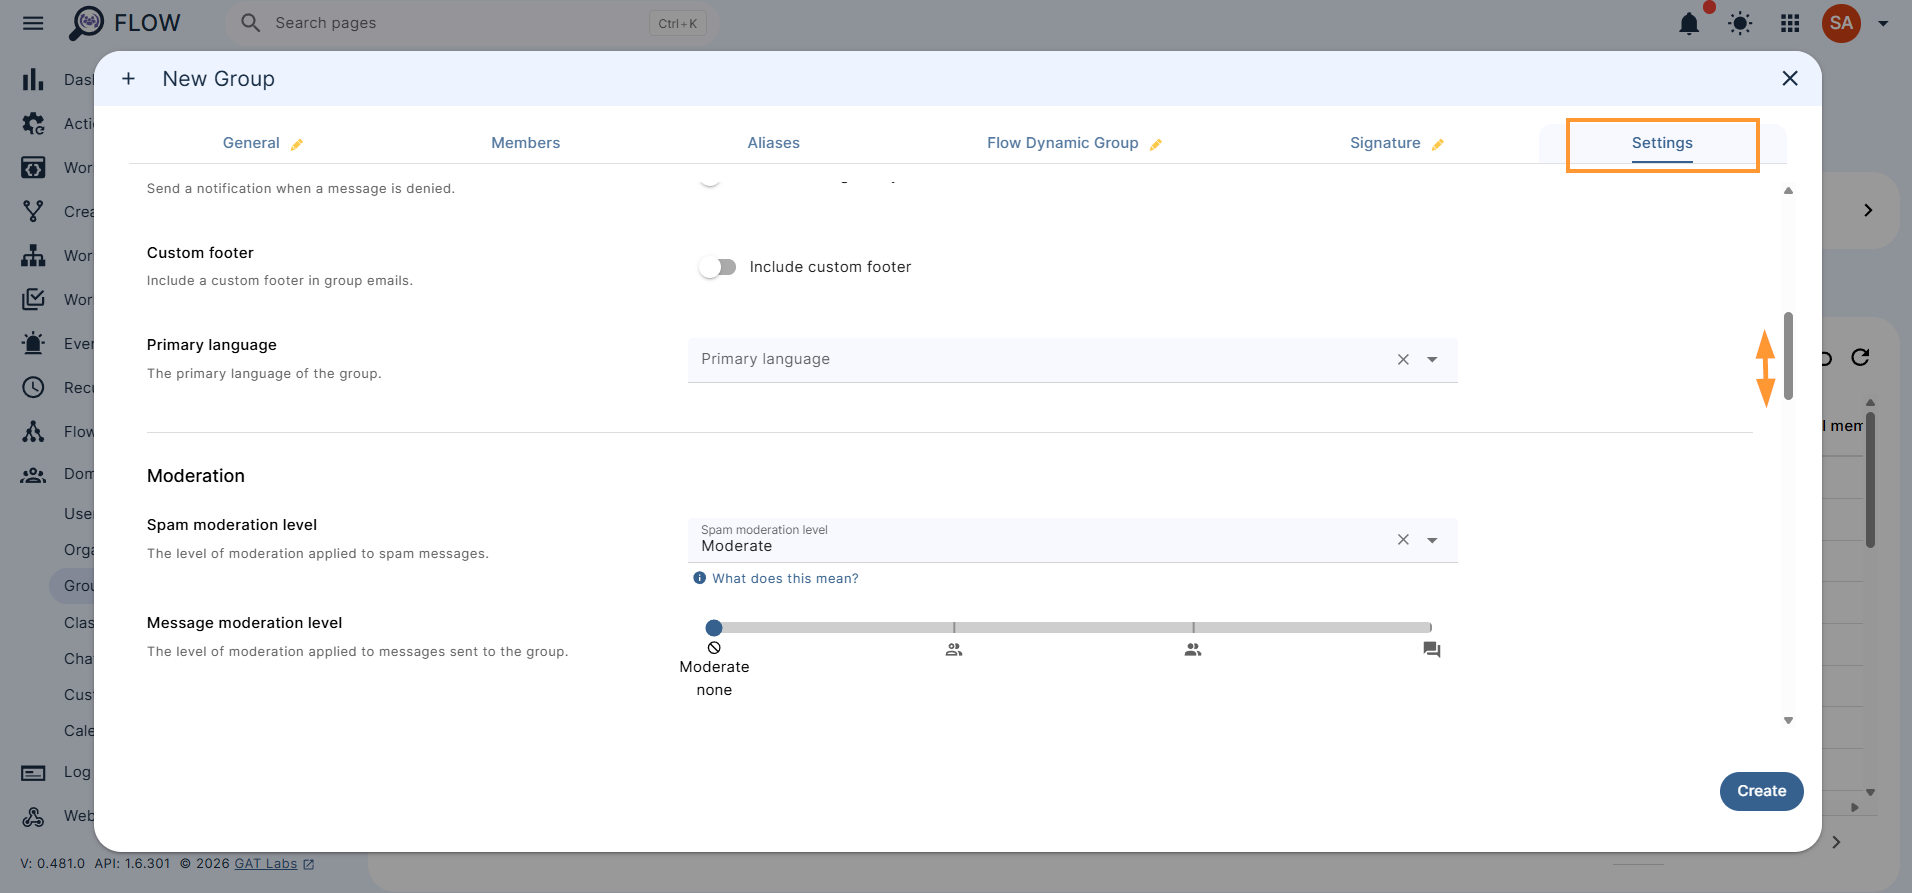
Group settings – open view, edit, and fill in the settings for the group
When all the above is done, click and create the group.
Once the group is created, all groups can also be edited in GAT Flow.
Edit Group #
On the Group Page, select any group and click on the “pen icon” on the right side.
When the changes have been applied, click on the Update button in the bottom right corner.
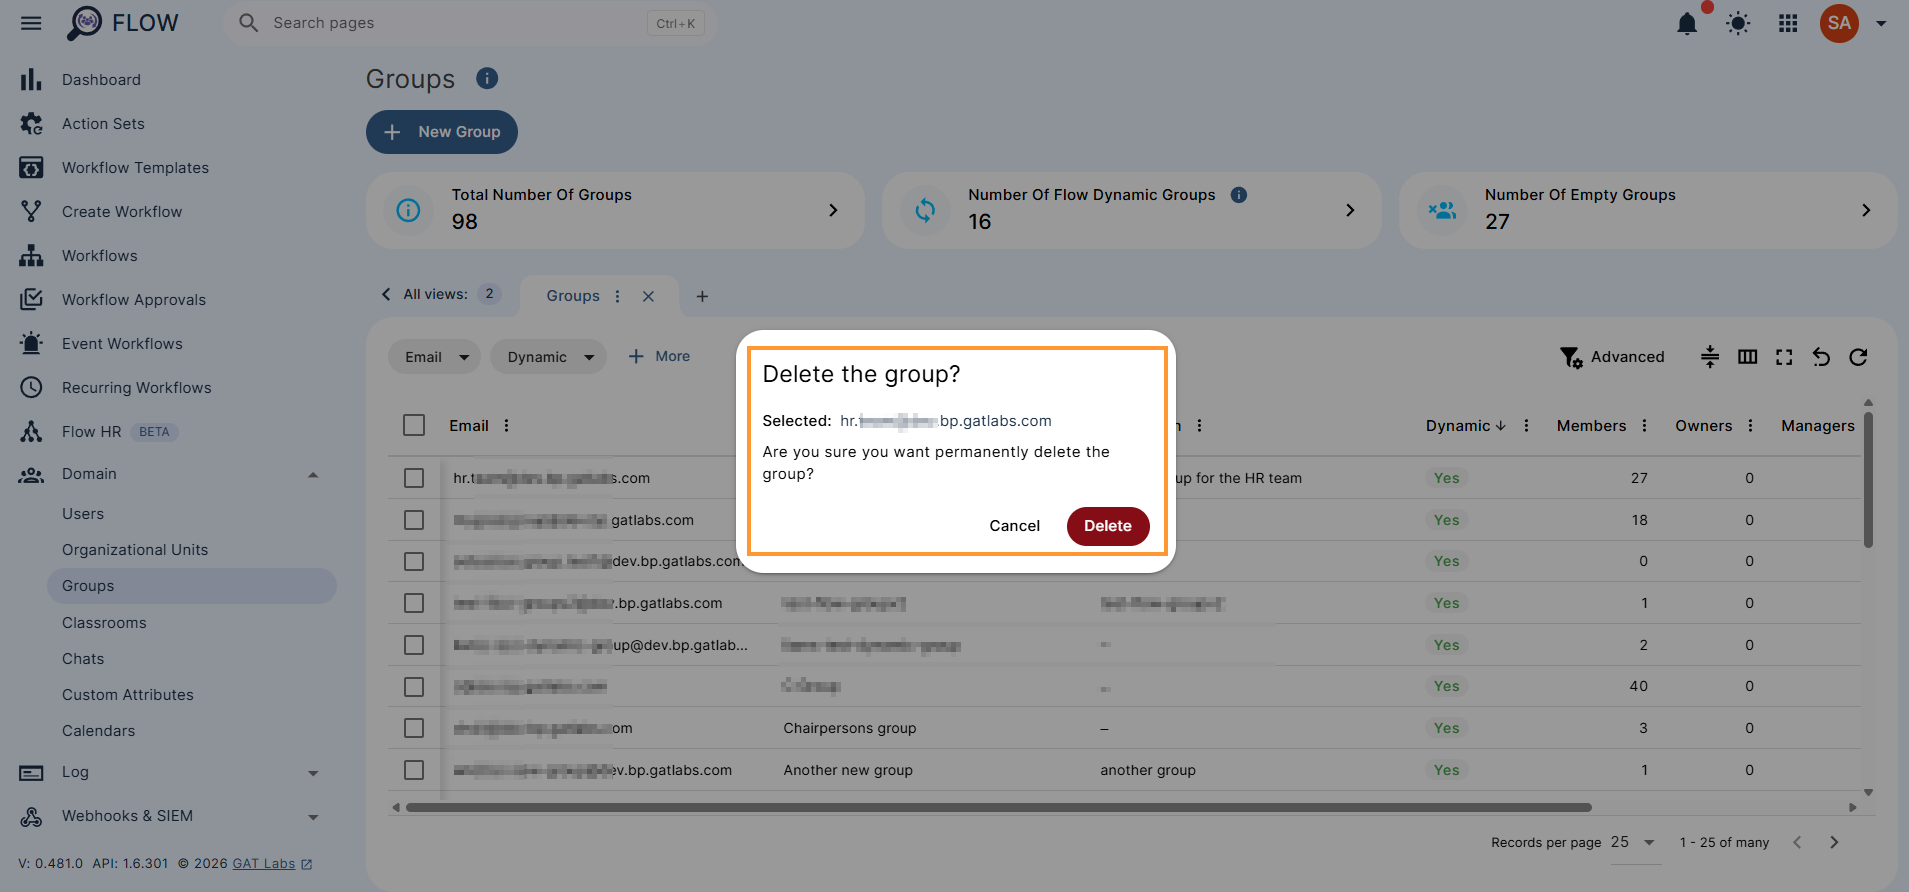
Delete Group #
On the Group Page, select any group and click on the “bin icon” on the right side.
Confirmation will be needed; once confirmed, the group will be deleted.