Introduction #
With the powerful auditing functionalities of GAT+, Google Workspace Super Admins can create and update their Google Classrooms across their school district without difficulty.
Before we start make sure you have enabled Google Classroom APIs.
Create new Google Classrooms #
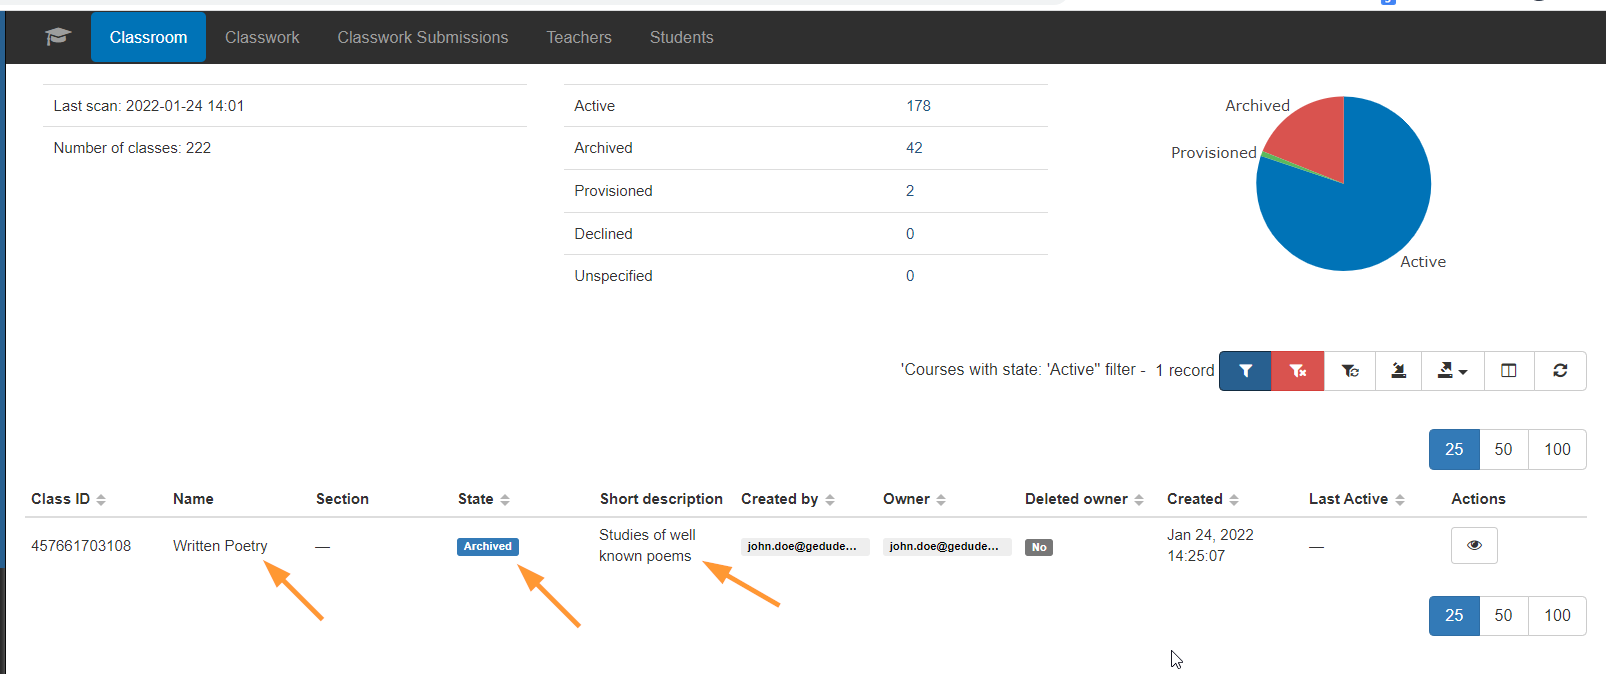
1. Enter the Classroom Audit menu then click on the Classroom tab.
2. Use the Apply custom filter (funnel icon) button to filter for specific classrooms if needed.
3. Click on the Export data button that’s located on the right-hand side of the page to export a Google Spreadsheet of the filter you applied.
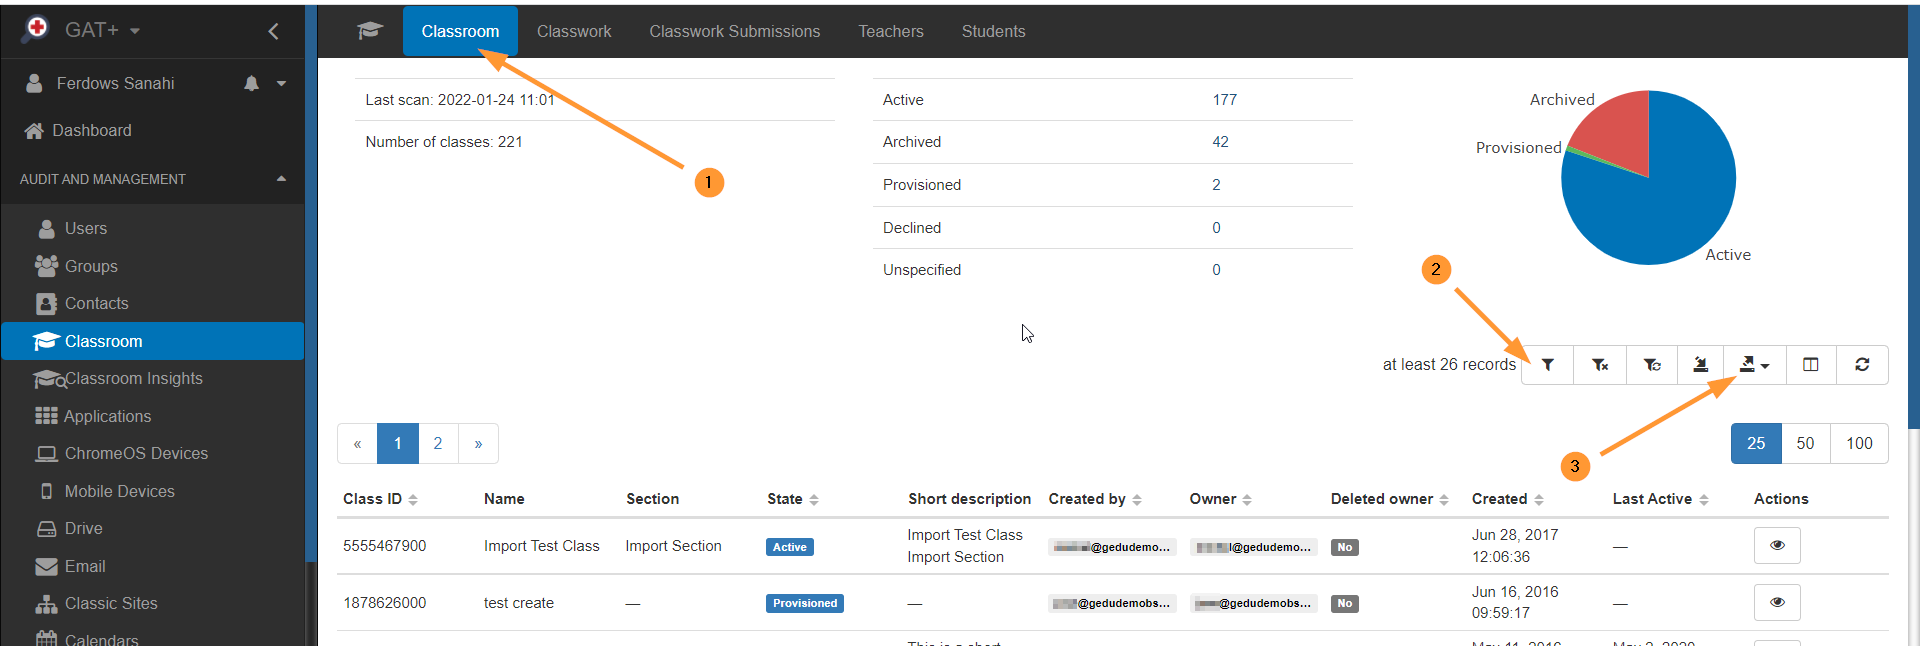
Make sure to click on the option Export to Google Sheet (max 150,000 records) option. This is the correct type for editing and modifying details. It’s got the right format.

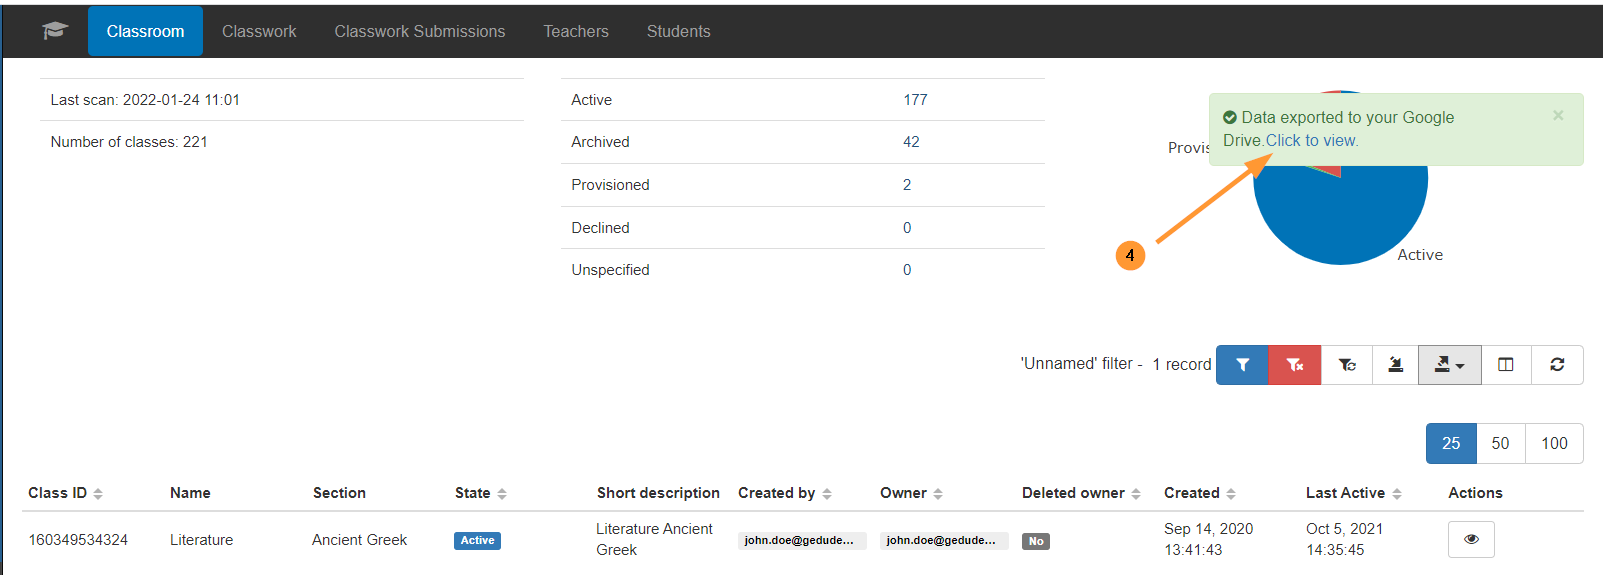
4. When the exported Spreadsheet appears, click to view and find an empty row at the bottom of the existing data.
Fill in the following fields:
- Name (Name of Google Classroom) – Mandatory Field
- Owner (Usually email of teacher) – Mandatory Field
- You must enter only one email address in the Owner field.
Optional Fields:
- Description
- Section
- Room
- State (ACTIVE, ARCHIVED)
- Aliases (start with :p or :d ) – ( Alternative identifier for a course, so instead of course id (number) use and add alias.
- Teachers (separate emails with a comma)
- Students (separate emails with a comma)
- Short Description
Important: DO NOT modify any of the RED-colored background fields in the spreadsheet. Fields in GREEN background can be edited
- Course_ID (when creating new classrooms, keep ID blank, if a classroom already has an ID do not modify it.) This field is handled automatically by GAT+.
- It’s not necessary to create or modify the Created (date field). This field is handled automatically by GAT+.

5. Once you have finished filling in the information for the new classroom close the Spreadsheet tab.
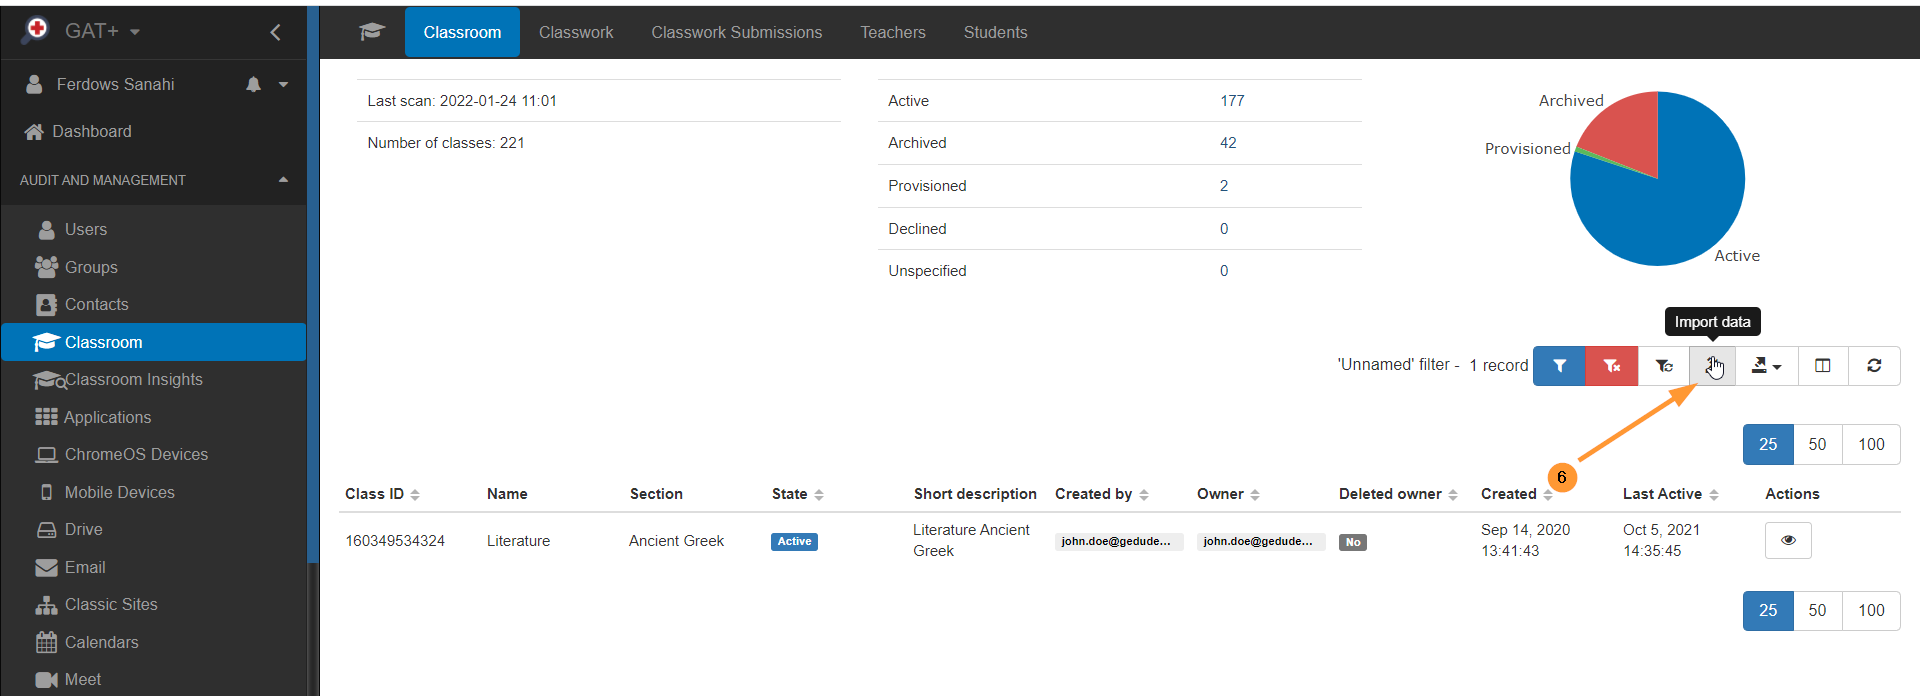
6. Then click on the Import data button, to add the data back and import it to G Suite (GAT+)
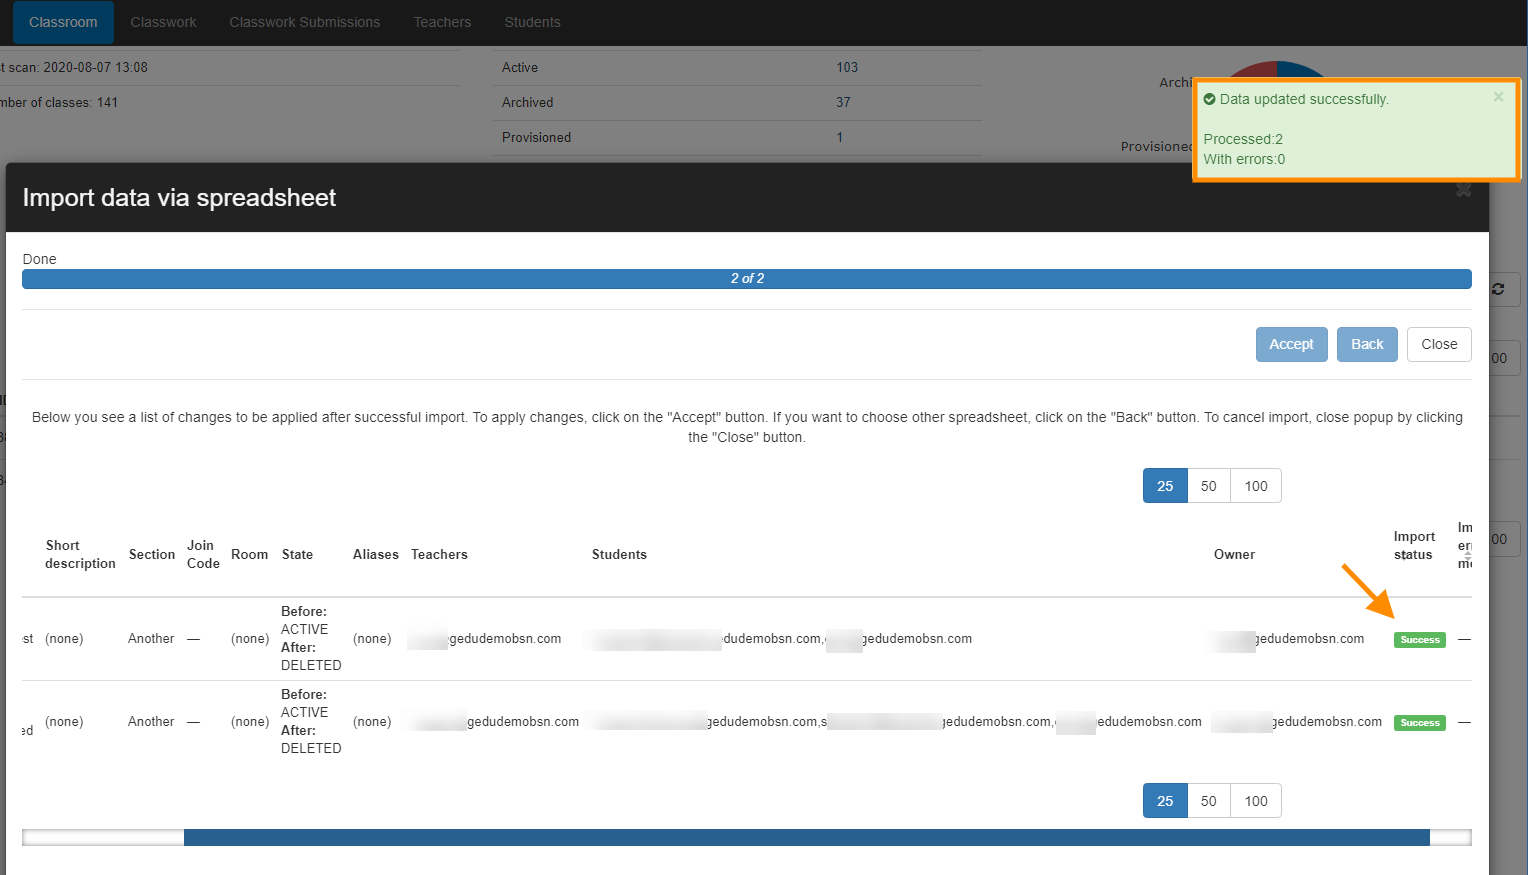
7. When the correct Google Spreadsheet from the list is selected, click on the “eye” icon to open the Spreadsheet again (Preview Spreadsheet option). Click on the “check-mark” (Choose) to complete the import of the spreadsheet, details will be displayed.

8. In the below example you can see the type of import is a CREATE action which means a new classroom will be created. After you are happy with these details click on the Accept button.
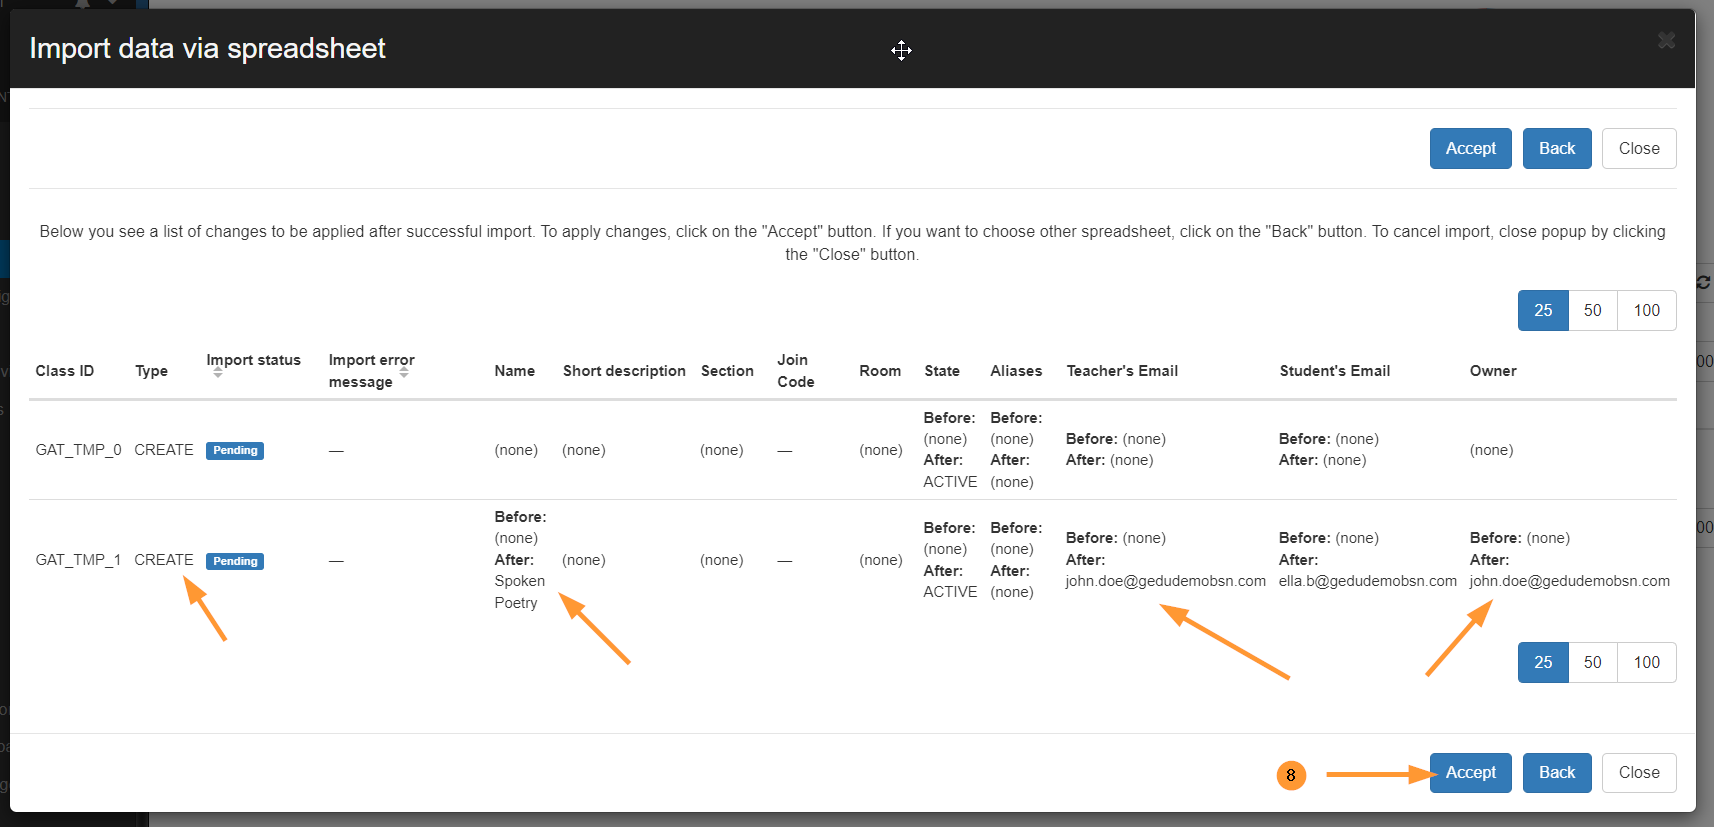
9. When the operation is carried out you should see a message stating whether the operation was successful. The dialog box will appear at the top right corner of the screen.
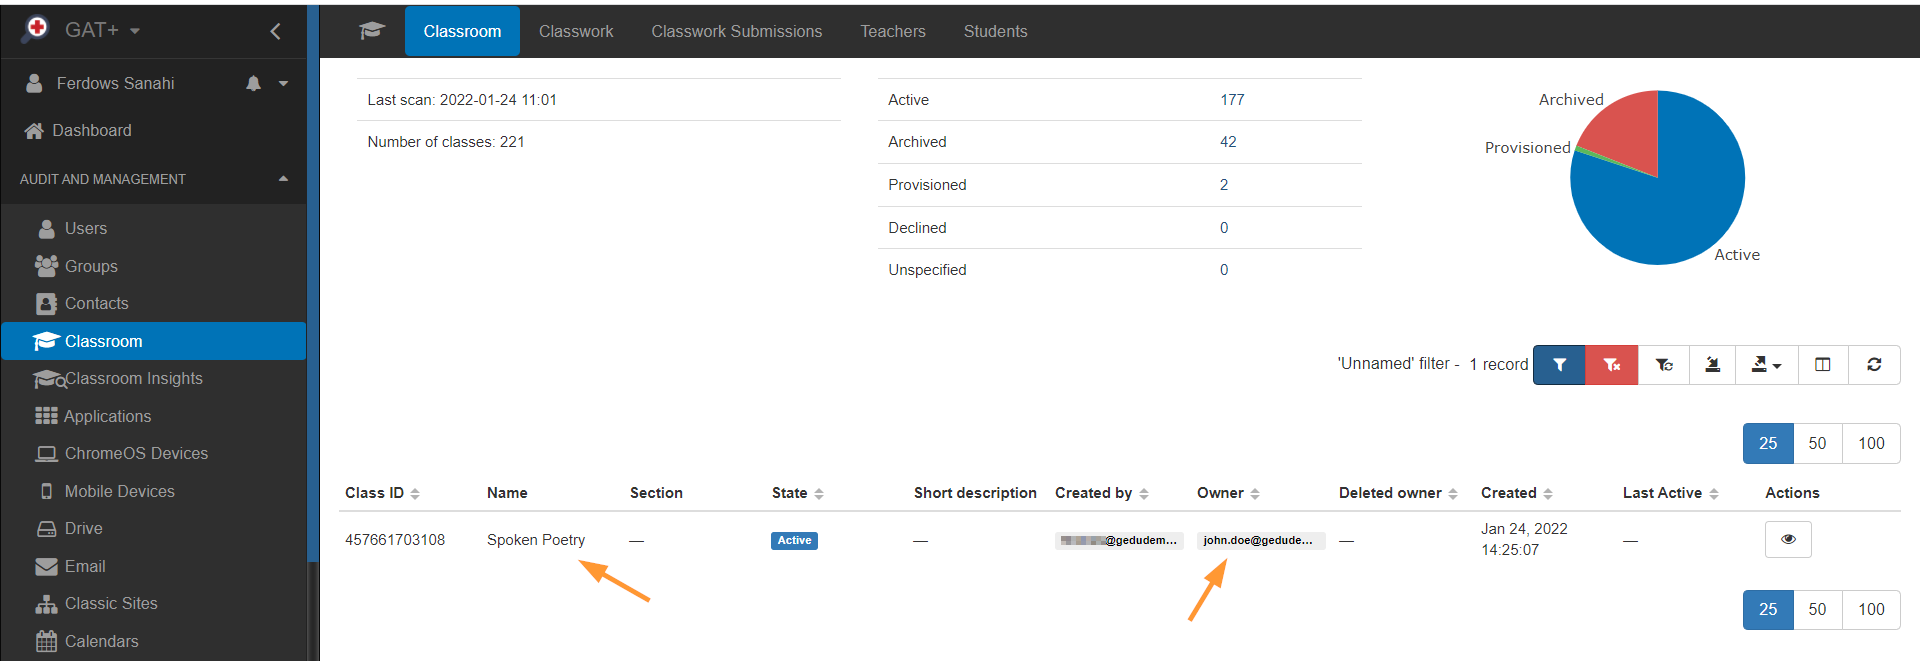
The classroom will be added and visible in GAT+.
Update existing Classrooms #
1. Apply a custom filter (funnel icon) and search for the classrooms you want to take action on. Use Search operands to find the classrooms you need to update.
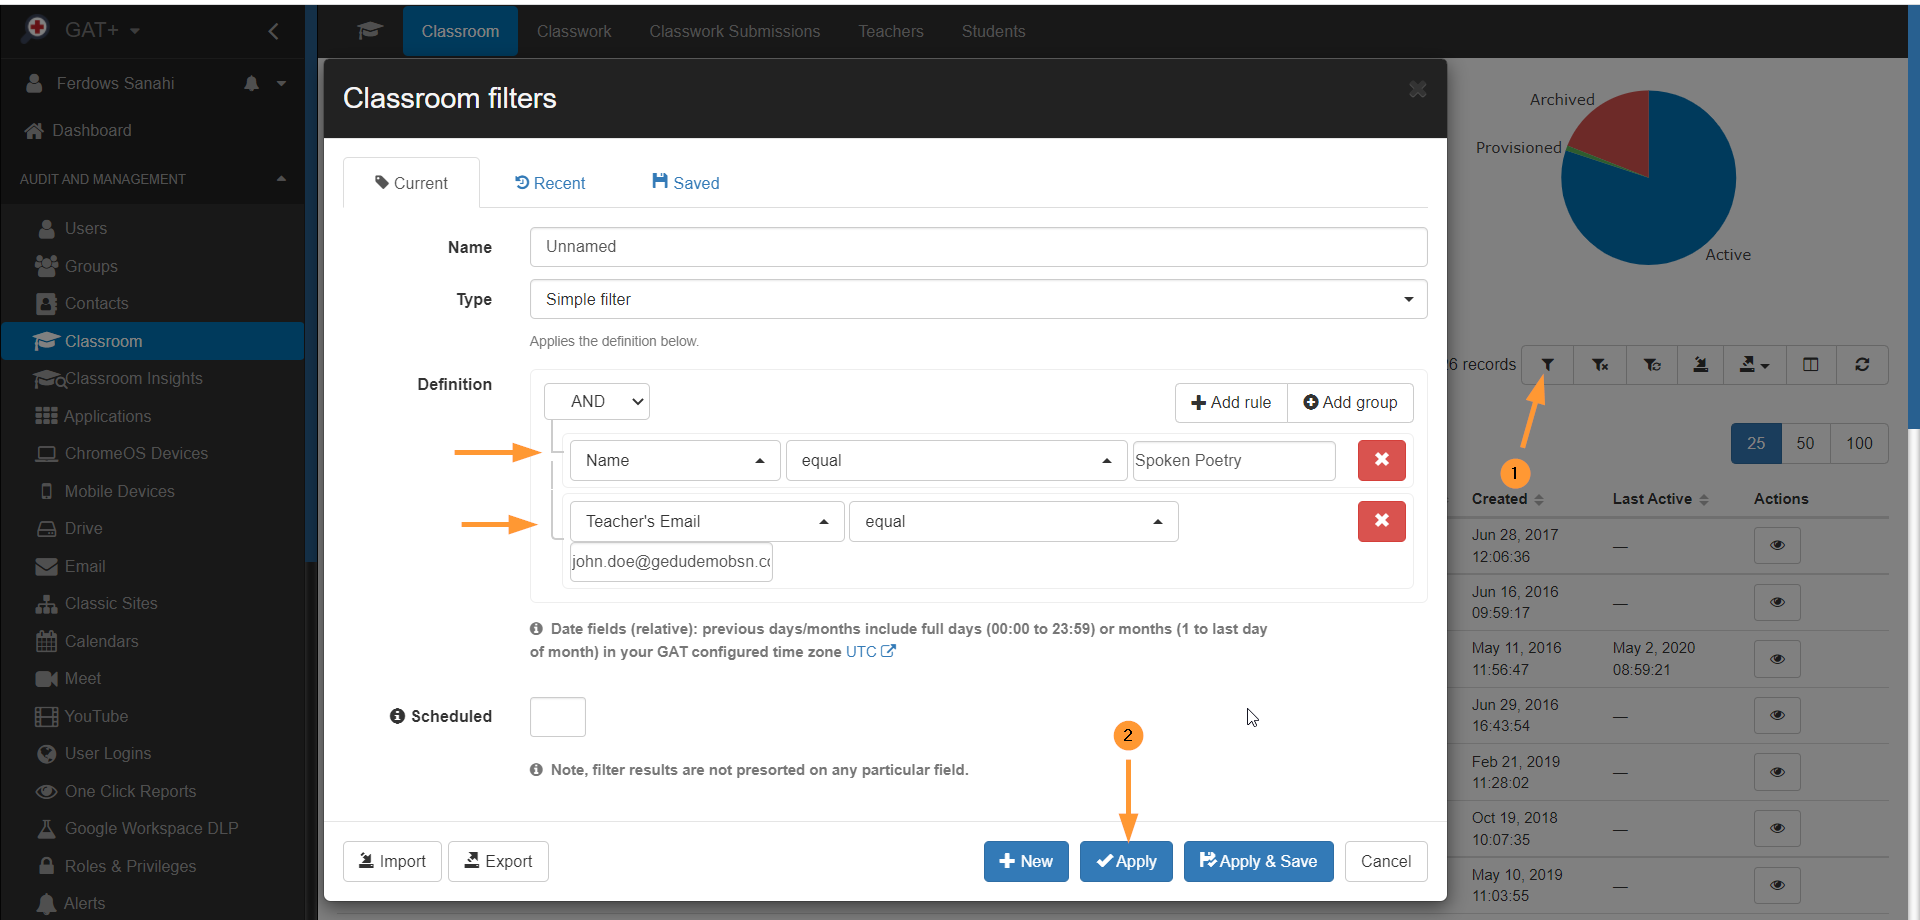
In the example above – I used Name and Teacher’s Email search operands.
2. Click Apply and the results will be displayed.
3. Click on the Export to Google Sheet.
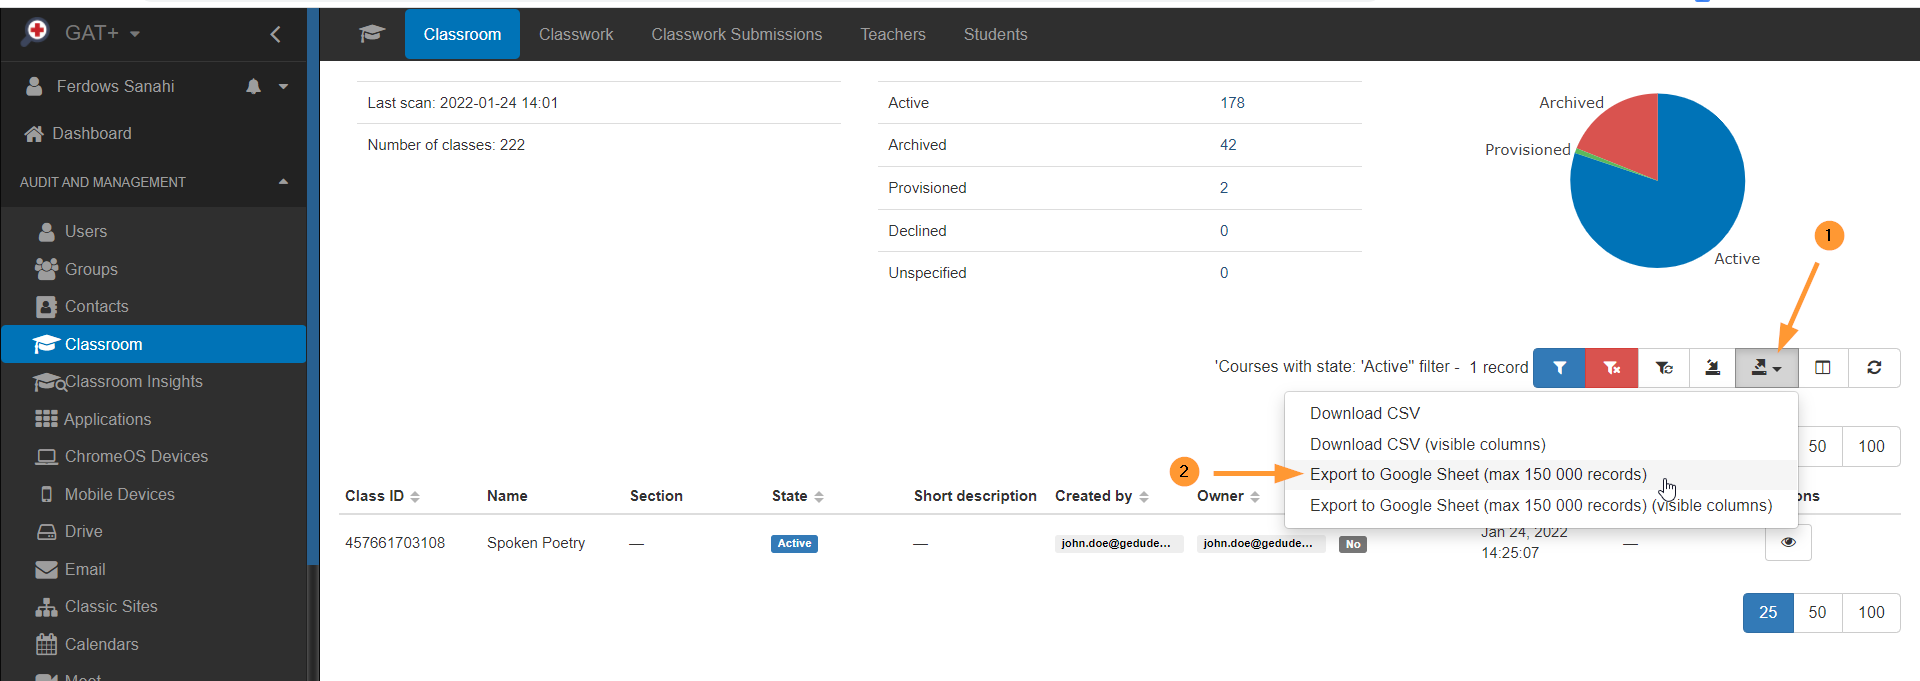
5. When the Spreadsheet is created, click to view.
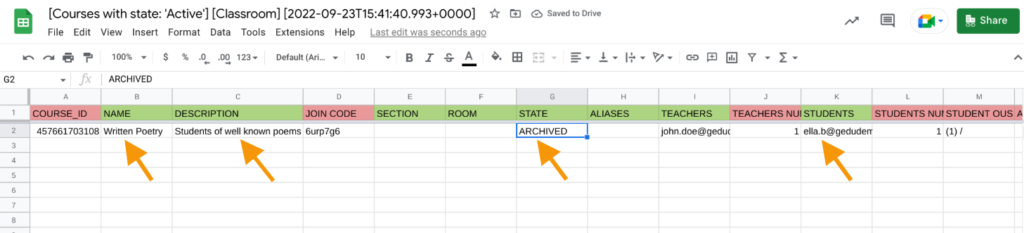
6. As in the example below. Edit any of the “allowed” fields as below.
In this case, changing the Name of one classroom, State to Archived, and Description, and adding additional Students.
Important: DO NOT modify or edit the fields in RED, Fields with the Green background can be edited
- Course_ID (when updating a classroom, keep the ID as it is) This field is handled automatically by GAT+.
- Created (date field). This field is handled automatically by GAT+.
7. When the desired changes are made, close the spreadsheet tab.
8. Click on the Import data button and select the spreadsheet you were working on.
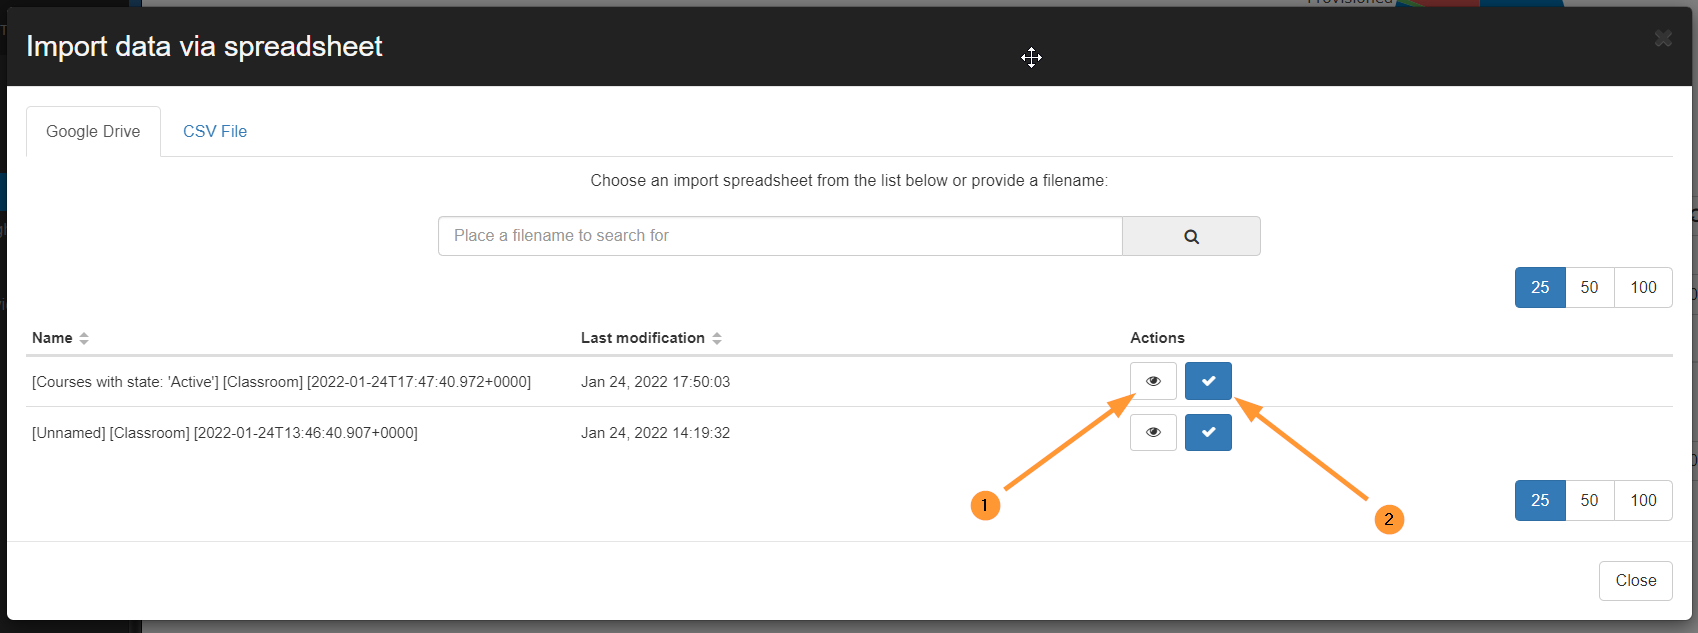
9. Cick on the “eye” icon to open the Spreadsheet again (Preview Spreadsheet option). Click on the “check-mark” (Choose) to complete the import of the updated spreadsheet, details will be amended.
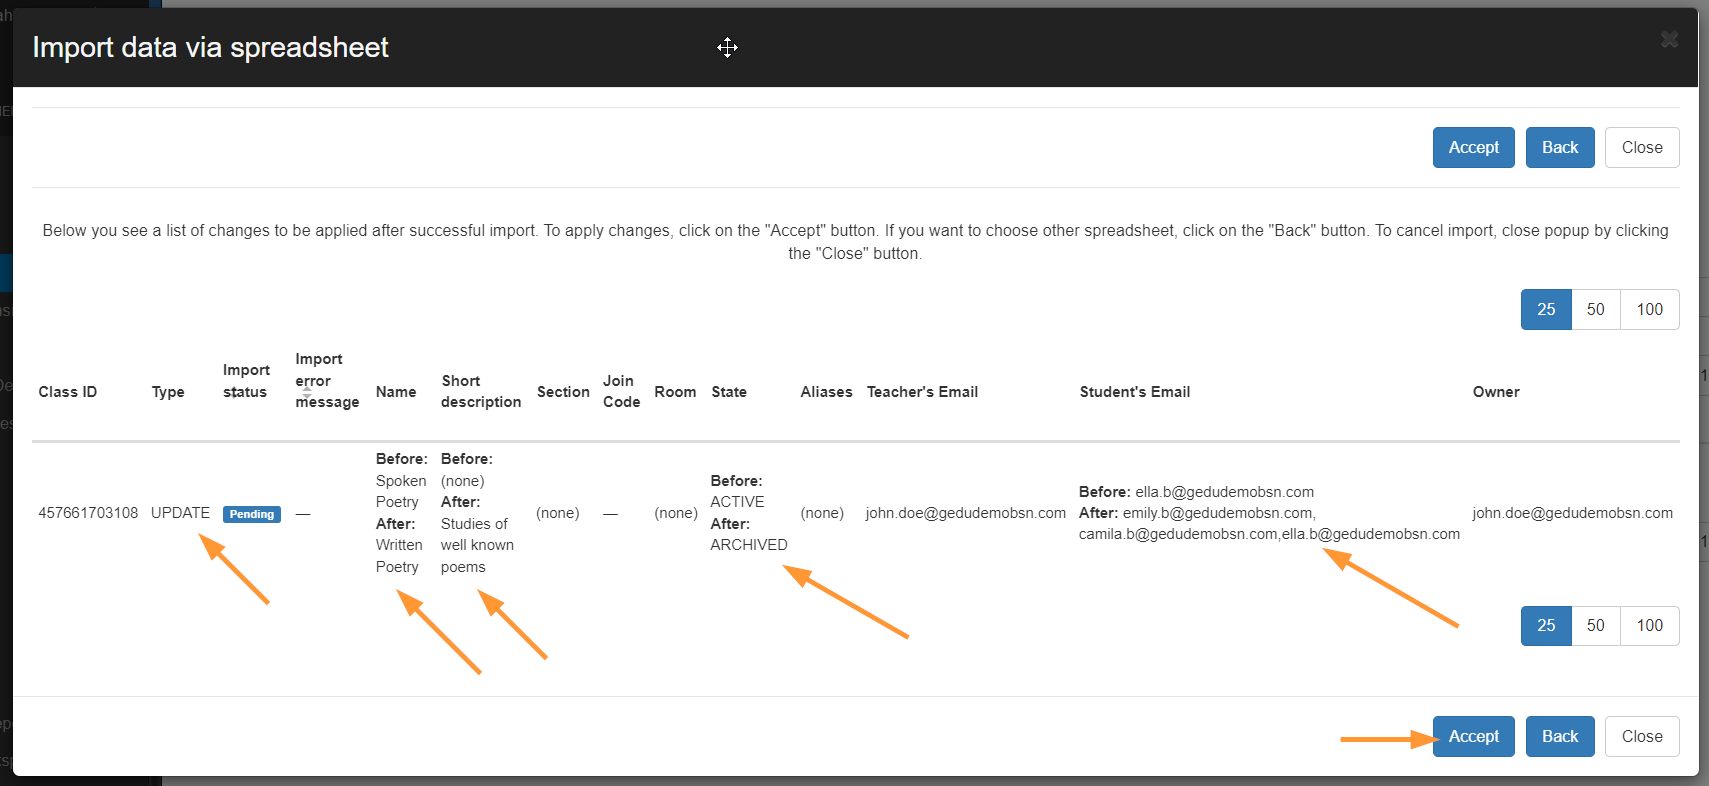
Then click on the accept button.
Note: It might take some time for the changes to be carried out (depends on the volume of data).
When the changes have occurred, a Success message will be displayed.
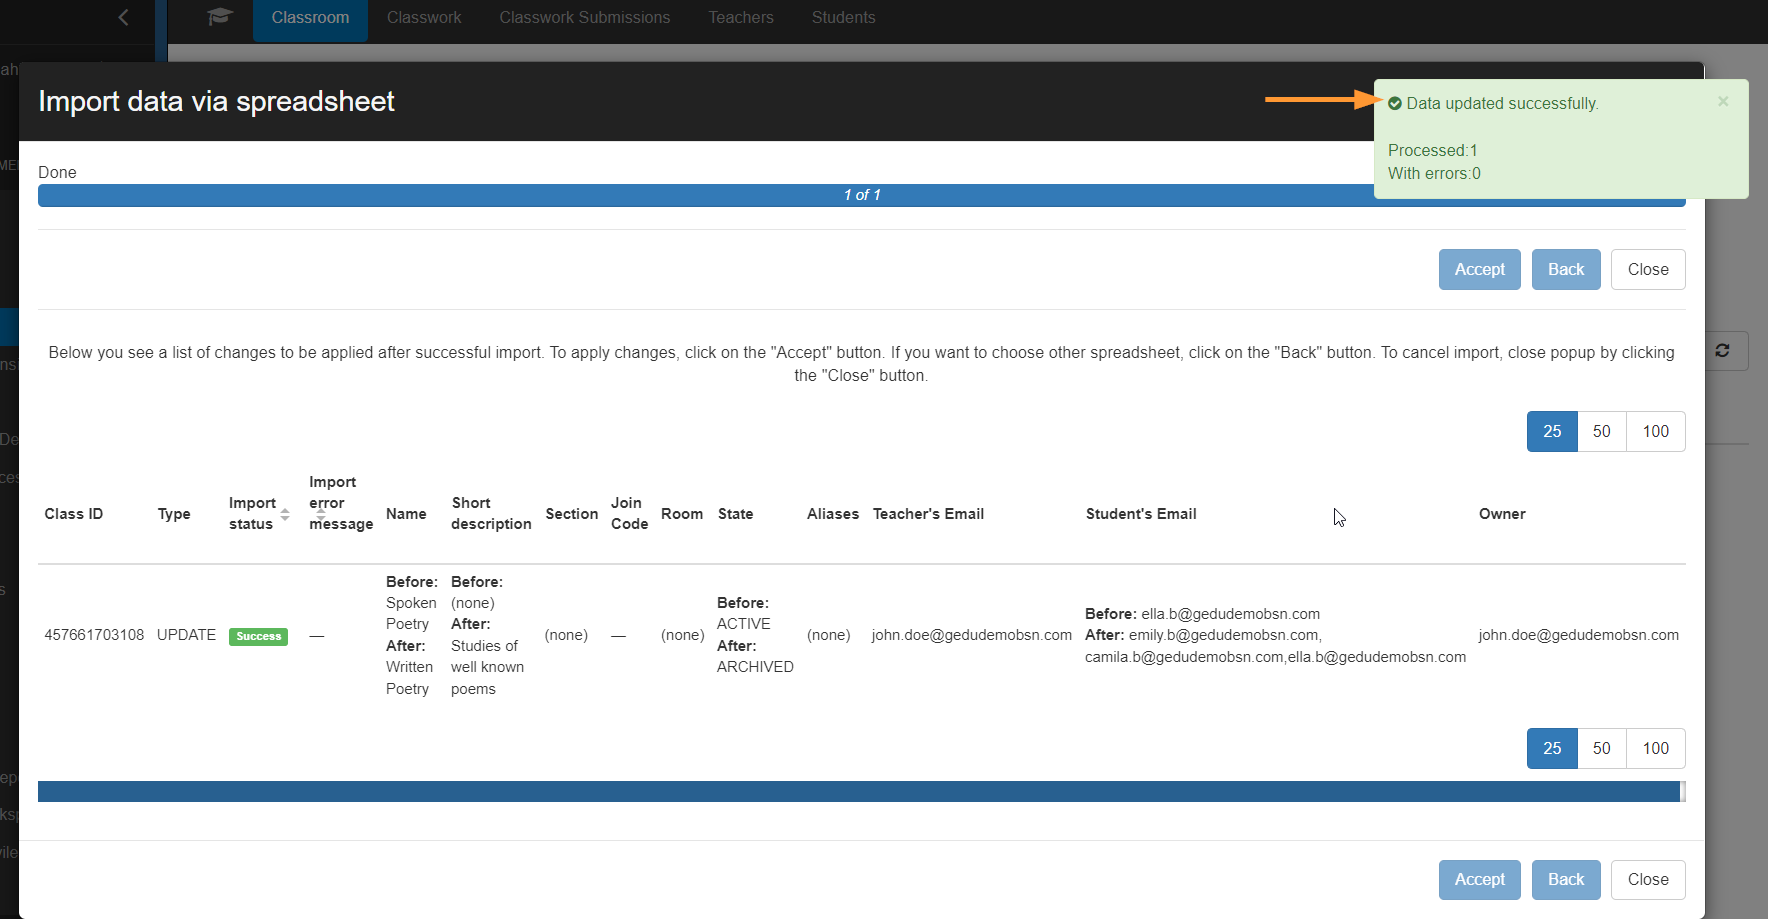
The data will be reflected in GAT+ right away.
Reasons why Google Classrooms Need Updating #
Examples of reasons to update Google Classrooms
- At the end of the school year, you can ARCHIVE classrooms that are not going to be in use next year so to avoid confusing students.
- Maybe the Description, Room, Student email addresses have to be modified because they were set up incorrectly by the teacher or classroom creator.
- A teacher is out sick or on temporary leave and you need to add the new teacher to the Google Classroom.
Delete existing Classrooms #
Deleting a Google Classroom is similar to editing or updating a classroom.
The only change you need to make is with the STATE field. Change the STATE field from ACTIVE/ARCHIVED to DELETED.
1. Find the classrooms using the Apply customs filter button, export into Google Spreadsheet or CSV, change the State value.
2. Change the State to DELETED
3. Make sure to close the spreadsheet down and then click on the Import data button.
4. Select the spreadsheet you were working on, confirm the changes done, and click on the Accept button.
5. When the change is done, Data updated successfully message will be displayed.
The data will be reflected in GAT+ right away.

Important information about the Google Classroom States #
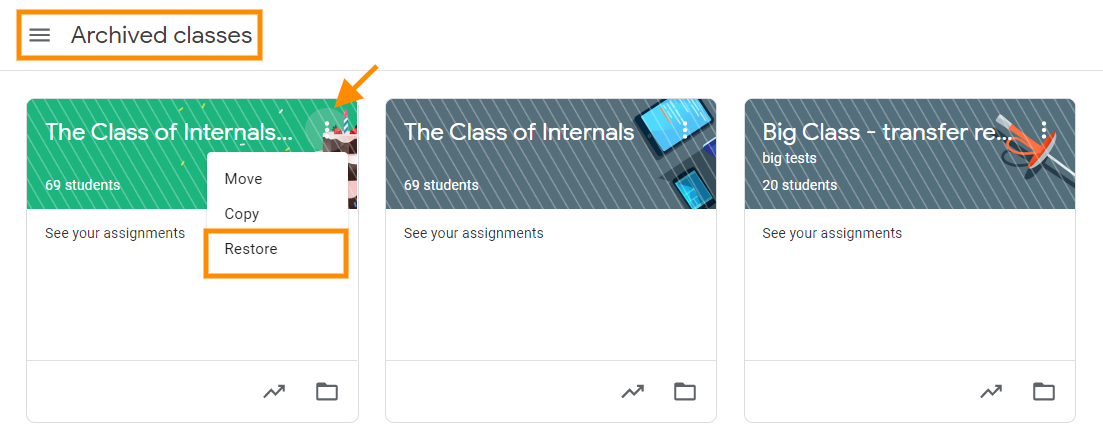
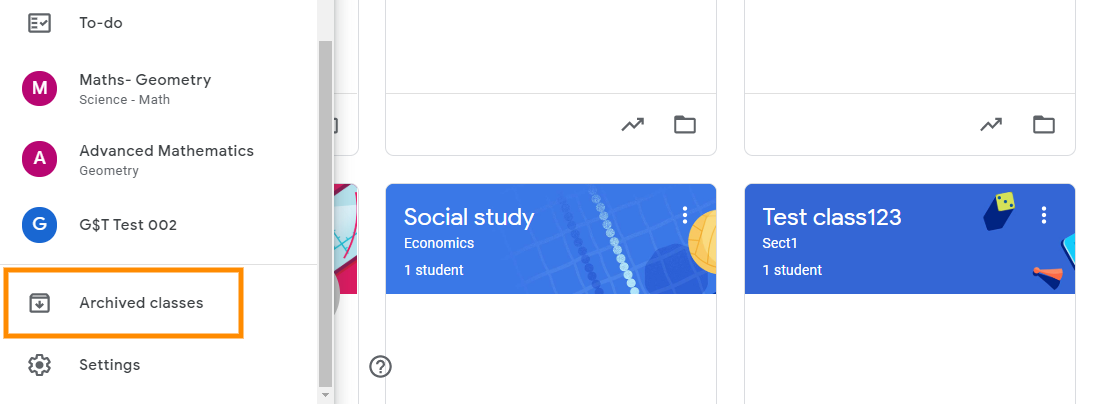
When a classroom is Archived it is still available on the bottom left-hand side section of the Google Classroom website
An archived classroom can be always restored. But if you delete a classroom it will be permanently removed.