

Teacher Assist can be accessed by Super Admins and Google Classroom Teachers by default.
Teachers are Google Workspace users who are assigned as Teachers to a Google Classroom. Teachers who own or have created a Google Classroom can log in and use Teacher Assist by default.
However, this is not always the case. Sometimes, a domain might not use Classrooms just yet but use Teacher Assist to run the sessions instead.
This is possible by creating Teacher Assist Groups that behave like a classroom even if no Google Classroom exists just yet.
Access Rights #
By default, Admins have full access to the tool and thus can create a virtual class group, and assign the students and teachers as they need.
An Admin can also give a Teacher additional privileges that give them the option to create/edit Teacher Assist Groups by assigning Access Rights for any teacher in Teacher Assist.
To do so, navigate to the Admin section in Teacher Assist, select Administration > Access Rights fourth top tab, and click on the “+” button to create a new Access Rights

For the Teacher to be able to create and edit the Teacher Assist Groups in Teacher Assist, an Admin must configure the below access right for the given user/teacher.
- Scope Type: User
- Enter a user Email: teacherXYZ@domain.com
- Area: Create & Edit group
- Type: Enabled
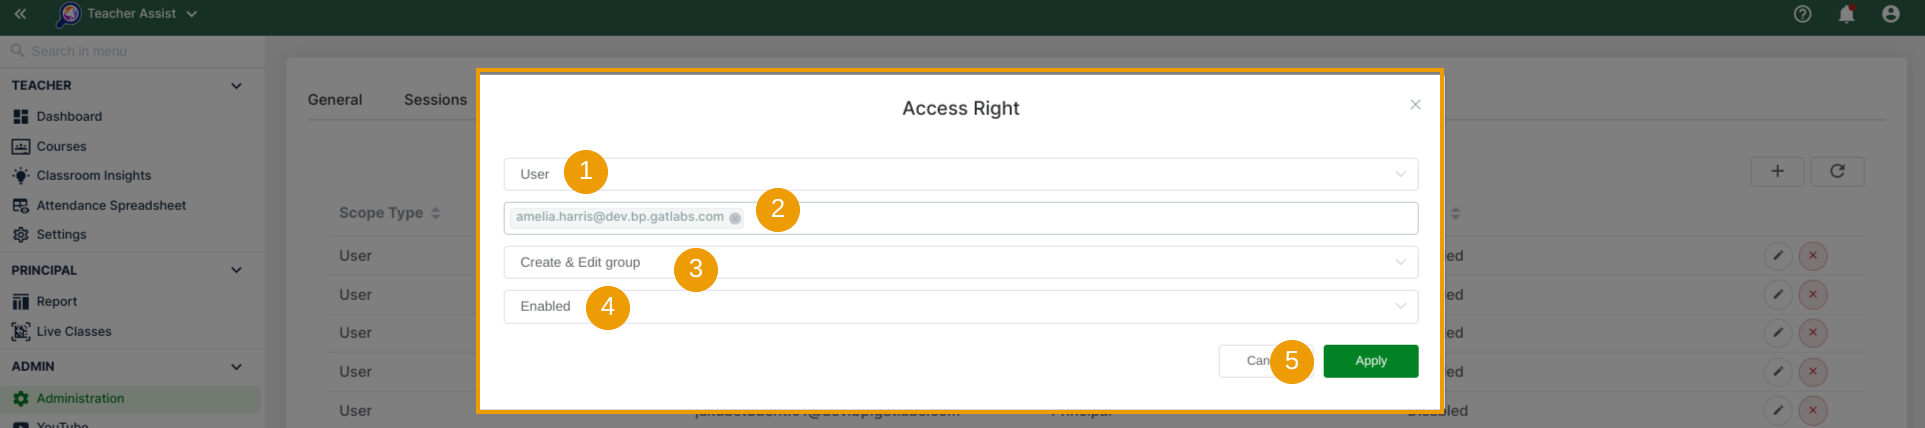
When ready, click on Apply (5). A new Access Right is created for the particular Teacher.
They can be edited (‘pencil’ icon) or deleted (red ‘x’ icon) at any time.

From now on, the designated Teacher has the privilege to create a Teacher Assist Group that can be used to run individual sessions with the students outside of the existing Classrooms.
To do so, the particular Teacher must log in to the Teacher Assist tool by using the teacher’s domain credentials.

In the next step, the Teacher can create Teacher Assist Groups that are different from the existing classes or will behave like the class itself if it doesn’t already exist.
Set up Teacher Assist Group #
Teachers with access rights can navigate to the Courses module (1) and click on the ‘Create group‘ button (2) to initiate the creation process:

The Groups’ creator window will come up.
Enter the new Group’s name first then click OK to proceed.

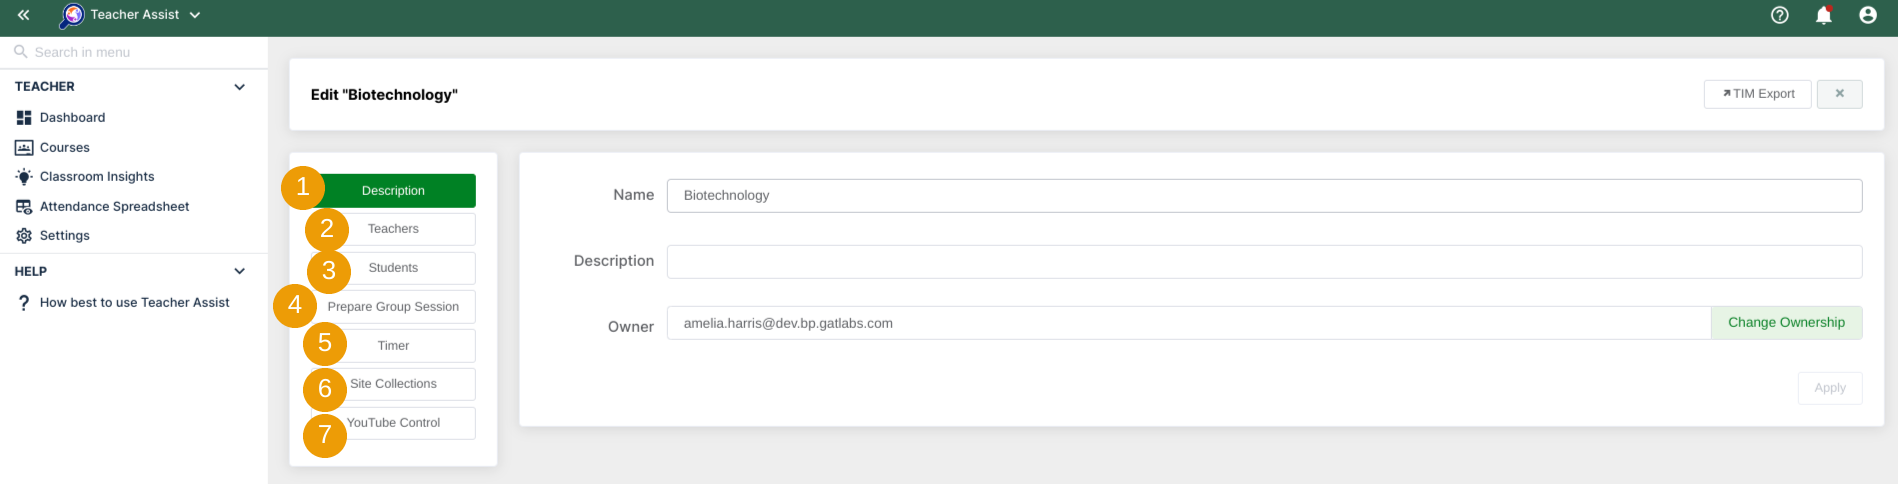
In the next step, the Teacher can create a Group by entering the details into each section:
- Description – The name of the Group session, its description, and the ownership can be changed here;
- Teachers – The user(s) can be added as teachers for this Teacher Assist Group;
- Students – Students can be added here;
- Prepare Group Session – The teacher can block all sides by default, and prepare Allow/Block site access rules from here;
- Timers – Set up a time for how long the groups’ session should last;
- Site collections – Set up and save Sites (Web pages) into a collection – This site collection then can be sent to students
- YouTube Control – Control YouTube by allowing or blocking specific Categories, Channels, Videos and Keywords
- IMPORTANT: Available only for Shield – Site Access Control (BETA) version users
When all is set up, navigate to the Courses module (1), for quicker identification of the TA Groups, make sure to select its Type (2) in one of the search options, and the TA Group card (3) uniquely created by the Teacher will be displayed.

The session can be run from the TA Group card, the Group can be edited or deleted if applicable.


