GAT Flow is a user management tool for Google Workspace domains. It allows the admins to take bulk and automated actions on all users of your domain. We provide a variety of different actions available to any user of the domain.
GAT Flow allows you to add or remove students and teachers from Google Classroom. We also have the option of changing the owner of the Google Classroom owned by specific users. This is ideal when the teacher is no longer part of the school and you want to transfer the classroom to a secondary teacher or to a specific user. Below we will show how changing the owner of the Google Classroom can be possible.
Create a workflow to change the owner #
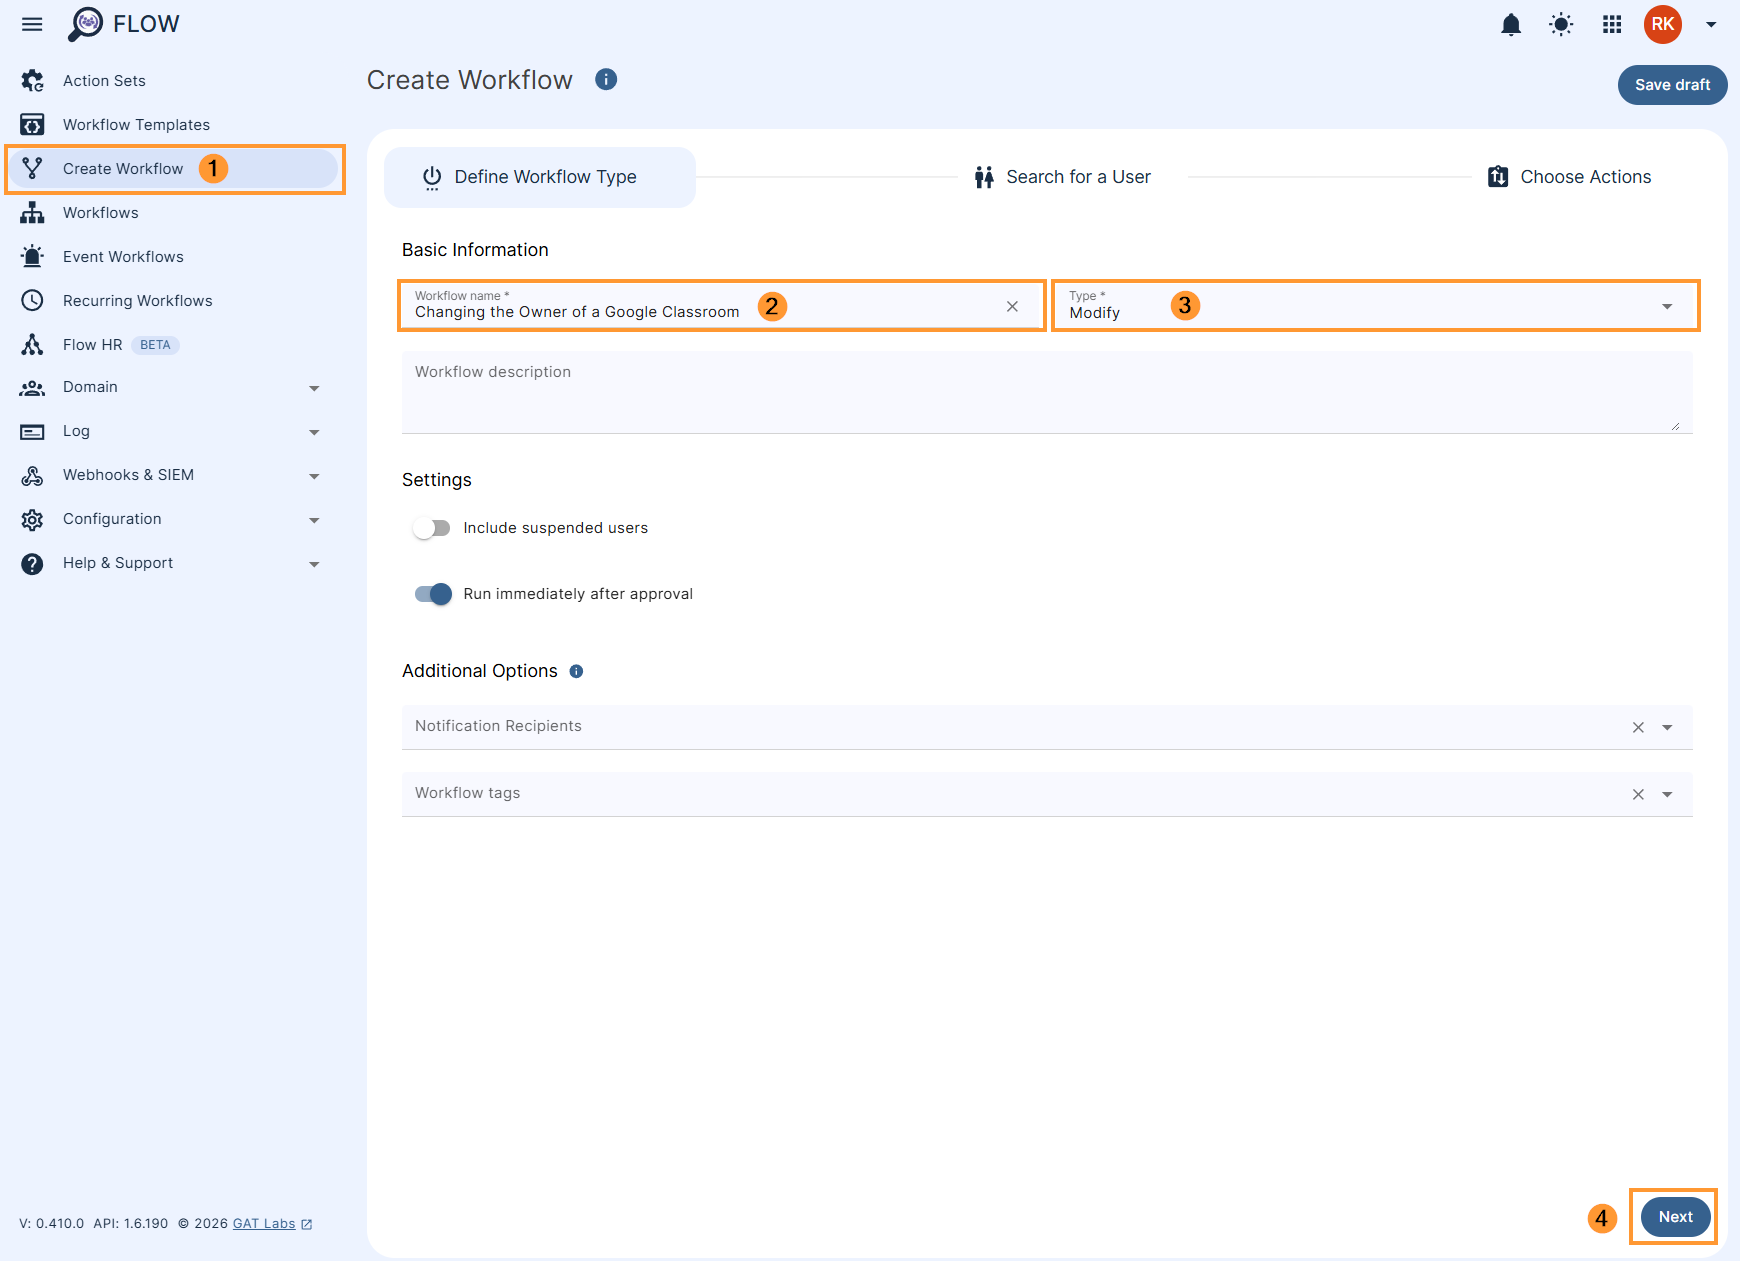
First, navigate to Flow > Create workflow (1).
In the Workflow fill in the details. You can set it up also as an Event workflow or Recurring workflow.
- Name – enter the name of the workflow (2)
- Description – enter a description for the workflow (optional)
- Type – select what workflow type you would like to run
- Modify – modify existing users (3)
- Include suspended users – enable or disable to allow you to select users who are currently suspended:
- If enabled – you will be able to select even users who are suspended
- If disabled – you will be able to select only users who are active
- Run immediately after approval – provides an option to schedule the workflow to run in a selected future time (optional)
Later click Next (4) to proceed.
Search for a user #
In the Search for a users subtab (1), select the user whose class (2) you want to change the owner of and then click on Next (3).

Choose action #
In the Choose actions click on the (+) button (1) and then click the Add action button (2)
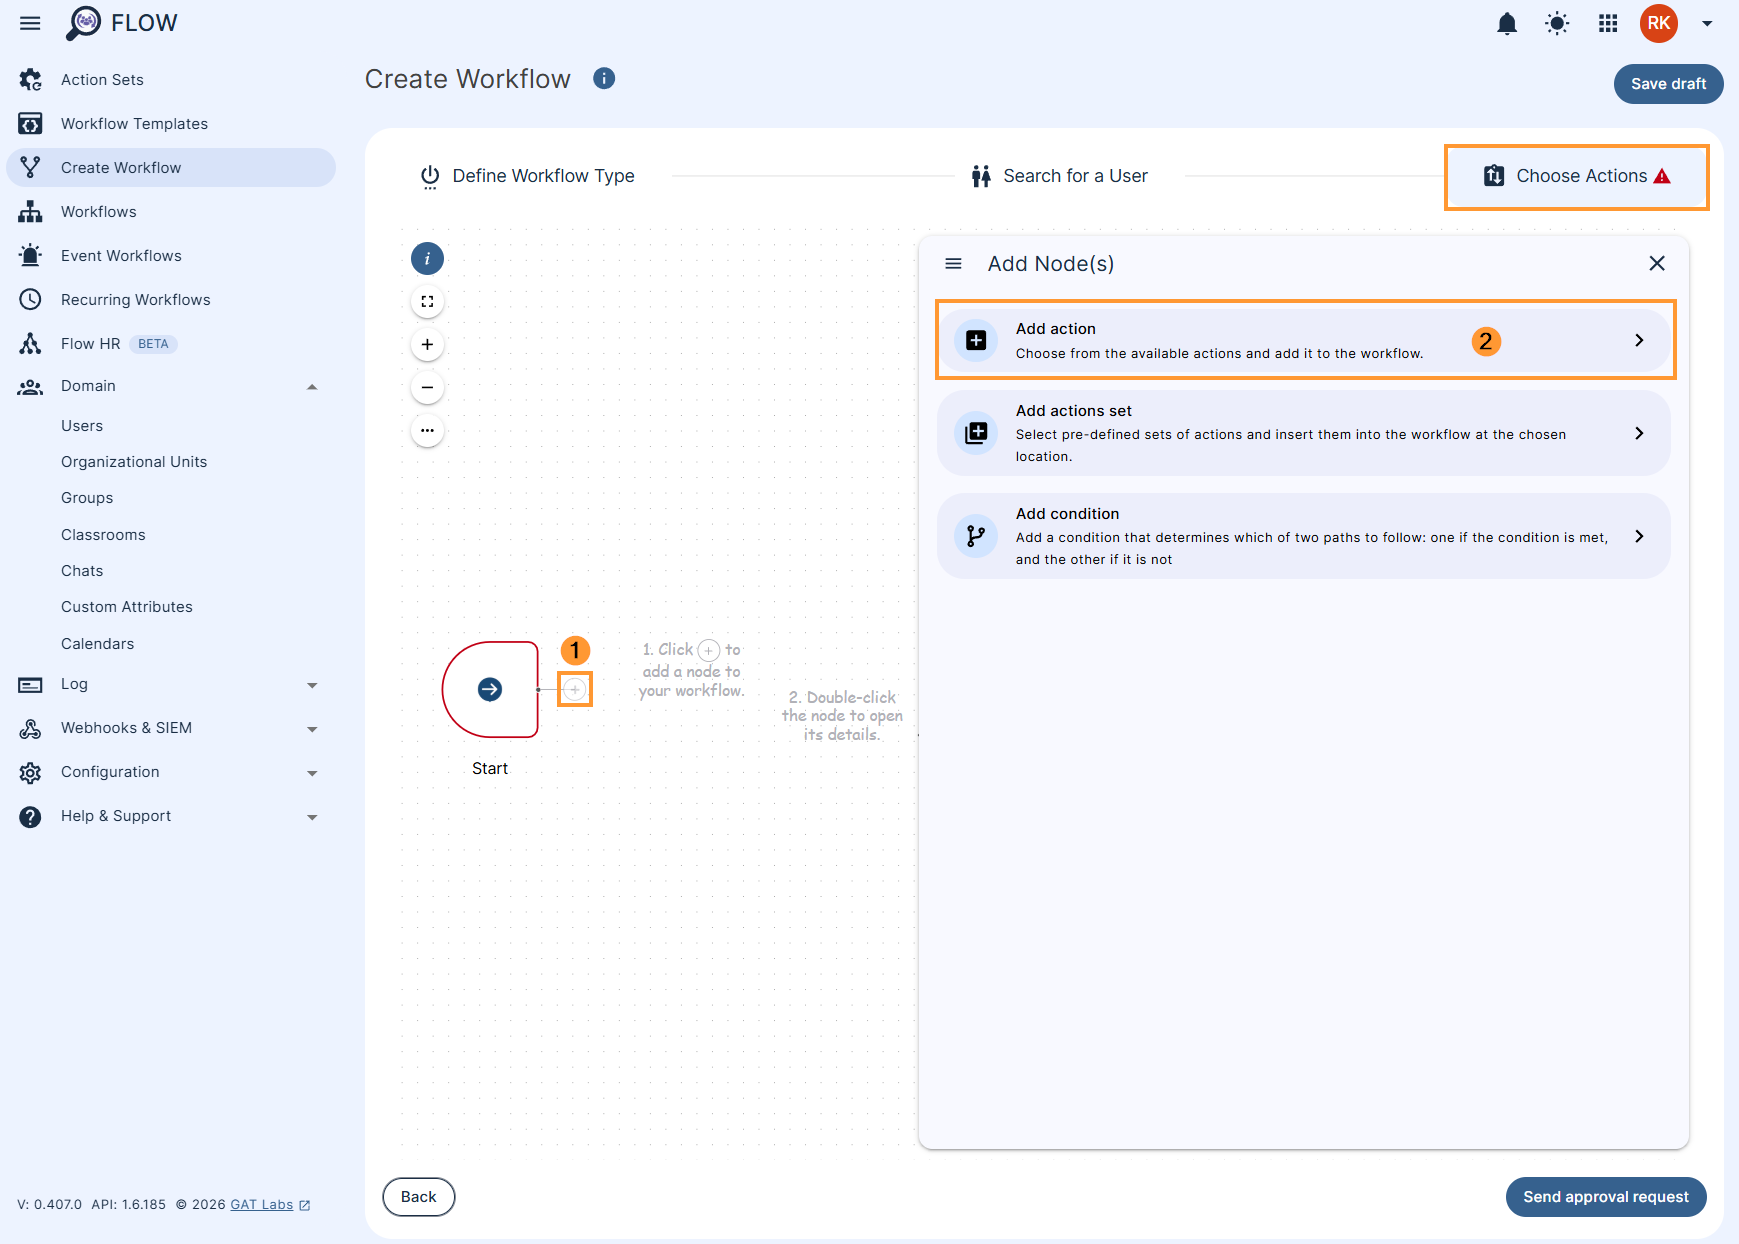
Search and find Change classrooms owner (2) under the Classrooms tab (1).
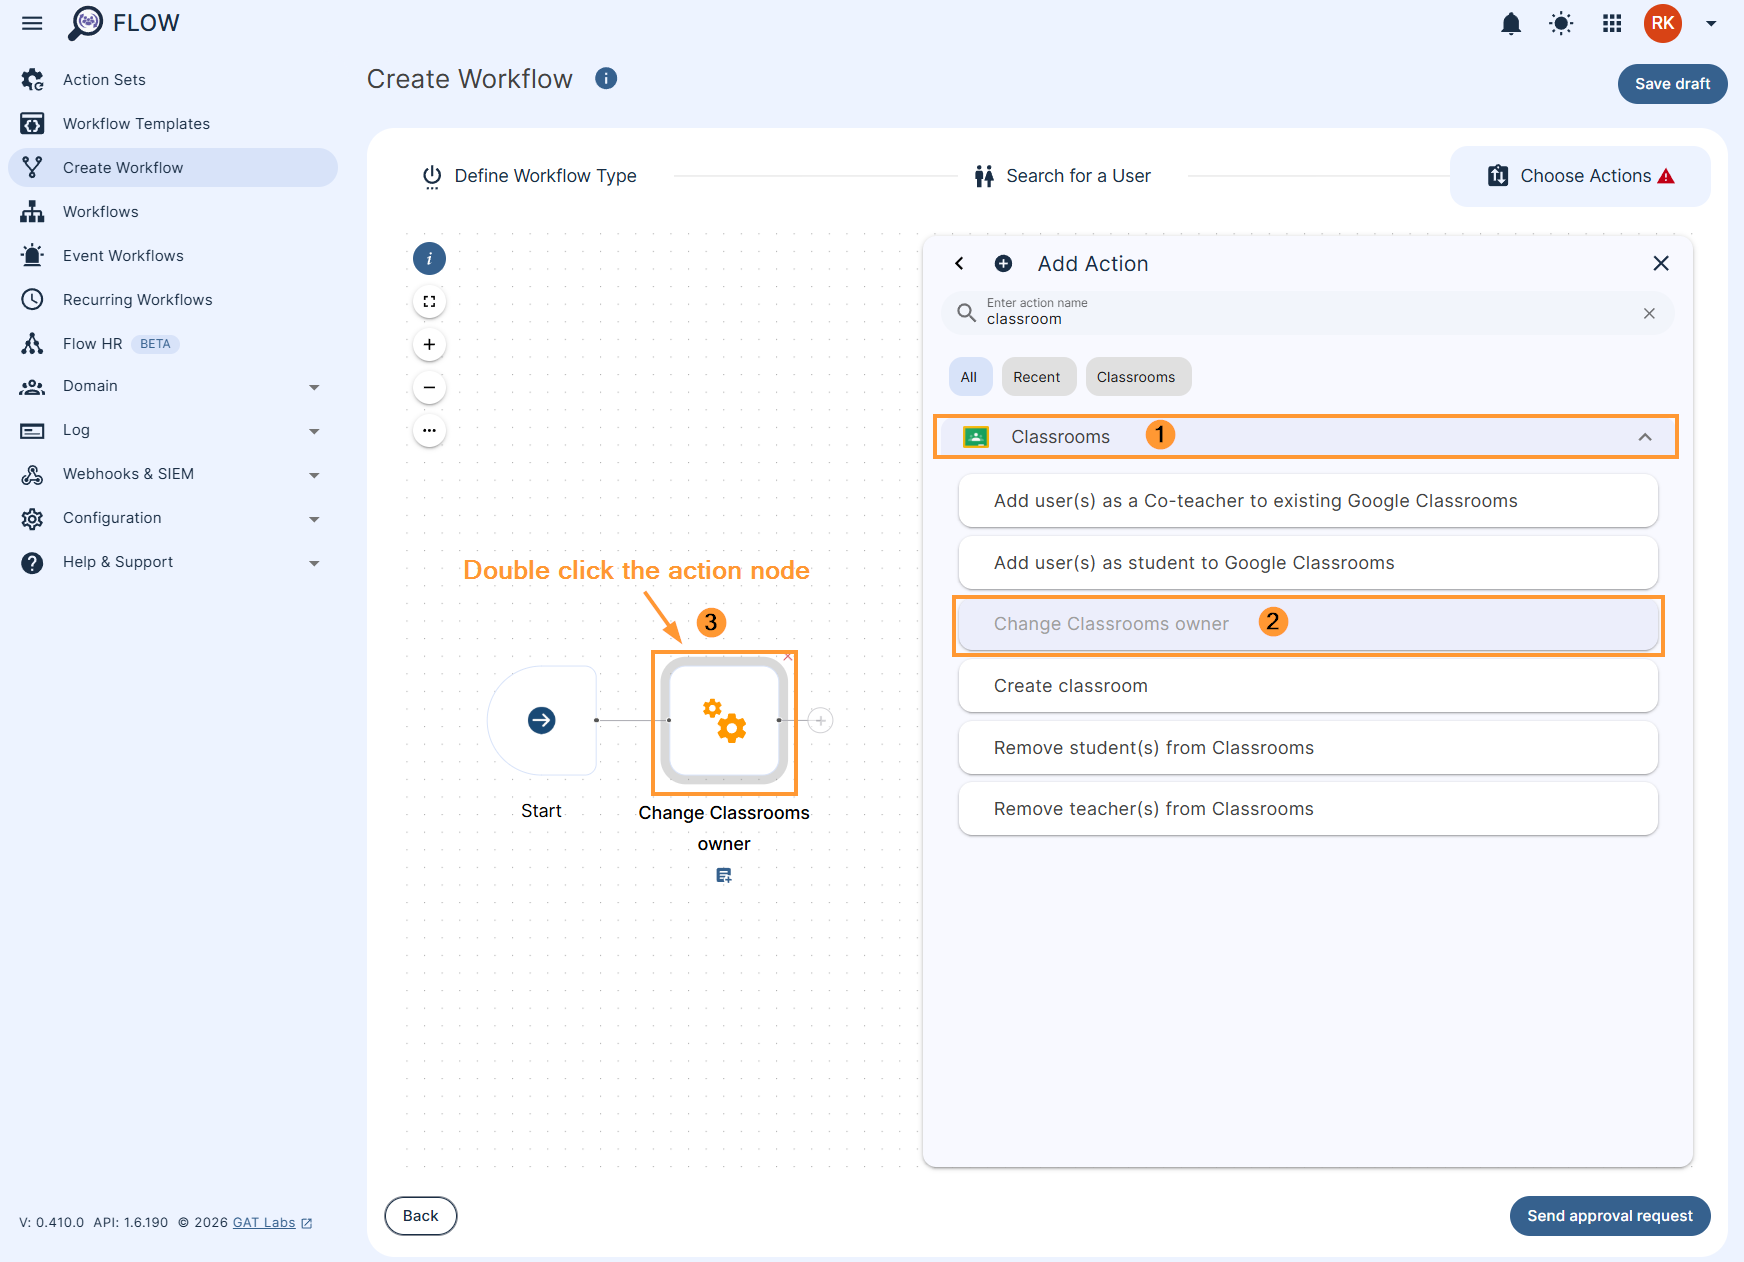
After you selected Change classroom owner (1), fill in the details by double click the action node (3).
There are two options:
- Transfer the ownership to a secondary teacher
- Transfer to a specific user
Action on Suspended or Deleted user #
The action of changing the owner of Google classrooms will NOT work if the Owner is Suspended or Deleted.
Note: If the owner is deleted the classroom becomes Orphaned and the owners cannot be altered.
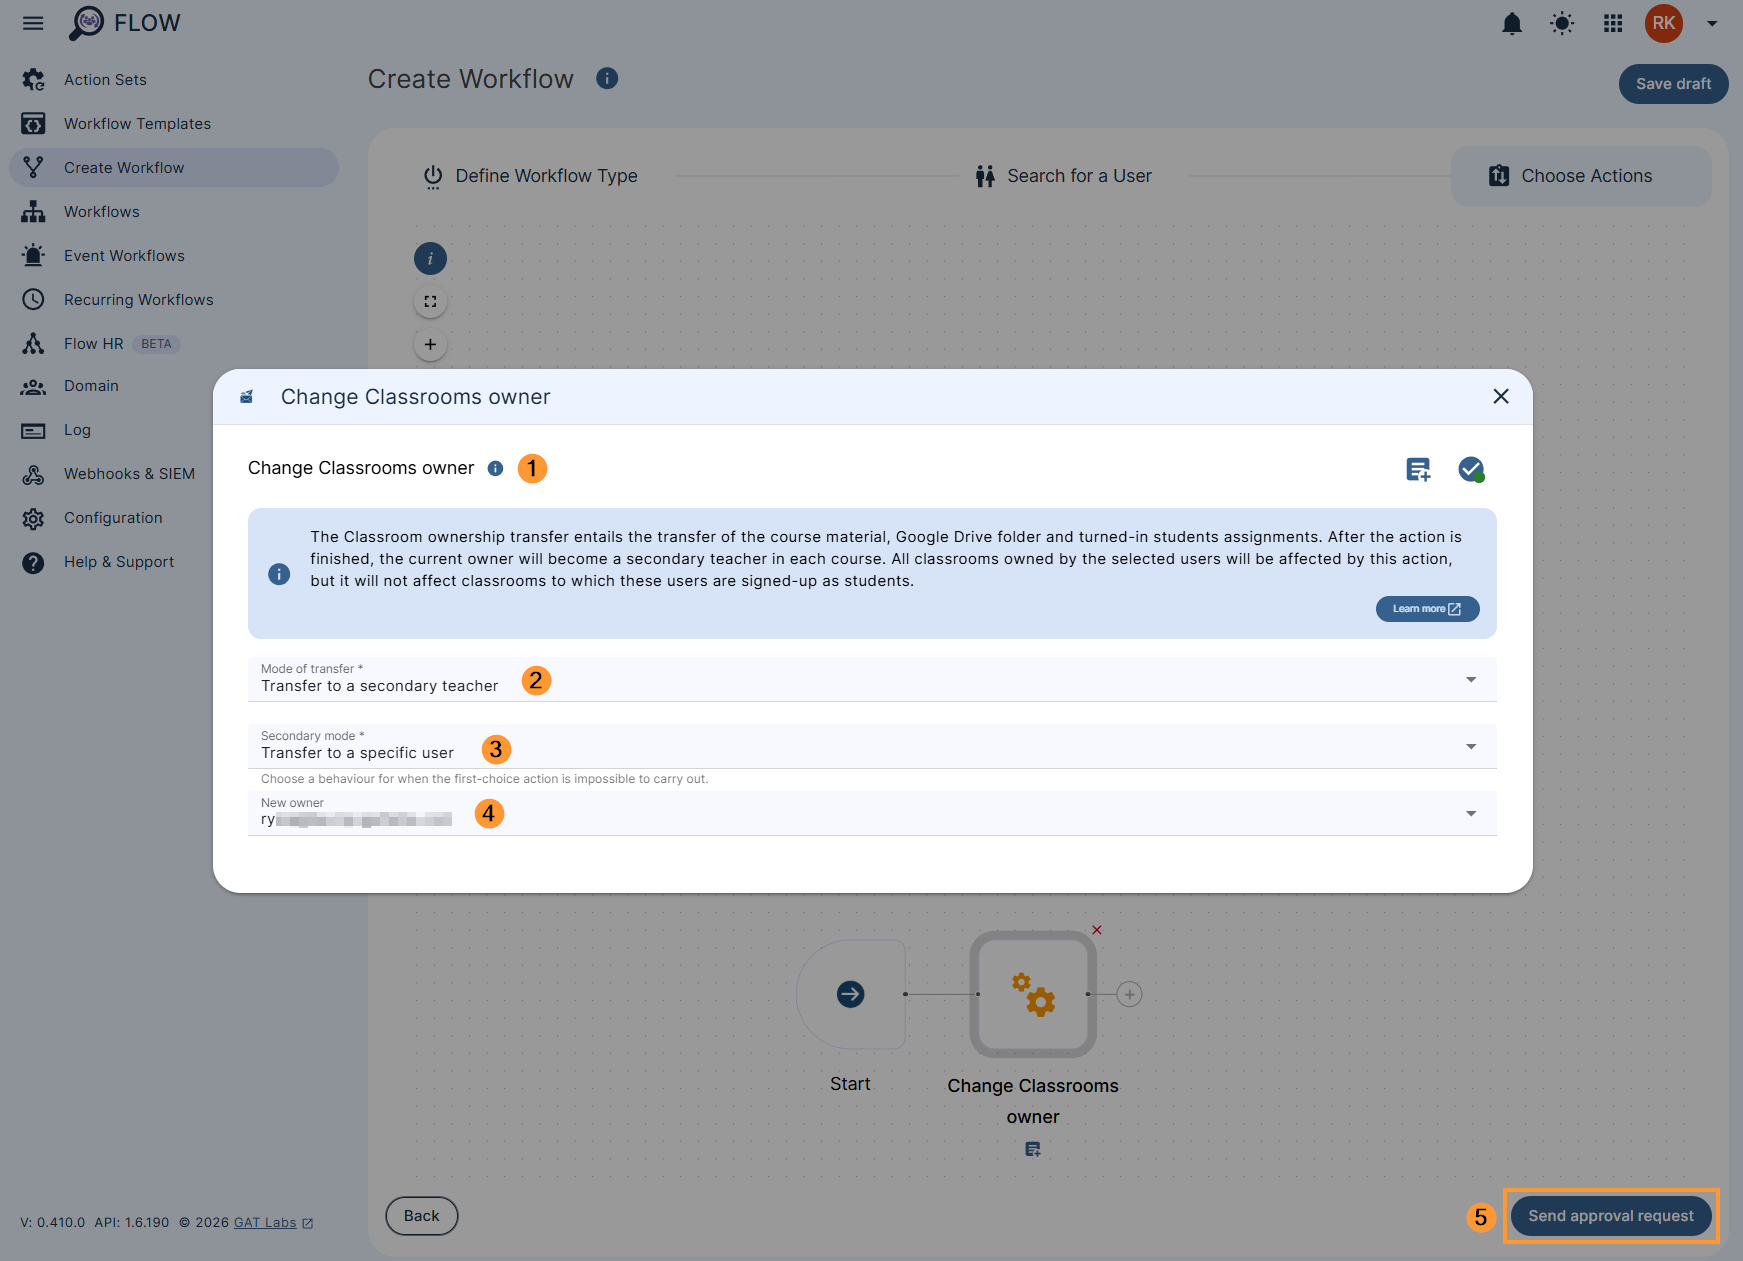
Transfer the ownership to a secondary teacher #
For the Transfer to a secondary teacher (2), there will be an option to choose its behaviour.
Select a behaviour for when the first choice action is impossible to carry out.
- Select mode – display error message
- Transfer to a specific user (3) – pick and select the user to whom the ownership will be transferred to
In the next step, enter the new owner address (4) and click on Send approval request (5).
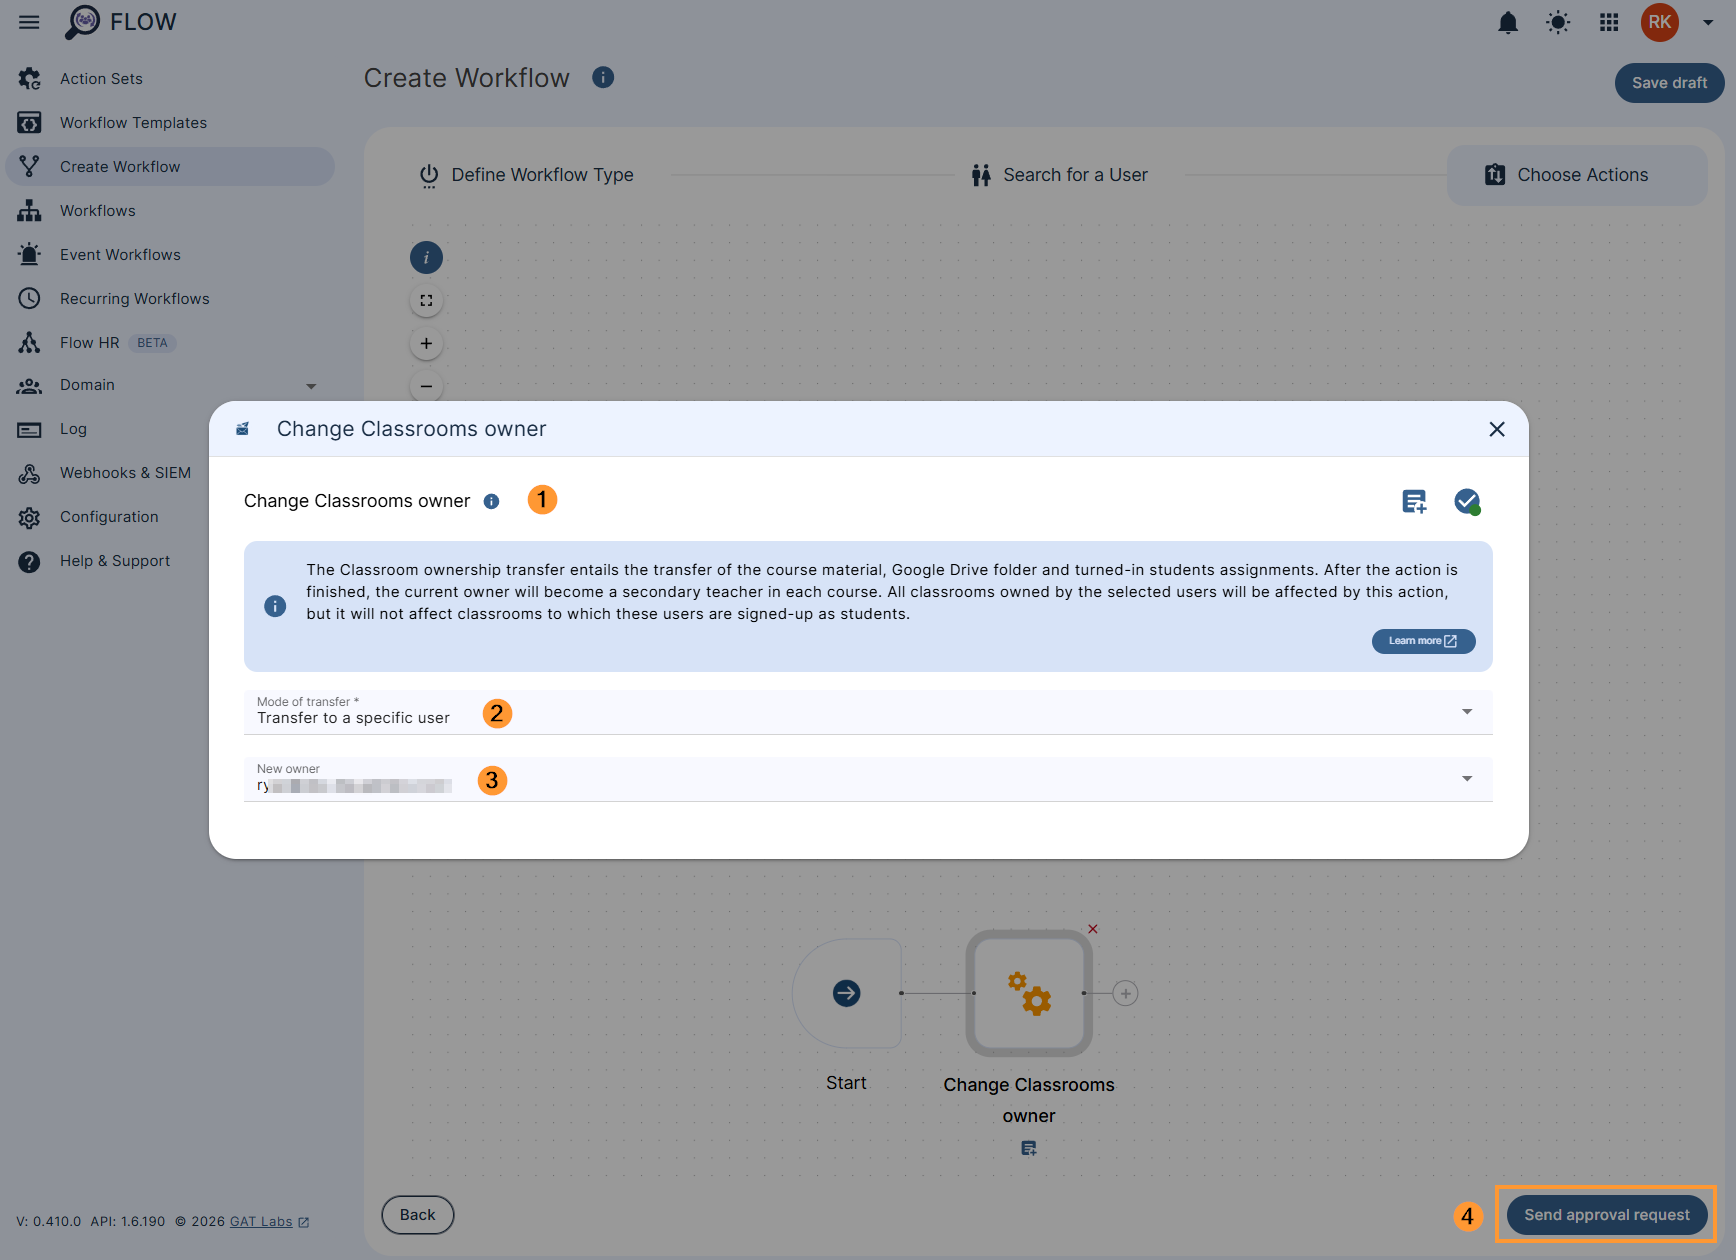
Transfer the ownership to a specific user #
You can also select Transfer to a specific user (2) as below.
Enter the new owner address (3) and click on Send approval request (4).
Warning!
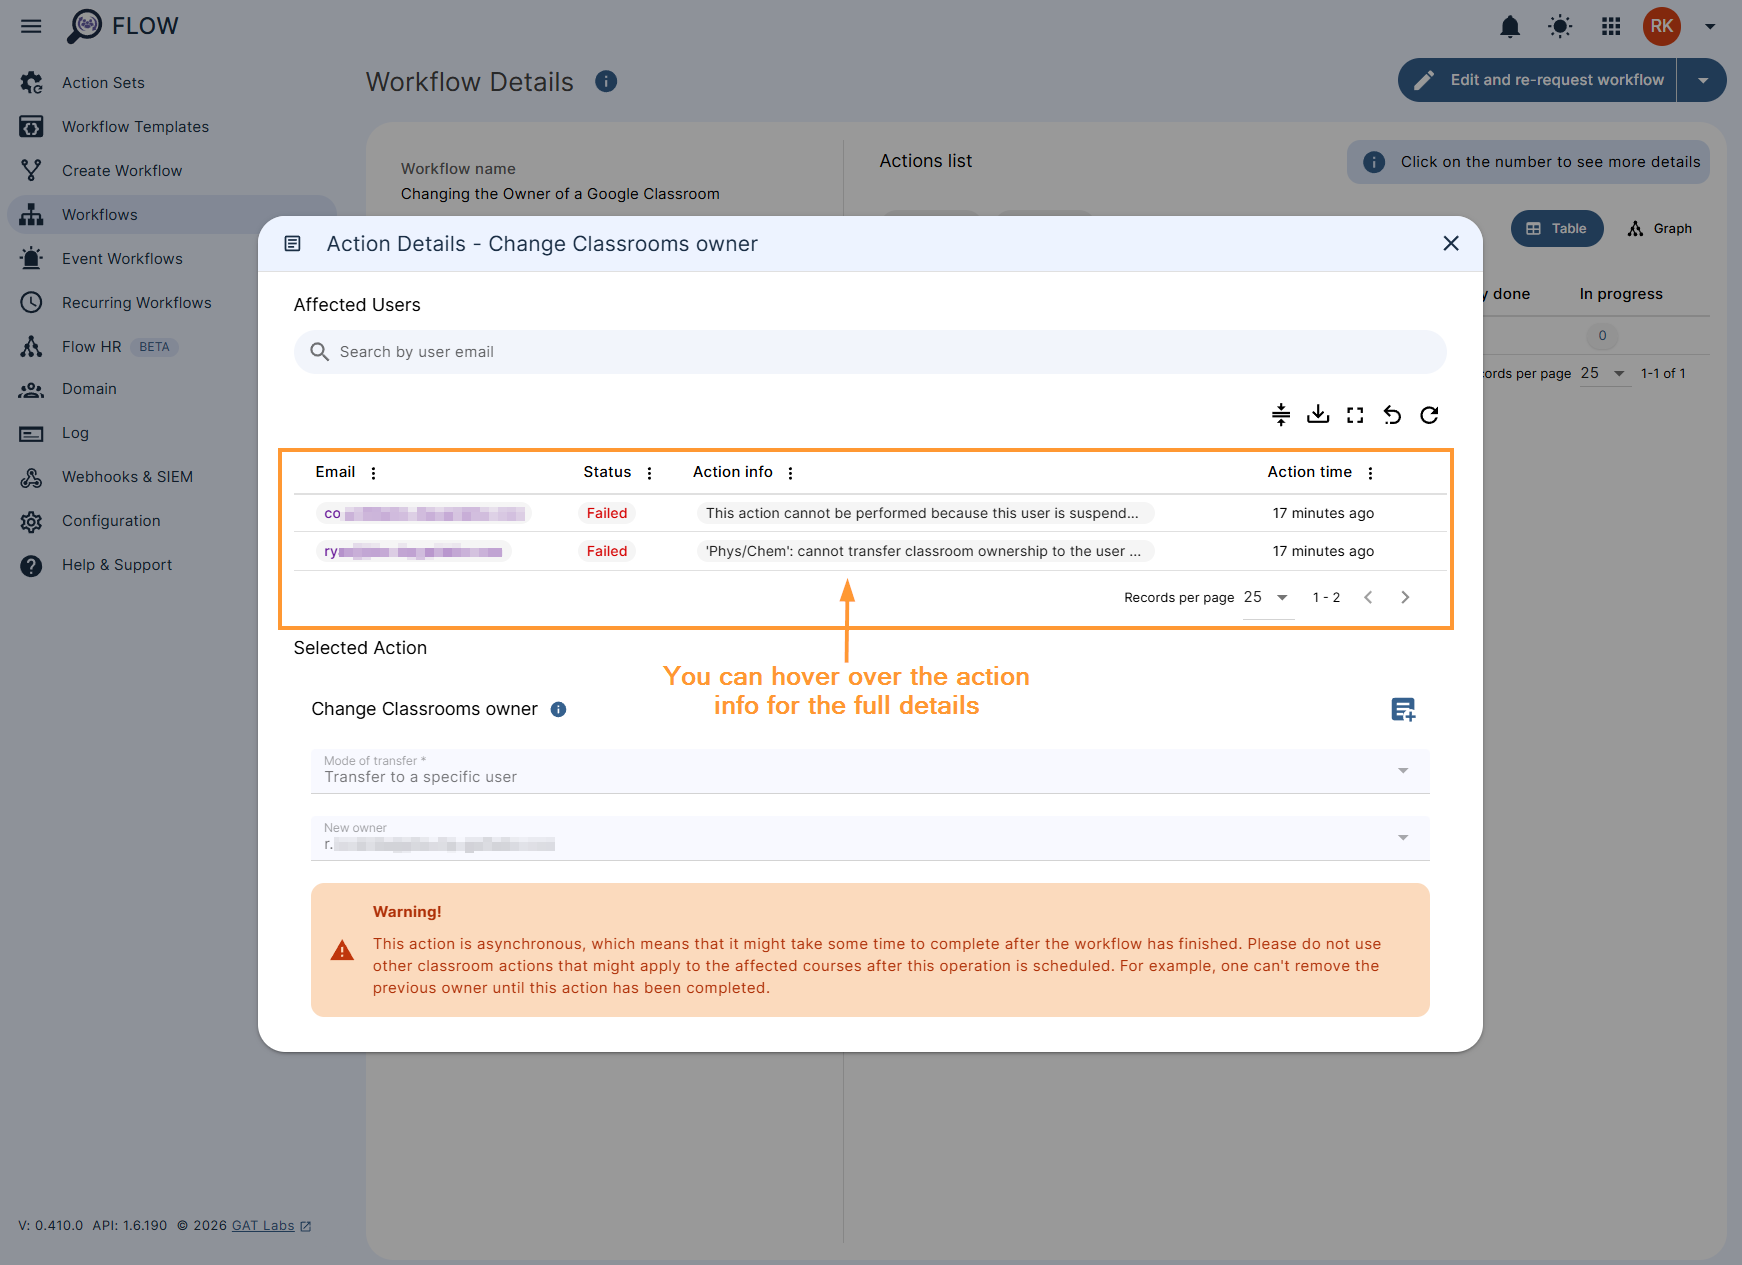
This action is asynchronous, which means that it might take some time to complete after the workflow has finished. Please do not use other classroom actions that might apply to the affected courses after this operation is scheduled. For example, one can’t remove the previous owner until this action has been completed.
This action will not work for suspended users. For these users, the result will show “Failed” in the Workflow summary after it is completed.
Pre-approval #
Note: You could also have pre-approval enabled, if that is the case, you can set the job to be executed right away.
Result #
After approving the workflow and making running, all classrooms owned by selected users will be changed as you required.
Note: If the owners cannot be changed or users are suspended, appropriate messages will appear.
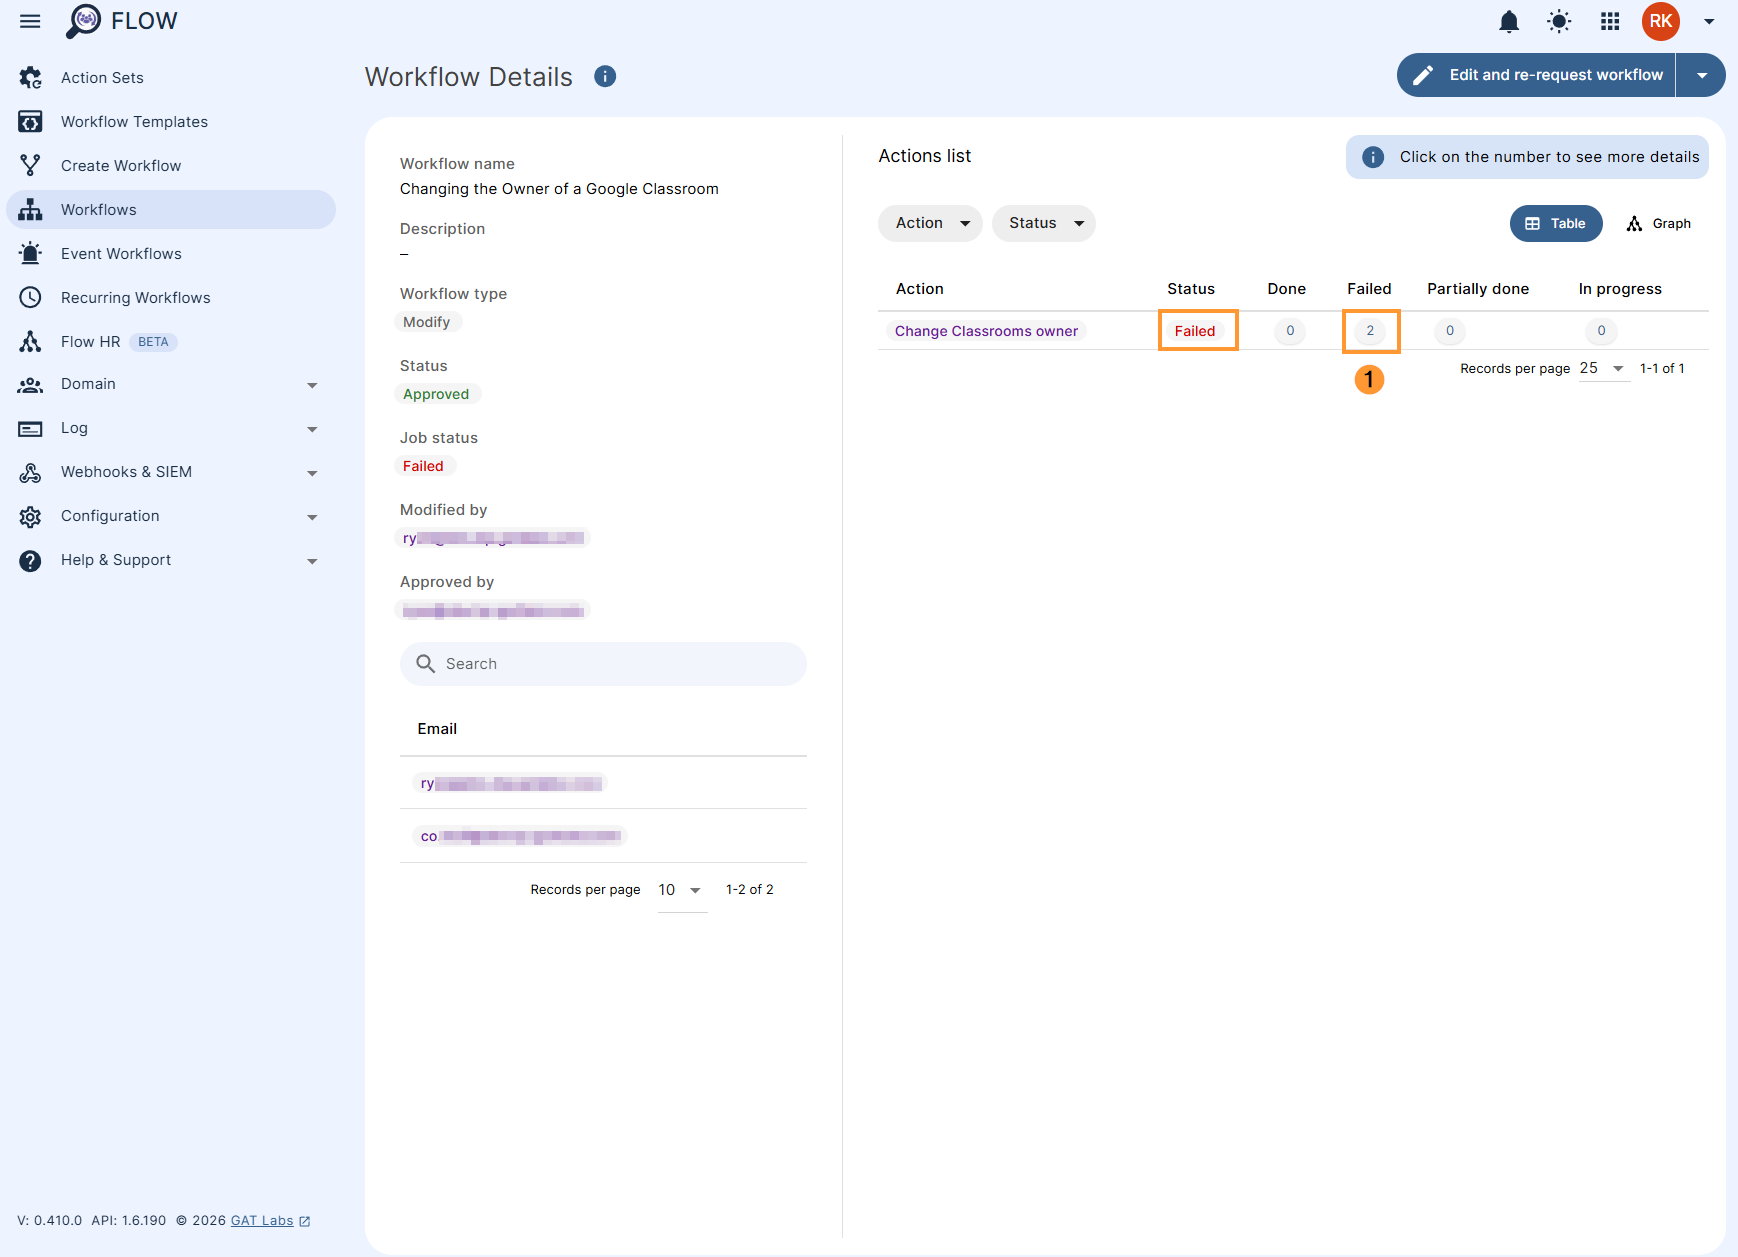
Result of change was unsuccessful #
Navigate to Workflows (1) and see more details by clicking on the page icon (2).
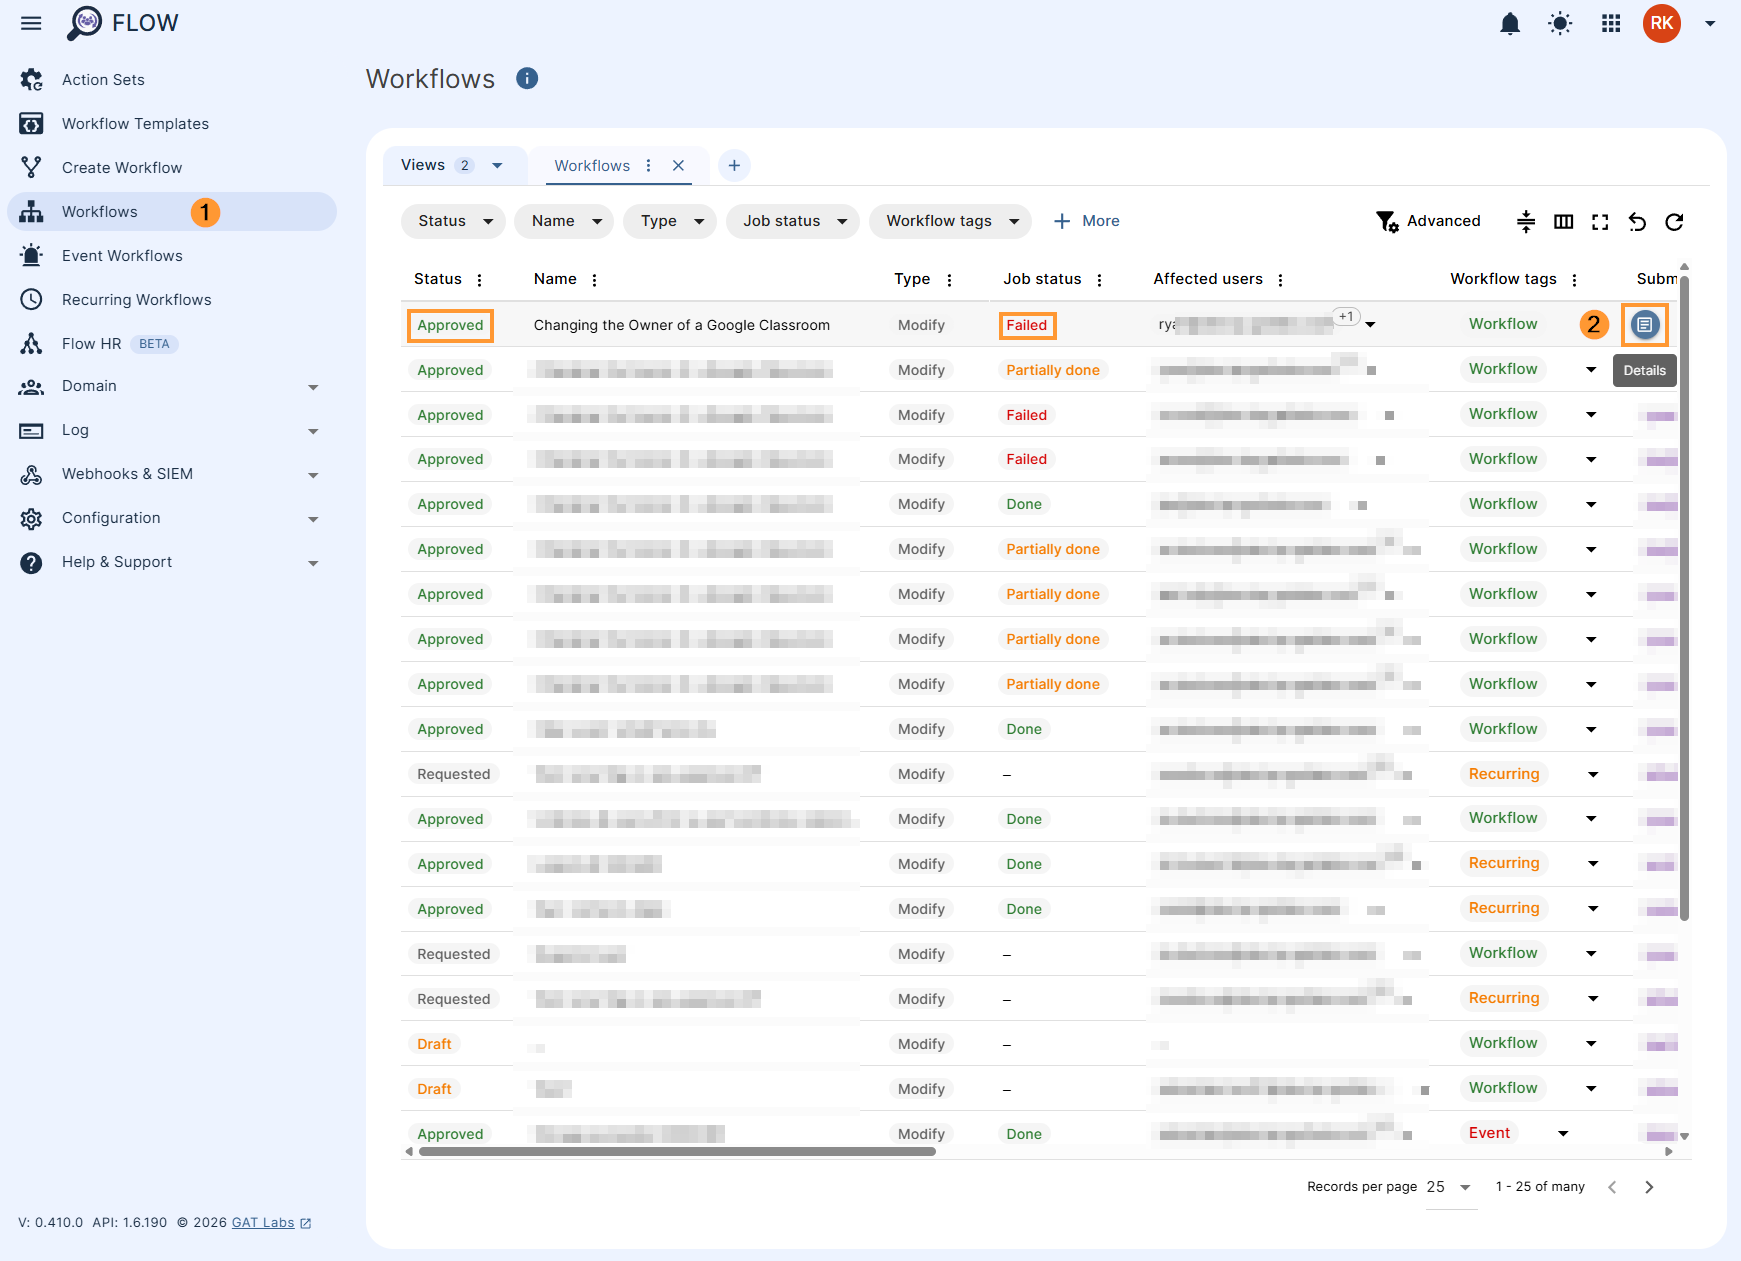
Then, you will view details that will show why the change was not successful (1).
For example:
- Ownership cannot be transferred as users are suspended
- Ownership cannot be transferred to a user who is enrolled as a student in that specific classroom