

Custom Tags #
Custom Tags are tags that can be created by the Admin. Those Tags can then be used by the Admin to assign the Tag to a specific set of data for Drive files and Emails.
The Emails and Drive files can be marked by the Tag and filtered by it.
How to Create Custom Tags #
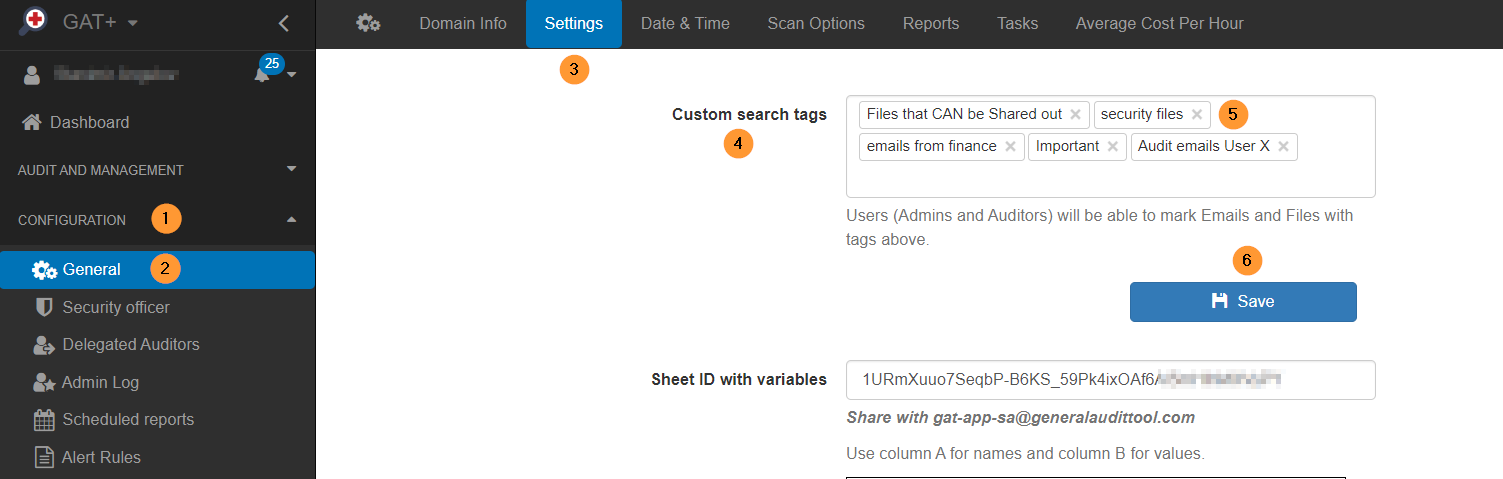
Navigate to GAT+ → Configuration → General → Settings → Custom search tags → Add a tag → Save
 1")
Add or Remove Tags to and from Files or Emails #
When the appropriate tags have been created, they will be accessible to other super Admins or Delegated auditors in the Email and Drive audit.
Add TAG for Emails #
Navigate to GAT+ → Configuration → General → Settings → Custom search tags – Add Tag (Enter name for the tag (new custom tag)) click on it > Save

Whent the Tag is created you can go on and assign Emails to the Tag.
Navigate to Email > Emails > Apply filter (funnel icon)
Search for any emails needed.
As example:
- Accounts = user@email.com
- Gmail date (relative) in the last X days)

Click on Appy and result will be displayed in the table.
Add tags #
Use the checkbox next to the email subject to select them (1).

Note: Click on the check mark beside “Subject” will select all items of the search.
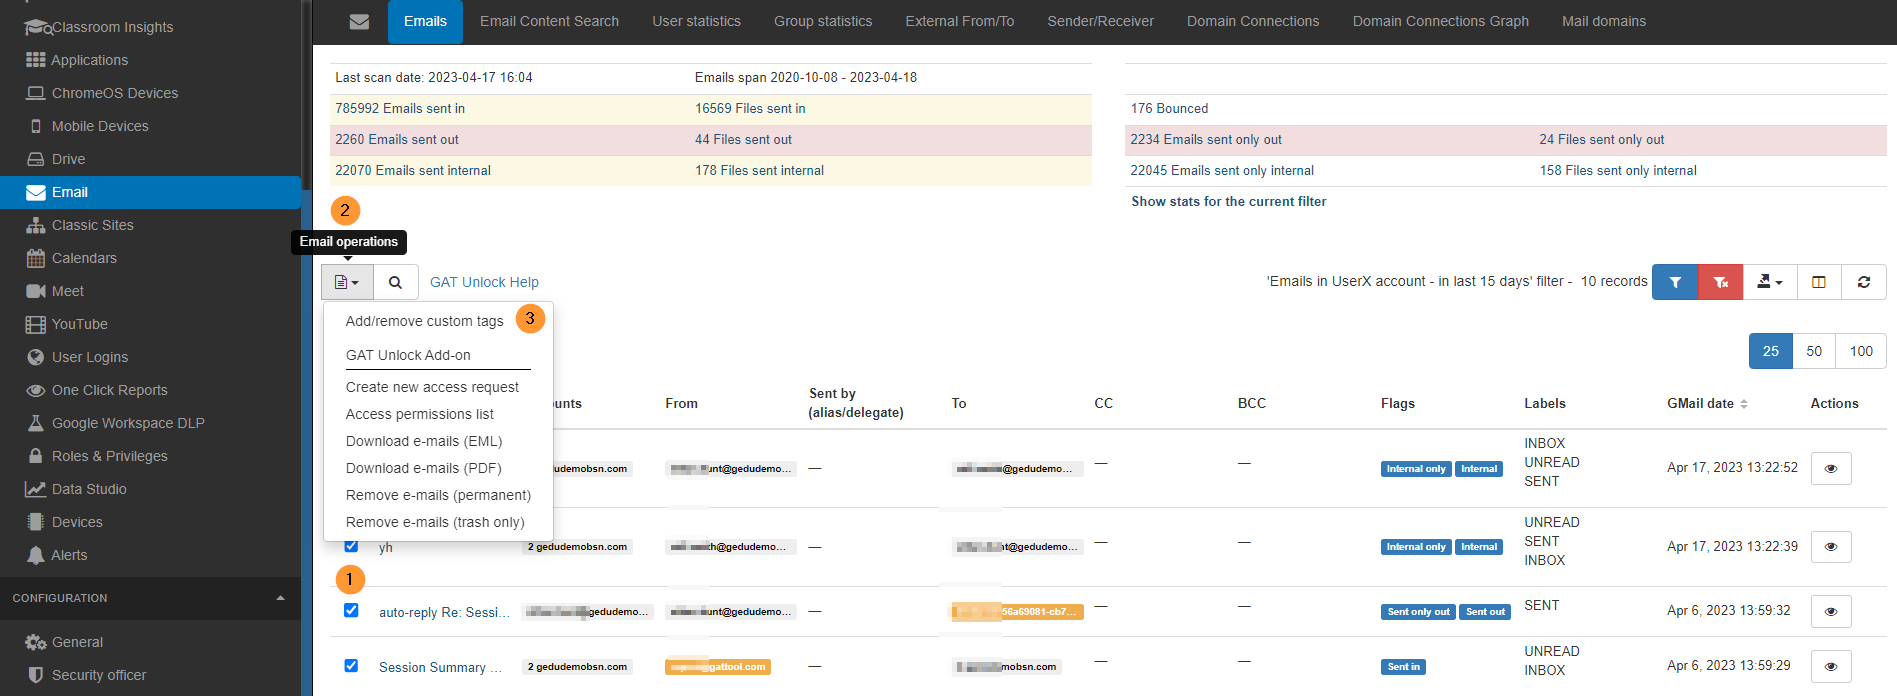
When the emails are selected click on the Email operations button (2).
A drop-down menu will be displayed select Add/Remove custom tags.
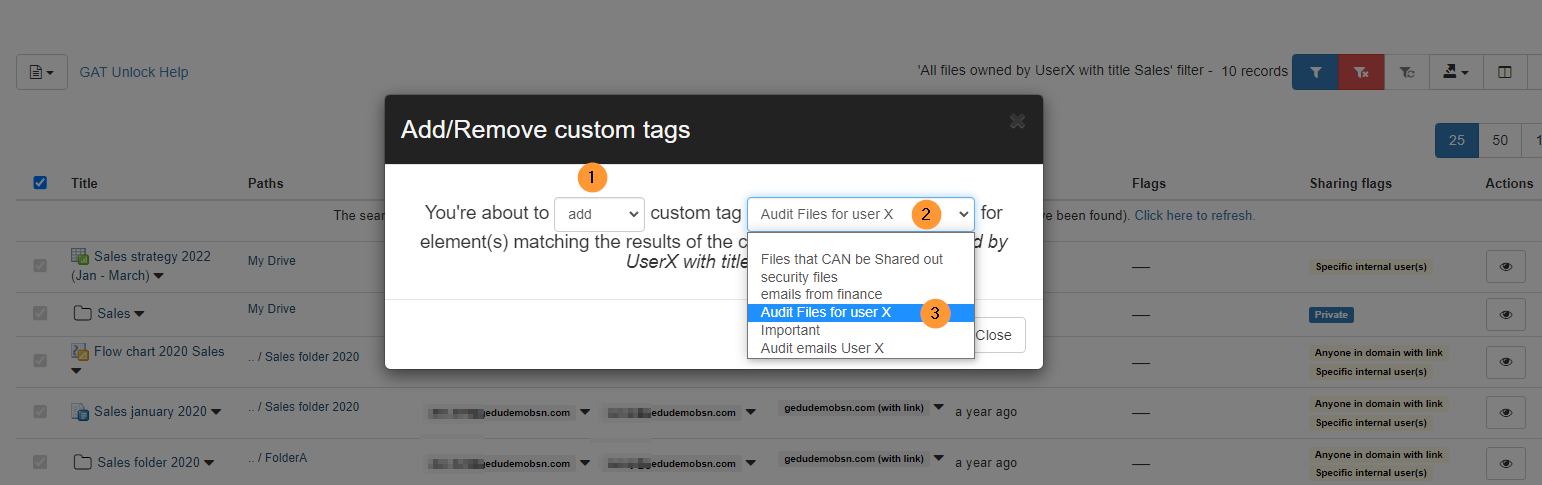
A pop-up menu will be displayed. Fill in the details required:
- Add/Remove the custom Tag
- Choose the tag required
- Confirm – The selected Emails will be assigned to the chosen Tag

Select Add and choose your custom tag and then Confirm.

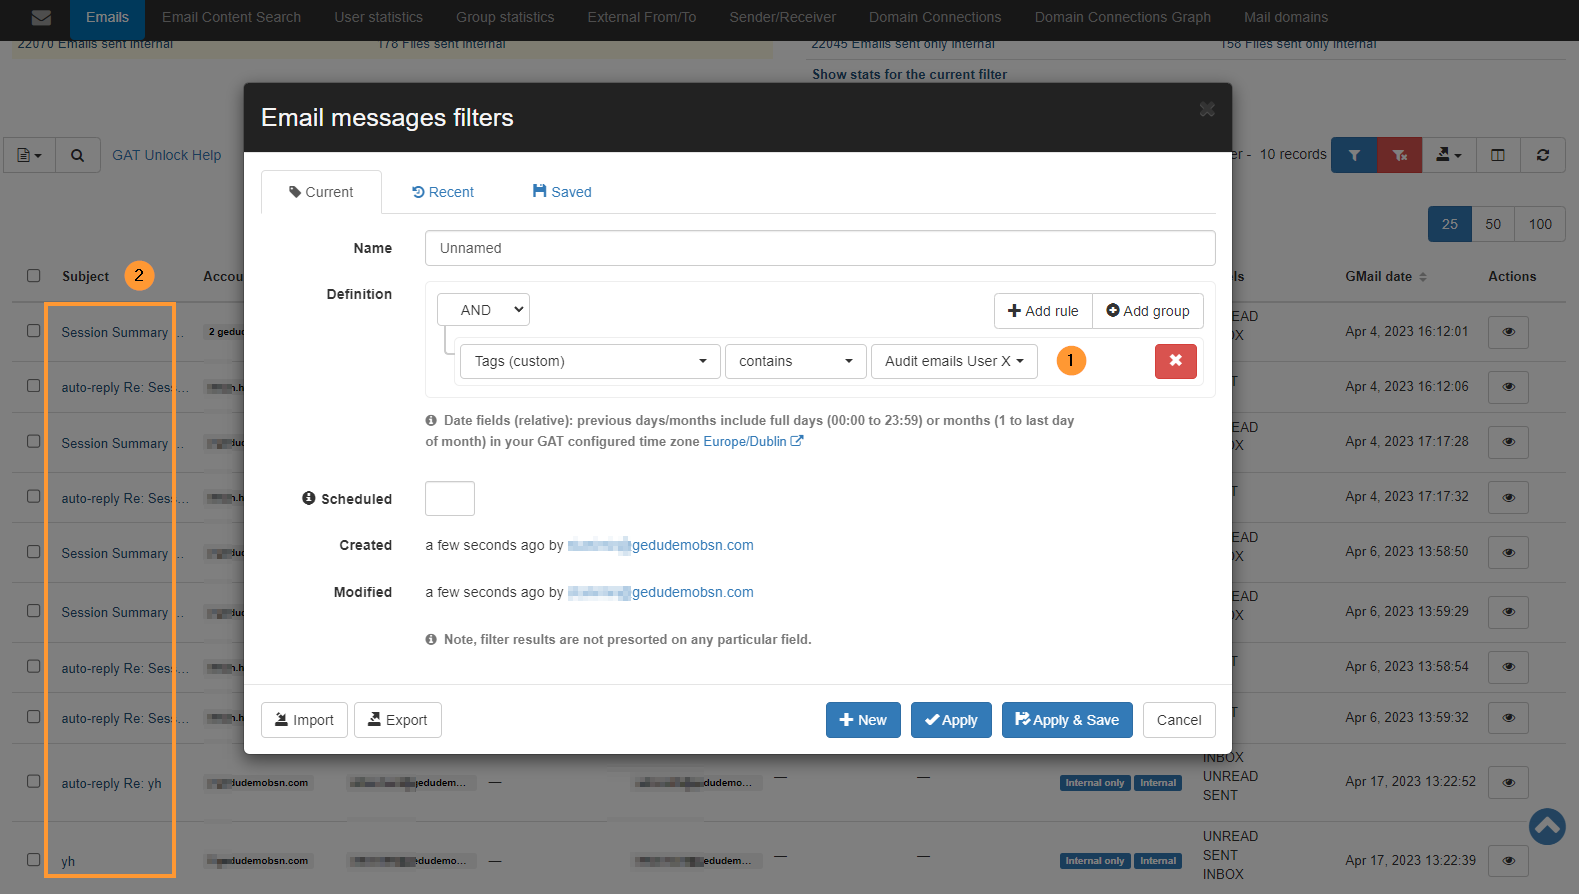
Result for Emails #
The Tag (Audit emails User X) will be assigned to the selected Emails.
Search for the Tagged emails #
Click on the “Apply Custom filter” button.
In the search, the Definition area selects the search operator Tags (custom) and chooses the tag you wish to view.
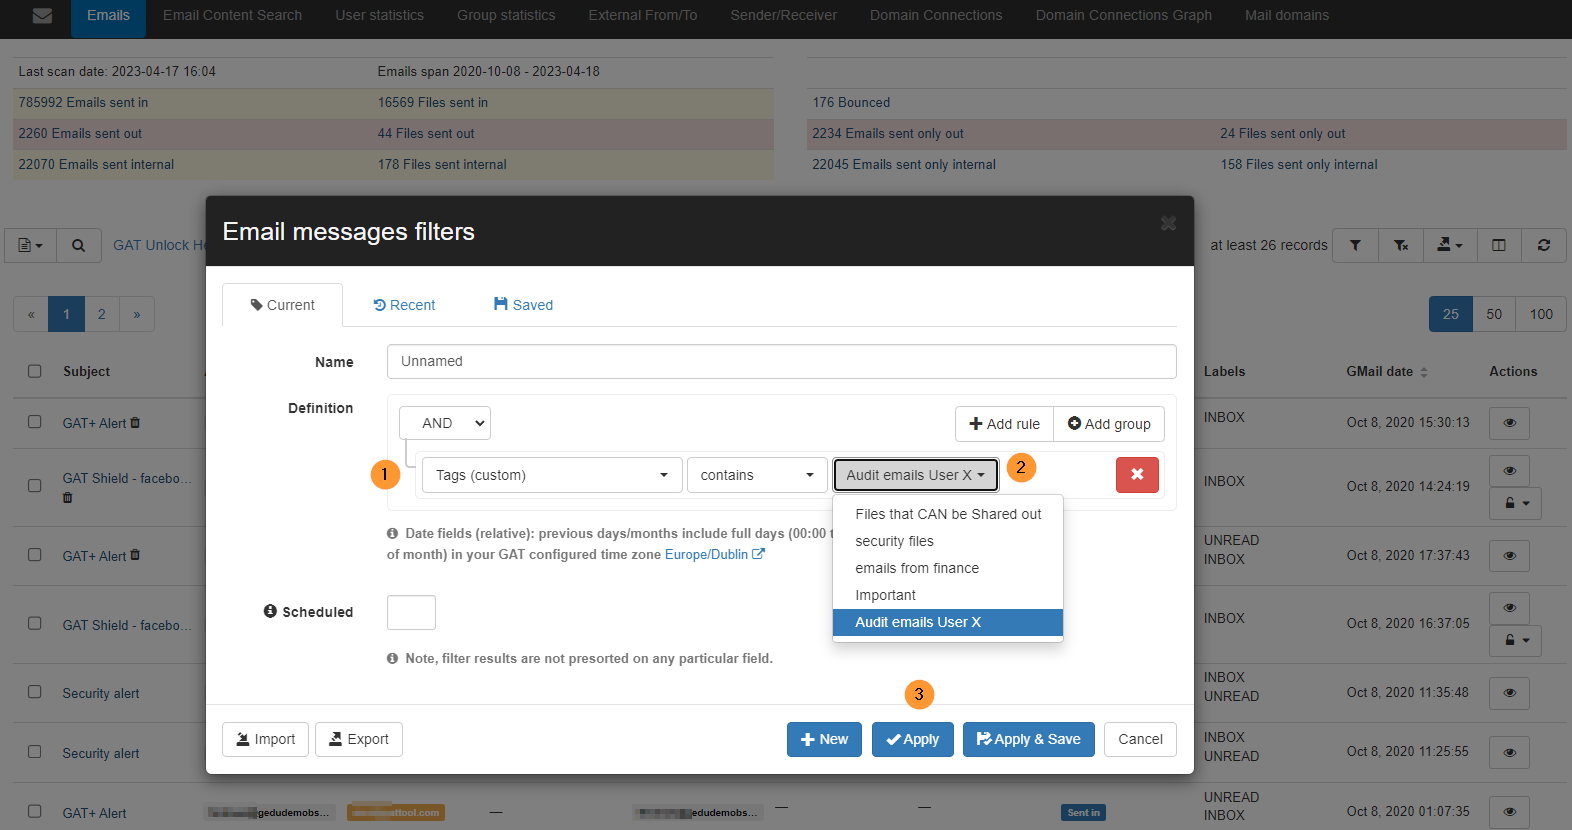
The result will show the emails with the assigned Tag.
Remove and Edit Emails from the Tag #
Select the Emails (all or any) of the “Tagged” emails. Click on the Email operations button. Drop-d0wn menu will be displayed select Add/Remove custom tags.
A pop-up menu will be displayed. Fill in the details required:
- Remove/Add– Element from the selected Tag
- Choose the tag required
- Confirm – The selected email will be removed from the Tag

Add TAG for Files #
Navigate to GAT+ → Configuration → General → Settings → Custom search tags – Add Tag (Enter name for the tag (new custom tag)) click on it > Save

Whent the Tag is created you can go on and assign Files to the Tag.
Navigate to Drive > Files > Apply filter (funnel icon)
Search for any files you need.
As example:
- Title contains “Sales”
- Owner equal – UserX

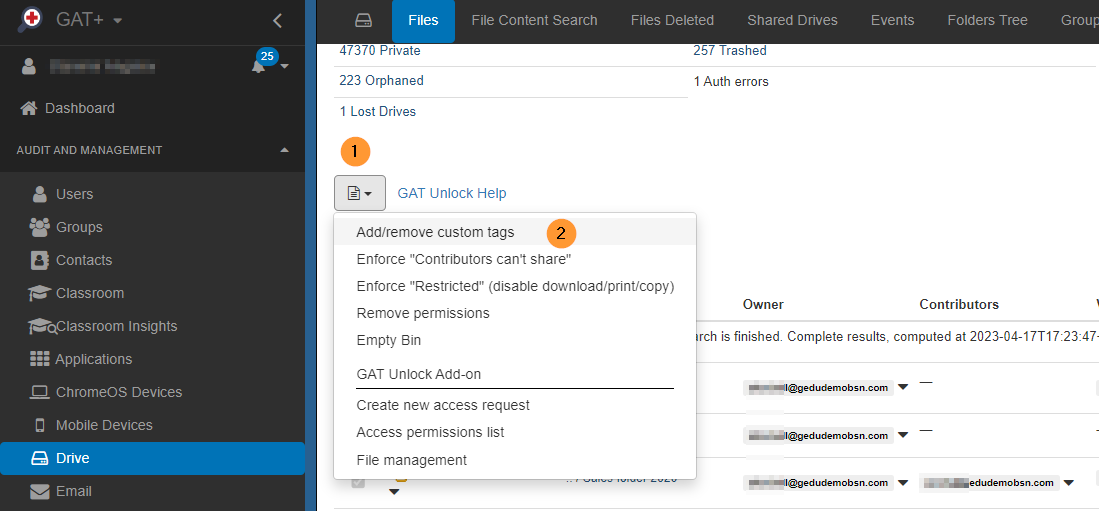
When the result is displayed select all or any files you want to assigned a Tag into.
Click on the checkmark beside each file or besided Title (1) to select all itmes.

A drop-down menu will be displayed select Add/Remove custom tags.
A pop-up menu will be displayed. Fill in the details required:
- Add/Remove the custom Tag
- Choose the tag required
- Confirm – The selected Files will be assigned to the chosen Tag
Then assing and add the tag to the files.
Select Add and choose your custom tag and then Confirm.

Result for Files #
The Tag (Audit Files for User X) will be assigned to the selected Emails.
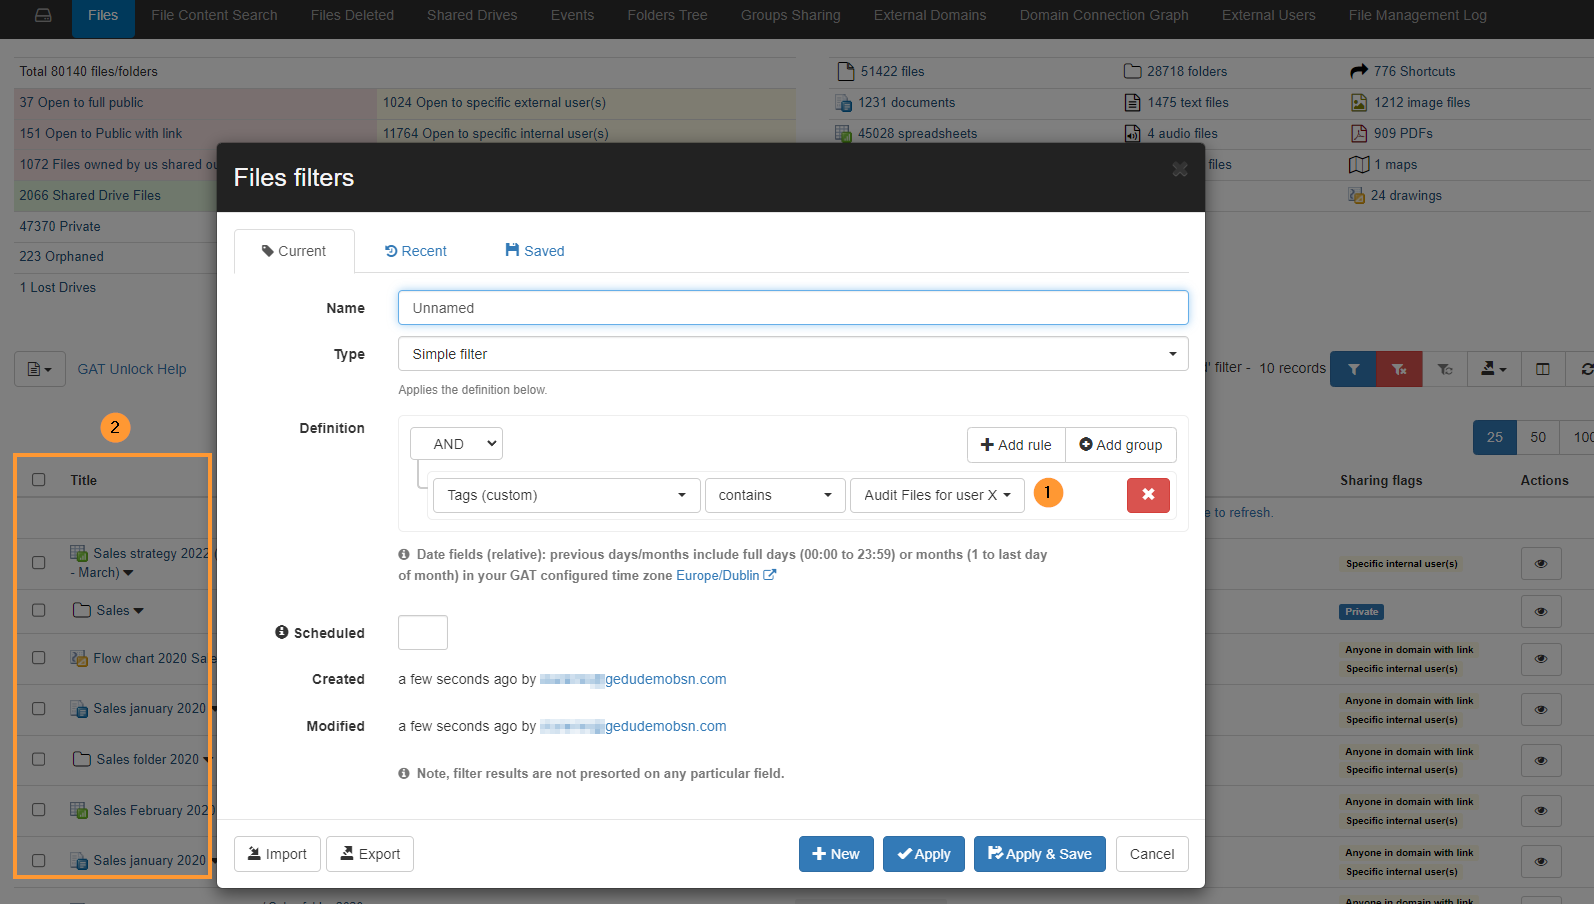
Search for the Tagged Files #
Click on the “Apply Custom filter” button.
In the search, the Definition area selects the search operator Tags (custom) and chooses the tag you wish to view.
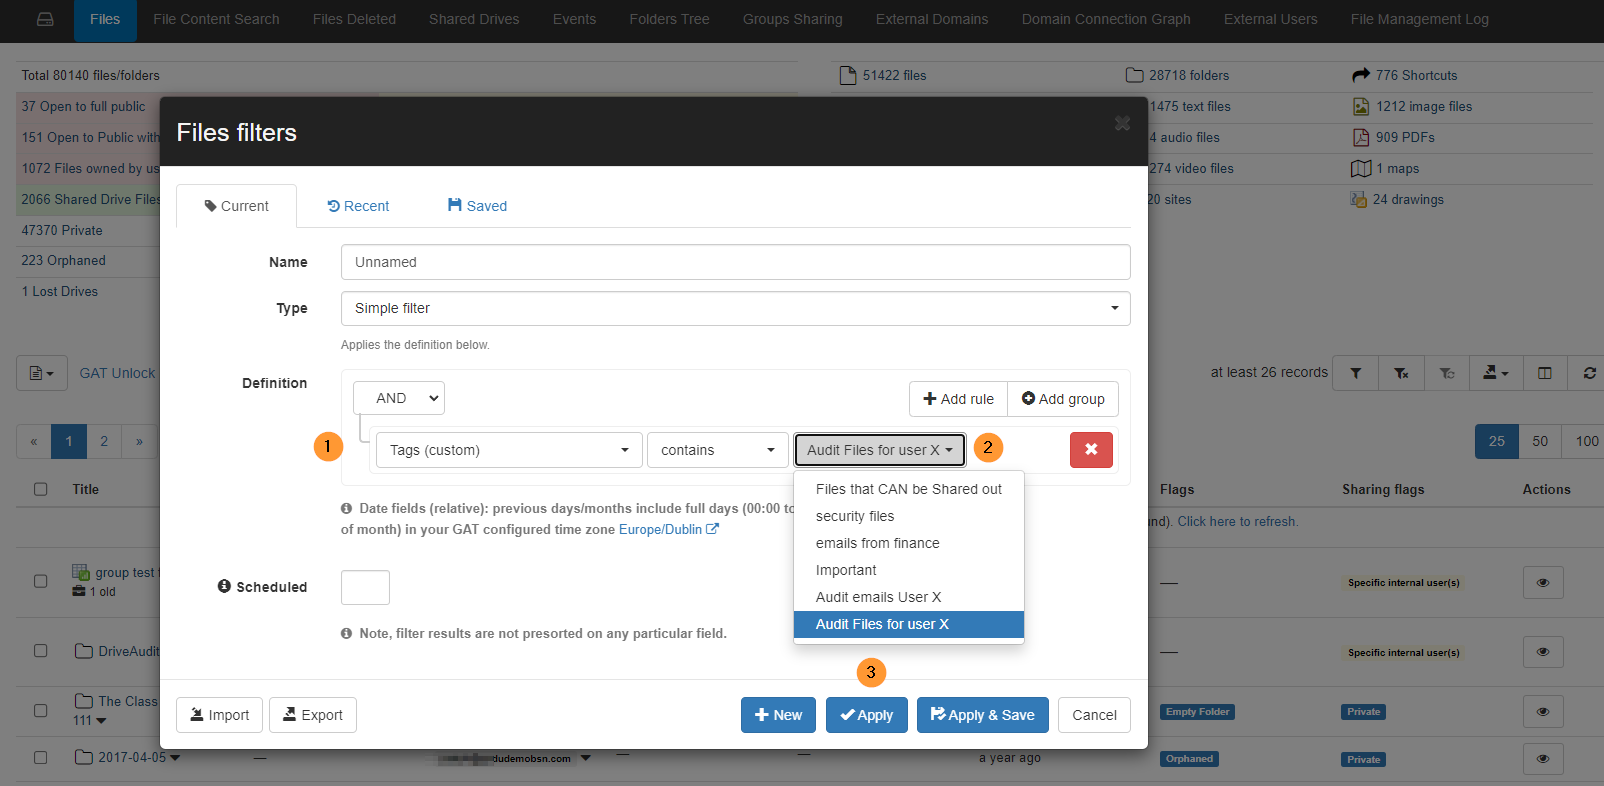
The result will show the emails with the assigned Tag.
Remove tag #
Remove the tags if they’re no longer necessary.
Navigate to GAT+ → Configuration → General → Settings → Custom search tags → Click on the X button beside the Tag
Click on the Save button, the Tag will be removed


