

How to Create Workflow Tags in GAT Flow #
Managing numerous workflows in your domain can be challenging.
GAT Flow introduces a tagging system to simplify this process, allowing you to see what’s happening at a glance.
Creating Workflow Tags in GAT Flow #
Navigate to GAT Flow > Configuration > Workflow tags
Click on the + New Workflow Tag button

That’s it! You have created your new tag and it is ready for immediate use.
Using your custom tag #
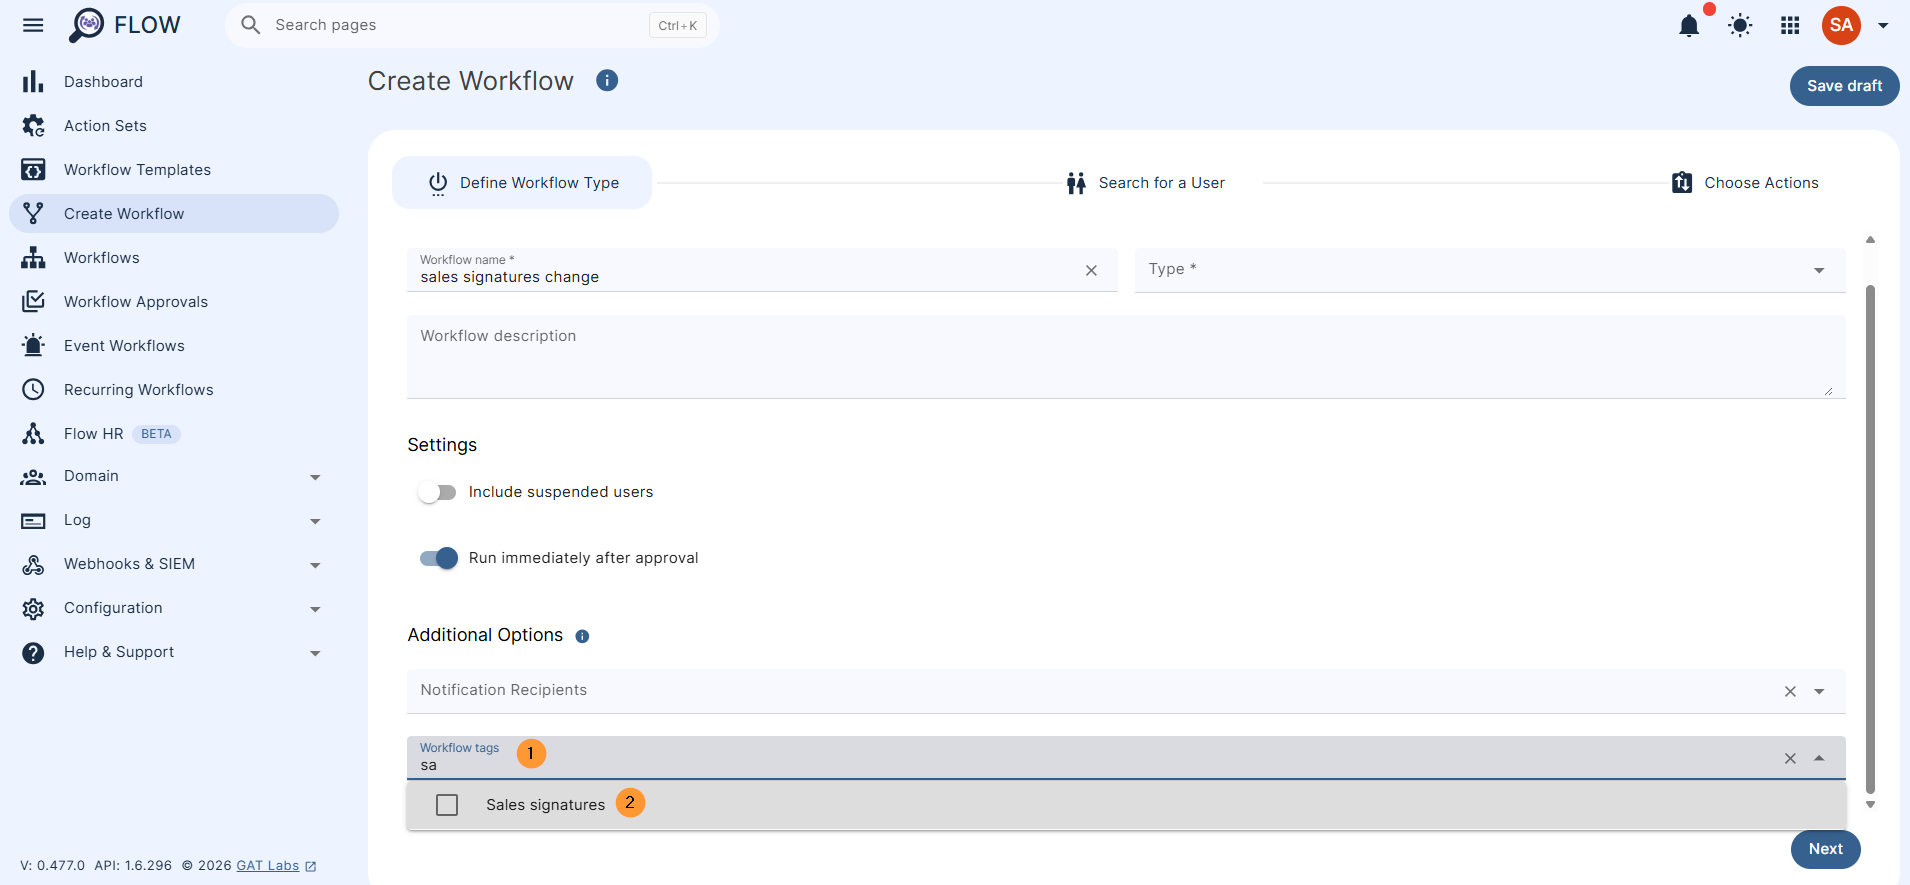
You can apply your new tag to any new workflow you create. Just click on the ‘Workflow tags’ field when creating any workflow to see your available tags.
You can add multiple tags to a single workflow if you wish.
In the Workflow section, you will see all the previously run workflows, alongside the draft workflows. The column labeled workflow tabs will show you the tags that each workflow is given.
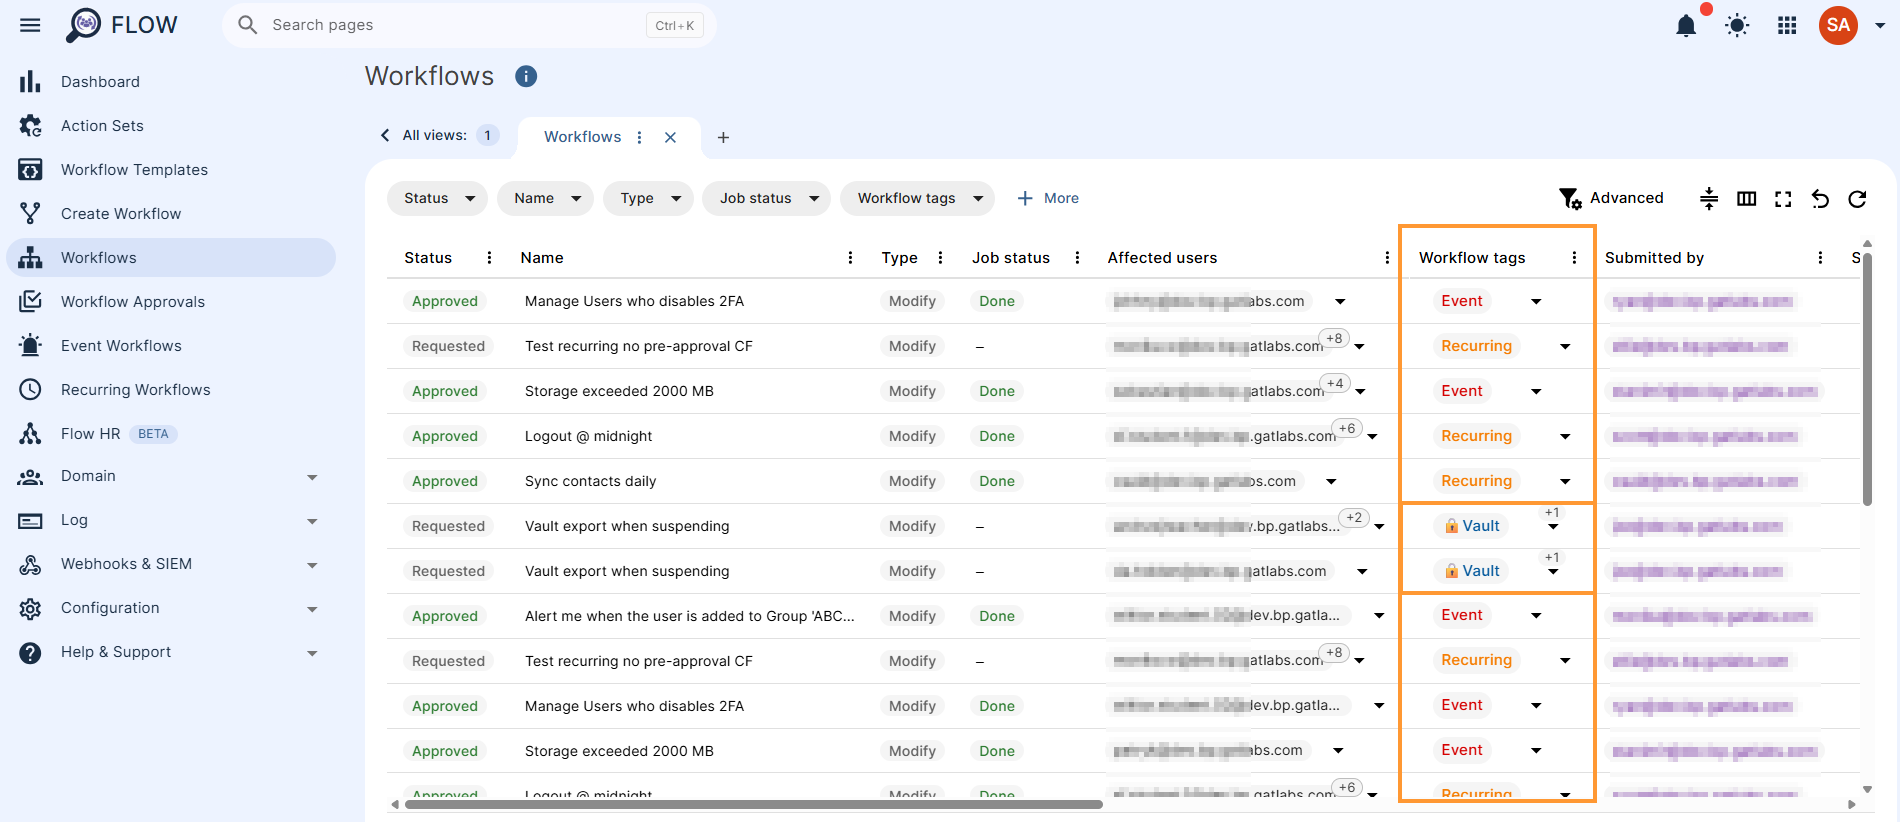
Each workflow receives one tag by default.
Standard workflow tags, will be also assigned based on what action was done, as normal one time workflow, event workflow or recurring workflow.
- Red workflow tag – Event
- Green workflow tag – Workflow
- Orange workflow tag – Recurring
- Blue workflow tag – Custom Workflow tag
Finding workflows from a specific tag #
In the Workflow section, apply filter for Workflow tag and search for the tag you want.
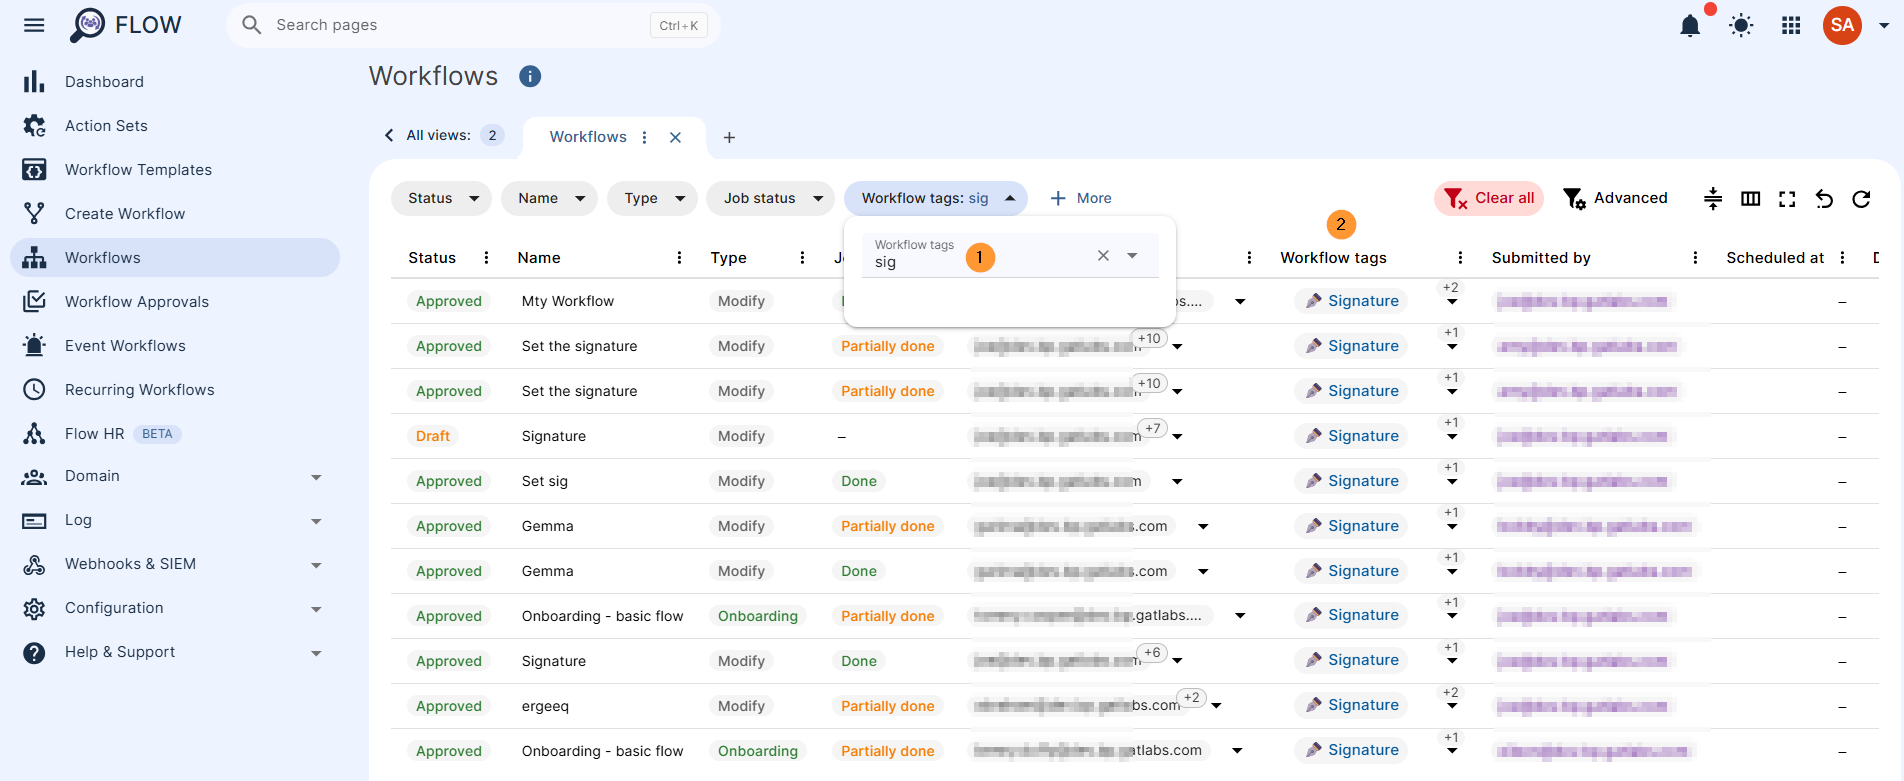
Custom tags allow you to move beyond the default system labels and create an organization system tailored to your organization’s specific needs.


