

You do not want to restrict it only to certain users, but everyone to have access to the Document, and if it is Shared out – the external users to be automatically removed.
Using GAT+ an admin can apply a rule on Google Doc or Folder and remove the external users and perform all the actions below automatically after each scan.
The important thing to remember about a narrow policy like this is that the file might also be subject to a big policy, which could warn the owners too. When designing policies for whole domains you have to carefully think out the domain-wide ones and the specific ones.
- So do you allow all shares and block specific ones, or do you block all shares and allow specific ones?
- Do you do nothing and just warn people once a month about files shared out that changed during the month?
- Are there some cases where you just remove access and don’t warn people?
These can become very complex questions which the Admin team needs to think through with the managers as to what is the appropriate level of external sharing and/or warnings.
- Remove All Internal and External Shares
- Remove Internal
- Remove All Internal Shares
- Remove Only the following Internal Shares
- Remove Groups Members
- Remove External
- Remove All External Shares
- Remove Only the following External Shares
- Remove All External Shares Excluding the following:
- Replace permissions
- Replace “Public” with “Public at generalaudittool.com”
- Replace “Public at generalaudittool.com” with “Public at generalaudittool.com with link”
- Replace “Public with link” with “Public at generalaudittool.com with link”
- Replace “Public” with “Public with link”
Find File #
In GAT+ → Drive → Files → Apply a custom filter → Search by Title
Search for the File/Folder in the example below we search by Title.
Admin can use any other search parameter to find the file they need.

When the result is displayed, click on it and get the File ID. Click on the document and copy the File ID.

When you have the File_ID copied apply the filter and search by the ID

This will show the same file again, we use this to make sure the rule we will apply is only for the selected File.
- Type – Simple filter
- Definition –
- File ID equals the ID selected
- Scheduled – enable the checkmark
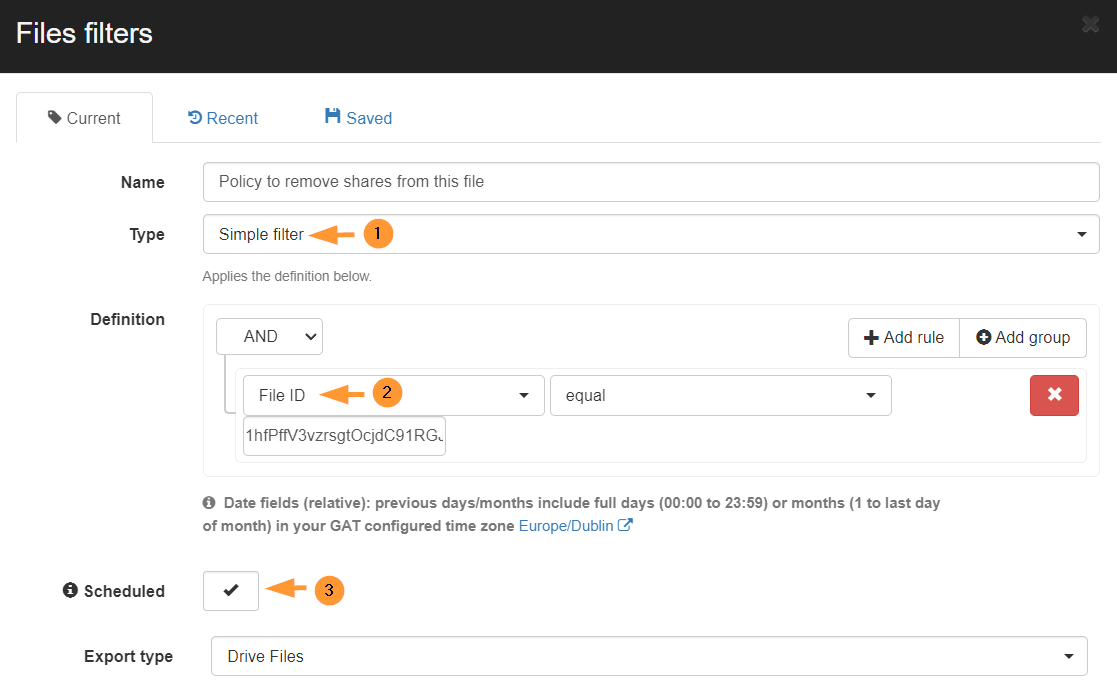
- Export type – select how the file is to be exported
- Drive files
- Drive files with the split layer folder path
- Drive files with the original folder path
- Occurrence – select the time when you want this policy to run
- Enabled – the report to run on not
- Recipients – enter the recipients to the report
- Output type – select the output type of the report
- CSV – Google drive
- CSV – Google Cloud storage
- Custom path and filename – enter a custom path where the report will be uploaded to – if none is selected, it will be set to the default location below.
- The file will be uploaded to the../DriveAudit/2021-12-16 directory on the recipient’s Google Drive. If there will be a file (created by GAT) with the same name in the directory – the file will be overwritten.
- Apply & Schedule – Apply the filter and Schedule the report

Scheduled report #
The report will be Scheduled
Navigate to GAT+ → Configuration → Scheduled reports → Job action edit button

When this is option is selected New window will be displayed.
In Scheduled Job Details click on
- External tab
- Remove All External Shares
- Configure
- Status – Enabled
- Save settings

Result #
An Action of Removing External Shares to be done, on the selected File, on a weekly basis.
Note: To revoke the action simply “Disable” by selecting Status = Disabled
Find Folder #
The Above method can be used to find a Folder and use the “File ID” to set up a policy.
Find the Folder ID, then Schedule report for it, and under Job Action edit (Scheduled jobs details) set the Action you want to take on the Folder.
Note: For Folder, the permissions will be removed on the root Folder itself


