

There may be times when you incorporate a new system, and it sends all sorts of emails to the users at your organization for various reasons. You may also use this feature if you have found that employees at your company are receiving emails from a rival company, or in the case of an educational domain, where students are receiving emails from children at another school.
We can combat this behaviour using GAT Flow to catch and forward these emails from a user’s account.
Setting up an Email Filter Workflow #
1. Create the Workflow: #
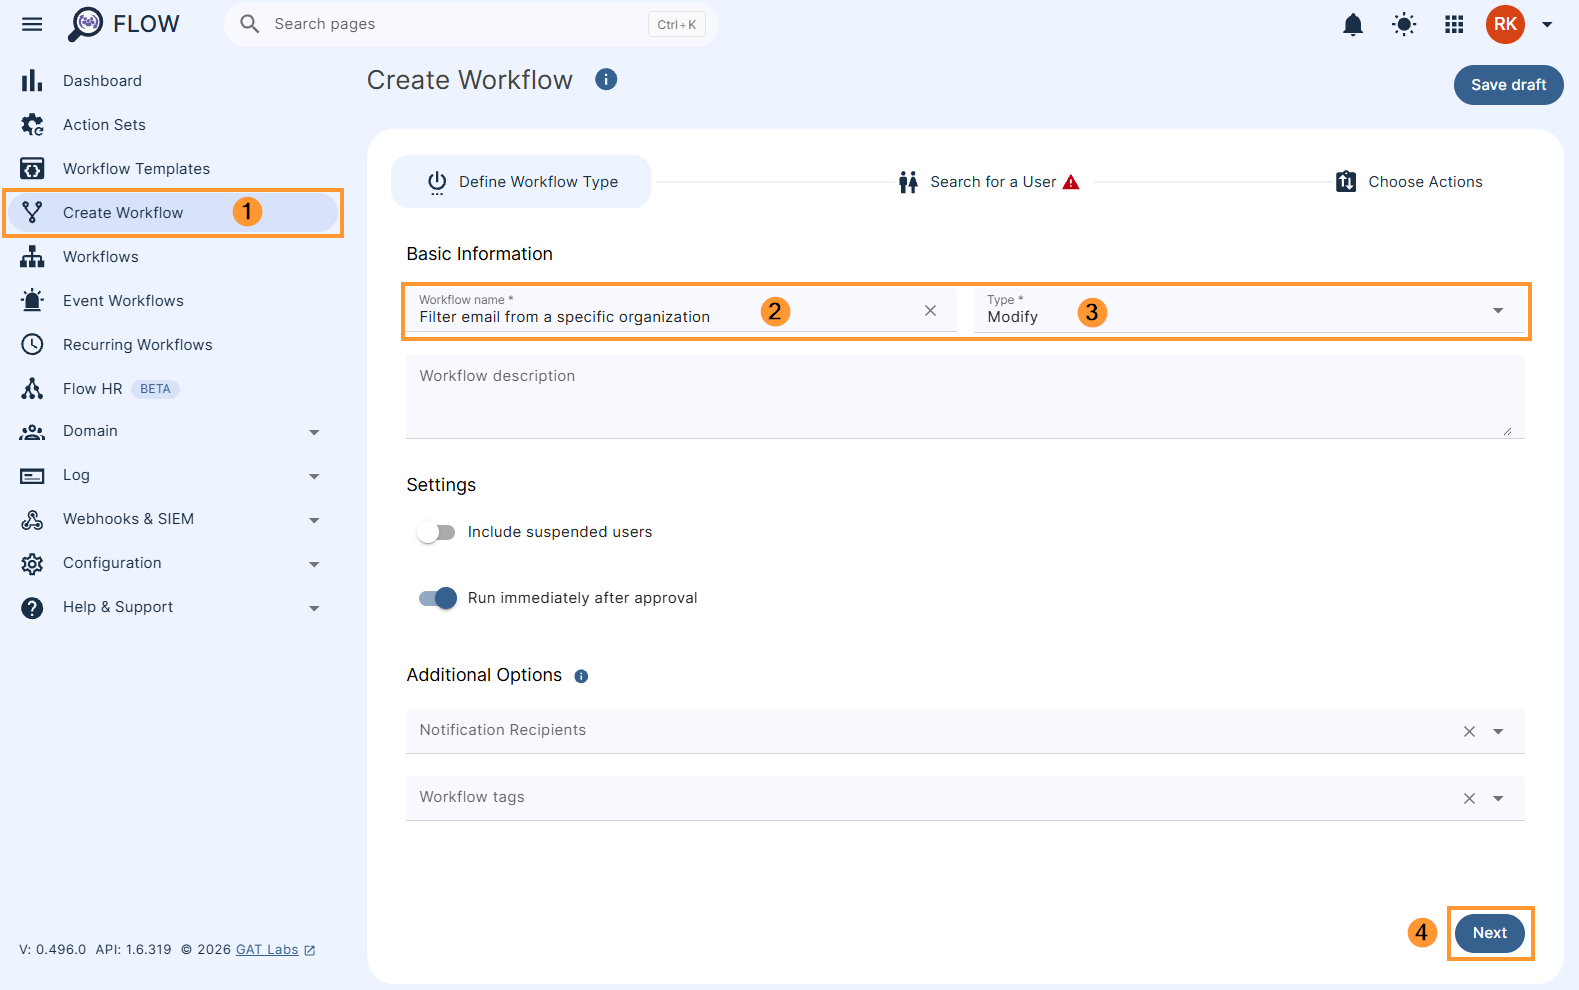
Go to GAT Flow and ‘Create Workflow’.
Give your workflow a name, and set the ‘Type’ to ‘Modify’.
When you are finished click ‘Next’.
2. Select Users: #
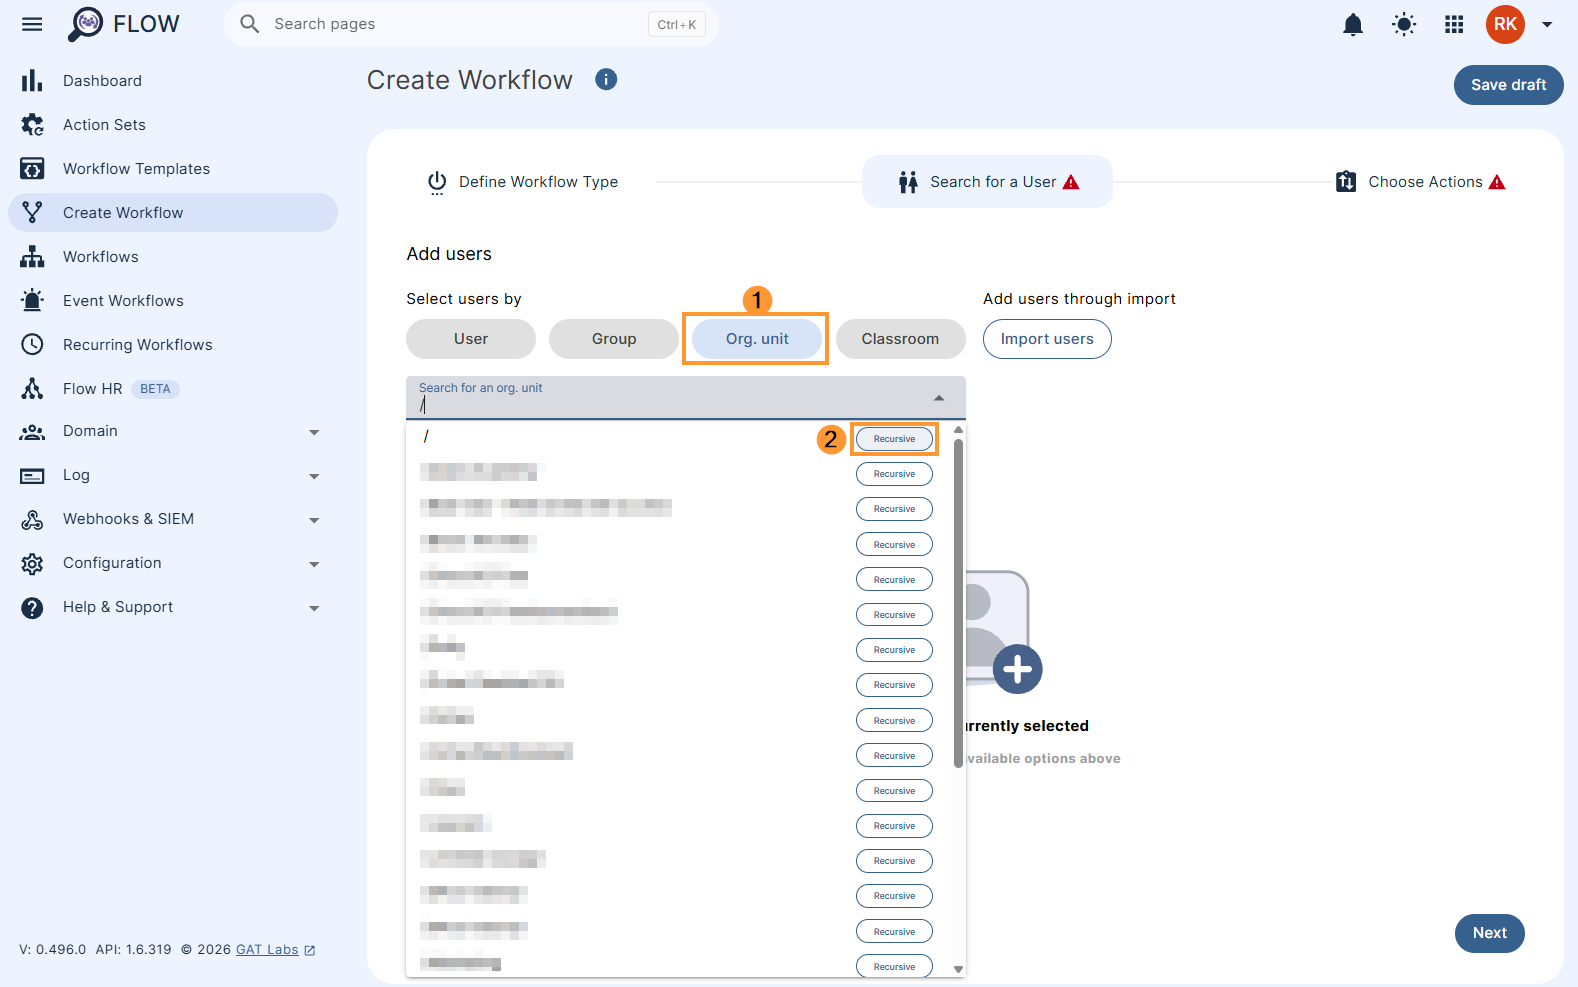
On the next screen, select the users that you would like the workflow to run on.
For this example, we want to divert the email regardless of who receives it in their inbox. So we will select everyone, by clicking the OU field and selecting the ‘Recursive’ option beside the Root OU (/).
In the modal that appears, click ‘Submit‘.
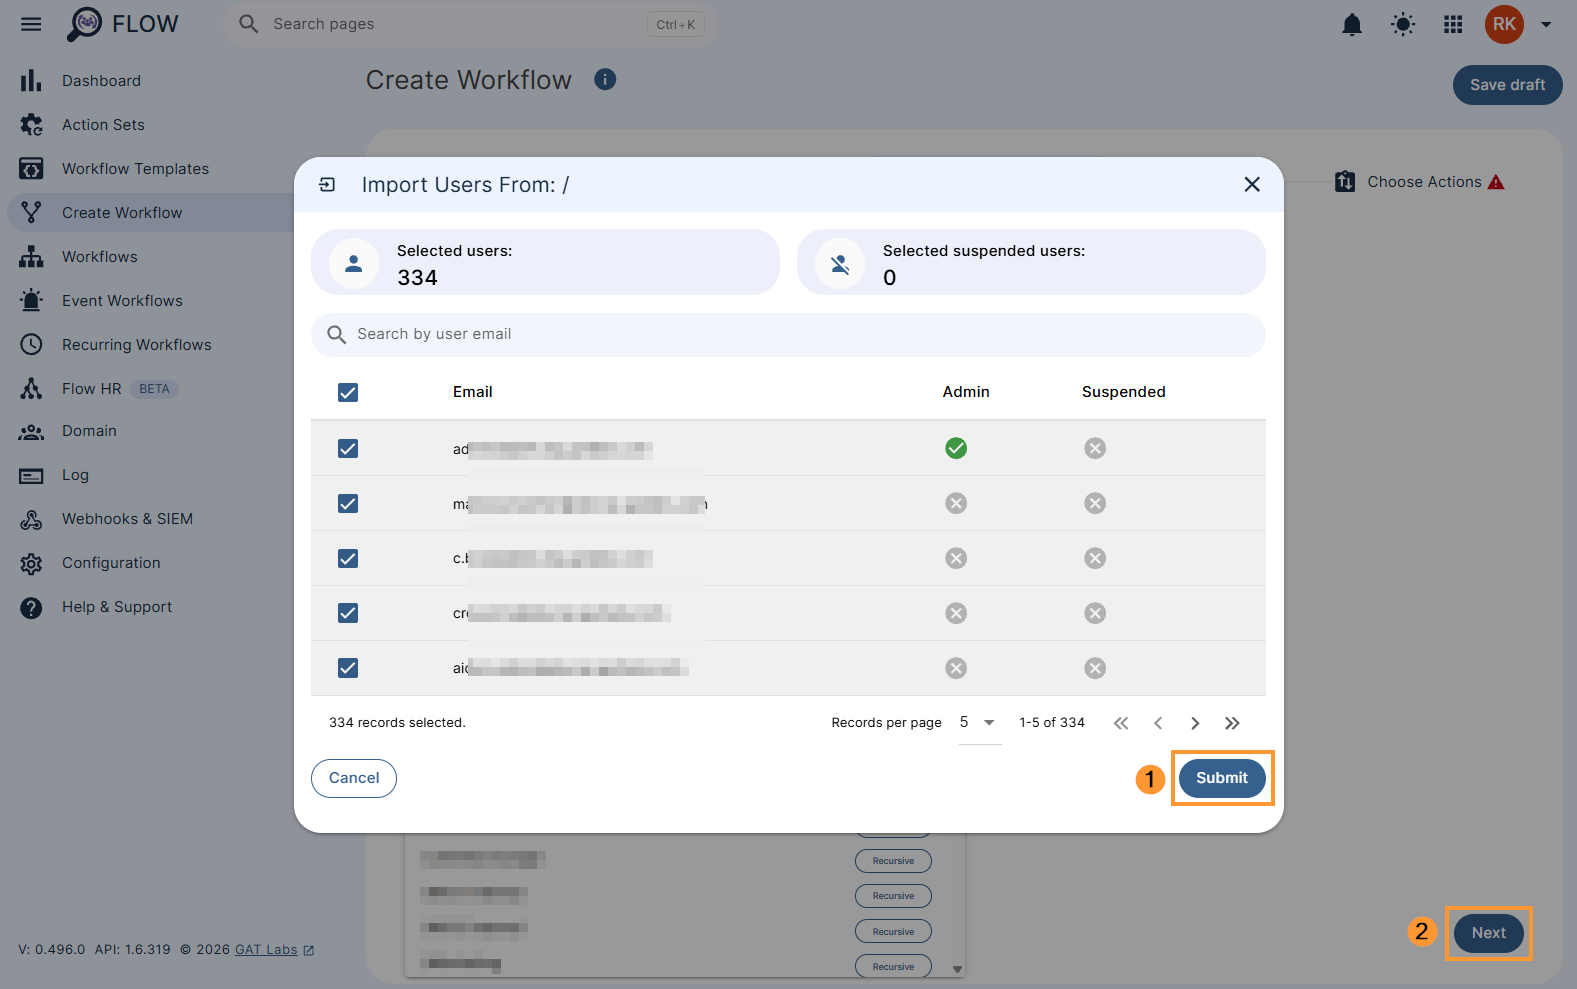
When you are finished click ‘Next‘ to go to the page to choose actions.
3. Choose Actions: #
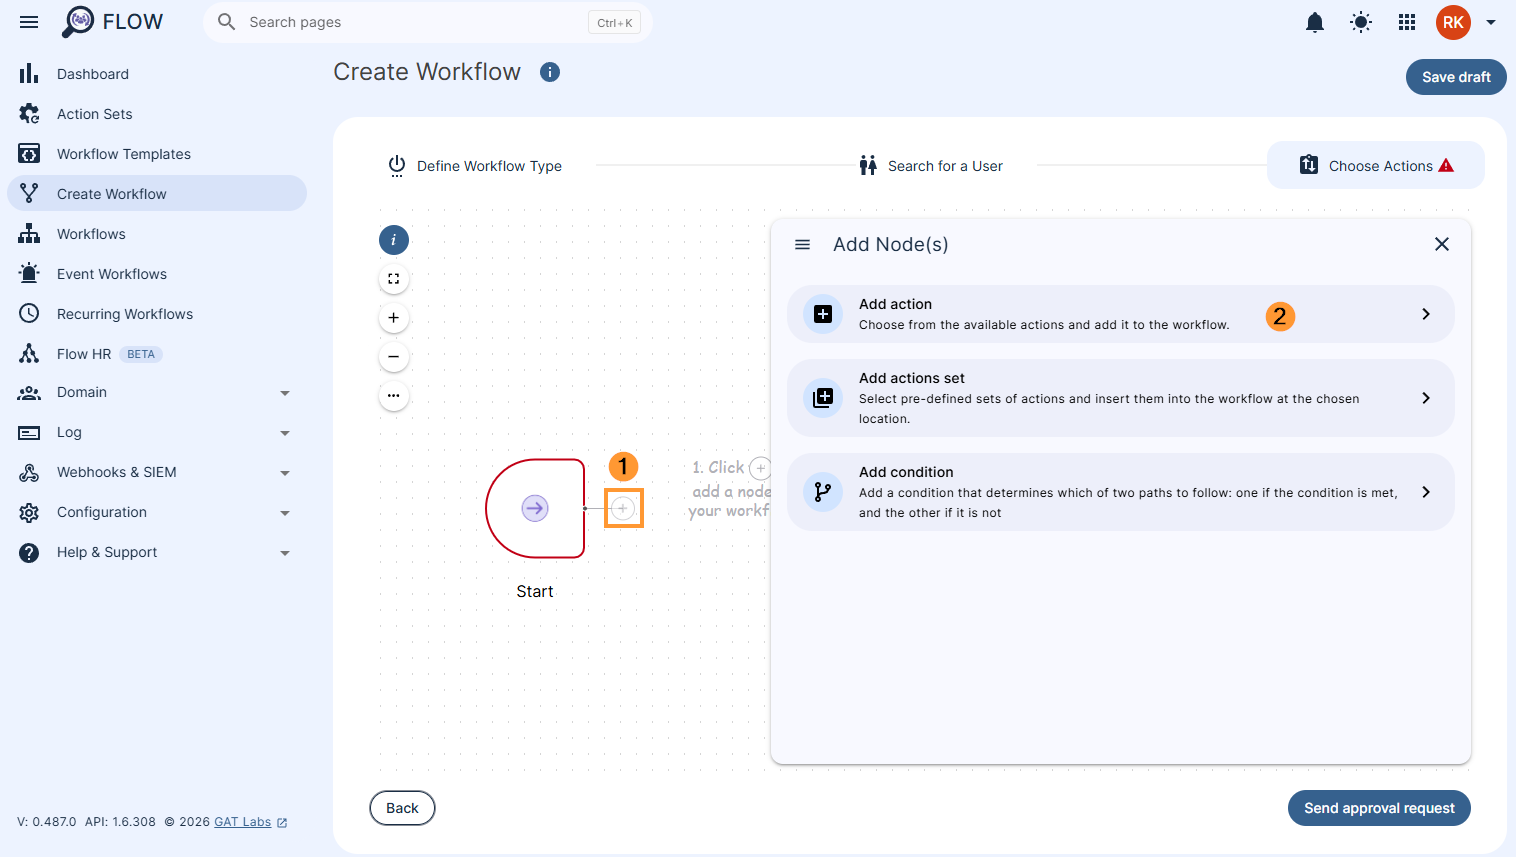
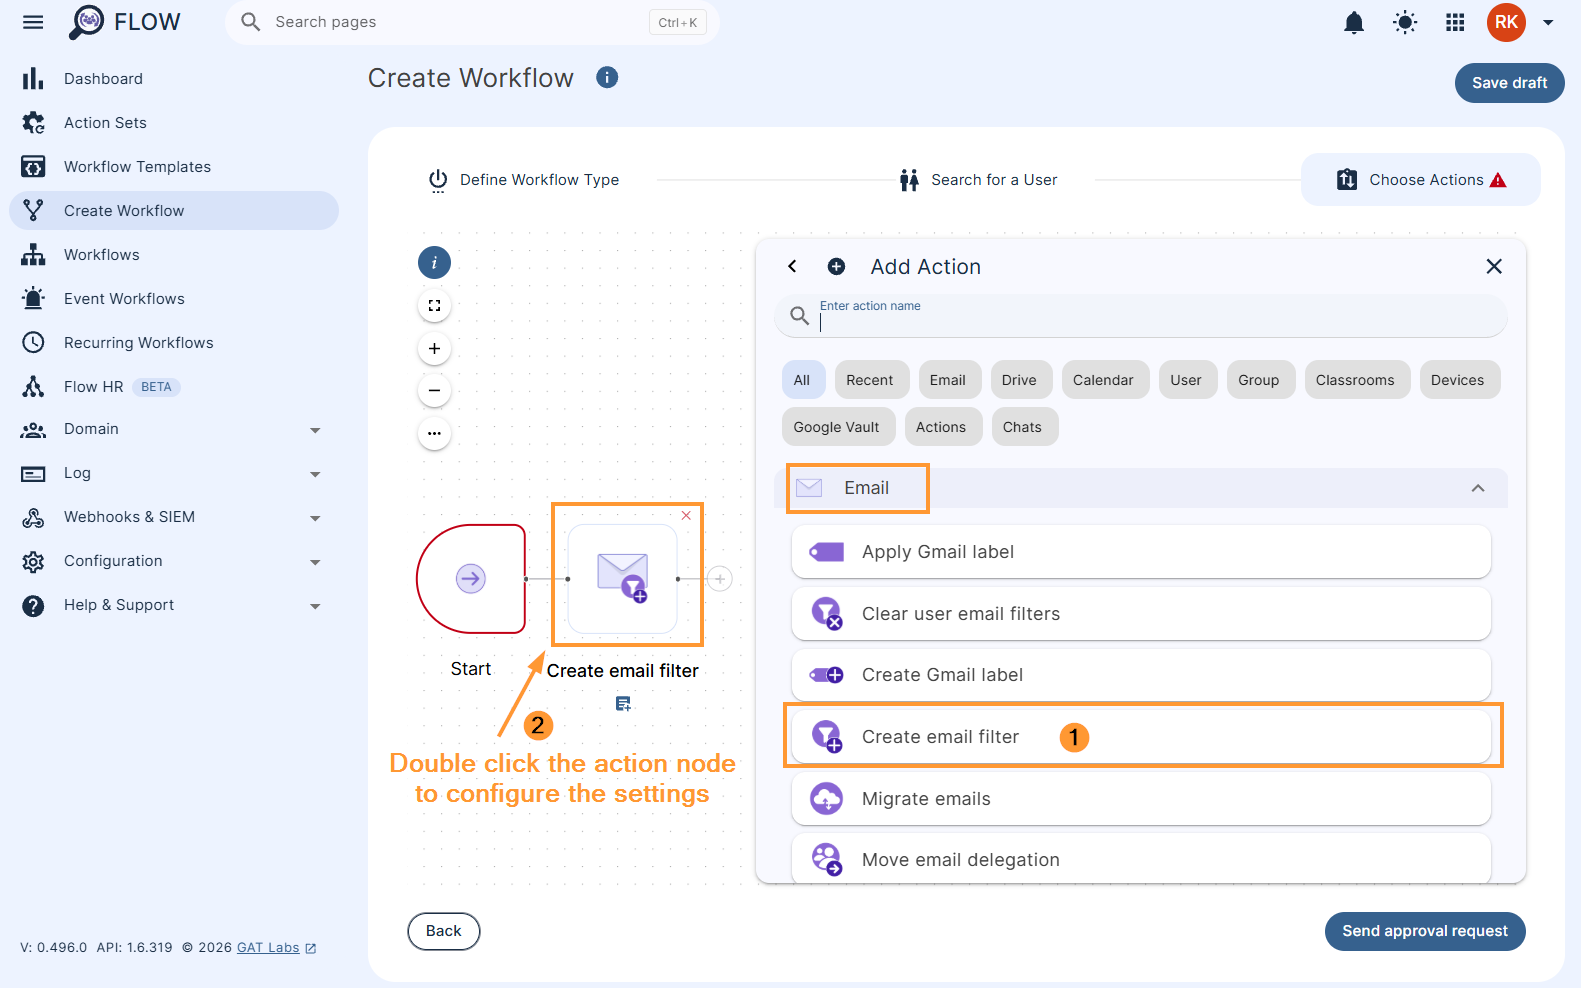
On the actions page, click on the (+) button (1) and then click the Add action button (2)
Select the ‘Create email filter’ action from the list that appears
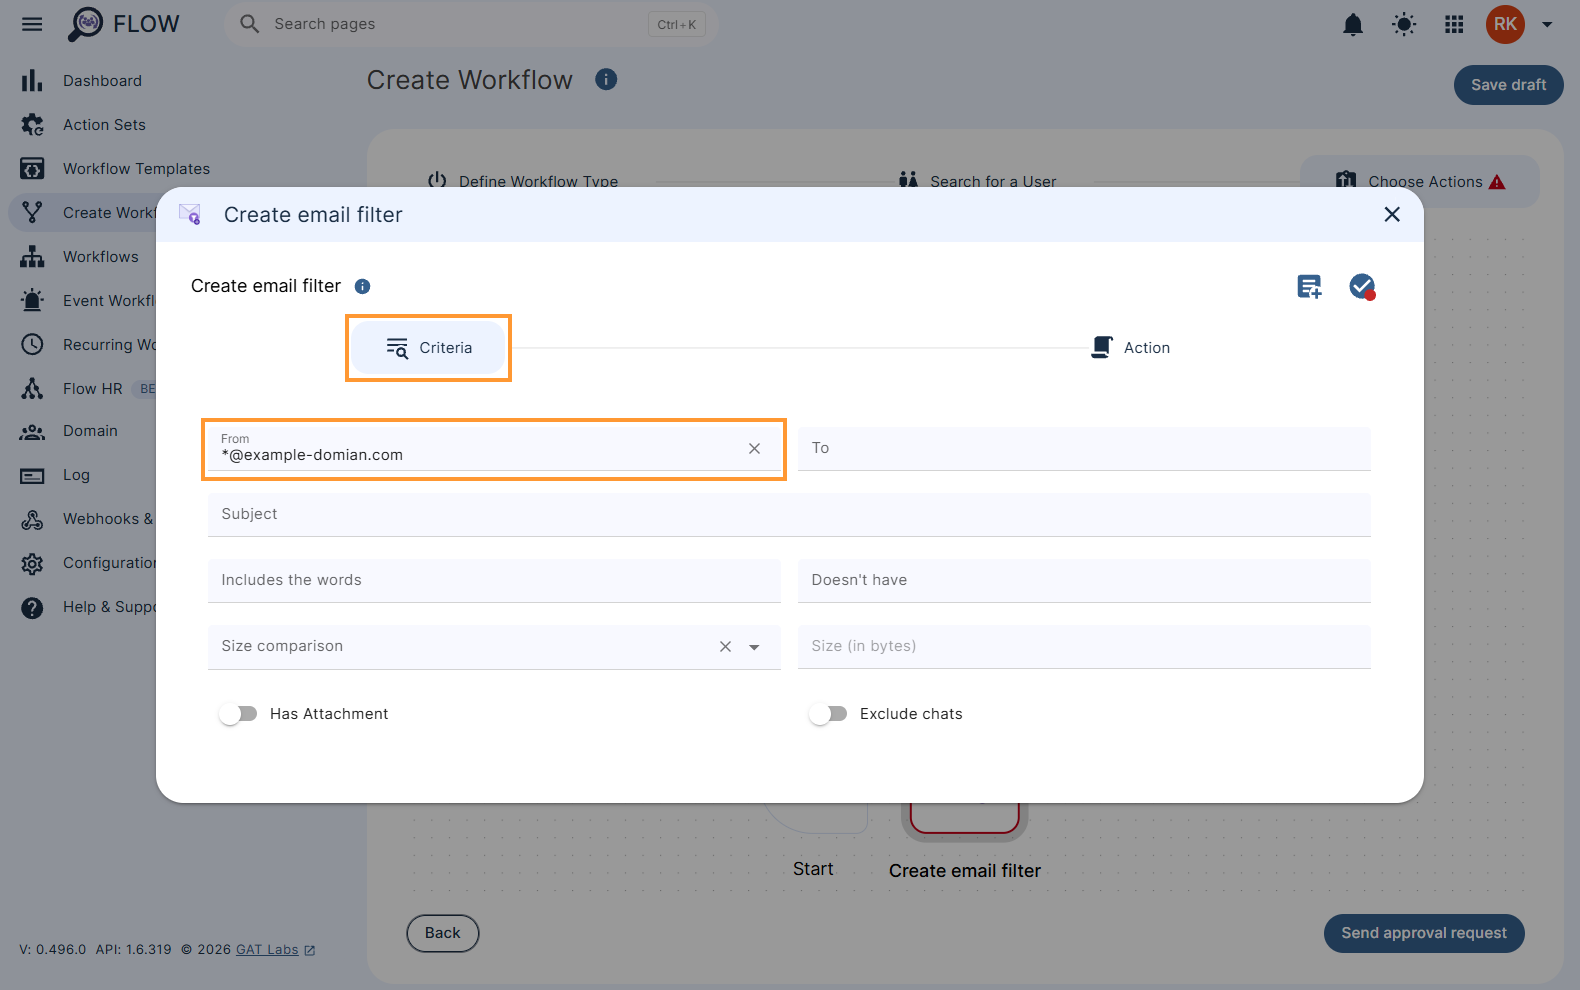
You can use a wildcard (*) to catch email from any address from a domain of your choosing, by entering an asterisk before the ‘@’ symbol in the domain name. eg. *@example-domain.com will catch emails sent from anyone that has @example-domain.com at the end of their email address.
We will enter *@example-domian.com in the ‘From’ field.
Next, choose what you would like to have happen to these emails. For this example, we will forward them to a service account and delete the original copy received by the end users.
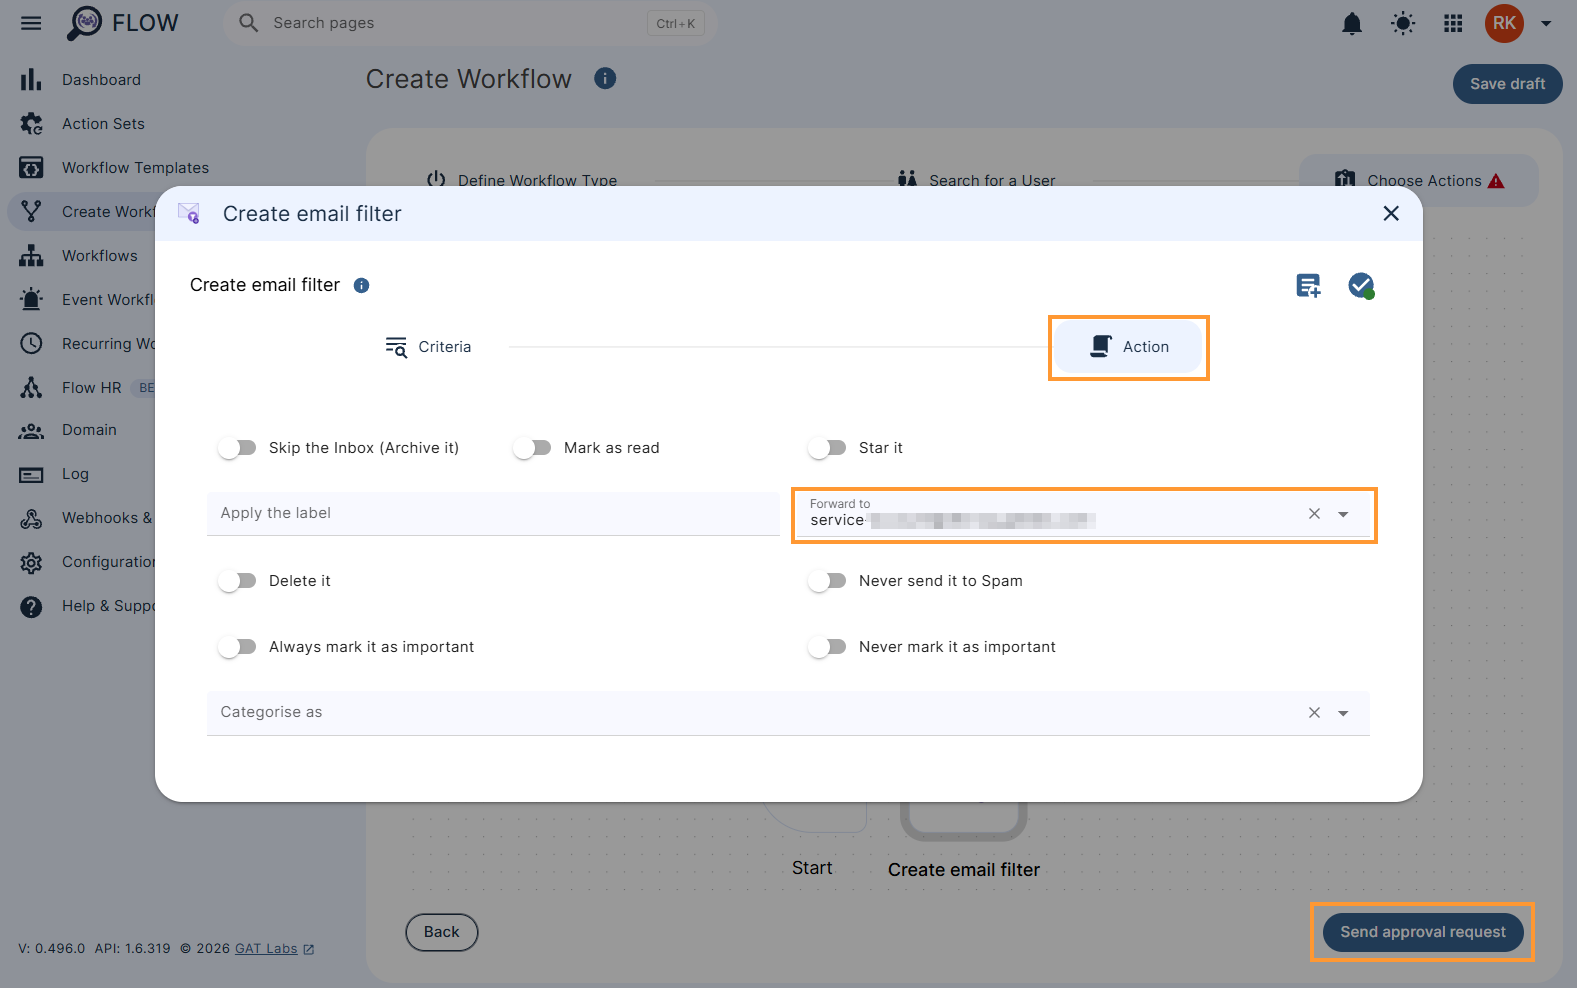
When you are finished click ‘Send approval request’.
4. Approval and Execution: #
Once the security officer approves the request, the workflow will run and all users will have this filter in their gmail.
Note: These steps do not prevent the end user from removing the filter.
If you want to ensure that the users do not delete the filter, you can run these steps as a Recurring workflow to run daily. Running a Recurring workflow with these steps will ensure that the filter is restored each day if a user deletes it.


