

GAT Flow is a user Management tool for Google Workspace. In the ‘Users’ Section you can manage Email Forwarding options for any given user.
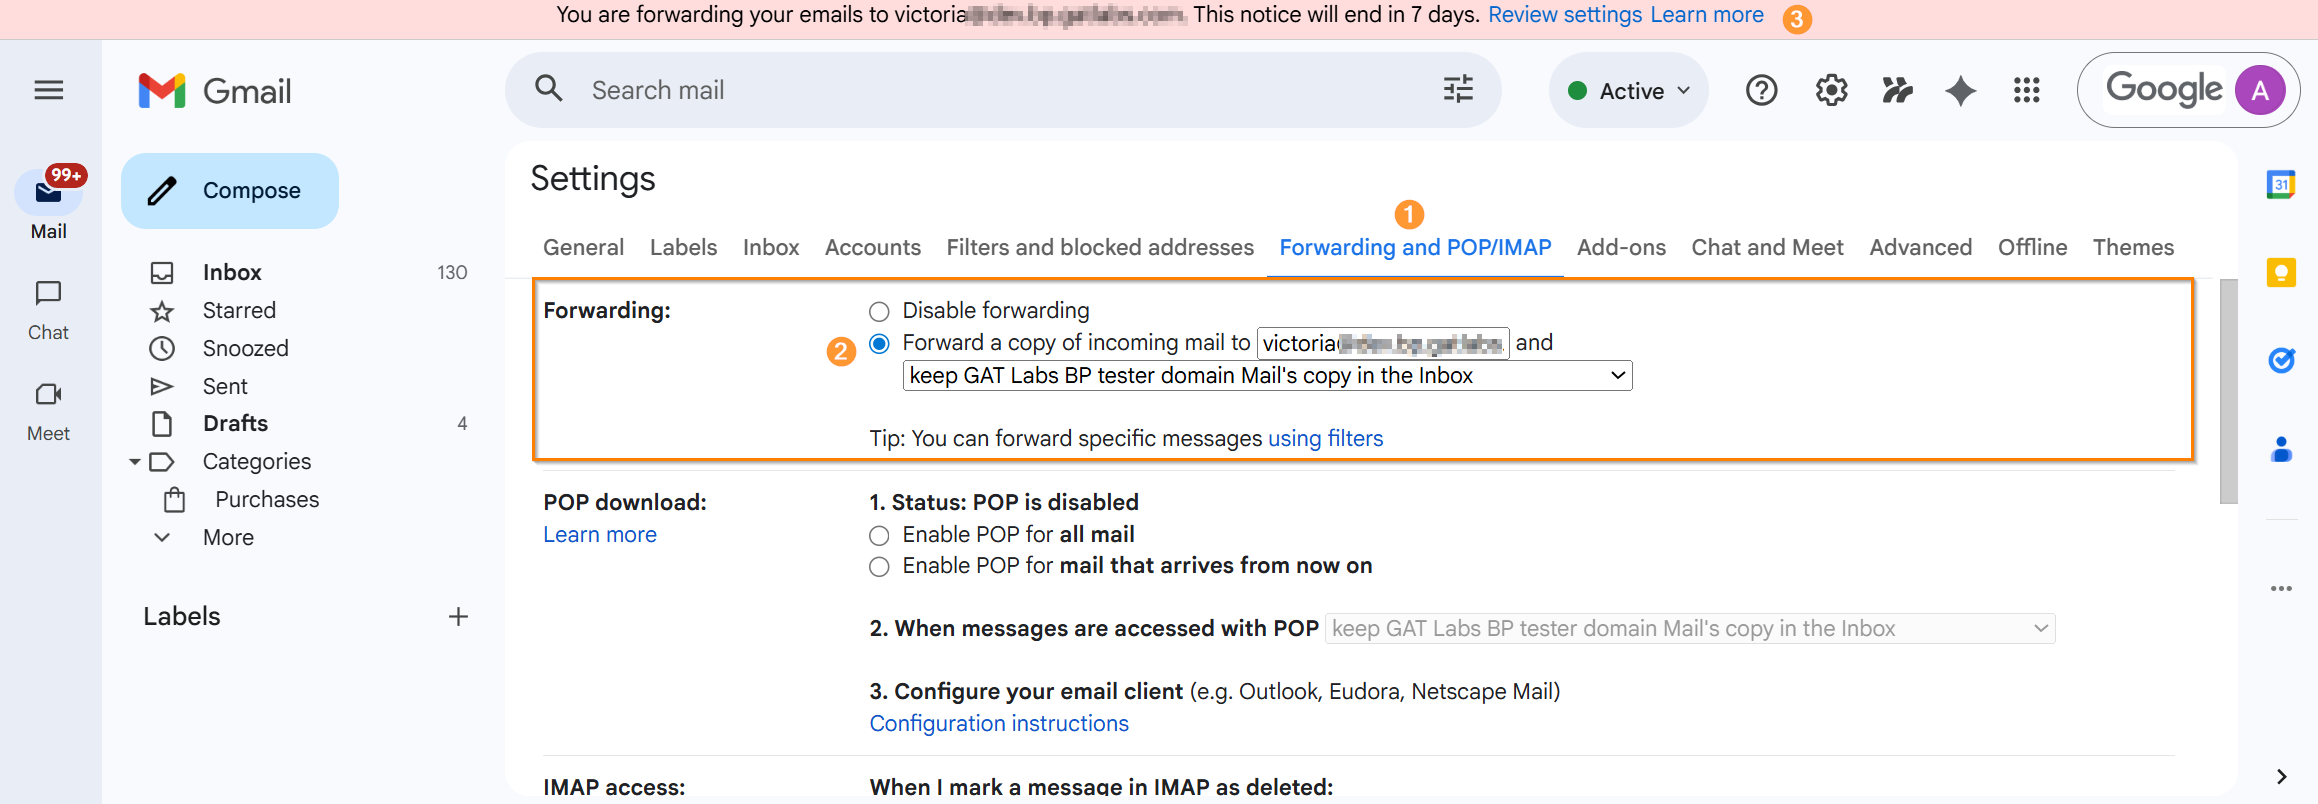
In users’ Gmail settings, forwarding settings can be viewed the the user under Forwarding and POP/IMAP (1-2). The image below shows the settings without forwarding configured.

Setting up Auto-Forwarding #
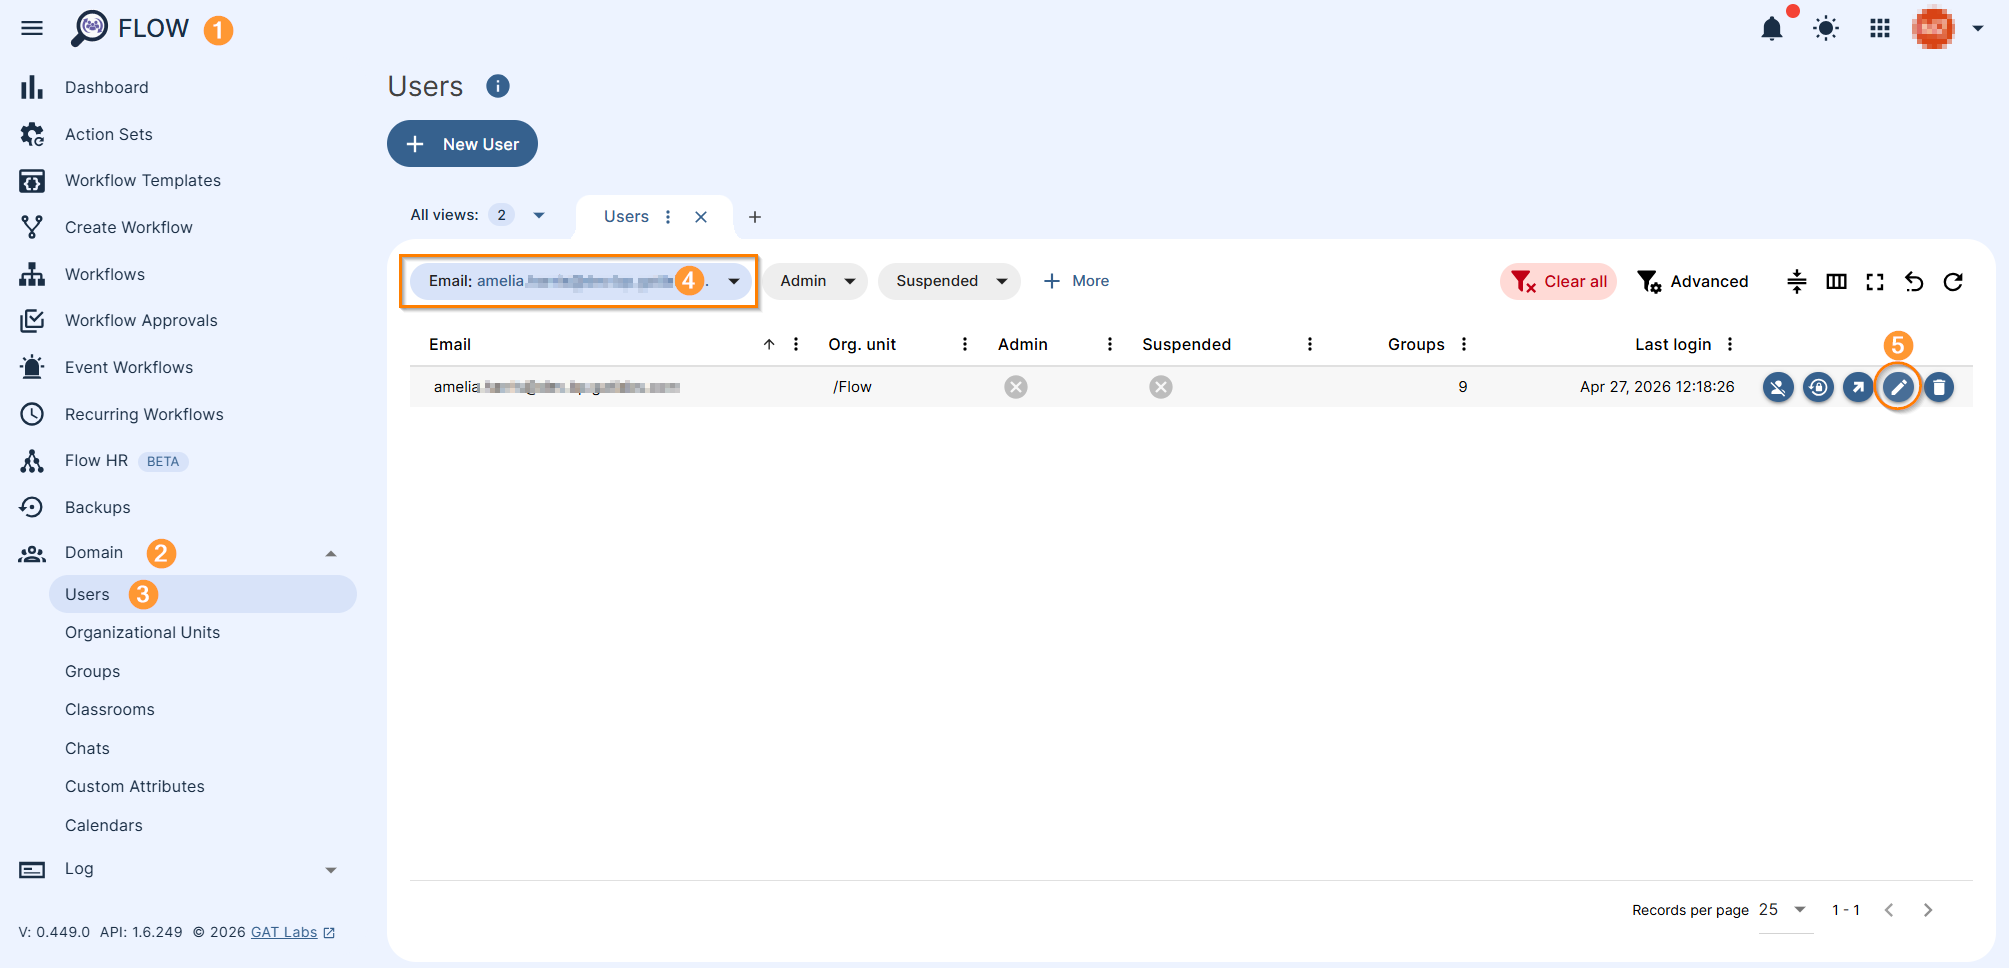
Go to the Domain > Users section of GAT Flow on the left (1-3). Type a user’s email address in the quick email address search field (4) and press ‘Enter’ to make the user’s records appear. Hover over the right side of the user record to see more options. Click the “pencil” icon (5) to display all details about the user.
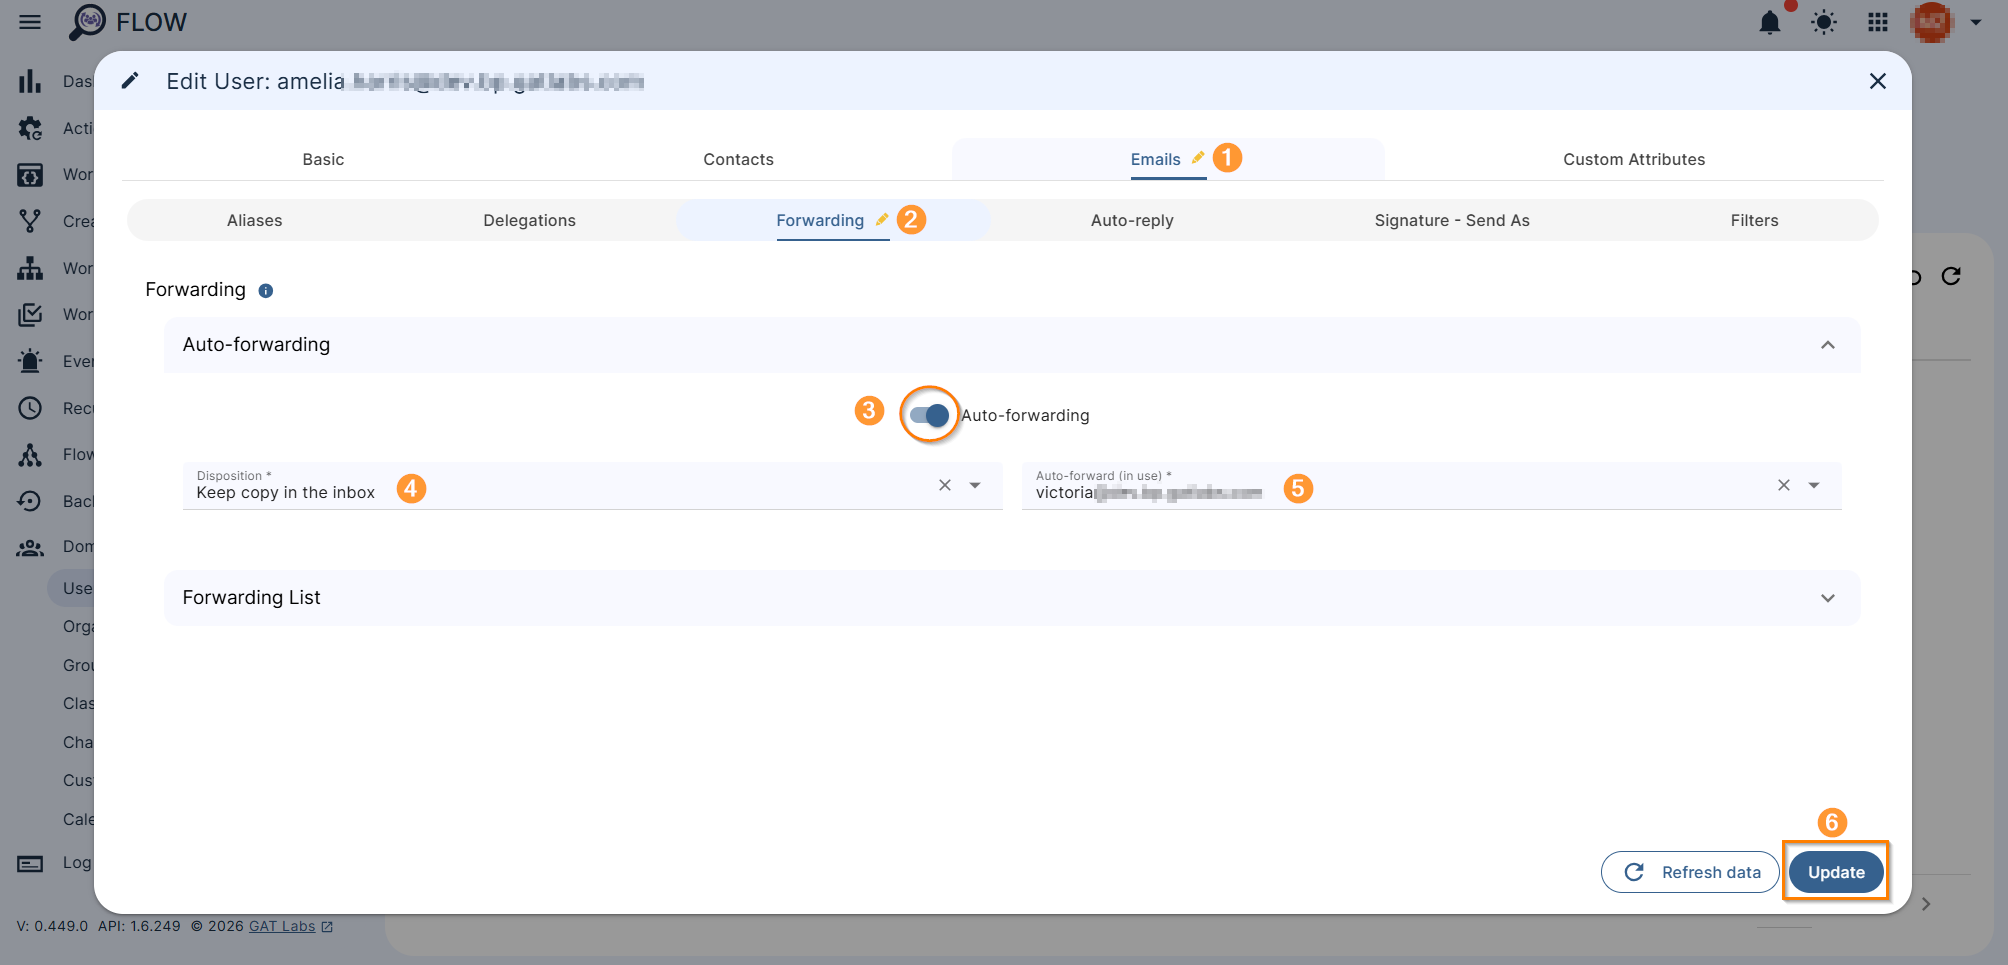
The new window with user’s details section is displayed. Navigate to Emails tab (1) > Forwarding (2). Toggle “Auto-Forwarding” (3) to open the new fields where the auto-forwarding can be set up.
Select the Disposition type (4) to choose what will happen to the emails that the original user would have received. The available options are the same as in Gmail. They are as follows:
- Keep a copy in the inbox
- Mark as read
- Delete copy
- Archive copy
Finally, in the Auto-forward (in use) (5) field select the user to whom the email will be auto-forwarded. Click on Update (6) to save the settings.
Configuring automatic email forwarding allows you to forward all emails of one user to any user you choose.
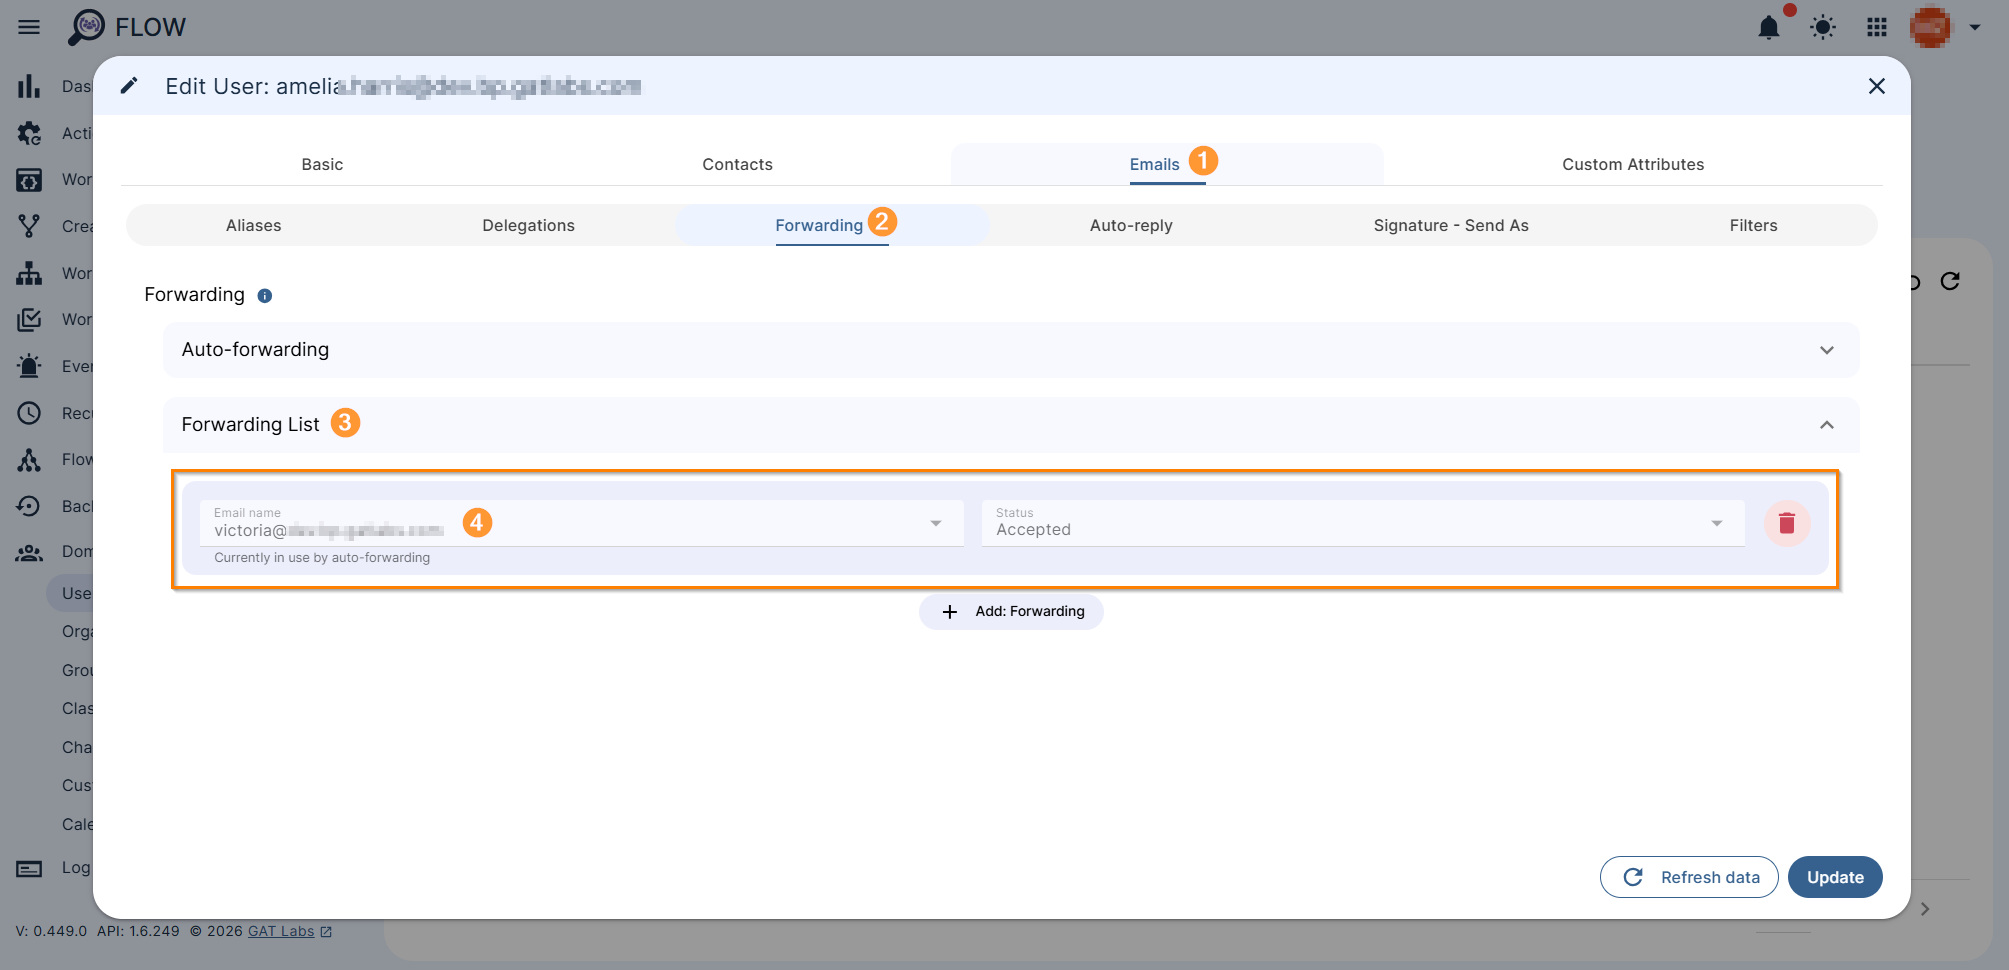
Once auto-forwarding has been set up for a user, the user that will be receiving the email will be shown at the top of the Forwarding addresses list (screenshot below) (1-4).
The user will also see this configuration and the notification in their Gmail settings (1-3).
Forwarding Addresses #
From the same section of user’s details, you can also set up any Forwarding address. Some domain settings may require the end user to request permission to forward their email to another user. If enabled, the other domain user must typically accept the permissions.
However, with GAT Flow, the admin can skip this step. They can select any user on their domain to forward email to another user. This is the purpose of adding a forwarding address. It does not independently forward the email. Instead, it bypasses the authentication process to allow email forwarding.
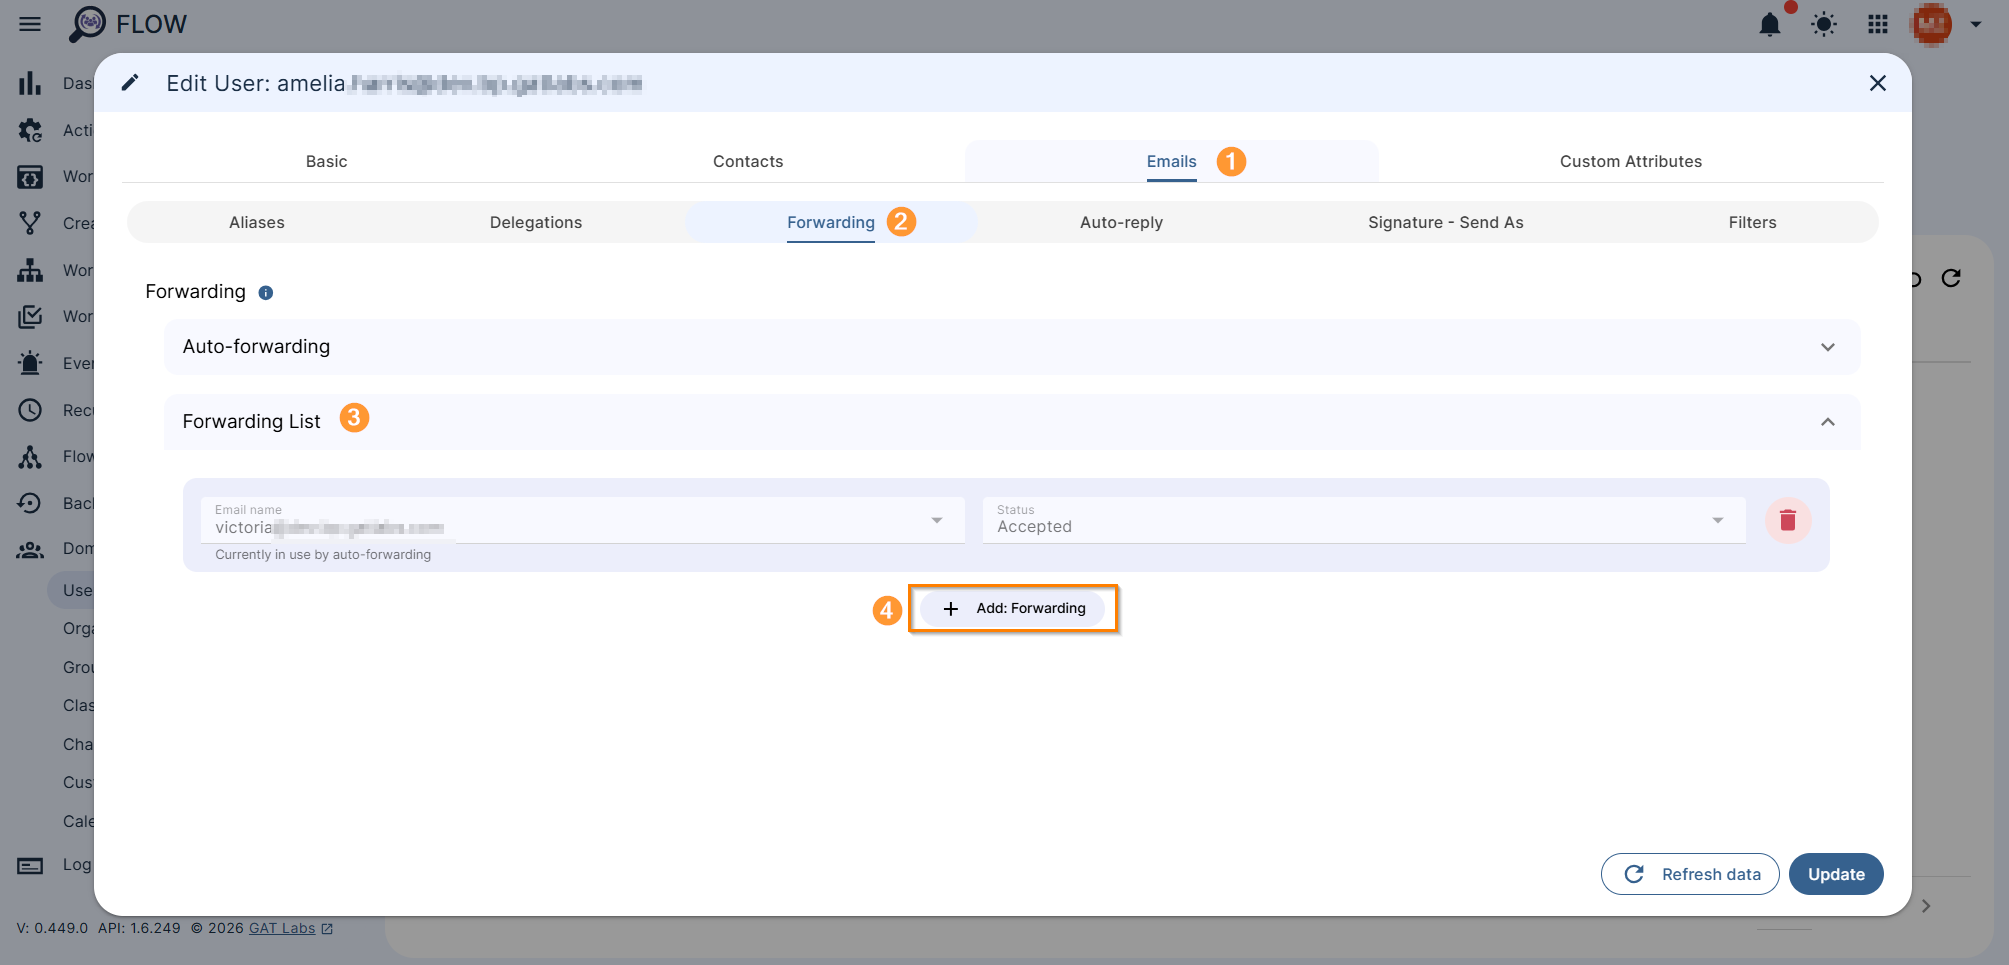
To set up any email forwarding, navigate to Emails tab (1) > Forwarding (2), Forwarding List section (3) and click on “+ Add: Forwarding” (4).
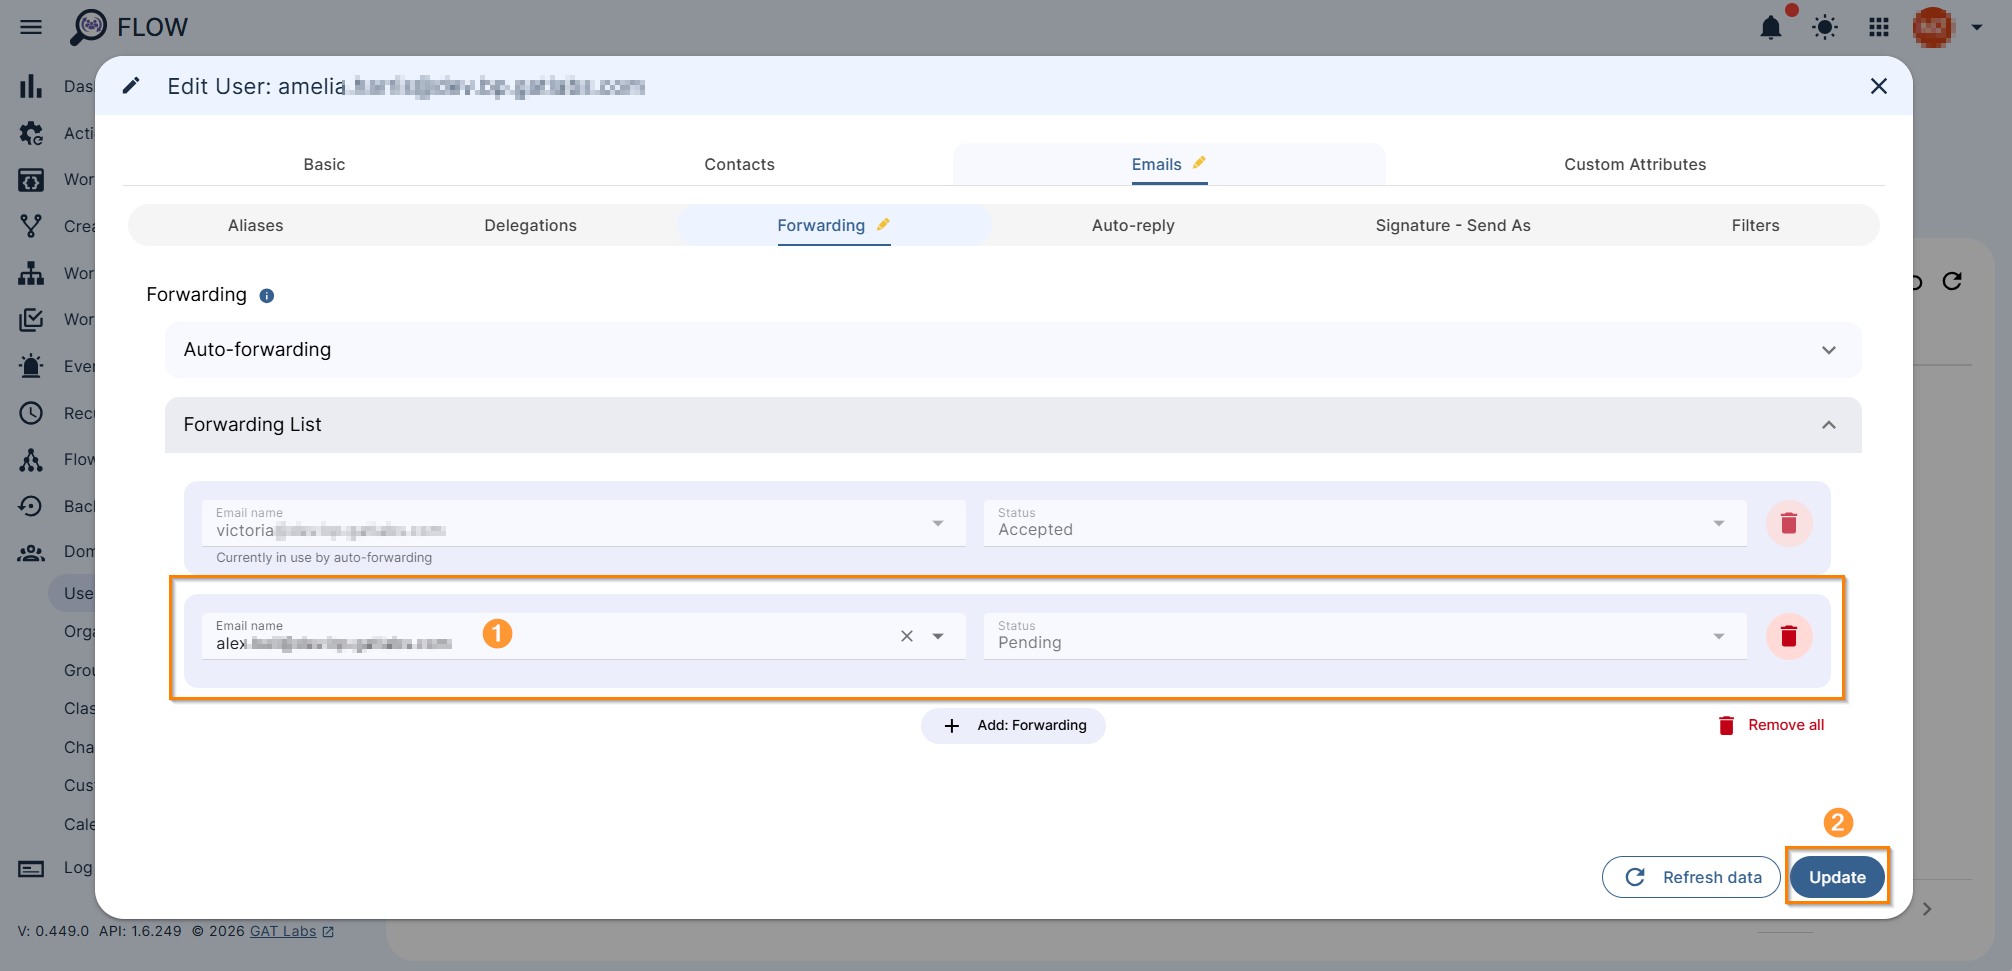
Once forwarded email is added (1), it will temporary show Pending status. Click on Update (2) to save the settings and auto-accept the forwarding.
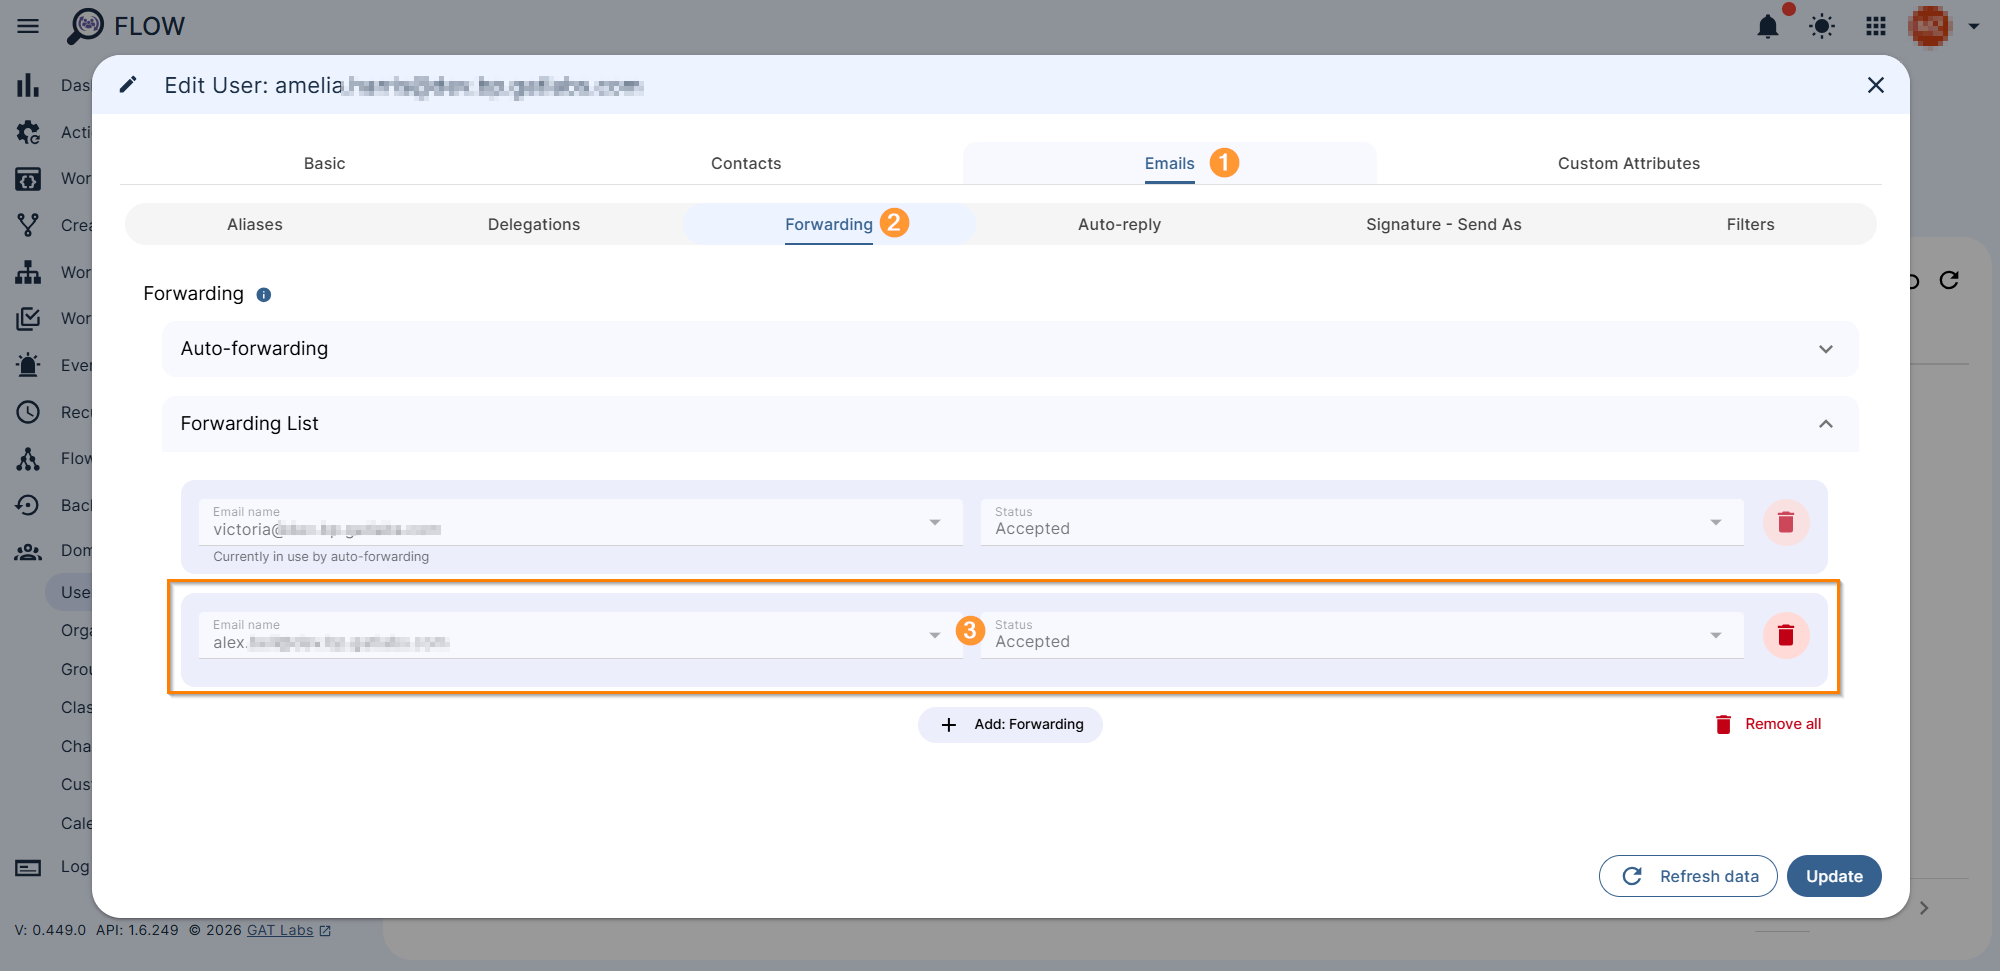
Once the settings are saved, the email forwarded status will show as Accepted.
FAQ #
Q: How many emails can be set up for auto-forwarding or forwarding?
A: You can save multiple email addresses for forwarding messages, but bear in mind, that only one may be in use for auto-forwarding.
Q: Can I configure forwarding to multiple people at once, e.g. via a Group?
A: Yes, this is possible. To forward messages to multiple recipients, create a Group with them and then use Group’s email address to set up email forwarding.


