With GAT+, Google Workspace Admin and/or Delegated Auditor can maximize efficiency and make bulk changes to the multiple Groups’ settings within a few simple steps. One of the changes is filtering who can view conversations in a group.
Step 1. #
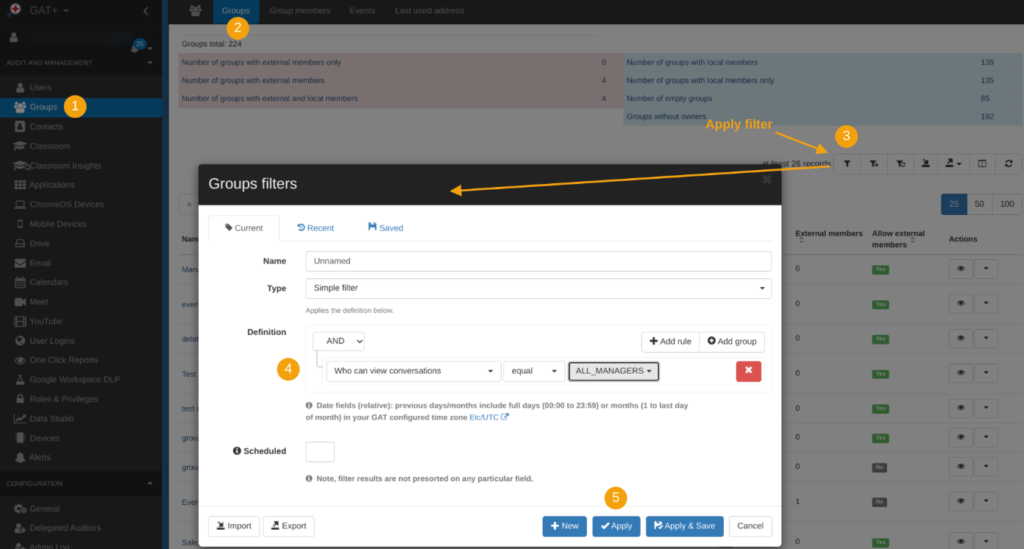
To apply a filter to find target Groups, navigate to GAT+ -> Groups.
Apply a filter that helps to extract the target Groups and narrow down the results to the number that is equivalent to your needs.
The below filter is one of many examples that you can use:
GAT+ returns relevant results. Now the metadata can be exported to Google Sheet.
Step 2. #
Then, export, amend, and import the data back to GAT+.
You can archive this by clicking on the “export” button. Next, select the exporting option: Export to Google Sheet (max 150 000 records).

You created the Google Sheet and can view it by clicking on Click to view:

Once selected, the Google Sheet will open in the new browser.
Inside the sheet navigate to “Who can view group” column and make the relevant changes.

NOTE: “Who can view group” is equal to “Who can view conversations”.
After making the changes, the spreadsheet is ready to be imported back to GAT+. You can now close the Google Sheet.
You are now ready to import the metadata back into GAT+. Click on the “import” button as shown below:

In the next window, you can select an “eye” icon to preview the spreadsheet, and to proceed further, select “ticked box”.

Next, the new window shows the changes you applied: before and after.
First, move the slider to the right and navigate to the setting that you amended: Who can view conversation (as this is equal to Who can view group). You can review the “before” and “after” the change information, and to proceed click on Accept.

Process import; it shouldn’t take long, however, it depends on the number of records that the change needs to be applied to.

When completed, the below message will appear: Data updated successfully. The updates are live.

Results #
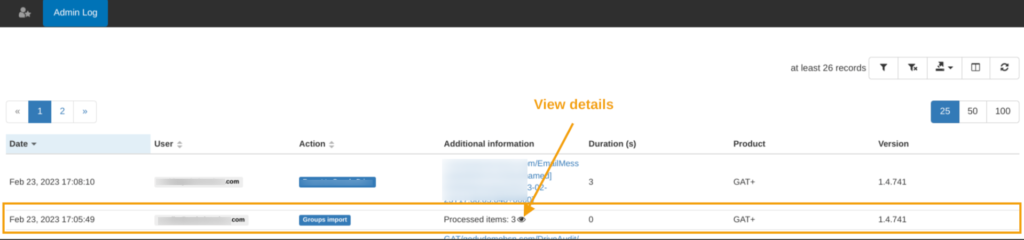
This action, as all in GAT+, will be logged under the Admin Log tab. It allows an Admin to have an overview of what is happening within the domain.
To see them, navigate to GAT+ -> Configuration -> Admin Log.