GAT Flow enables the configuration of an email template to send to a chosen user. This can be done either by Google Workspace Administrator or/and GAT Flow Delegated Auditor.
The email’s content can be automated and will adjust according to the user affected by the workflow.
This automation is possible by using the variables available in the Send email action. An Admin can automate the content of the email intended for the selected person within the domain.
The variables utilized within the email template change based on the user that is affected.
Use case #
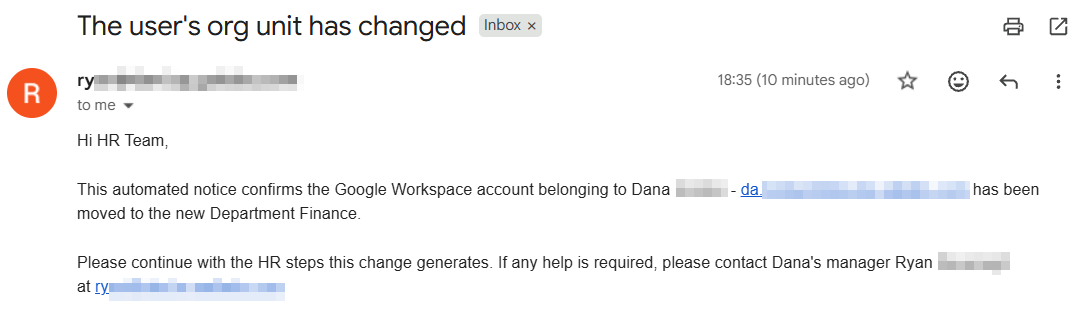
This feature becomes useful when, for example, you move a group of users to a different organizational unit. You need to notify the appropriate person about this change. For instance, an HR member must be informed about which organizational unit is being altered for subsequent HR processes.
Send email action setup #
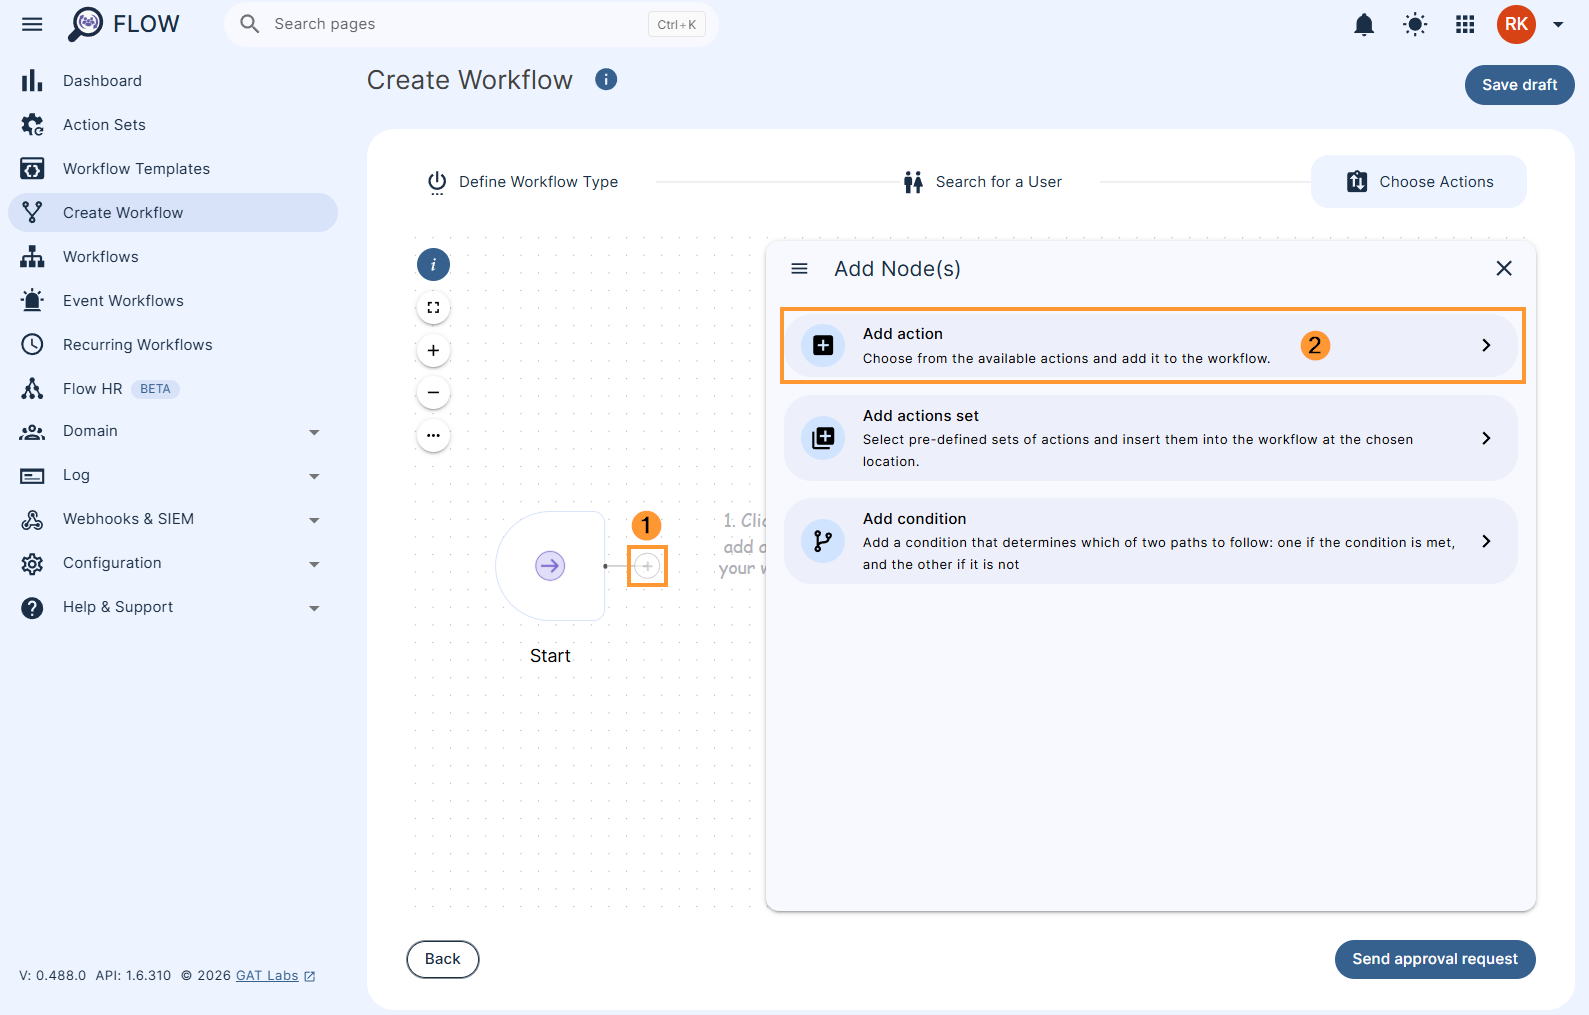
While crafting a workflow, in the Choose actions section, click on the (+) button (1) and then click the Add action button (2) This will present all the available actions.
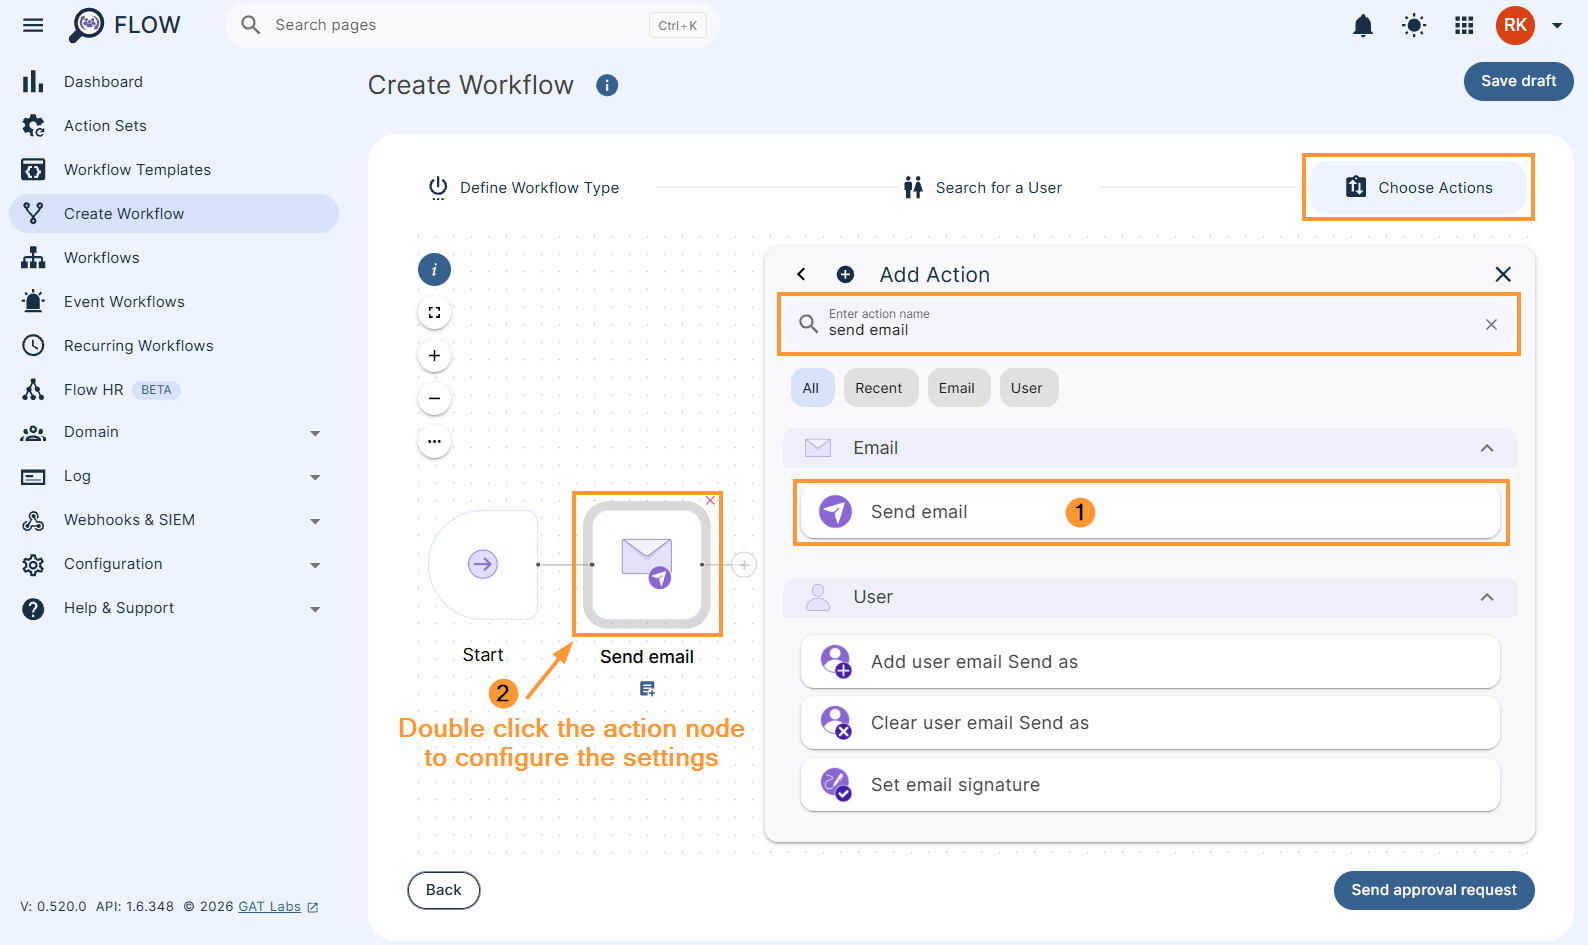
Search for the Send email action and add it to the workflow (1), then double click the Send email action node to configure the email.
Under the Type field select Send to specified user option (1).
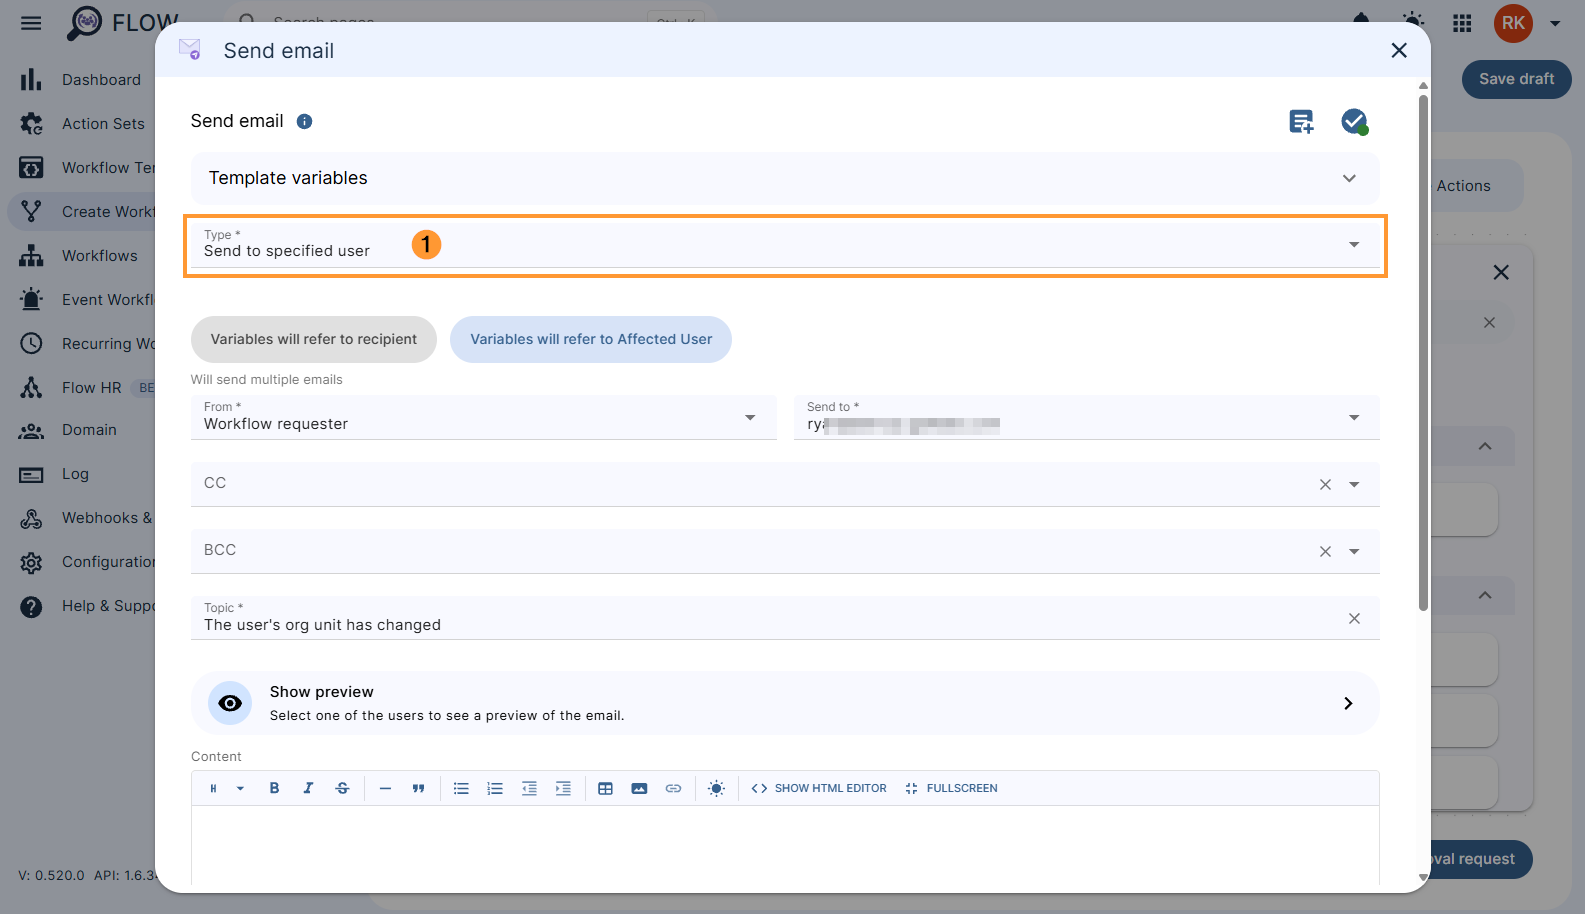
When you select the Type: ‘Send to a specified user,’ alternative options will appear underneath:
- Variables will refer to recipient – Choosing ‘Variables will refer to recipient‘ will result in sending a single email to the designated person. If the email template contains variables, they will reference the information specific to that user.
- Variables will refer to Affected User – Opting for ‘Variables will refer to Affected User‘ will generate multiple emails, with the quantity determined by the number of users chosen for the workflow. The variables employed in the email template will mirror the information of these selected users. NOTE: This contrasts with the variables used in the email content template for the single email option mentioned earlier.
To send multiple emails to the designated user, choose the ‘Variables will refer to Affected User‘ option (1). Then, select that particular user’s email address in Send to the field above (2).
Note: You can select a Group’s email in the ‘Send to’ field.
Next, start to construct the email by adding its title first (3). In the next step, you can start creating an email template.

Email template setup #
When you set up the above, you can create the email content according to your needs.
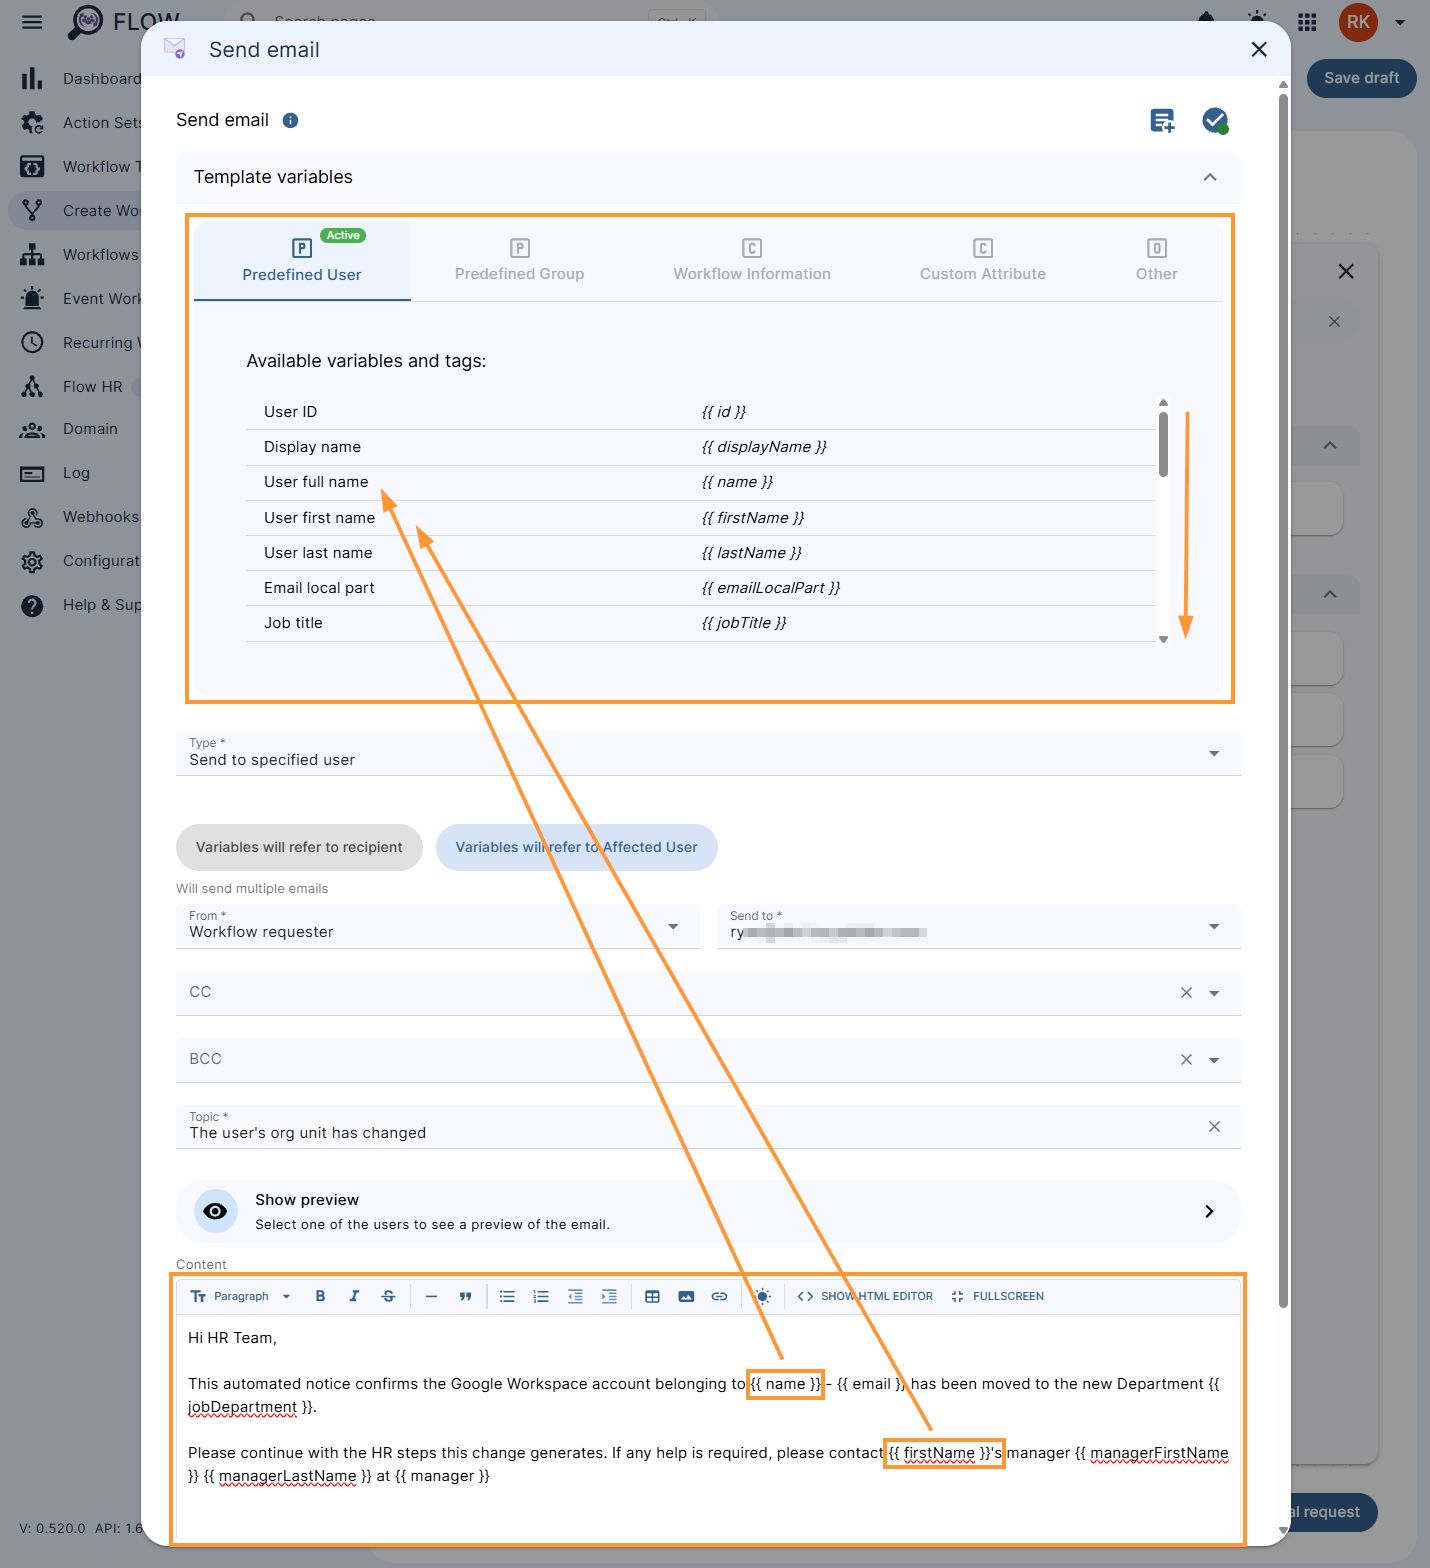
Above the email configuration window (1), you can find and use all email variables. Moreover, you can click the gray arrow at the bottom of the variable list to expand it and view the complete list of variables along with their availability.
Now, you are ready to construct an email template and use email variables for the full automation of this action (2).
You can easily apply variables to the email Content field by clicking on it. Additionally, clicking on a variable will populate the body of the email with the name of that variable.
Preview an email #
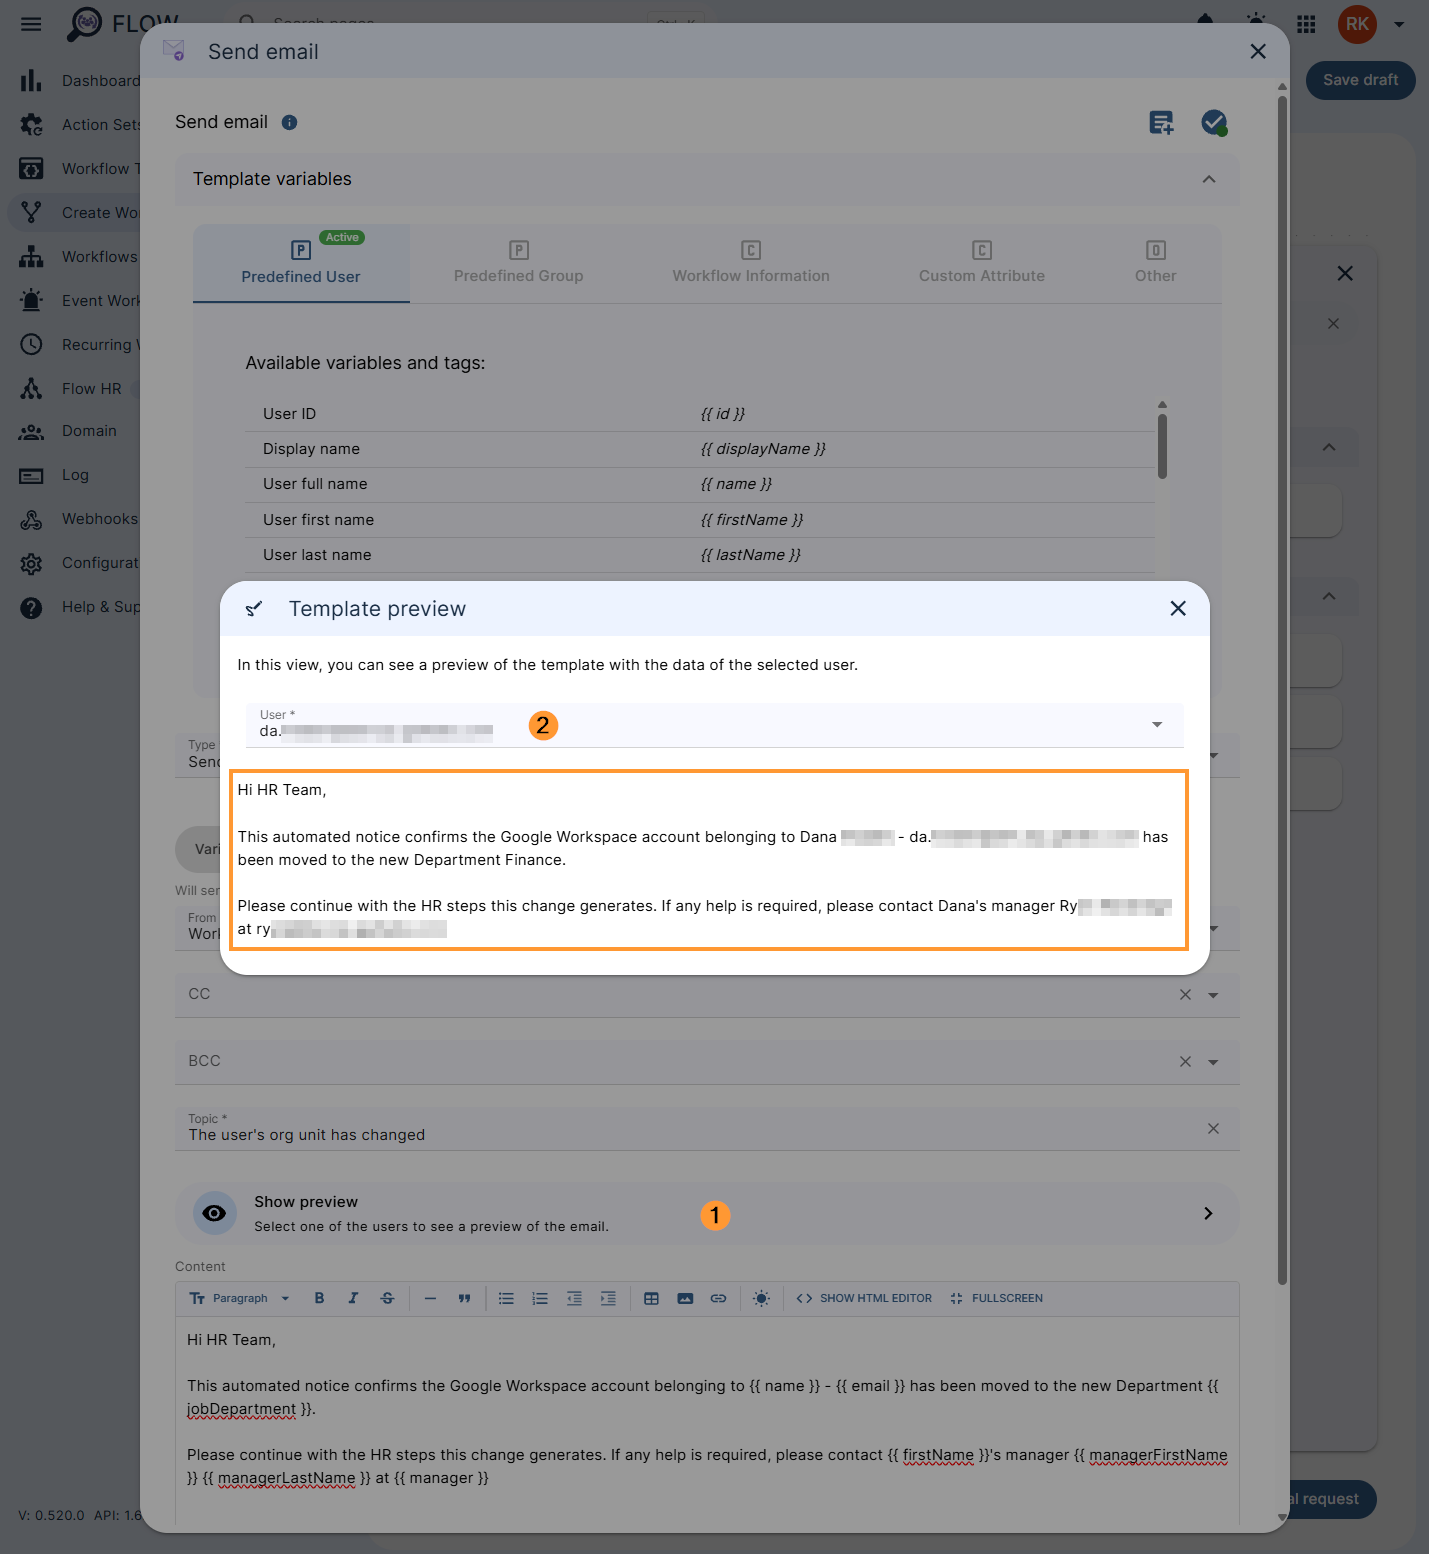
To see the real example preview of the constructed email, simply click on the ‘Show Preview‘ button. You can preview the content of the email, by selecting the user from the auto-populated list and the variables used in the email body are fulfilled with the user’s information.
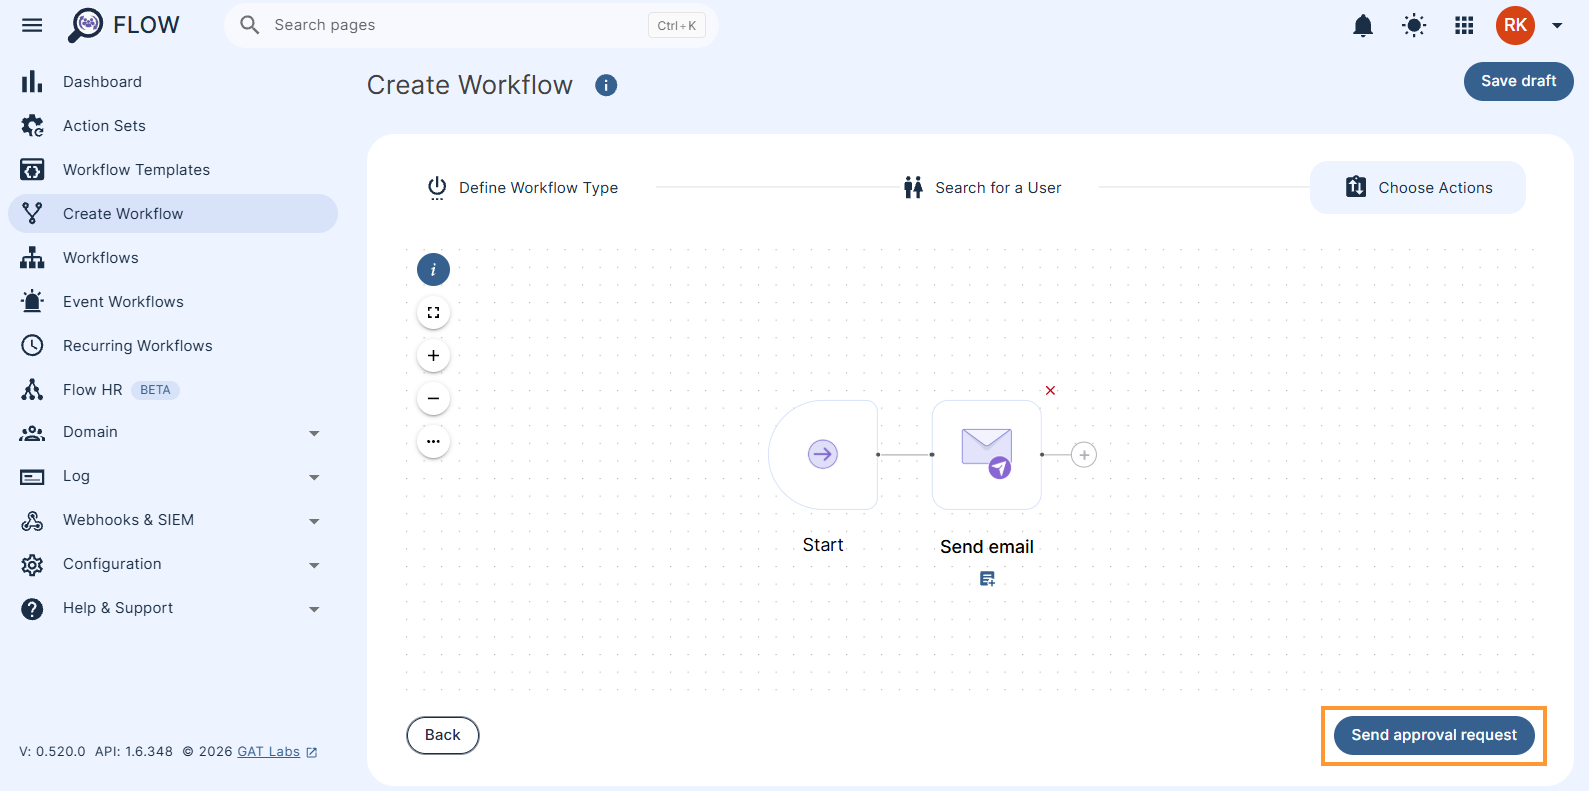
Finally, when everything is ready, the workflow can then be sent for review to the Security Officer by clicking on the ‘Send approval request‘ button.
Results #
After the Security Officer approves the workflow, the system will execute the job and send multiple emails to the designated user.
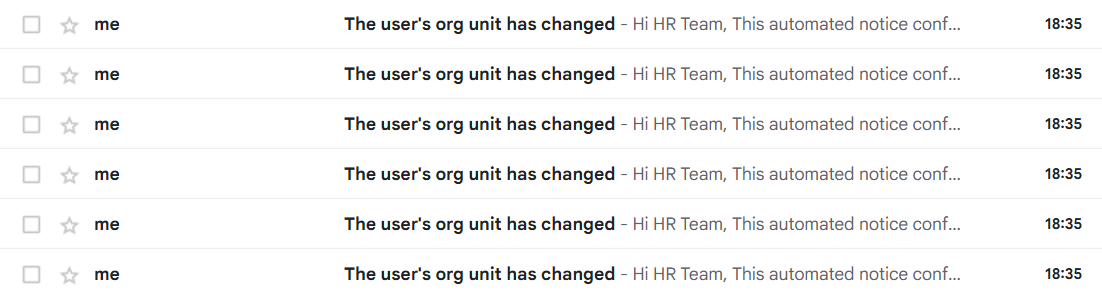
Each email pertains to an individual user selected for this workflow. Furthermore, in line with the examples provided above, we received 6 emails, aligning with the number of users selected for the workflow illustration.