

GAT Flow can be very useful in many processes for Google Workspace for Education Admins. The Classroom tab within GAT Flow helps manage an existing classroom – modify and delete it instantly.
An Admin can add, edit or delete Classroom, Teachers, and Students. The admin can also apply the Guardians to each student in the existing Classroom. For more info on how to manage Student’s Guardians, see this post here: Create, Modify, Delete or Add Guardian to Classroom via GAT Flow.
Step 1. #
First, for editing an existing Classroom, navigate to the Classroom module in GAT Flow and search for the Classroom in question by using the following attributes:
- Classroom name
- Teacher email
- Room number

When found, the Admin can edit the existing Classroom by navigating to the operators on the left-hand side as shown below:

The ‘pencil’ icon leads to the Classroom’s editor window and allows editing its details.
The ‘x‘ symbol triggers the removal of the Classroom.
Step 2. #
Next, you can edit each part of the General section of the Classroom:
- Class name (mandatory field)
- Owner (mandatory field)
- Section (optional)
- Room (optional)
- Classroom state (mandatory field)
- Description (optional)
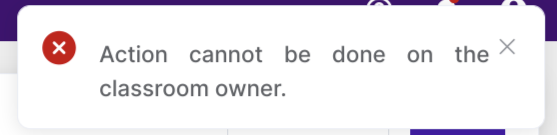
Note: The Owner of the classroom is automatically assigned as a Teacher, and cannot be removed. As a consequence, ‘Action cannot be done on the classroom owner’ message will appear if trying to perform the removal of the Owner while editing the Classroom.
If more non-owner Teachers exist in the classroom, they can be removed successfully.
Note: In case the account of the Owner is deleted, the Classroom Owner field will become ORPHANED. When the classroom becomes orphaned it is impossible to add a new student/teacher to it or change its owner.
Tip: To avoid the above situation, the best practice would be to make sure you have transferred the classroom ownership to the other teacher before deleting the user from the domain. By doing it, the classroom will still be kept active and you can edit it at any time.
Note: The Admin can update the Owner of the Classroom. After changing the Owner, the new Owner is automatically assigned as a Teacher. The original Owner is still kept as a Teacher, until their removal.
Step 3. #
As the next step, the Admin can set the state of the Classroom as follows depending on the current needs:
- Unspecified
- Active
- Archived
- Provisioned
- Declined
- Suspended

Step 4. #
The Admin can simply edit the Classroom members section by:
- Add member – adding member manually (the user is added immediately during automatic membership acceptance)
- Invite member – inviting a student or Co-Teacher to join the class (the user must accept the invite to be able to join the class)
- Import students – importing additional members in bulk (the students are added immediately during automatic membership acceptance)
- editing the role of the existing member – ‘pencil’ icon
- deleting the member – ‘x’ icon
- assigning Guardian(s) of the students

Edit Classroom member:

Add or delete the student’s Guardian:

Step 5. #
Lastly, you need to save actions to update the information on any changes made in the Classroom module.
When everything is ready, click on one of the Save buttons visible on the top or lower right corner of the dashboard. As a result, you update the Classroom instantly.


