

GAT Flow allows any workflow job for OnBoarding, OffBoarding, and Modifying users to be scheduled and run at a future date.
NOTE: This feature requires you to have a Security Officer, you can learn how to enable a Security Officer here.
Launch GAT Flow #
Open GAT Flow from your GAT+ app bookmarked link
Create the workflow #
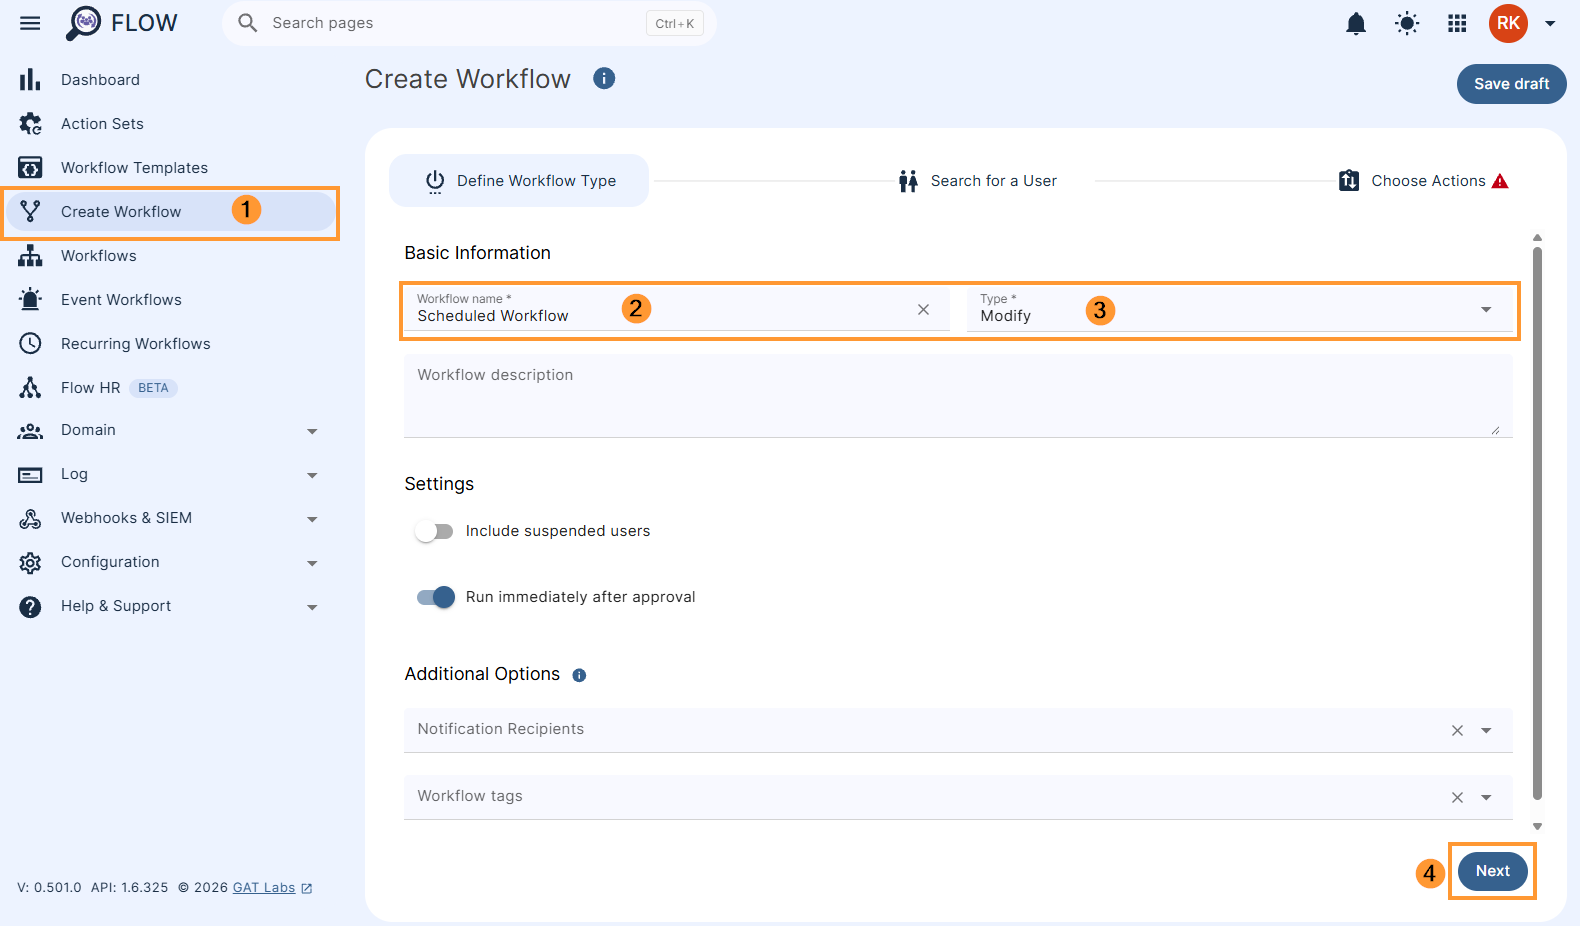
Navigate to GAT Flow > Create a workflow (1)
In the Workflow fill in the details. You can set it up also as an Event workflow or Recurring workflow.
- Name – enter the name of the workflow (2)
- Description – enter a description for the workflow (optional)
- Type – select what workflow type you would like to run
- Modify – modify existing users (3)
- Offboarding – offboarding existing users
- Include suspended users – enable or disable to allow you to select users who are currently suspended:
- If enabled – you will be able to select even users who are suspended
- If disabled – you will be able to select only users who are active
- Run immediately after approval – provides an option to schedule the workflow to run in a selected future time (optional)
Later click Next (4) to proceed.
For each of the workflow types, you can deselect the “Run immediately after approval” button.
Set up Time and Date #
This will allow scheduling the job to run in a future time period.
This is ideal if you want to schedule offboarding for users.
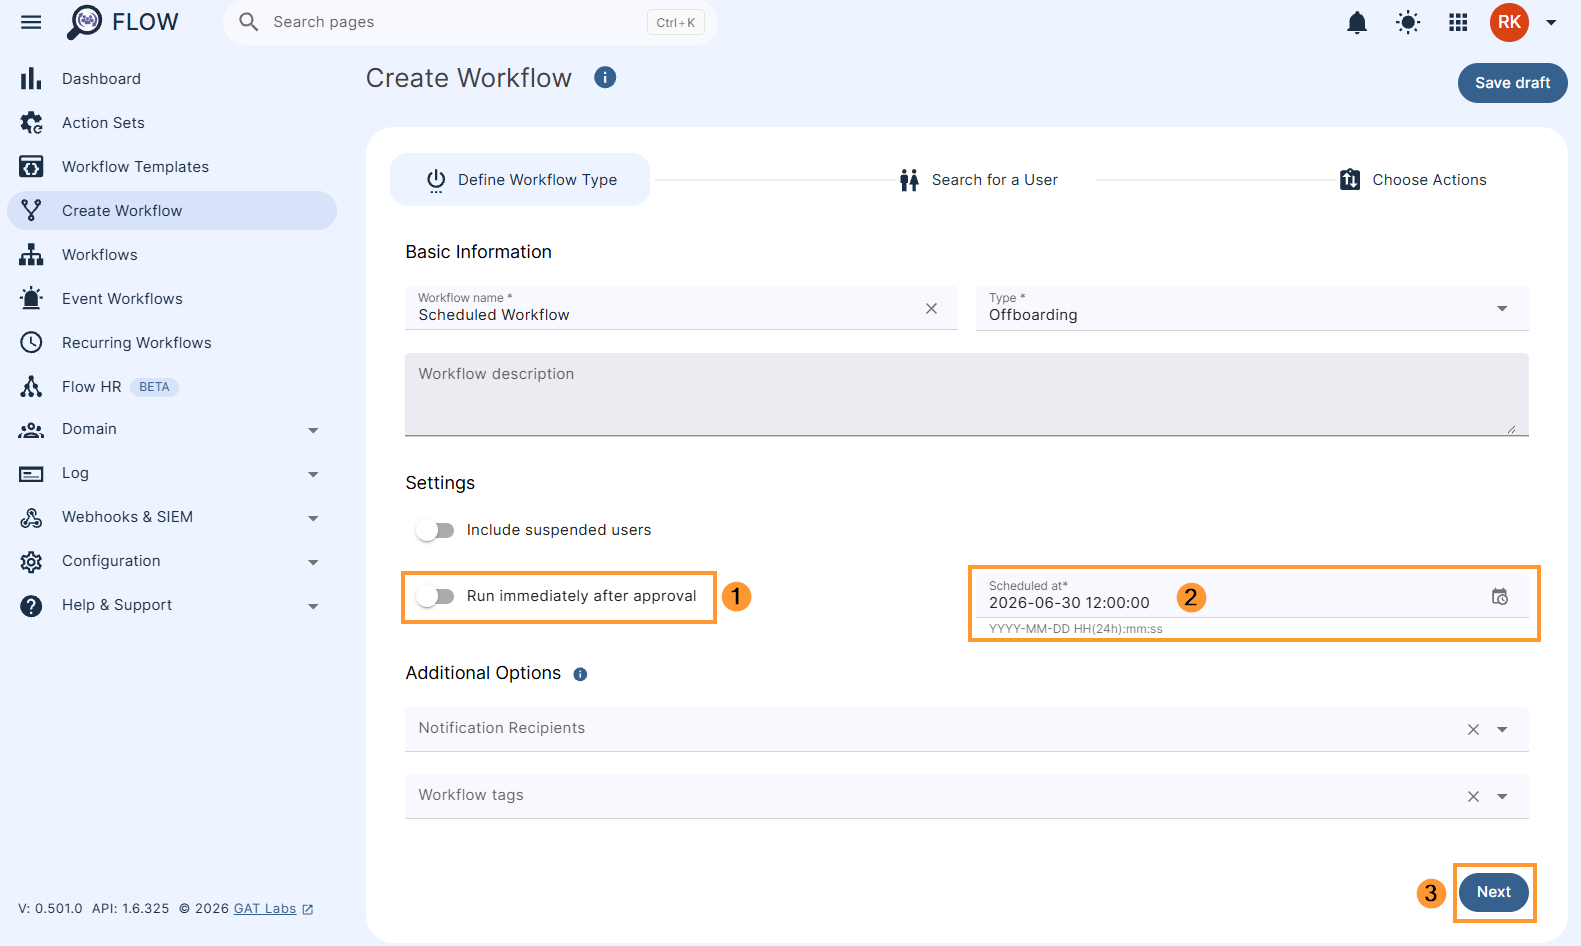
Click on the check (run immediately after approval) button.
The calendar option will be displayed below to pick the date & time when the Scheduled workflow should run.
Select DATE and TIME for when the workflow is to be set to run.
Note: Keep in mind that the selected time is not exact! This is the time that workflow will be requested it will require the Flow task to start. It might take some time.
Note: This scheduling can be done for each of the workflows – Onboarding, Modify, and Offboarding
Click Next to proceed.
Search for user(s) #
Under the Search for a user section, pick the users that will be offboarded.
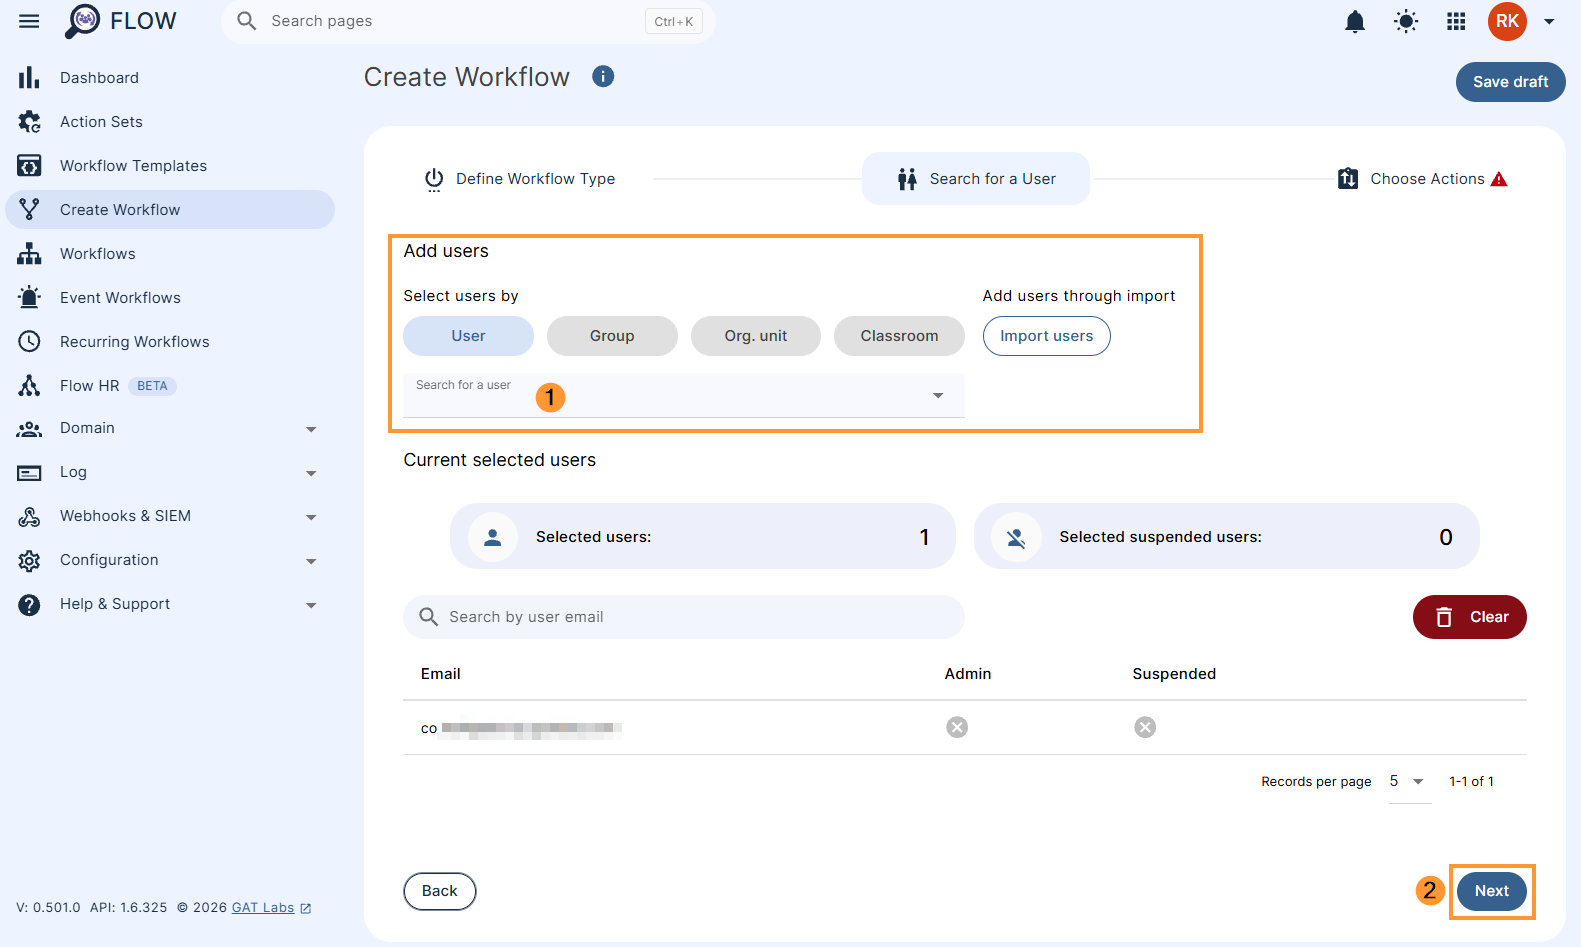
Click the Next button and choose the Actions to take with offboarding the user
Choose actions #
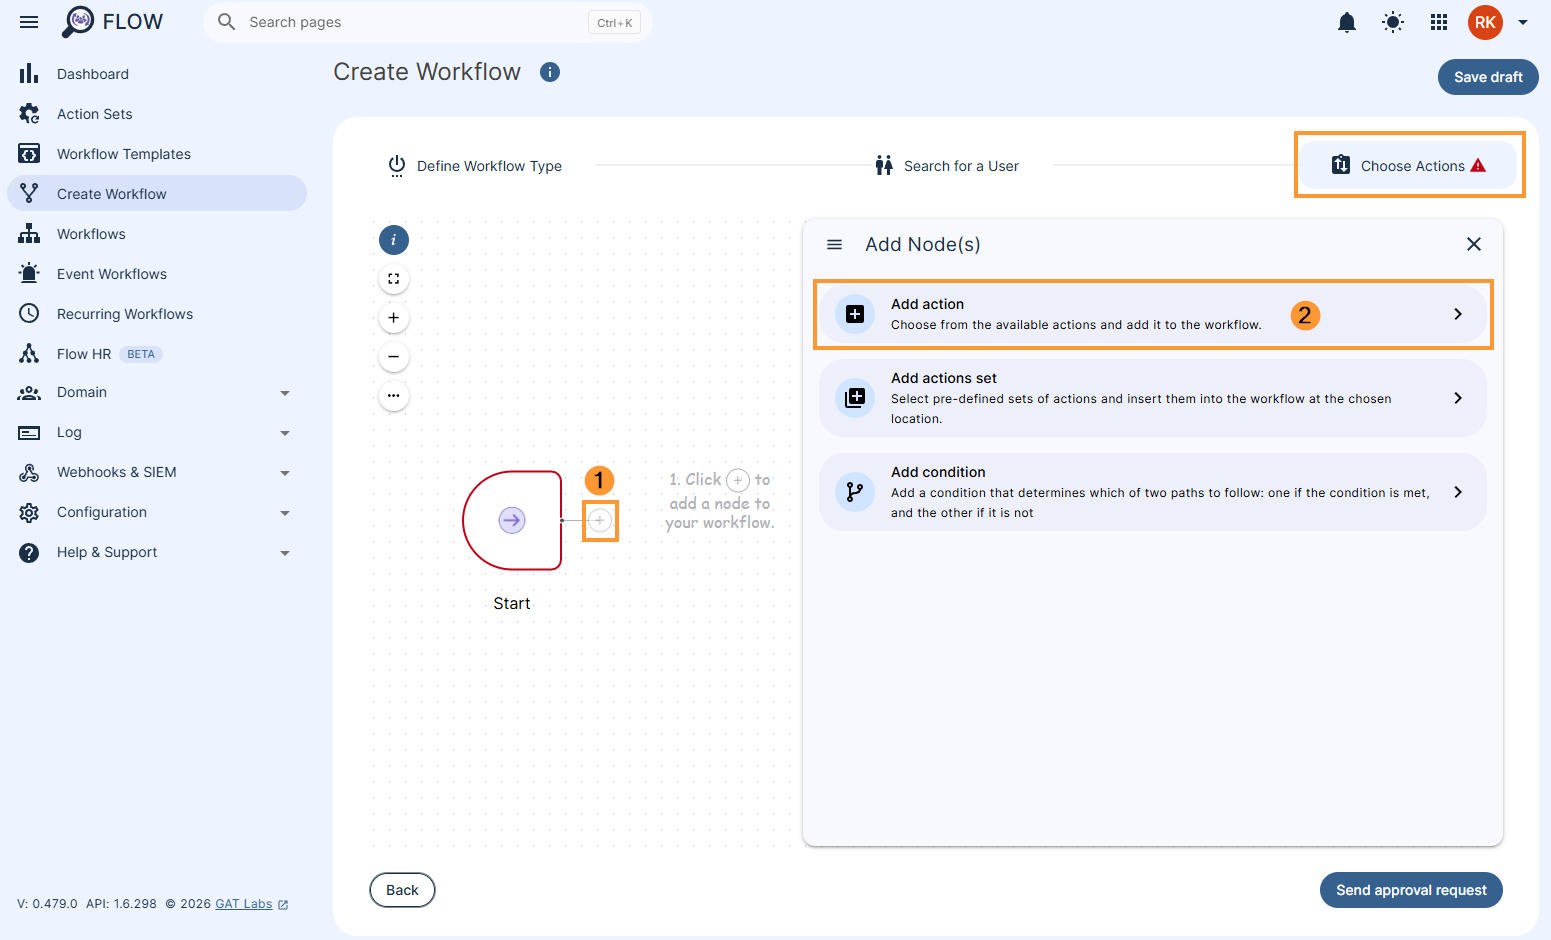
In the Choose actions click on the (+) button (1) and then click the Add action button (2)
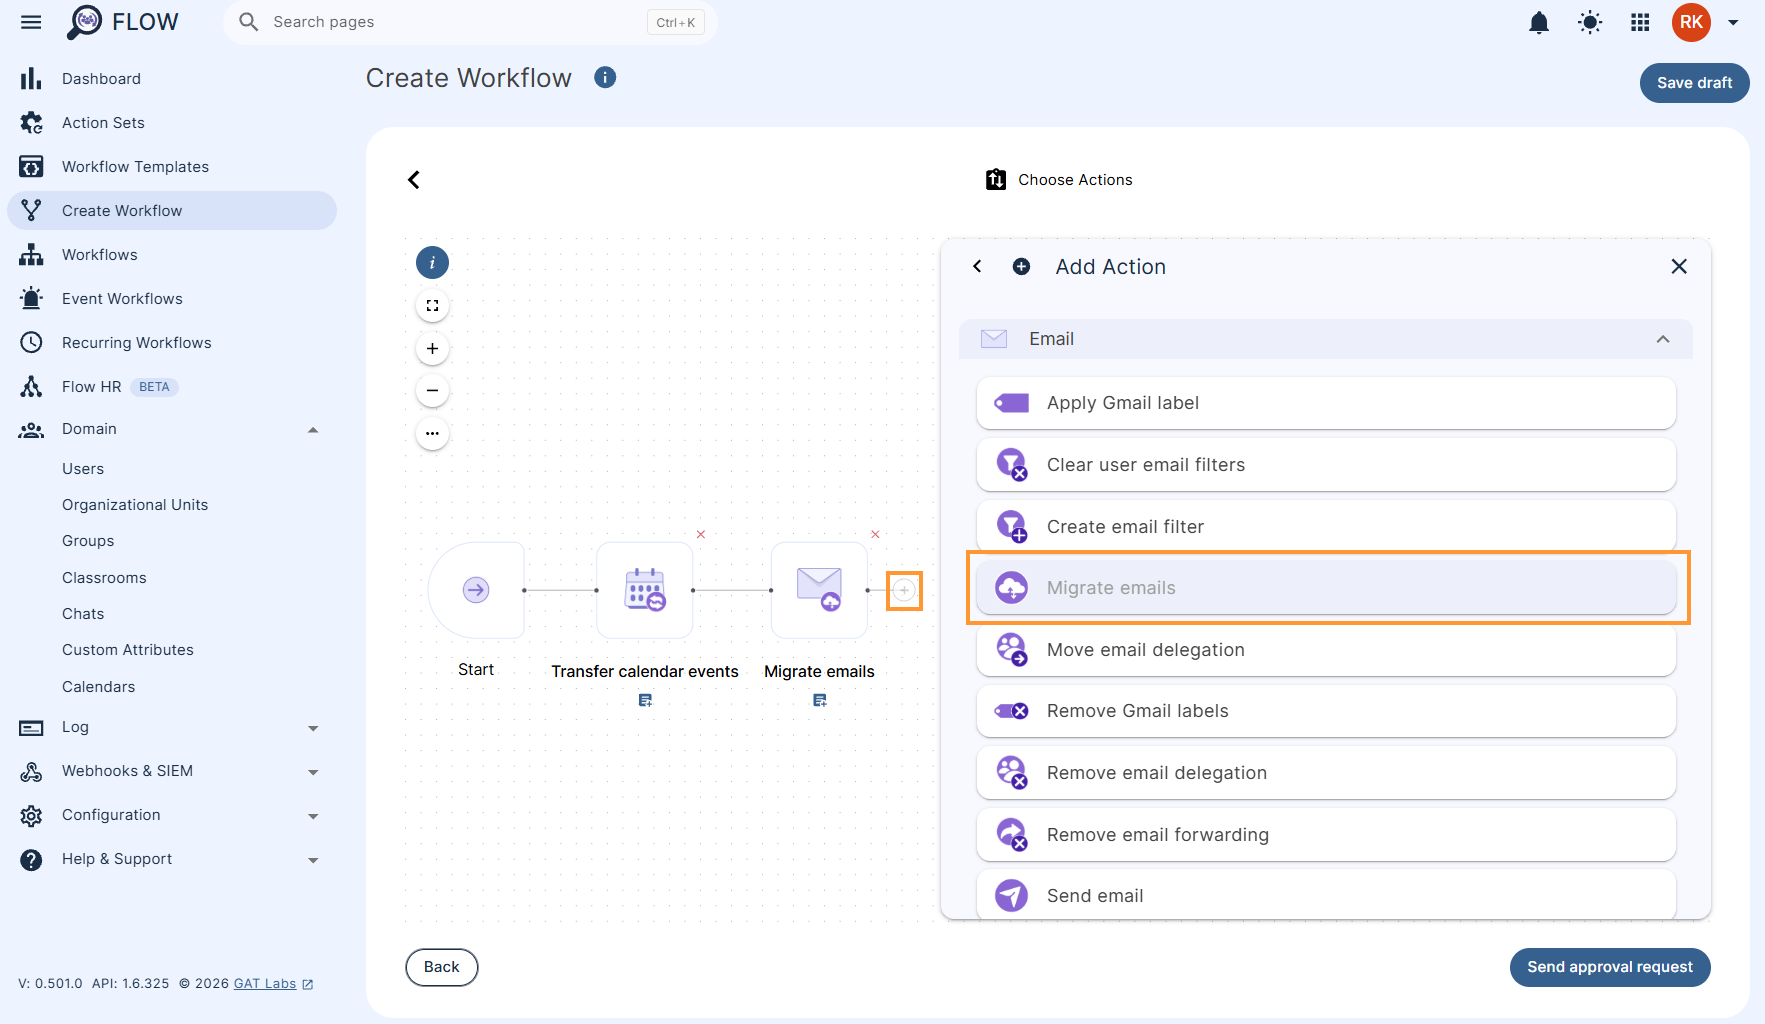
Select any of the actions to add to the workflow, double click on the action node to fill in the details for each of them.
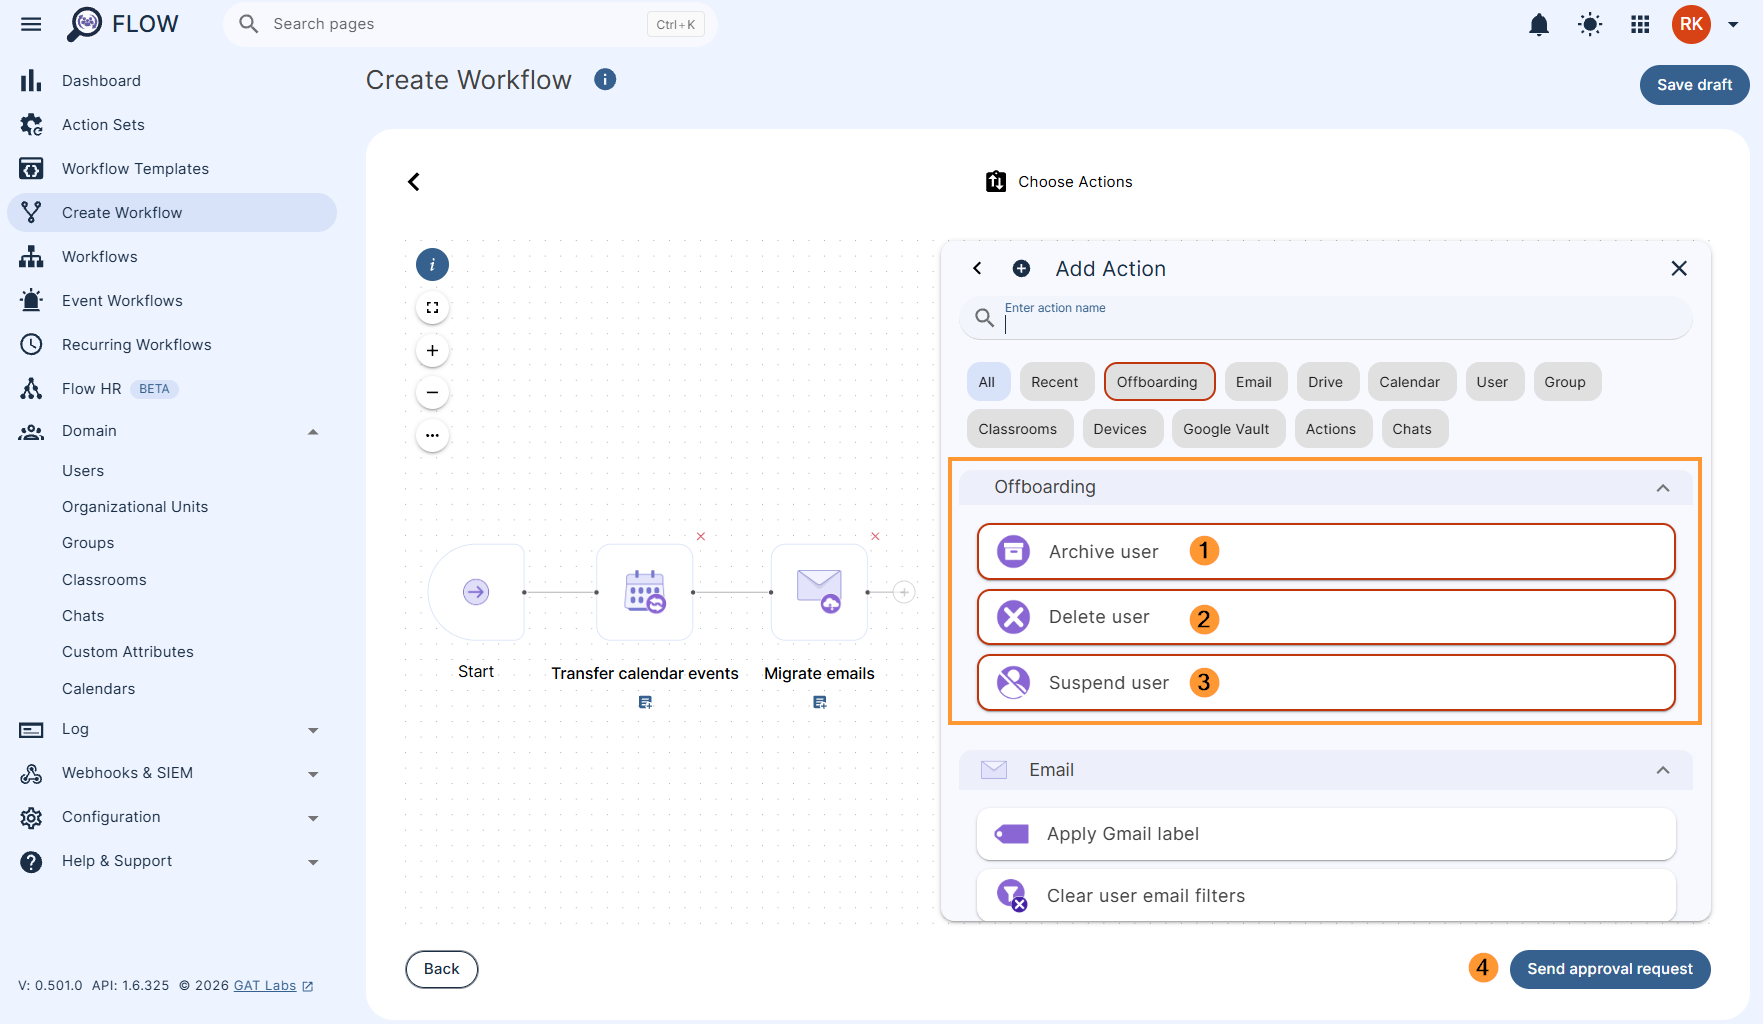
You must now choose the offboarding action. This can either be to Archive the user (1), Delete the user (2) or Suspend the user (3) and click on Send approval request (4).
Approval Request from Security Officer #
When the Security officer approved the request, the job status will be changed to Scheduled.
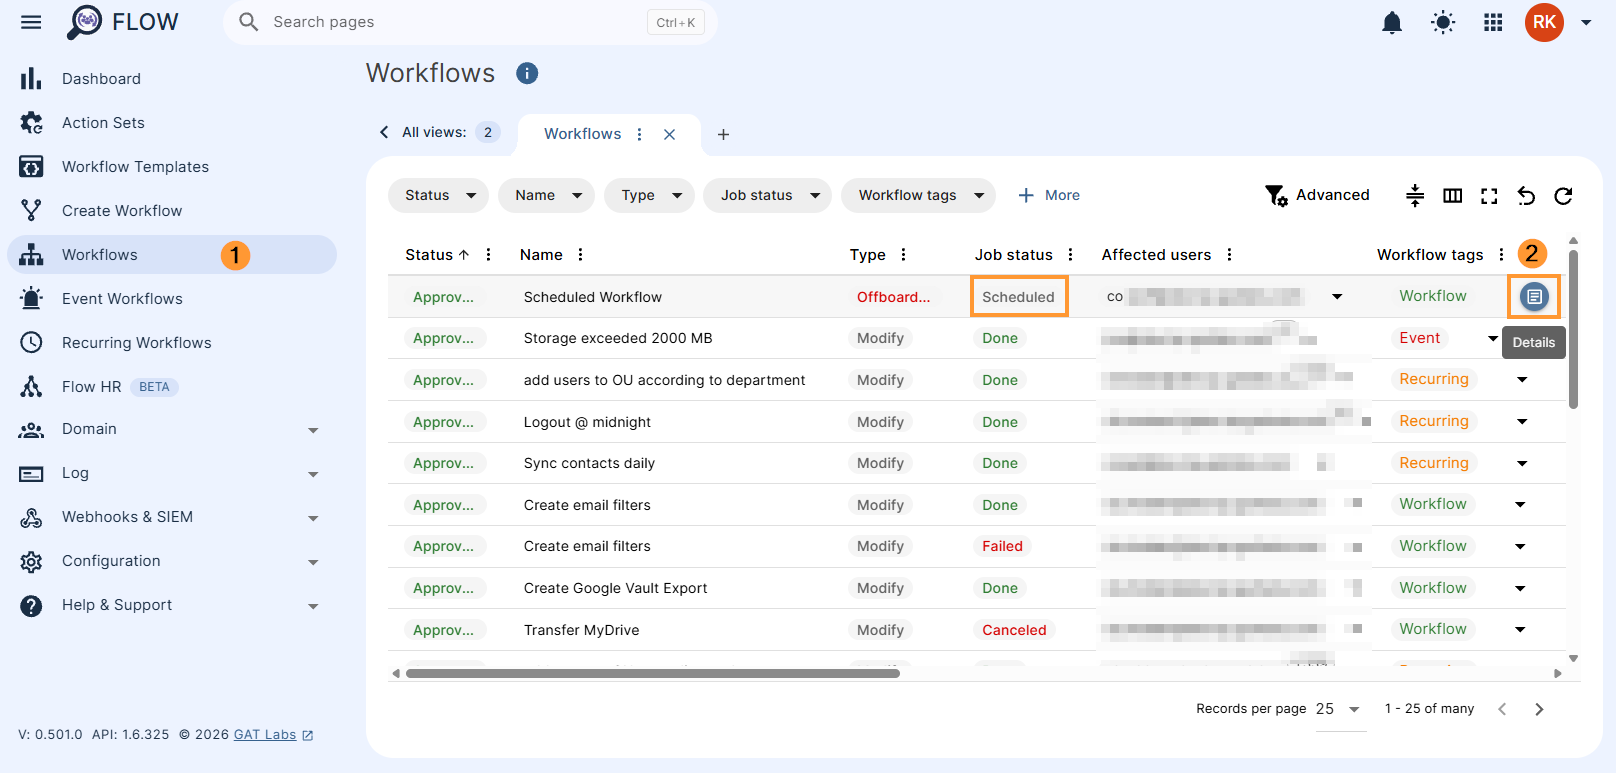
Selecting the page icon will show additional details.
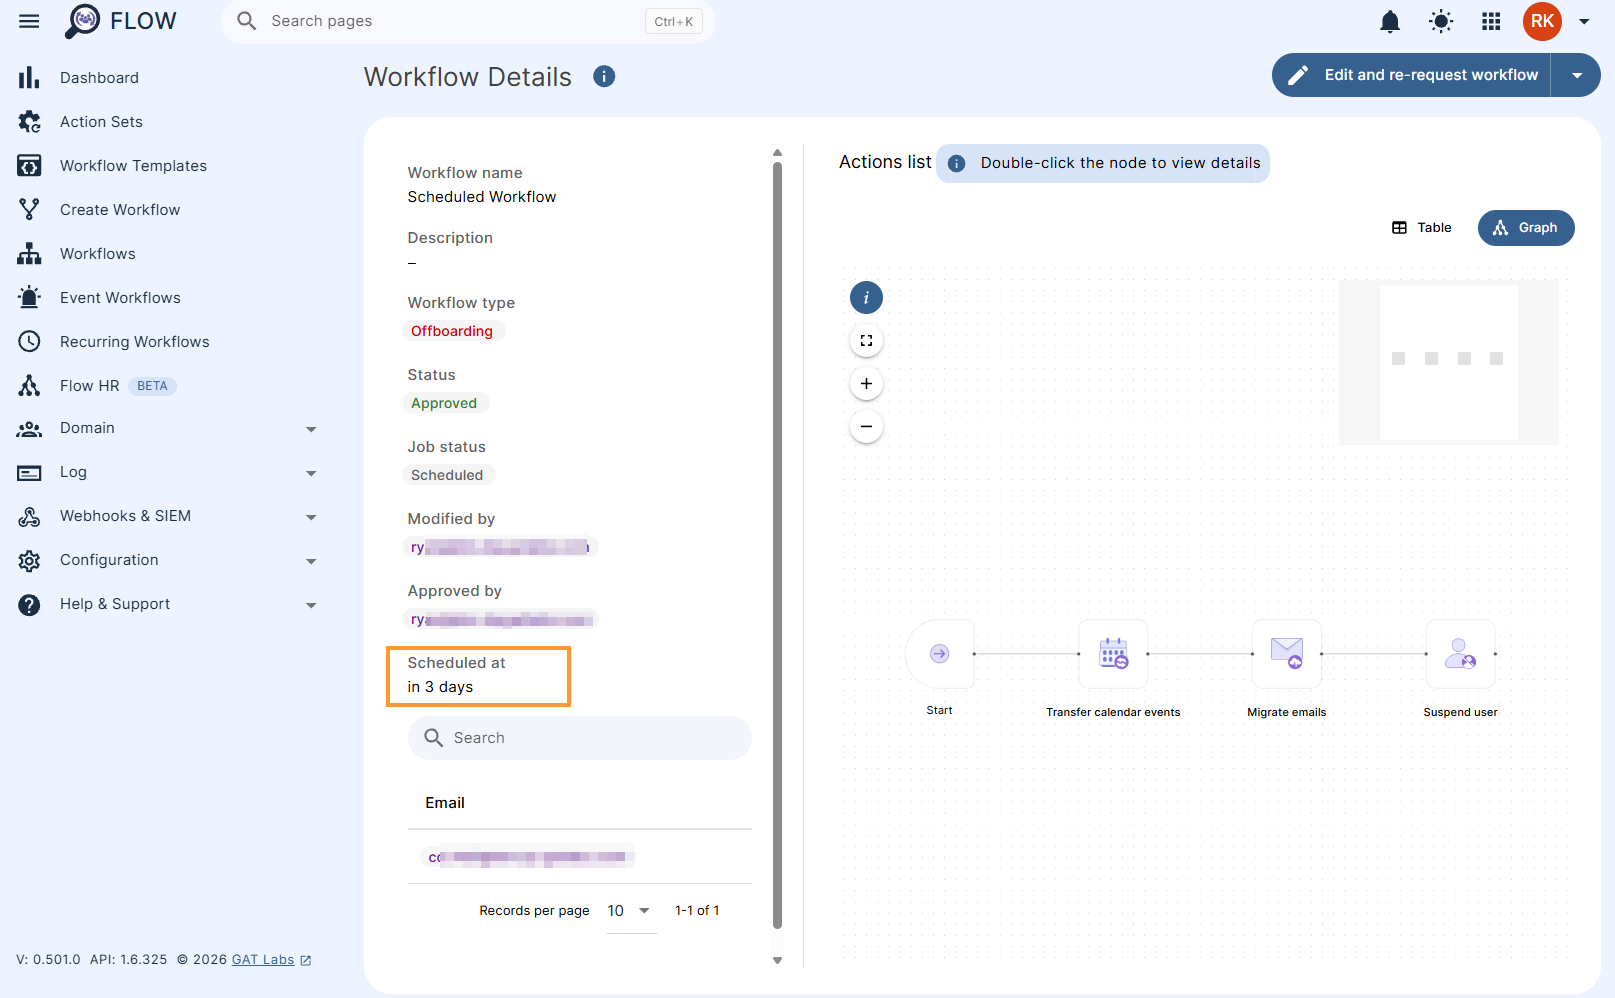
On the date of the Scheduled time, the actions we selected will take effect.


