Overview #
GAT Flow is a user management tool for Google Workspace Domains.
It allows Admins to set up and take automated actions on their domain users.
There are multiple different actions that can be taken for users, one of them is to generate passwords for users.
Generate passwords #
User Onboarding workflow #
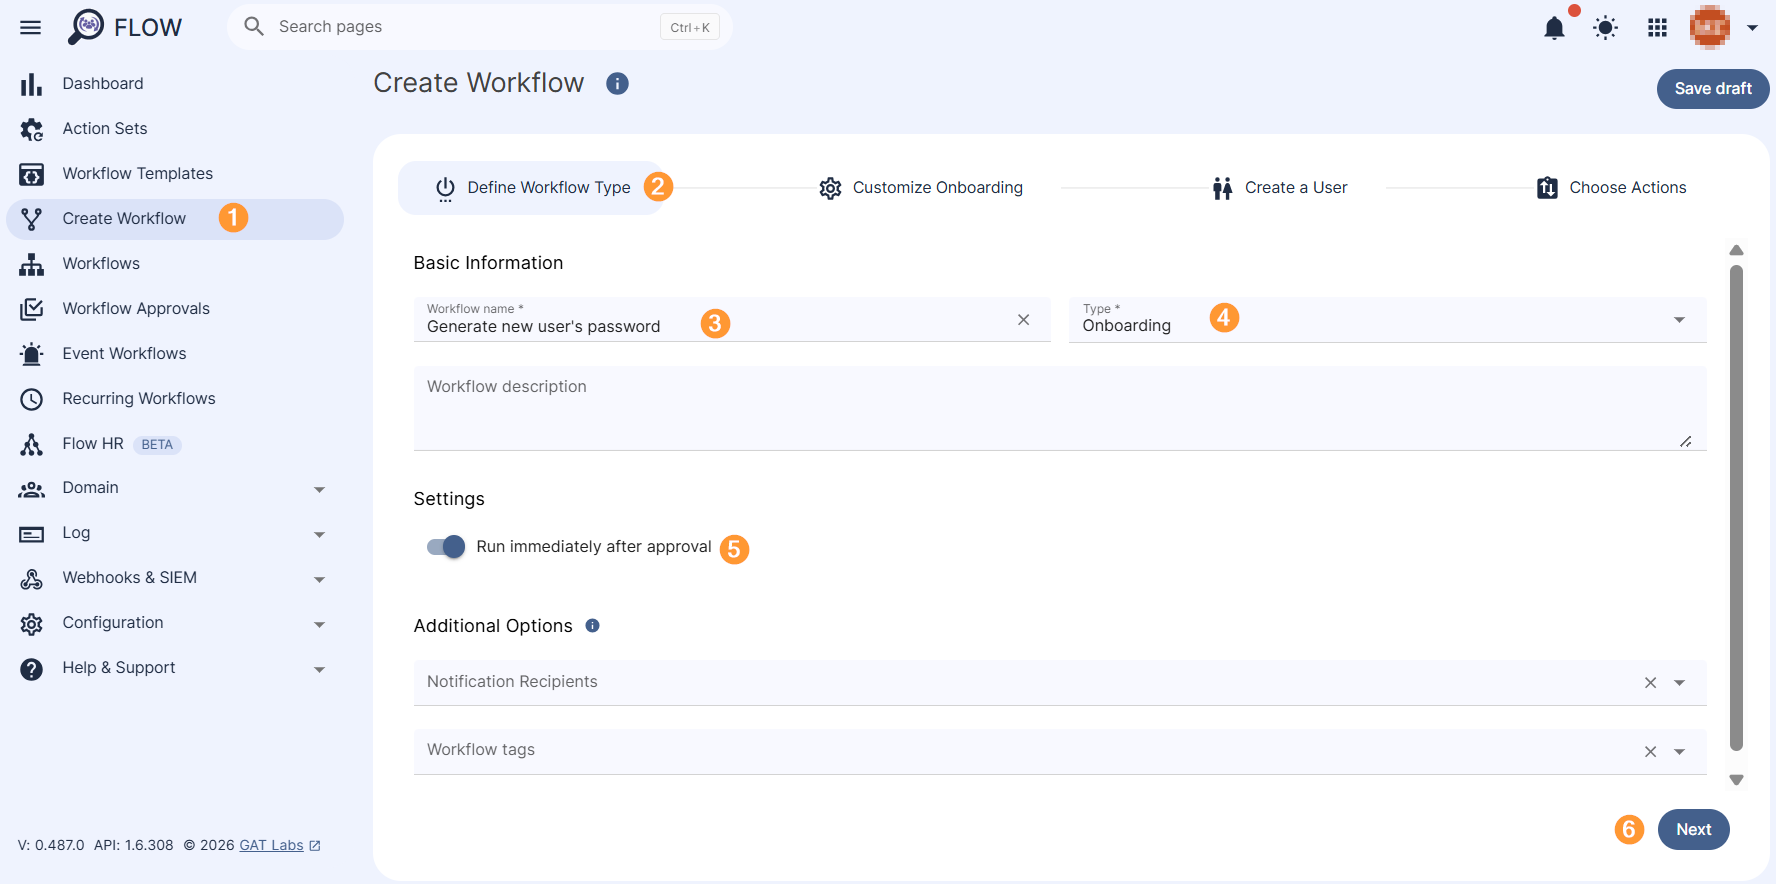
Navigate to Flow > Create Workflow
In Define Workflow Type – select the workflow type and name
- Name – enter a name for the workflow
- Type – select the workflow type
- Onboard – onboard the new users to the domain
- Description (optional) – a description of the workflow can be added
- Run immediately after approval
- Next – click on the button to proceed
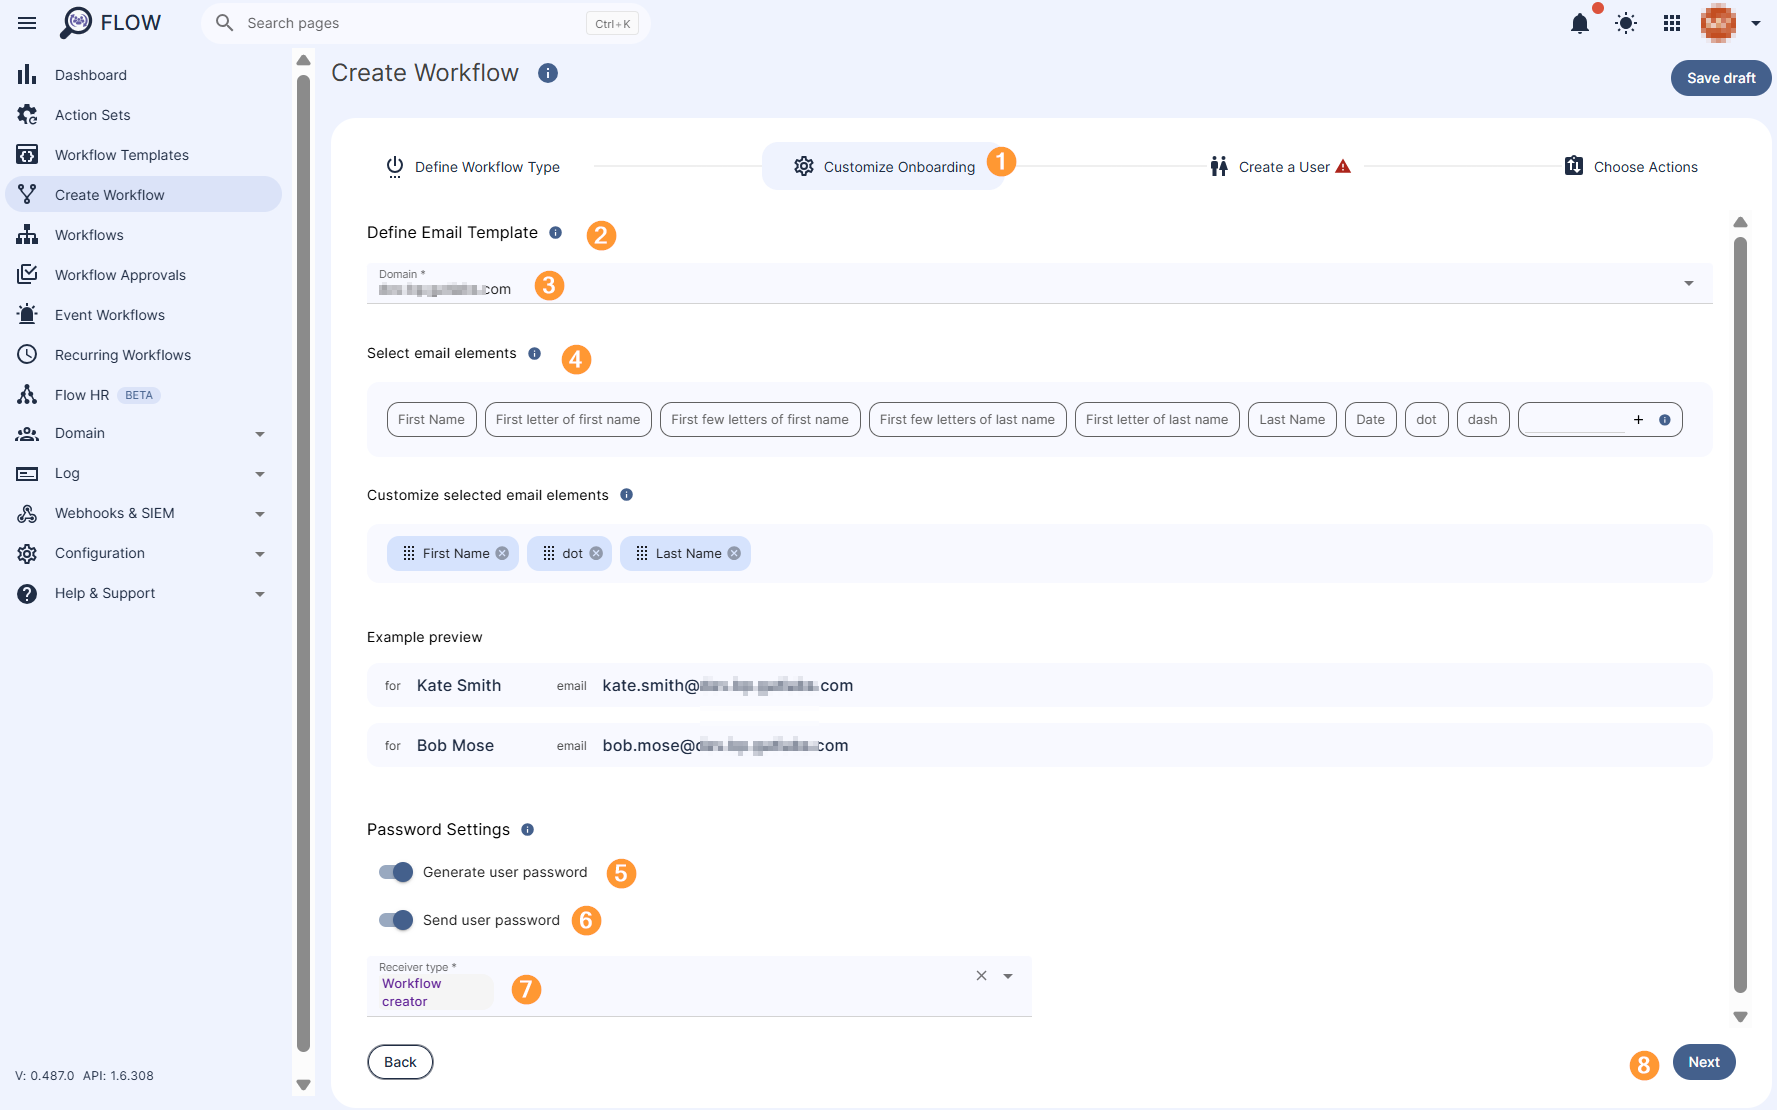
Customize Onboarding #
In the Customize Onboarding section (1), define email template (2), select the default domain (3), select email template (4), and configure the Password Settings as follow:
- Generate user password (5)
- Send user password (6)
- Receiver type – e.g. Workflow creator (7)
Click on Next (8) to move forward.
Create a New User #
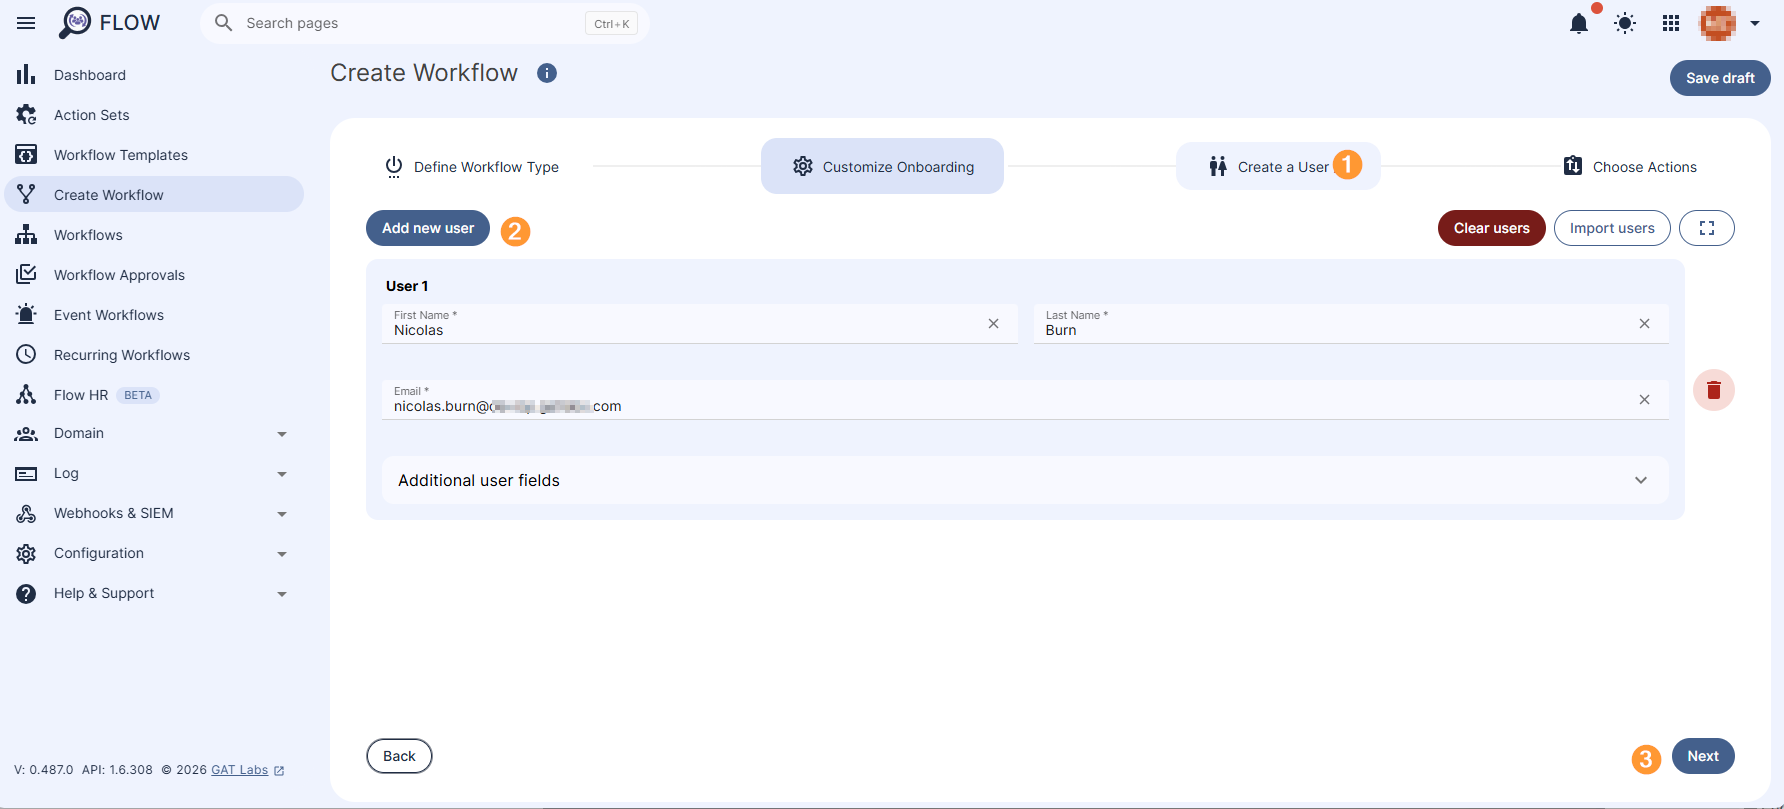
You can add relevant actions into the workflow so once the new user is created, they will be also executed, e.g. Send email (send welcoming email with onboarding instructions)
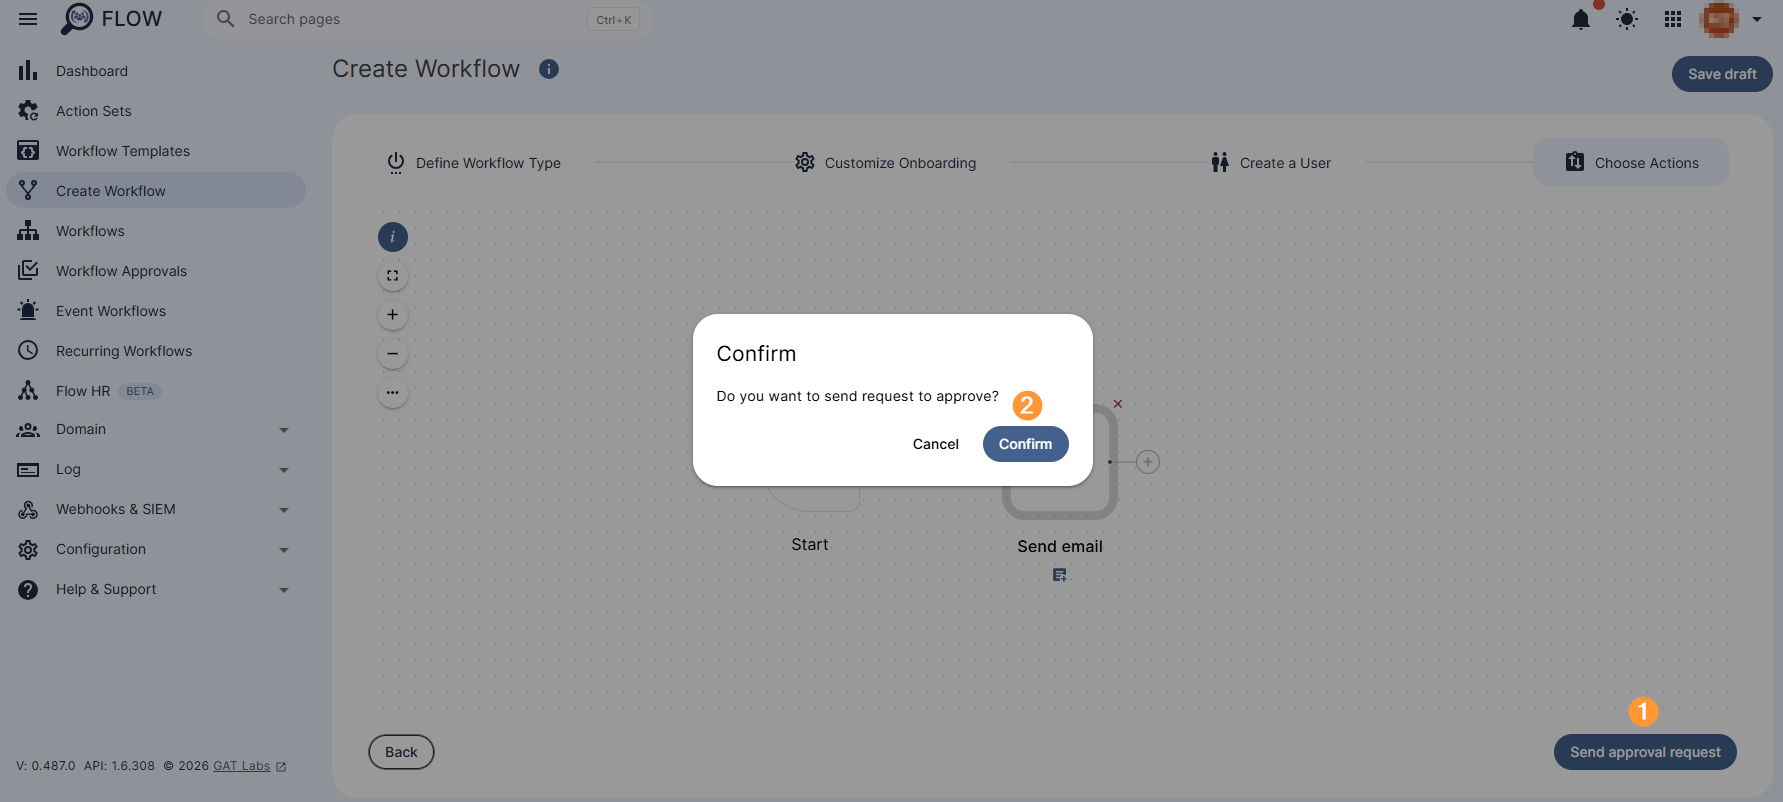
Once finished, click anywhere outside the action node to close it and select Send Approval Request to the Security Officer for review.
After selecting Send Approval Request (1), a confirmation message will appear. Confirm to continue (2).
Security Officer Approval #
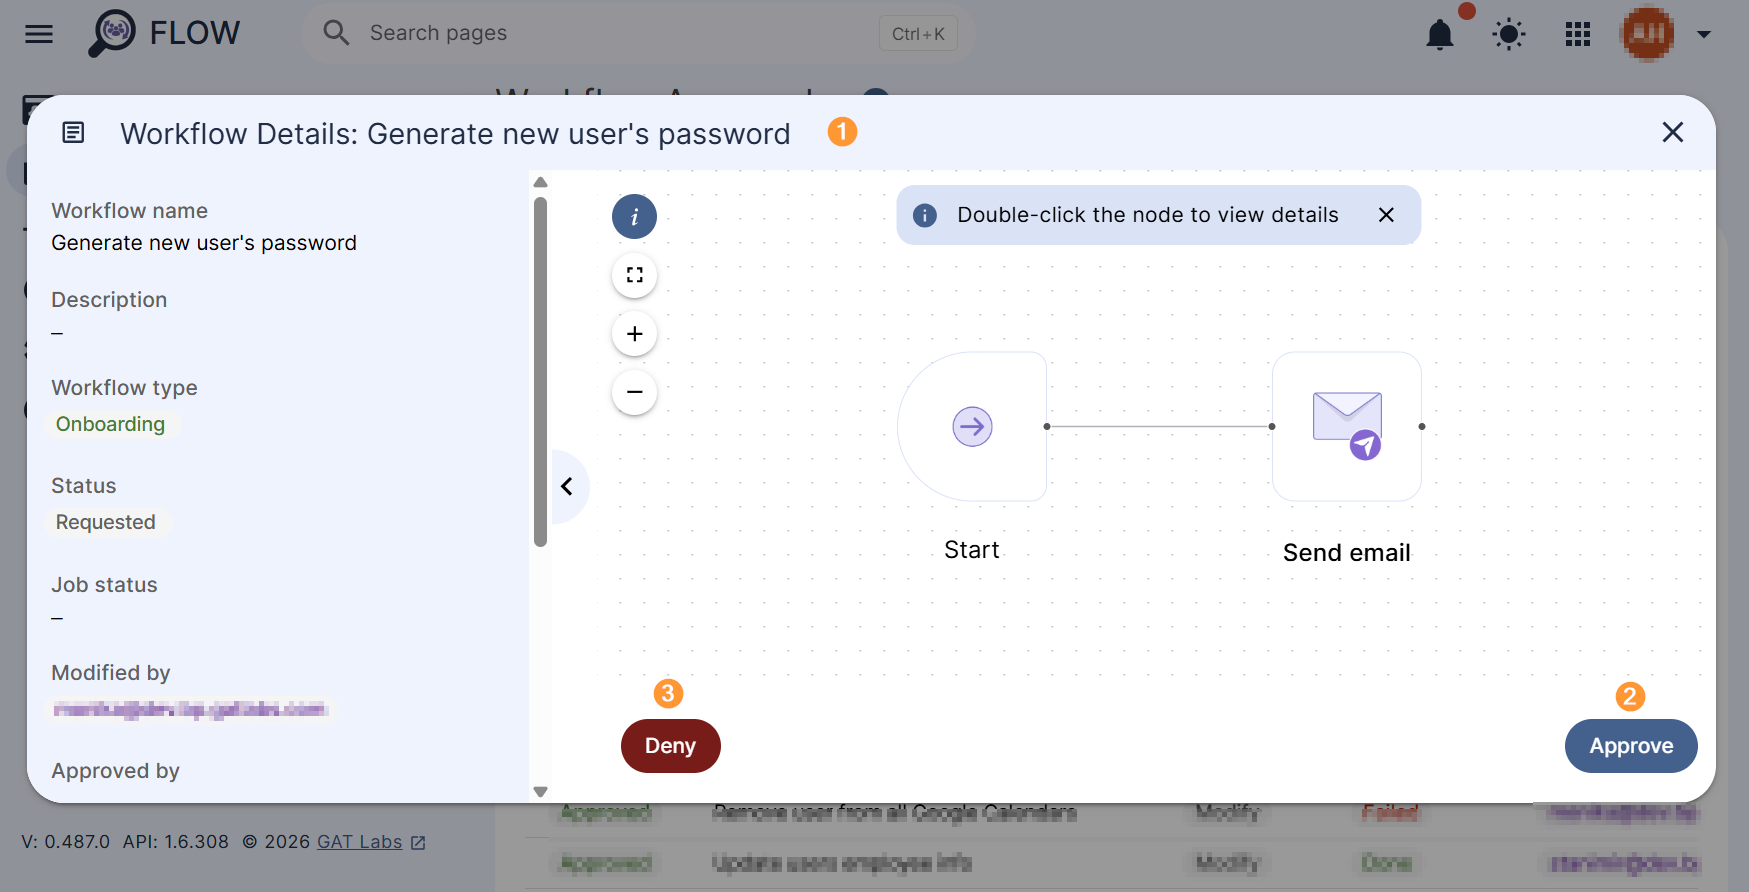
The Security Officer will receive an email notification for verification.

After clicking the link in the email, they will be redirected to the approval section of the relevant workflow in Flow (1), where they can review the request and approve (2) or deny it (3).
Once approved, the action will take effect and all user access permissions to calendars will be removed.
Note: If pre-approval is enabled no Security Officer approval will be needed.
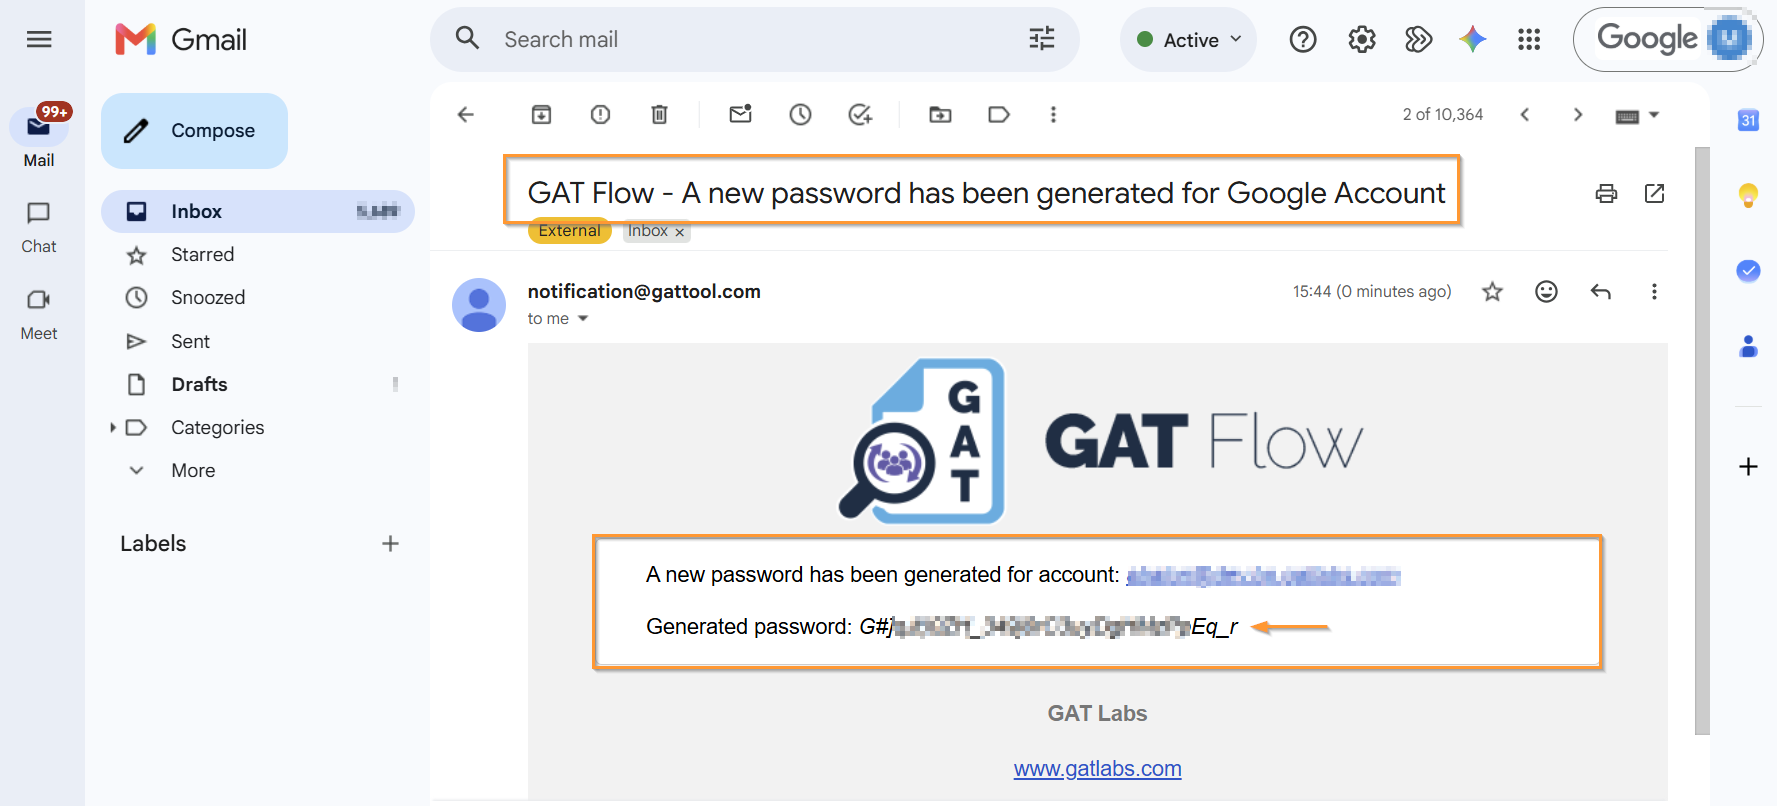
Results #
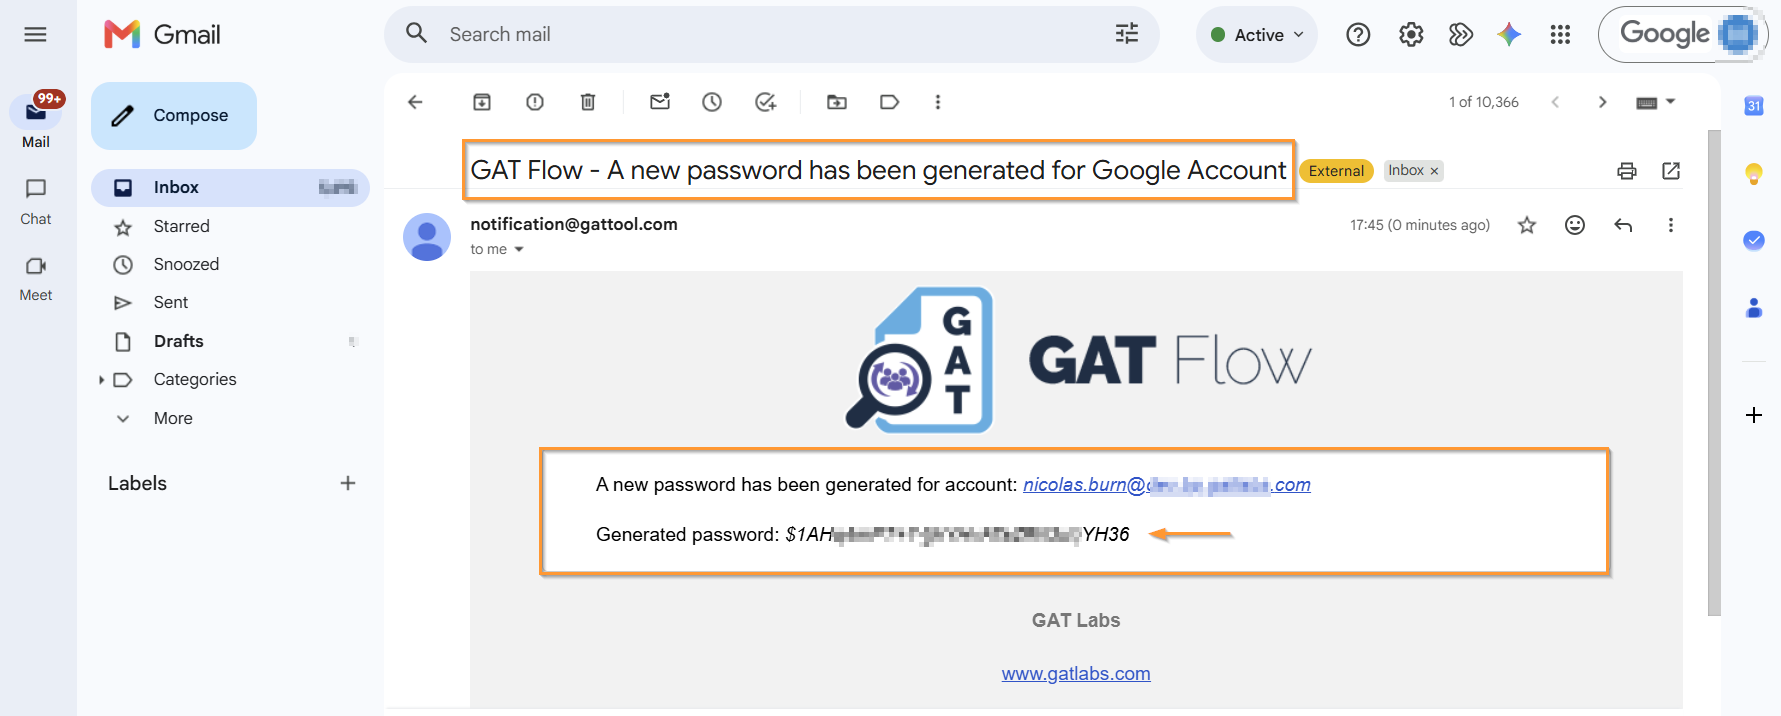
As a result of the action, the new user’s password will be automatically generated and sent to the workflow Recipient as configure under in the workflow.
Modifying workflow #
The Admin can also Generate passwords when Modifying existing users
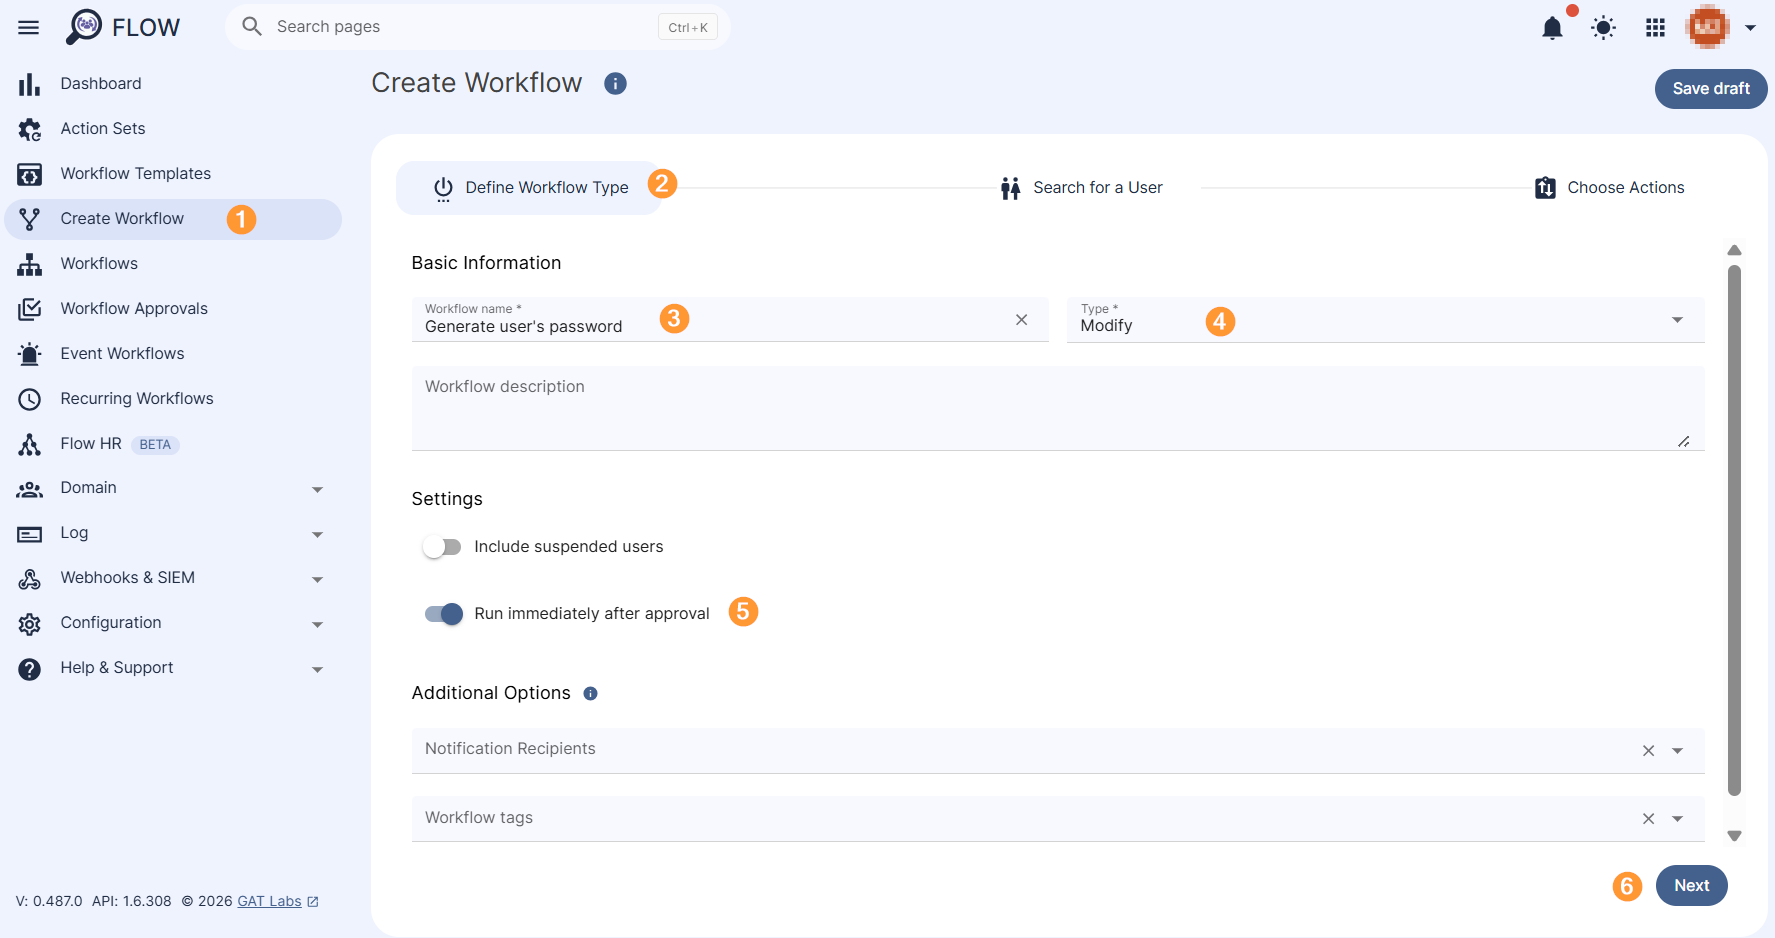
Navigate to Flow > Create Workflow
Create Workflow #
In Define Workflow Type – select the workflow type and name
- Name – enter a name for the workflow
- Type – select the workflow type
- Modify – modify and update existing users of the domain
- Description (optional) – a description of the workflow can be added
- Run immediately after approval
- Next – click on the button to proceed
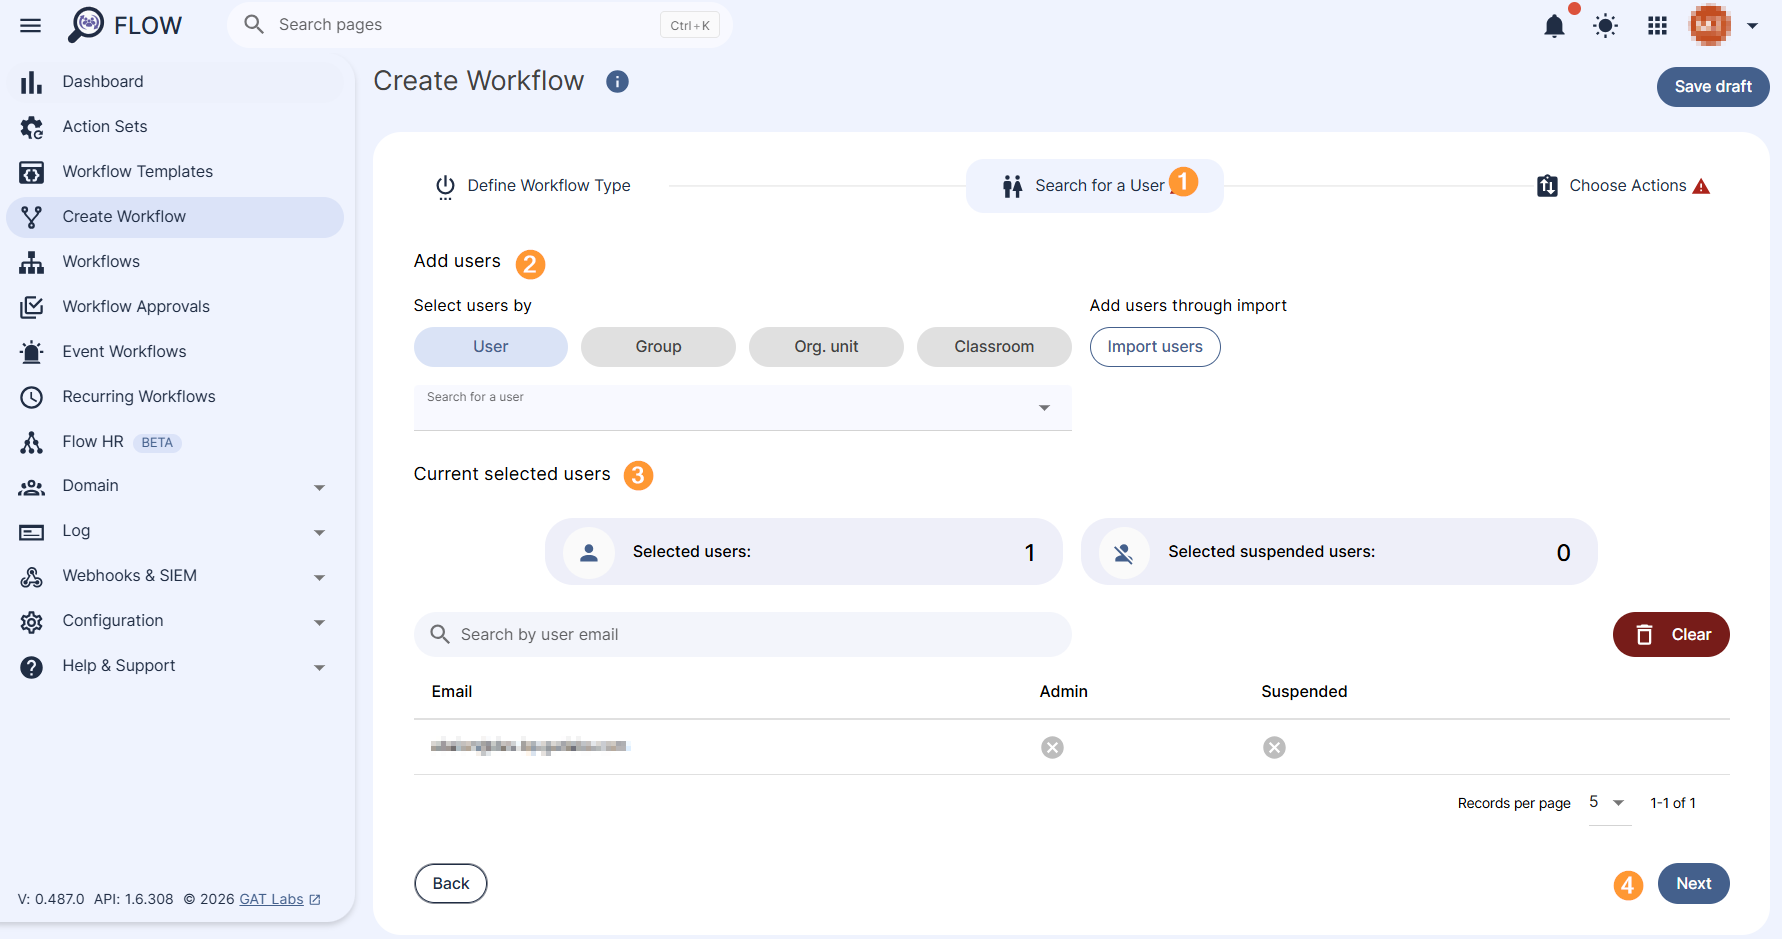
Search for a User #
In Search for a user (1)- select what users to be affected by this workflow (2)
- Search for a User – select individual users
- Search for a Group – select a group of users
- Search for an Org. Unit – select Org. Unit of users
- Classroom
- Import users – import used via Google spreadsheet
Check the list of selected users under the Current selected users section (3), and click Next (4) to move on to the next step.
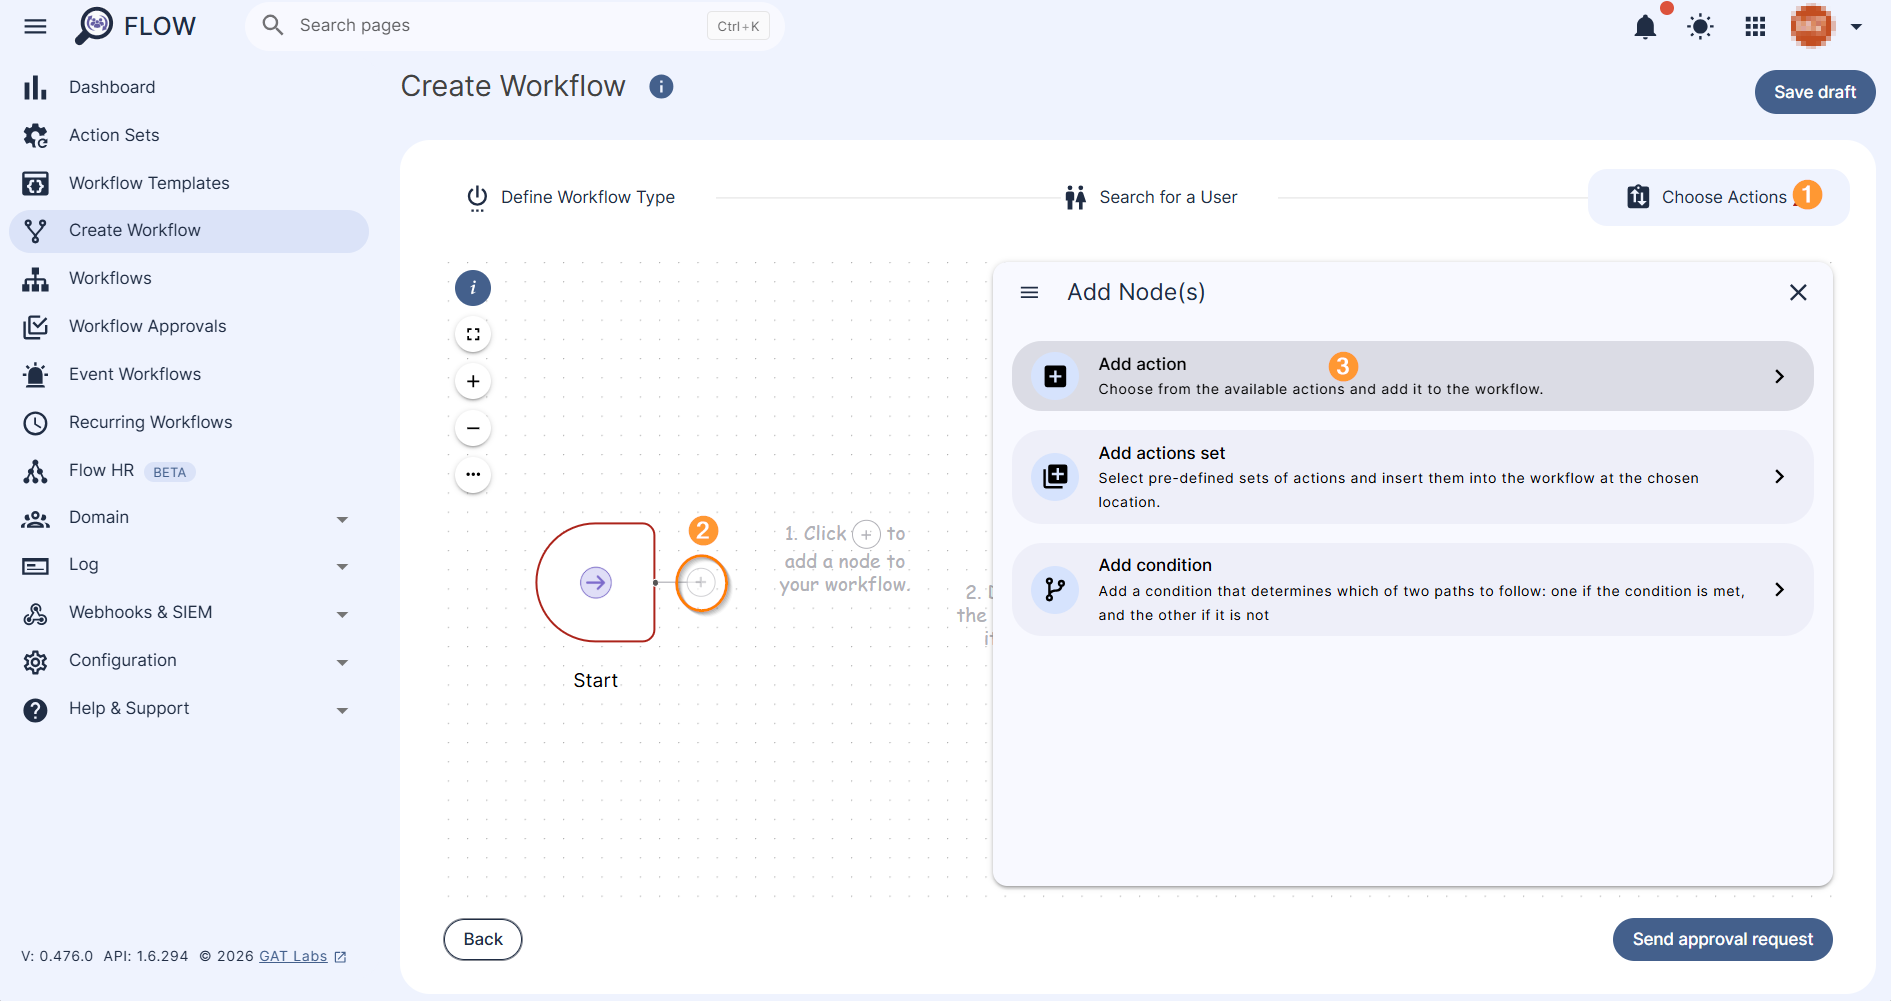
Choose Actions #
Under the Choose Actions section (1), click on the + button (2) and Add action (3). A pop-up menu with all the available actions will be displayed.
From all available actions, search for (1) and select “Change user password ” action (2) under the Users section.
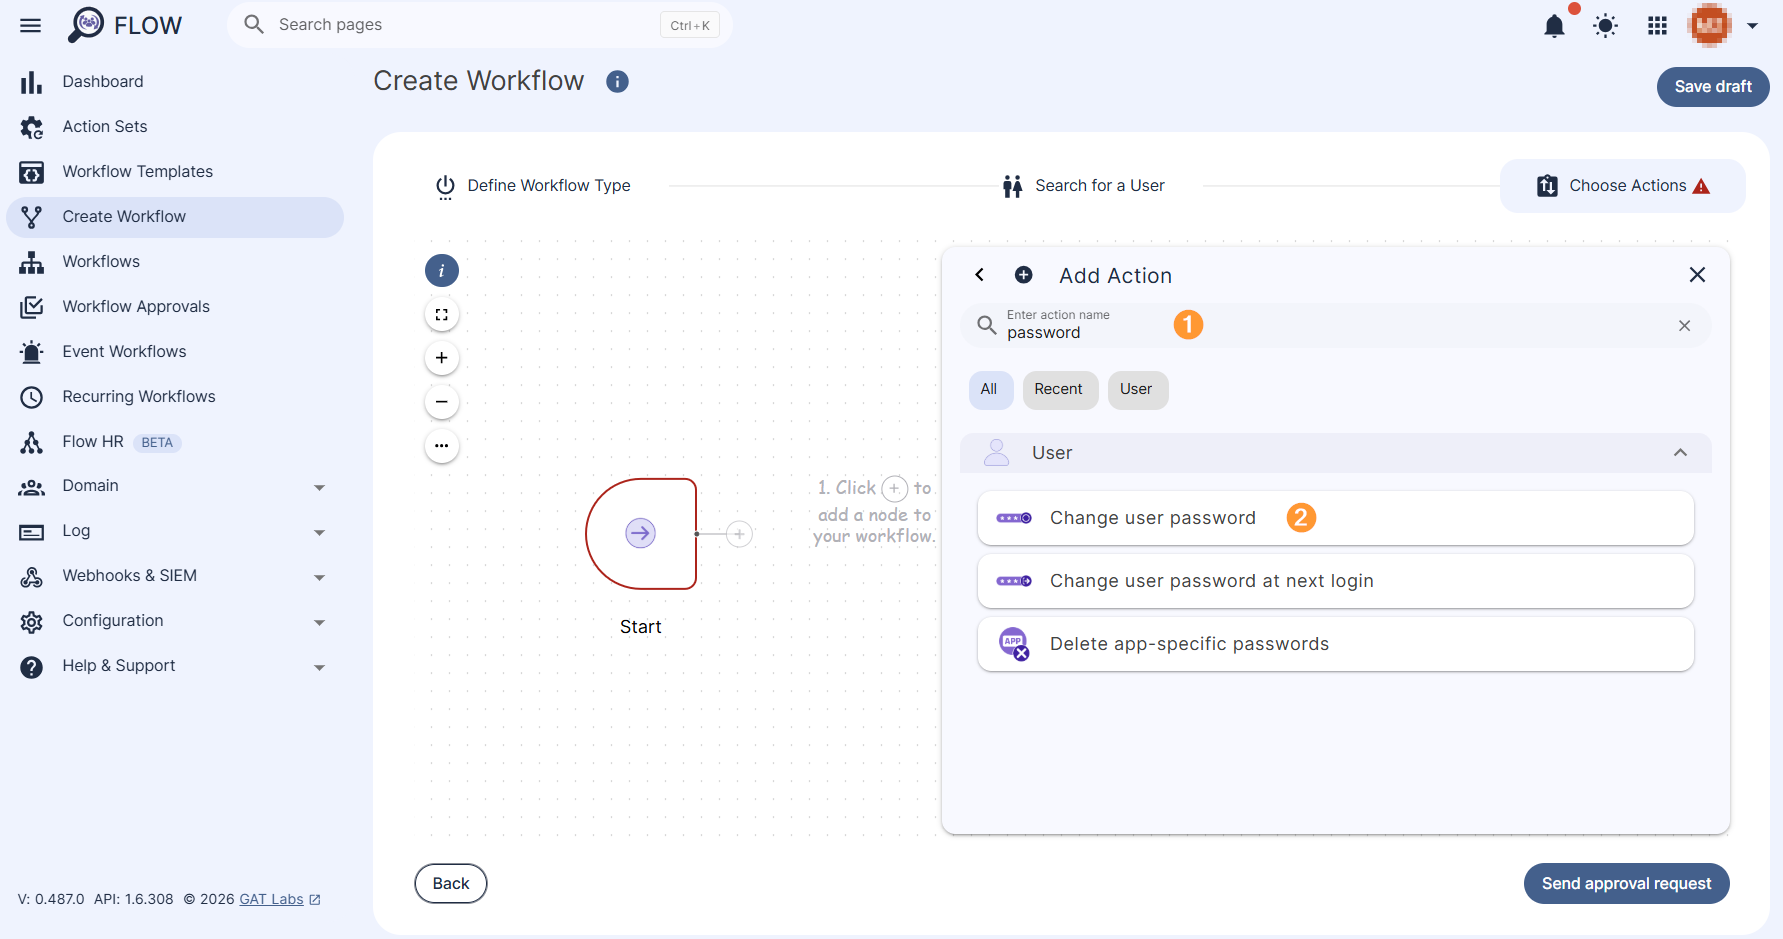
The selected action will be added to the node section. Double-click on the action node to open the action’s configuration section.
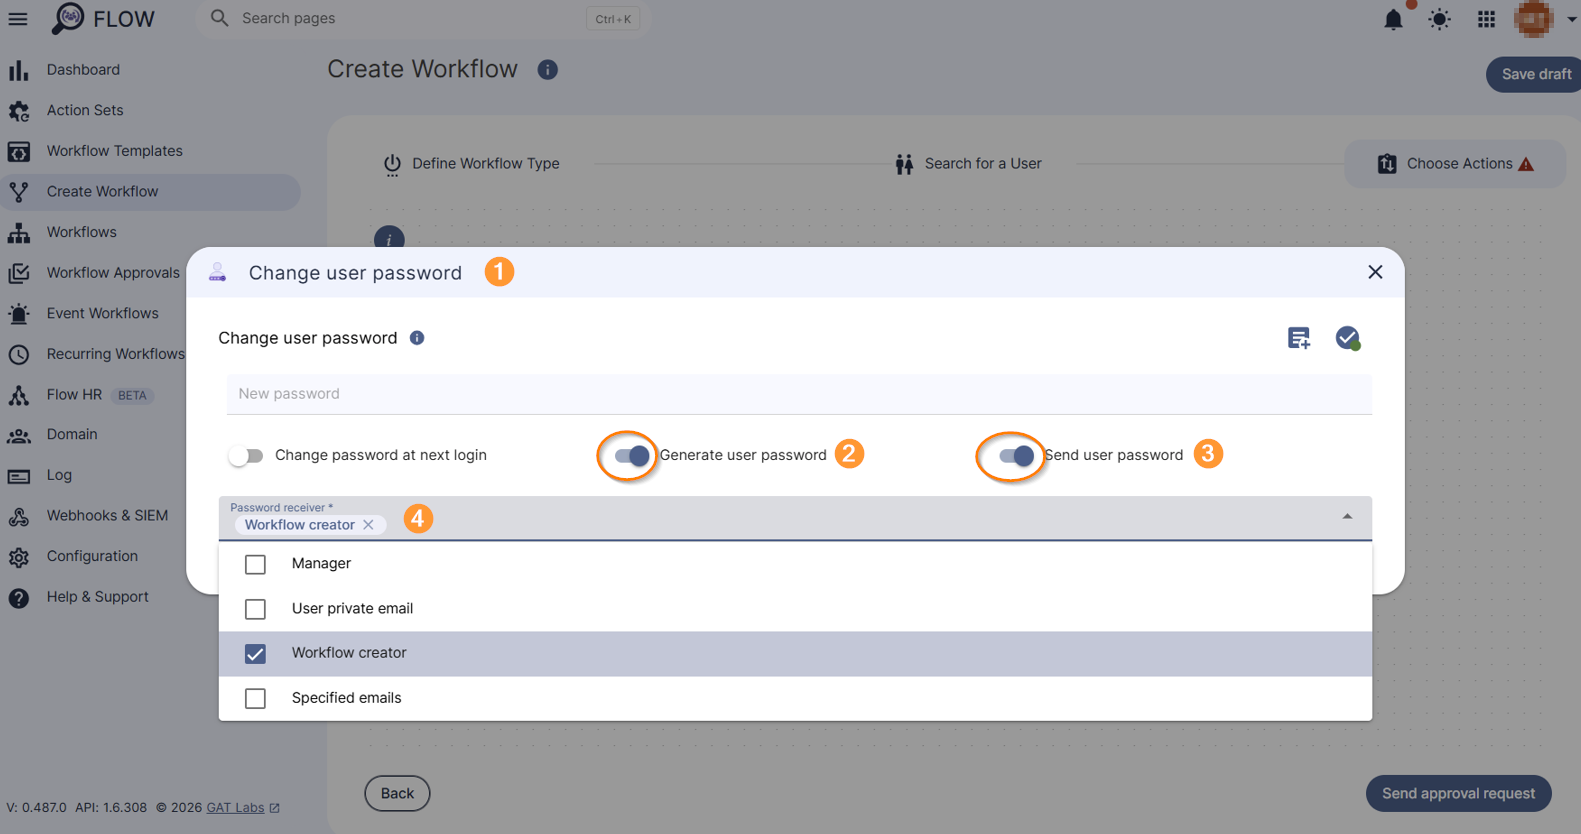
Under the “Change user password” action’s settings (1), select the “Generate user password” option (2), “Send user password” option (3), and select the “Password receiver” (4).
“Password receiver” allows to select who to receive the generated password (multiple receivers can be selected at once, e.g Workflow creator and Specified email):
- Manager – The user who is set as Manager will receive the generated password
- User private email – The email that is set up in the “user private email” field, will receive the generated password
- Workflow creator (default setup)- The workflow creator (Admin who creates the workflow) will receive the generated password
- Specified emails – The password will be sent to the email(s) specified in the field ‘Send password to‘ (multiple emails can be specified)
Once finished, click anywhere outside the action node to close it and select Send Approval Request to the Security Officer for review.
After selecting Send Approval Request (1), a confirmation message will appear. Confirm to continue (2).
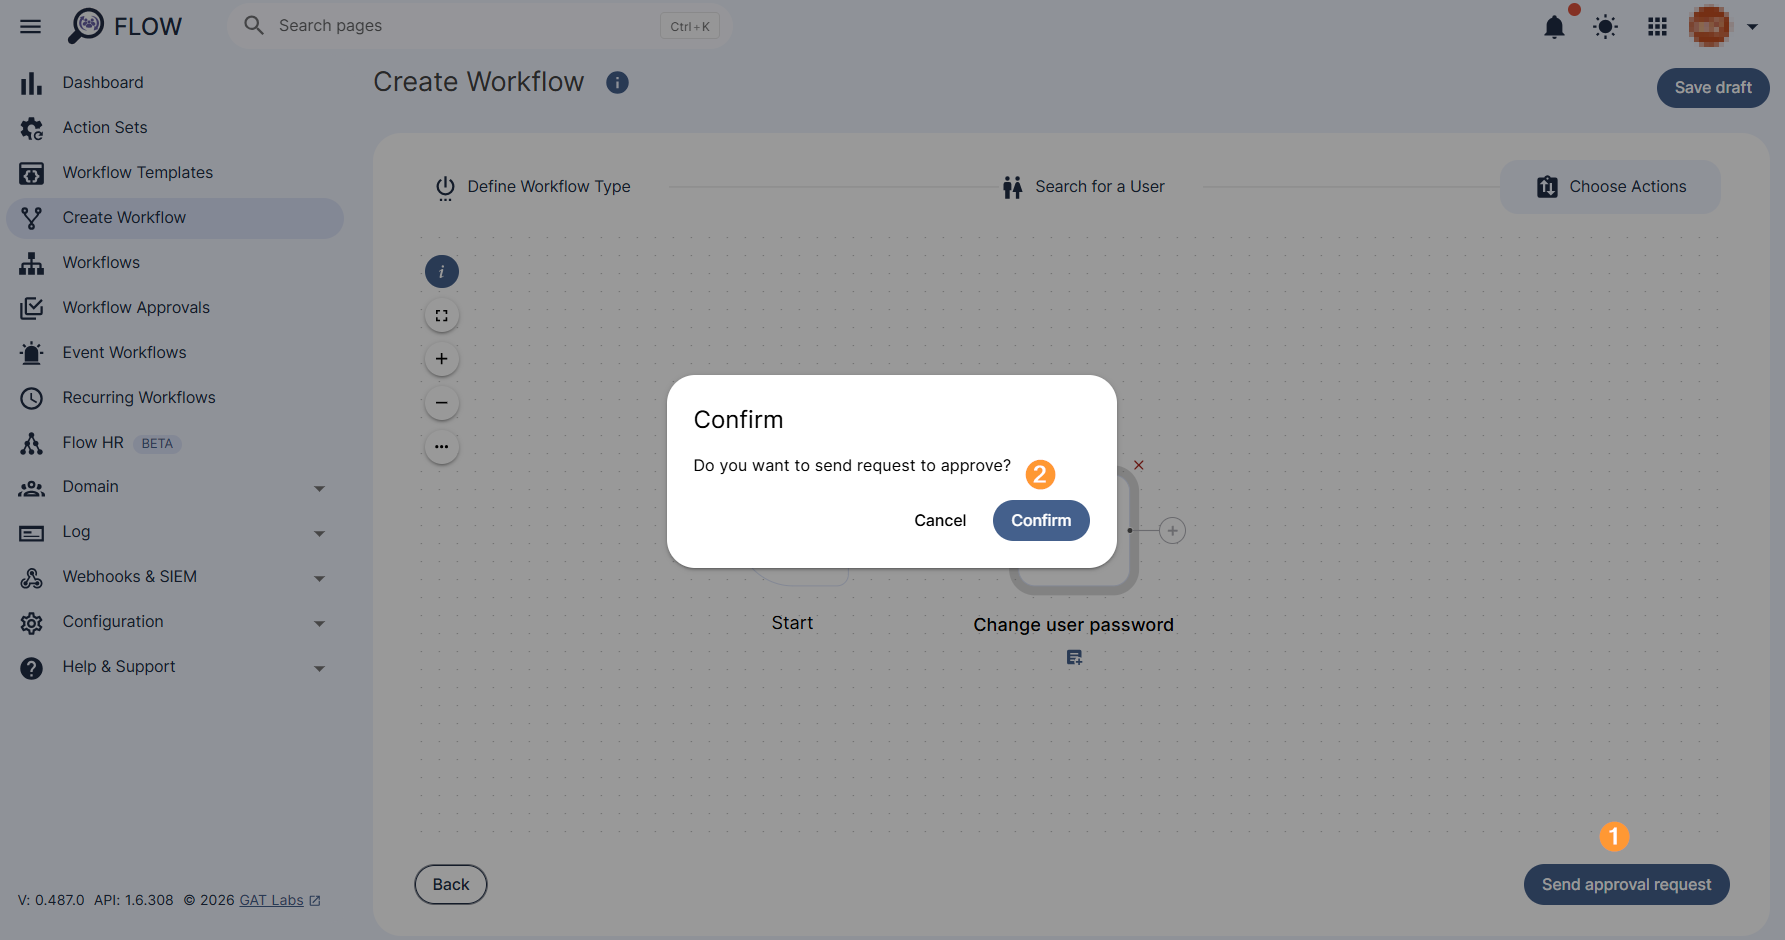
The workflow will be submitted for approval to the Security Officer.
Security Officer Approval #
The Security Officer will receive an email notification for verification.
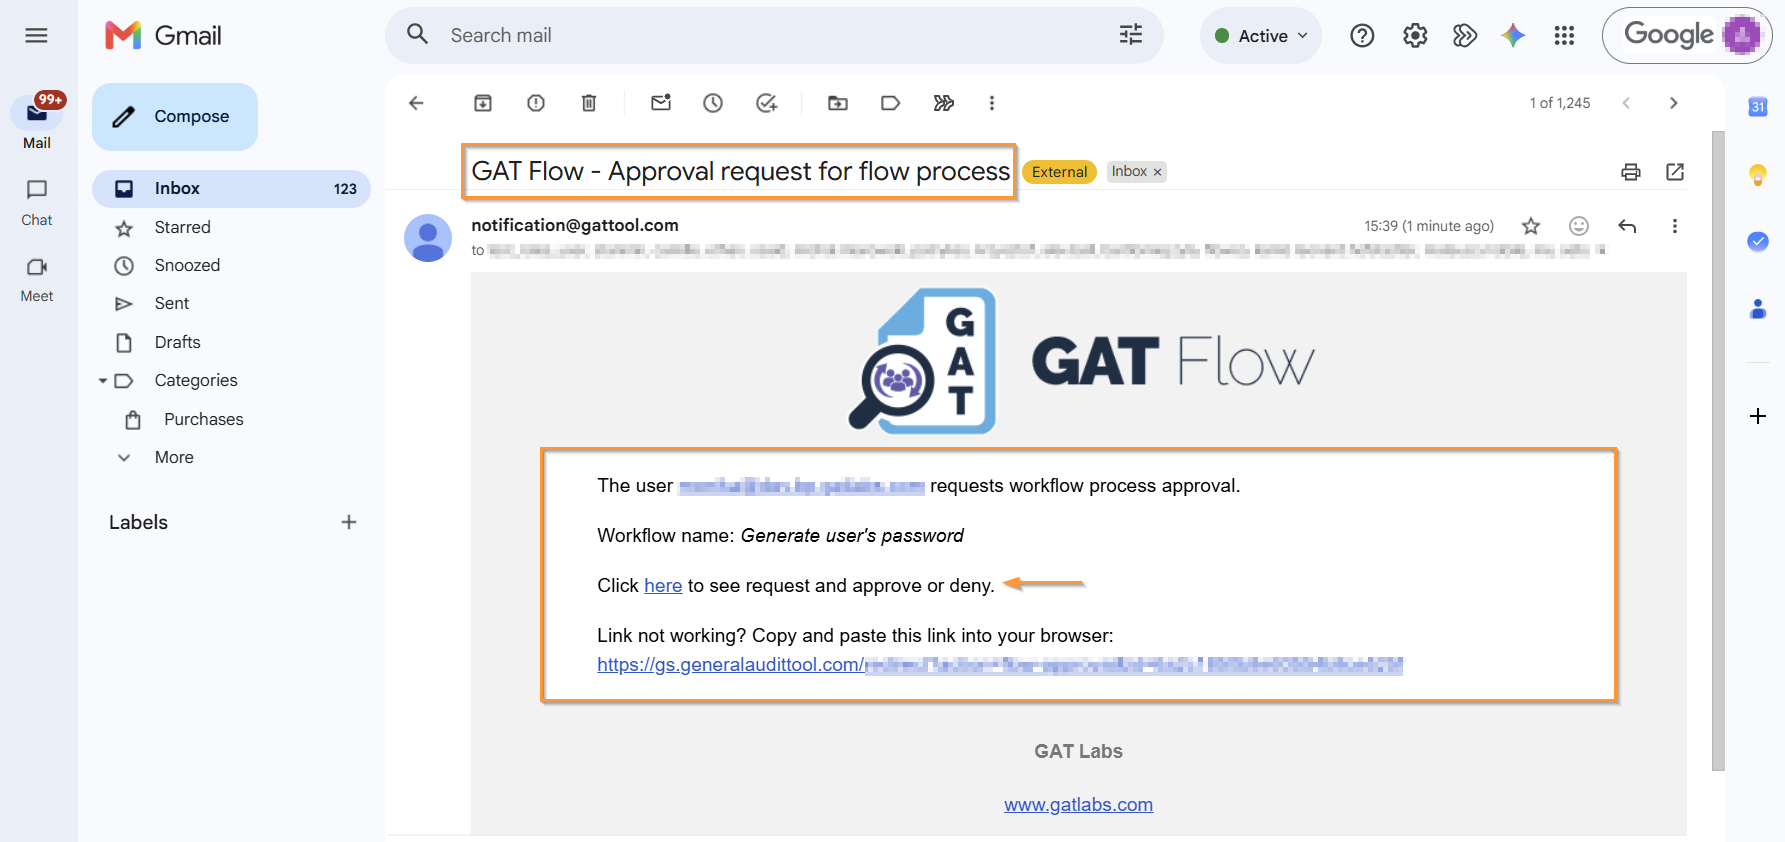
After clicking the link in the email, they will be redirected to the approval section of the relevant workflow in Flow (1), where they can review the request and approve (2) or deny it (3).
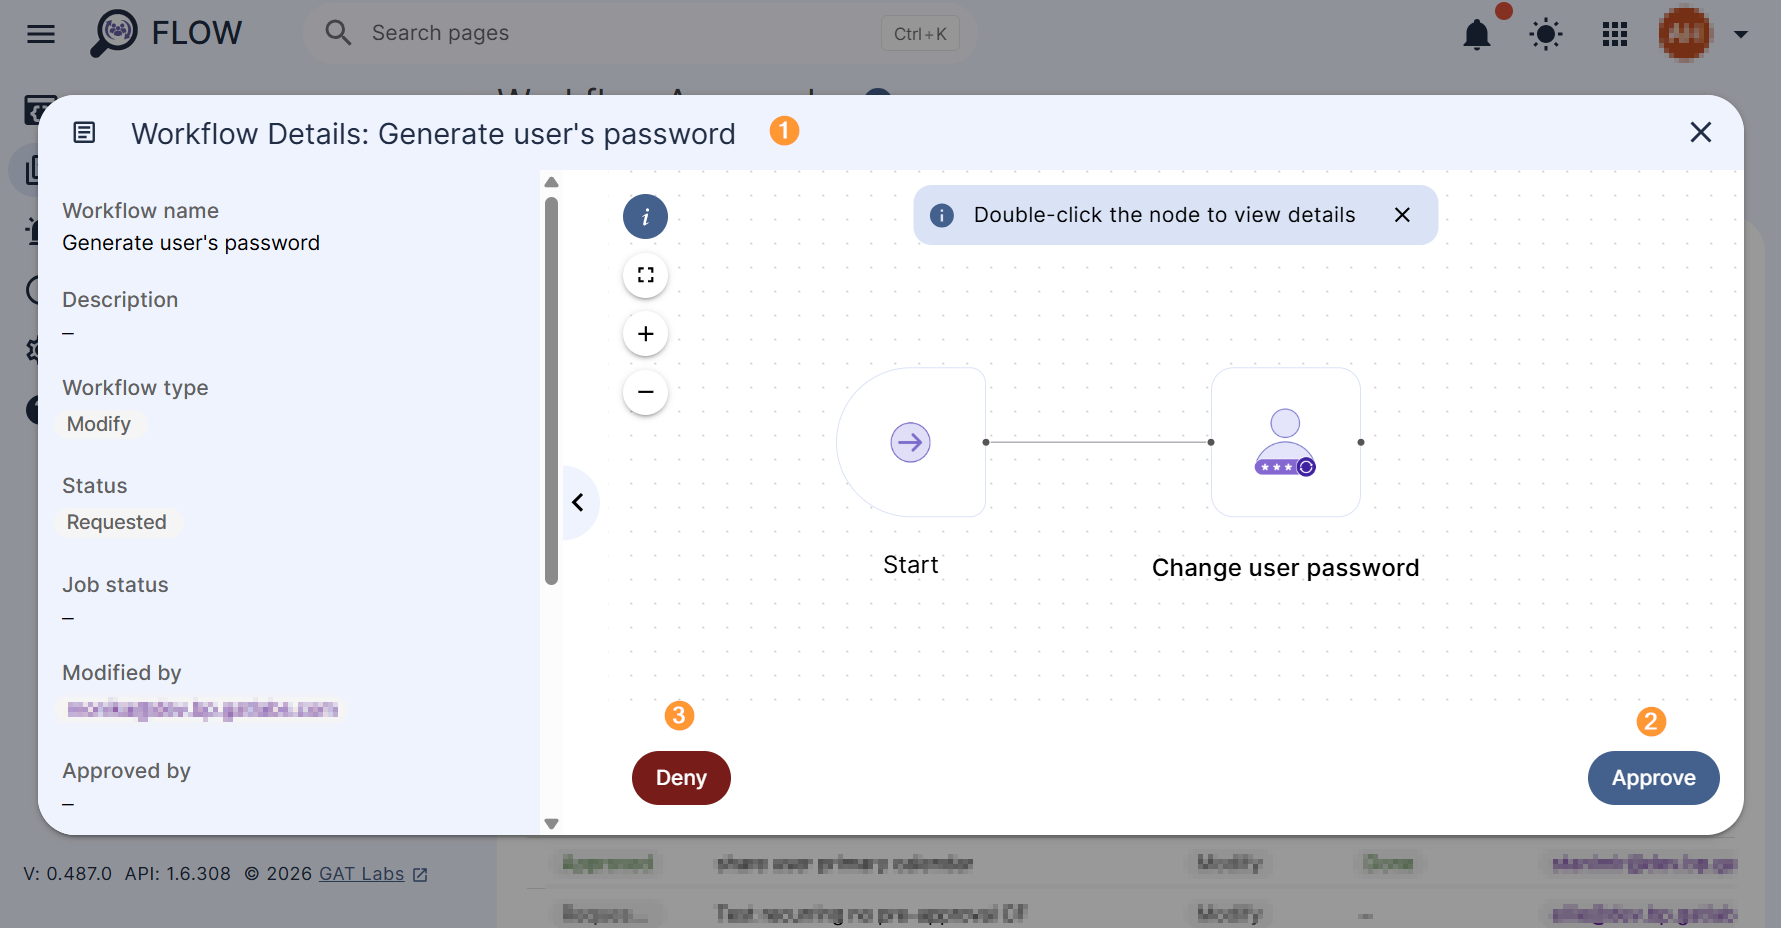
Once approved, the action will take effect and all user access permissions to calendars will be removed.
Note: If pre-approval is enabled no Security Officer approval will be needed.
Results #
As a result of the action, the user password will be automatically generated and sent to the workflow Recipient as configure under the action’s node.