

We are excited to announce our newest addition to GAT Flow – The ‘Groups‘ Module!
This powerful new feature allows Google Workspace Admins to apply multiple changes for their Google Groups.
This is possible via the Groups audit section in Flow
Audit Groups #
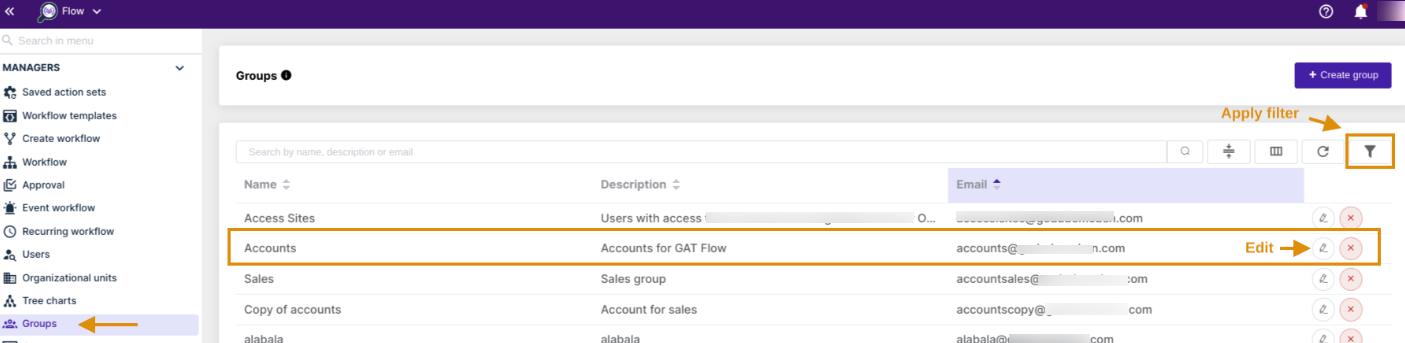
Launch GAT Flow and navigate to the ‘Groups‘ module.
All Google Groups will be displayed on the menu on the right side.
Select a Group from the list of Google Groups in the domain. You can also apply a filter (funnel icon on the top right) to search for the Group you want to configure.
Group Configuration #
Select the pen icon next to the group you want to configure.
Now the tool will take you to the Edit group window.
In the Edit group window, you can select at will what information you want to edit. This is divided into a few different sections.
General tab #
The General section will allow you to update:
- Email – change the email of the group
- Name – change the name of the group
- Description – change the description of the group

Flow dynamic group #
- when Enabled the existing Groupe can be converted into Dynamic Group or copied and used to create a new Dynamic Group
Aliases tab #
- Aliases – enter aliases to the chosen group
Members tab #
Groups member configuration where you can view Group member, a role for the user in the group, and state if is changing or not.
Add member #
Click on the “Add new member” button this will allow you to add a new member to the selected group
In the pop-up window enter
- Member email – search and enter the email (user needed)
- Member role – enter the role for the new member
- Member – add a user to be a member of the group
- Owner – add a user to be the owner of the group
- Manager – add a user to be a manager of the group

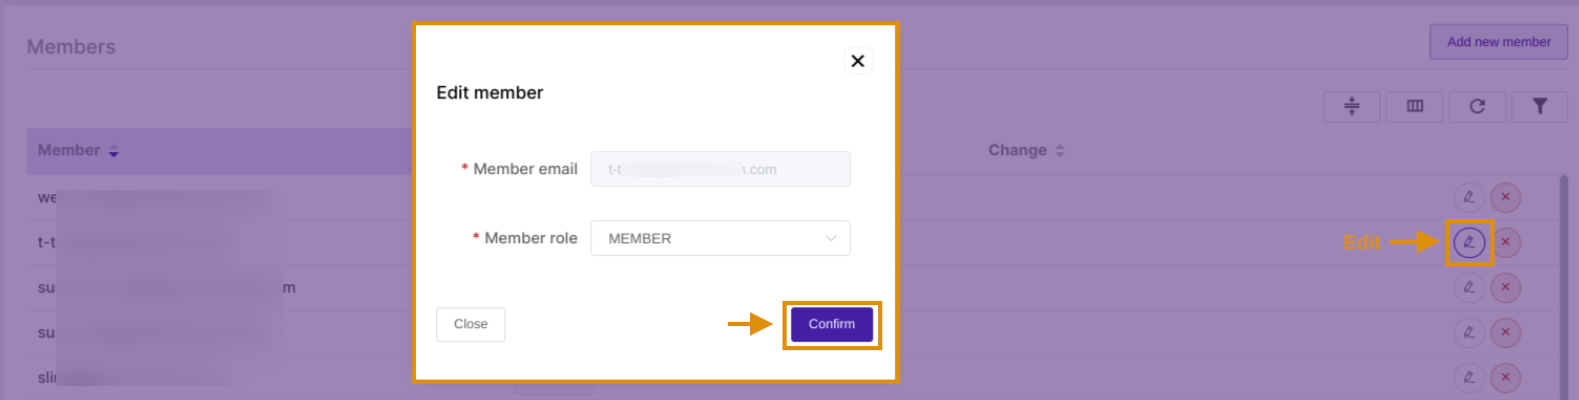
Edit member #
You can also launch a filter to find and edit certain members.
Selecting the pen icon will allow you to edit the member, select a different role and click on the “confirm” button.
Delete member #
Selecting the red subtraction icon will delete the member.
Any change that is applied will be shown above under the Changed member section, and the “Type of change” indicates the modification.

Group Signature #
Scrolling further down will give you the option to set up the email signature of the group using HTML code.
You can add the signature via Classic editor, HTML editor and use any of our Signature templates

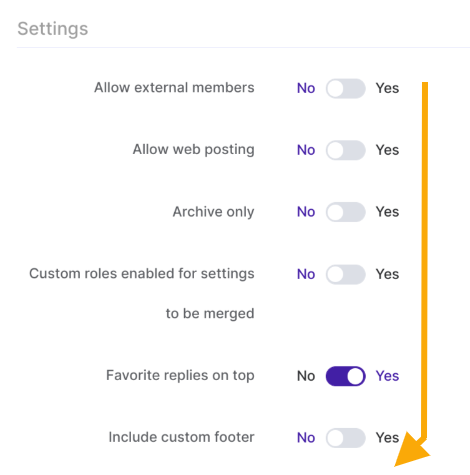
Group settings configuration #
In this section, you can manage group settings by toggling the options as below:
- Allow external members – yes or no
- Allow web posting – yes or no
- Archive only – yes or no
- Customer roles enabled for settings to be merged – yes or no
- Favorite replies on top – yes or no
- Include custom footer – yes or no
Group settings
- Include in global address list – yes or no
- Is archived – yes or no
- Members can post as the group – yes or no
- Send message deny notification – yes or no
- Message moderation level –
- Reply to
- Spam moderation level
- Who can assist content

- Who can contact owner
- Who can discover group
- Who can join
- who can leave group
- Who can moderate members

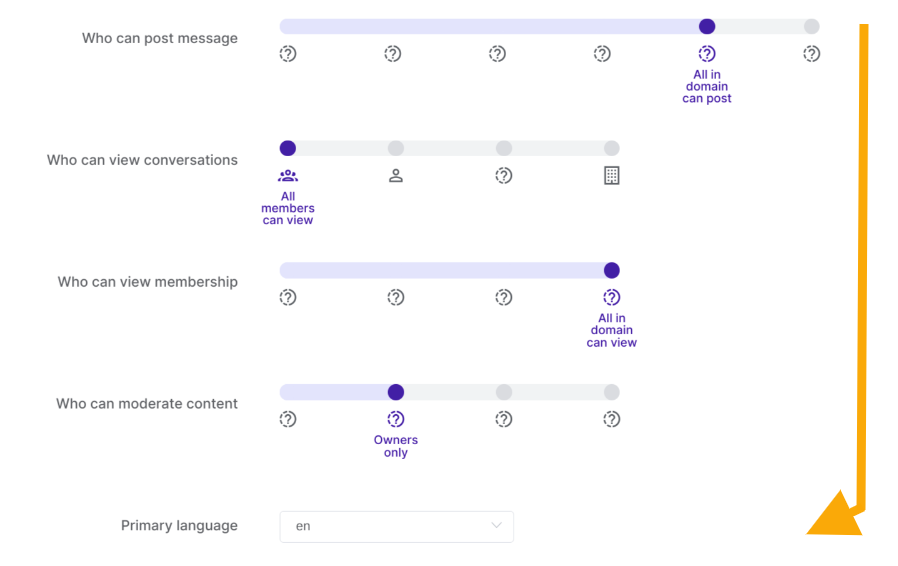
- Who can post a message
- Who can view conversations
- Who can view membership
- Who can moderate content
- Primary language
Result #
Edit any of the options available in the Group audit in Flow and click on the Save button.
The selected configuration will be applied to the group.


