

Overview #
When managing a growing organization, onboarding new Google Workspace users involves more than just creating an email address. It requires adding users to specific Google Groups, assigning appropriate product licenses, giving them permissions to set Shared Drives, or configuring standard email signatures.
Doing this manually for every single employee or bulk importing is time-consuming and prone to human error.
With GAT Flow, Google Workspace Super Admins can build and save a reusable blueprint of these tasks called an Action Set.
Once created, an Action Set allows you to quickly deploy complex, department-specific onboarding workflows in just a few clicks – eliminating repetitive setup and ensuring consistency across your domain every single time.
How to create an Action set for onboarding Google Workspace users? #
Navigate to GAT Flow.
From the menu on the left, click Action Sets > New Action Set
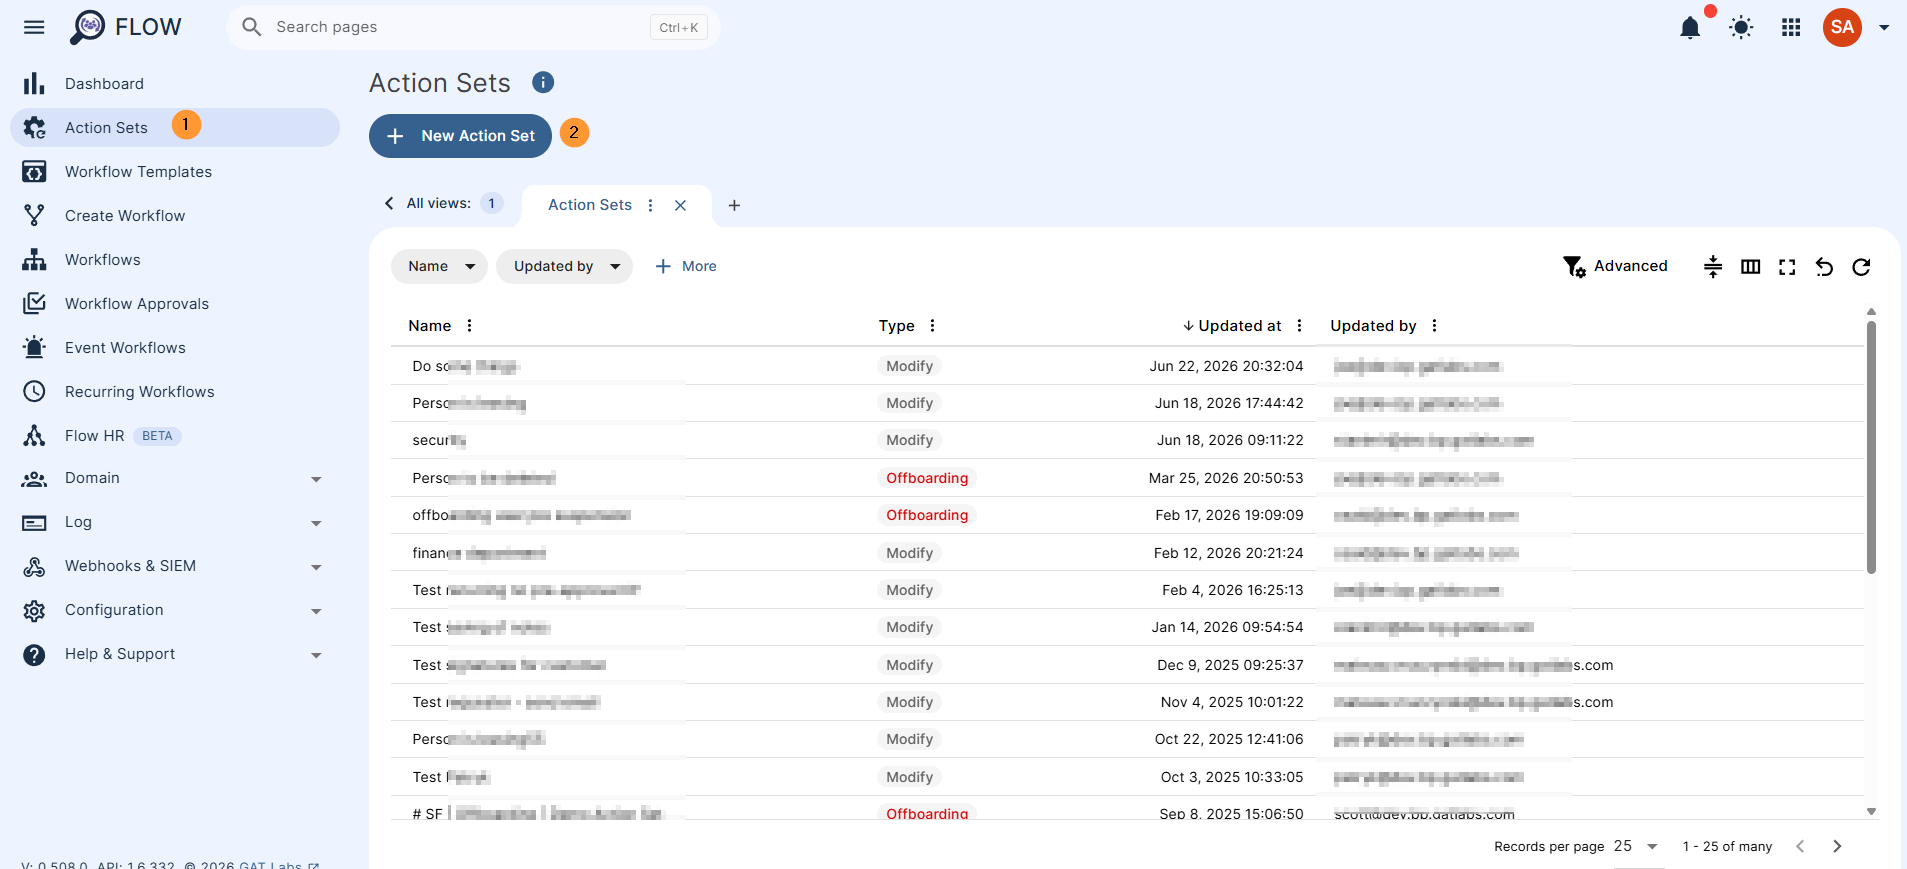
A new tab will be opened to fill in the details for the Action set you want to save.
- Name – enter a name for the Action set
- Type – select the Onboarding type
- Validated – enable or disable validation.
- This allows you to choose whether you want to fill all mandatory fields or leave them empty so they can be filled during workflow creation.
- Enabled – will force you to pre-fill all of the settings within chosen actions.
- Disabled – you can select actions but not necessarily fill in the settings for them.
- This allows you to choose whether you want to fill all mandatory fields or leave them empty so they can be filled during workflow creation.
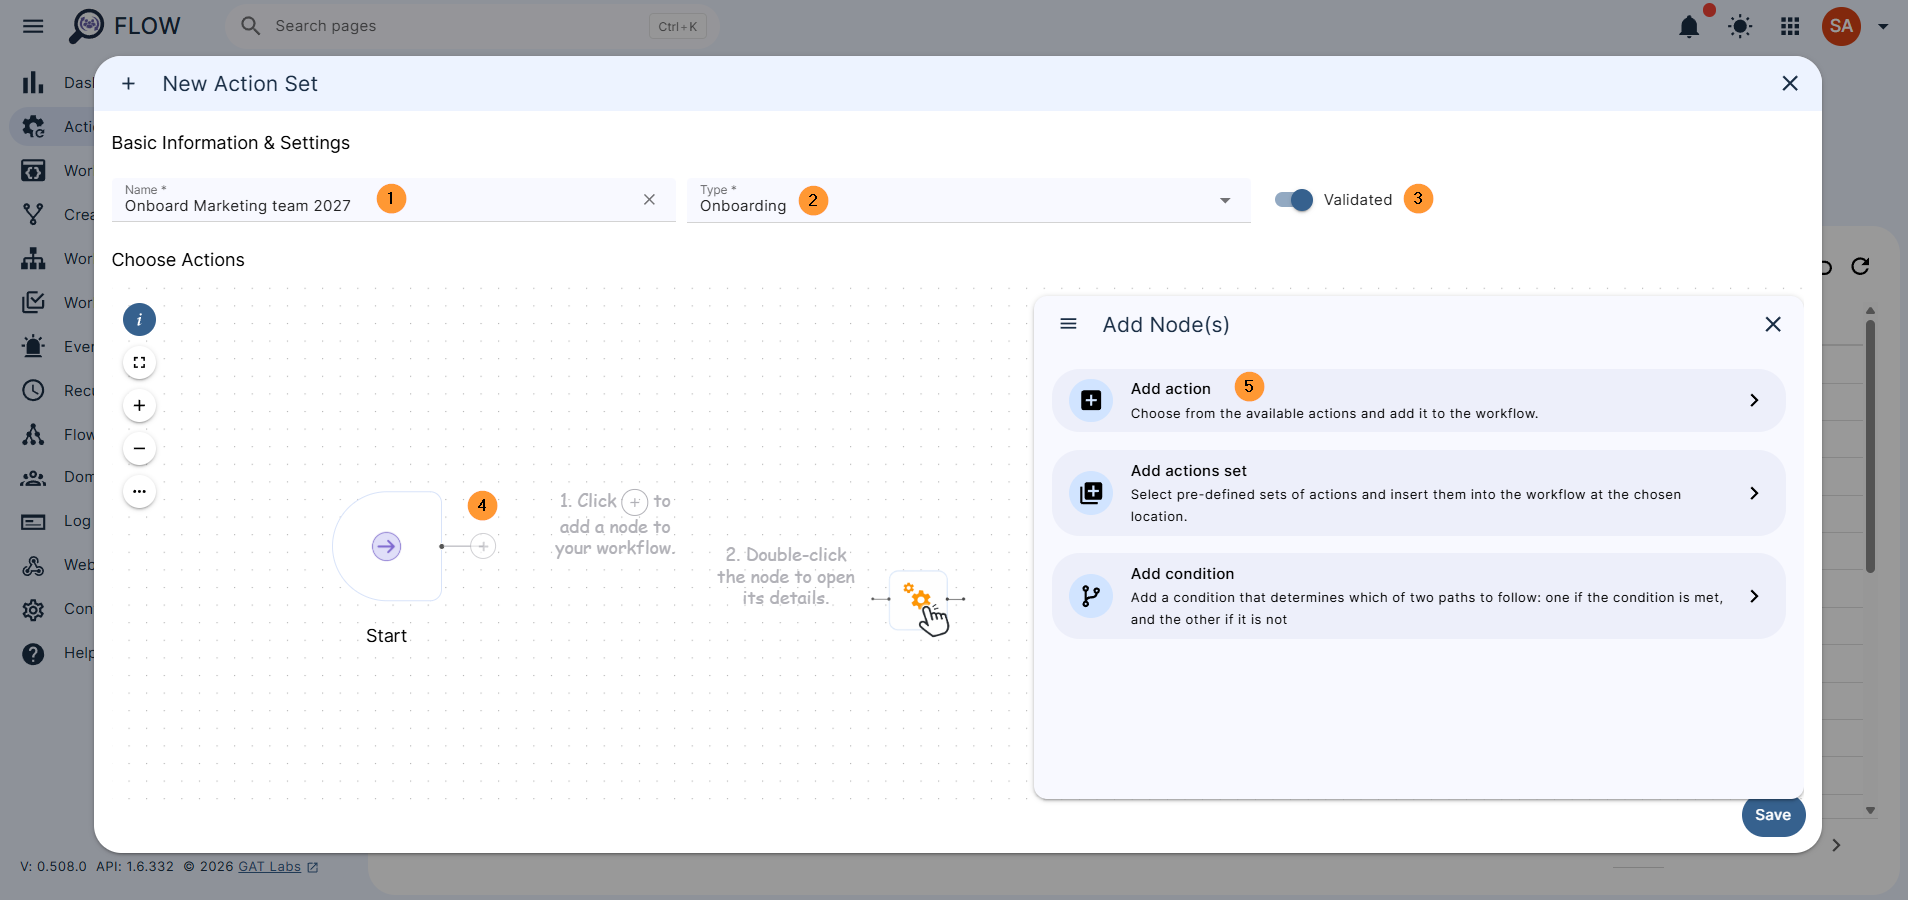
Click on the + button (4) and Add action (5)
A menu with all the actions will be displayed.
You can search for any action and select the actions you want to save as an Action set.

Select the Action, double-click on it to open and fill in its details
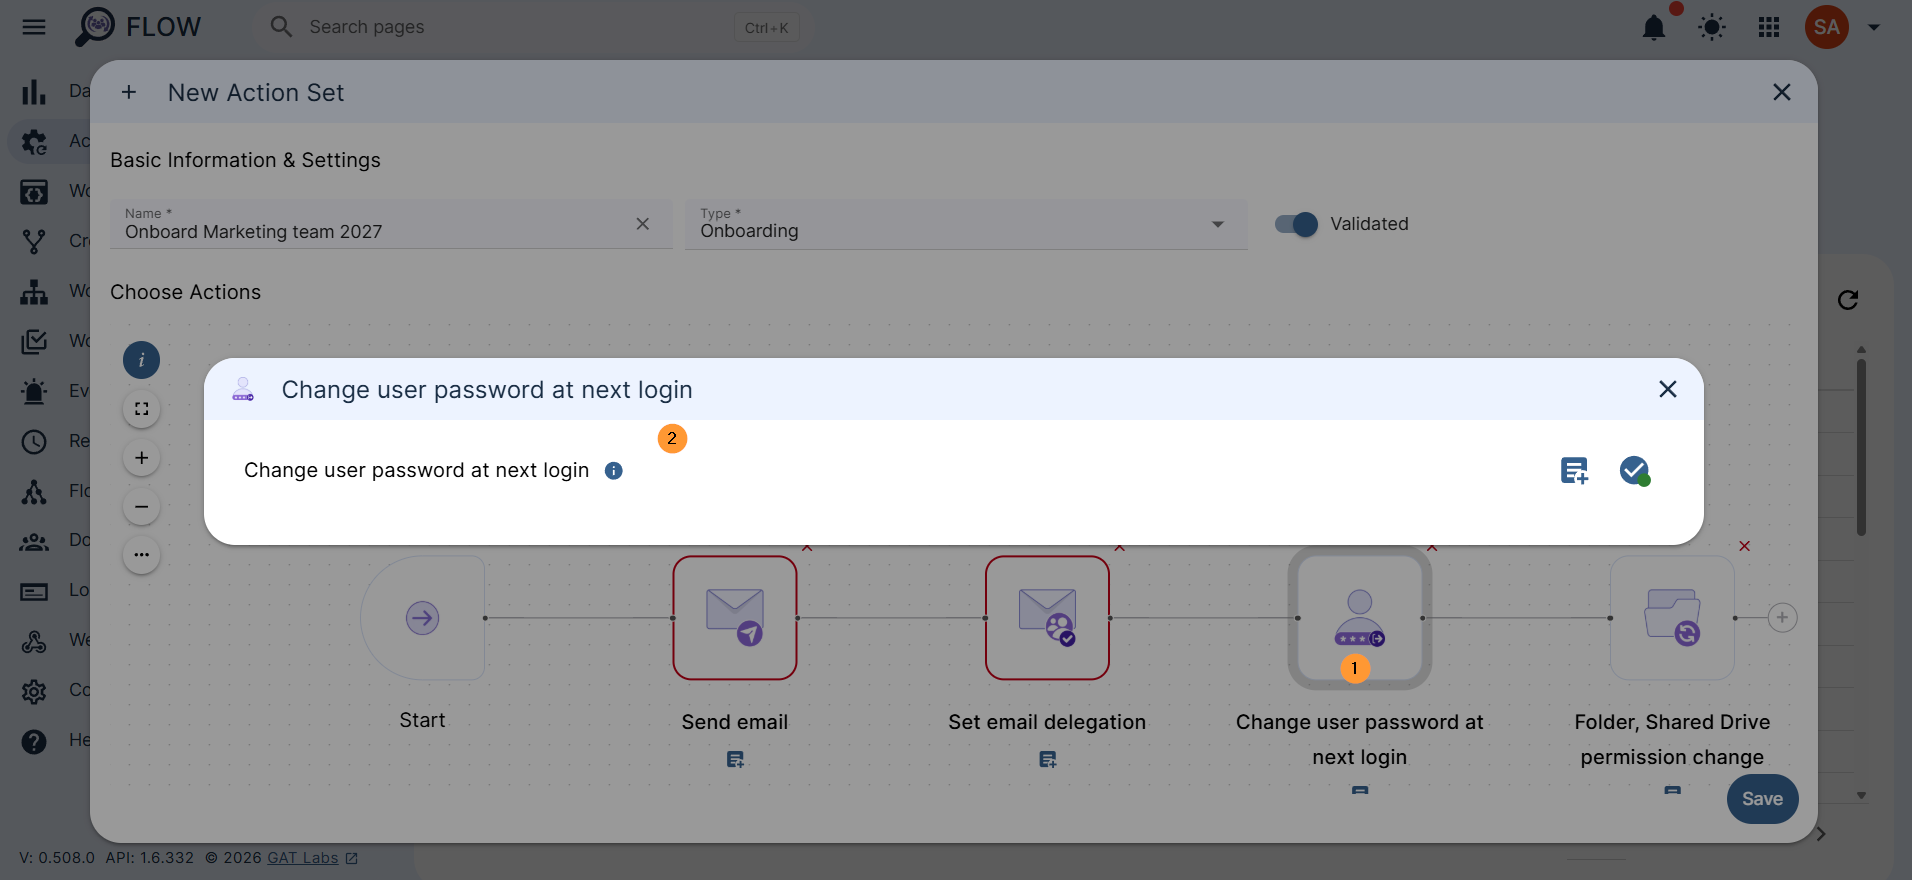
When ready with the action selection and details filed in, click on the Save button.
Result #
When the action set is saved, it can be used over and over again for every workflow you want.
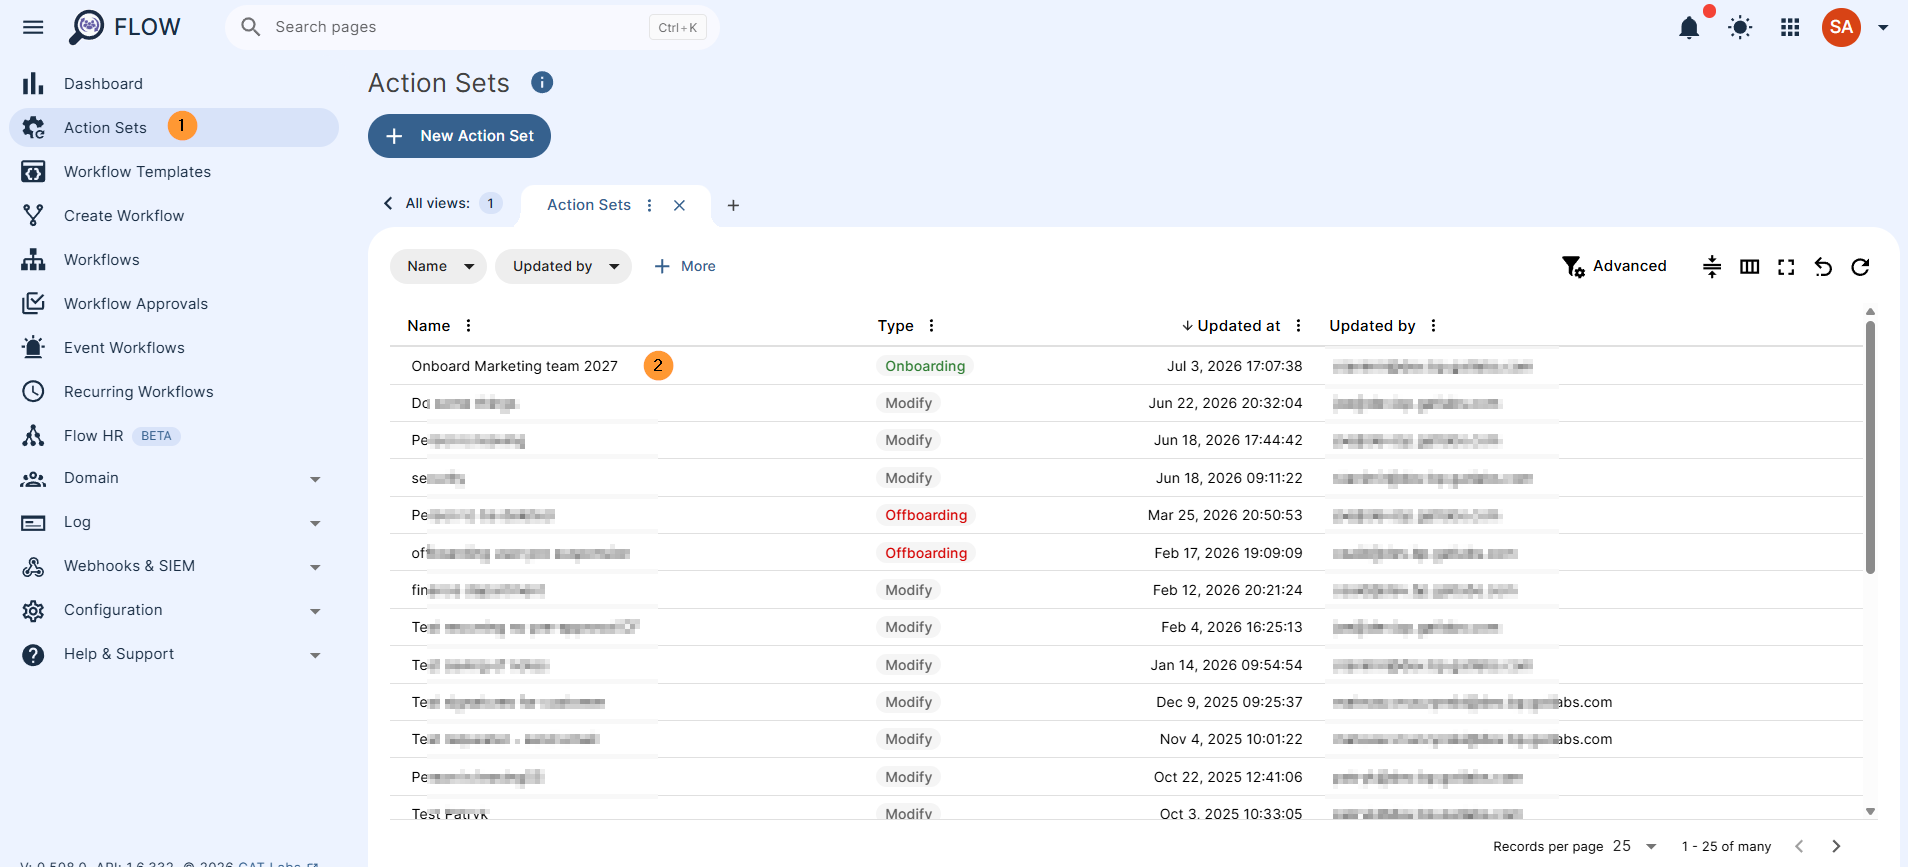
The saved action set will be displayed in the list of Action sets.
Hover over it and on the right side click on the pen icon to update or the bin/trash icon to delete
Use of the Saved Action set #
Create a simple onboarding workflow.
Define workflow type – enter the details.
- Name – enter the name for the workflow
- Type – select Onboarding
- Fill in all other details for the users
- Customize onboarding
- Create user – manually in Flow or Import
- Choose actions
When users are added and in the Choose actions tab.
Click on the + button and then select Add actions set (3)
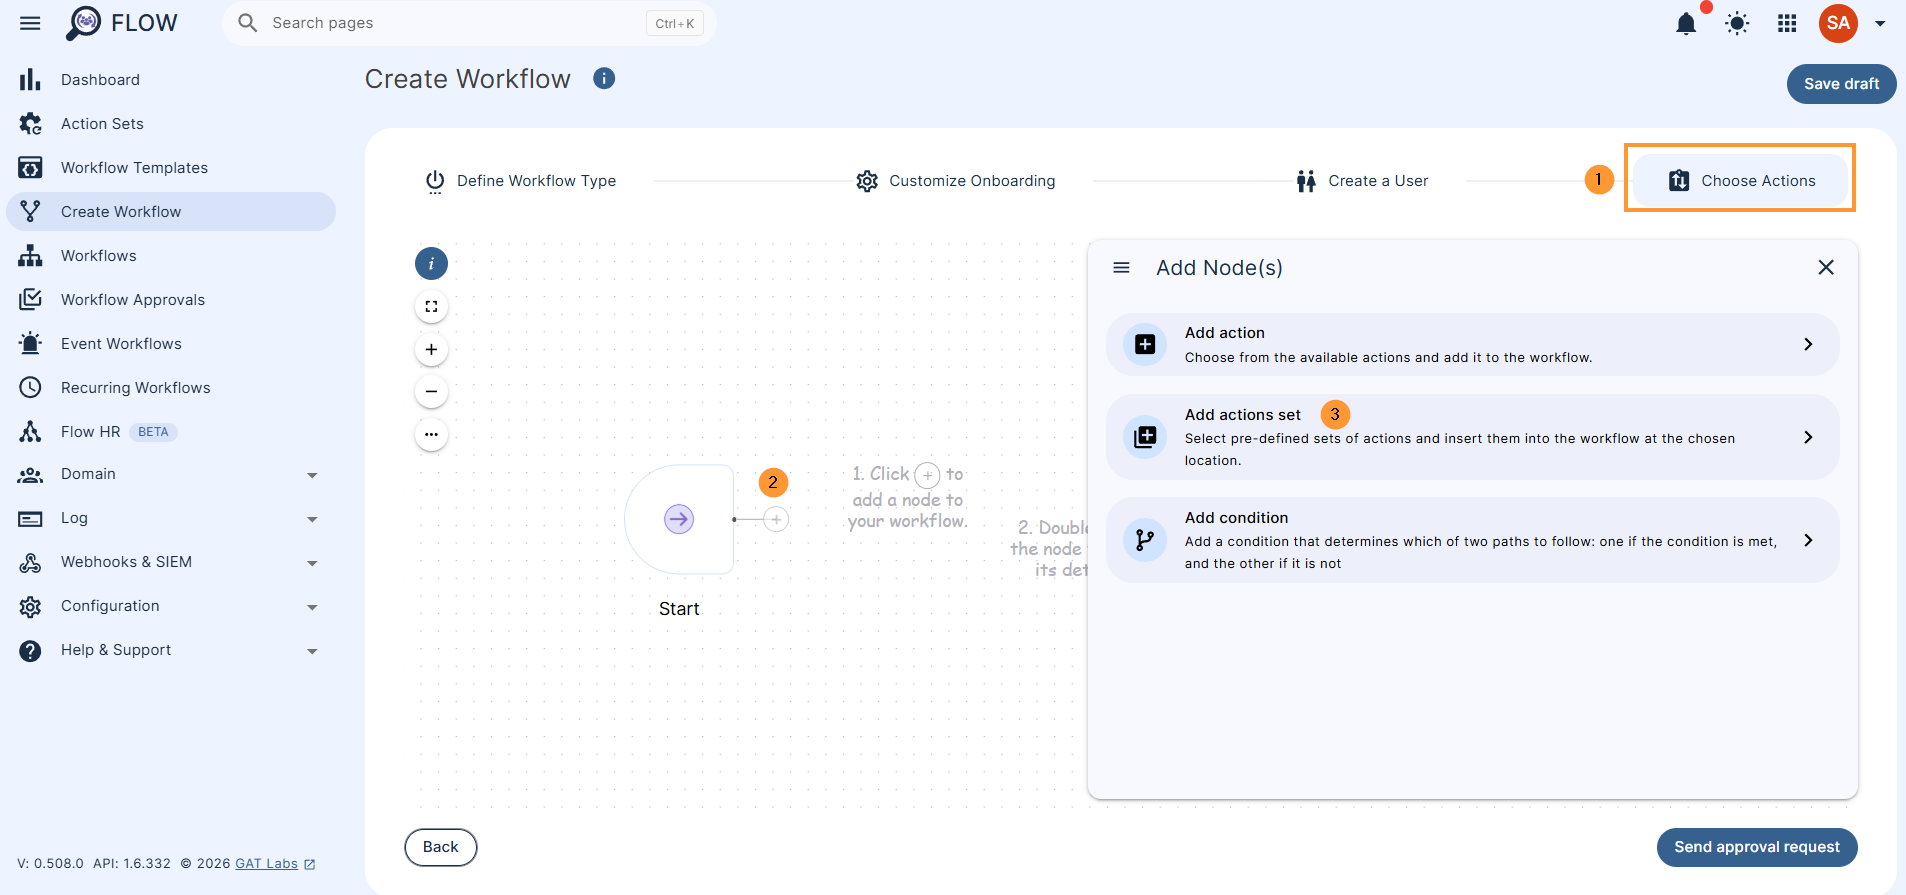
A pop-up window will appear with all the action sets for the Onboarding workflows.
From the list, you will see the one we created above: Onboarding Marketing team 2027
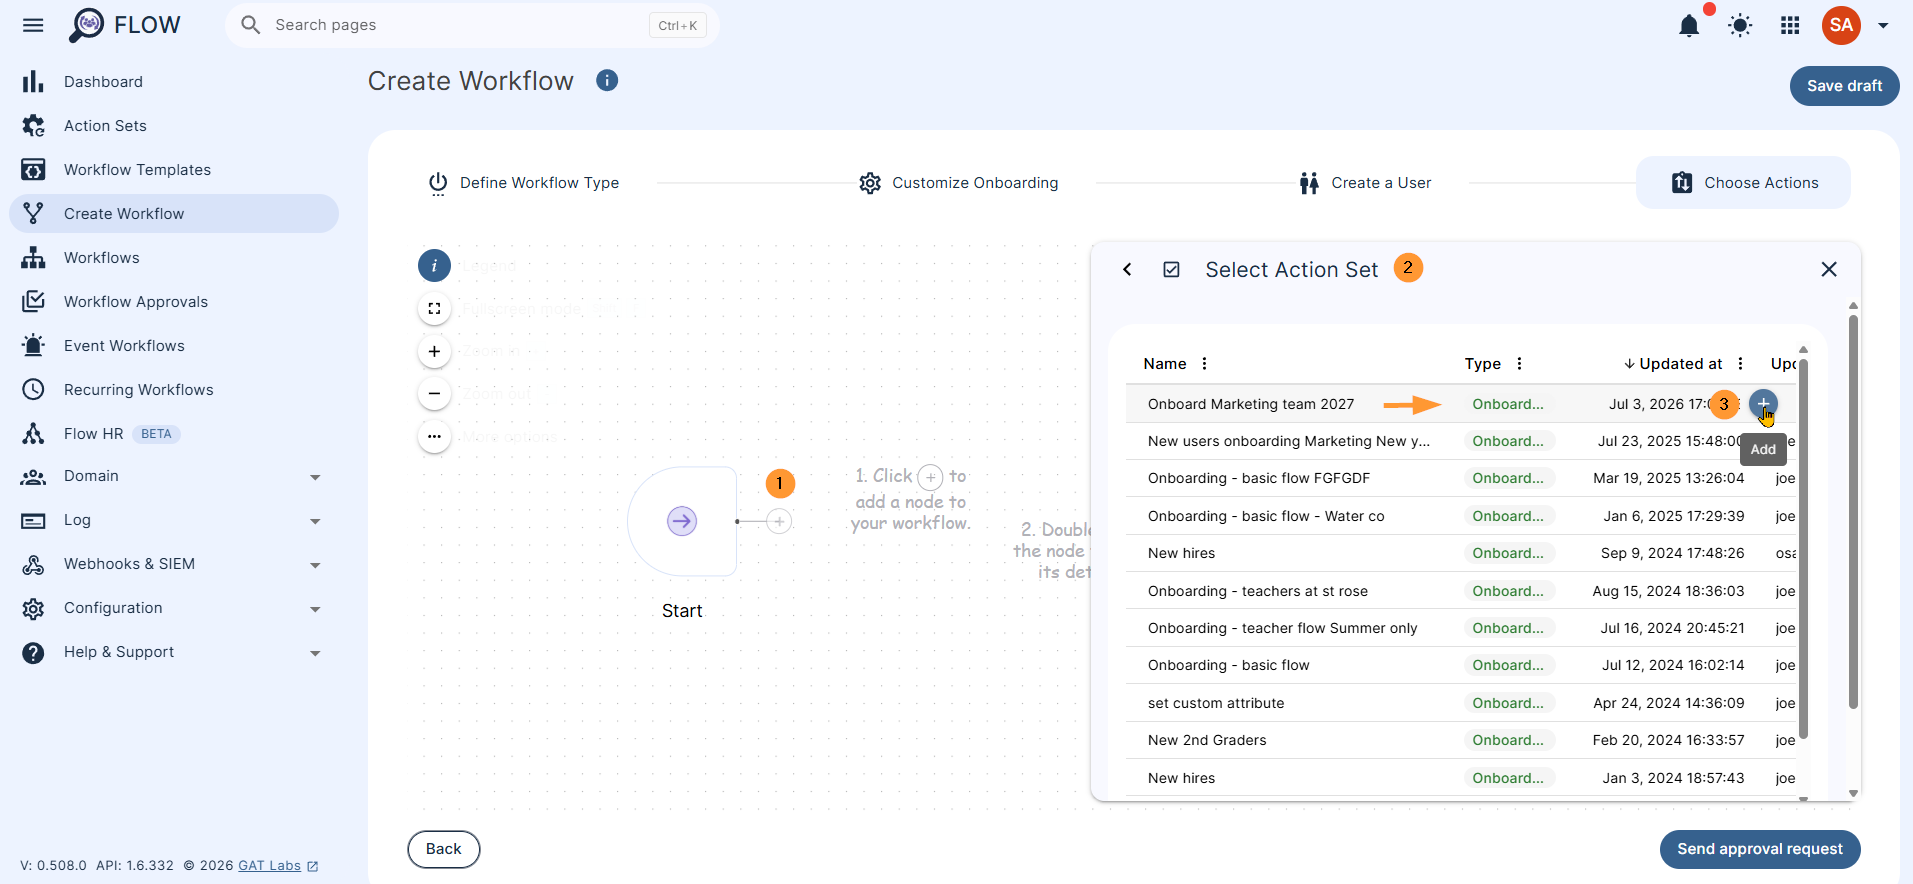
Click on the + button (2) to apply the Action set
A list of all actions associated with the set will be loaded.
Select the newly created Action set
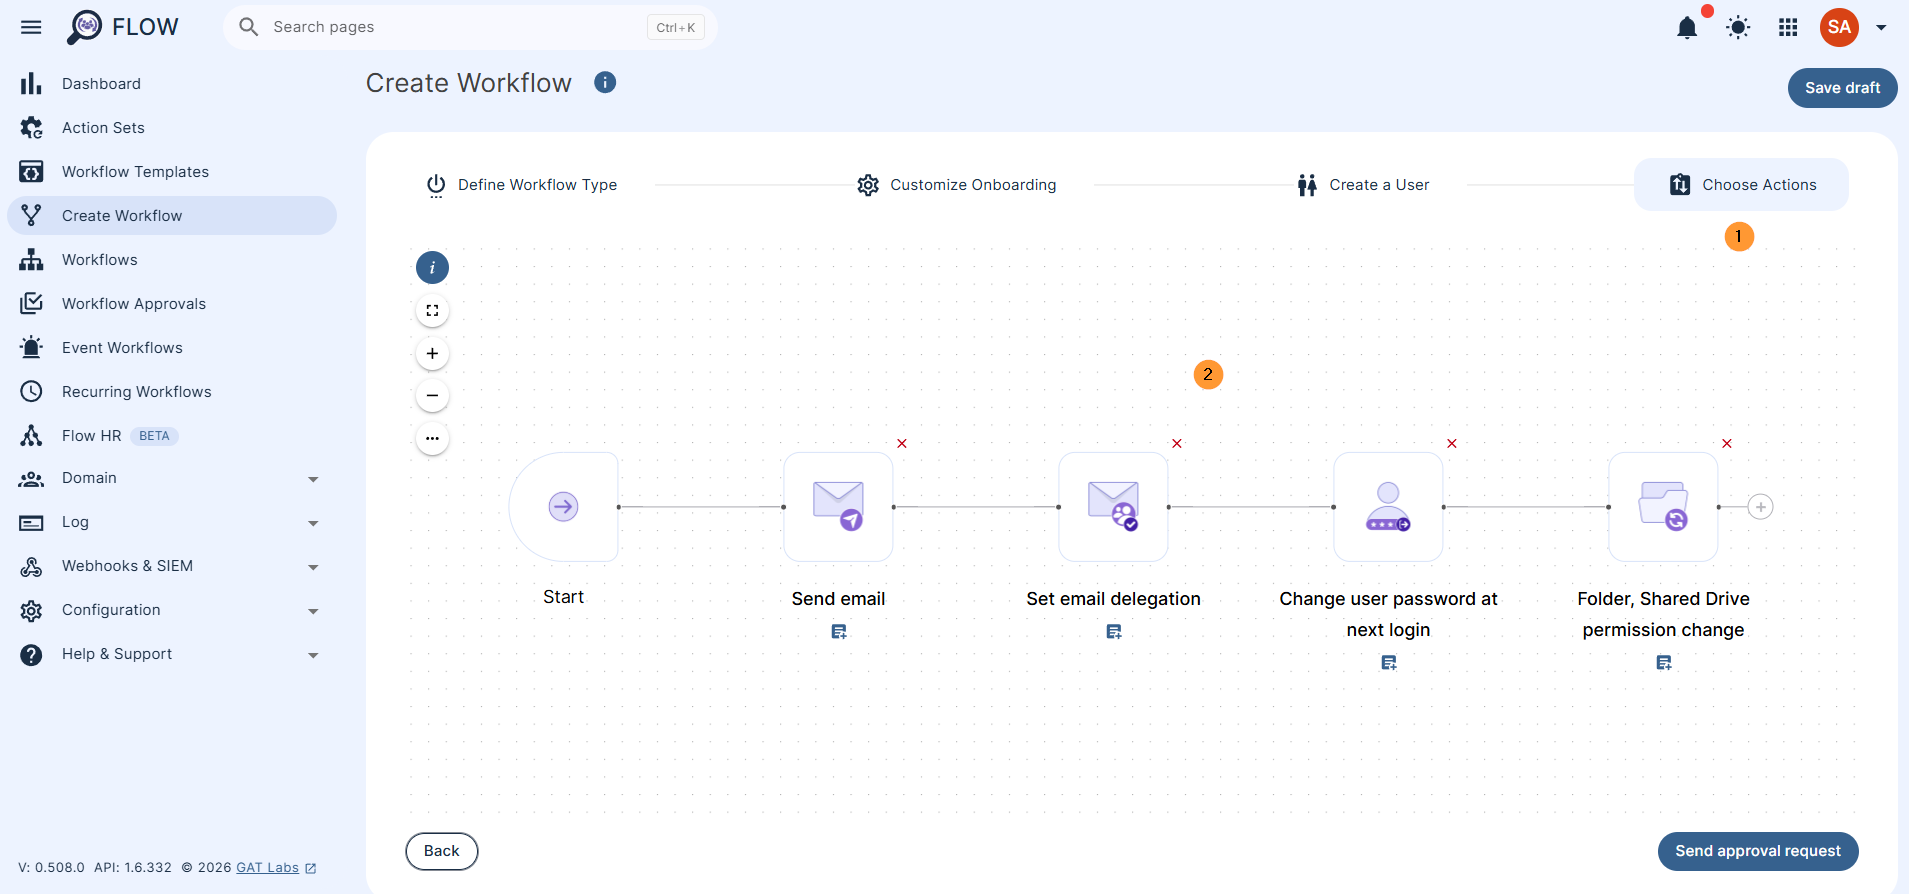
Additional actions can be added by clicking on the + button
When ready, click on the “Send approval request” (4) button. A request will be sent to the Security officer for approval
When approved, the actions will take effect, and the user accounts will be created alongside all the actions selected in the Action set.


