GAT+ audit tool provides an extensive and detailed overview of the entire Google domain.
One of the Audit sections is Google Contacts
It is easy to manage your organization’s Google Contacts with GAT+. It provides Google Workspace Super Admins or delegated auditors with a centralized way to audit and make changes to any user’s Google contacts.
View Contacts #

An Admin can view all users and their contact lists. The owner of the contact is the person who created it and has the users in their Contact list.
The Contacts list can be found here: https://contacts.google.com.
NOTE: We are copying or deleting the Contact’s Email.

Actions on contacts #
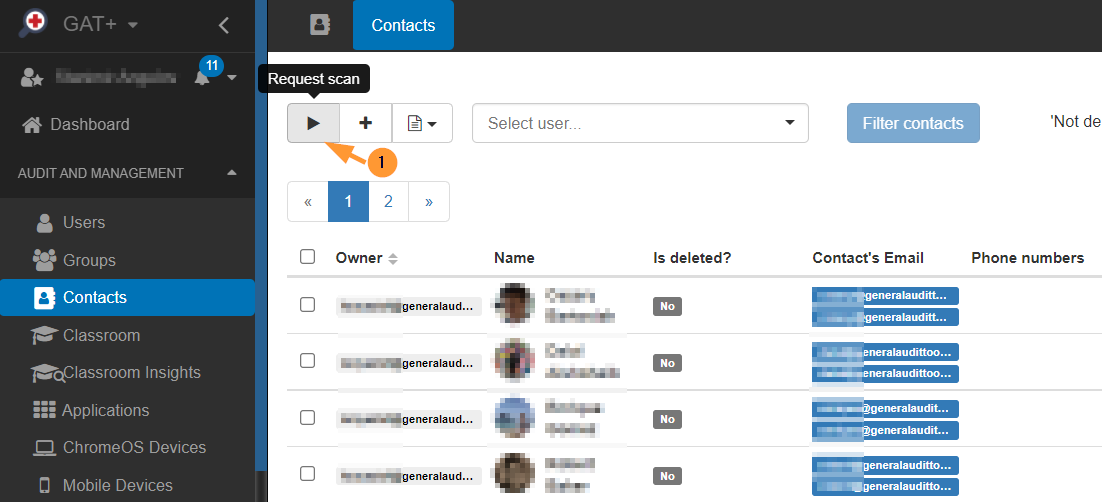
Request scan #
The Admin can request a fresh scan of the contact list, this will scan your users’ Contact lists to sync with existing contacts.
Create contacts #
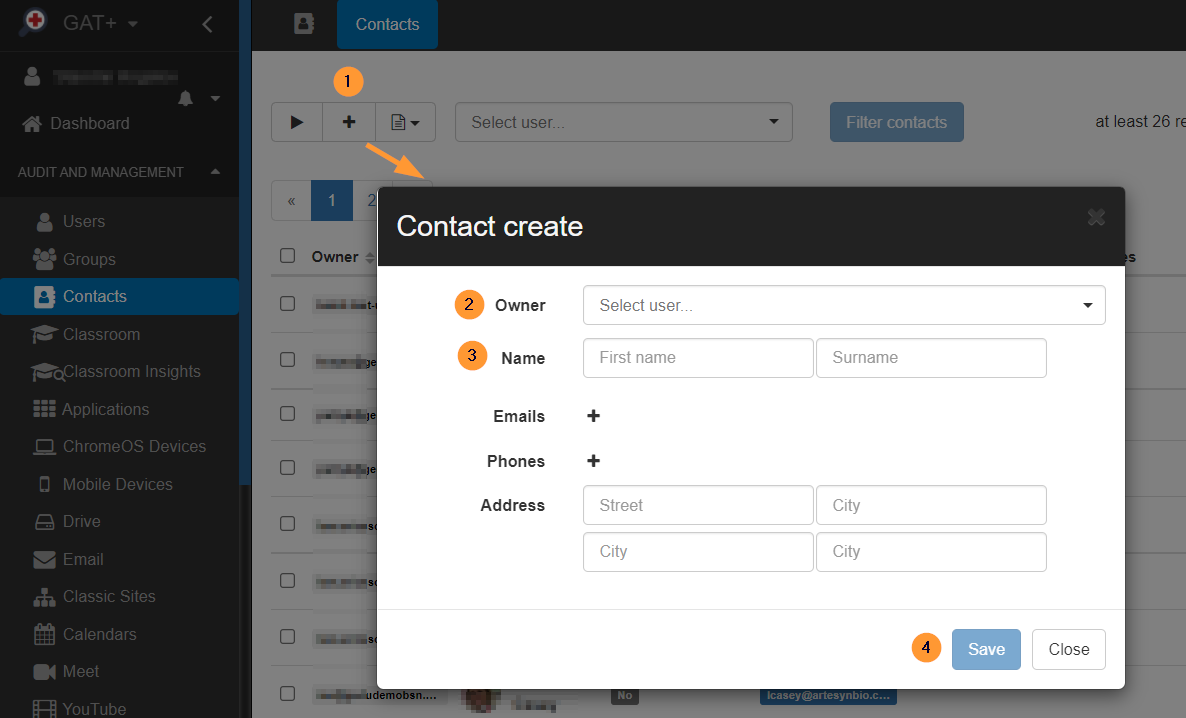
In Create Contacts, the Admin can create a brand new contact and add it to user accounts.
An admin can create and add a new contact inside a user’s account.
- Click on the ‘+’ button.
- Owner – select the owner (user where the new contact will be added to).
- Fill in the details
- Name – enter the name of the new contact.
- Emails – click and enter the email of the new contact
- Phones – click and enter the email of the new contact
- Address – enter the contact addresses.
- Save – click on to save the contact
Bulk Action #
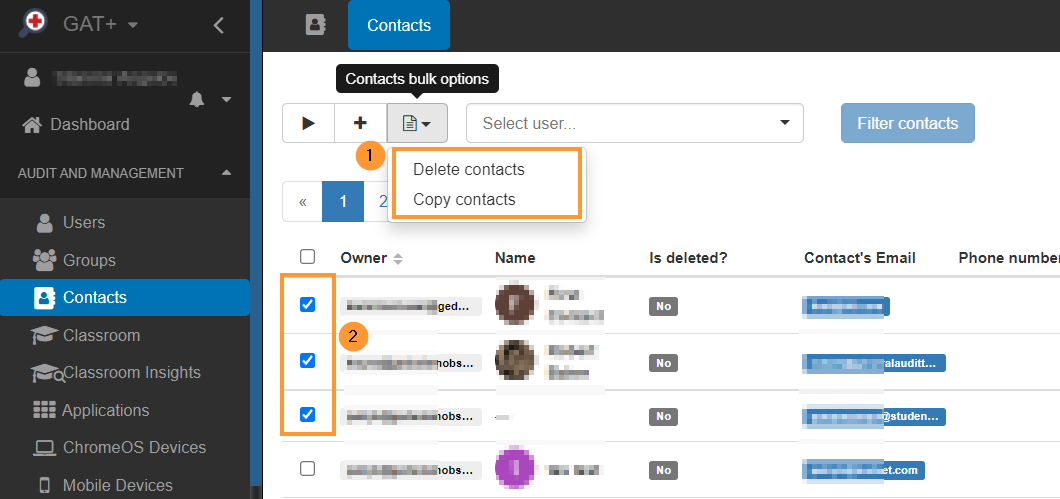
Actions in bulk can be taken on the Contacts. The Admin can select multiple contacts and bulk Copy or delete them.
Select the contacts you would like to copy or delete and click on the “Contacts bulk options.”
This will allow you to Delete or Copy the selected contacts.
Delete contacts in bulk #
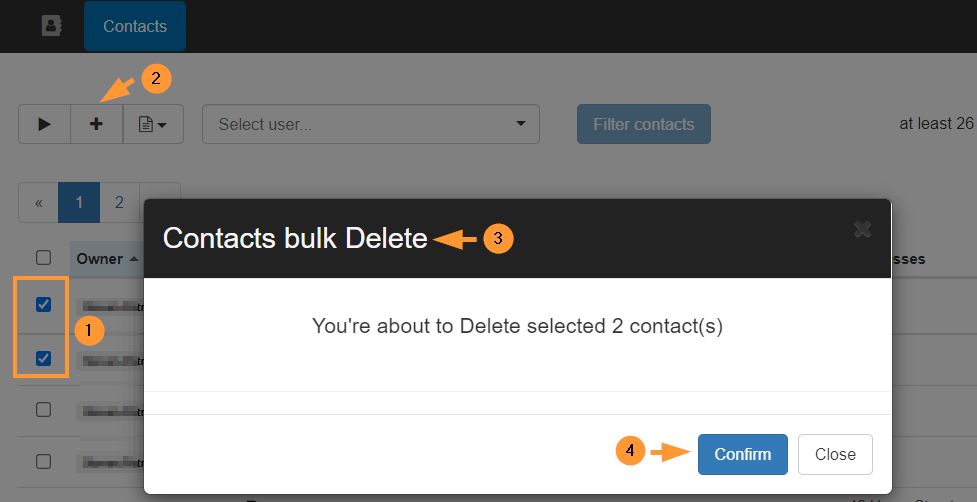
Select the contact you want to delete (by clicking on the check mark beside the Owner) and click on “Delete contacts“.
NOTE: We are deleting the Contact’s Email

A pop-up message will be displayed.
Click on the “Confirm” button to confirm the deletion of the selected contact.
Copy contacts in bulk #
Select the contact you want to copy (by clicking on the check mark beside the Owner) and click on “Copy contacts“.
NOTE: We are copying the Contact’s Email

A pop-up message will be displayed.
- Destination user – enter the destination user where the contact will be copied into
- Labels – add a label
- Contacts will be labeled with the labels typed above
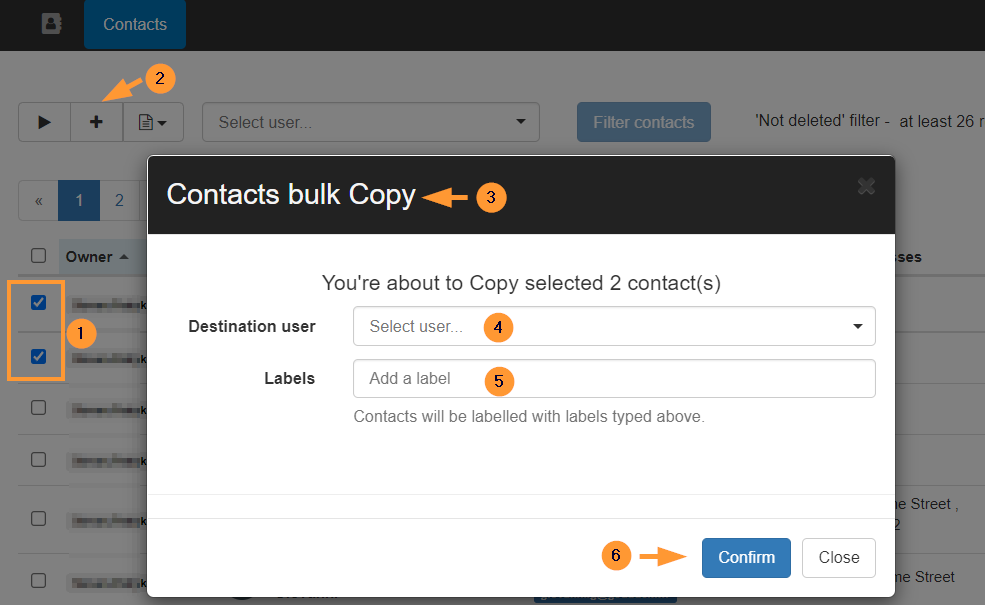
Click on the “Confirm” button to confirm the copying of the selected contacts
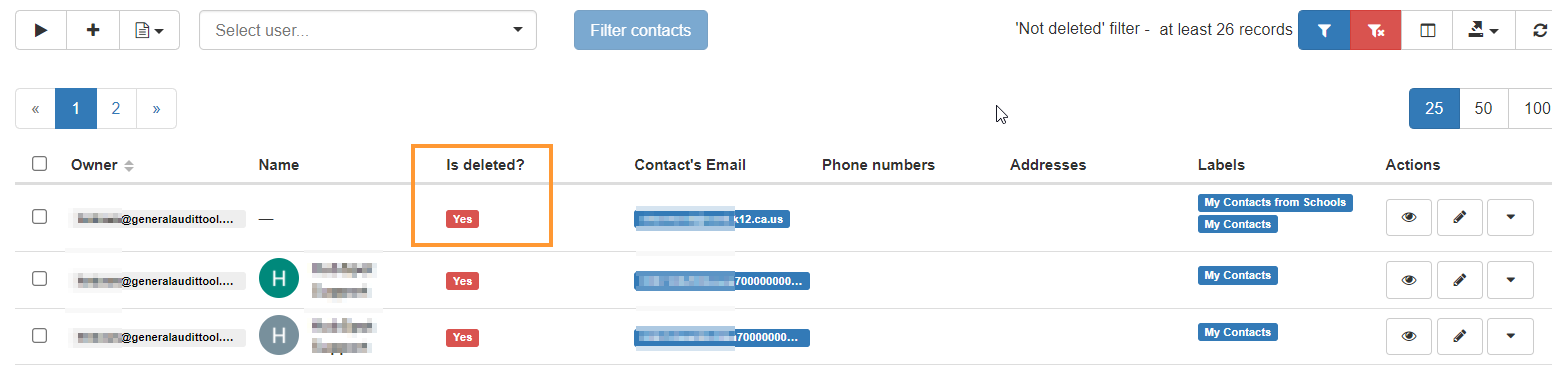
The contacts will be added to the ‘Destination user’ contact list.
In the above example, 2 users were selected, and a label was created.

If you select Delete contacts, the contact and the ‘deleted’ flag will be set to ‘Yes’.
Search Options #
You have the ability to search for contacts using a multitude of different ways.
The easiest one is to search for the owner of the contacts; this will show you all of the contacts that the user has.
Simply search for the Owner’s email address and click the Filter contacts button.
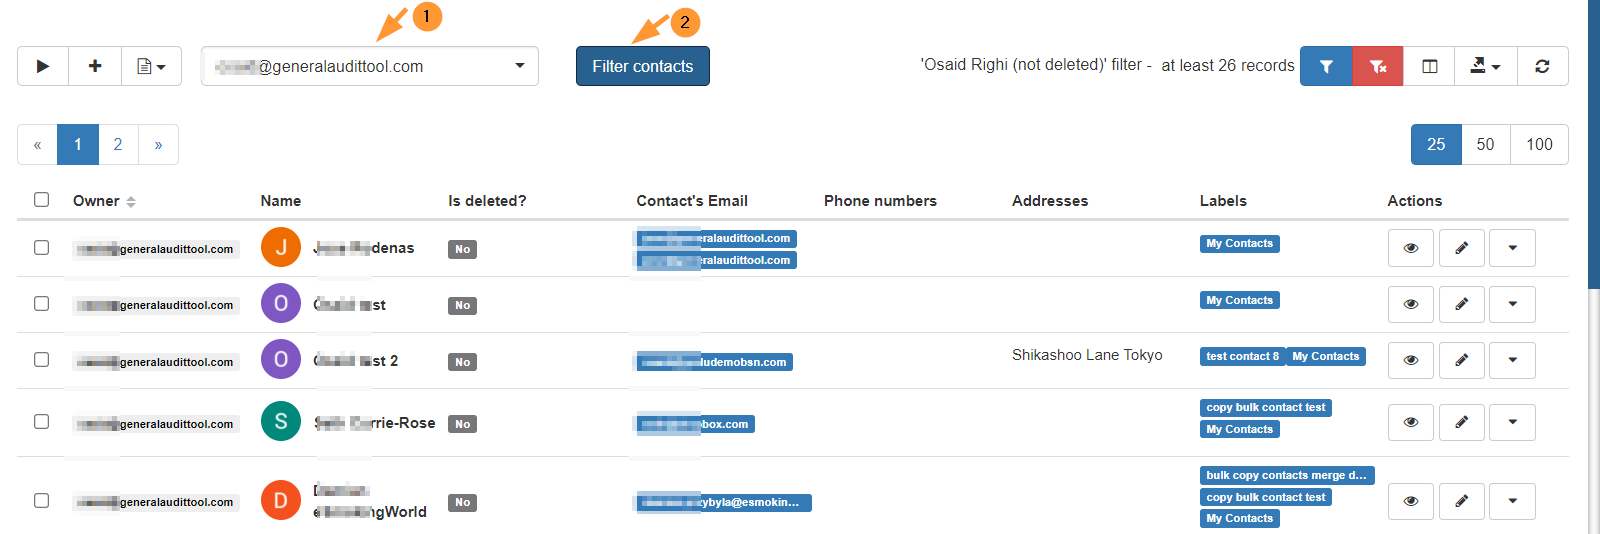
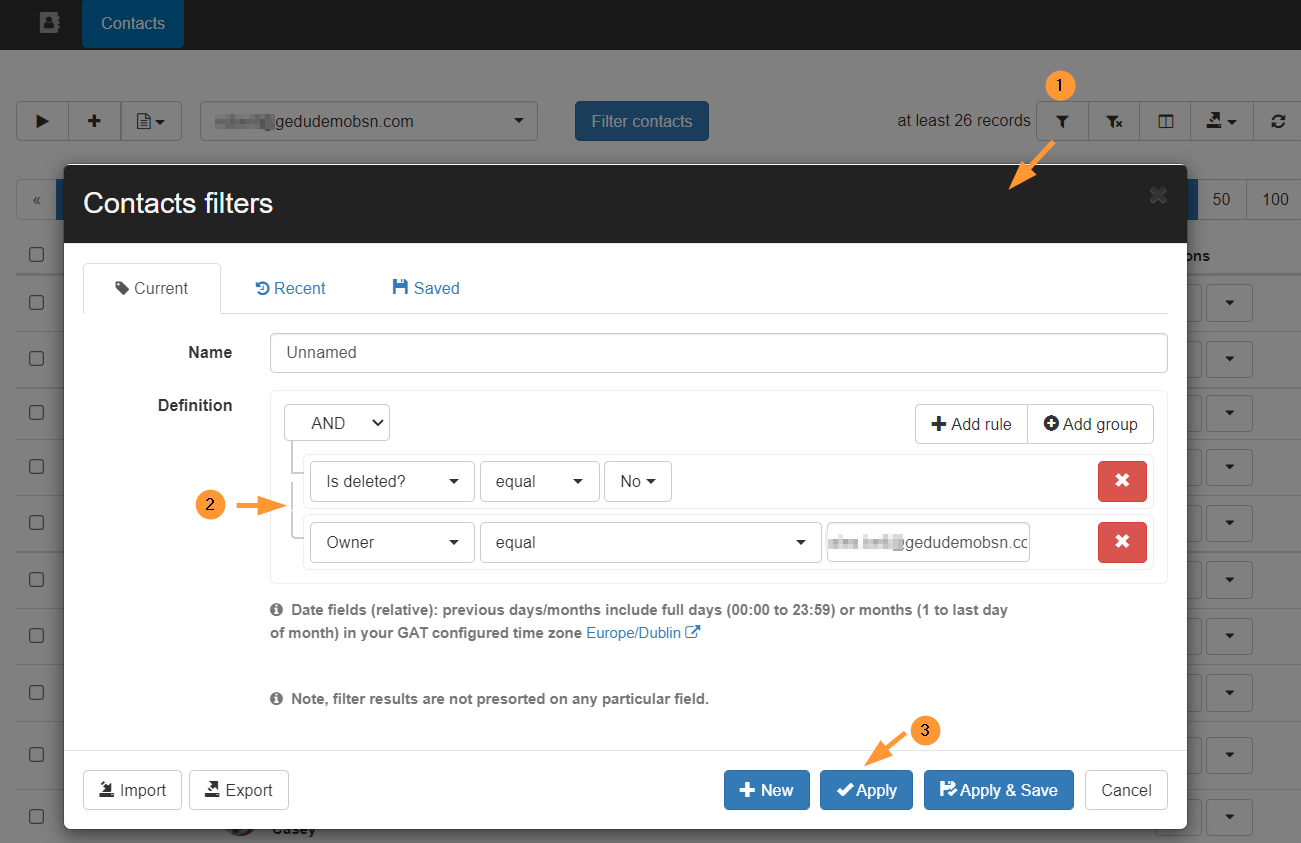
The results will show every single contact in the user’s Google Contacts list. Alternatively, you can search using the Apply Custom Filters button on the top right corner.
When the dialog box is presented, click the +Add rule button to keep adding additional search criteria to narrow down the results.
When you’re done, click on Apply.
Action on one contact #
In the Contacts tab, find any contact needed and click on the “arrow” button under Actions.
Select any action needed:
- Delete – delete the selected contact
- Copy contact – copy the selected contact
- Download VCF – download the contact as .a vcf file (virtual contact file)
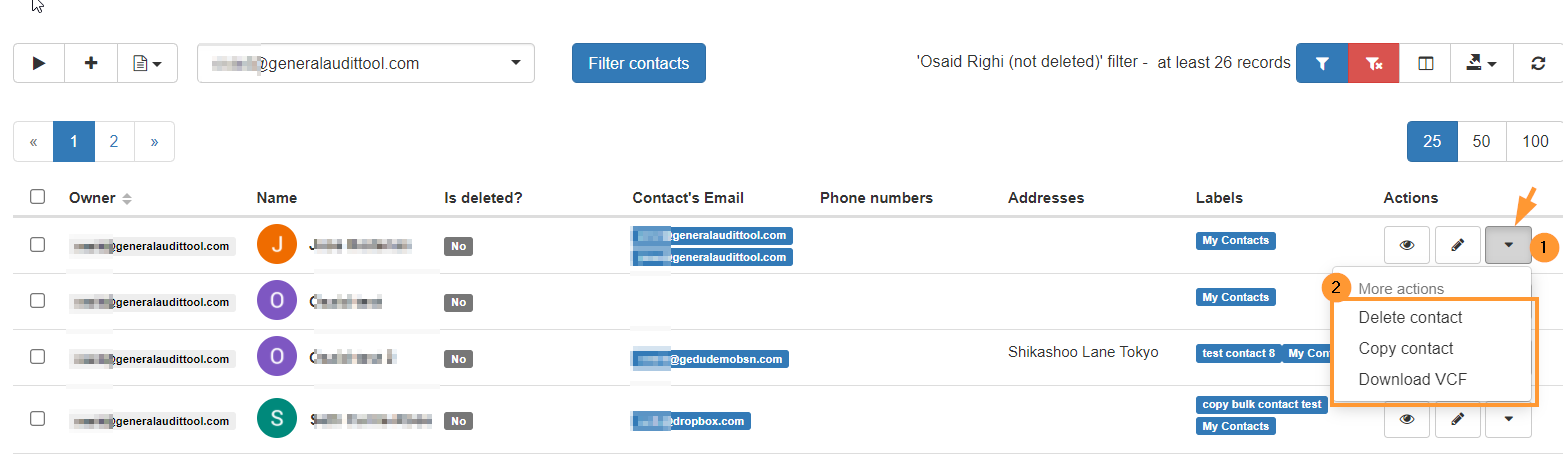
- Edit Contact – select the show details pen icon

Copy individual users #
Under Actions, select Copy contacts
A pop-up message will be displayed.
- Destination user – enter the destination user where the contact will be copied into
- Labels – add a label
- Contacts will be labeled with the labels typed above
- Copy – when ready, click on the “Copy” button.

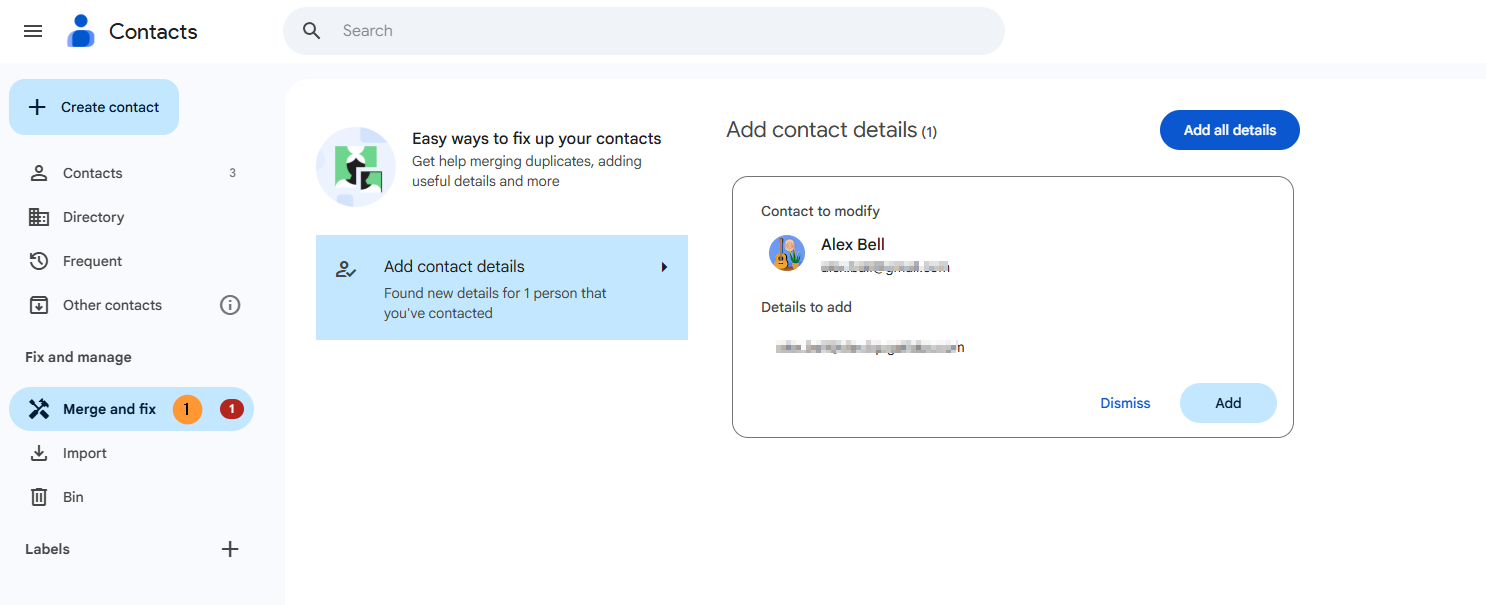
Note: Since owners can have the same contact, there may be cases where duplicates are created as contacts. This can be amended by simply selecting the ‘merge and fix ‘ button.
Navigate to Google Contacts ( https://contacts.google.com/suggestions ) and “Merge and fix”