GAT Flow can assist with the automatic generation of a User ID for every newly created user.
An Admin can achieve that in two simple steps outlined below.
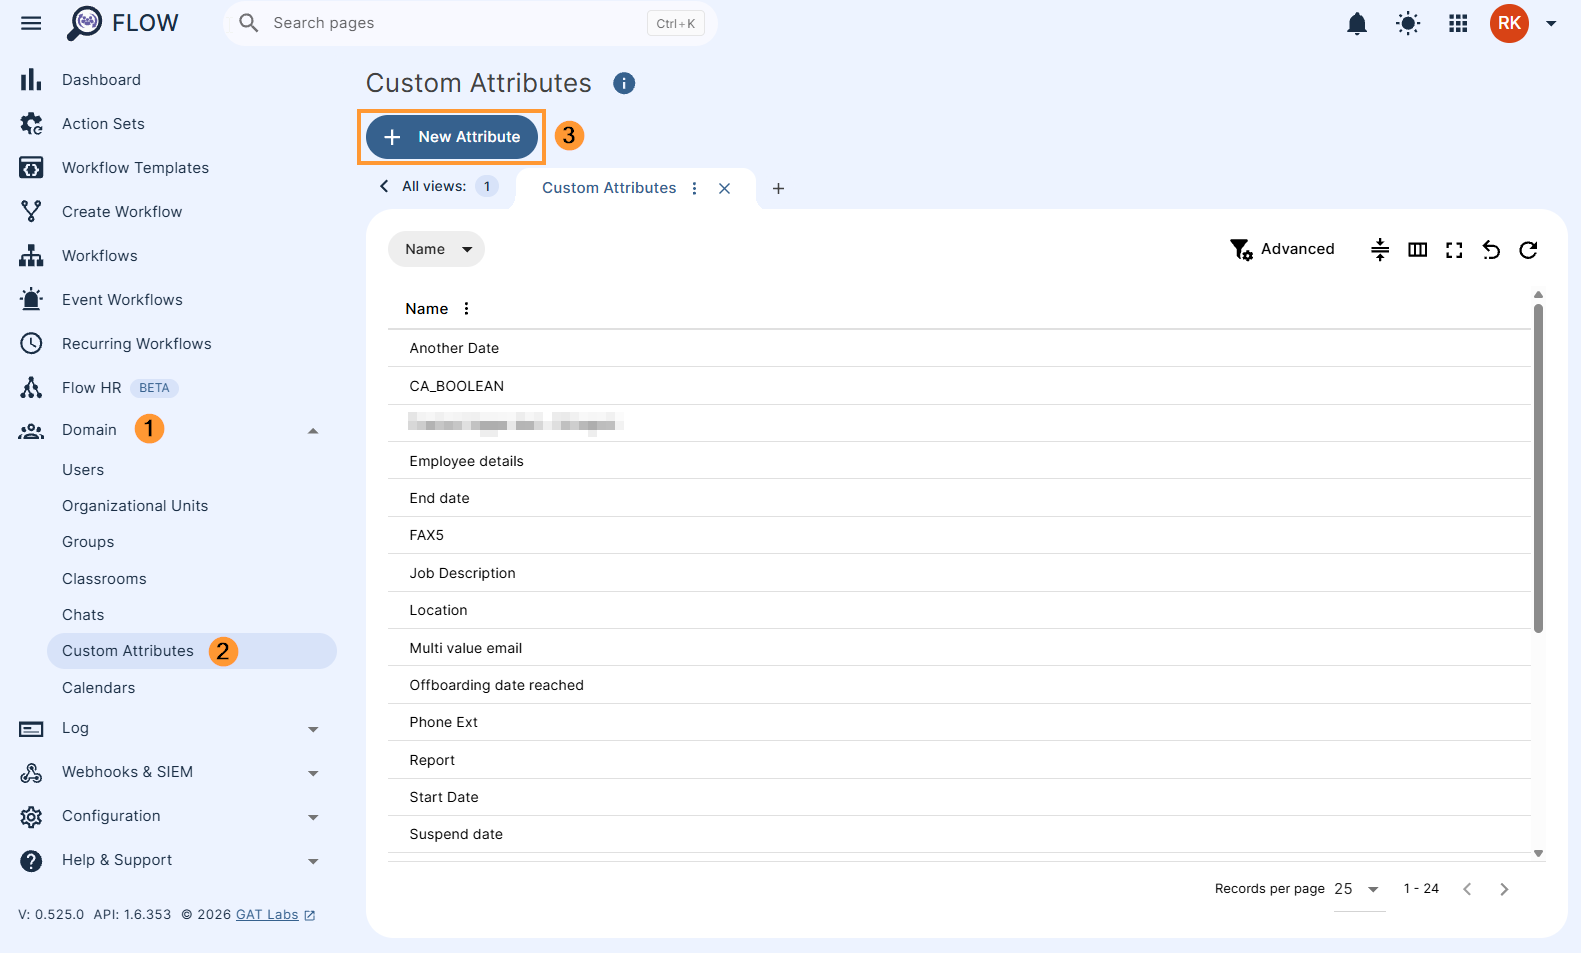
Create Custom attribute titled User ID #
Make sure to create a relevant custom attribute titled User ID if doesn’t exist yet on your domain.
To do so, navigate to GAT Flow > Custom attribute > Create attribute
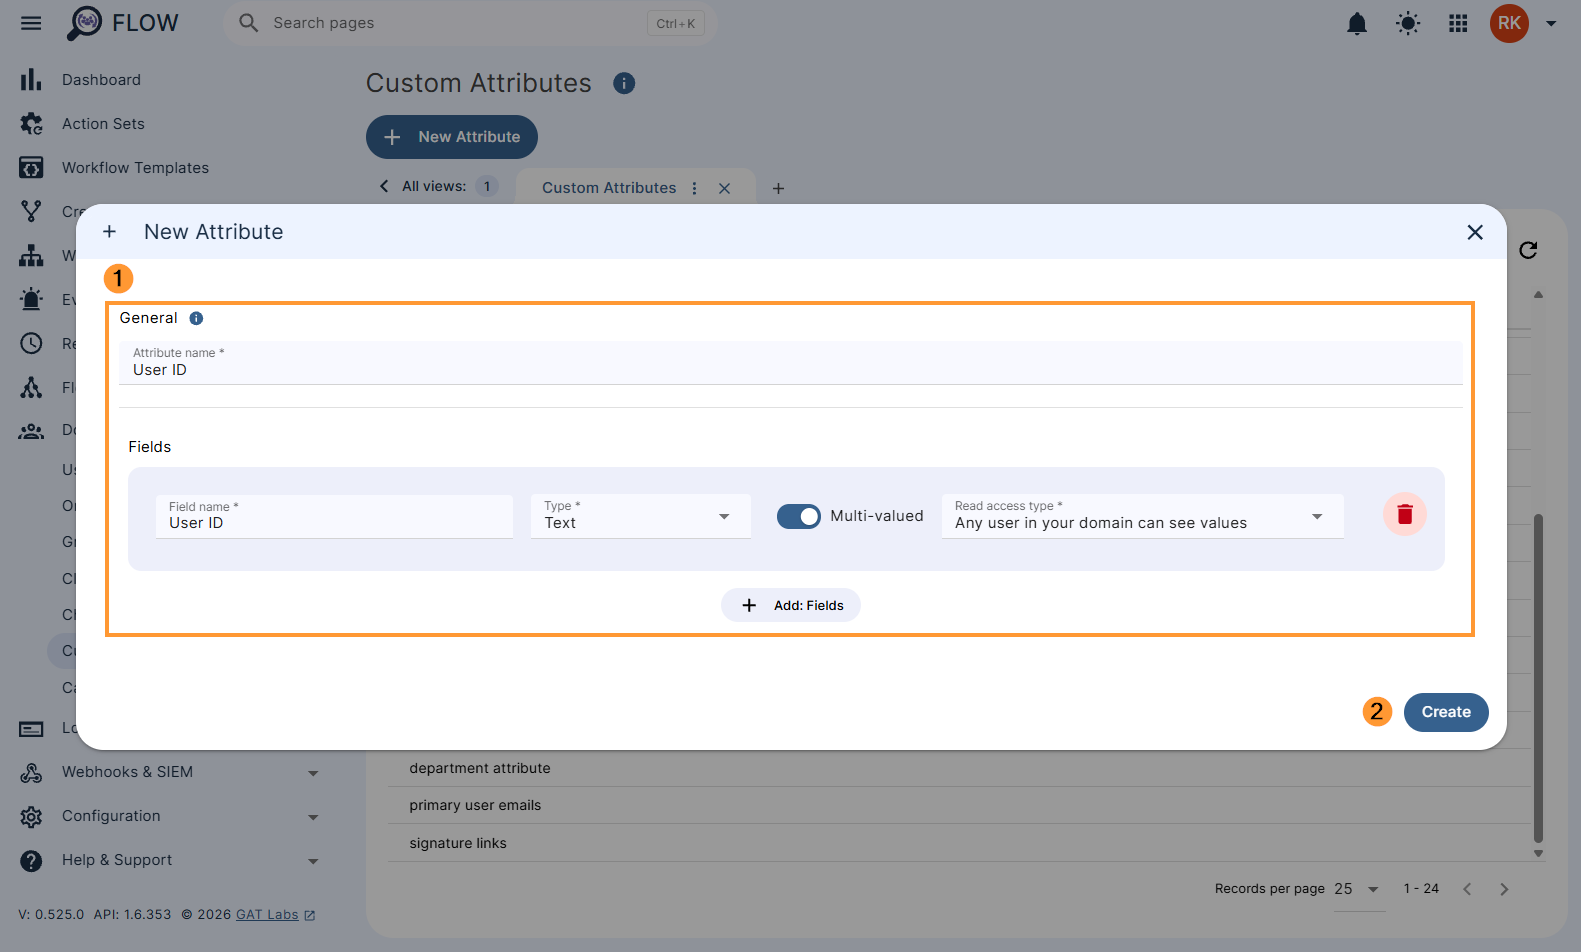
Next, start configuring the relevant attribute:
- Name – apply the name to the newly created custom attribute: User ID
- Fields:
- Name: User ID
- Type: Text
- Multi valued – enable the option to allow multi values to be applied to the attribute
- Read access type – select one of the options:
- Only administrators and associated user can see the values
- Any user in your domain can see the values
Once all is ready, Create the custom attribute.
Now the creation is completed and the custom attribute: User ID exists and can be used in the second step during the onboarding process to automatically generate newly created users’ IDs.
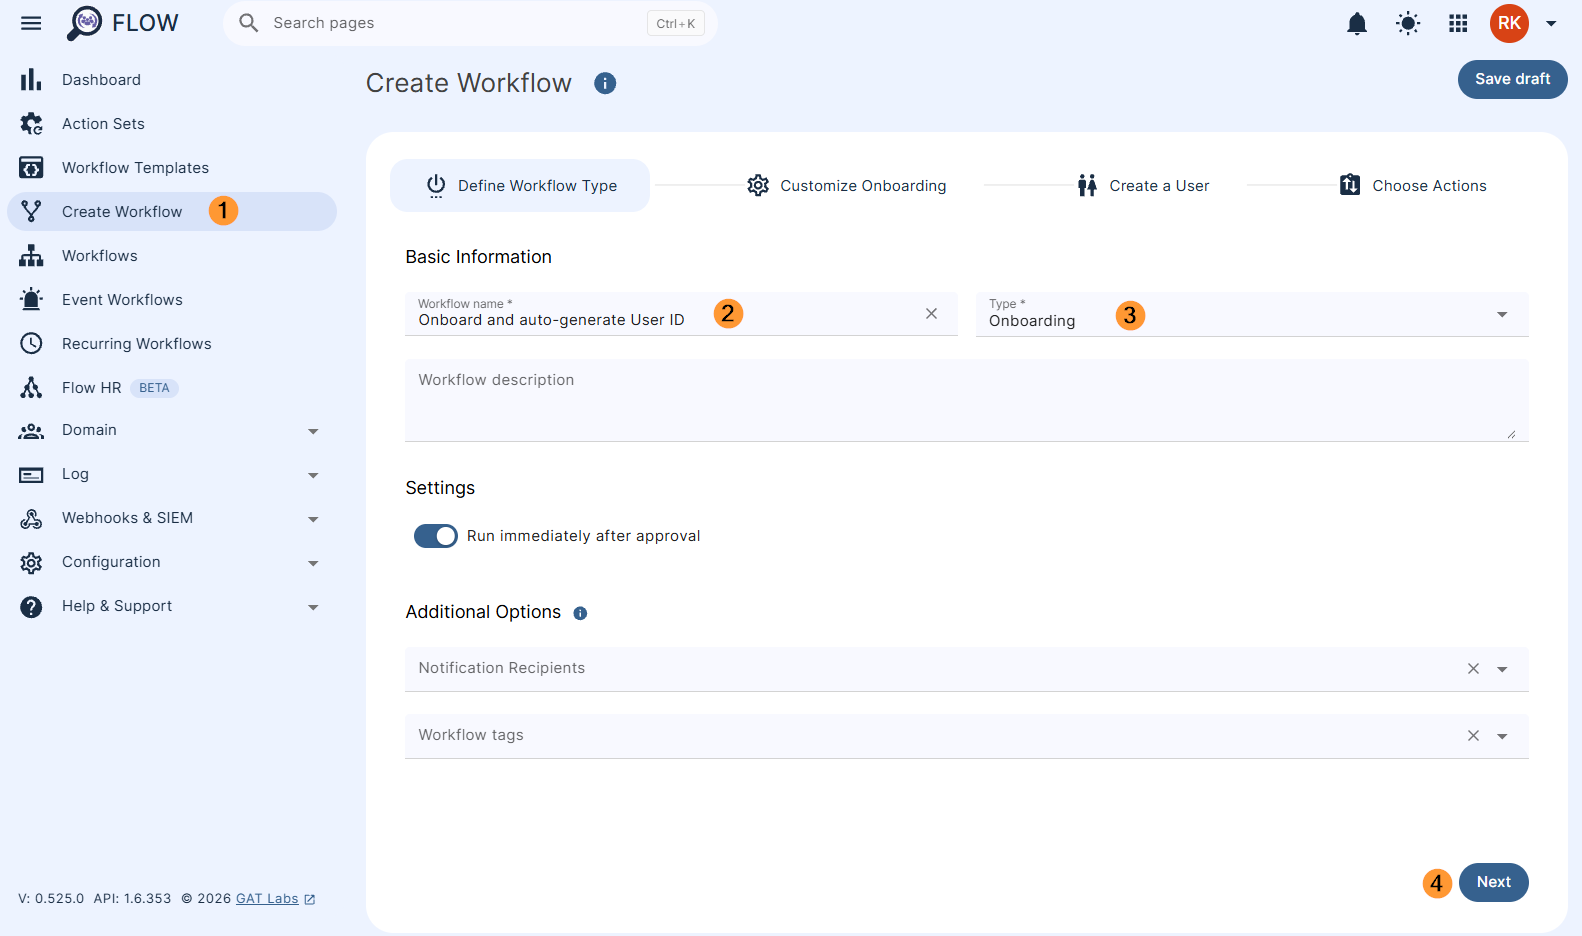
Onboard and auto-generate User IDs #
To onboard new users, navigate to GAT Flow > Create workflow
Type workflow name, select workflow type: Onboarding, and click on Next.
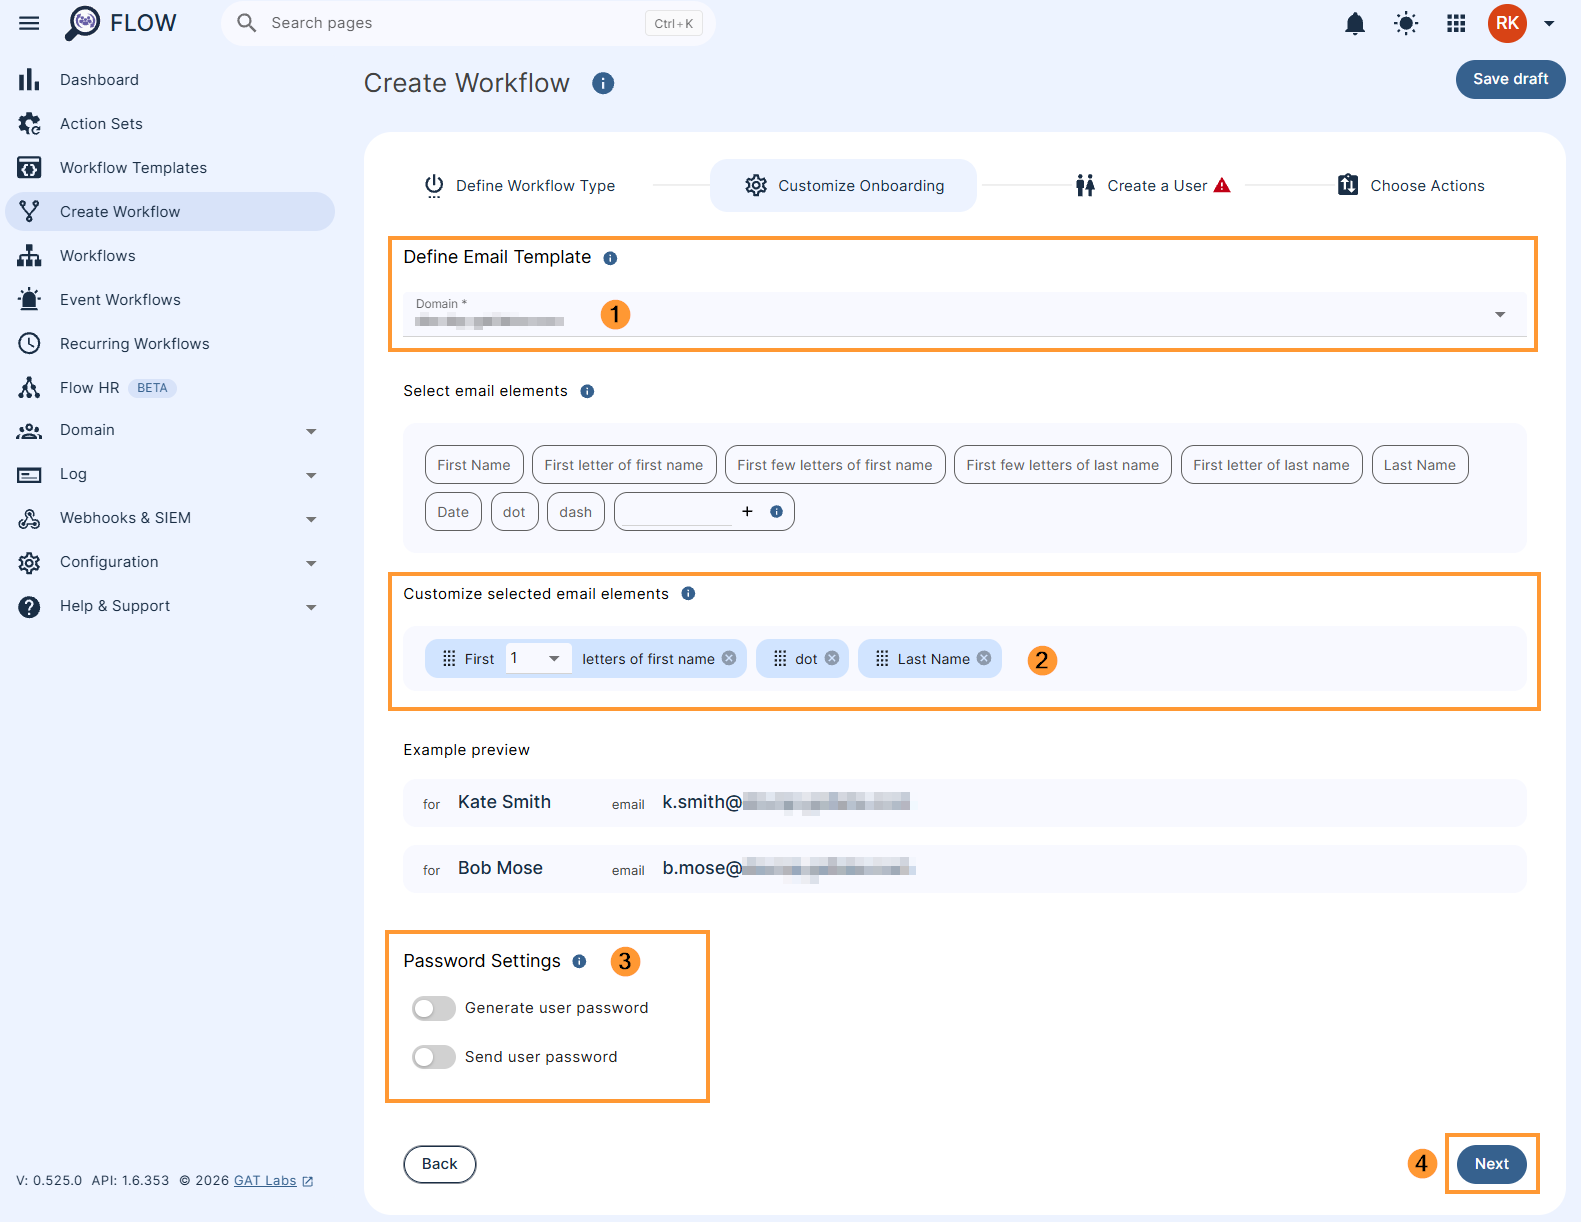
In the next step, Customize Onboarding.
Select the domain name and generate an email template.
Decide whether you wish to auto-generate the user’s password or add it manually in the next step.
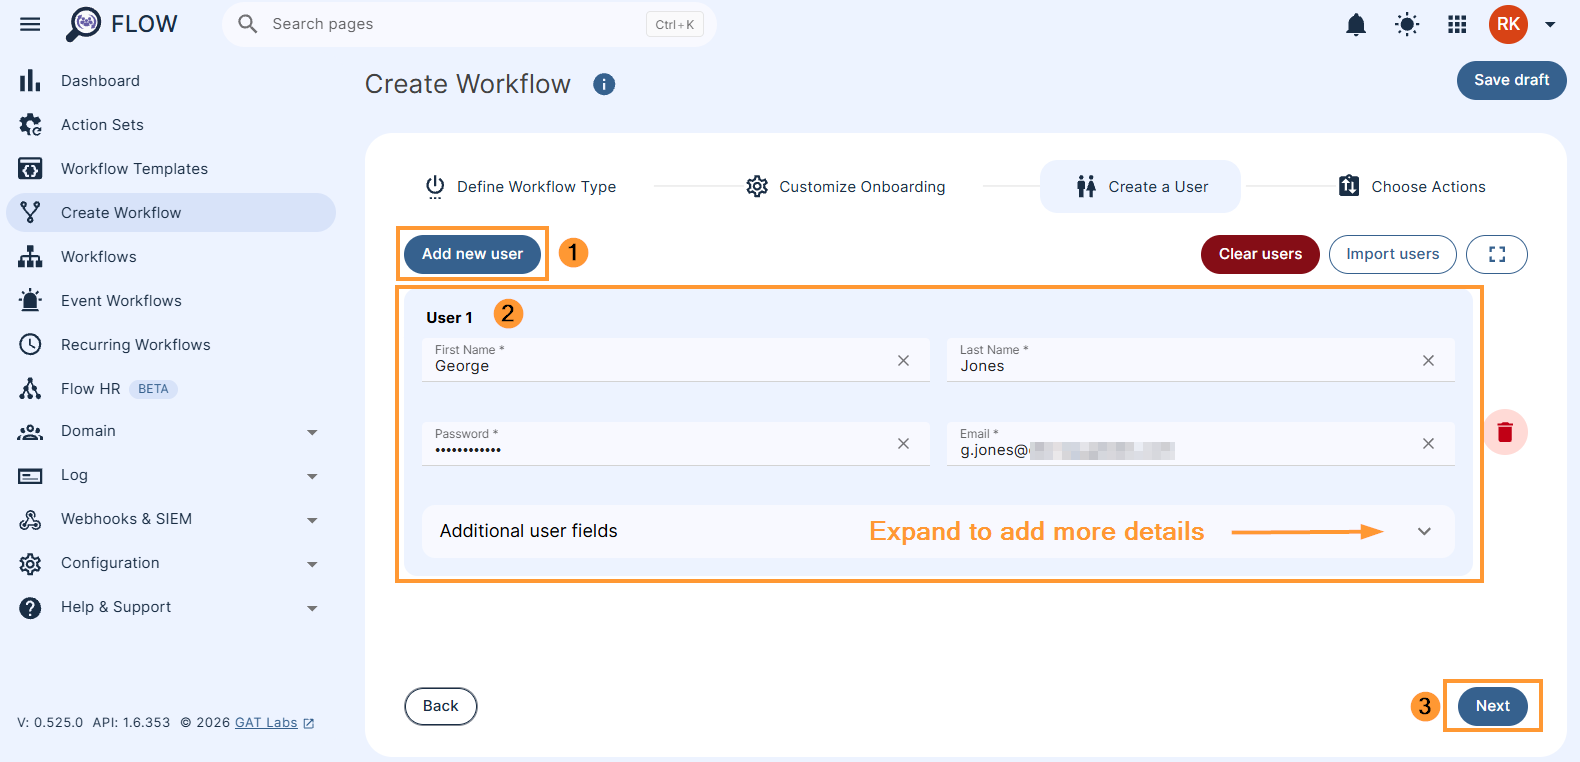
Next, proceed with adding the users, either individually Add new user or via the Import users option.
See how to use Import user option here.
To manually add a new user click on Add new user button.
Add mandatory information as follows: First Name and Last Name.
If you decided not to generate a password in the earlier stage, create one now under the Password field.
The email field will be prefilled based on the previously provided information.
When ready, Next.
Then, to choose actions, click on the (+) button and search for the action.
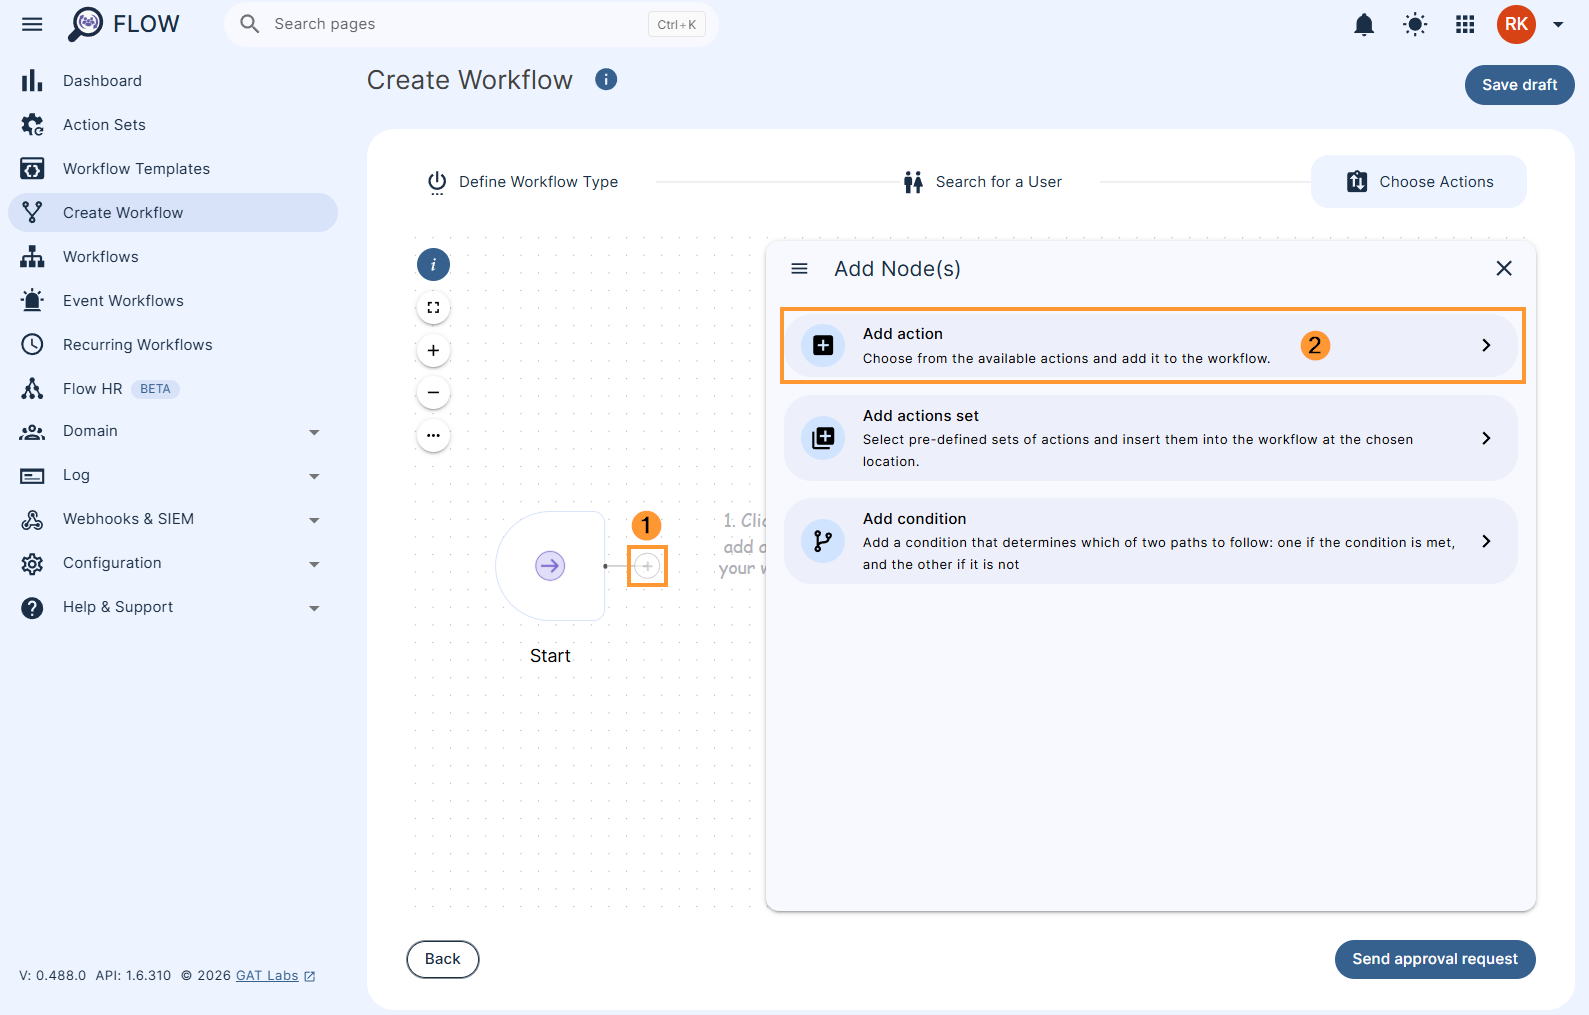
Next, you will see all the options available, search and select the below action:
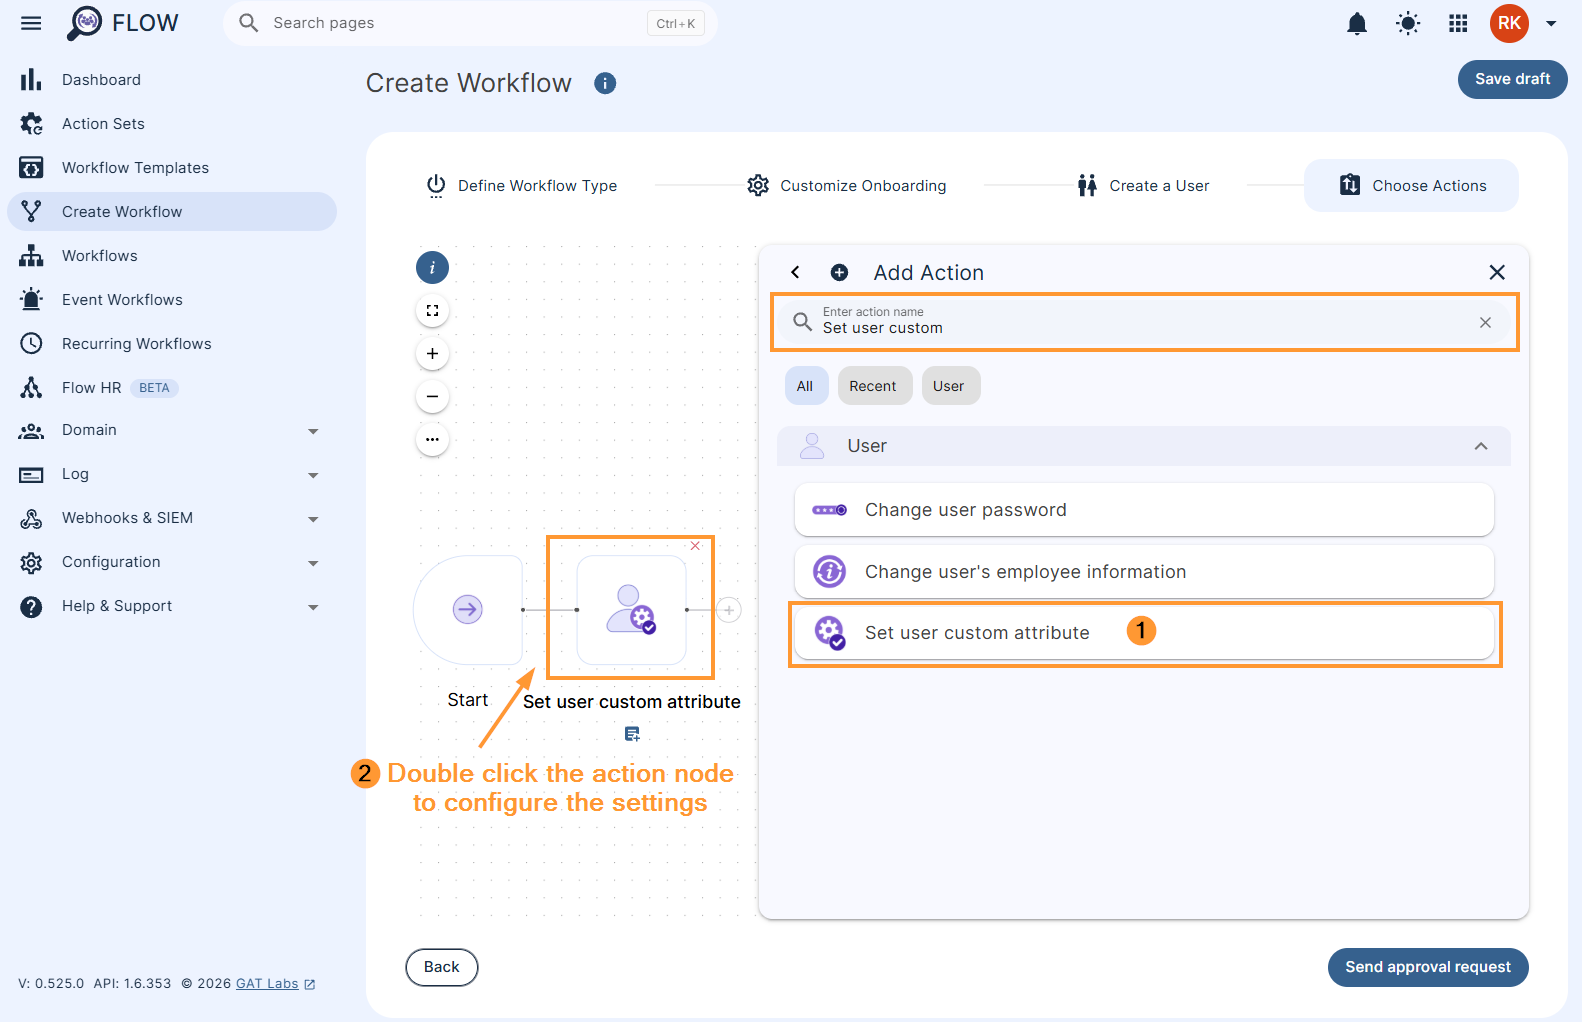
When selected, complete the action settings as follows:
- Custom attribute – select pre-defined in the first step custom attribute ‘User ID – User ID‘ (attribute will auto-populate in the field once configured earlier)
- Override old values – enable the option (optional during the onboarding process as there is no value to override yet)
- Value 1 – to apply relevant value, click on the User ID variable available under the PREDEFINED variables above. Click on {{ id }} variable which copies the variable, and go back to the Value 1 field and past it there
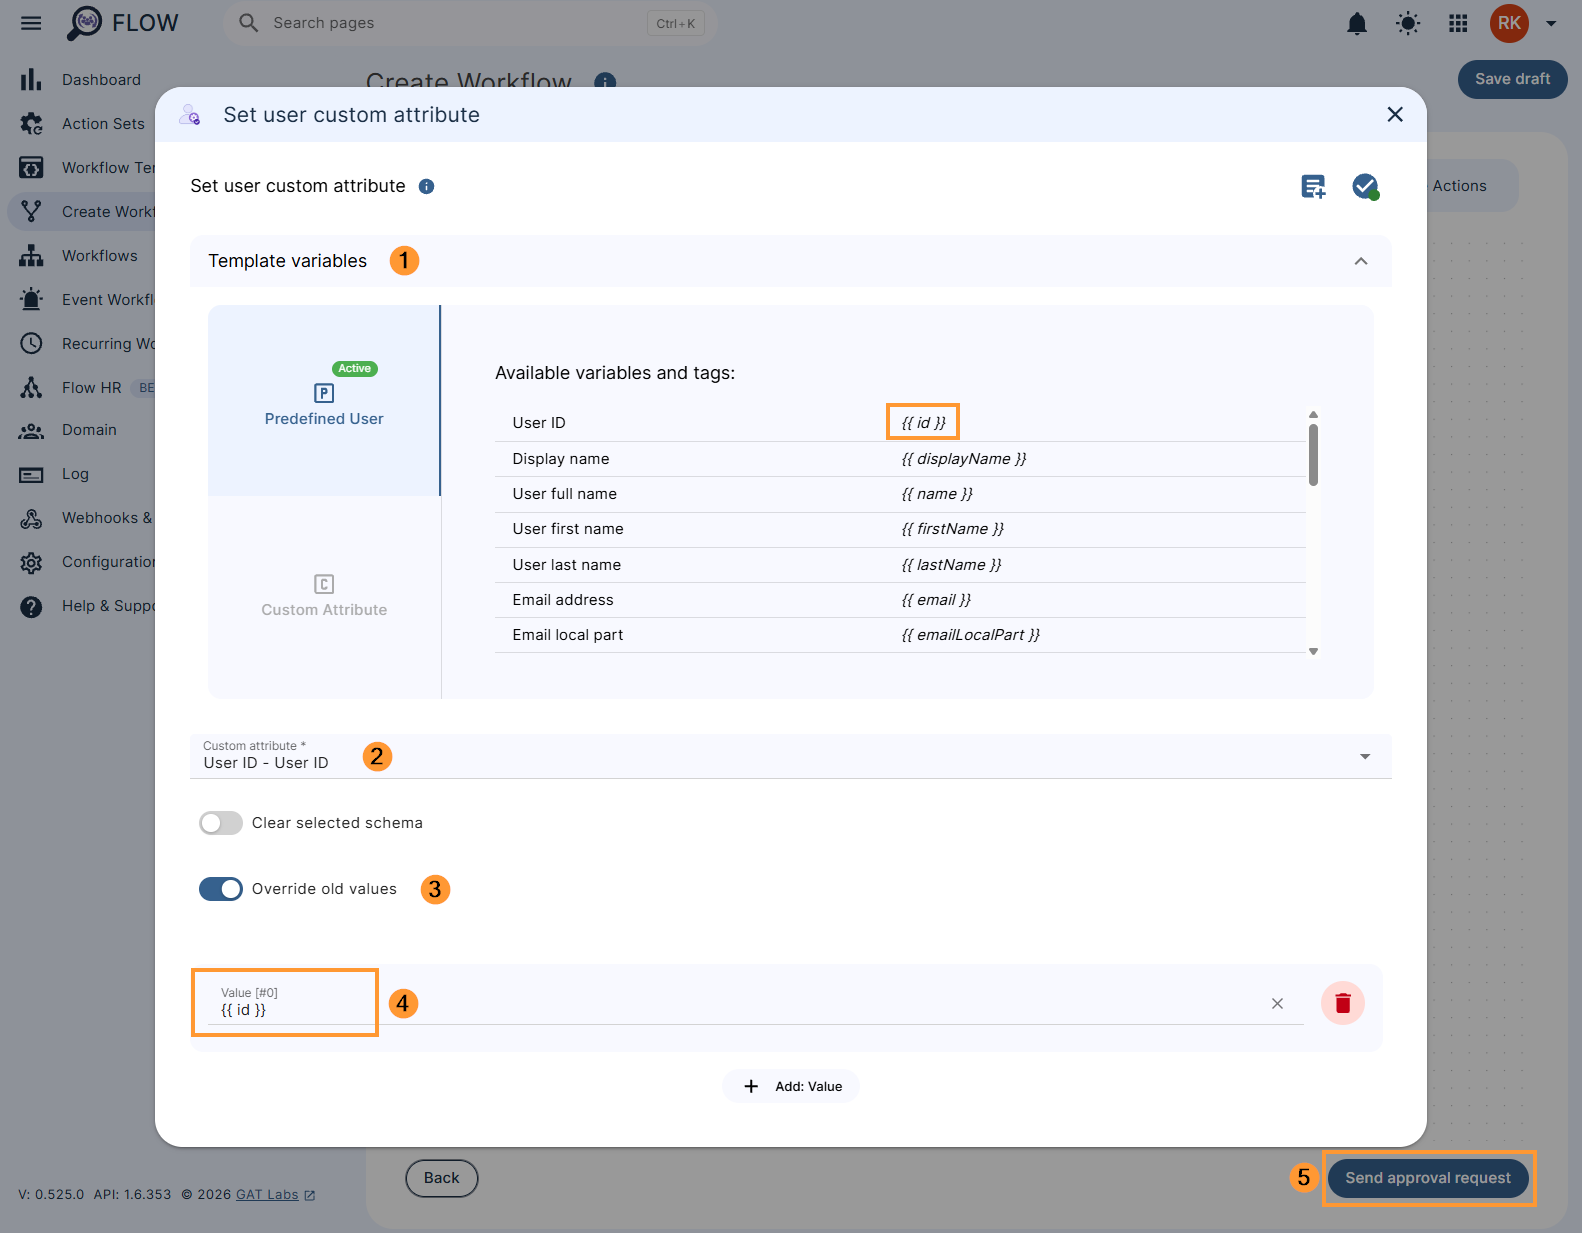
Once ready, Send approval request.
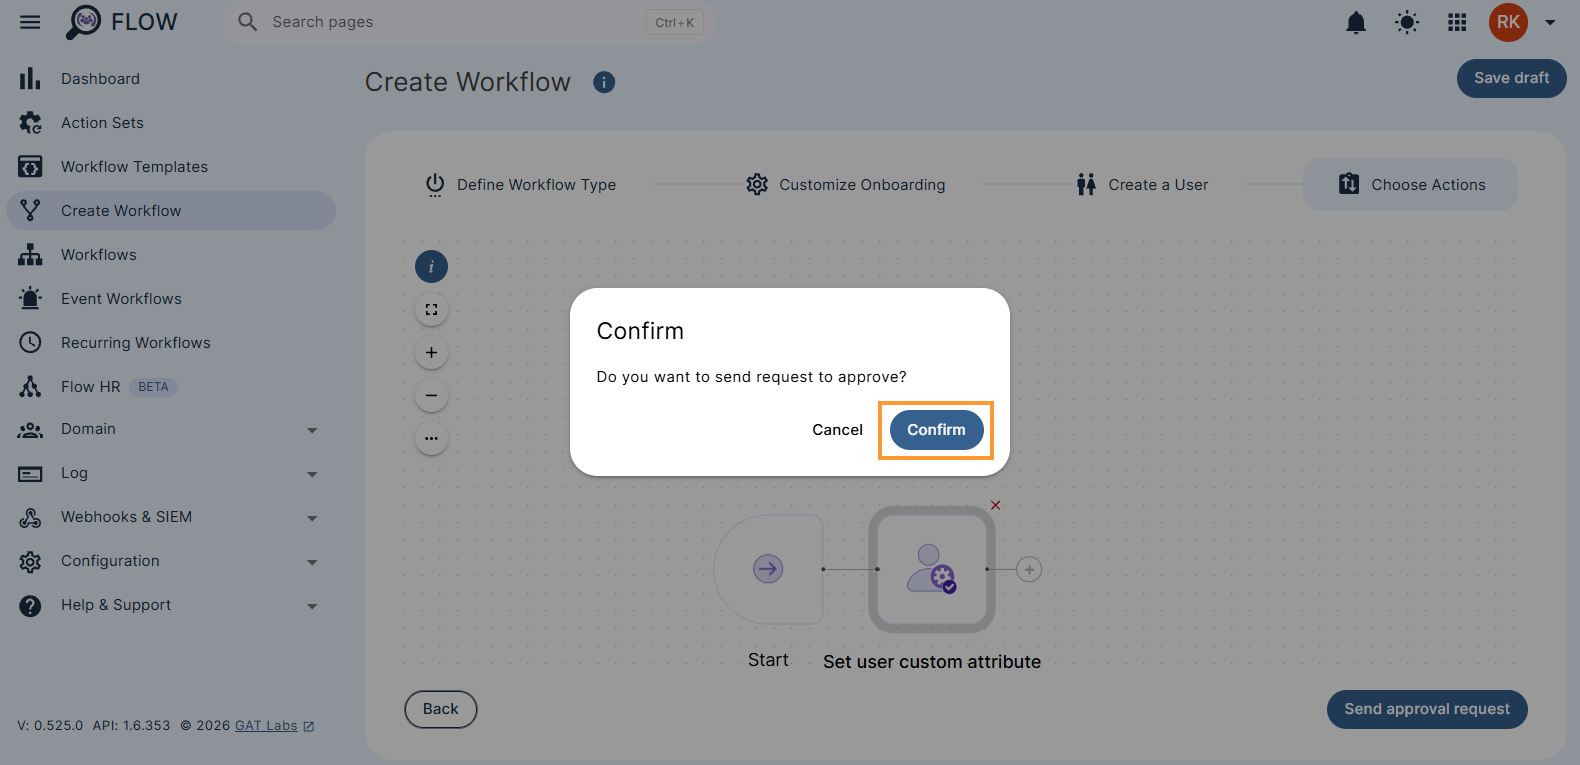
Once confirmed. the request is now sent to Security Officer for verification, and once approved the job will run.
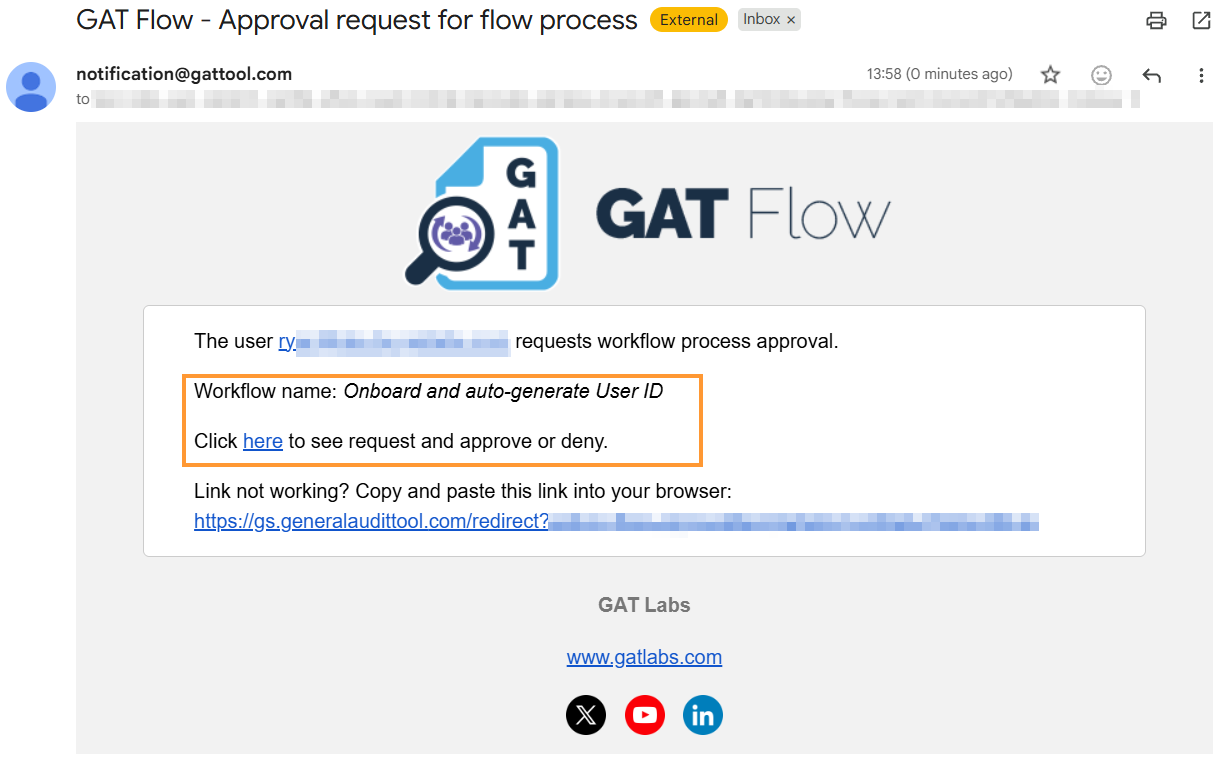
Security Officer approval #
Email notification is delivered to the Security Officer. They can review the request by clicking on the link from the email that brings them to the GAT Flow Approval tab in GAT Flow. They can approve or deny the request from there.
Results #
When the request is approved by Security Officer, a workflow requested/Admin received a confirmation email when the process has been finished.
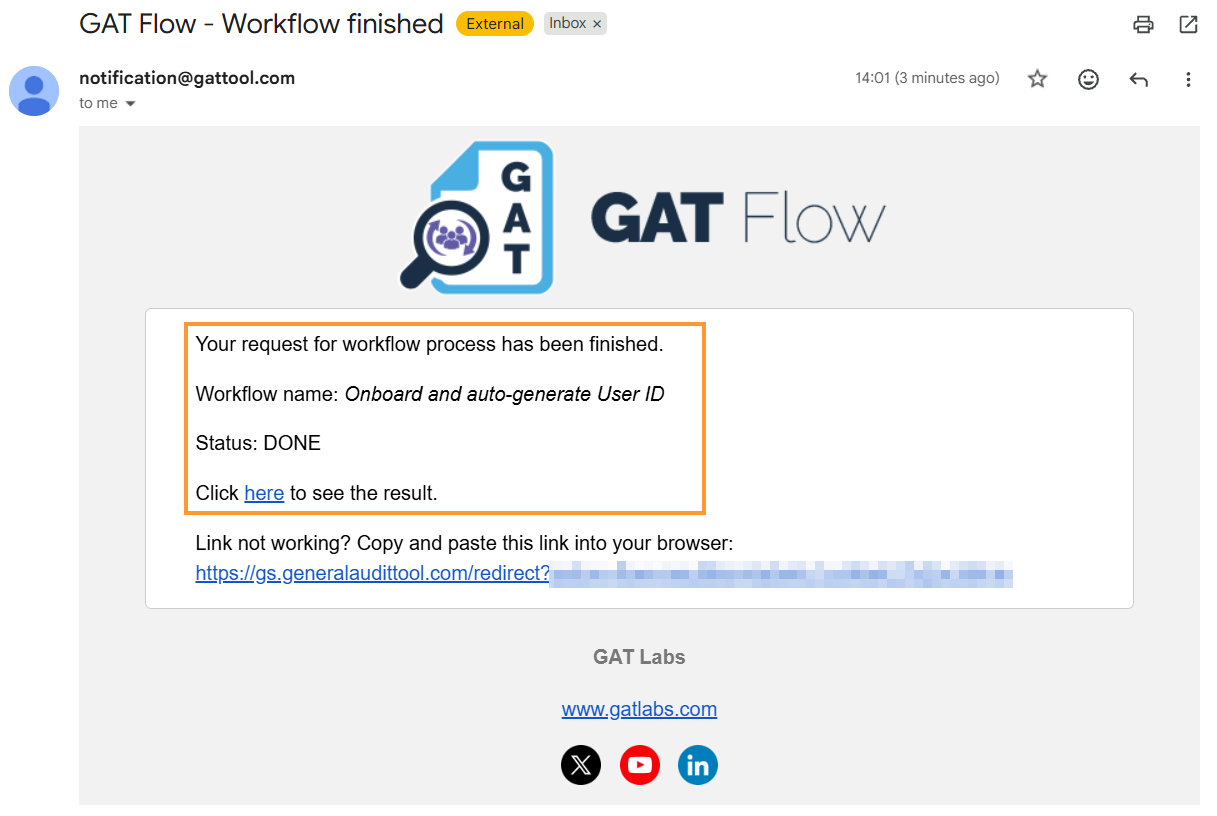
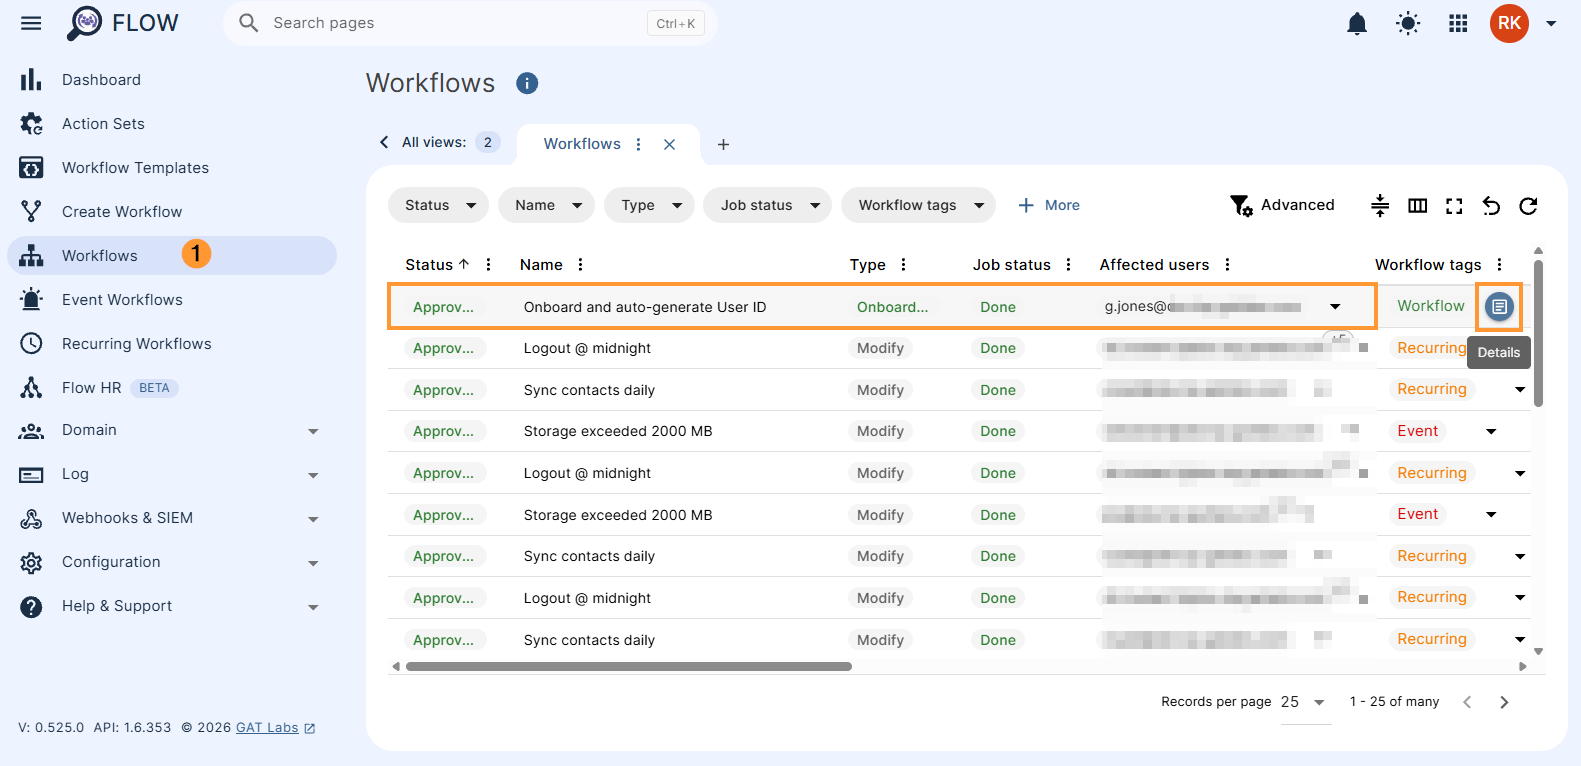
The details can be viewed by clicking on the Workflows section and clicking the page icon.
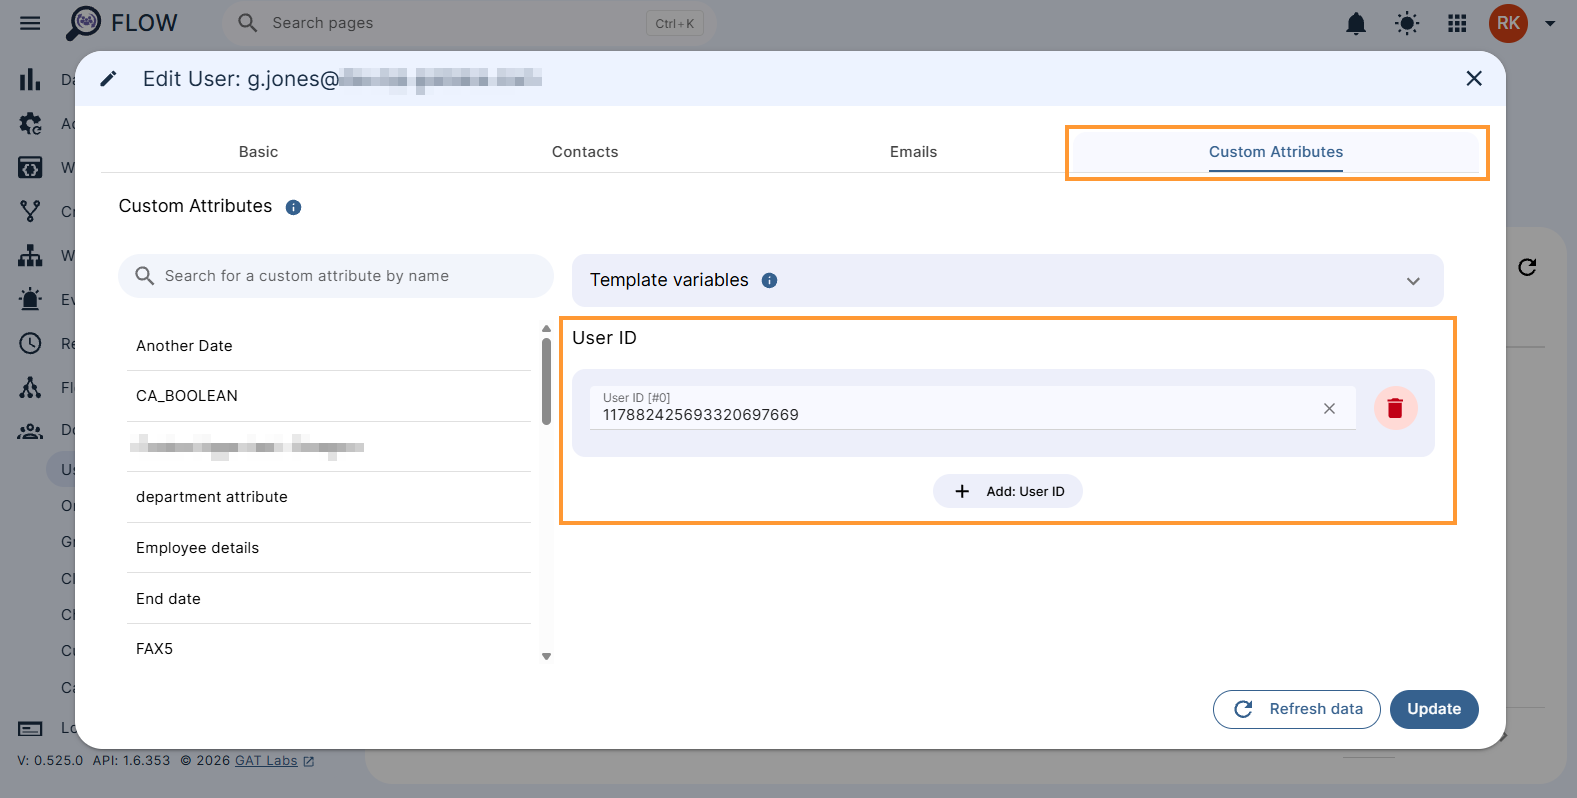
As a result of that, a new user is created, and their User ID is autogenerated.
To view a particular user’s User ID, navigate to Domain > Users > Edit > Custom Attributes tab.