

GAT Shield extension allows the Admins to monitor the user behavior while browsing on the Google Chrome browser.
The Admin can set up multiple DLP Alerts rules.
Based on those alerts then the Admin can be notified via Alert notification when the users have done something against the Alert rule.
All the Shield alerts that are triggered can be viewed in the Shield > Shield Alerts module.
Delegated auditor – reviewer #
The Alerts rules that are triggered could be too many for one Admin to review.
To help the Admin, a Delegated Auditor ( reviewer ) can be created.
This will allow a person to be added to use GAT Shield and view and review all the Alerts that are being generated.
Create delegated auditor in GAT Shield #
Delegated auditors feature allows users, who don’t have to be administrators, to access GAT Shield’s auditing capabilities. You can configure auditors to view data for only specific users, groups or organization units.
An Admin can create the delegated auditor (reviewer) and give them access to view and manage the Shield Alerts
To configure Delegated Auditor role, navigate to GAT Shield > Configuration > Delegated Auditors > + New Auditor
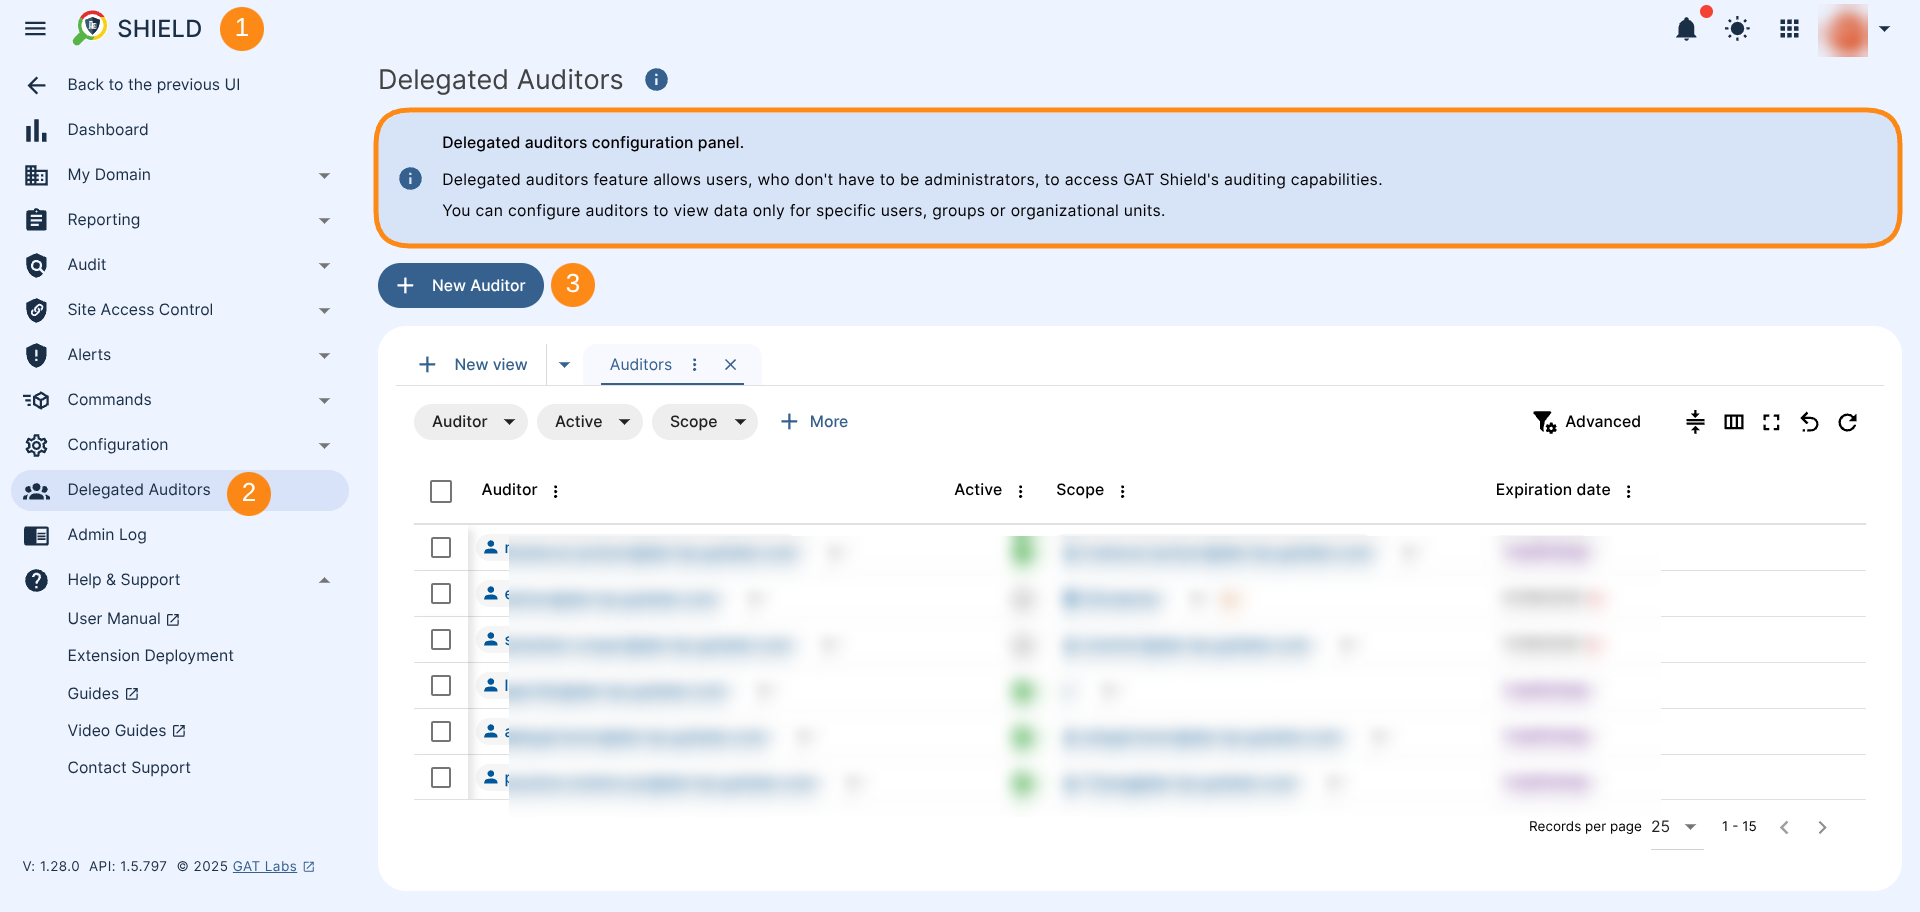
When selecting the + New Auditor button, a new wizard window will be displayed.
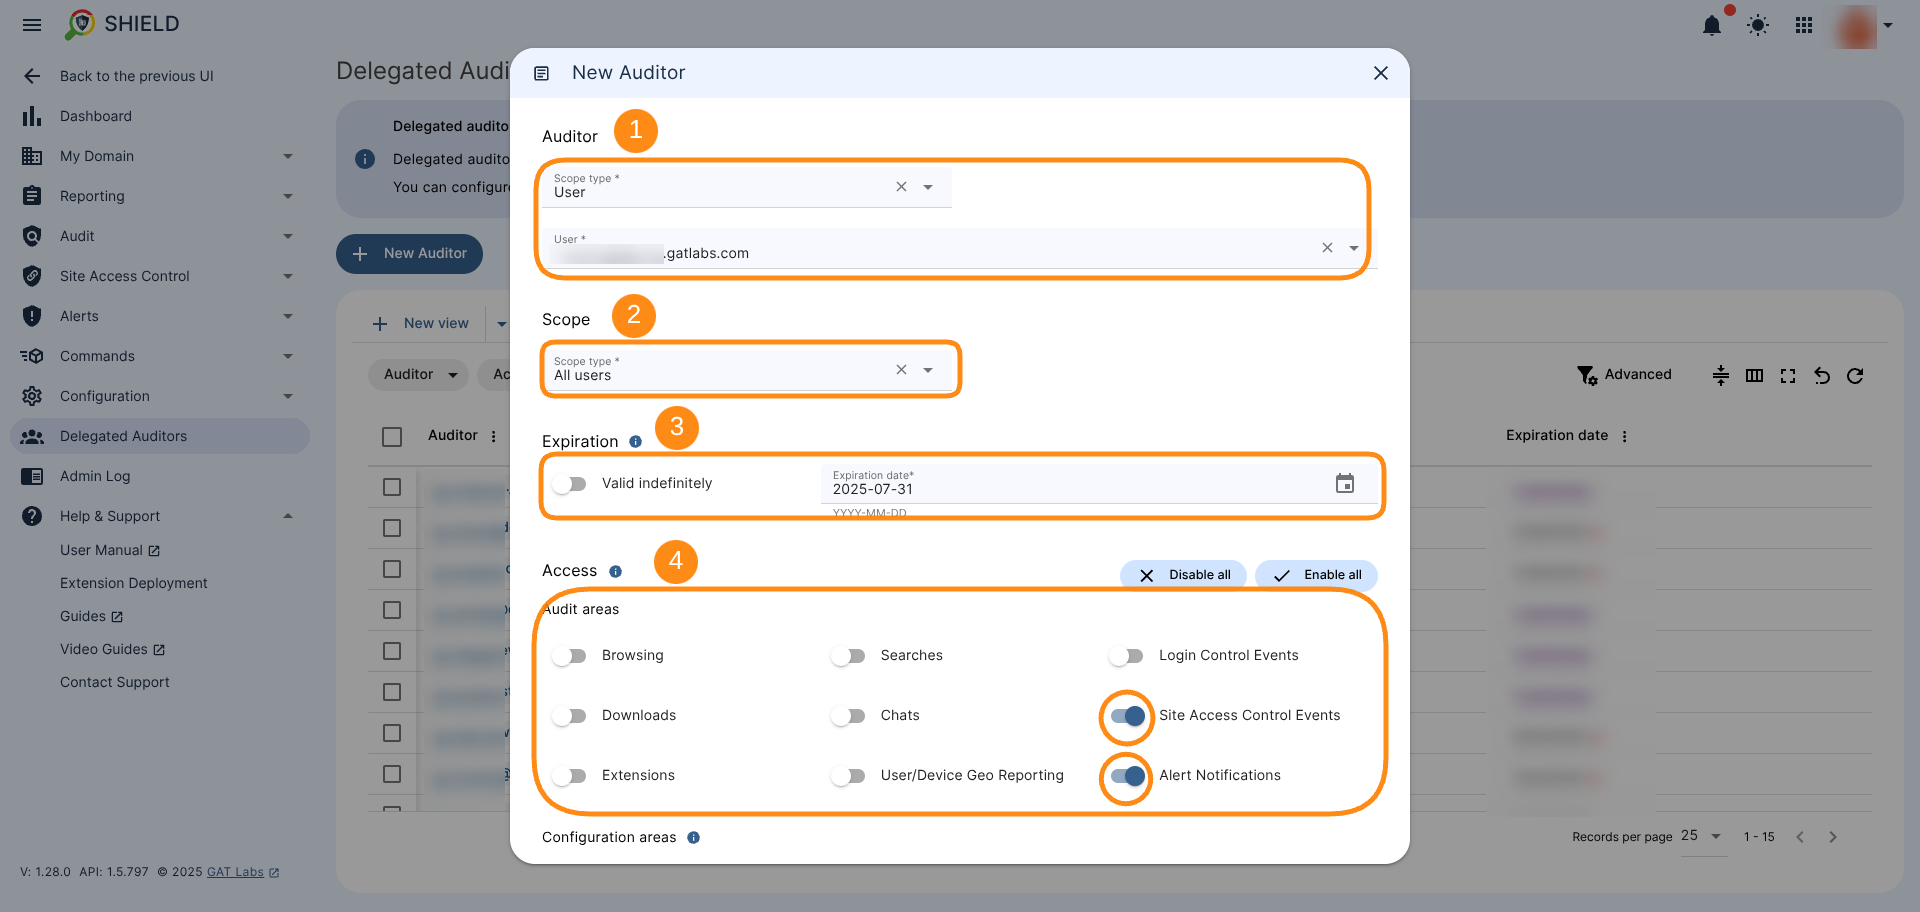
Fill in the details for creating the Auditor.
- Auditor (1) – enter the user email who will audit the Alerts
- Scope type – define the scope type as User if you want to delegate the role to only one user, alternatively as Groups or Org. Unit to delegate the role to more people at once
- User – if the scope type is defined as User, Under the Users field select the domain user that you wish to delegate the role to (alternatively, Groups or OUs depending on the earliest selection under Scope type)
- Scope (2) – select into what users the Auditor will have access over, to view their Alerts
- Scope type – select All users to monitor all domain users without any exceptions
- Expiration (3) – define the date until which the role will be valid
- Valid indefinitely – the role will be assigned indefinitely or until manually removed by the administrator
- Expiration date – select the date until which the role will be active
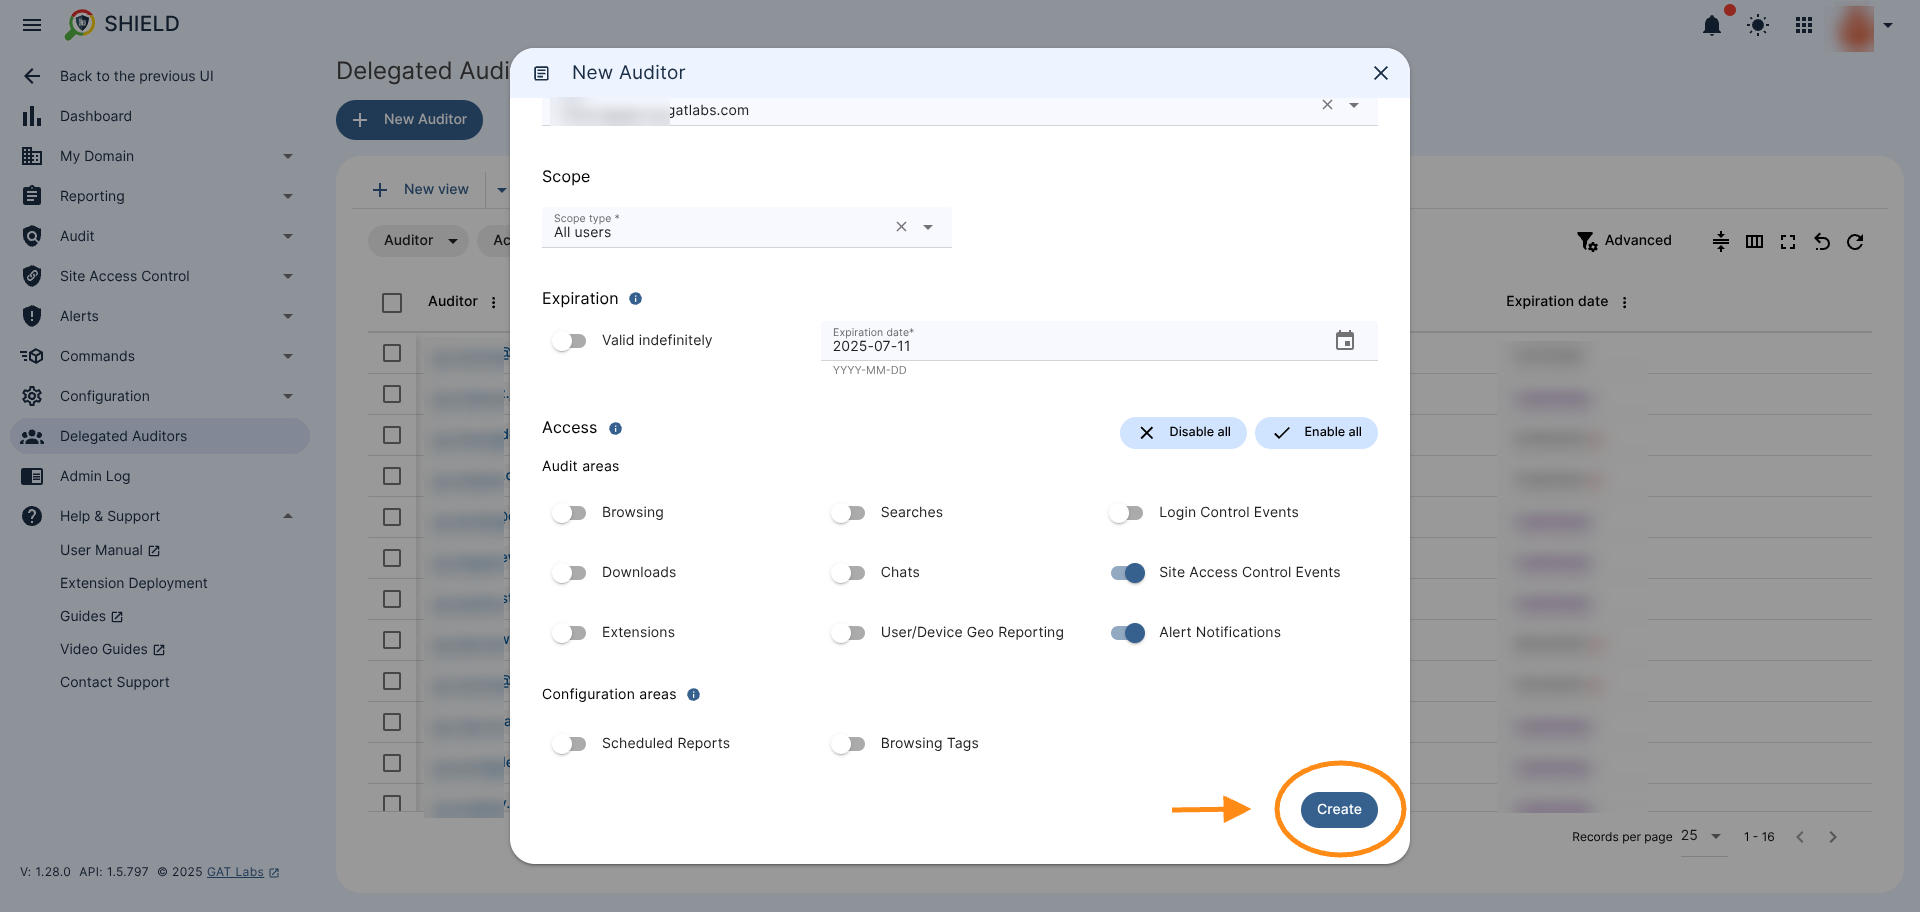
- Access (4) – select and enable the areas to which the auditor will have access:
- Site Access Control Events – enable this module to allow auditors to audit events triggered by Site Access Control rules
- Alert Notifications – enable this module to allow auditors to audit notifications triggered by Shield Alert Rules
Once all the configuration is ready, clicking the Create button creates the Delegated Auditor role with access permissions tailored to the needs defined by the administrator.
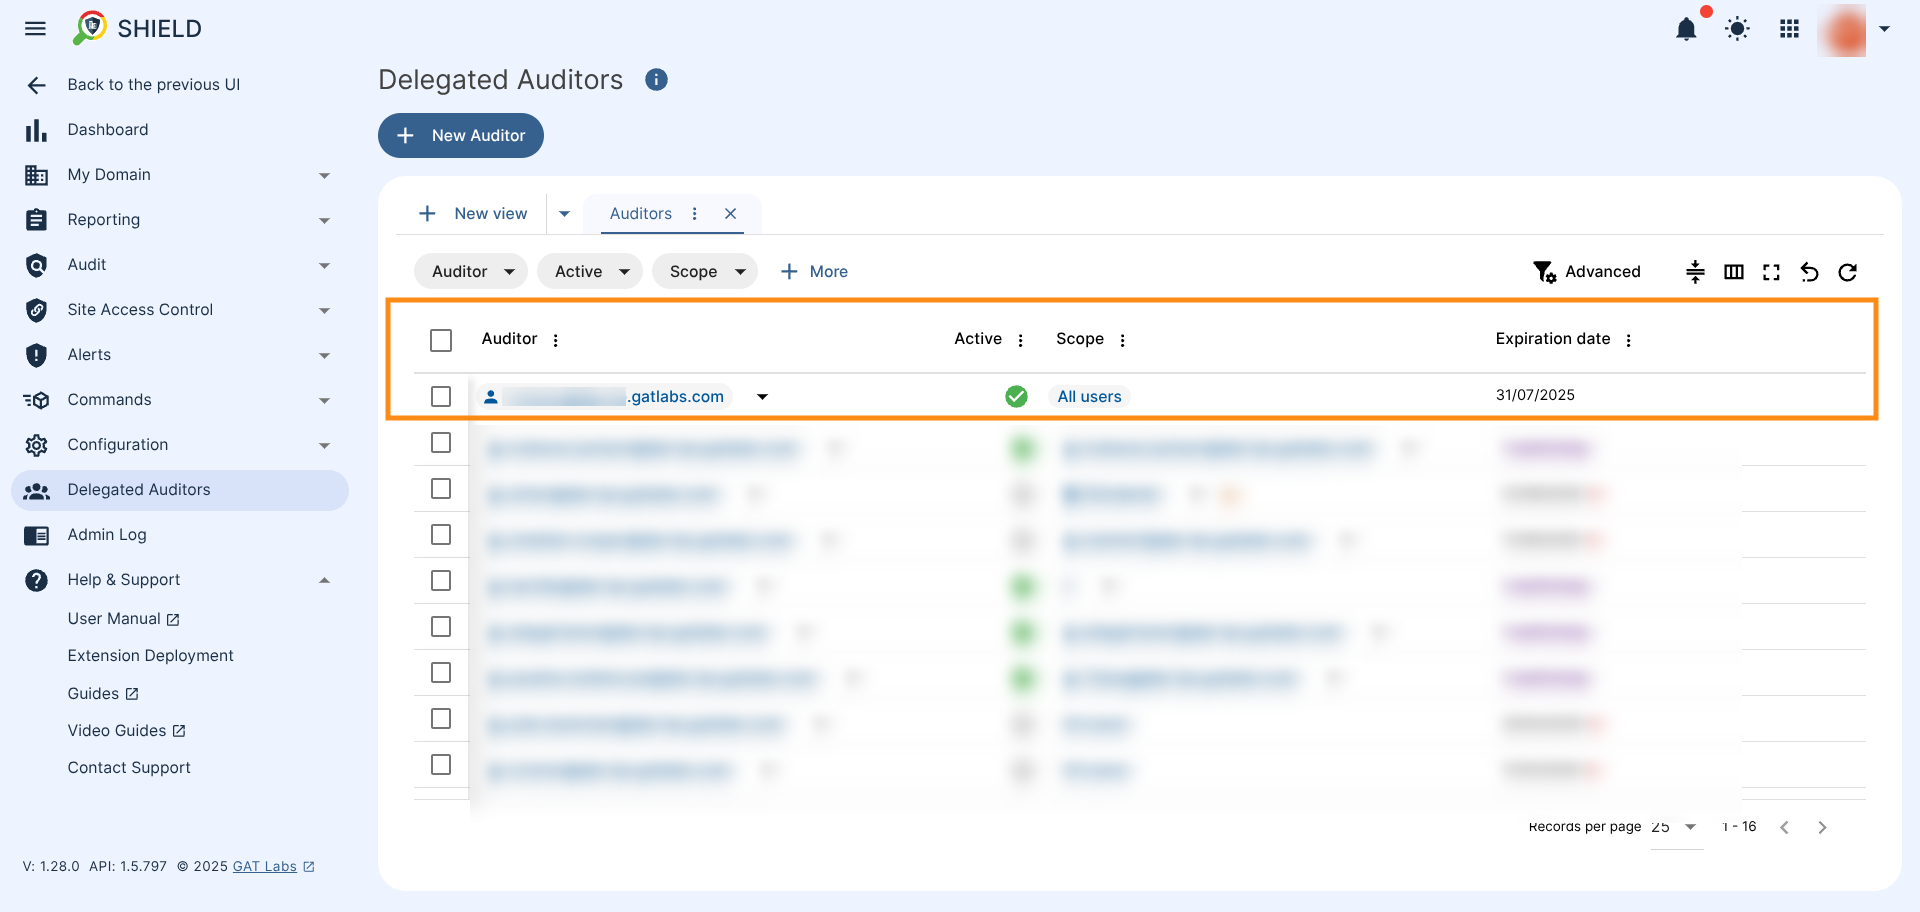
Once a Delegated Role is created, administrators can review it in the GAT Shield > Delegated Auditors module, which displays a table with the roles created. This table shows the email addresses of the auditors, the scope they have access to, the expiration date, and whether the role is active or inactive (expired).
Delegated auditor (Reviewer) #
When the Delegated auditor is created they can log in to the tool and view and audit all the Shield Alerts Notifications and Site Access Events.
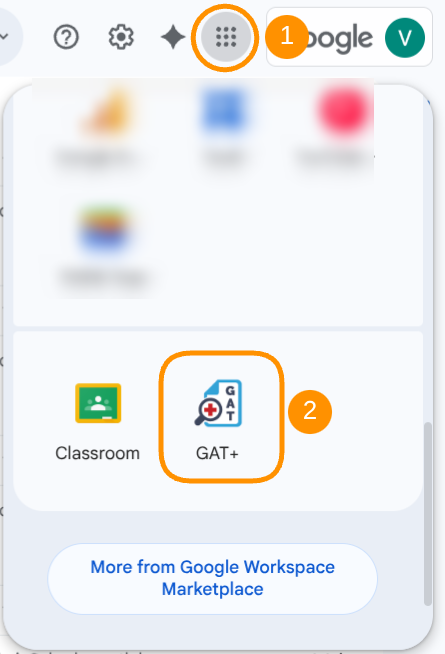
The Reviewers can log in from the Google Apps button by clicking on the GAT+ button.
When login into GAT Shield they can view the sections allowed.
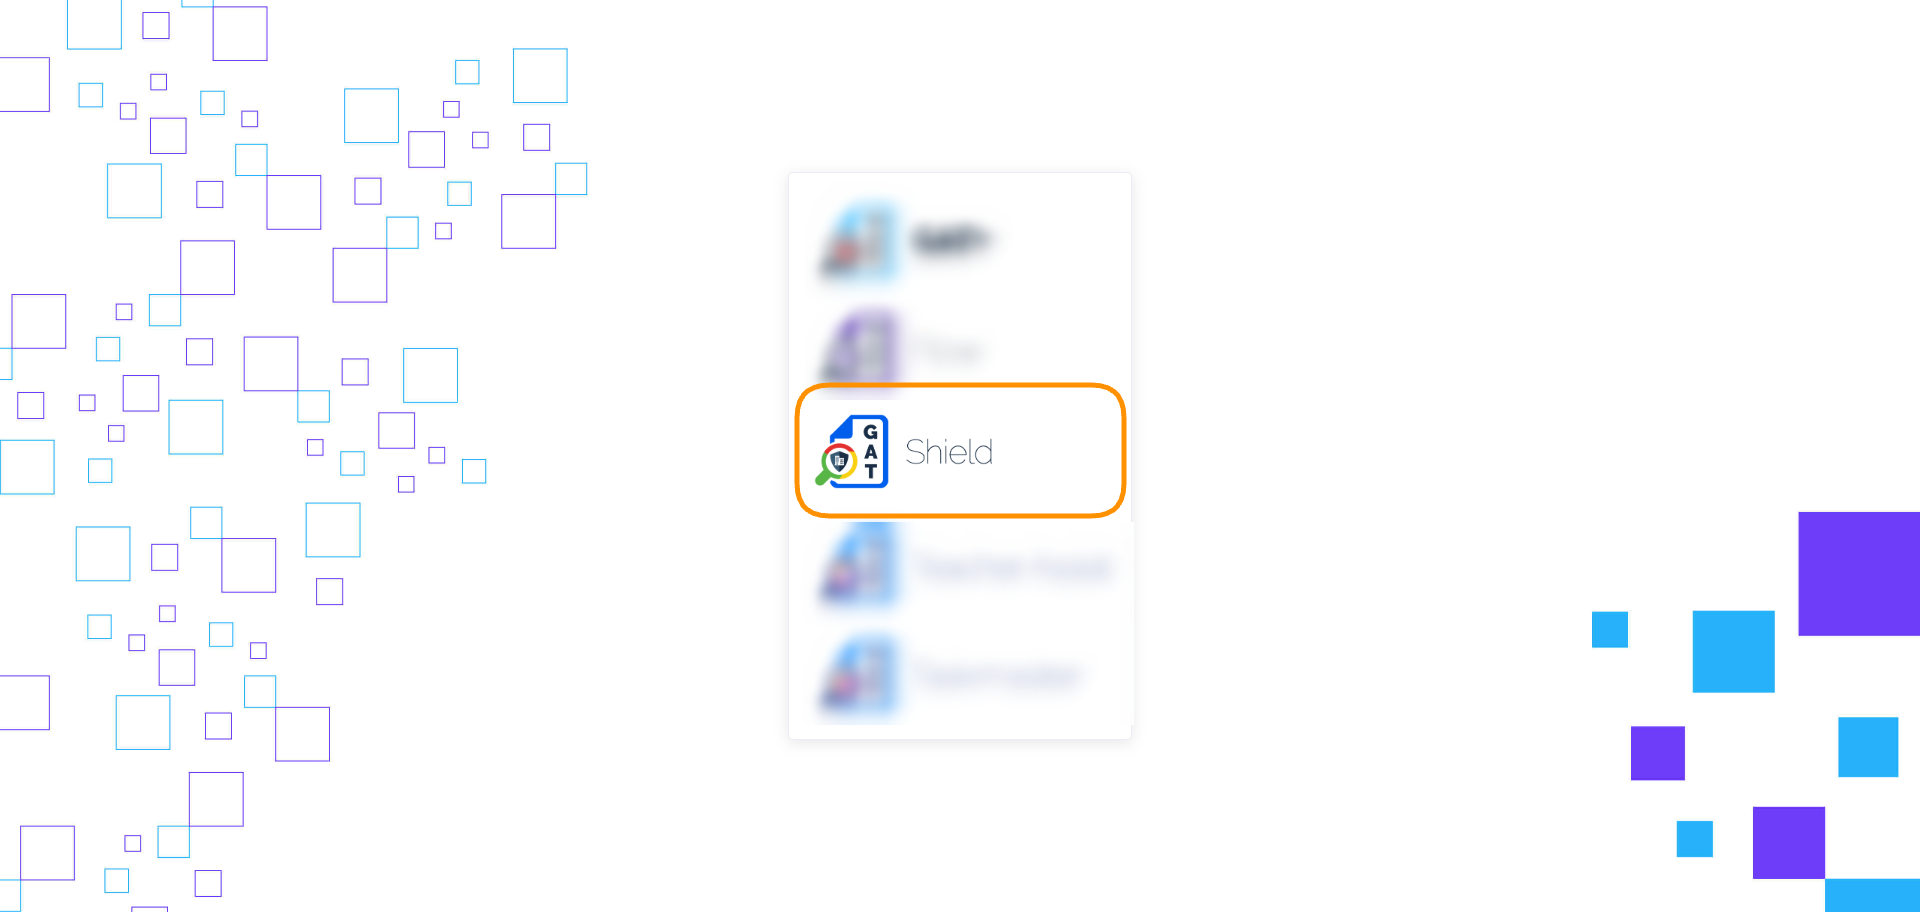
When login into GAT Shield they can view the sections allowed.
Site Access Control > Events section:

Site Access Control Events audit #
The Reviewer (delegated auditor) can also review the Site Access Events rules that are being triggered.
Those are all webpages that are blocked for the users via Site Access Control, created by the Admins of the domain
- User – view who the site is being blocked for
- Action – Blocked
- Rule name
- Website – view the website URL
- Date – view went the site was blocked
Alerts > Notifications:
Shield Alerts Notifications audit #
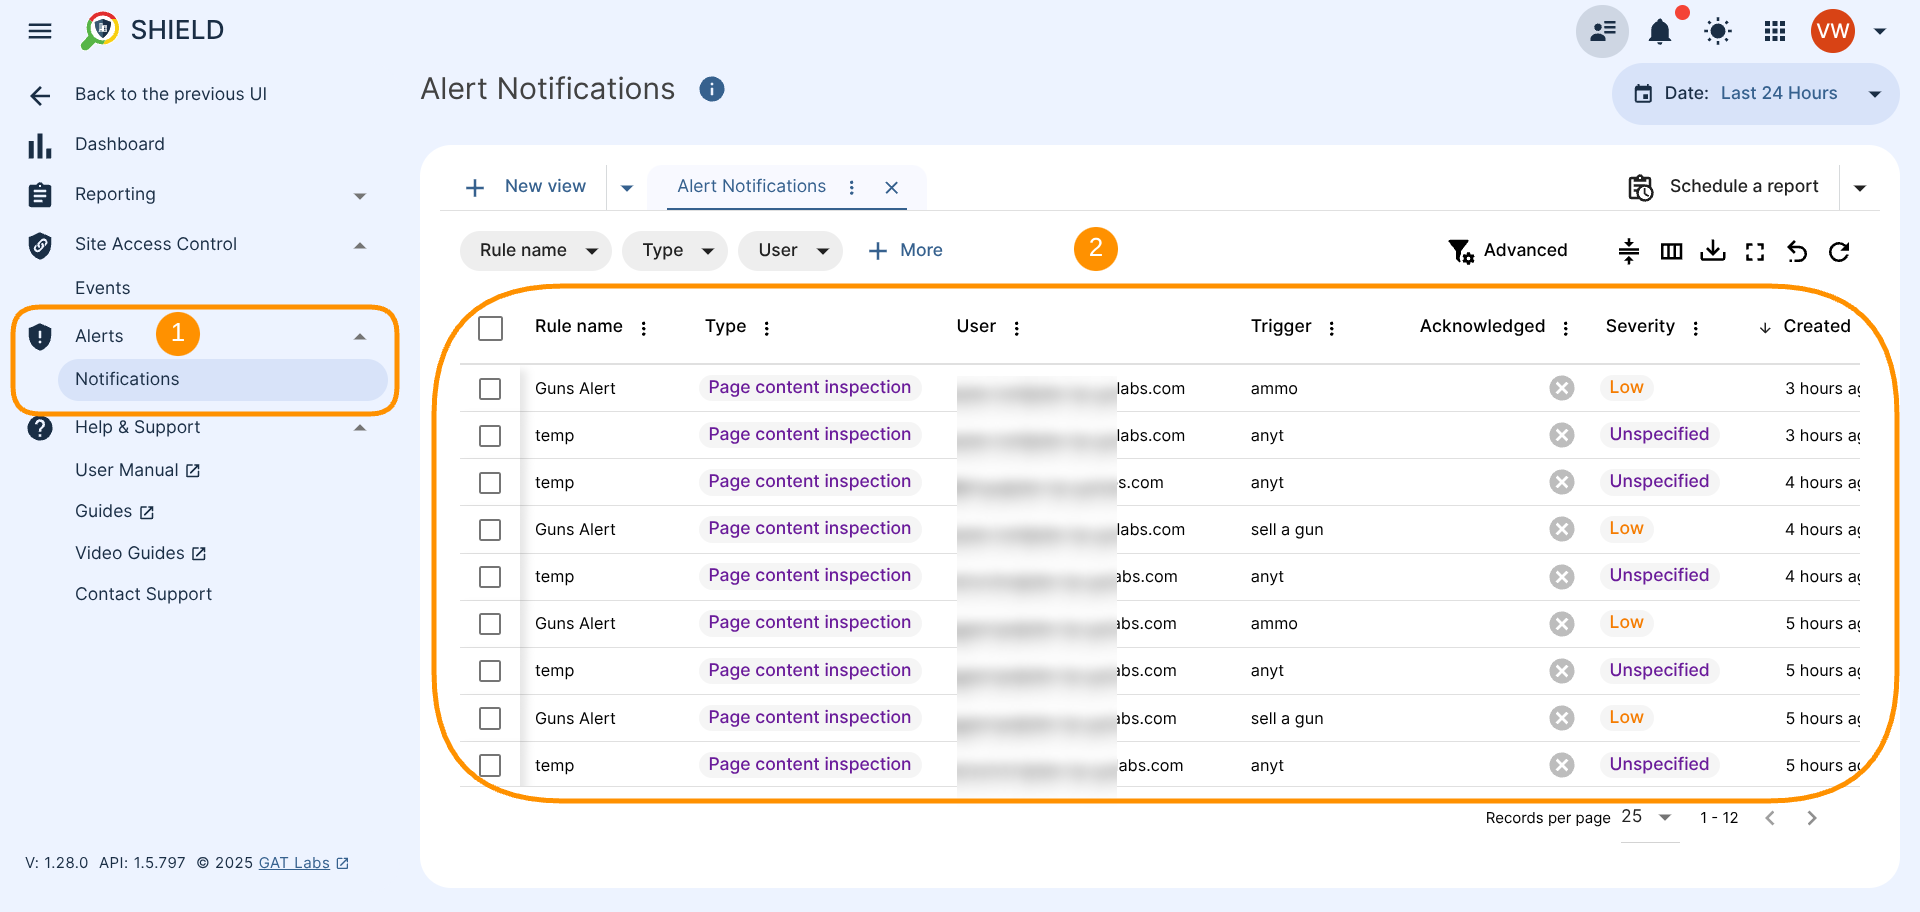
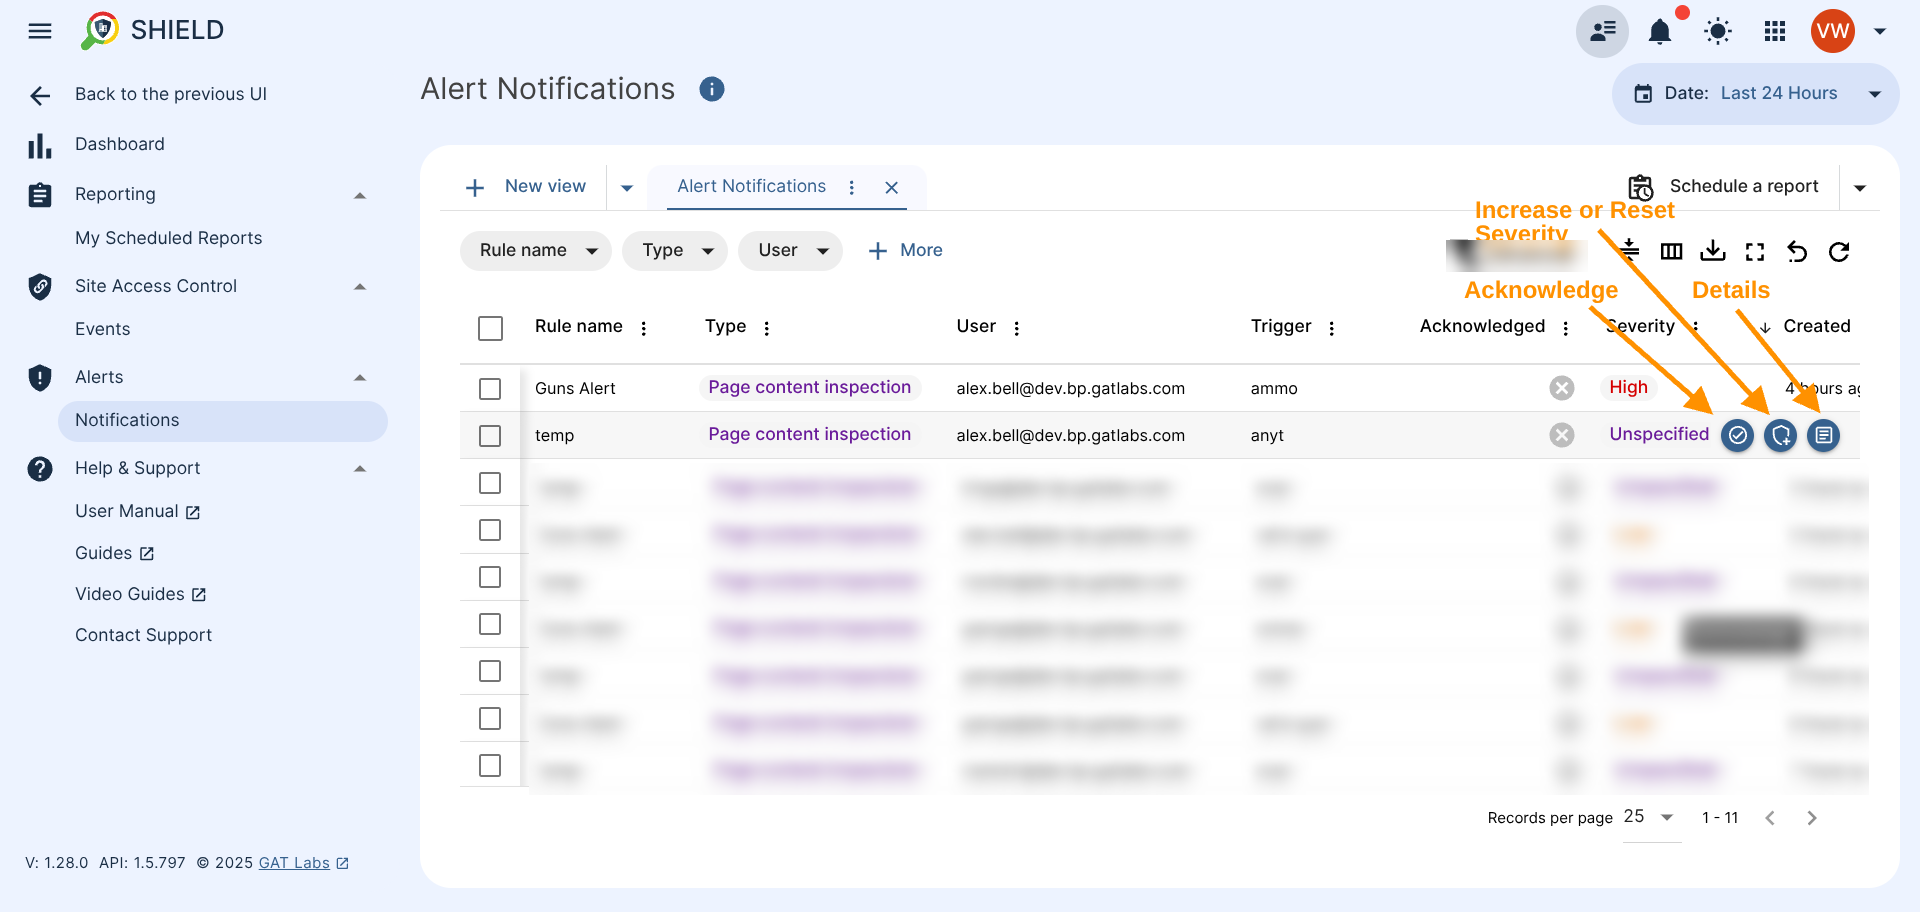
The Auditor (Reviewer) can view all the Shield alerts notifications (1) that are triggered by the end-users displayed under the Alert Notifications table (2).
Audit all Shield Alerts Notifications:
- Rule name – view the rule name for the Alert
- Rule type – the type of rule created
- User – view who is the user who triggers the alert
- Trigger – view the trigger word or sentence that the user has typed
- Acknowledged – indicator showing whether the alert was acknowledged by the auditor or not
- Severity – severity of the alert rule defined by an admin when creating the alert rule itself
- Created – the timestamp when the alert was created
Each alert can be reviewed in detail, acknowledged or its severity can be changed by hovering over the left side of each alert metadata displayed in the table (3) and clicking the appropriate button.
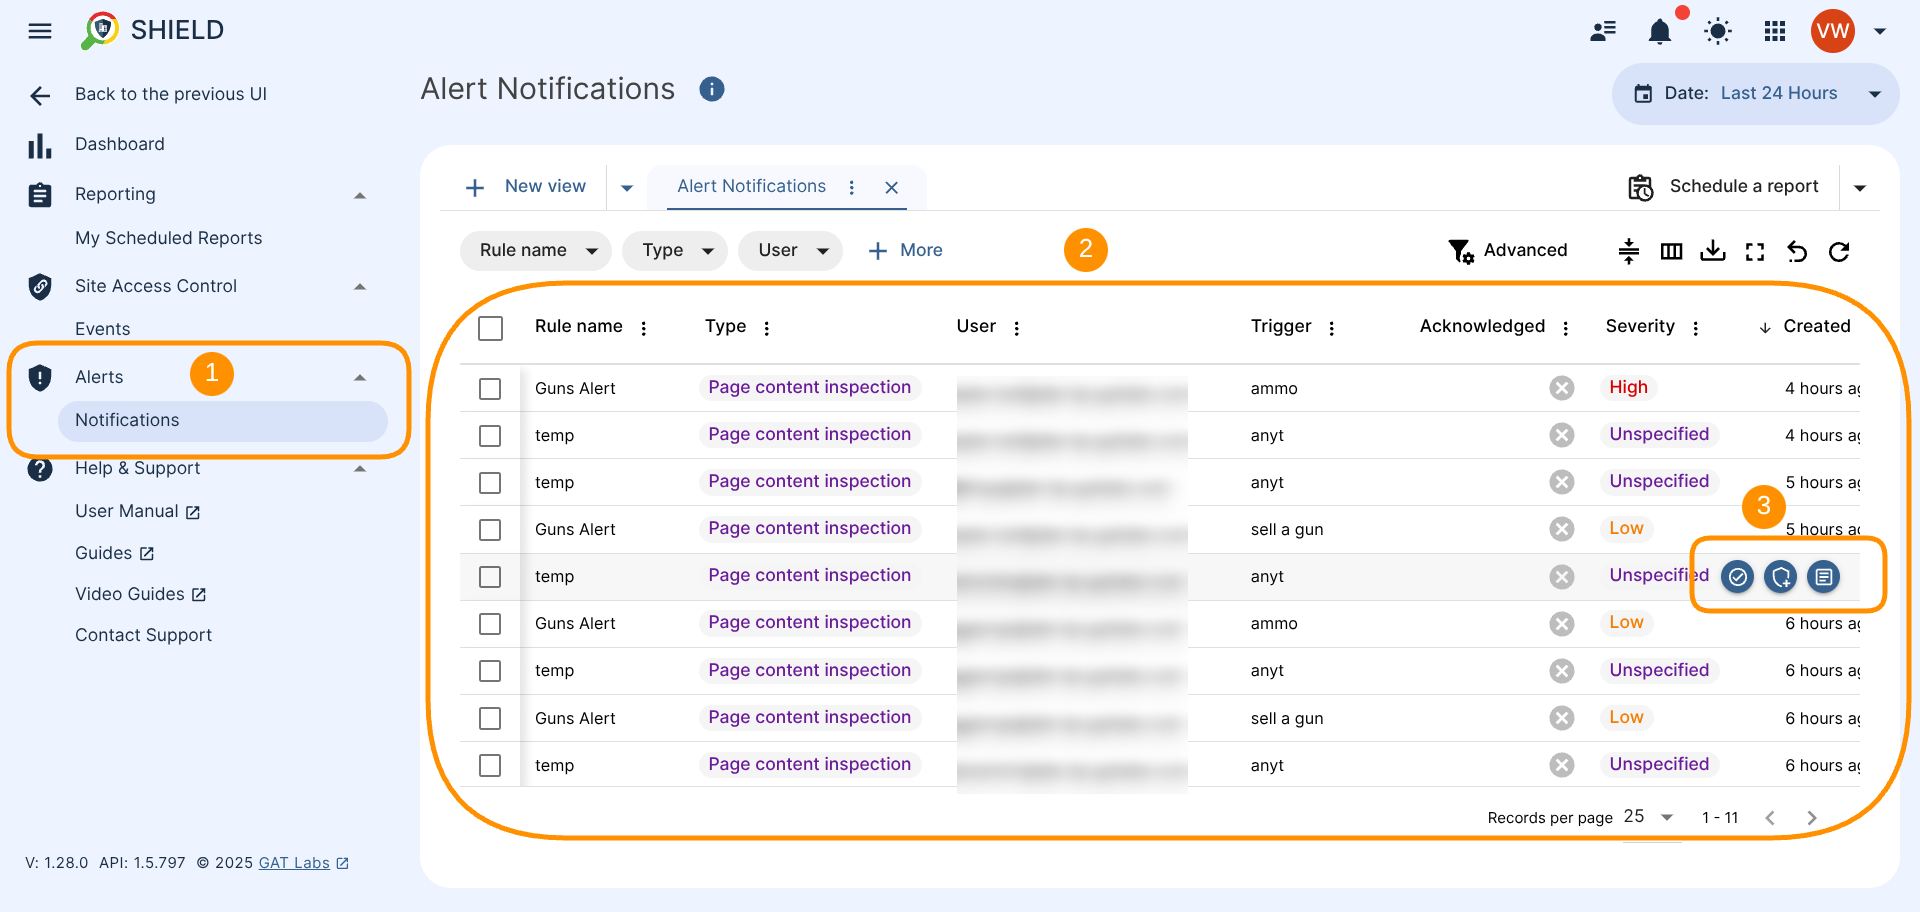
Actions on Shield Alerts #
An Alert Notification Auditor can perform the following actions:
- Acknowledge – the auditor can Acknowledge the alert – marking it as “acknowledged” – meaning is checked and acknowledged
- Update Severity – either increase or reset severity level, acknowledge the seriousness of the alert based on an impact it may have on your domain
- See the alert notification Details – view details for the Alert notification triggered.
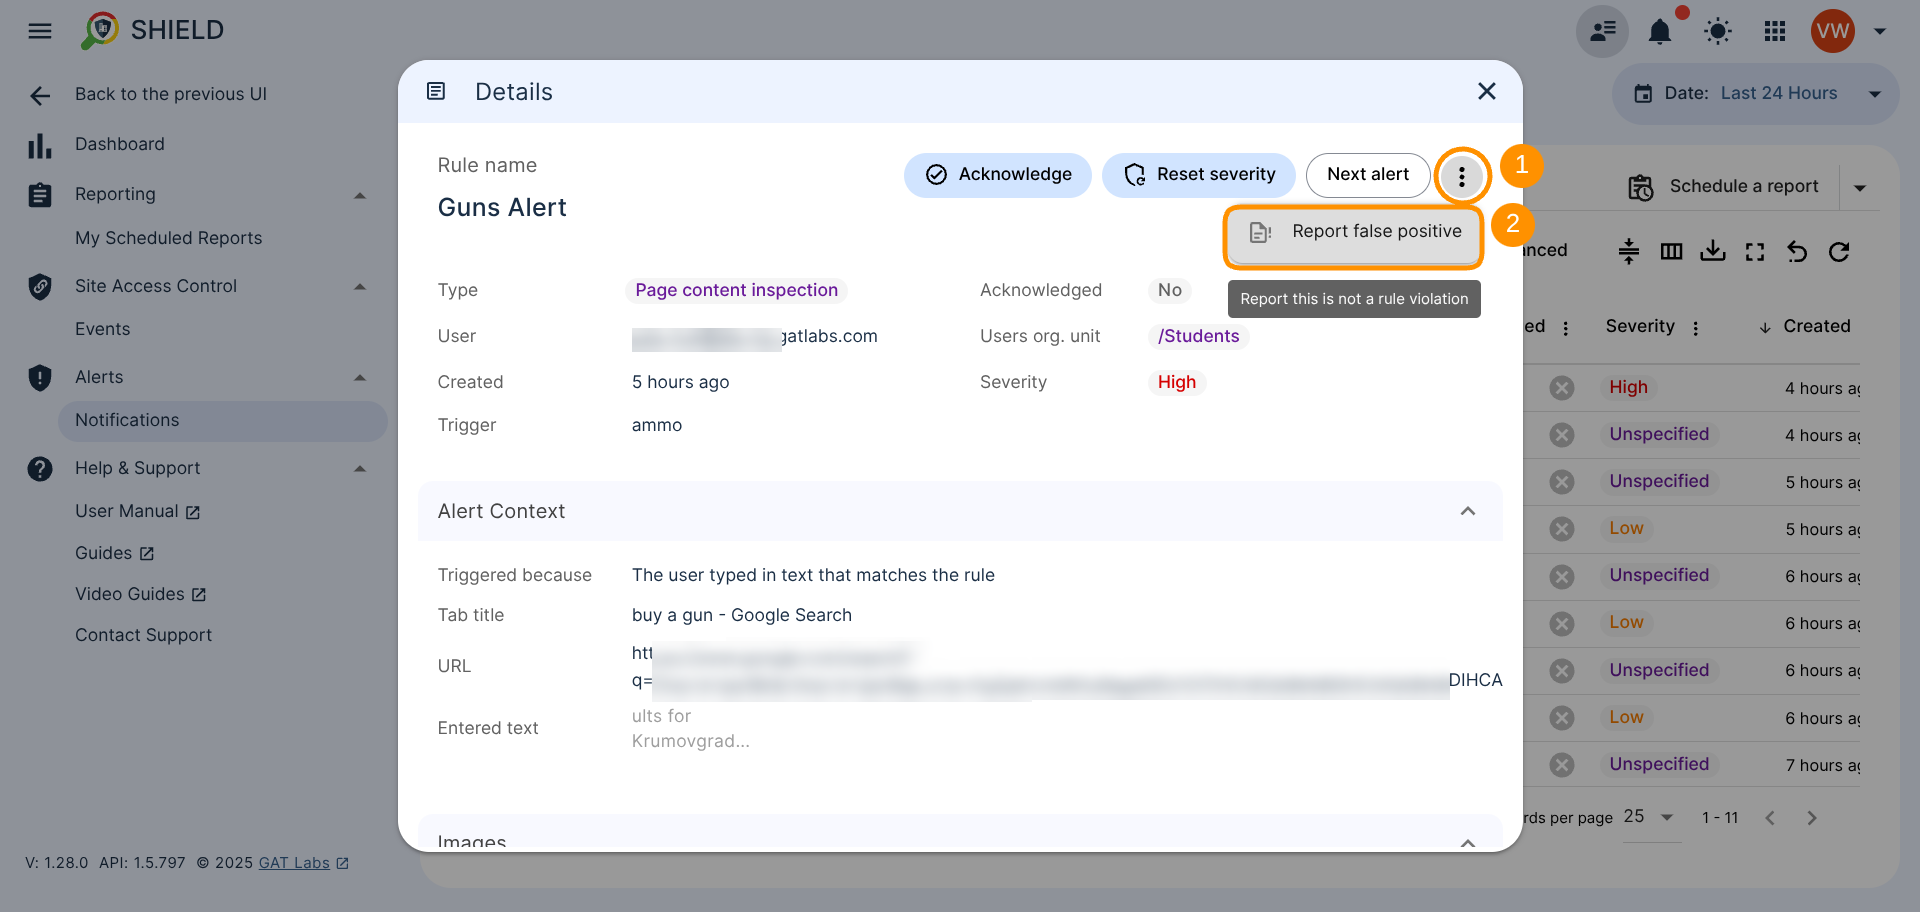
When Details are selected, a new window will be displayed with all the additional details for the Alert rule
- Acknowledge – on the top left side you can acknowledge the Alert
- Update Severity – Marks this alert as either High or Low. This will be used by an algorithm later on.
- Review Next alert – move on to the next alert

- Report false positive – notify about false-positive alert – click on 3 dots (1) and Report false positive (2)
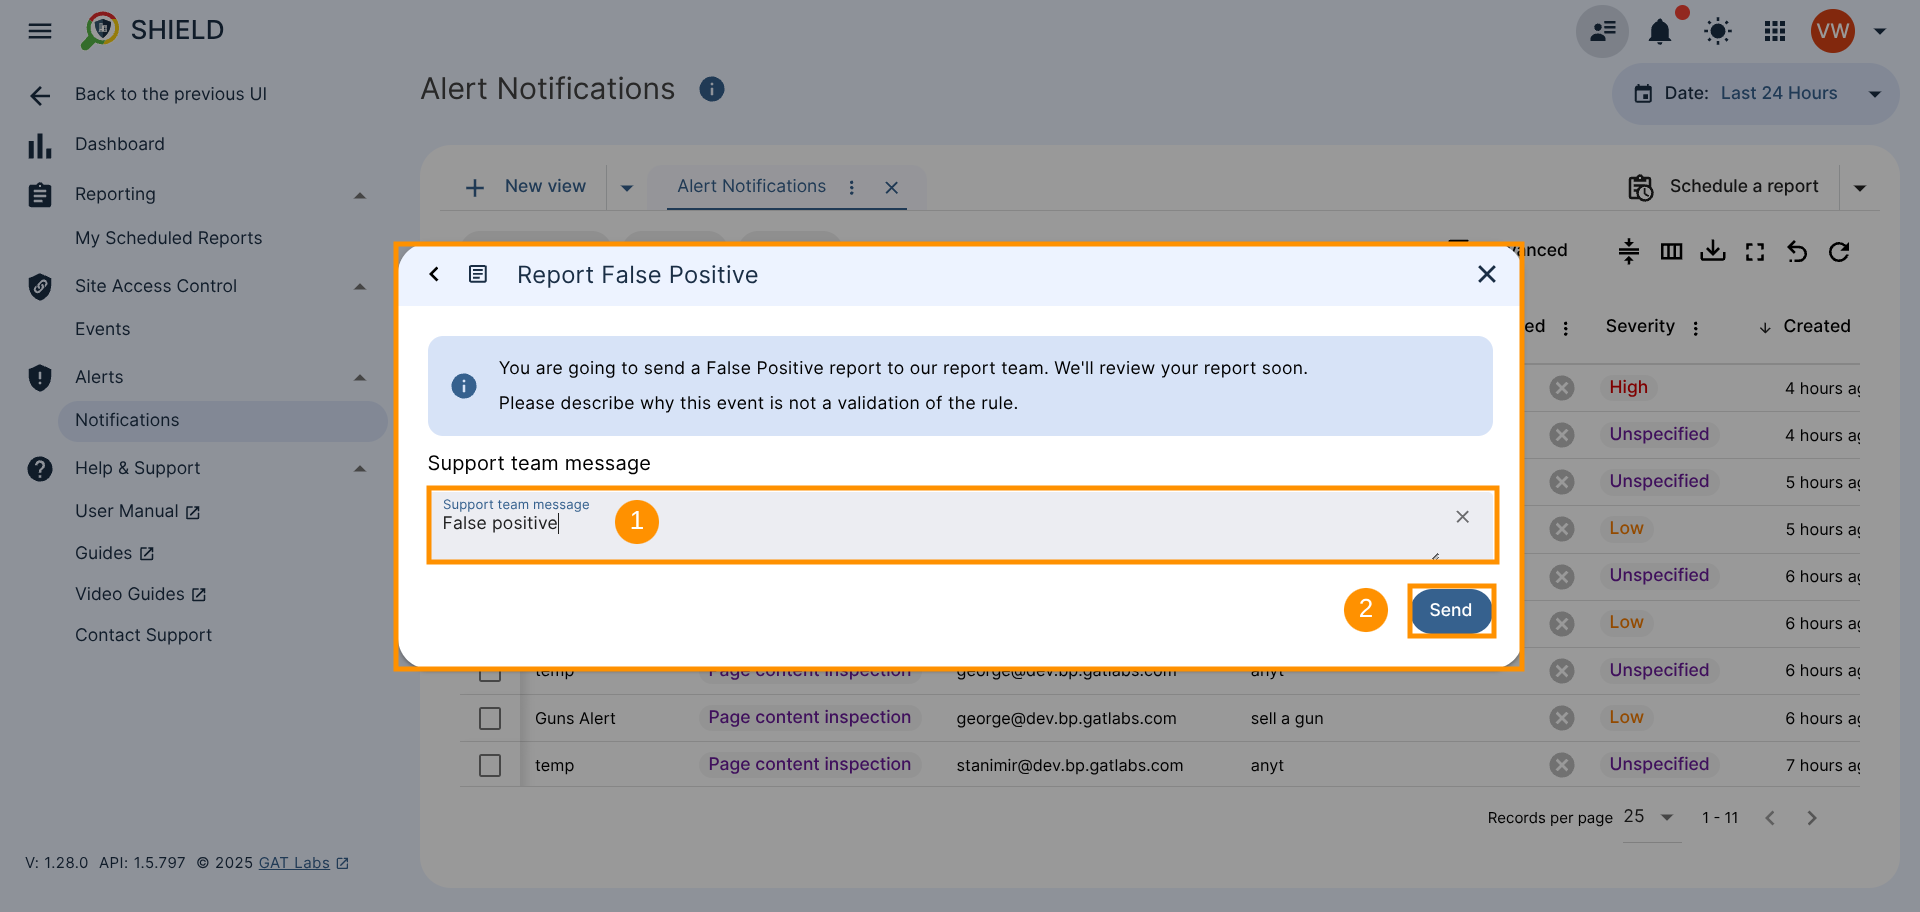
A new window will appear where you can add an appropriate support message to explain why the alert was identified as a false positive (1). To send the message, click Send (2).
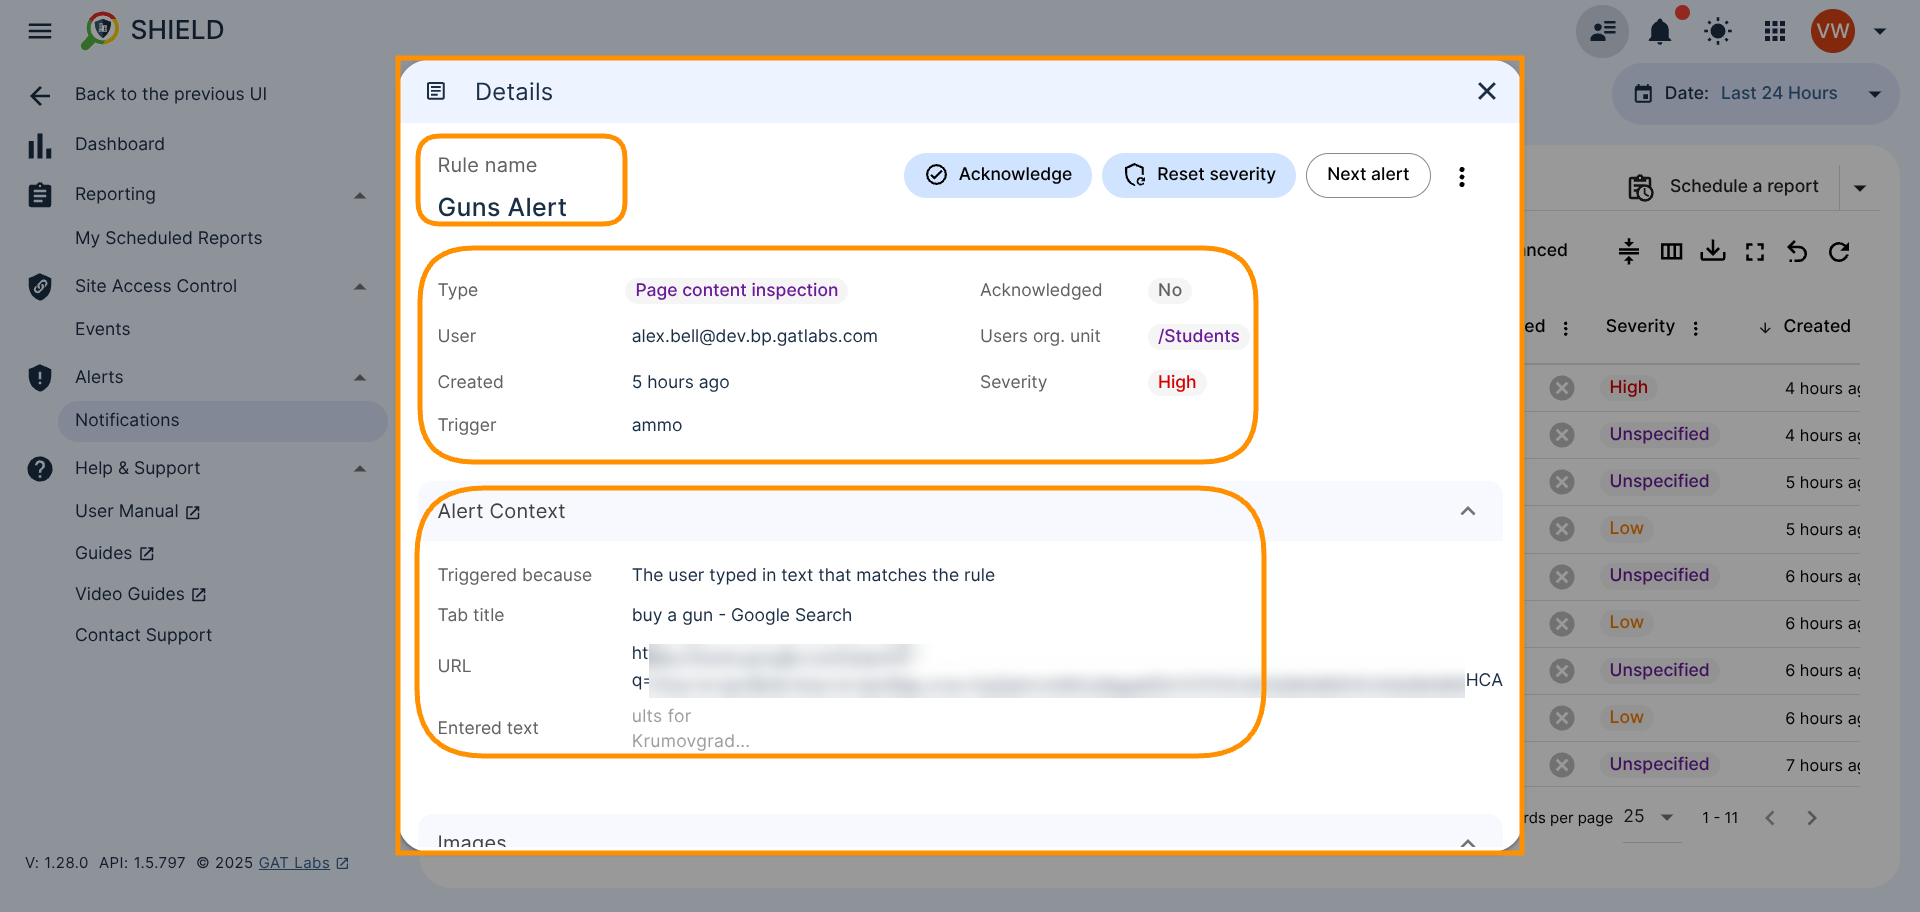
View all the additional data reported for the Alert rule, such as:
- Rule name – The alert name given when configuring it
- Type – the type of the alert selected when setting up the alert
- User – the email address od the user who triggered the alert
- Created date – the date then when alert was generated
- Trigger – the action that triggered the alert
- Acknowledge – identify whether the alert was acknowledged or not
- Users org. unit – the OR unit of the user that triggered the alert
- Severity – The heaviness of the alert triggered define during the alert setup
- Alert Context – defines why the alert was triggered and see its evidence such as tab title, URL and entered text
FAQ #
Q: Does the Delegated Auditor see other sections on GAT Shield?
A: Delegated Auditor can only see the GAT Shield sections that were granted to them by the Administrator when configuring the Delegated Auditor role.
Q: Can the Delegated Auditor role be automatically deactivated?
A: Yes, the Delegated Auditor role can be configured to deactivate or expire automatically by providing expiration details when an administrator configures the role.


