Block All Websites in Google Chrome with GAT Shield allows an admin to block a user from any web access and allows them to use only specific sites to be accessed.
First, we can use a special category called “ALL” that allows us to block all site URLs for the users.
We can then create a custom list of sites that will be allowed.
The allow list takes precedence over the blocklist.
Below are instructions for how to enable this special category and block all, and how to create a simple allow category to allow specific sites.
Blocklist #
Navigate to GAT Shield > Site Access Control > Predefined Categories
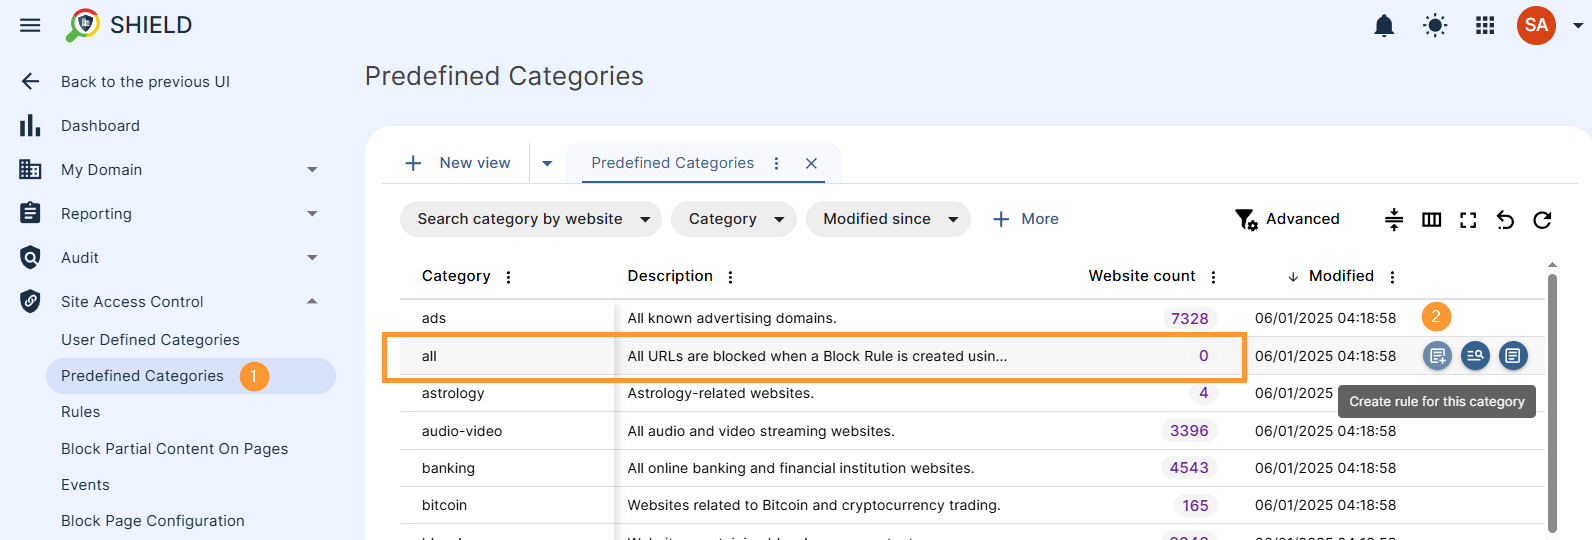
In the Predefined Categories section, search for the “all” category. This is a special category that will block all URLs for the users. Click on the + Create rule for this category button (2).
Create the “block All” rule #
After clicking + Create rule for this category button, the Create rule wizard window will be displayed, where you can fill in the required information.
- Rule name (1) – enter the name of the rule
- Category (2) – will be “all” as pre-selected
- Action:
- select “Rule action – Block” (3)
- Redirect URL (optional) (4) – to redirect the user, enter the redirect URL
- Scope (5)- select the scope type and fill in other scope related fields if applicable
- Scope type:
- User – enter the users to be blocked
- Group
- OU
- Include sub. org. units
- All users
- Scope type:
- Create (6) – click Create button to create the rule

Result: #
Blocking all websites in Chrome will prevent users from accessing any URL.

Allowlist #
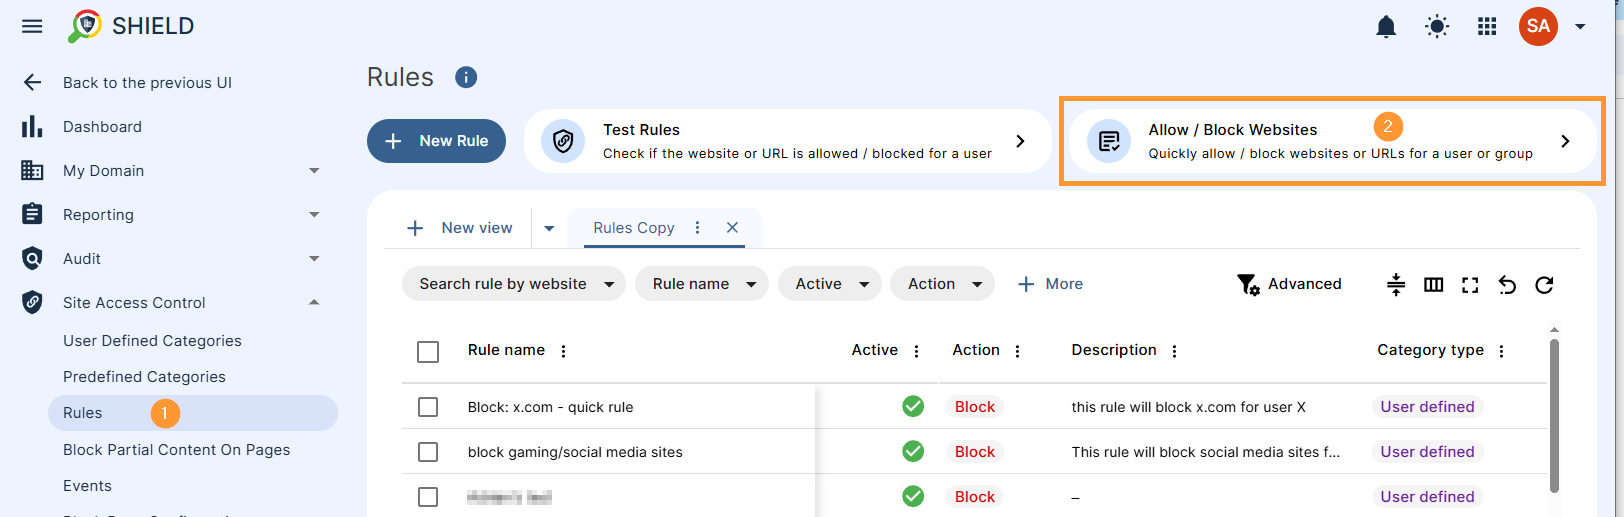
Now to Allowlist and set up the Only pages the user is allowed to open, navigate toto the Rules (1) section and select Allow/Block Sites (2)
When selected, a new pop-up window will be displayed.
Select Allow (1), and enter the Scope (2) of users to be affected by the rule.
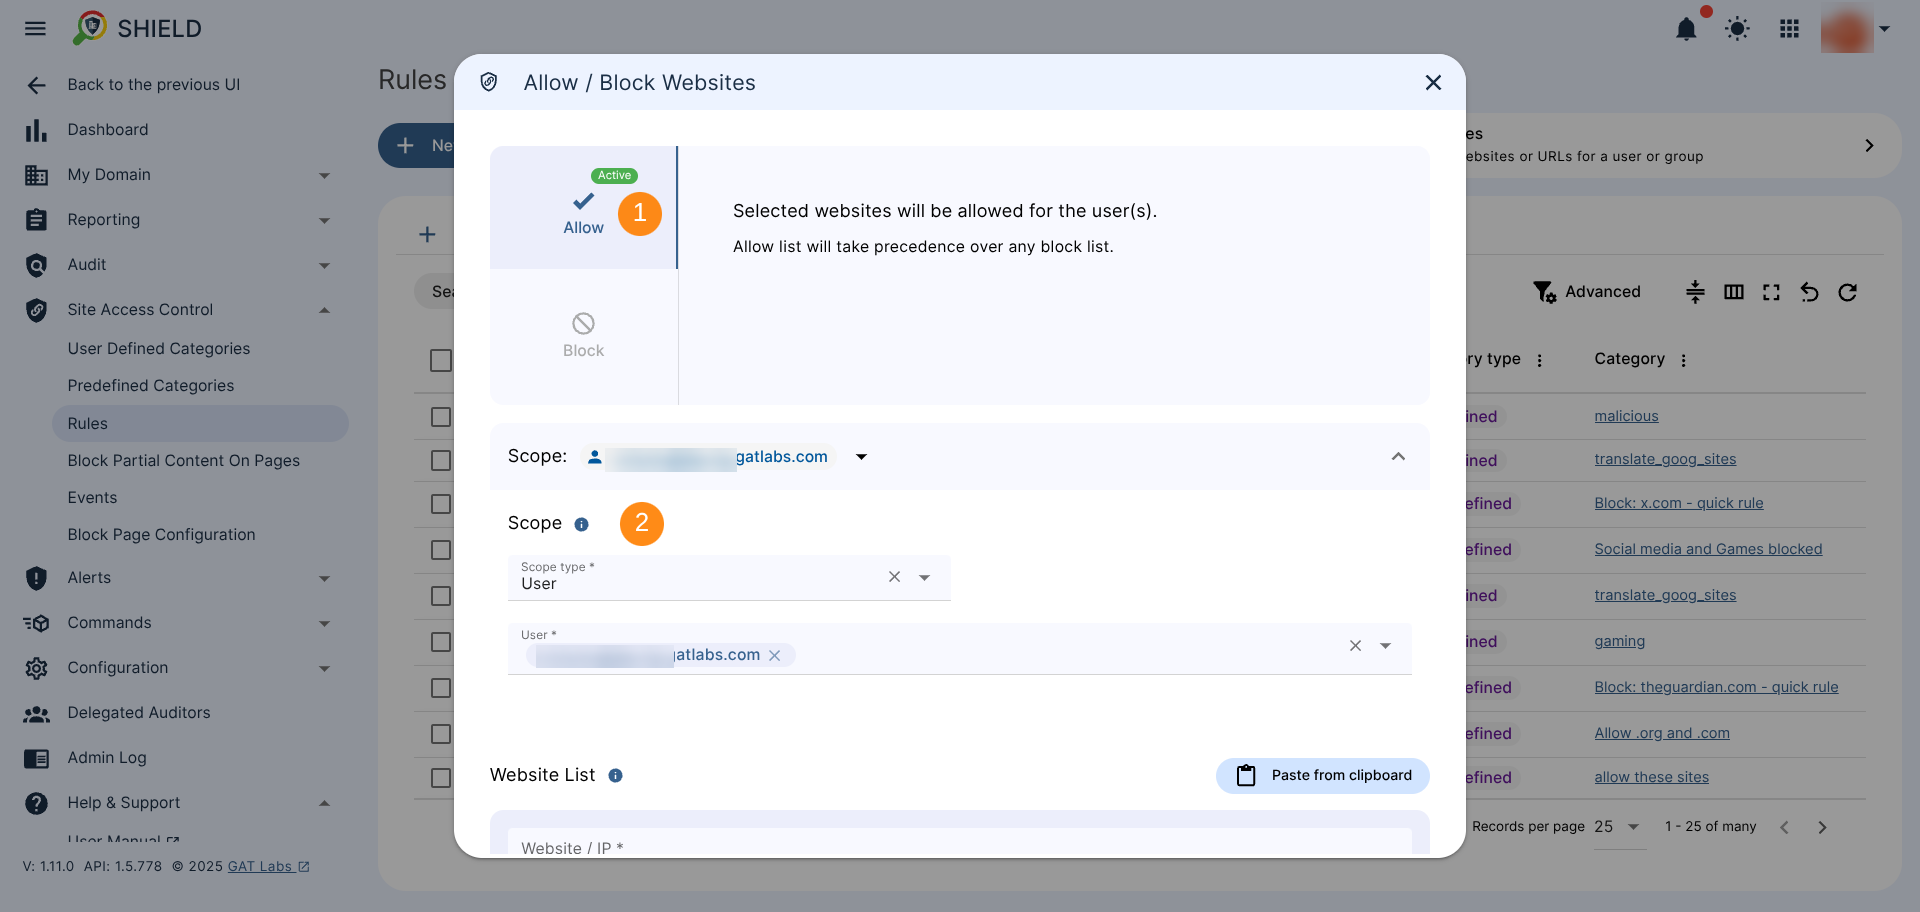
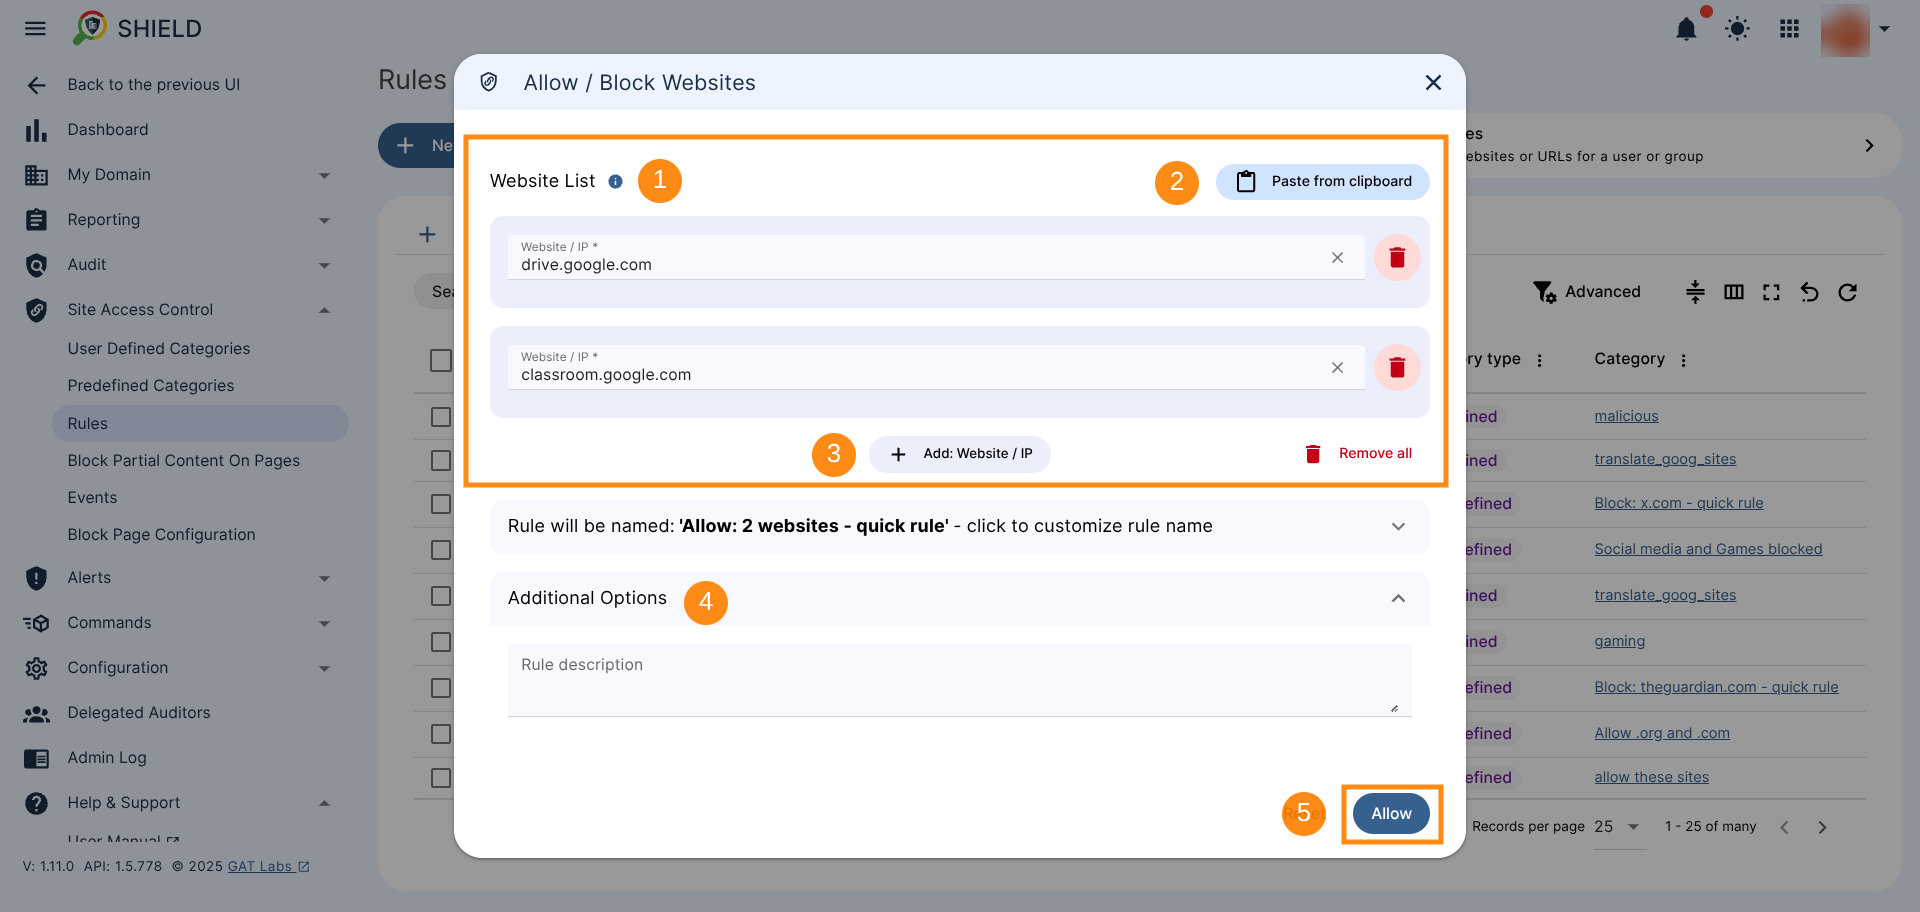
Scroll down the Allow /Block wizard window to enter the website URLs (1) that will be allowed to be opened.
You can use the option to Paste from clipboard (2) or Add Website / IP manually (3).
The Additional Options section (4) is optional. You can add a rule description there to better identify the rule or provide a reason for adding it.
When ready, select “Allow” to activate the rule (5).
Result of the block and allowlists #
As a result, all pages will be blocked but the allowed ones.