- Identify "last logins" for the Users
- User Logins Filters
- Filter for Active Users
- Move Users to Specific Org. Unit
- Utilizing Organization Units
- Deprovision or Disable ChromeOS devices
- Find owned calendars and remove users
- Transferring Future Calendar Events to Other Users
- User Clean-Up Assessment- Remove user's access to files and folders they have access to
- User Clean-Up Assessment- Managing User Mobile Devices
- Overview
In this post we will show you the essential steps for conducting a thorough Clean-Up Assessment before removing a user.
Identify “last logins” for the Users #
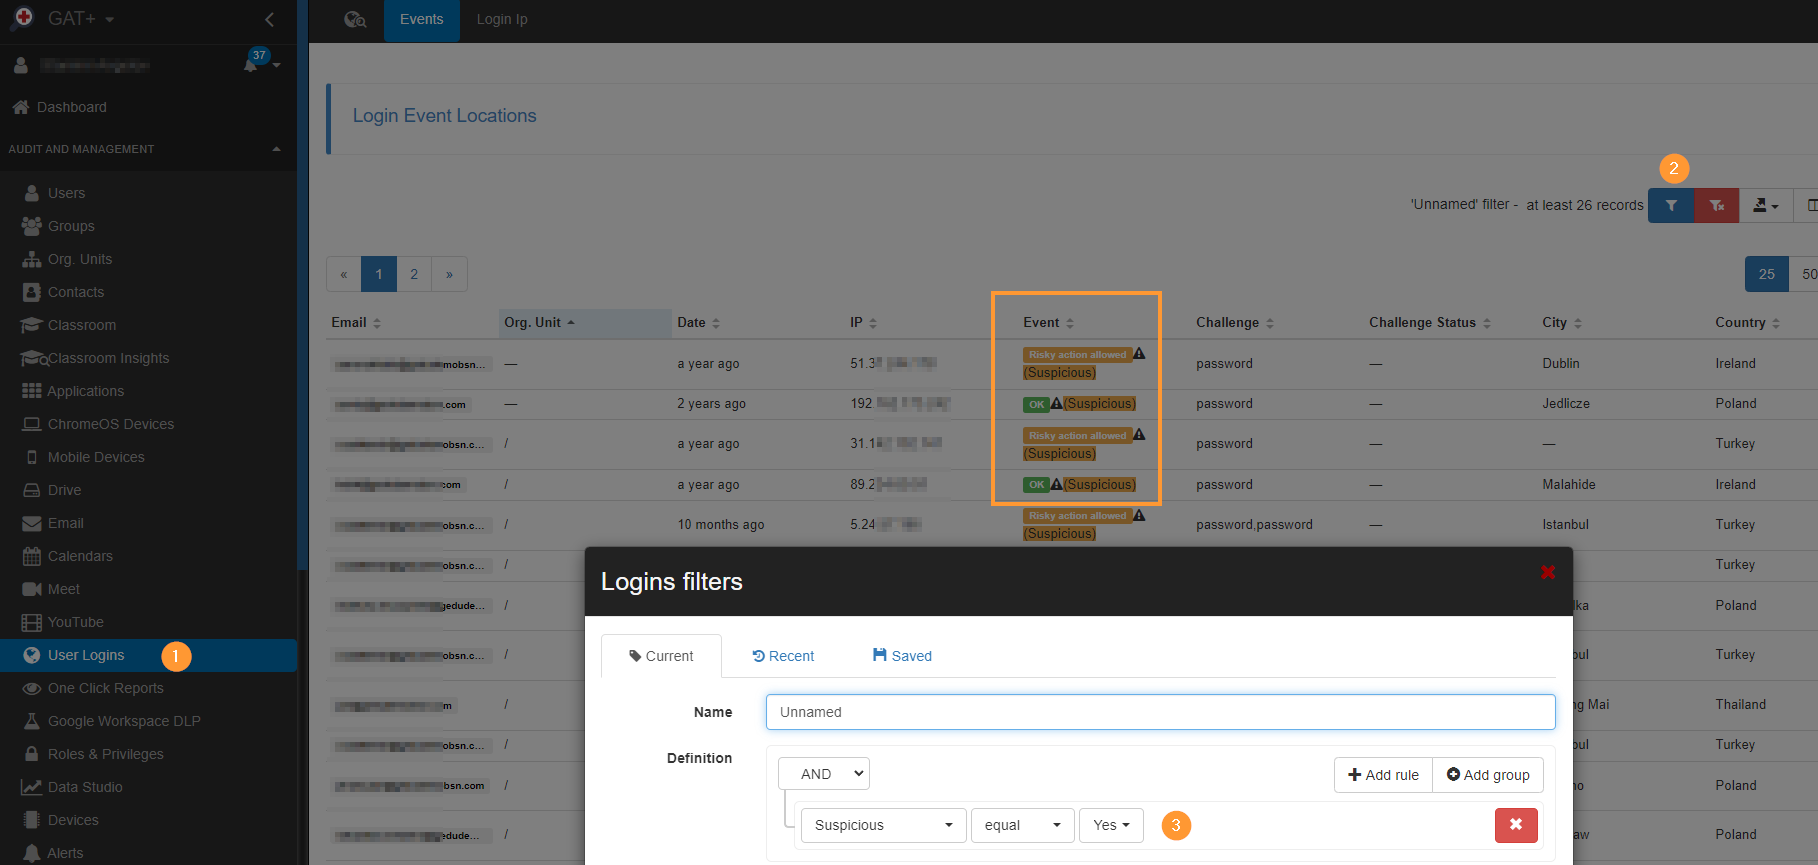
Navigate to GAT+ > User logins
In this audit, you can see the last login dates of the users (emails) and their locations.

User Logins Filters #
Apply various filters to refine your search. For instance, use ‘Filter by Suspicious = Yes (Event)’ to narrow down results.”
Filter for Active Users #
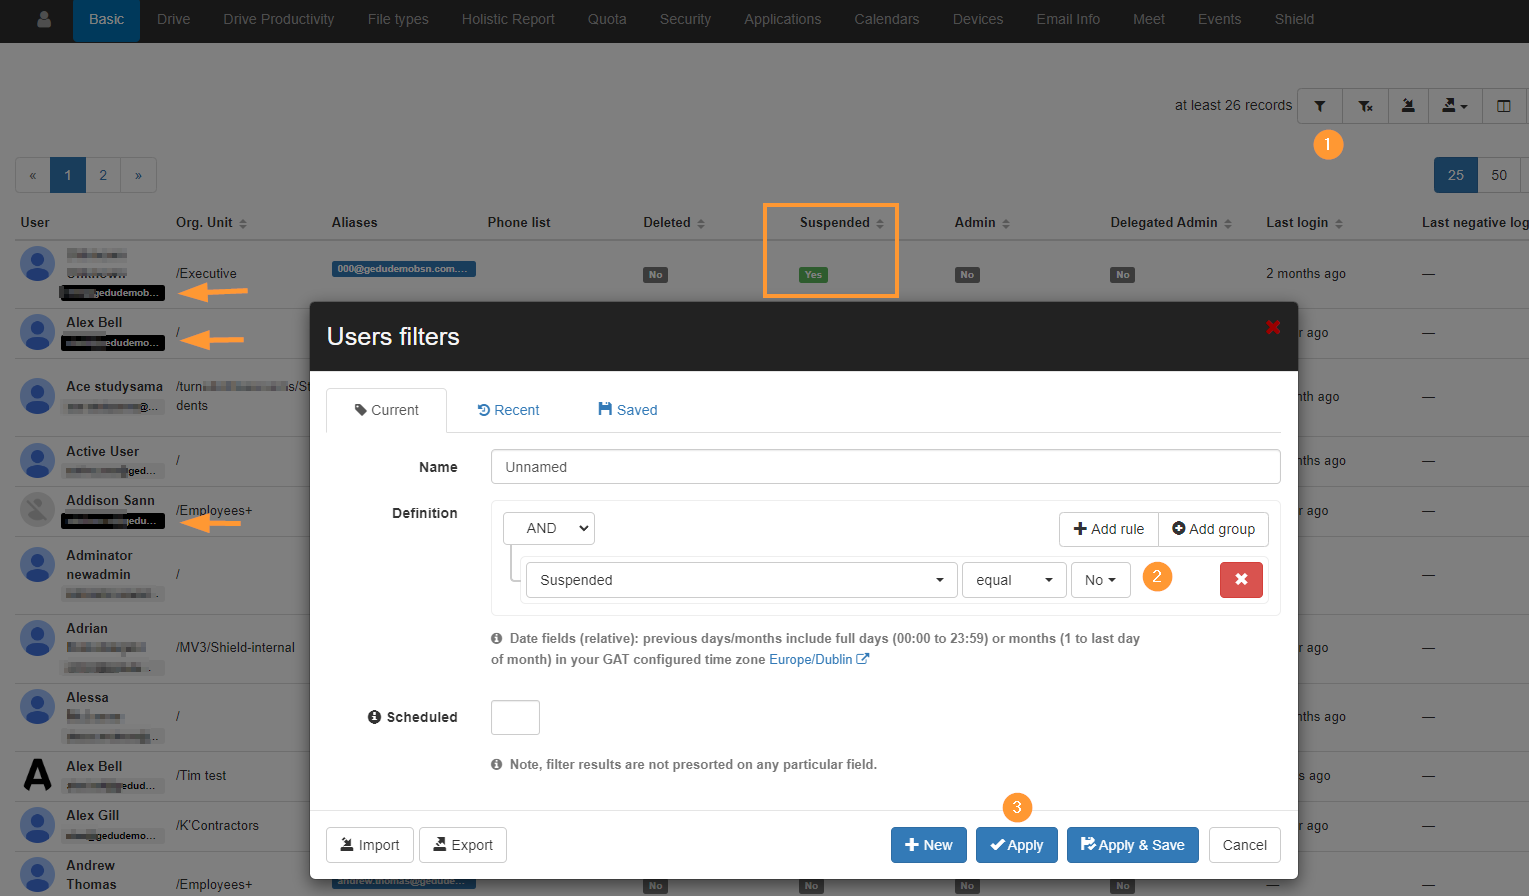
In GAT+, we display all domain users by default, including suspended accounts. To focus on active users only, use the ‘Suspended equal No‘ filter.
This will exclude suspended accounts from the results.
Move Users to Specific Org. Unit #
Move users to an Organization Unit for easy filtering later.
You can perform this action using the Export/Import method.

Export users to a Google spreadsheet, then modify their org. unit names (to existing ones) before importing the changes.
- Green fields – can be changed and edited
- Red fields – can not be changed

Utilizing Organization Units #
Apply filters and leverage Organization Units for bulk user actions and application audits.
For Applications Audit: #
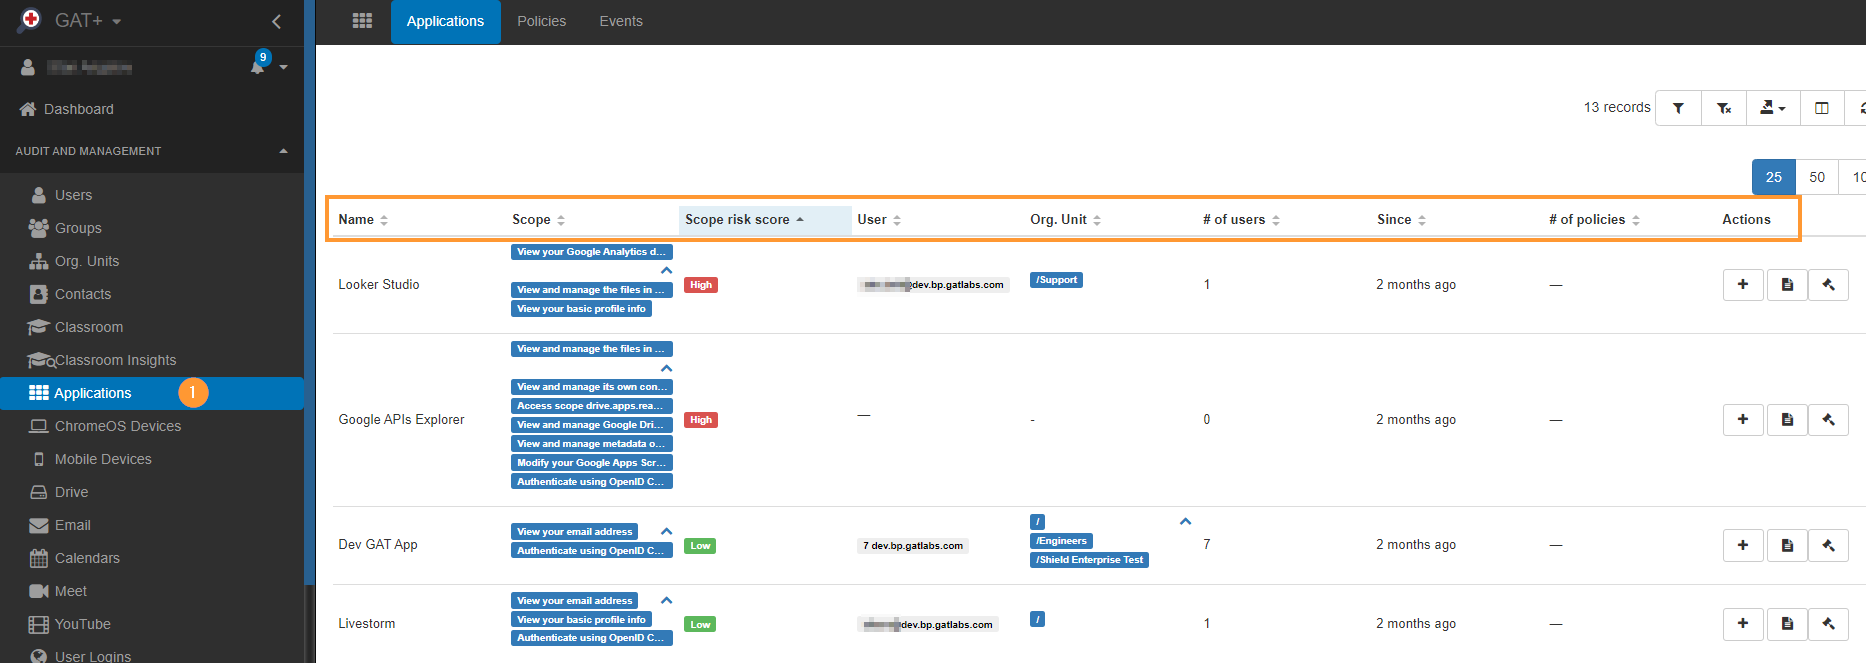
- Navigate to GAT+ > Applications.
- View connected apps for users and filter by Org. Unit as necessary.
Create a policy for Apps #
You can create a policy to remove access to those apps if required.
More information on the steps required can be found here.
Deprovision or Disable ChromeOS devices #
With GAT+, you can also take action on all enrolled ChromeOS devices.
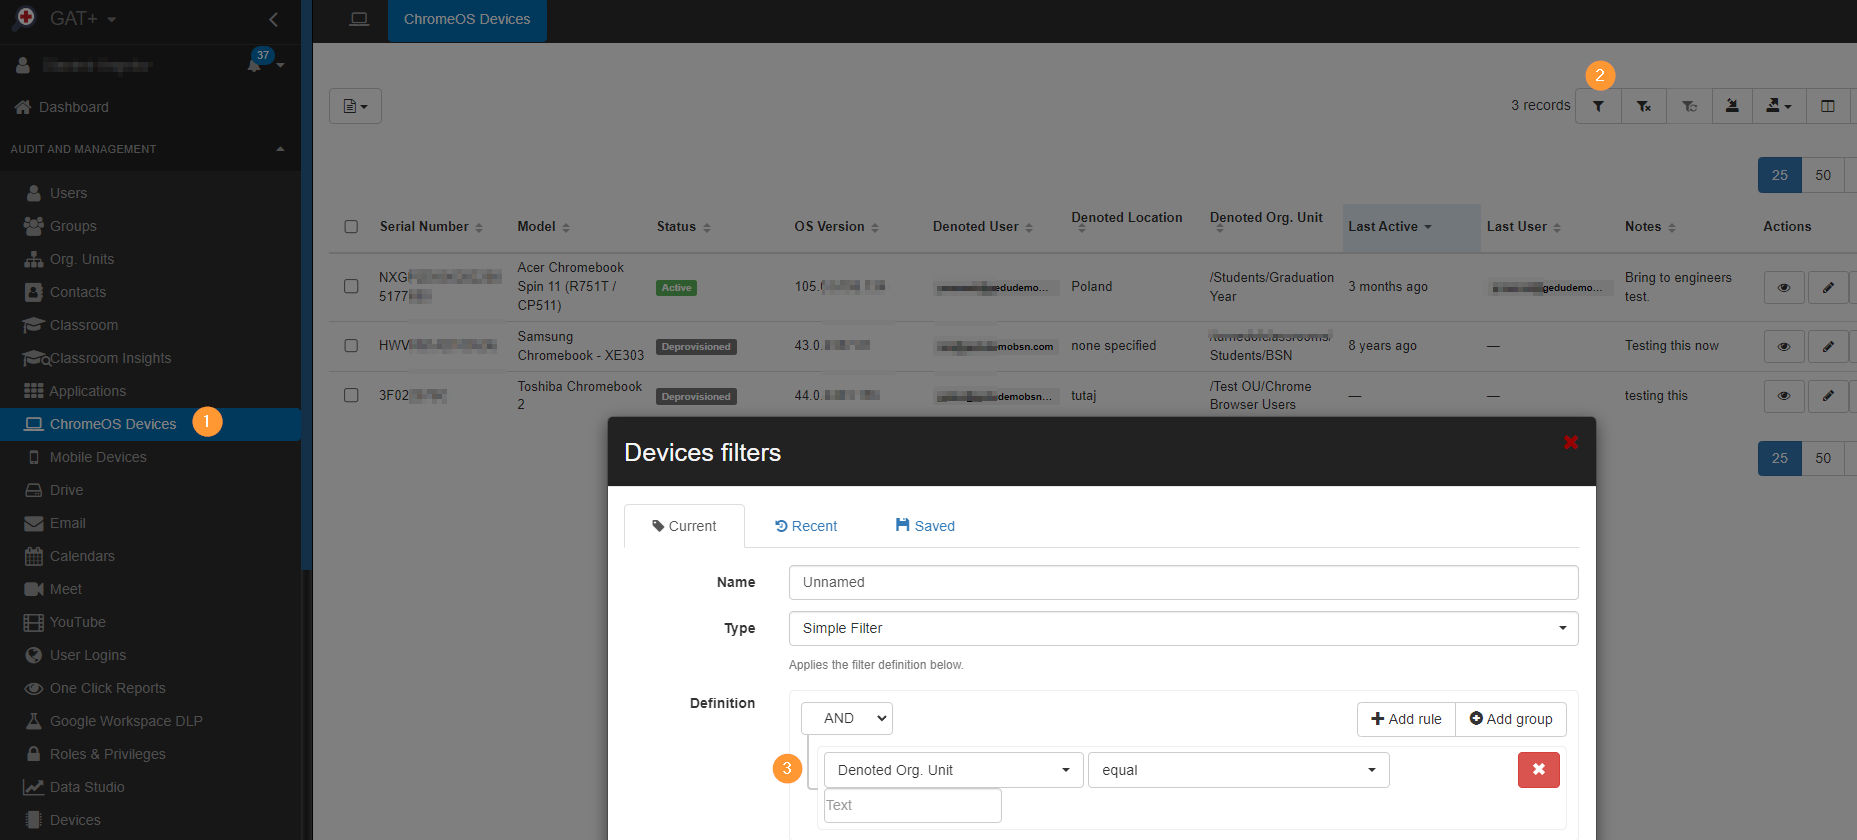
You can apply filters for devices sorted by Org. units (denoted org. units)
Device audit #
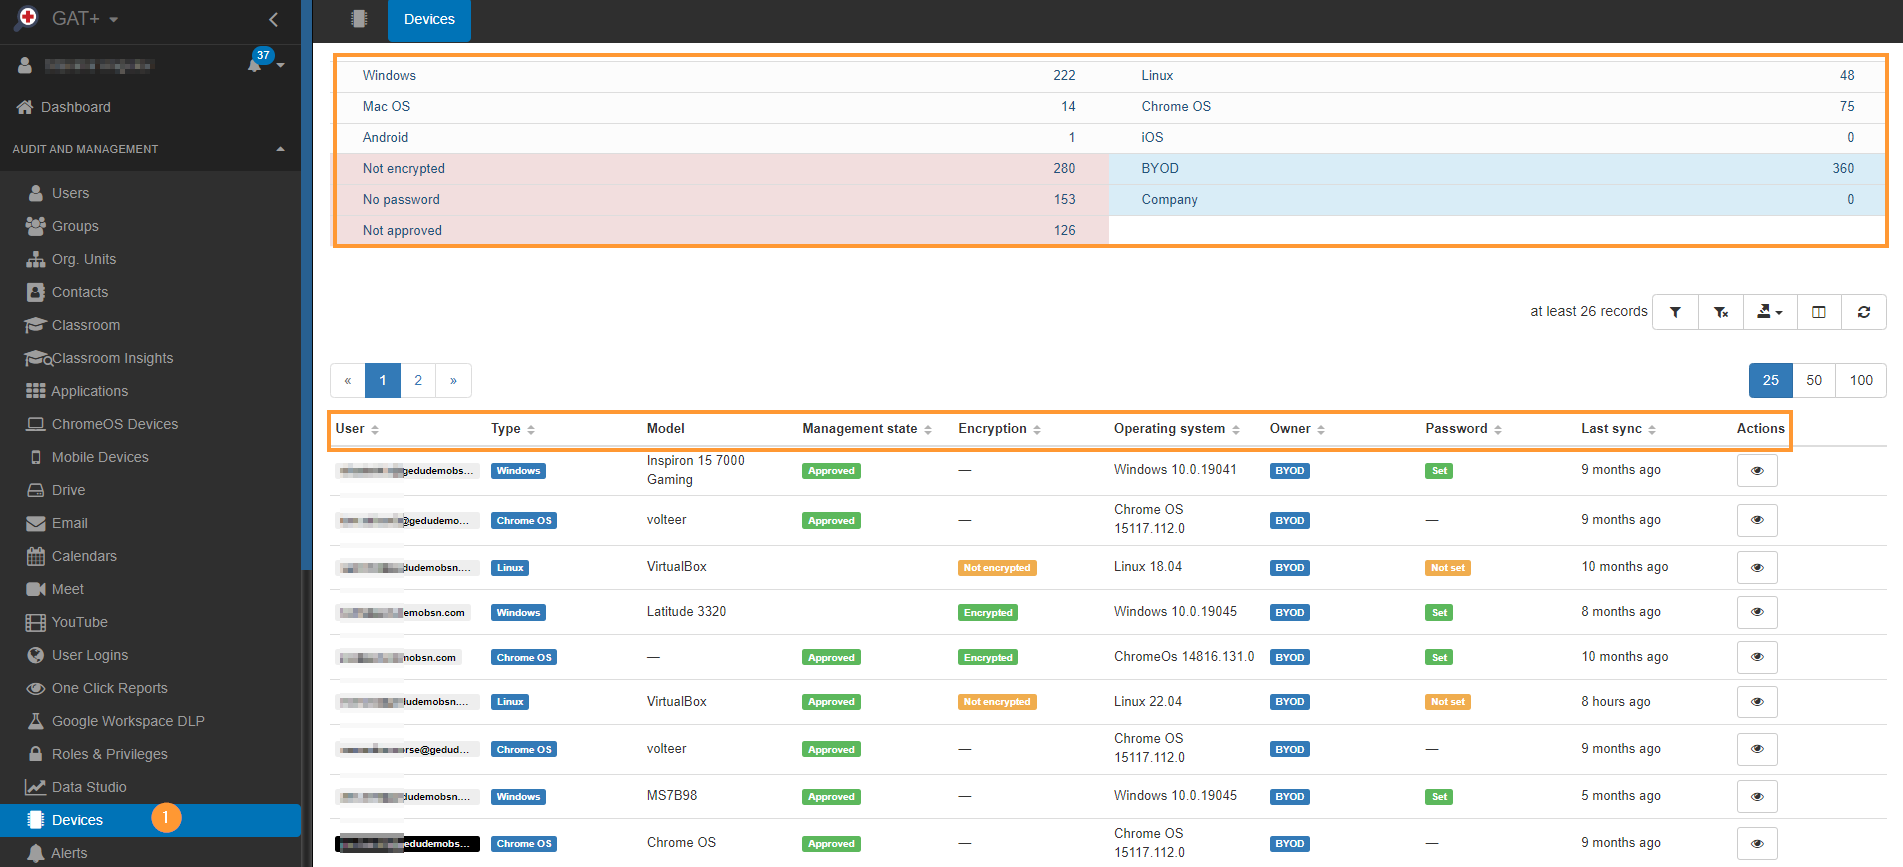
You can also filter by device type in the Devices audit.
Here You can filter all users and the devices each user uses to log in to your domain.
Navigate to GAT+ > Devices
Find owned calendars and remove users #
With GAT+, you can find and view all calendars the users have.
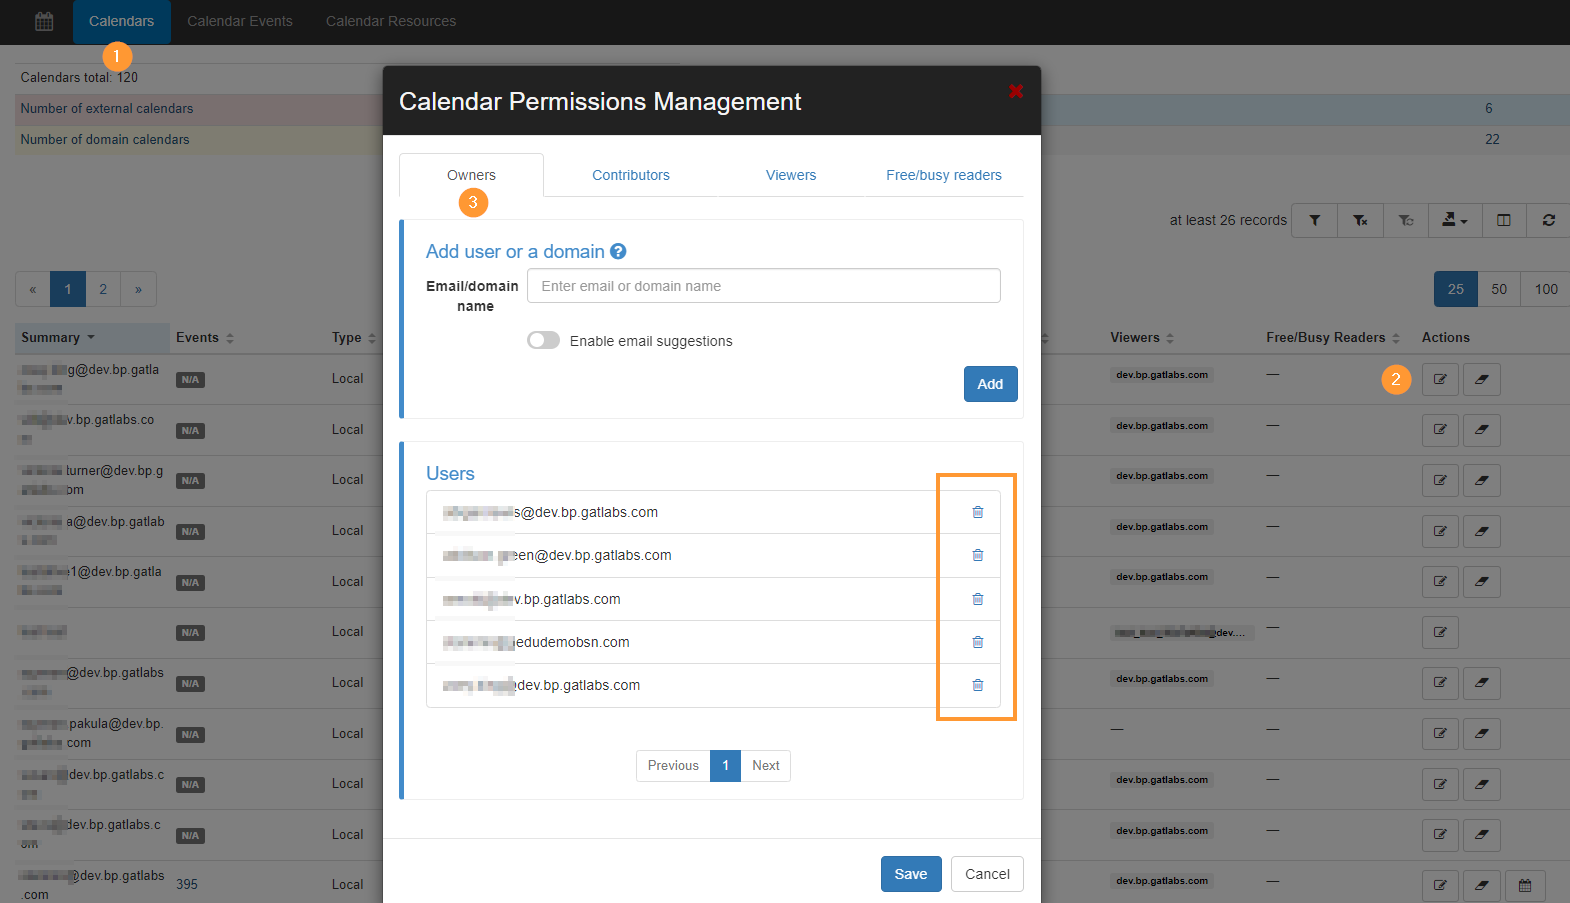
You can see the owners of the calendars and remove the additional or secondary owners.
Navigate to GAT+ > Calendars
Filter by users, and under “Actions” select “pen icon” (Calendar permission management ) – under Owners – you can remove all secondary owners of the calendar.
Transferring Future Calendar Events to Other Users #
In GAT+ > Calendars > Calendar events > Future events, you can view all scheduled Calendar events for domain users.
Apply filters to search for specific events or organizers (creators) and change the organizer as needed.

User Clean-Up Assessment- Remove user’s access to files and folders they have access to #
Navigate to GAT+ > Drive > Files
Apply a filter to search for all files user X has access to and is not the owner of.
This can be easily filtered in Drive > Files
Filter by
- Owner != (not equal) – to UserX
- Users = equal – to UserX
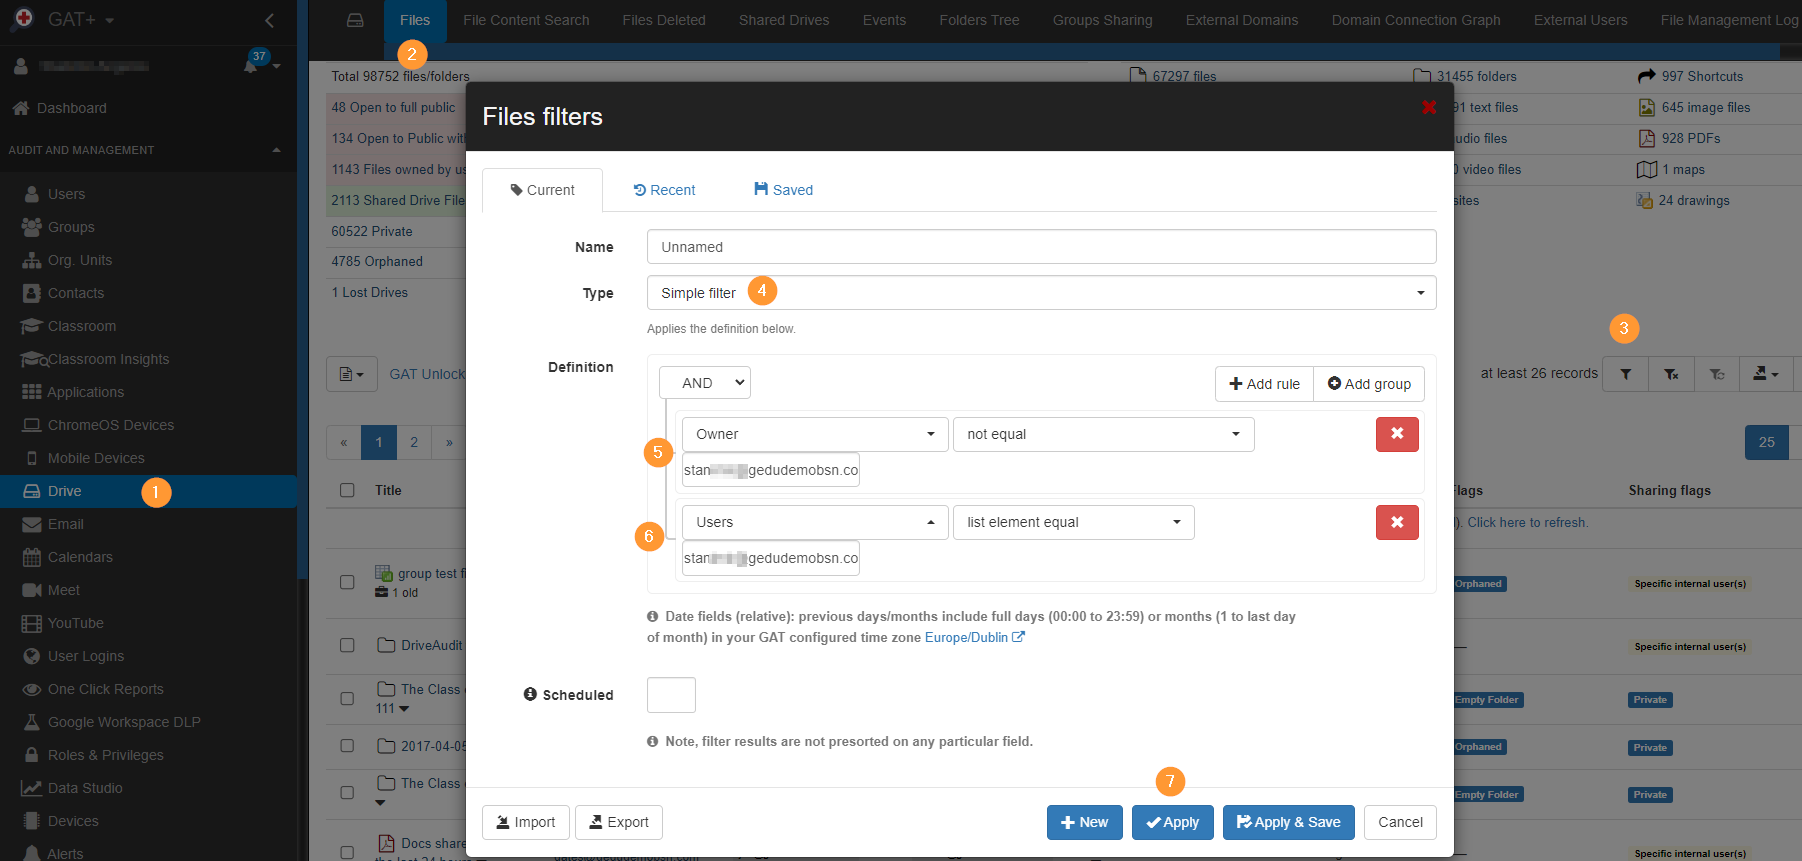
The result of this filter will show you all the files, to which user X has direct access as a viewer or contributor and is not the owner.
There are two ways to remove the permission.
- Firstly, via Remove permissions
- Secondly, via the UI – Remove this permission.
Way to remove permissions 1 #
Select all items on every page – select the checkmark beside “title”.
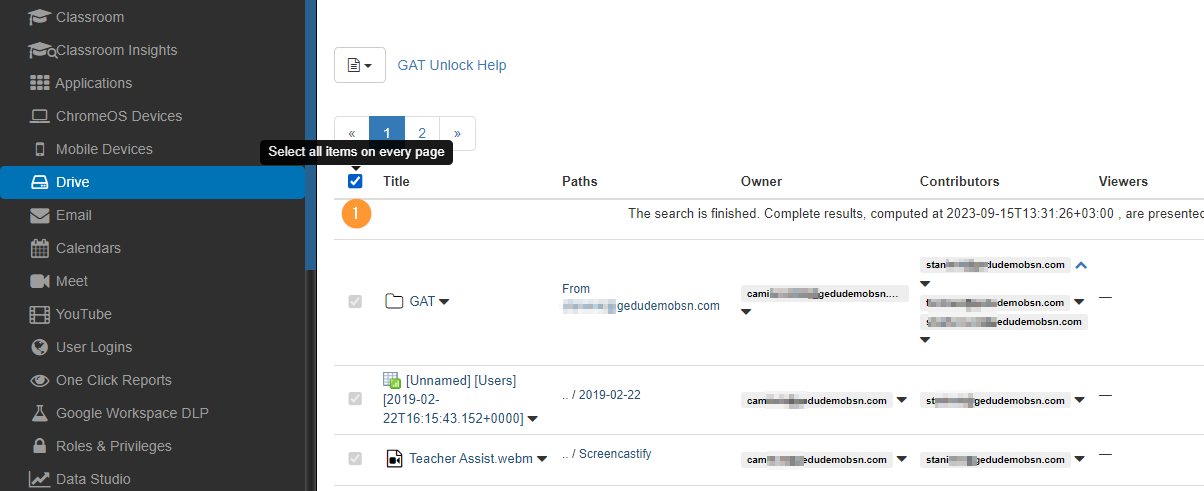
Next, select the File operation button and a menu with options will be displayed.
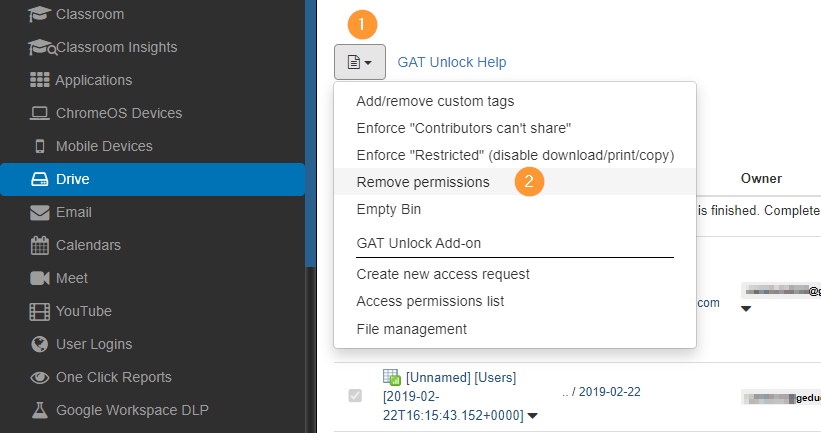
Select Remove permissions
A pop-up window will be displayed, select Internal > Remove only the following internal shares
In “Shared to remove” enter the email address of the users whose access you want to remove.

Then scroll down on this window and click on “Remove permissions”
As a result – the selected user will be removed from all the files they have access to
Way to remove permissions 2 #
Another way to remove the shares is by clicking on the share itself and removing it in bulk for all the files.
- Select the User as Contributor or Viewer – for the searched user
- Select “Remove userX as Contributor and viewer from files in the current filter”

A pop warning window will be displayed.
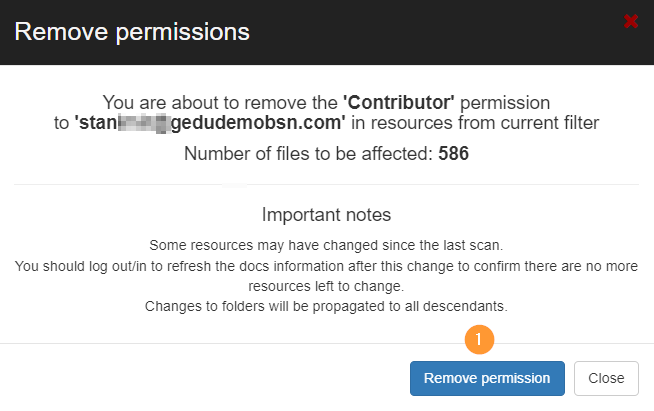
As a result: This will remove the chosen user from all the files and folders found based on the filter applied, with the permissions of the user as a contributor or viewer.
The result of the performed action can be seen in the Admin log.

User Clean-Up Assessment- Managing User Mobile Devices #
Additionally, you can also manage mobile devices for your users. The Admin has the ability to block, remotely wipe, wipe accounts, and delete users’ mobile devices.
These actions will affect the user’s mobile device and remove Google domain data from it, mirroring the actions available in the Admin console.
To get started, navigate to GAT+ > Mobile devices > Apply a filter.

Next, actions can be selected to manage the user’s mobile device as shown below


