- How to block specific webpages for domain users with GAT Shield’s Site Access Control.
What it is #
This guide demonstrates how to use the Site Access Control feature of GAT Shield.
The Site Access Control feature gives the Admins control over which websites users in the domain can access.
Why it matters #
Blocking webpages with GAT Shield gives you fine-grained control over what your users can see online. It’s like a safety net, protecting them from dangerous websites and letting you block any pages you don’t want them to visit.
The Google Admins (or delegated auditors) can create a custom list of webpages that would be blocked for the users of the domain.
How to implement #
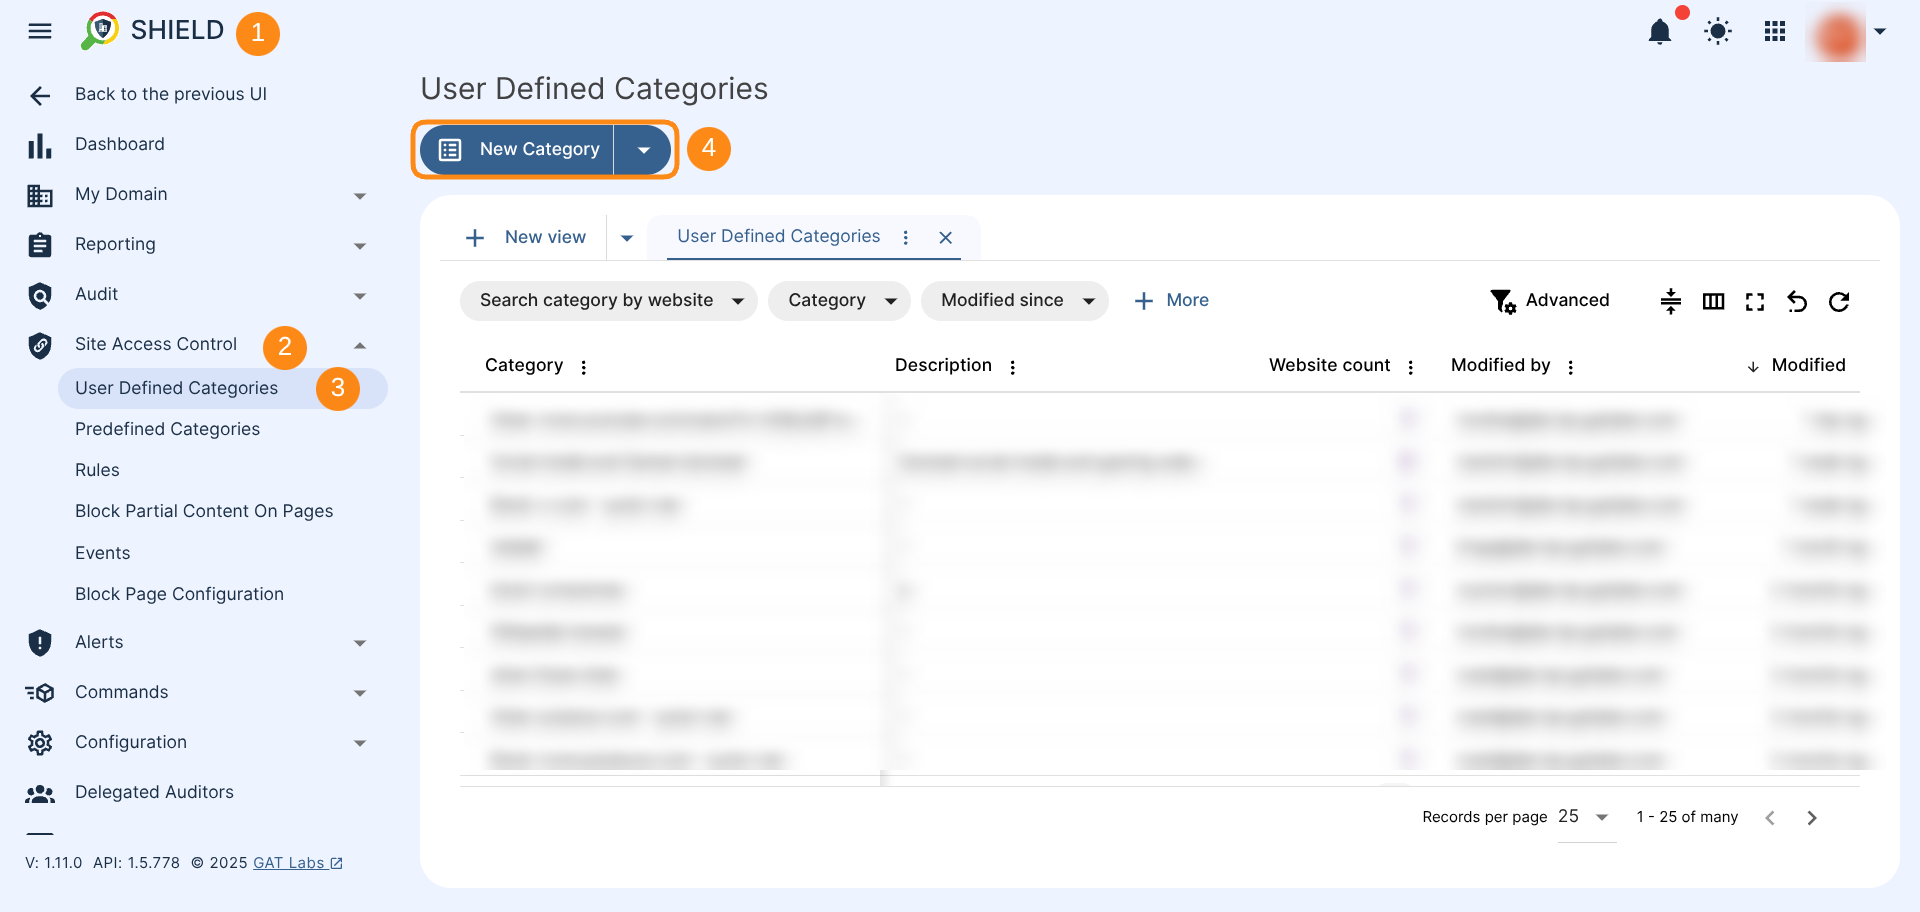
Navigate to GAT Shield > Site Access Control > User-defined categories #
User-defined categories are manually created categories that the Admins create for the users.
To create a custom category click on New Category button.
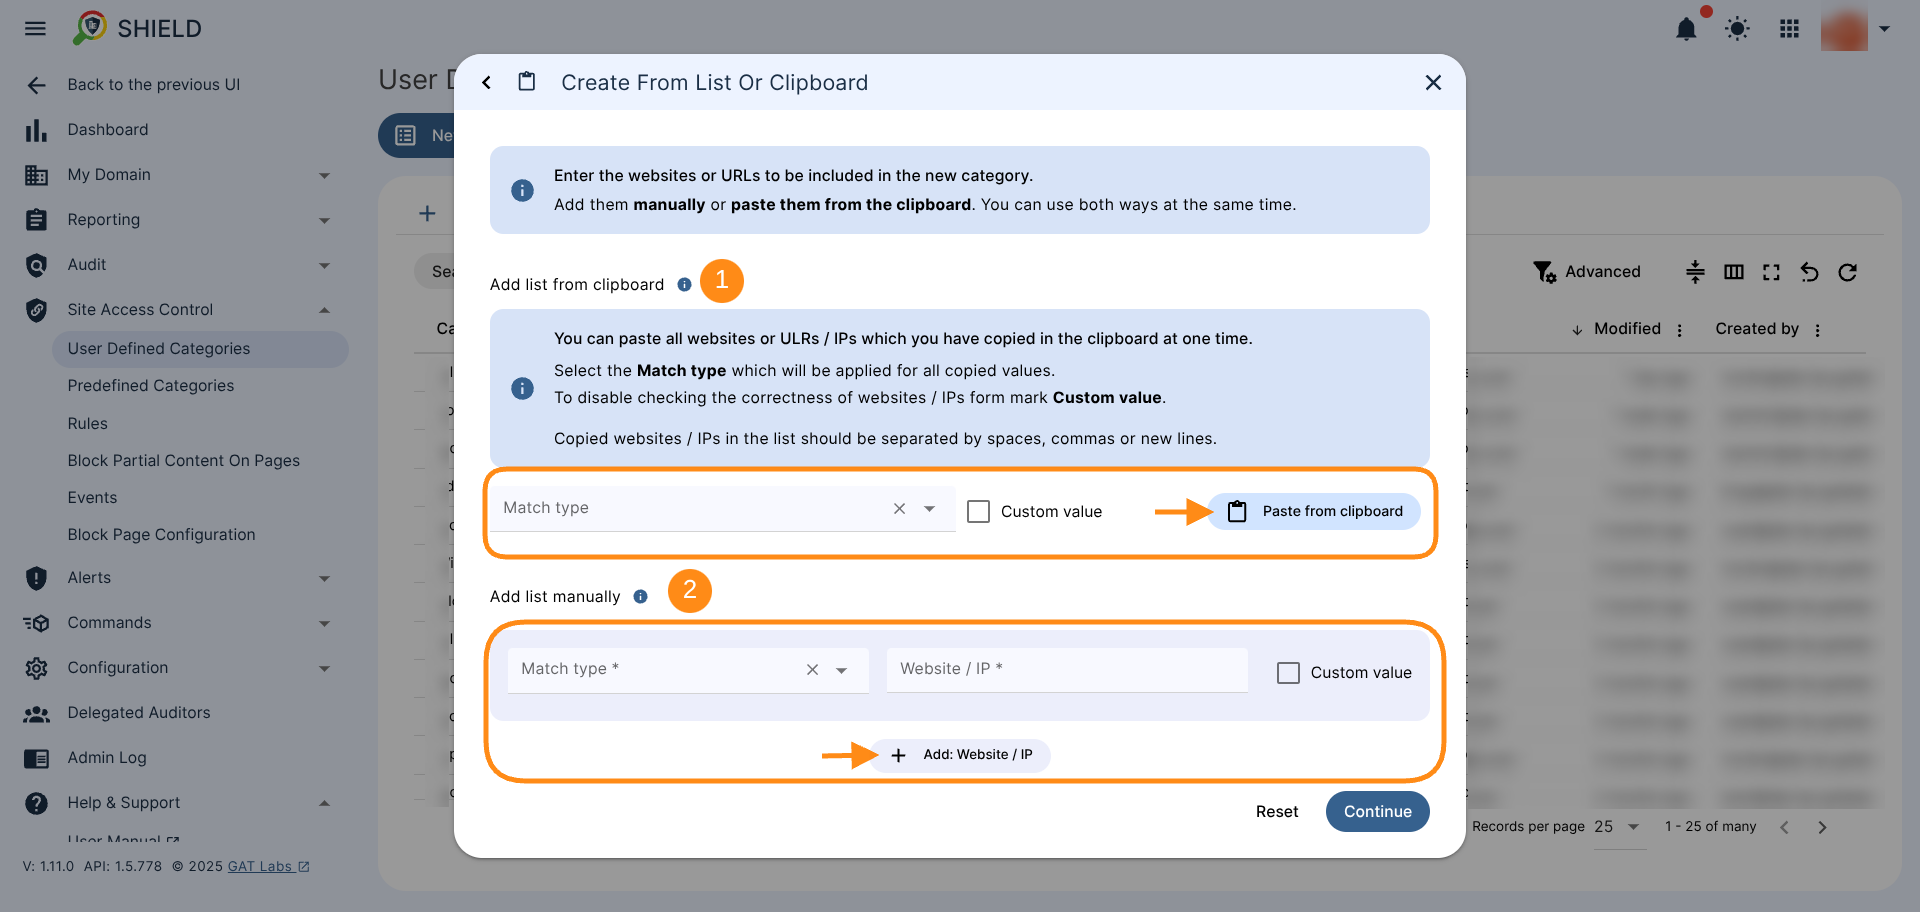
All available options to add a list of the websites to the category will be displayed in the new window.
There are a few ways to add a list of web pages to the category:
- Via a List or a clipboard
- Via Spreadsheet
- Via Web Search
- Via Recent Browsing

Each way uses a different method to add the URLs to the category.
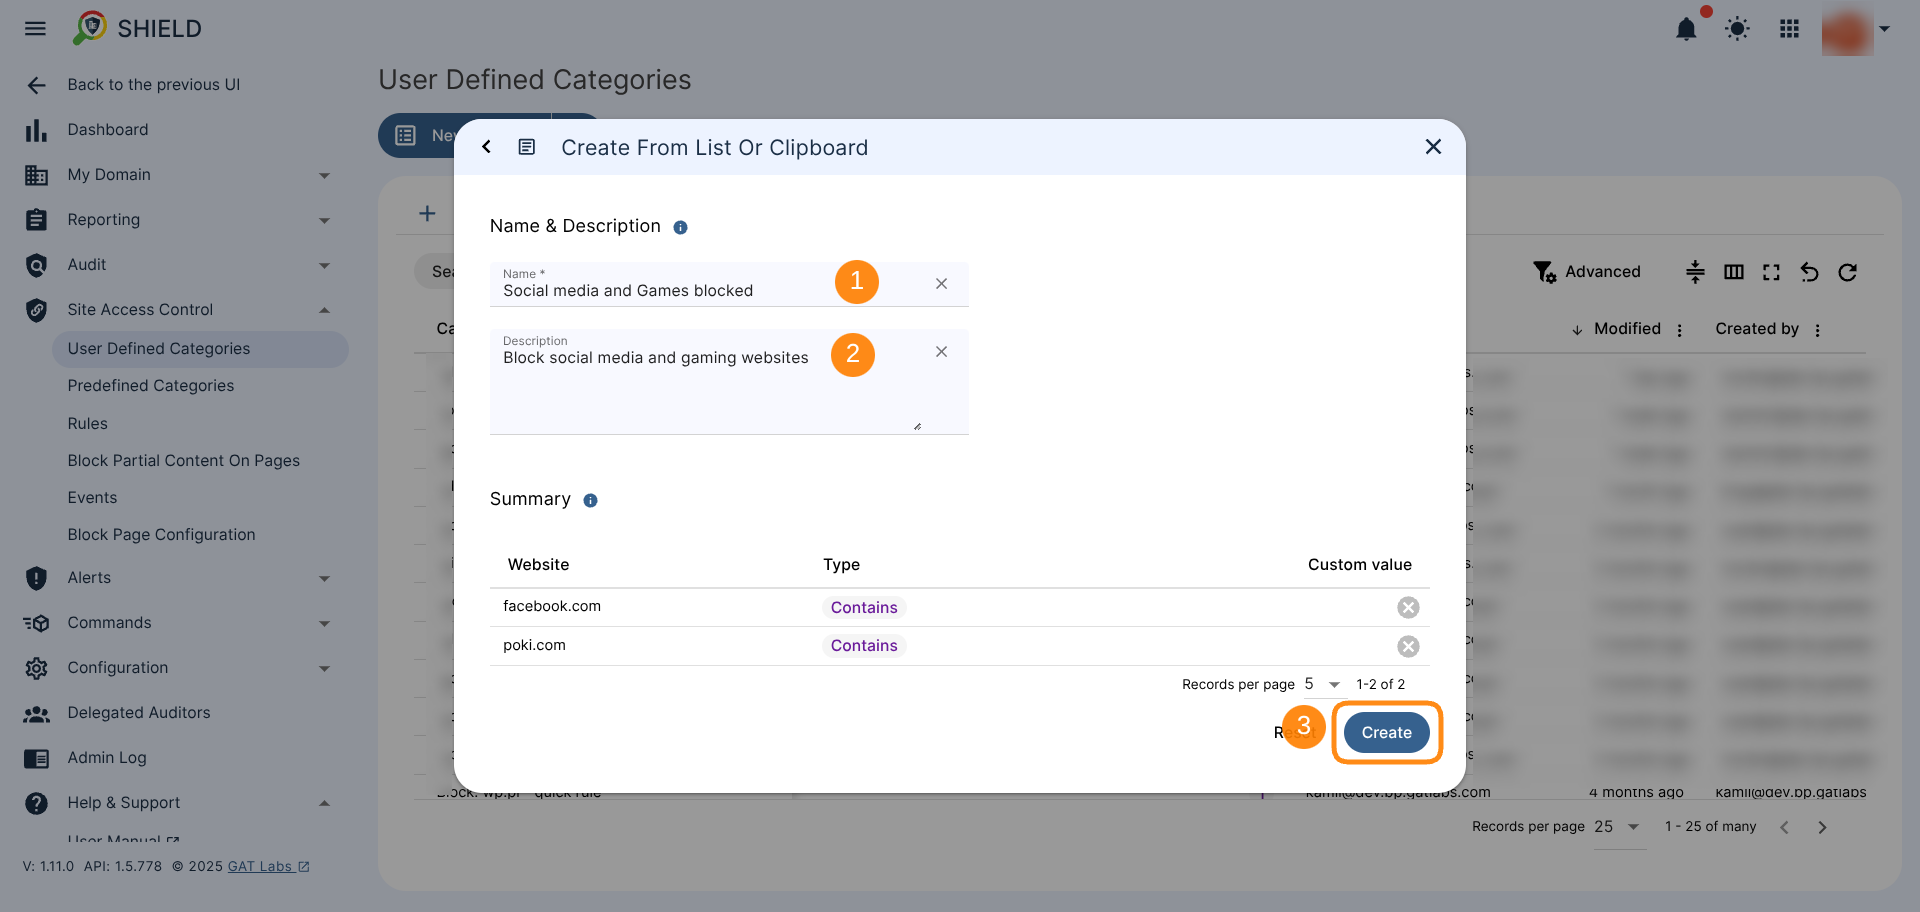
- Create From List or Clipboard – enter the Site URLs to be blocked via Paste from clipboard (1) or add list manually (2)
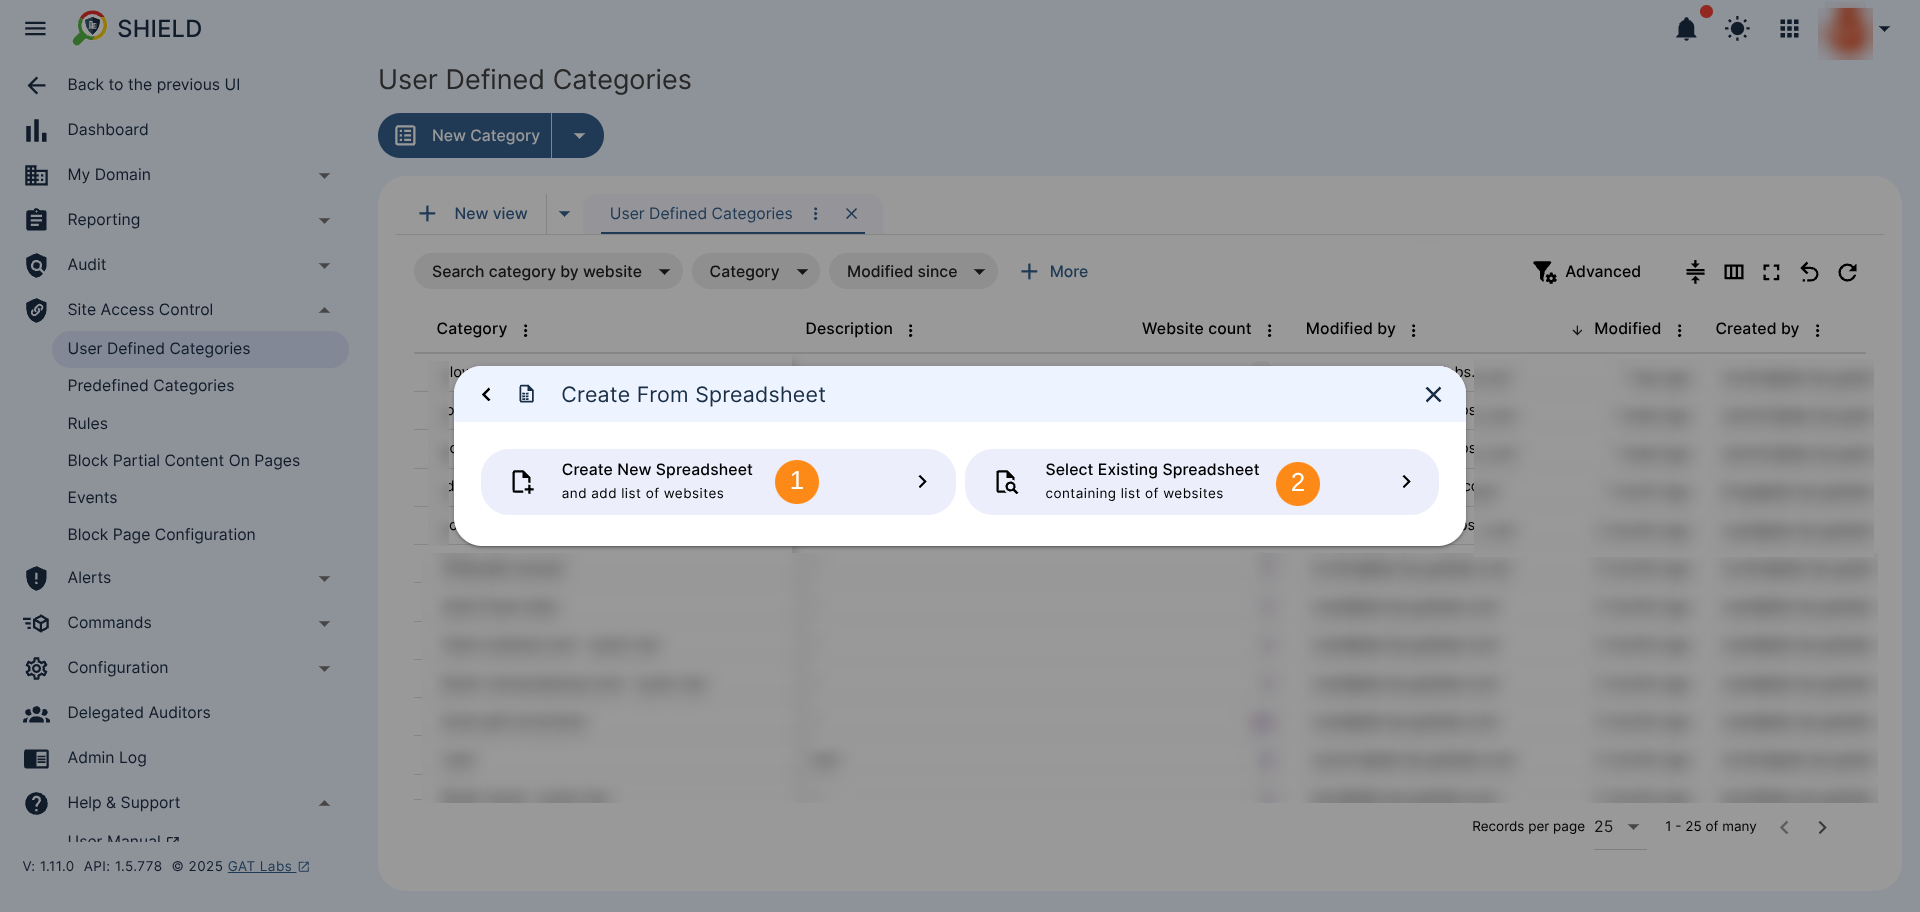
- Create From Spreadsheet – Create New Spreadsheet (1) and add the Sites needed, or Select Existing Spreadsheet (2) to enter the URLs
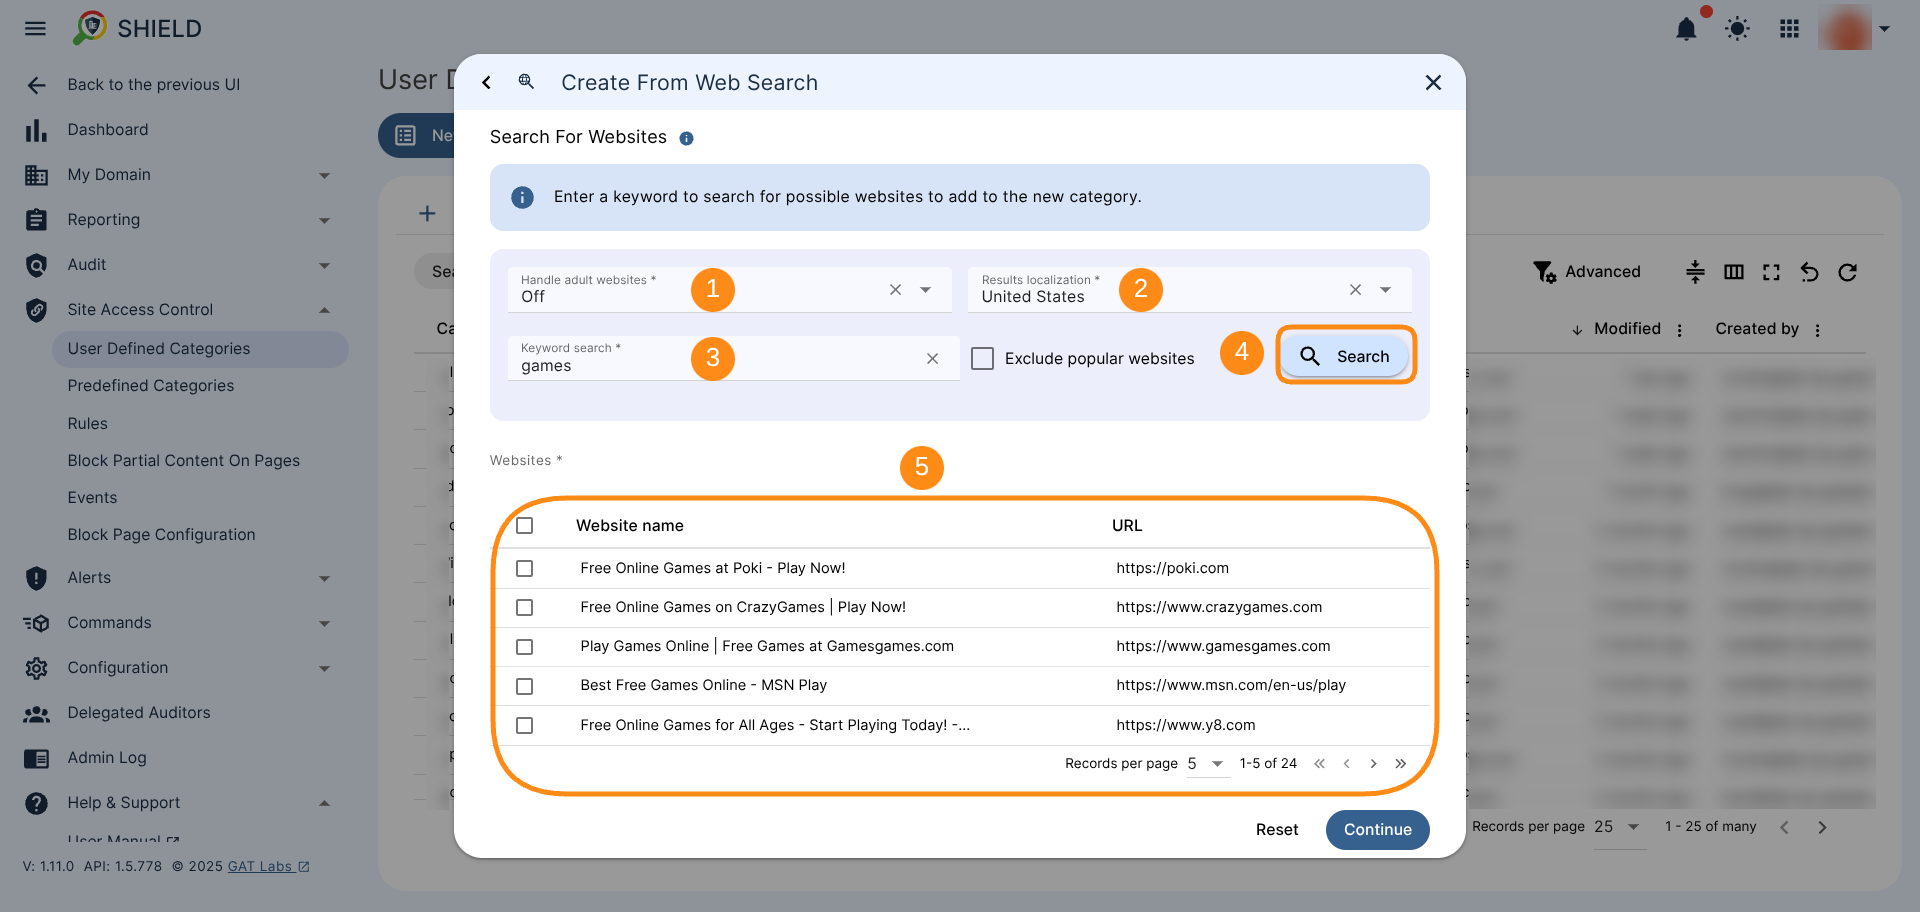
- Web Search – Search for a keyword and block or allow all sites found by the Search. Adjust your filter by specifying Handle adult websites (1) option from the following ones: Off, Moderate, Strict, and select the Results localization (2). Next, enter the Keyword search (3) and click on Search button (4) to be able to review the search results (5).
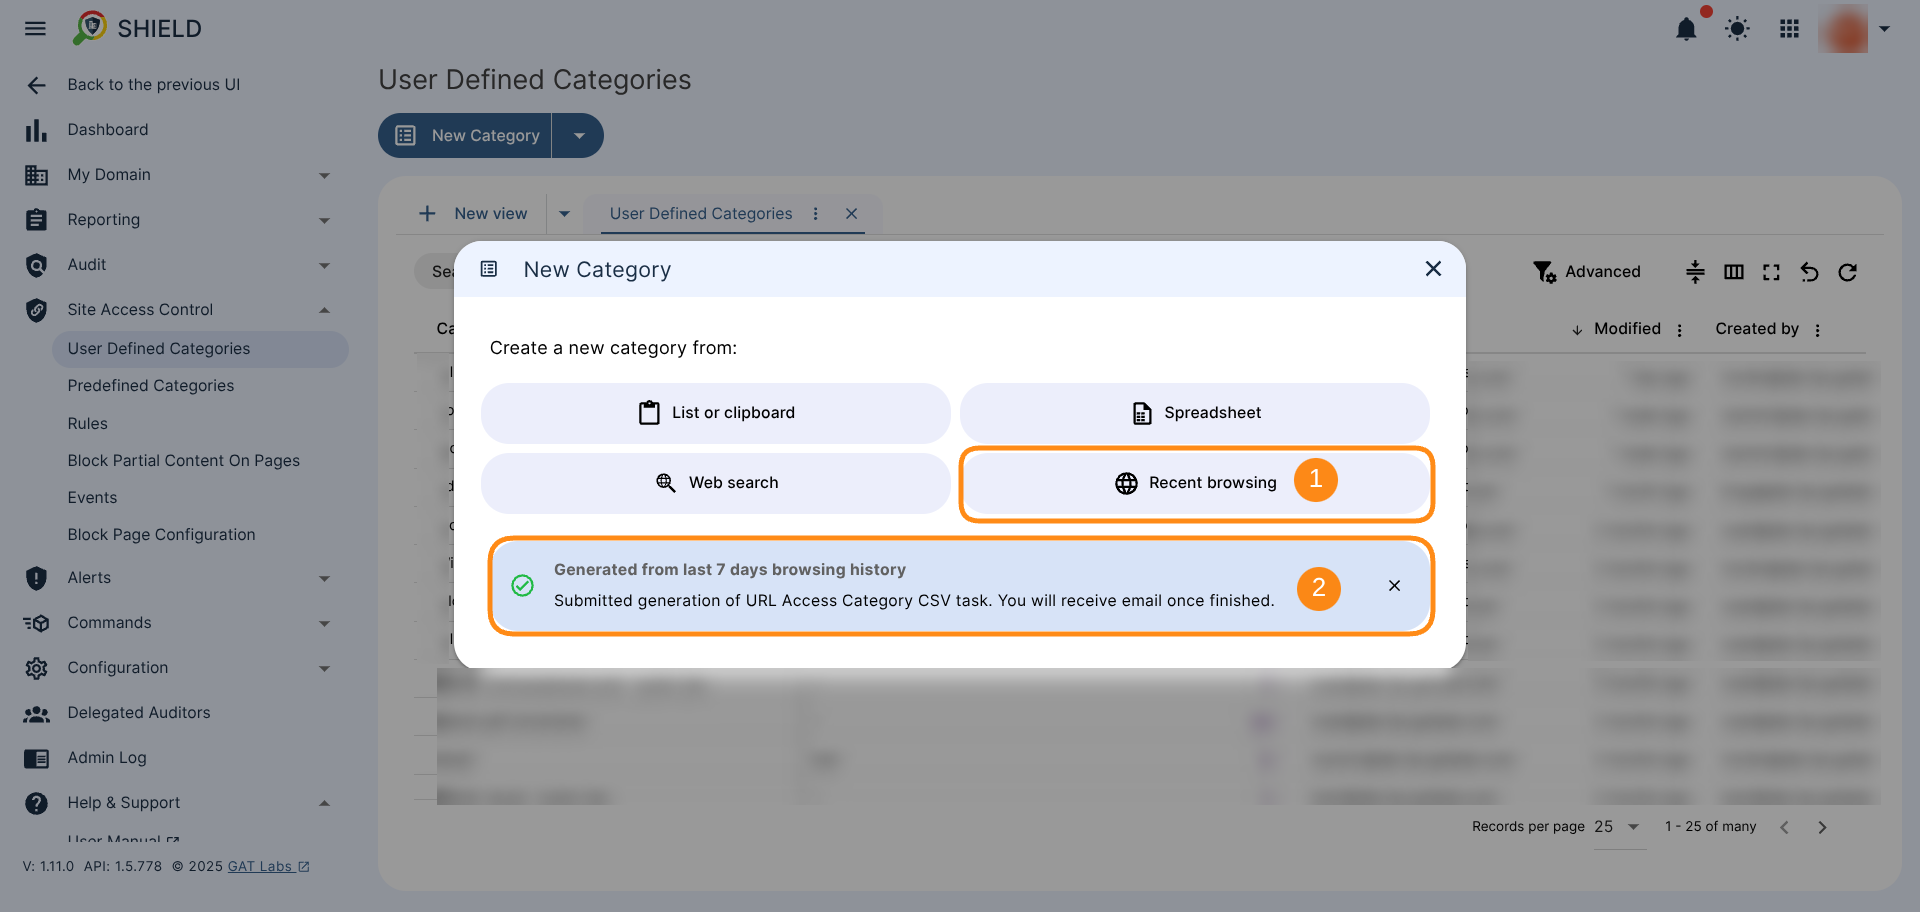
- Recent browsing – this is a list of URLs generated from the last 90 days’ browsing history.
-
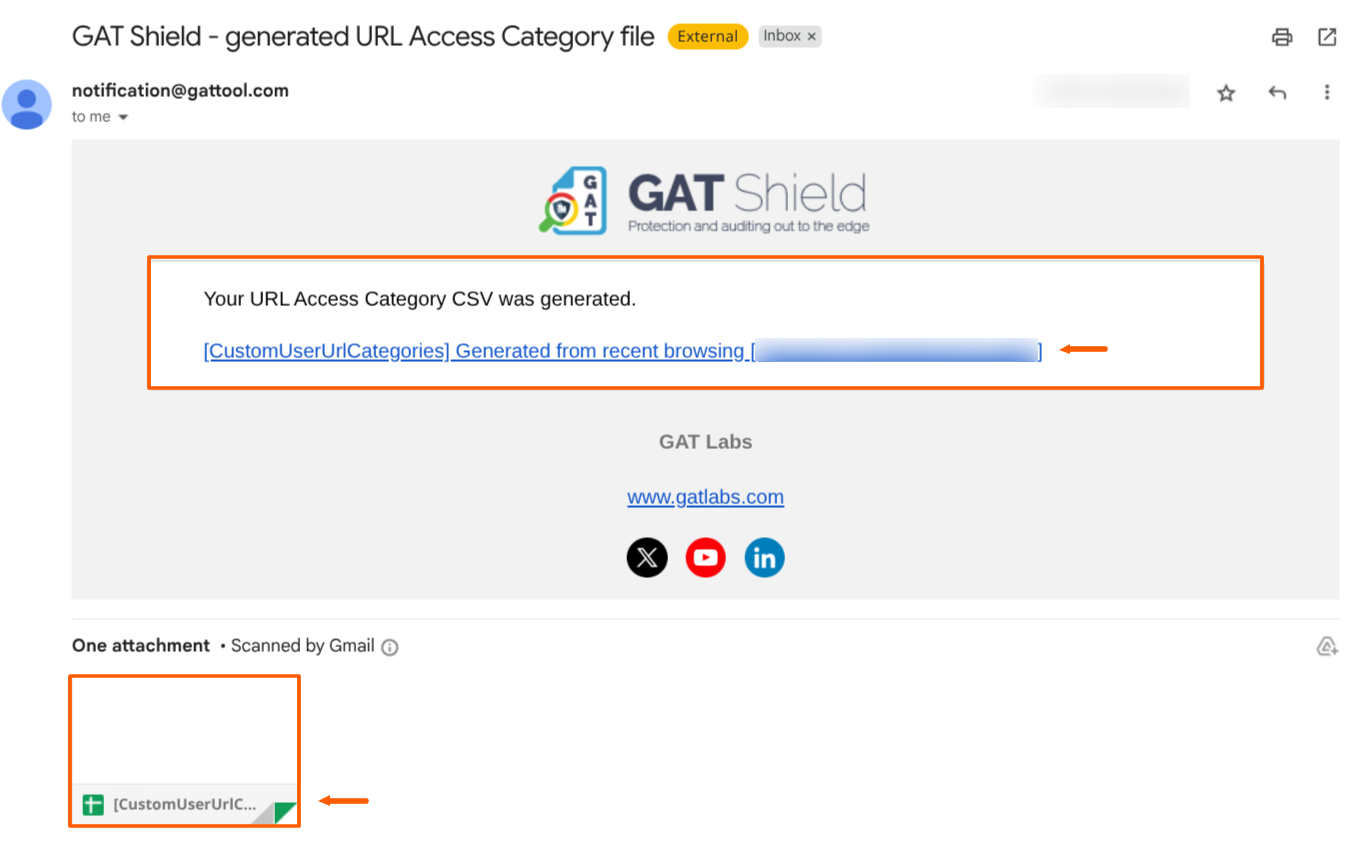
- When the spreadsheet is generated, it will be sent as an email to the Admin account
-
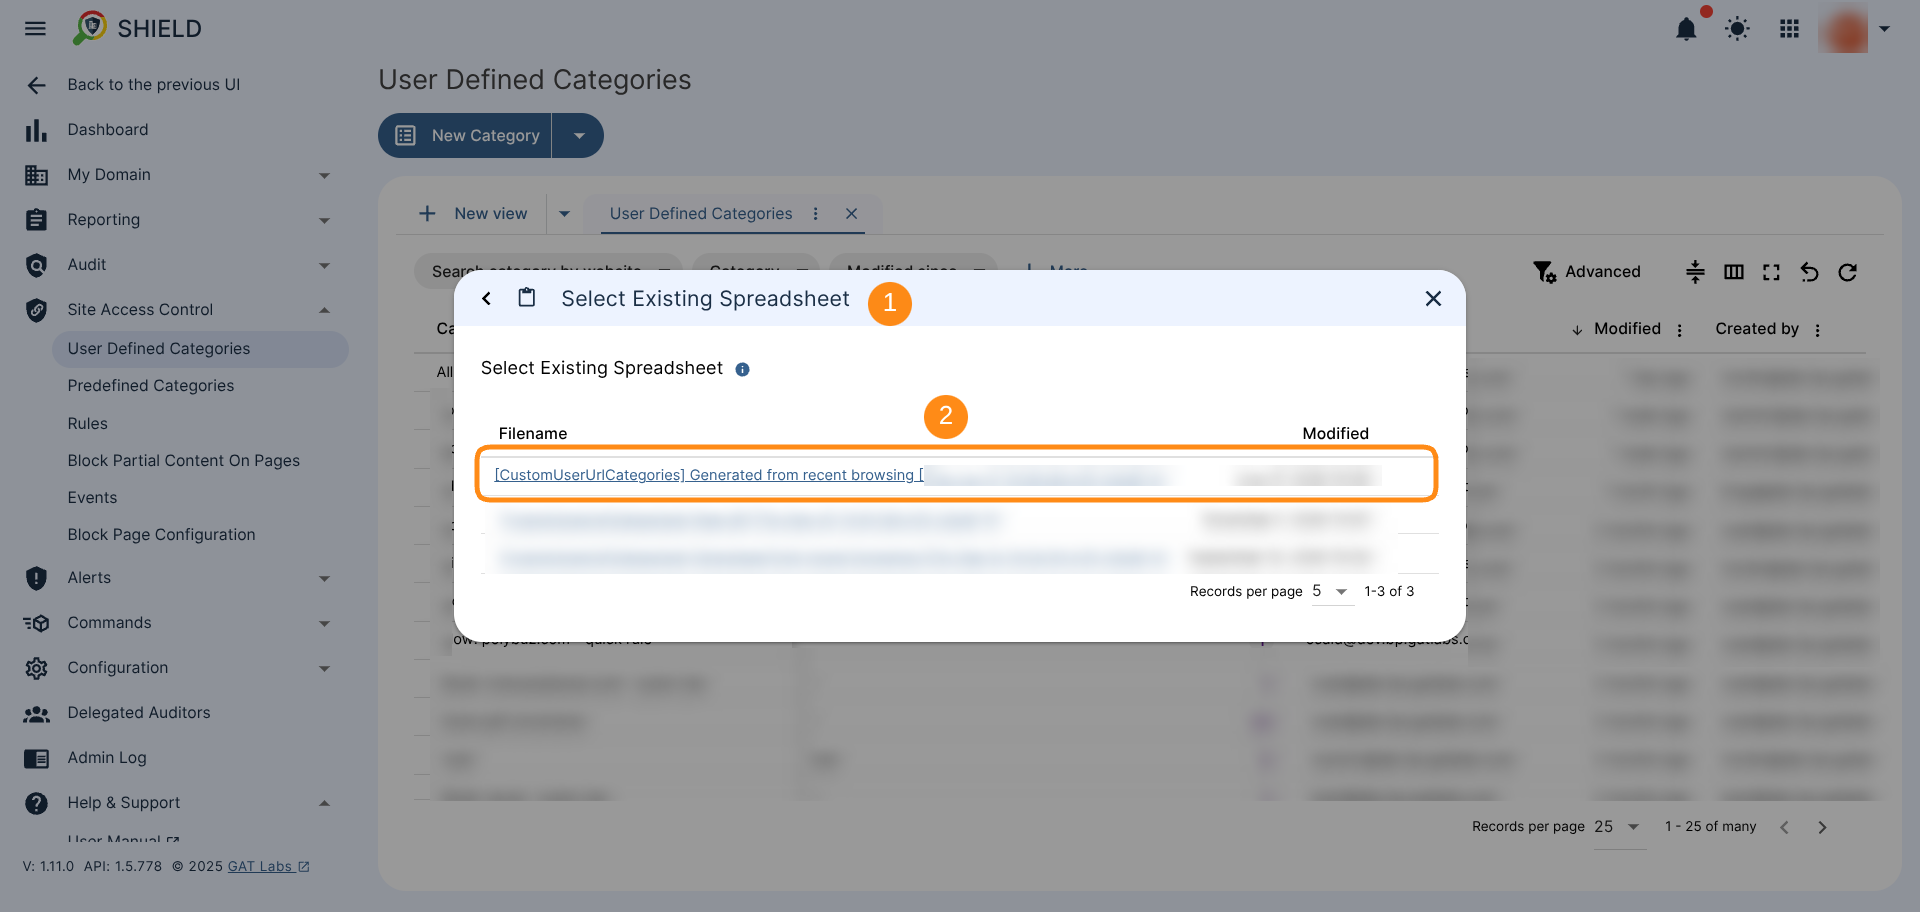
- Use the generated spreadsheet and import from Create From Spreadsheet > Select the existing spreadsheet > The generated spreadsheet will be shown as an option to be selected
- Select the sheet, and the URLs will be added as a category of sites
- Use the generated spreadsheet and import from Create From Spreadsheet > Select the existing spreadsheet > The generated spreadsheet will be shown as an option to be selected
-
-
- Alternatively, copy and paste the URLs via the List or Clipboard option.
-
Create the rule #
When the Site URLs are added by using one of the above options, enter a name and description for the rule and click Create.
Create a rule based on the custom category #
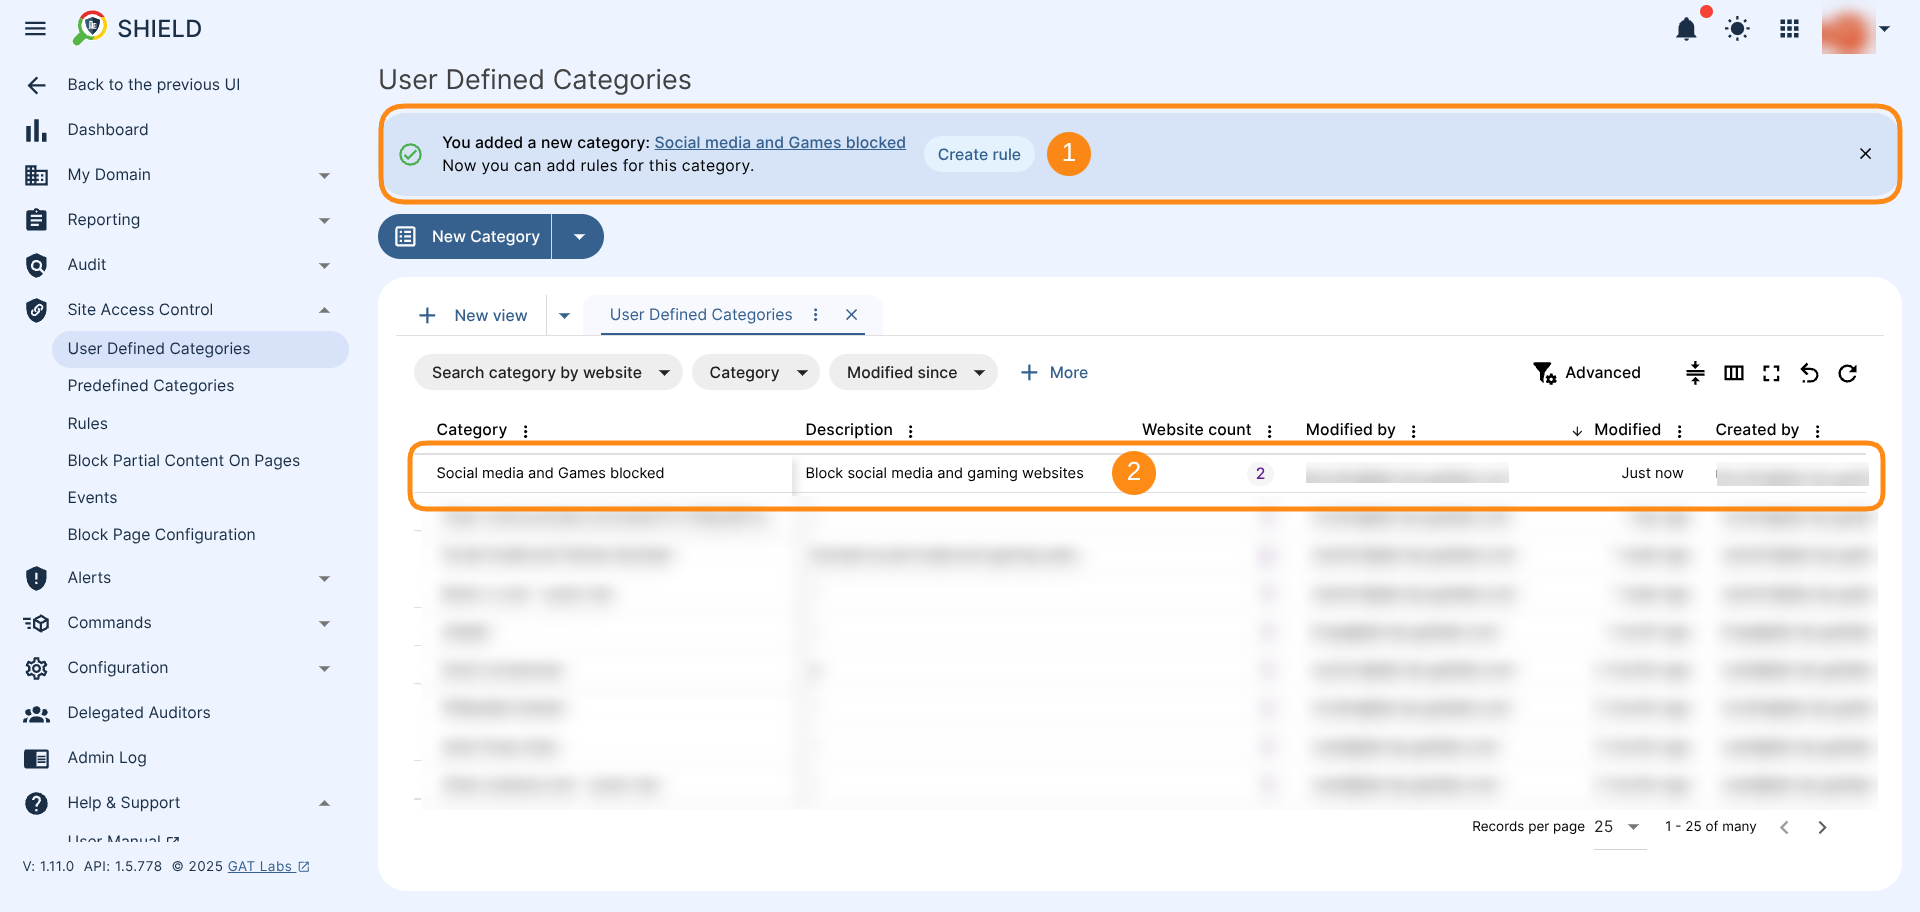
When the category is created, there will be a new button to click on the Create rule (1).
The category is also displayed under the User Defined Categories menu (2)
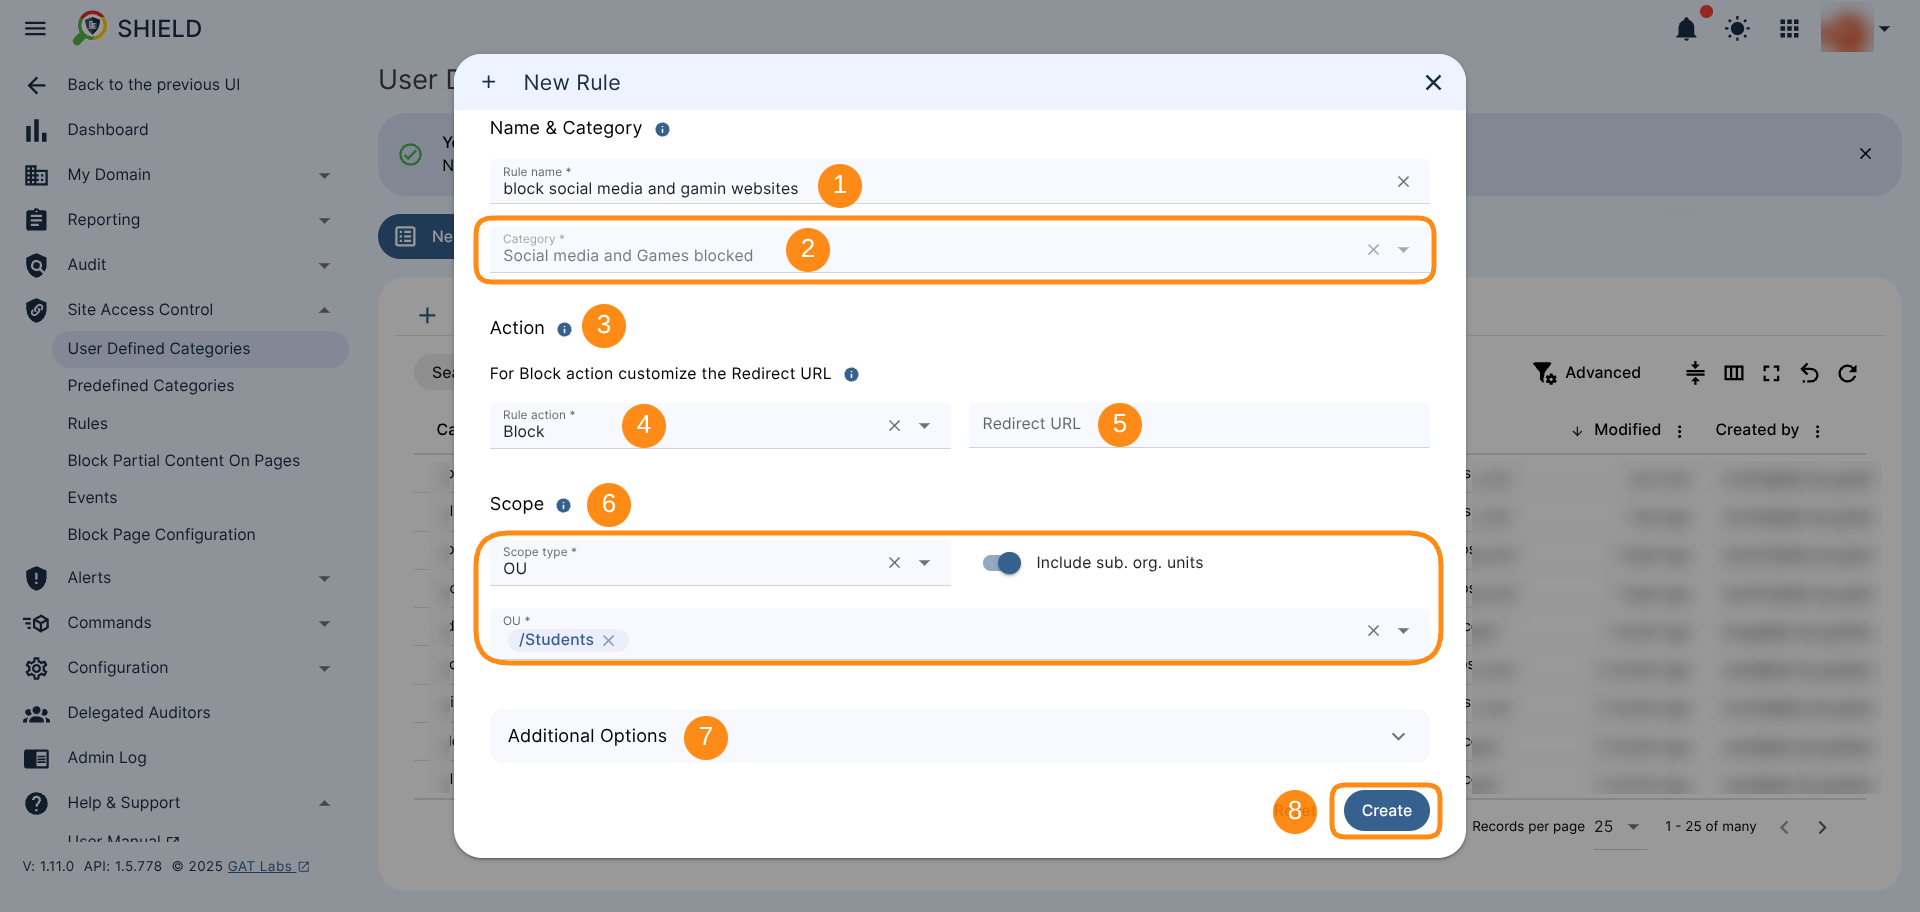
A new window will be displayed. Fill in the details.
- Rule name – enter the rule name (1)
- Category – the newly created category name will be shown by default (2)
- Action – under the Action section (3) select the action to be done:
- Set the Rule action to Block (4)
- Redirect URL – enter a page to which the users will be redirected if they visit the blocked site (optional) (5)
- Scope – under the Scope section (6) select the users who will be affected by the rule
- User
- Group
- OU
- Include sub. org. units
- All users
- Set up Additional Options (optional) (7), such as:
- Apply this rule only for Chromebook devices
- Enter rule description
- Add Time restriction
- Create – click to Create the rule (8)
Result for User-defined category #
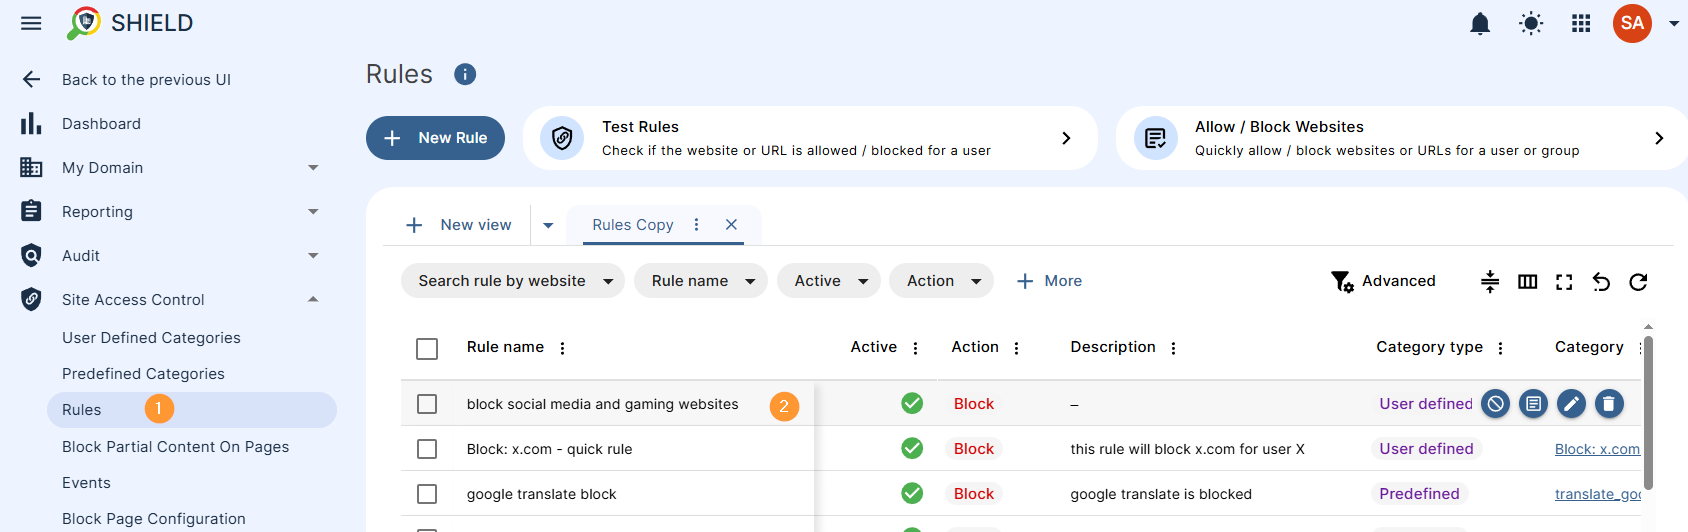
When the rule is created, it can be found under Rules.
The affected user will be blocked from opening the websites as below.
Every time the user tries and open the page, it will be blocked.