

Delete Big Gmail Attachments with GAT+ #
GAT+ audit enables the Google Workspace Admins and Delegated auditors to perform and take actions on the workspace emails of the domain.
Admins can search by the size of emails and their attachments and delete them.
Step 1. Find Big Attachment Emails #
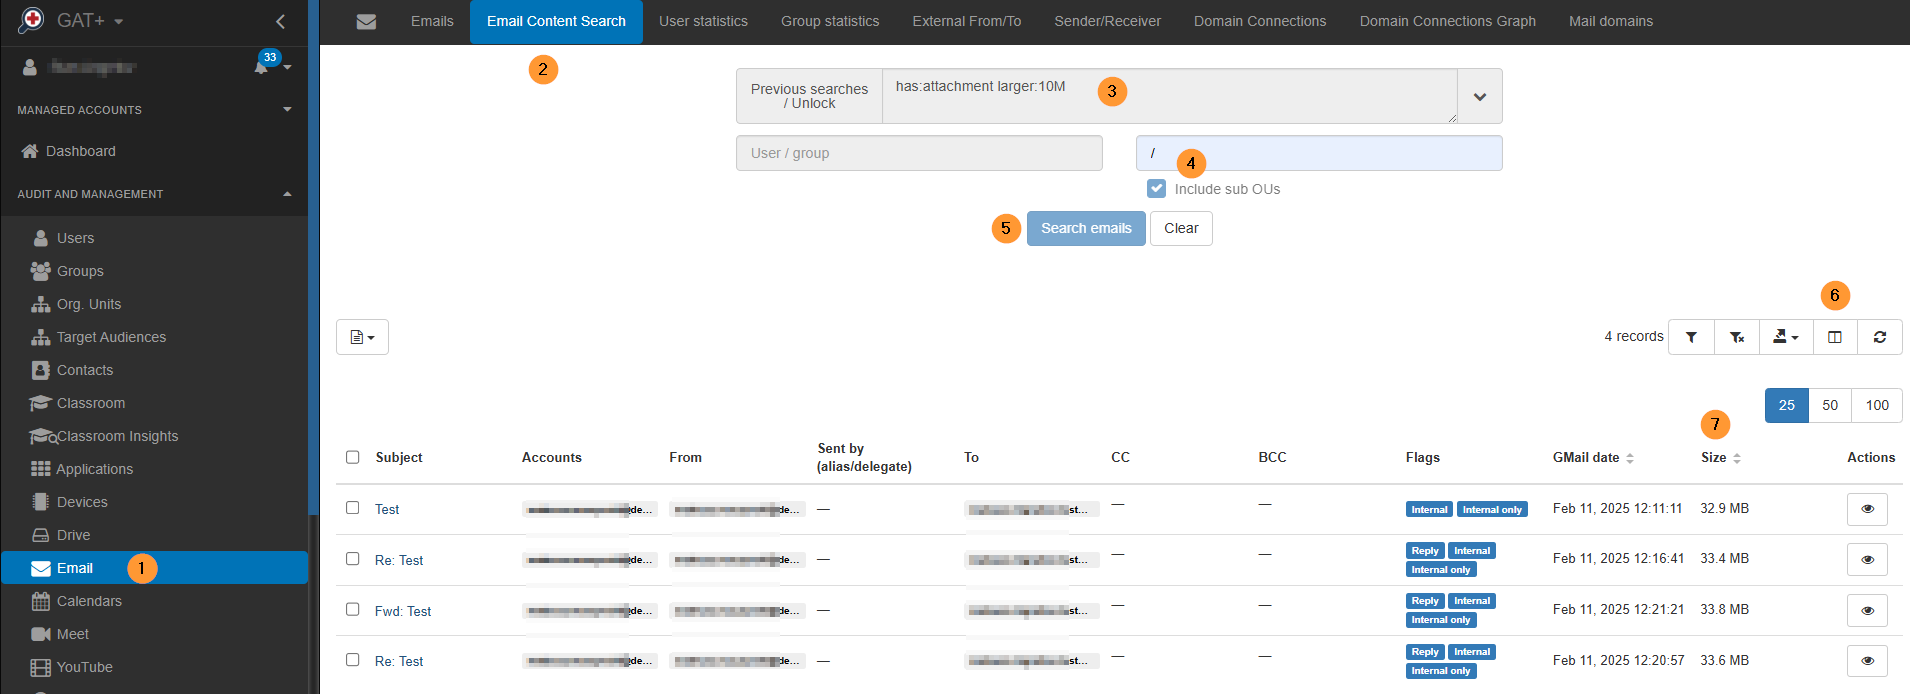
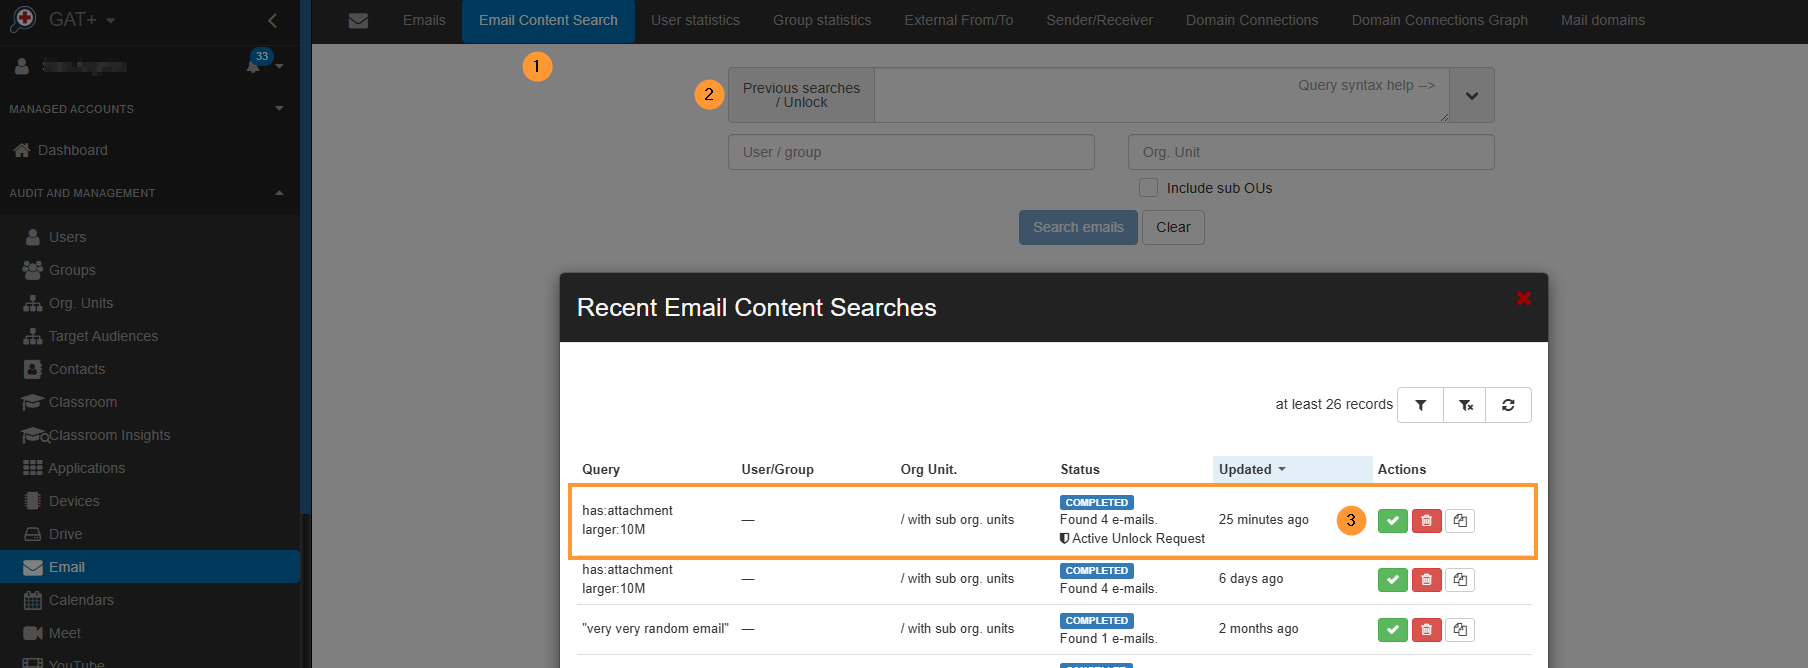
Navigate to GAT+ > Email > Email content search.
In the search field, enter the search parameters.
has:attachment larger:10M
For whom you want to search, enter the User, Group, or Org. Unit of users to search through. To search for everyone in the domain, enter “/” forward slash and include sub. OUs.
To show the size in the User interface, click on the Column visibility button (6) and enable the Size from the menu option.
Step 2. Result #
As a result of the filter, you can see all the emails found that have attachments and a size larger than 10 MB.
You can search for any user and any email size using this filter.
Step 3. Delete Emails with Big Attachments #
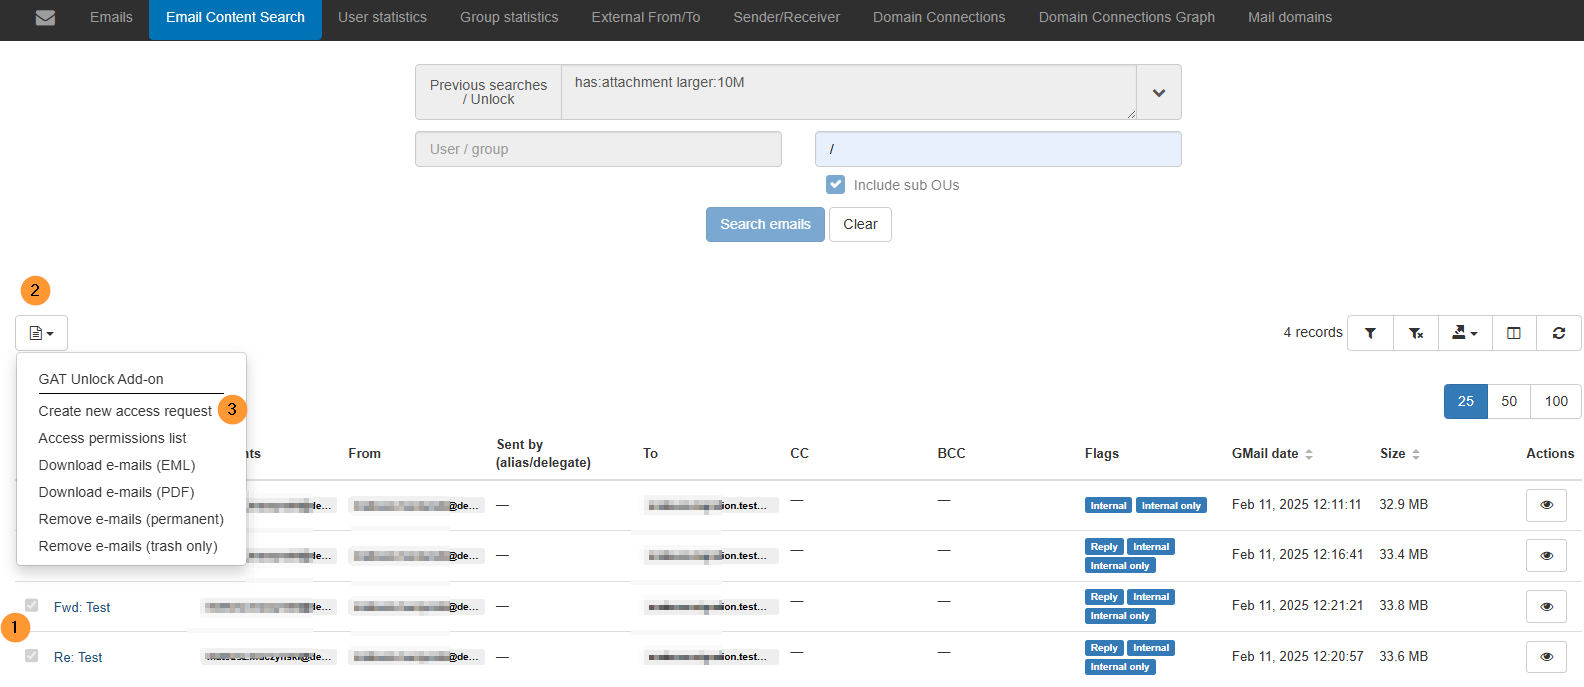
Once the result is found, you can request access to the emails and the option to delete them.
Select the emails from the checkmark beside their subject (1), then click on Email operations (2), then Create new access request (3).
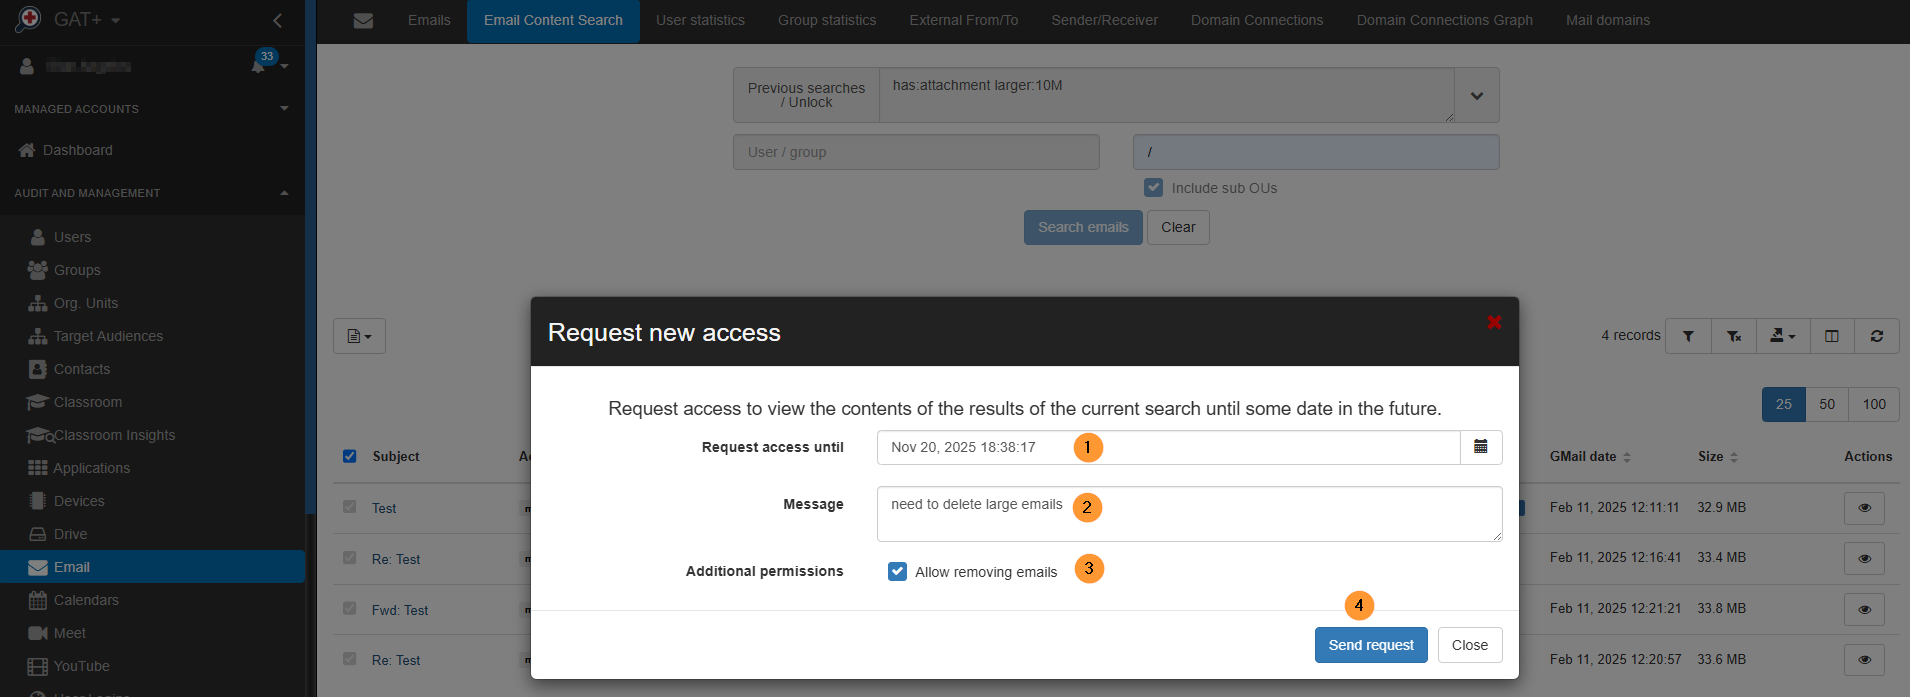
In the pop-up window displayed, fill in the details:
- Request access until: select for how long this request is to be active
- Message: leave a custom message to the Security officer explaining why you need this request approved
- Additional permissions: Allow removing emails – you must enable this option
Step 4. Security Officer Approval #
The security officer will receive an email to approve the request.
Pre-approval #
If pre-approval is set up, no approval will be needed.
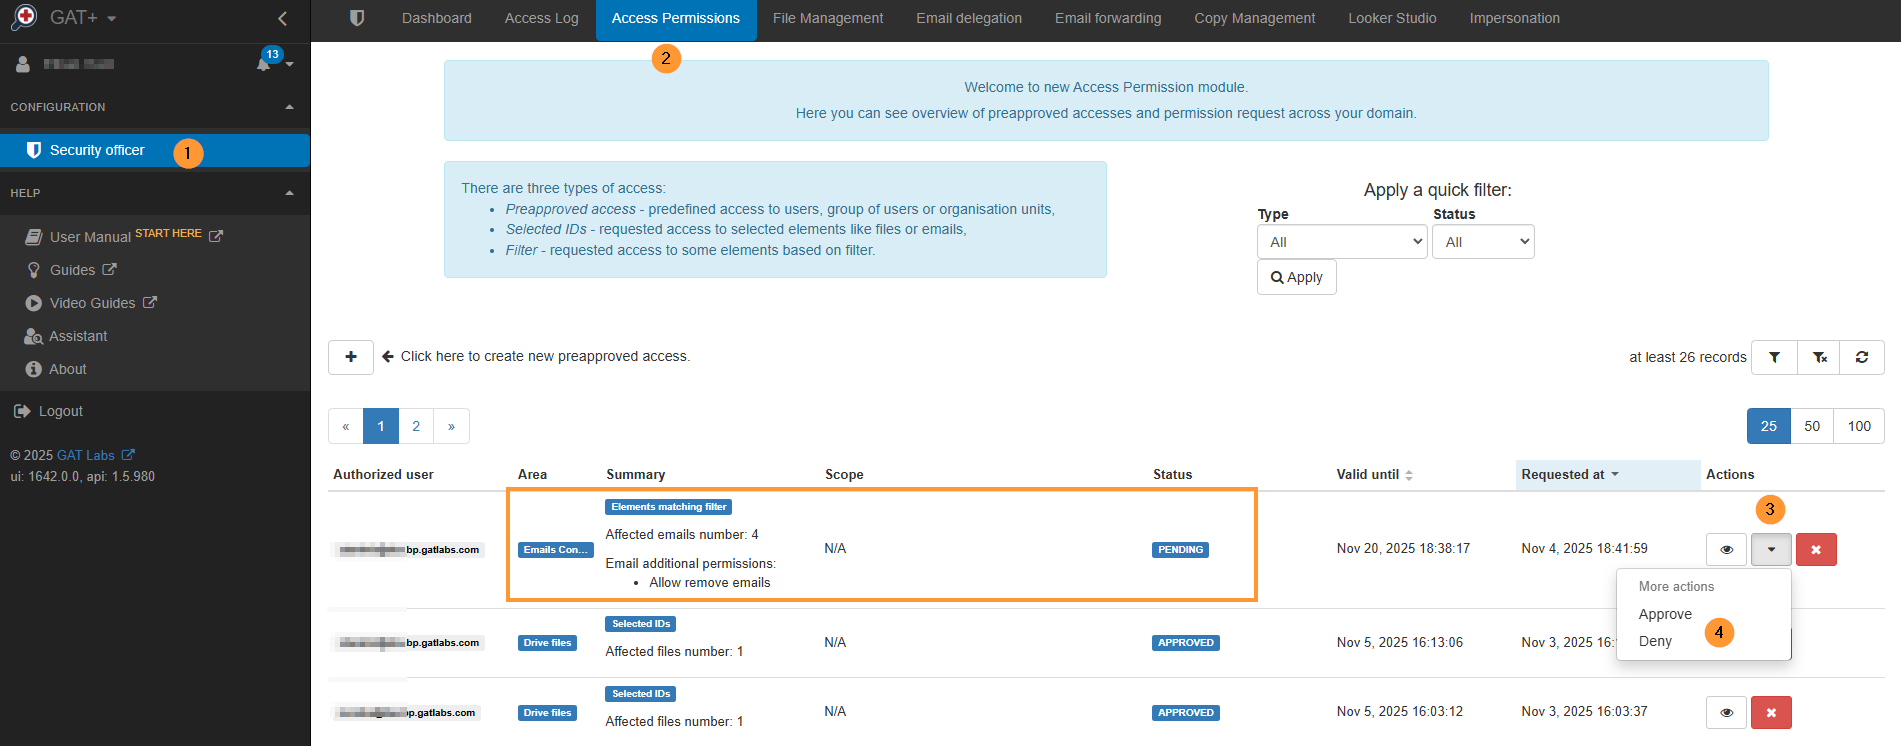
In the email, the security officer will be directed to GAT+ > Security Officer > Access Permissions, where they can approve or deny the request.
Click the eye icon on the right side to view details of the request.
Step 5. Delete Emails #
When the request is approved, the Admin can access the emails found and delete them directly with GAT+.
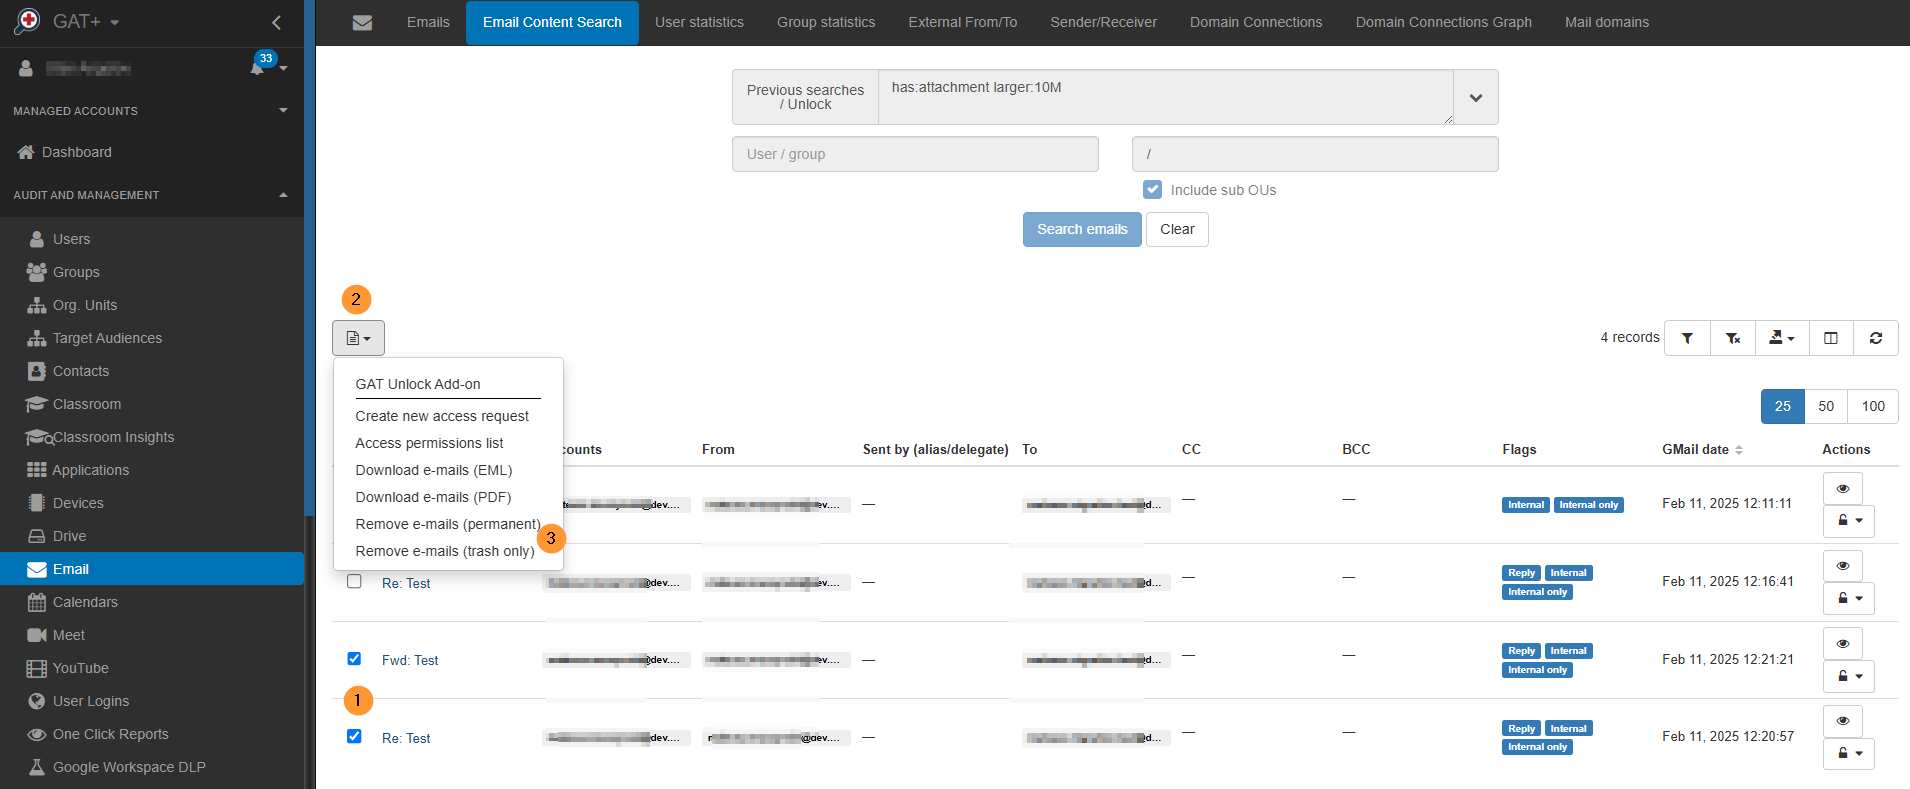
Navigate to GAT+ > Email > Email content search > Previous searches/Unlock.
From the menu, select the request used above.
The emails will be displayed again, but this time, Unlock will be enabled, along with options to delete the emails.
Select the emails to be deleted (1) and then Email operation (2) > Remove e-mails (3)(permanent or trash only).
In the pop-up window, you will see a warning message for the action to be done.
You’re about to remove 2 email messages (permanently – trash only). Information about removal will be sent to your mailbox.
Permanently Deleted Email #
If the email is permanently deleted, it cannot be restored, unlike when it is deleted as “trash only”.
Click Proceed.
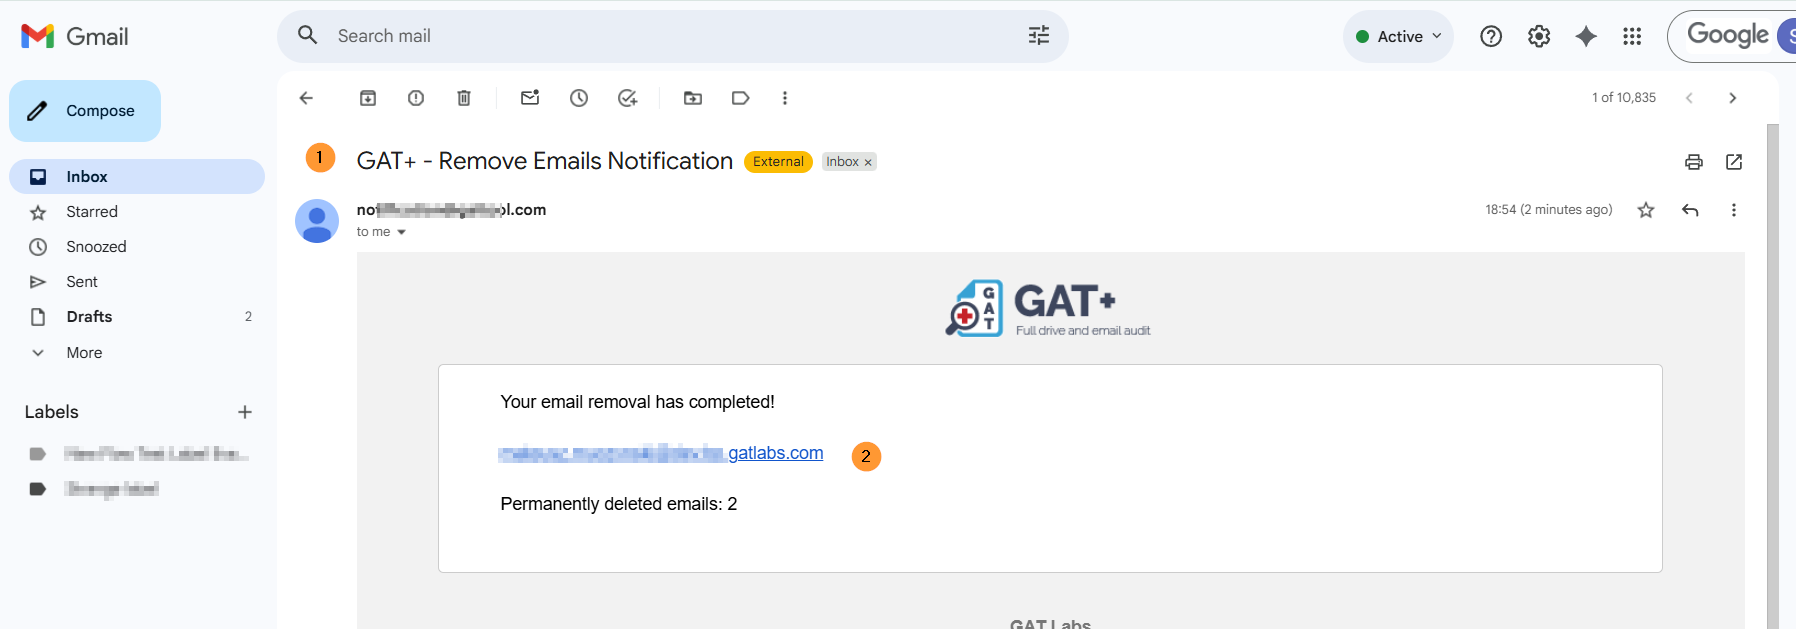
An email will be sent to the Super Admin who requested the action.
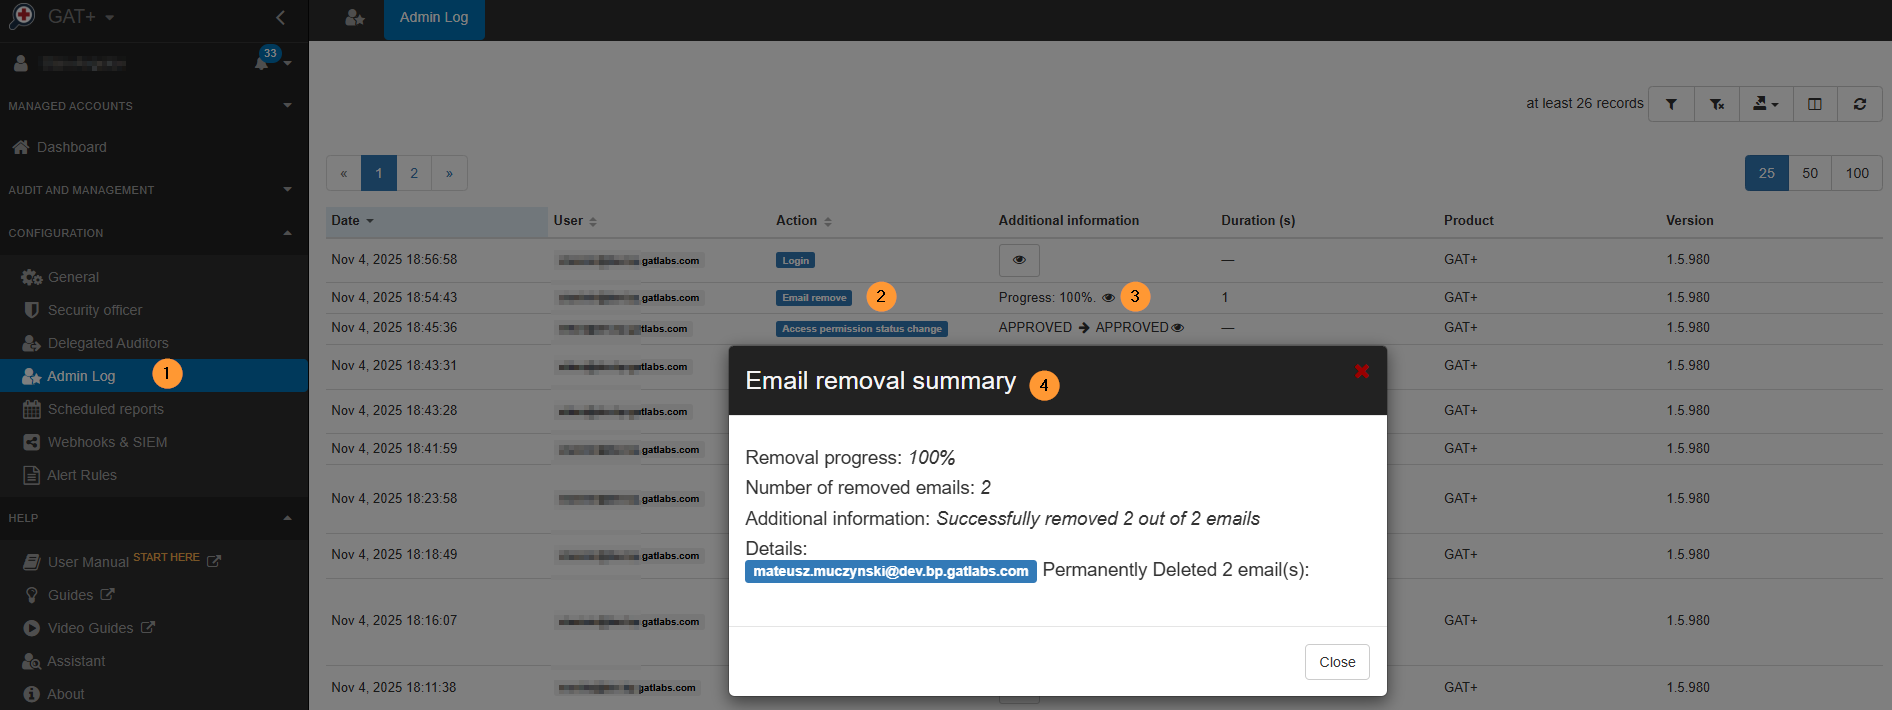
GAT+ Admin Log #
A log of the action will be kept in GAT+ > Configuration > Admin log.
Step 6. Conclusion #
You have successfully executed a targeted cleanup of your Google Workspace mailboxes using GAT+ Email Content Search.
By applying the filter, has:attachment larger:10Myou identified storage-heavy emails.
After securing necessary permissions via the Security Officer access request, you were able to unlock and permanently remove (or move to Trash) these large items.
FAQ #
Q1: What happens if I select “Remove e-mails (trash only)” instead of “Permanently remove”?
A1: Selecting “trash only” moves the emails to the user’s Trash folder in Gmail. These emails remain recoverable by the user for 30 days before being automatically purged, similar to a standard manual deletion within Gmail.
Q2: I entered / (forward slash) for the search scope, but I only see emails from one sub-Organizational Unit (OU). Why?
A2: Entering / is intended to search everyone and include sub-OUs. If the results are limited, it indicates that the system may not have been instructed correctly to perform a recursive search across all sub-OUs, or the specific structure for searching the entire domain’s hierarchy was not fully met in the input field.
Q3: How long does the Security Officer have to approve my access request?
A3: The access request remains active only until the date and time you explicitly set in the “Request access until” field in the pop-up window. After this time expires, the request will become invalid.


