

What Are Alert Rules in GAT Shield? #
Alert Rules in GAT Shield allow Google Workspace Admins to detect and respond to risky user behaviour in real-time. These rules monitor Chrome activity and trigger alerts based on predefined actions or policy violations.
You can use Alert Rules to detect things like:
-
File downloads over a certain size
-
Access to suspicious websites
-
Unexpected use of the account in an unexpected location
-
Inappropriate keywords in chats
-
Time spent on non-work-related websites
Once a rule is triggered, you’ll be notified by email or through GAT Shield’s dashboard.
Pre-requisite: The GAT Shield extension must be deployed and available to users who are logged into the Google Chrome browser and have synced it into their accounts.
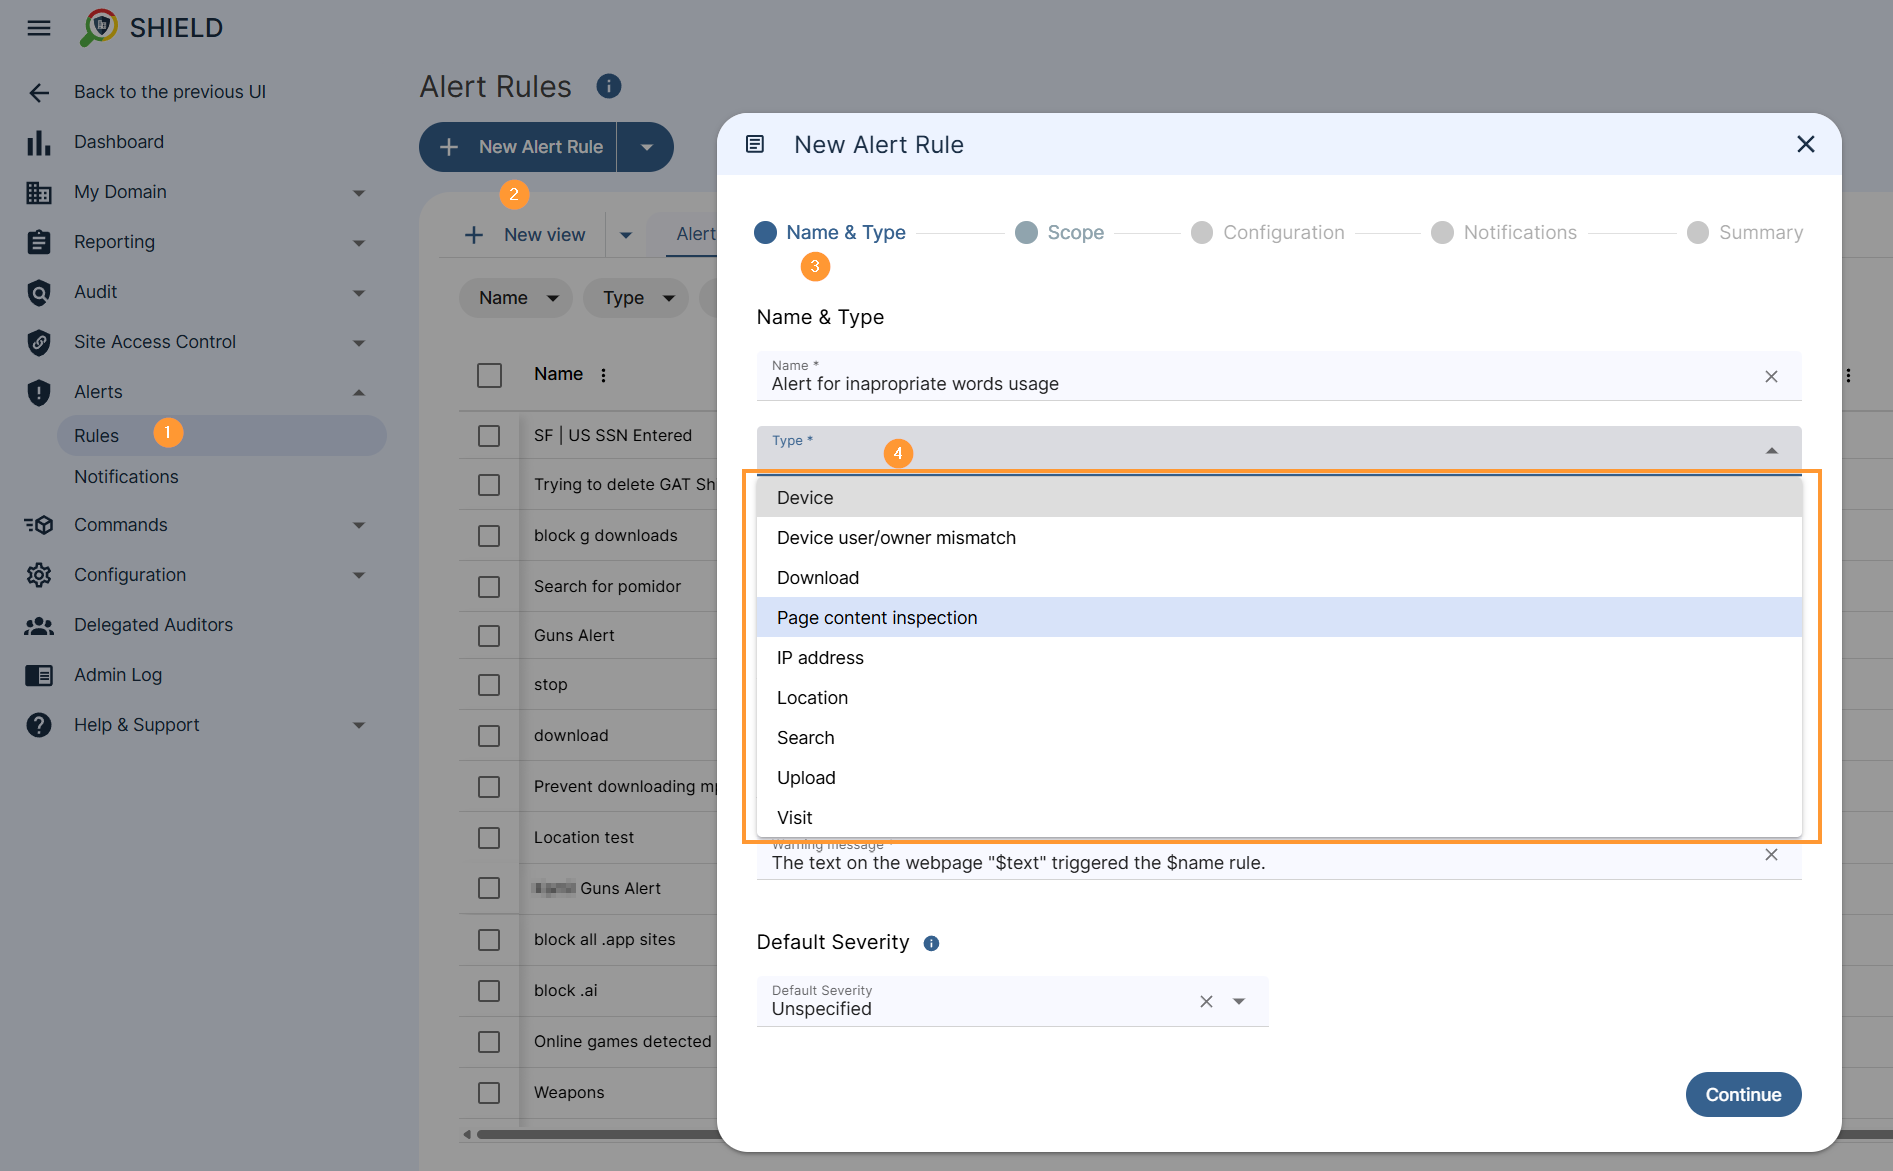
Types of Alert Rules Available #
You can configure a wide range of rule types to suit your security or productivity policies. These include:
- Device
- Device user/owner mismatch
- Download
- Page content inspection
- IP address
- Location
- Search
- Upload
- Visit
Each rule type comes with customisable conditions and thresholds.
How to Create a New Alert Rule #
Step 1: Access the Alert Rules Panel #
Navigate to Shield > Alerts > Rules > click on ‘+ New alert rule’
A pop-up window will be displayed to fill in the required information.
Step 1: Name & Type #
-
Enter the Rule Name
-
Select the Rule Type (e.g. Page content Inspection)
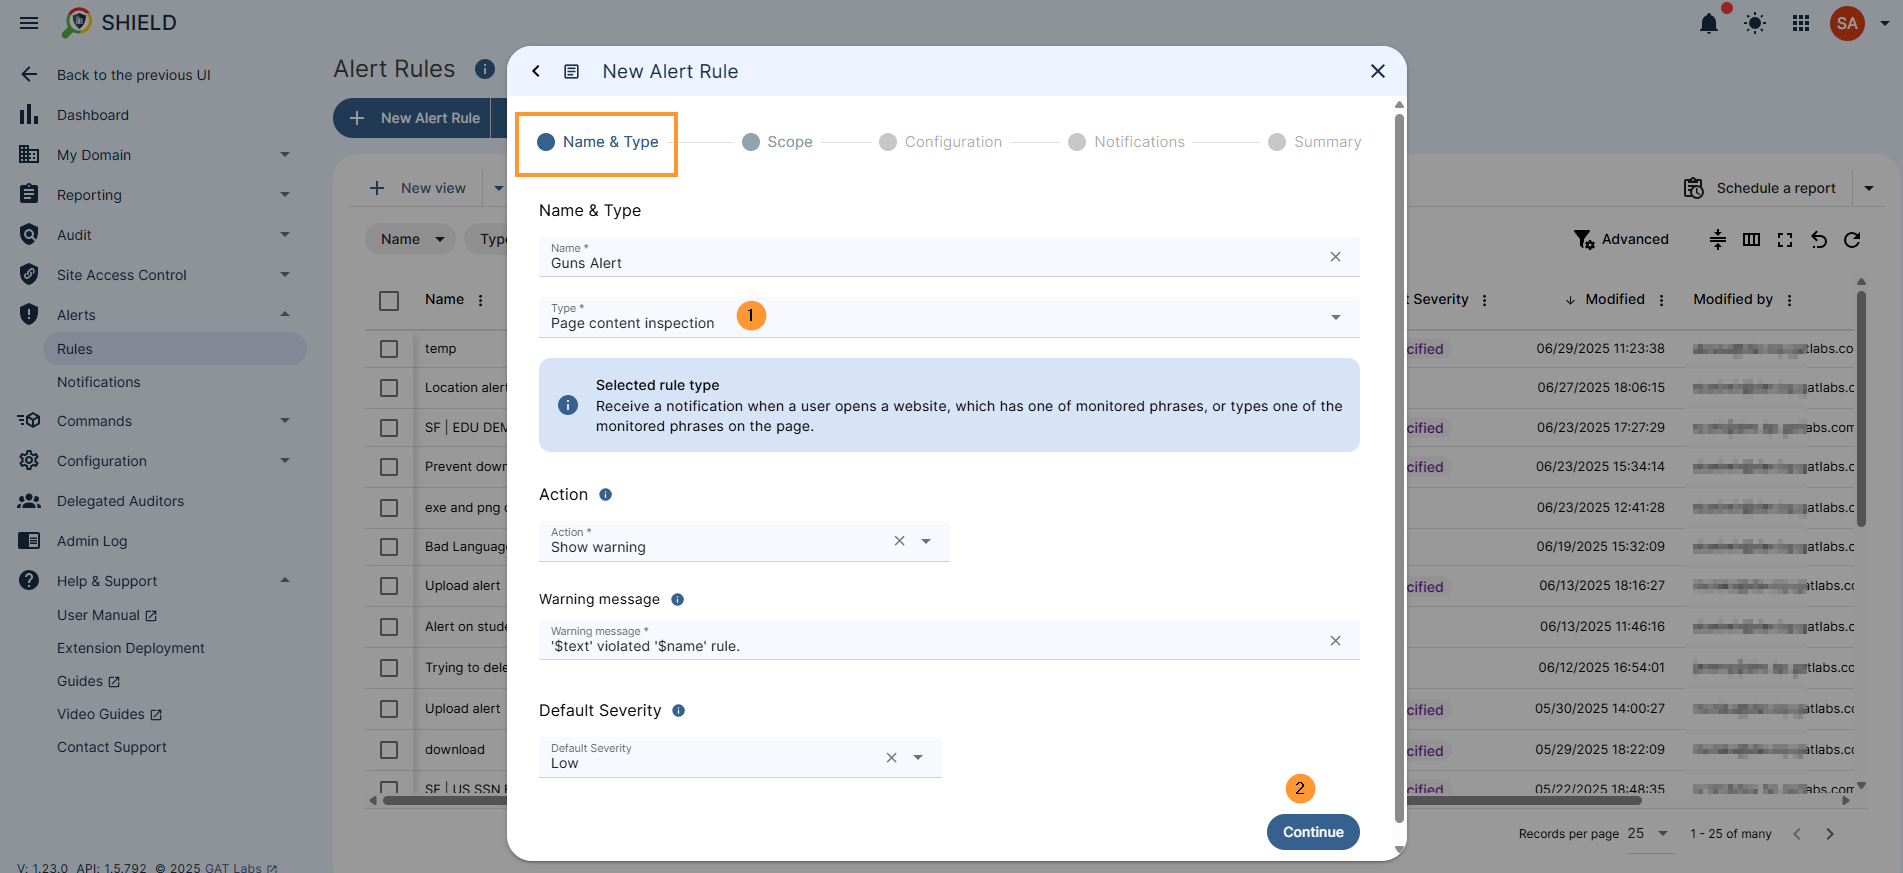
Step 2: Define the Action #
Choose what happens when the alert is triggered:
- Show warning
- Close
- Close without warning
- Redirect
- Redirect without warning
- No action
Warning message – Users will see this message when the alert rule is triggered. To customize the Warning message, you can use the following variables: $name will be replaced with the rule name, $text will be replaced with the visited website URL when a Visit alert rule is triggered. You can edit the message to suit your needs.
For example, you could add a contact person’s details for further assistance, or you can remove any bits of information you prefer not to share with users.
Step 3: Set Alert Severity #
When the Alert Rule is triggered, a notification is created. The severity of the notification indicates its level of importance. “Default Severity” is the value assigned to all notifications generated by this rule.
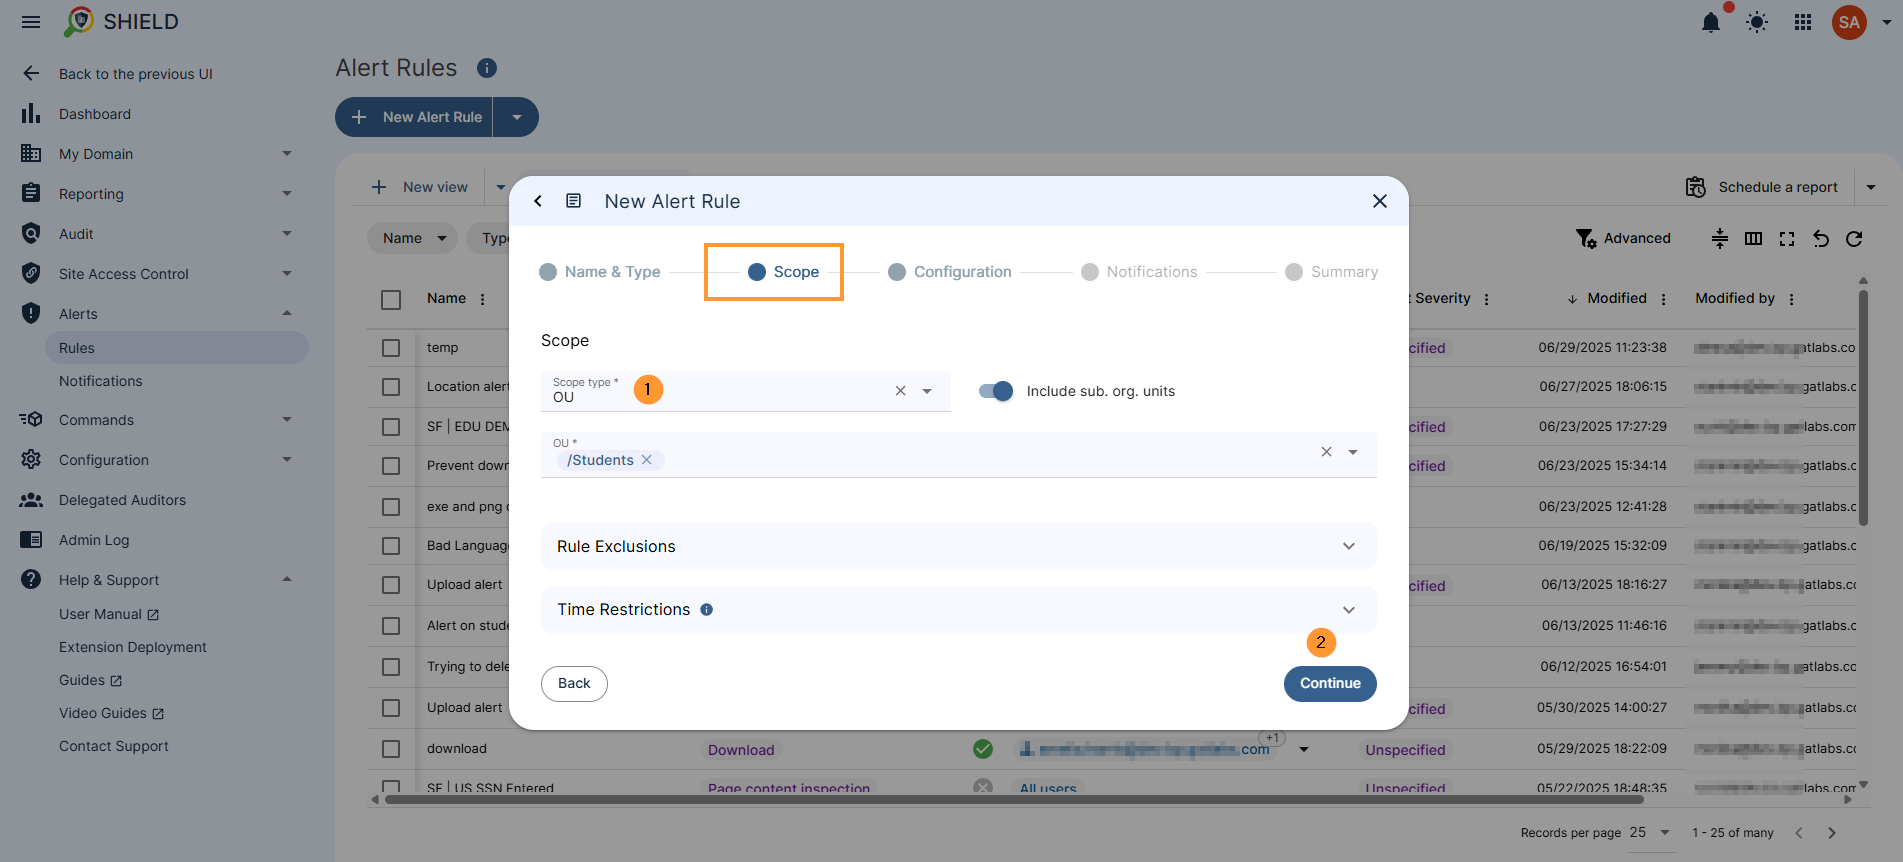
Set Scope and Exclusions #
Select what users will be affected by the rule filtering, the scope of users, rule exclusions, and time restrictions.
- Scope – select the users, you can select one user, a group of users, or an organization. unit of users
- Rule exclusions – select the scope of users who will be excluded from the rule
- Time restrictions – by default, when no time restriction is added, the rule will always be active. To change it, select days and time ranges when the rule will be active.
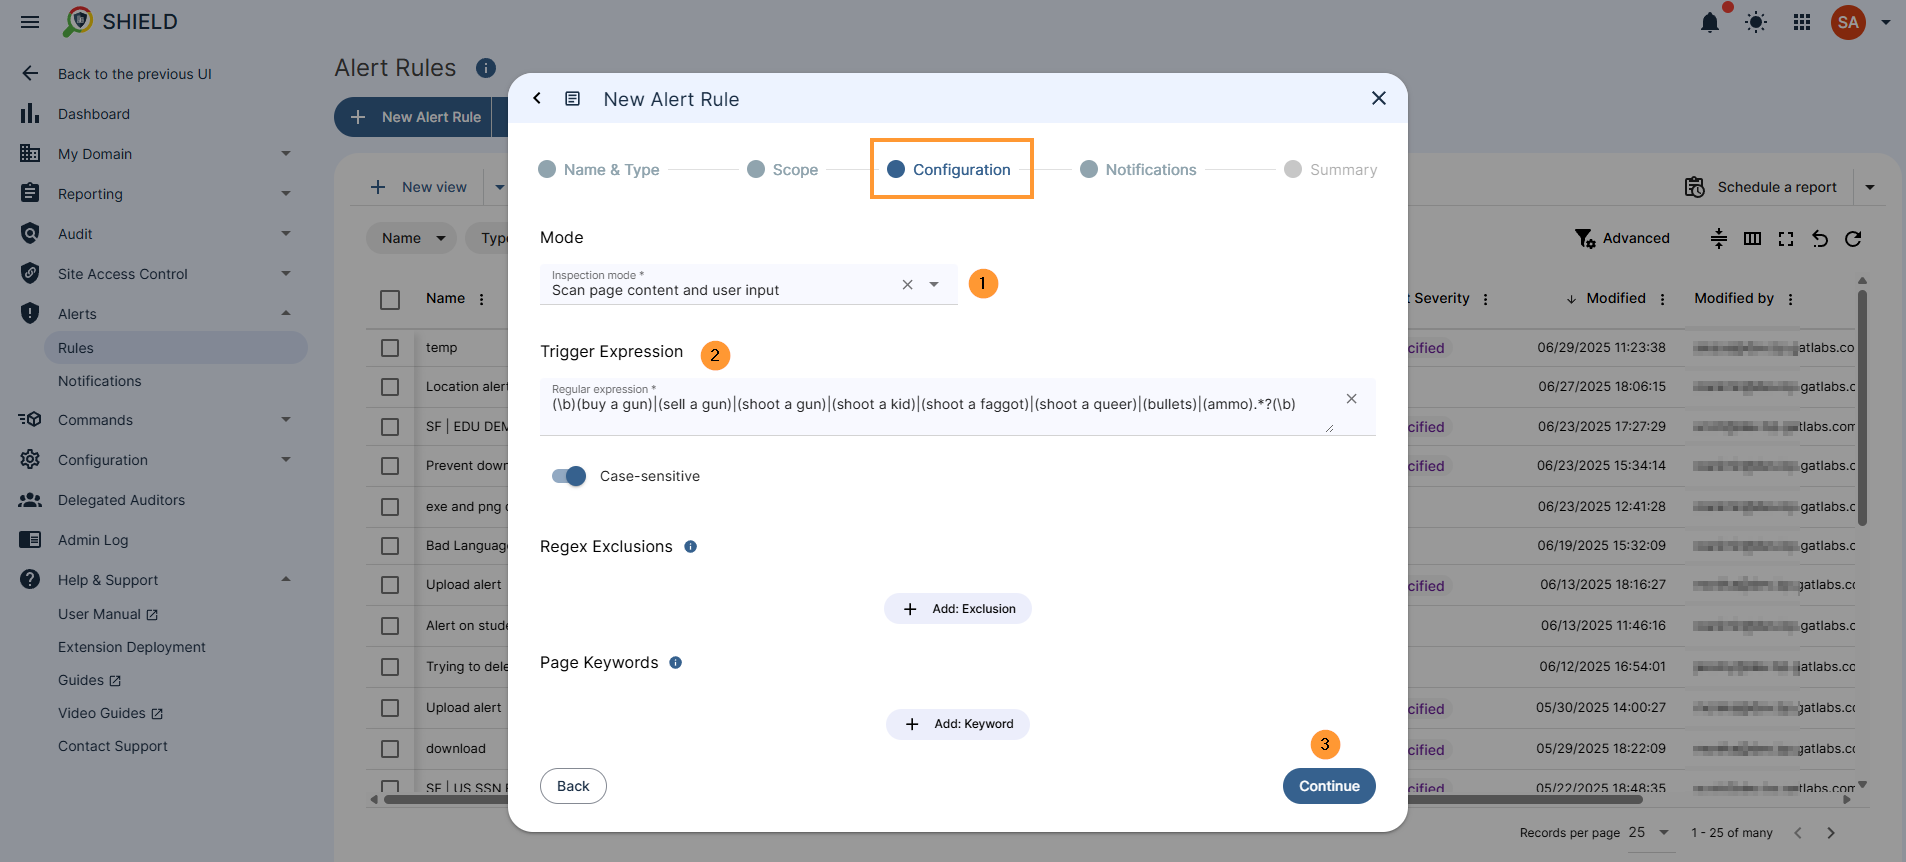
Configuration #
Configure the rule and select Alert mode; each alert will have different modes based on what is applied for.
For example: Inspection mode (Page content inspection)
- Page content inspection – you can select Scan page content and user input, or Scan only user input
- Trigger expression – Enter the Regular expression you want to be checked against.
- Case-sensitive – enable or disable the case sensitivity of the text on the page
- Regex exclusions – Alert won’t be triggered if any of these words are found on the page.
- Page keywords – Enter page keywords to reduce alert sensitivity. Keywords stop the rule from being triggered unless the combined keywords’ weight on the page meets the threshold. The weight of a keyword contributes to the score only once, even if the word occurs many times on the page.
Define Notifications #
In the notifications, fill in the details
- Alert recipient – enter an email if you would like to get an email notification.
- If left blank, the alert will just be reported in the GAT Shield console.
- Notification interval – select how many minutes of interval to be set between the different notifications
- Full alert context – Save website information and include it in notifications
- Screen capture – select the option for the screen capture
- Do not send
- Send in the notification email
- Send in the notification email and save it to the rule creator’s Drive
- Send in the notification email, save it to the rule creator’s Drive, and share it with other alert recipients
- Webcam capture – select the option for the screen capture
- NOTE: The webcam capture must be enabled from within the Google Admin console – not enabled by default
- Do not send
- Send in the notification email
- Send in the notification email and save it to the rule creator’s Drive
- Send in the notification email, save it to the rule creator’s Drive, and share it with other alert recipients
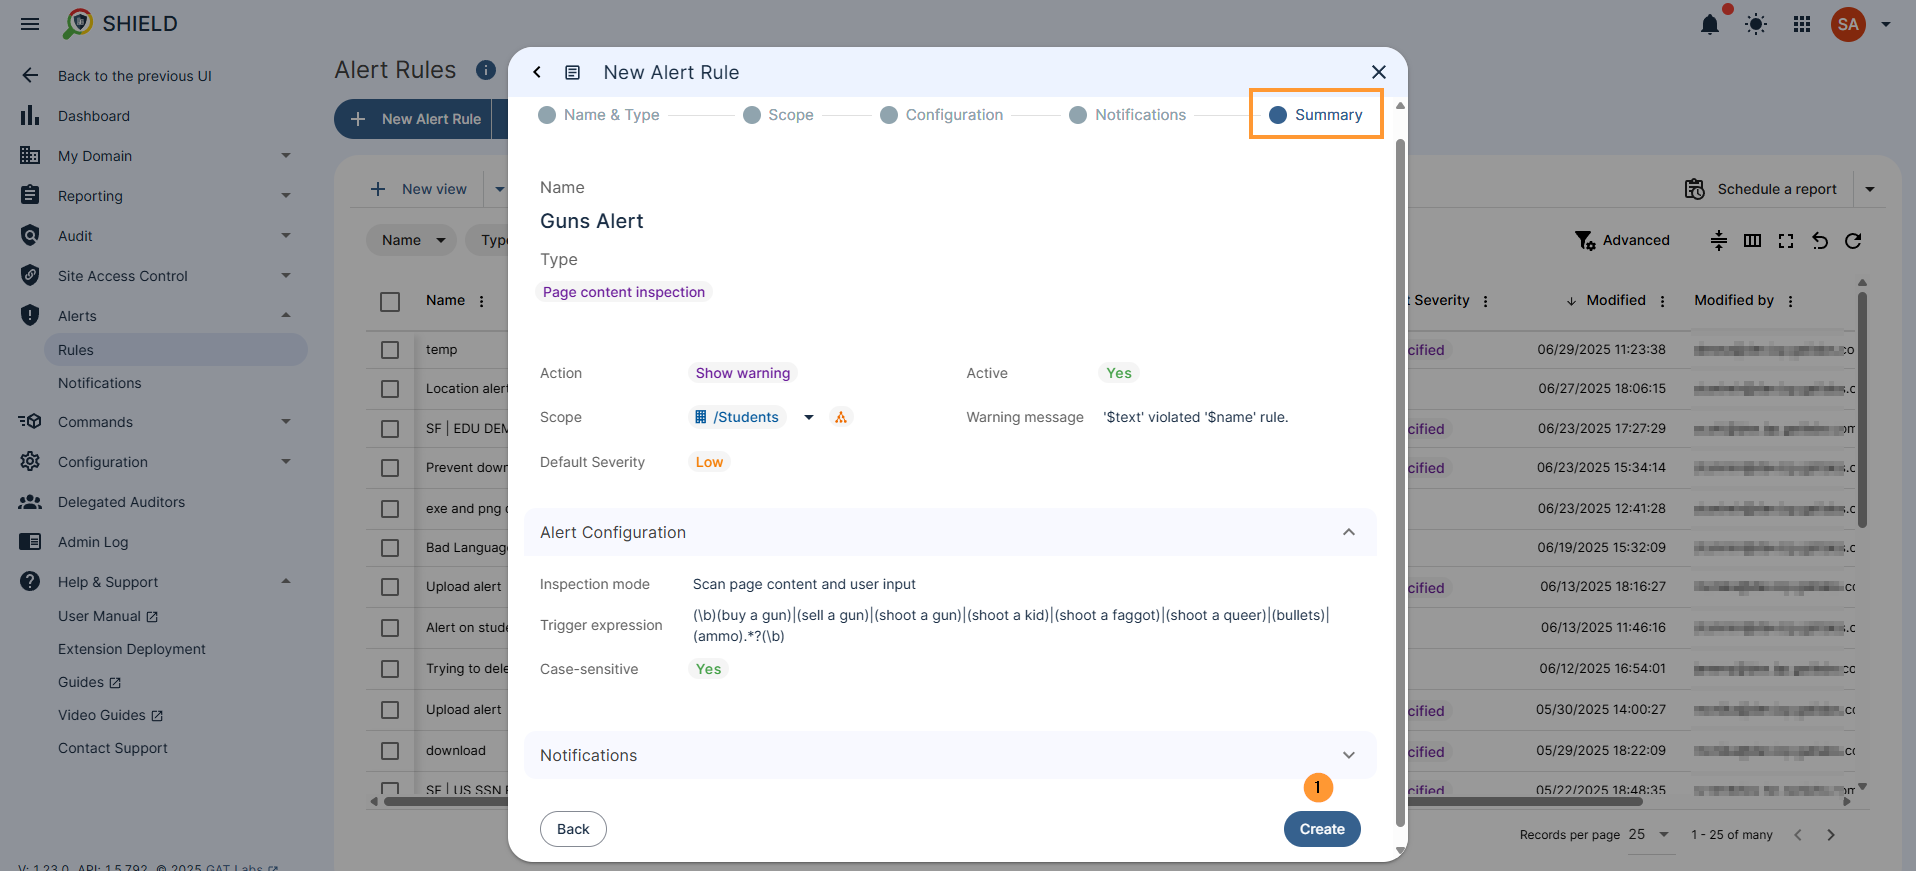
Final Step: Summary #
In the summary tab, review your new alert: what is it about, which users will be affected by it, and click to ‘create’ the rule.
Result: Alert Rule #
When the rule is created, the alert will be triggered by the scope of users for whom the rules are applied.
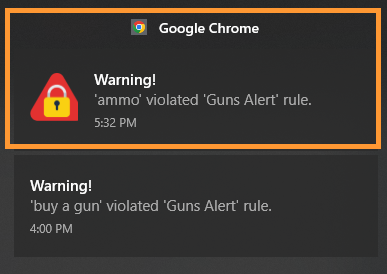
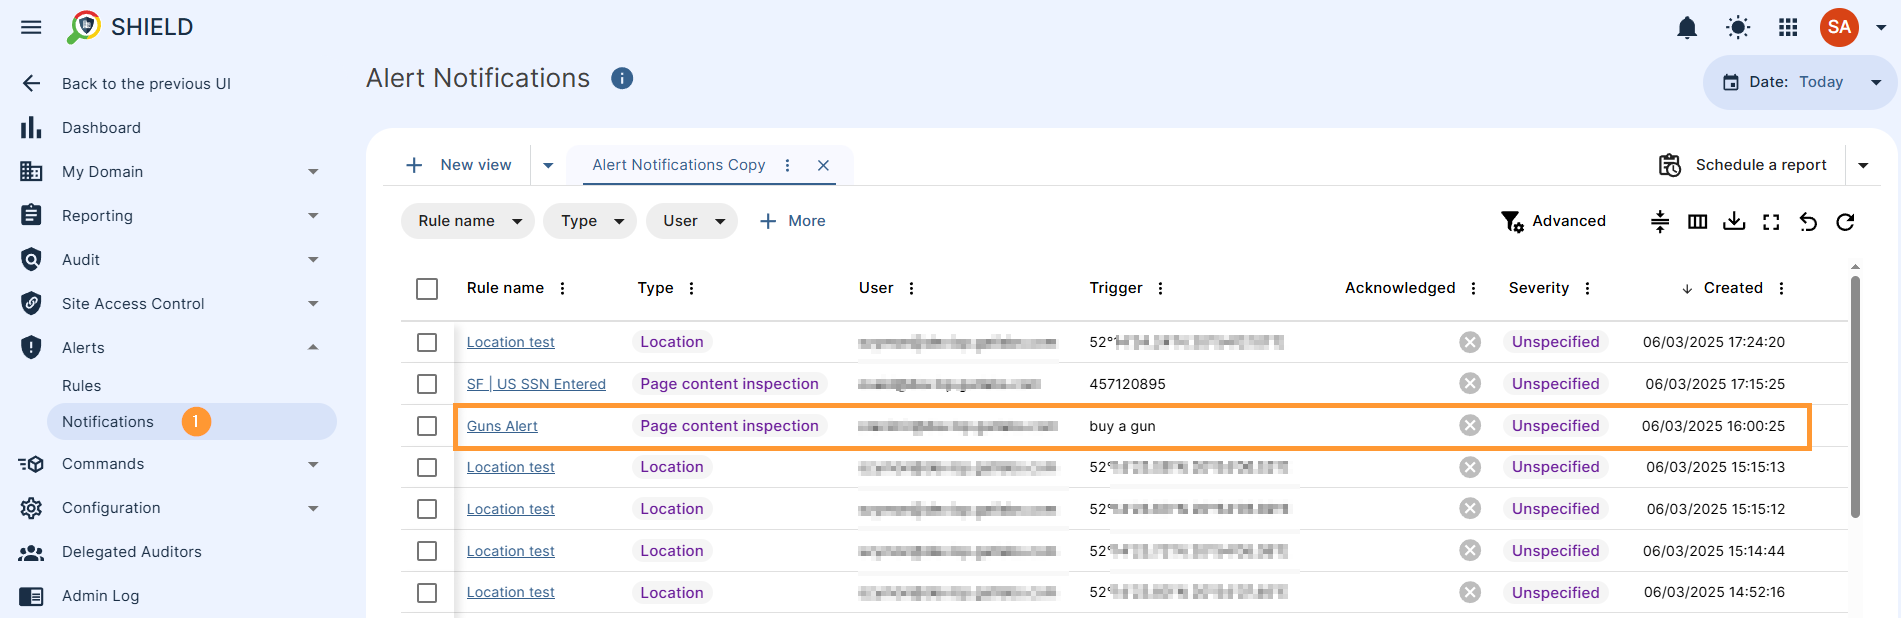
The alert triggered will be displayed in the Notifications center of the Alerts.
Related Articles #
FAQ #
Q: What types of activities can trigger a GAT Shield alert rule?
You can trigger alerts based on site visits, file uploads/downloads, Chrome extension usage, screen time, and more.
Q: Can I block websites or redirect users with alert rules?
Yes. Some actions include auto-closing tabs or redirecting users to a different URL when the alert is triggered.
Q: How long are alert logs stored?
They’re stored in GAT Shield’s reporting section as part of your audit trail. Duration depends on your organisation’s retention policies.


