Data Studio provides auditing capabilities for all Google Data Studio (Looker Studio) reports.
To access these features, navigate to GAT+ > Data Studio.
Here, Admins can view and audit all Looker Studio files.
- The Metadata associated with the Data Studio files will be presented
- Actions – actions that can be taken on any data studio file/reports

Quick Access Table #
A quick-access table will indicate the accessibility of the assets(2), including:
- Assets accessible from outside the domain
- Assets with domain-wide access
- Assets in Trash
Click on any of the values to see details for them
Remove permissions on data studio files #
For each Looker Studio file the admin can remove and change the permissions
Bulk Management #
Admins can select multiple Data Studio reports to perform bulk actions such as:
- Add new permissions (User or Group with Editor or Viewer permissions)
- Revoke all external permissions
- Revoke link access
- Revoke all editors
- Revoke all viewers
- Revoke all permissions
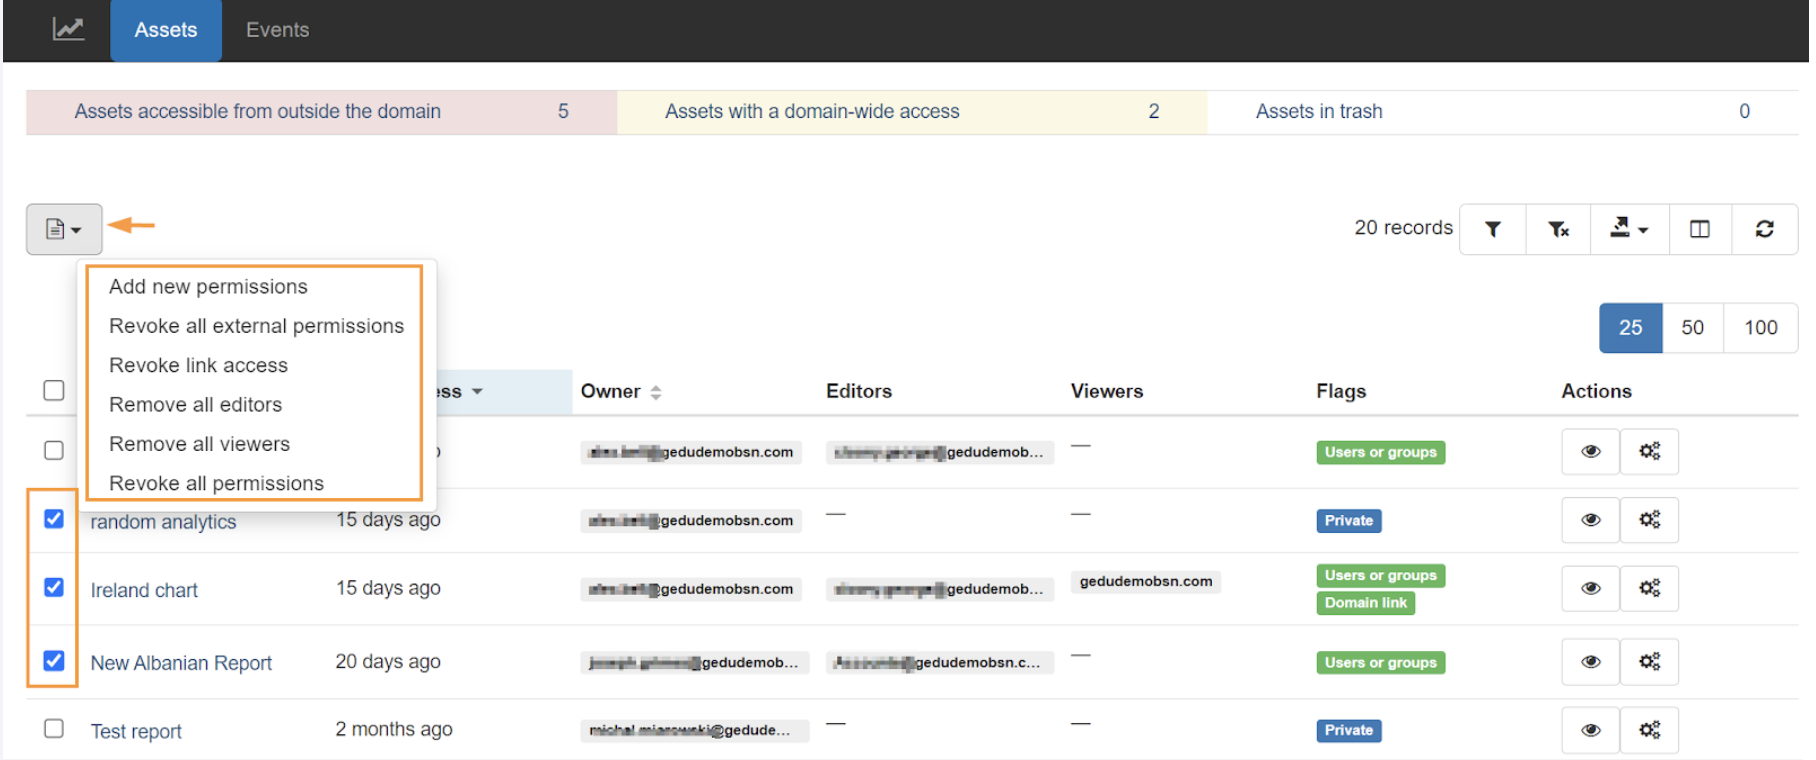
To confirm the removal of selected permissions, click ‘Accept’.
Individual Asset Management #
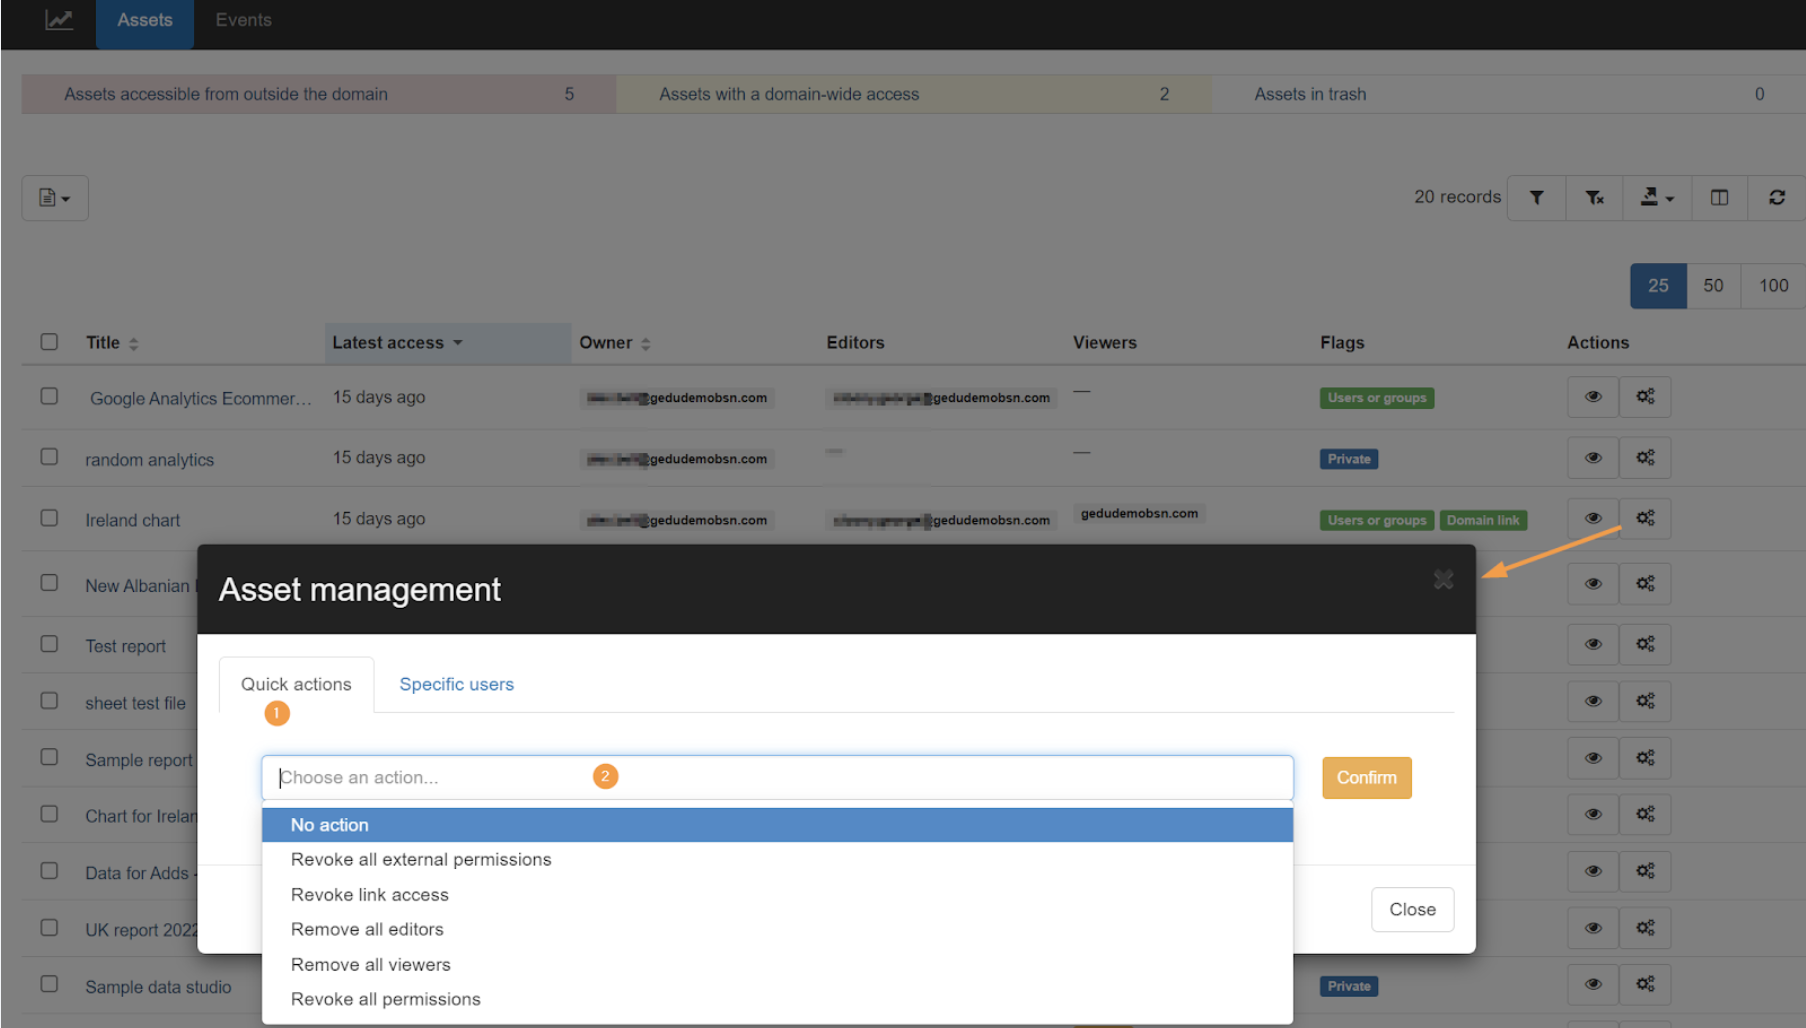
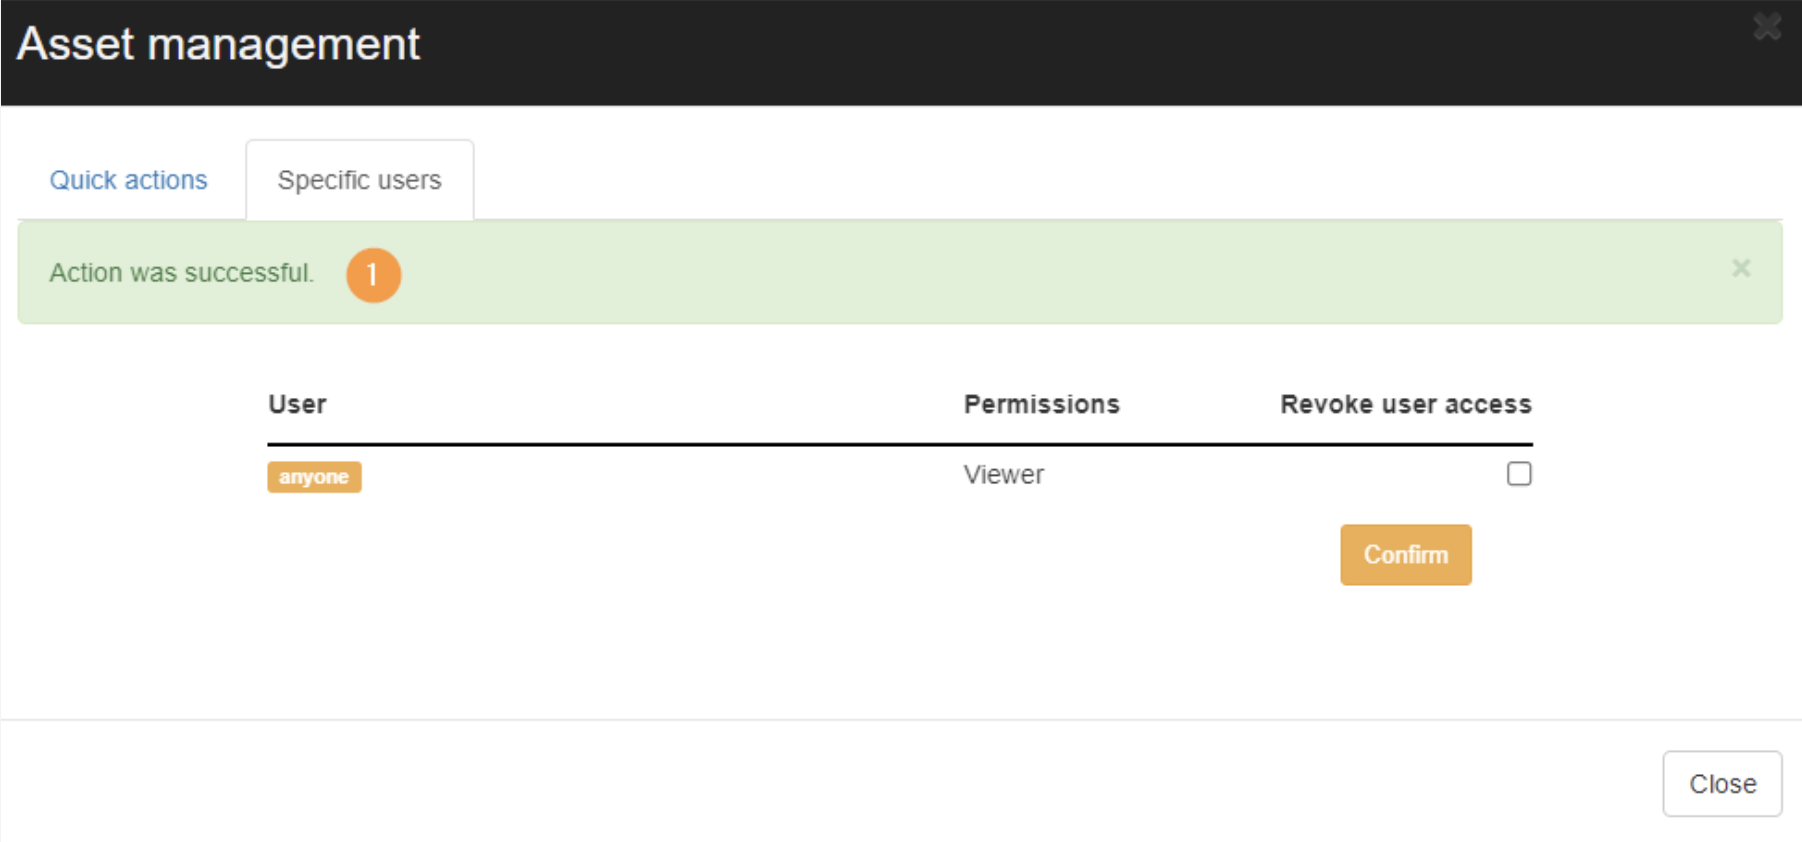
For specific file management, click on ‘Asset Management’ under Actions and select one of the quick actions:
- No action
- Remove all external permissions
- Remove link access
- Remove all editors
- Remove all viewers
- Revoke all permissions
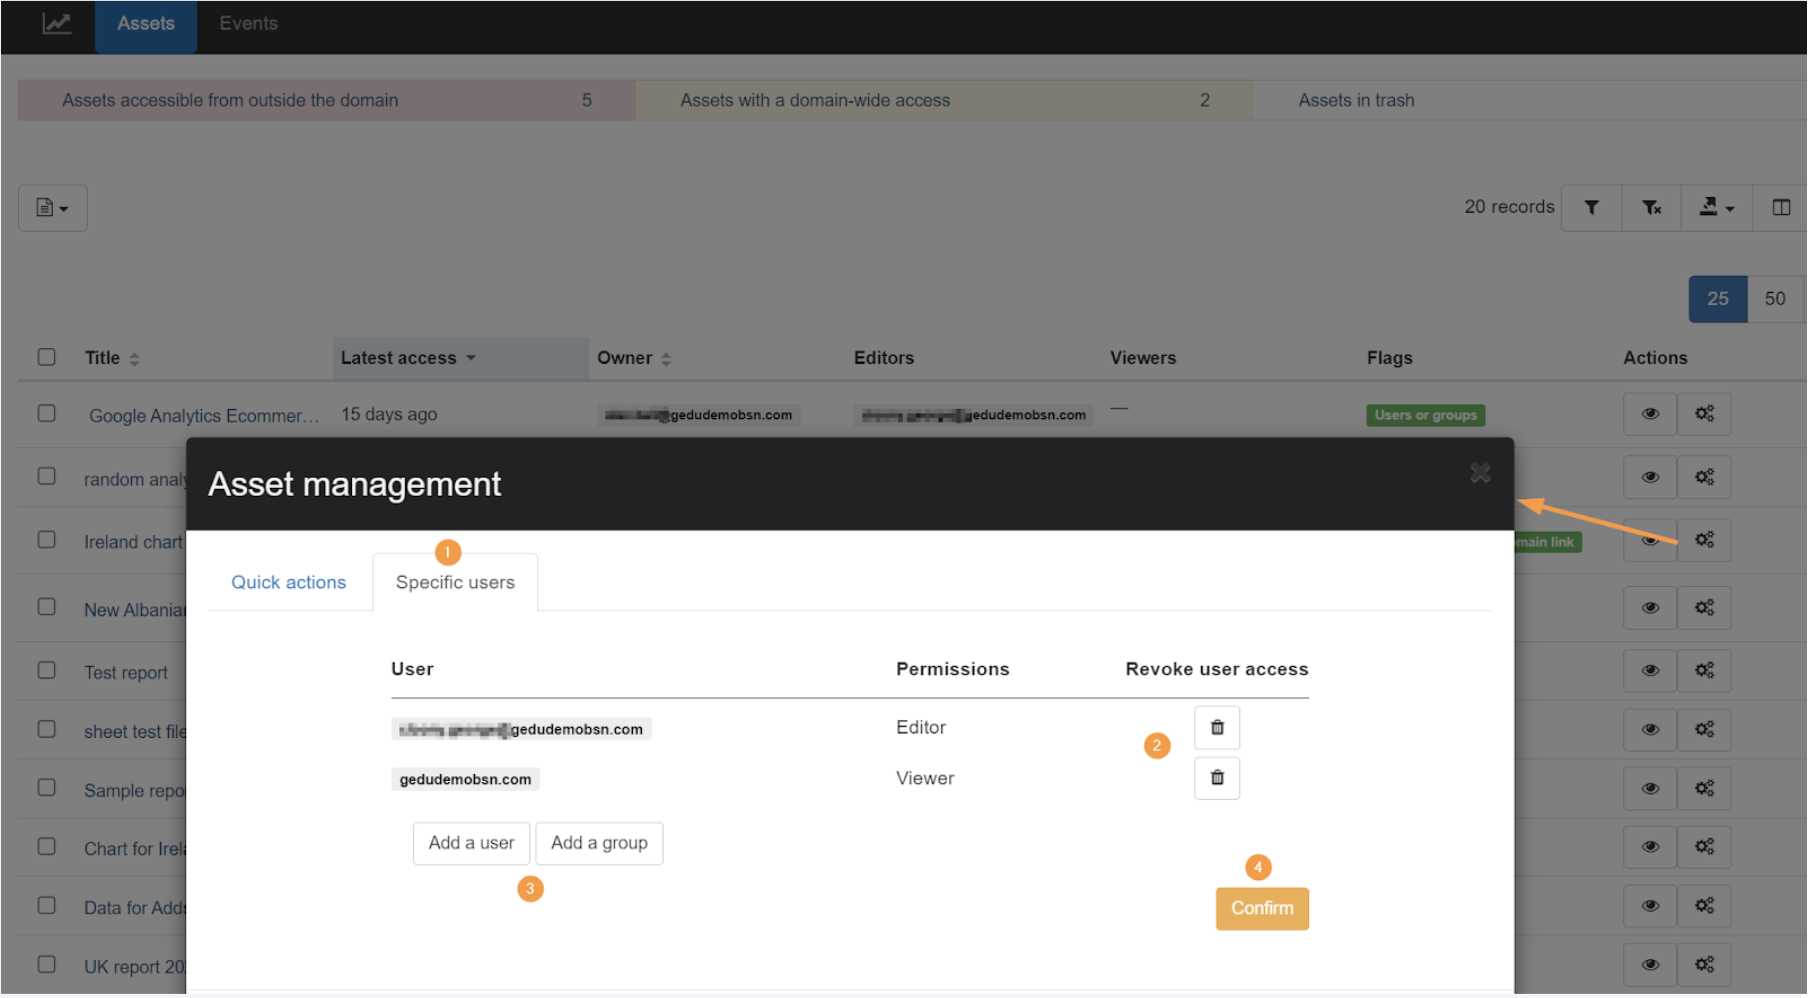
For specific user actions, you have the option to:
- Revoke user access
- Add a user or group and choose the permission level
To confirm the action taken, click ‘Confirm’.
Conclusion #
As a result, Admins can effectively conduct a Data Studio Audit with GAT+ by changing selected assets and removing permissions as needed.
View details #
To view the details for any asset click on the Eye icon.

View more information about the Asset itself.
- Asset – view the metadata for the asset
- Events – view the events that occurred on the Asset
- Embedded sources events – view the embedded events
Schedule Report #
You can schedule a Data Studio metadata report by applying an appropriate filter and receiving reports based on that specific filter and the Occurrence time specified in the settings, as per the example shown below.
First, apply a filter in the Data Studio section of GAT+ by clicking on the funnel icon on the right side of the dashboard (1). The DataStudio filters window is displayed and the scheduled report can be configured there.
Name the report (2), apply a relevant filter (3), enable the Scheduled report (4), select the Occurrence time (5), enable the report if you want it to start working right away (6), type the Recipients email addresses (7), and finalize the settings by clicking on Apply & Schedule (8).
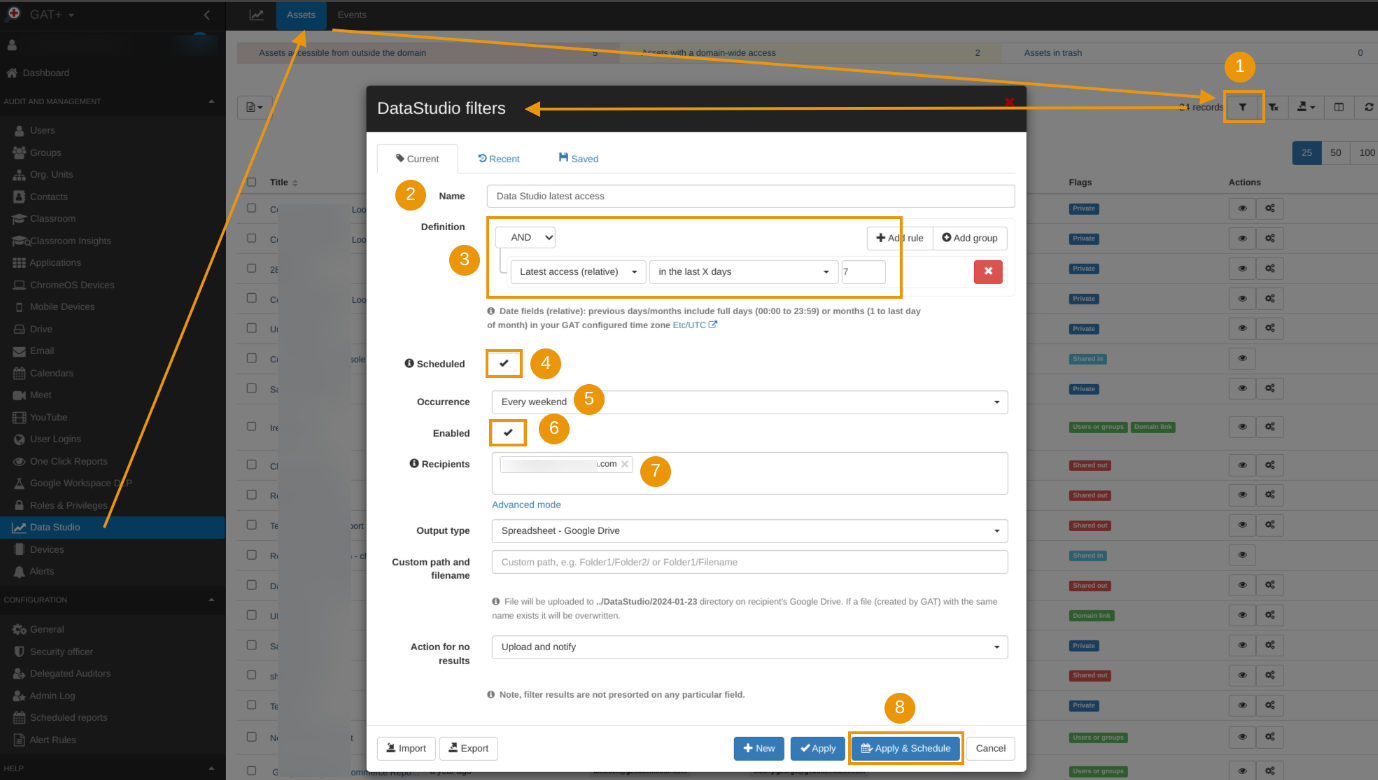
Once done, the report is configured and up and running. It can also be reviewed and amended under the Scheduled Reports section of GAT+.
Events #
The Events tab will show the events that occurred on the Data Studio assets.
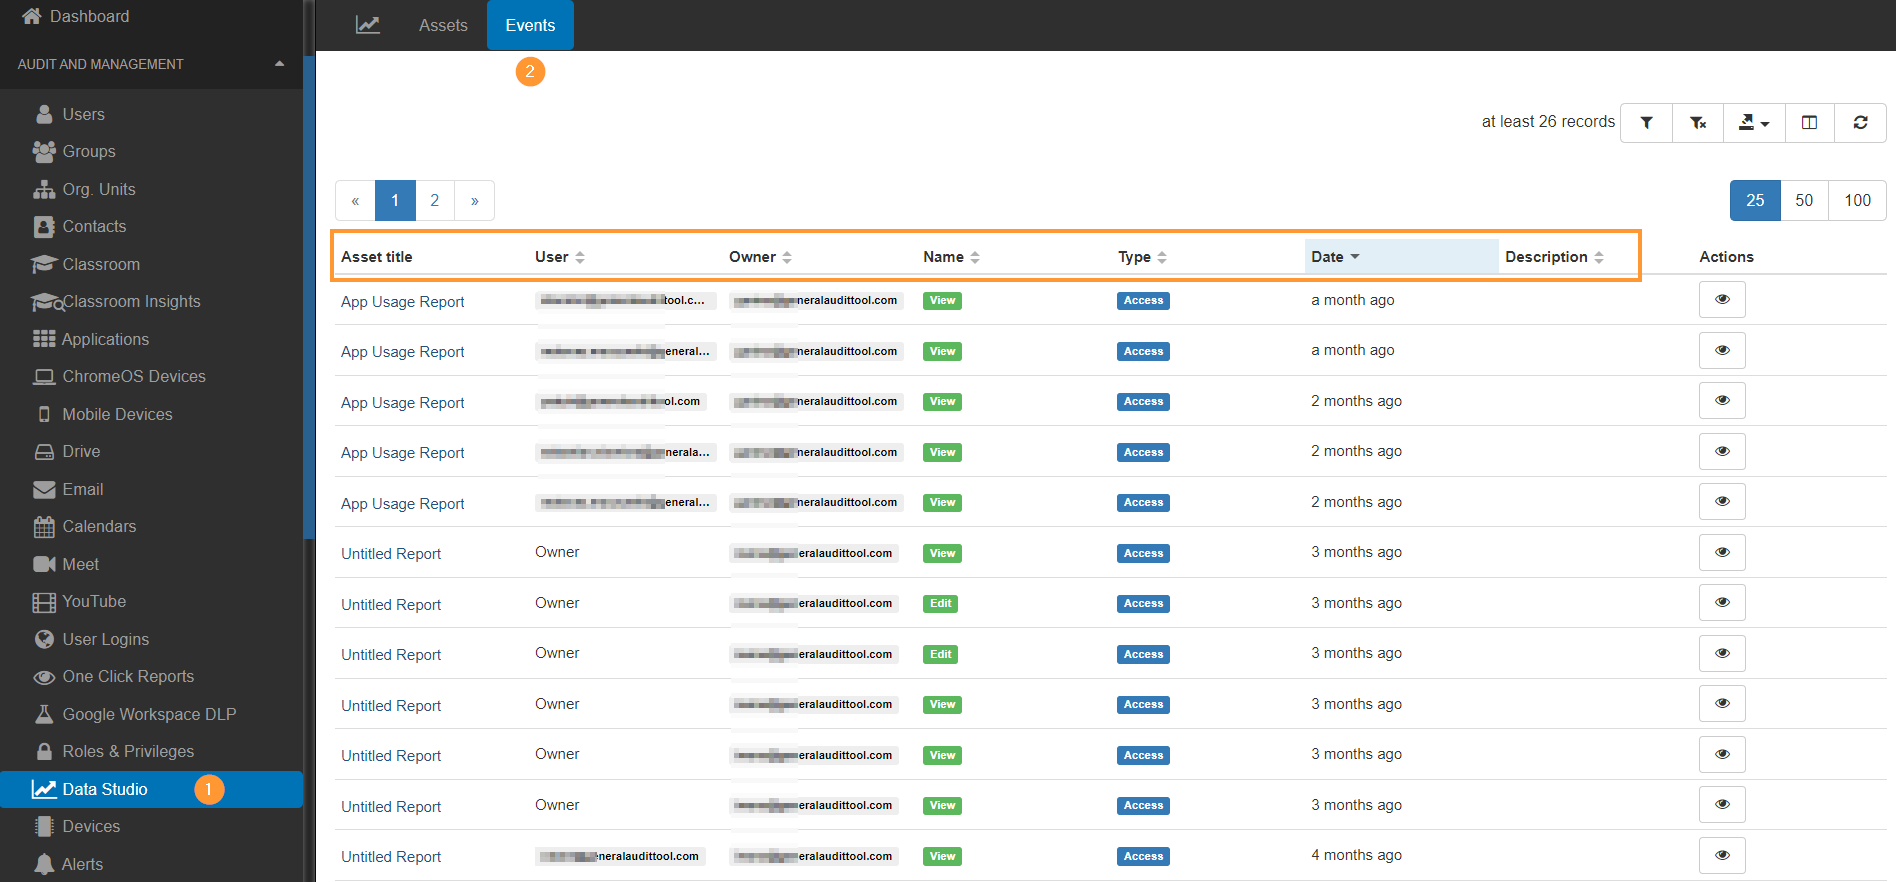
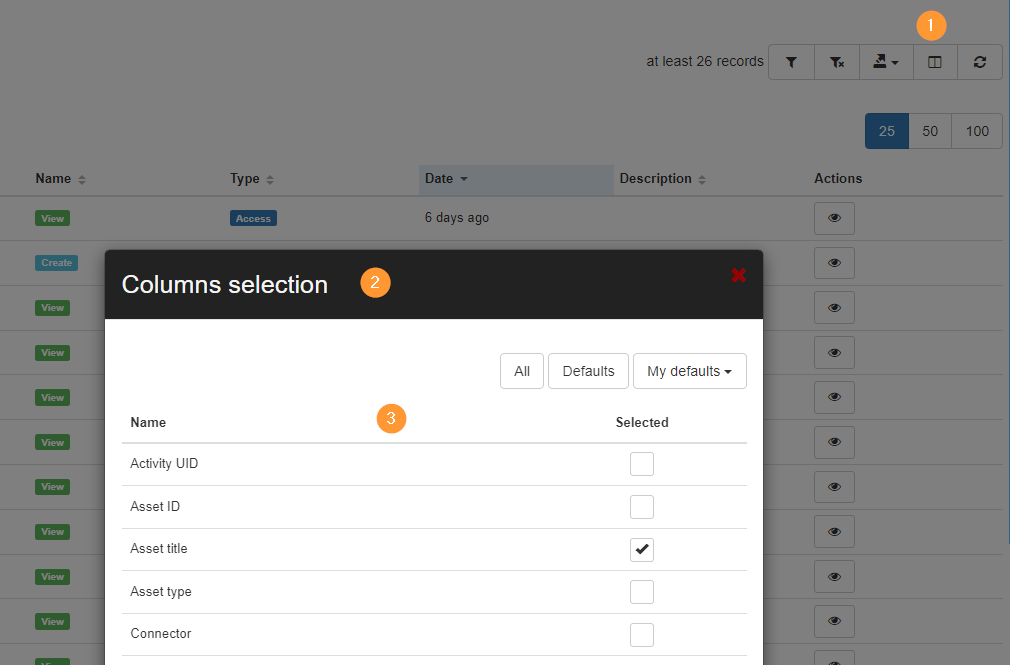
Column visibility #
Select the Column visibility and view and audit all the events that are reported by the APIs:
The Events reported are as follows:
- Activity UID
- Asset ID
- Asset title
- Asset type
- Connector
- Connector type
- Current value
- Data export type
- Date
- Description
- Name
- Owner
- Parent Workspace ID
- Parent asset
- Previous value
- Prior visibility
- Type
- User
- Visibility
