

Introduction #
GAT Shield is a chrome extension deployed to domain users. This extension allows the Google Workspace Super Admins to view and audit the browsing activity of the entire domain users.
It is a DLP solution for a Google Workspace domain, allowing Google Admin to set up and use the tool as a Web Filter for the users and enabling Alerts to be generated based on the user browsing behavior while using GAT Shield in the Chrome browser. Admin can define what data will be monitored on the deployed extension.
Admins can choose to monitor users by Networks, Users, and Chrome Devices.
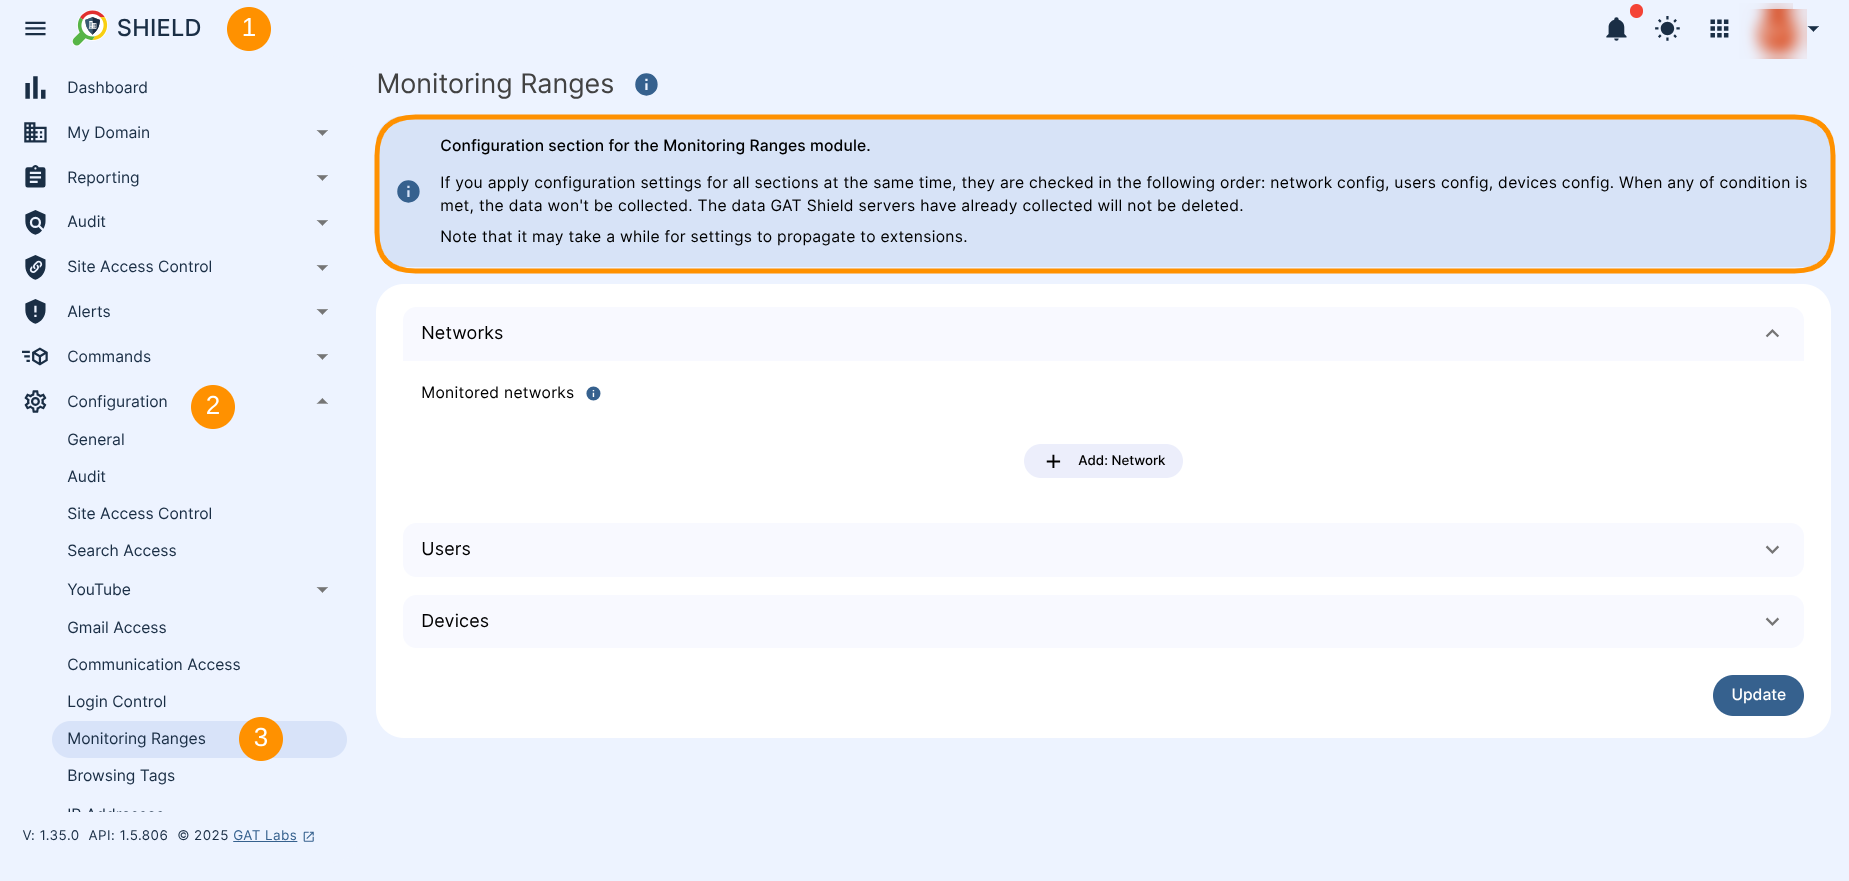
Navigate to GAT Shield > Configuration > Monitoring Ranges
Networks monitoring #
Admin can select Monitored Networks – Allowlist.
Monitored networks
- Monitor only selected networks/hosts.
- For network addresses (that must end with a CIDR) Shield will collect data for all hosts inside this network.
- For a device with multiple IP addresses (on different interfaces) if just one address matches the allow list then the device will be considered to be allowed.
- Use single host address (eg. 72.14.0.154) or network address (eg. 64.233.187.99/8).
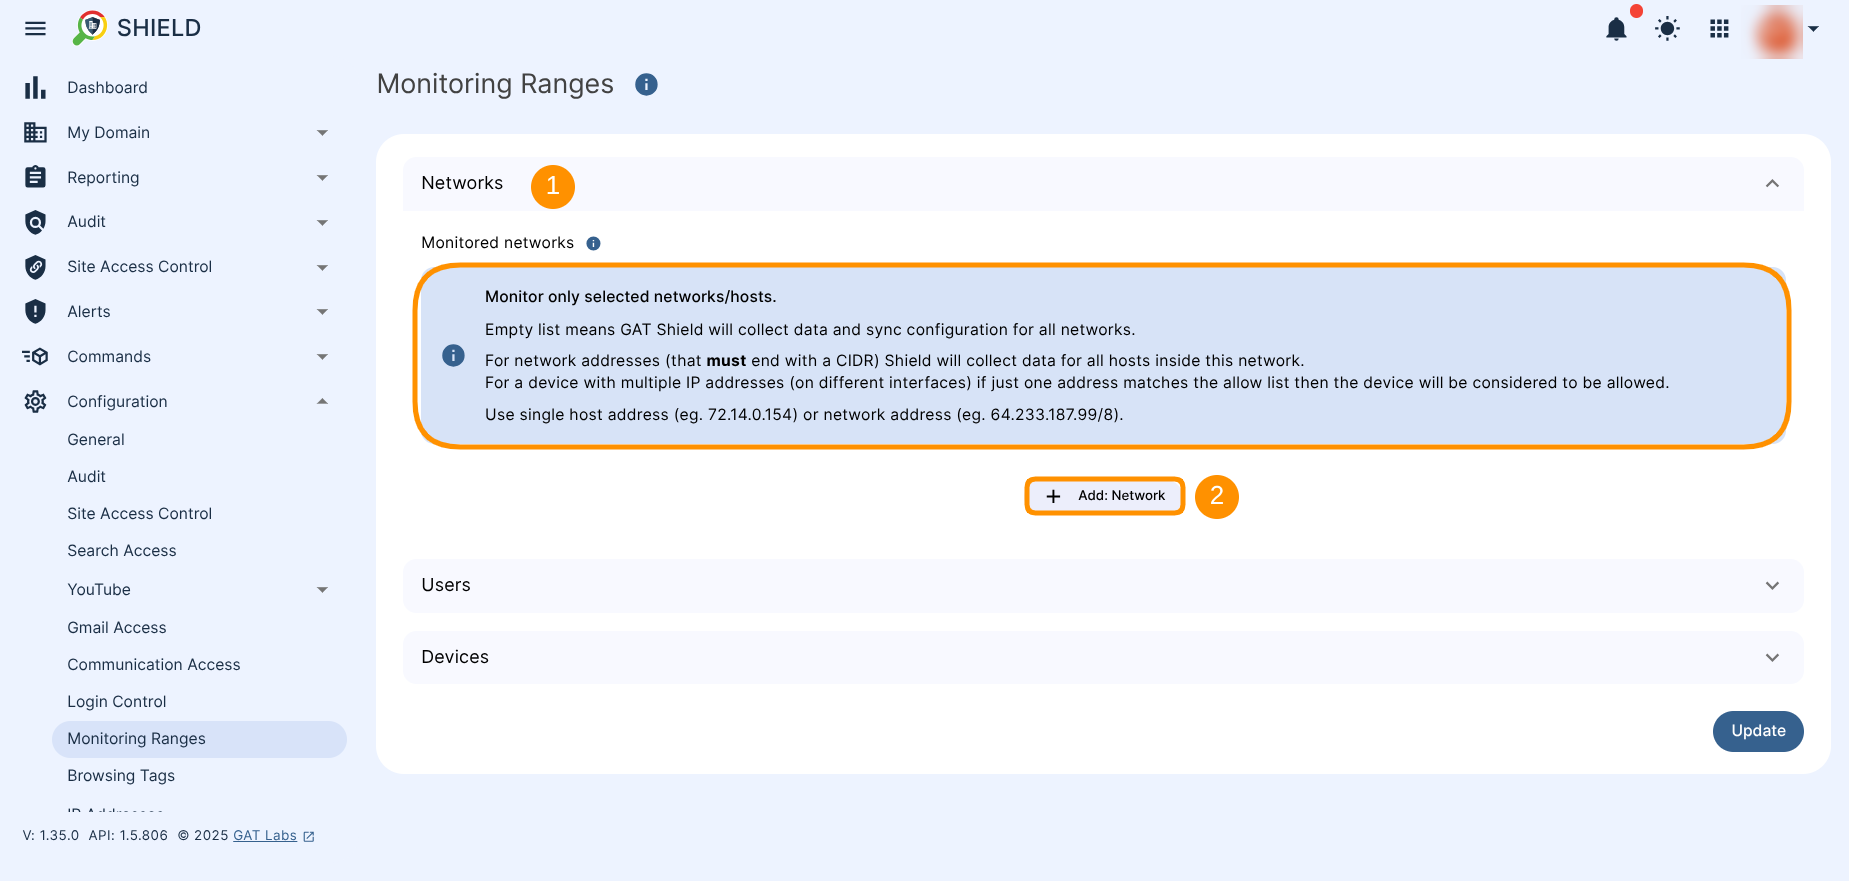
- Use +Add: Network button (2) to configure the settings for monitored networks.
Users monitoring #
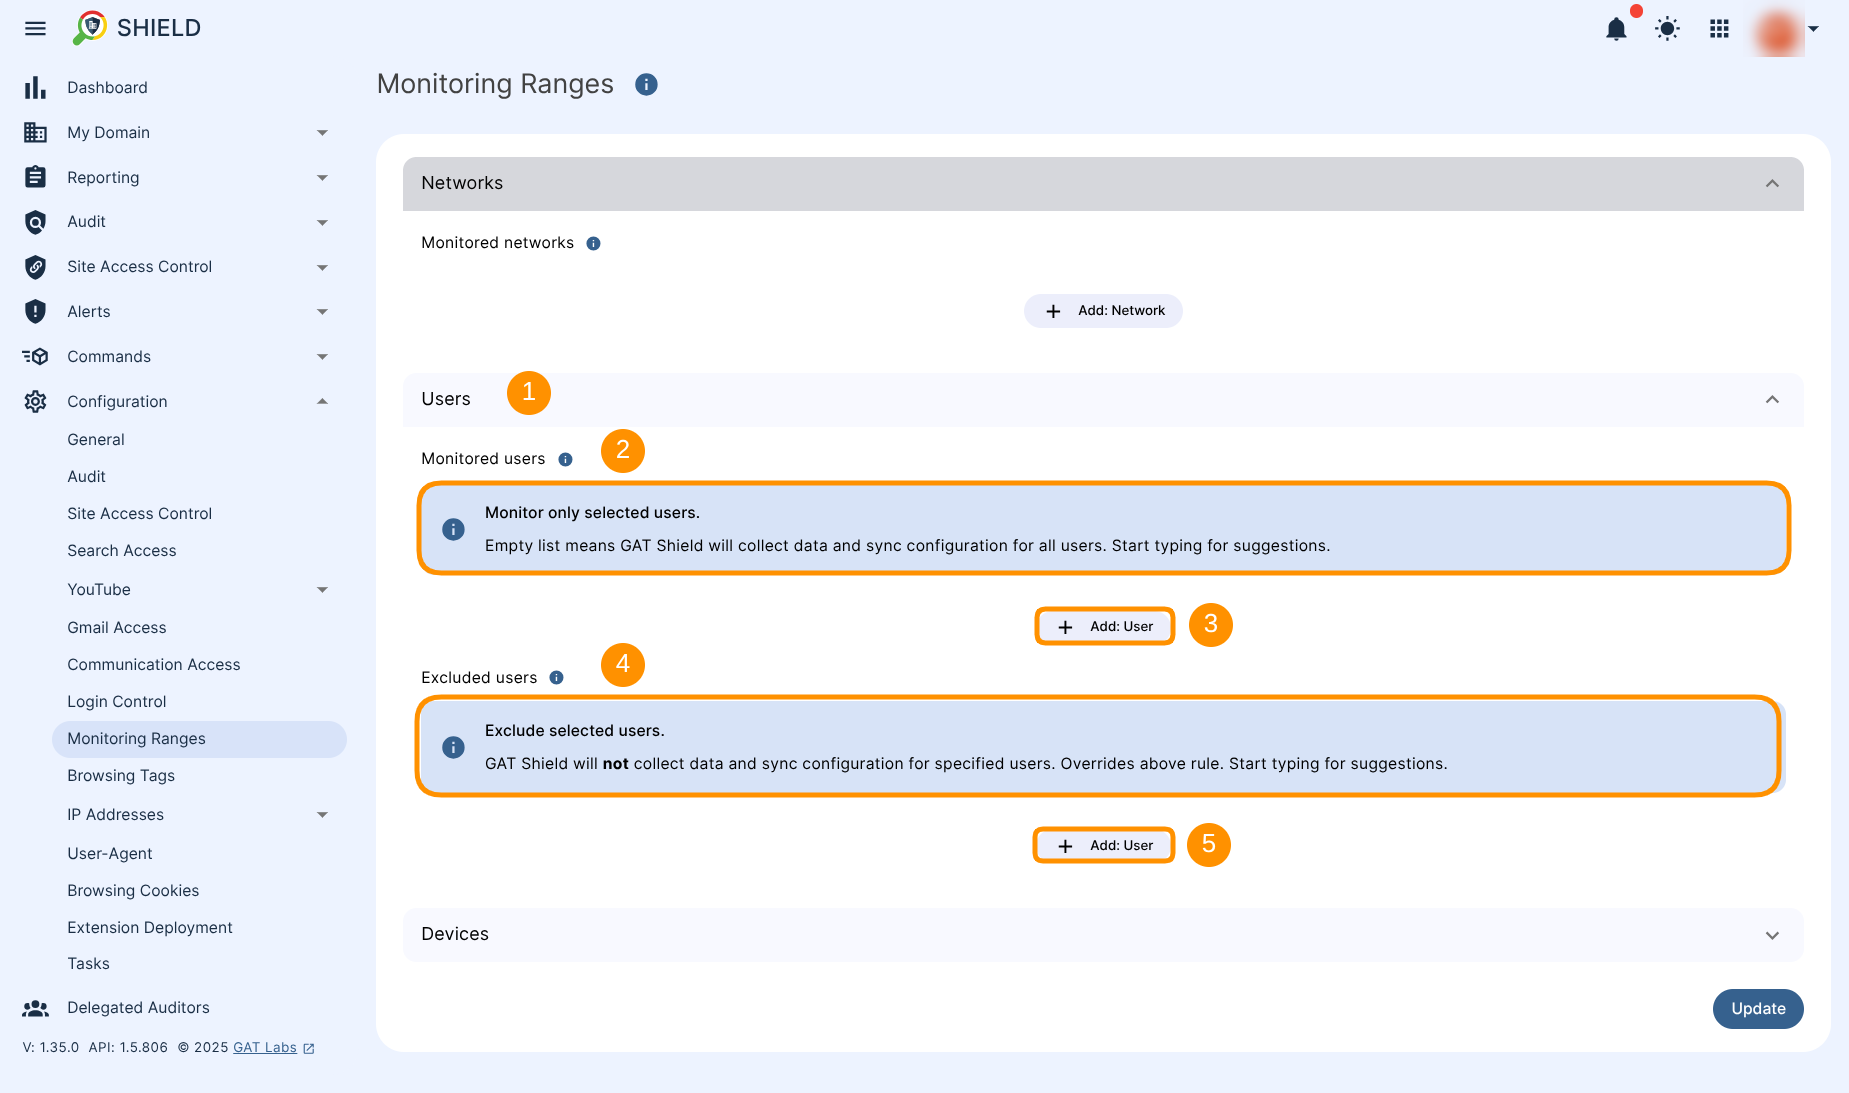
Under the Users section (1) fill in the details for Monitored users (2) to define the monitoring range of users.
Monitor only selected users
- Empty list means GAT Shield will collect data and sync configuration for all users.
- To customise the scope of monitored users, use +Add: User button (3). Start typing for suggestions.
Excluded users
Use the Excluded users section (4) to define users who will not be monitored
- If set GAT Shield will NOT collect data and sync configuration for users specified. Overrides above rule.
- Use +Add: User button (5) to configure settings for users excluded from monitoring. Start typing for suggestions.
Devices monitoring #
Admins can select to monitor their environment by Devices (1), based on the device serial number. Select all registered Chrome devices at once. This is particularly useful for schools as it allows Admins only to monitor activity on school-owned Chromebooks.
Monitored devices (2)
- Empty list means GAT Shield will collect data and sync configuration for all devices, else only specified.
- Monitored device must be a correct Chromebook’s serial number.
- Use +Add: Device button (3) to configure settings for monitored devices.
Exclude devices (4)
- If set, GAT Shield will NOT collect data and sync configuration for devices specified. Overrides the above rule.
- Use +Add: Device button (5) to configure settings for devices excluded from monitoring.
Apply only for ChromeOS devices (6 – 7)
- Monitor ONLY enrolled ChromeOS Devices with known serial numbers. Devices that are NOT enrolled in ChromeOS devices will NOT be monitored.
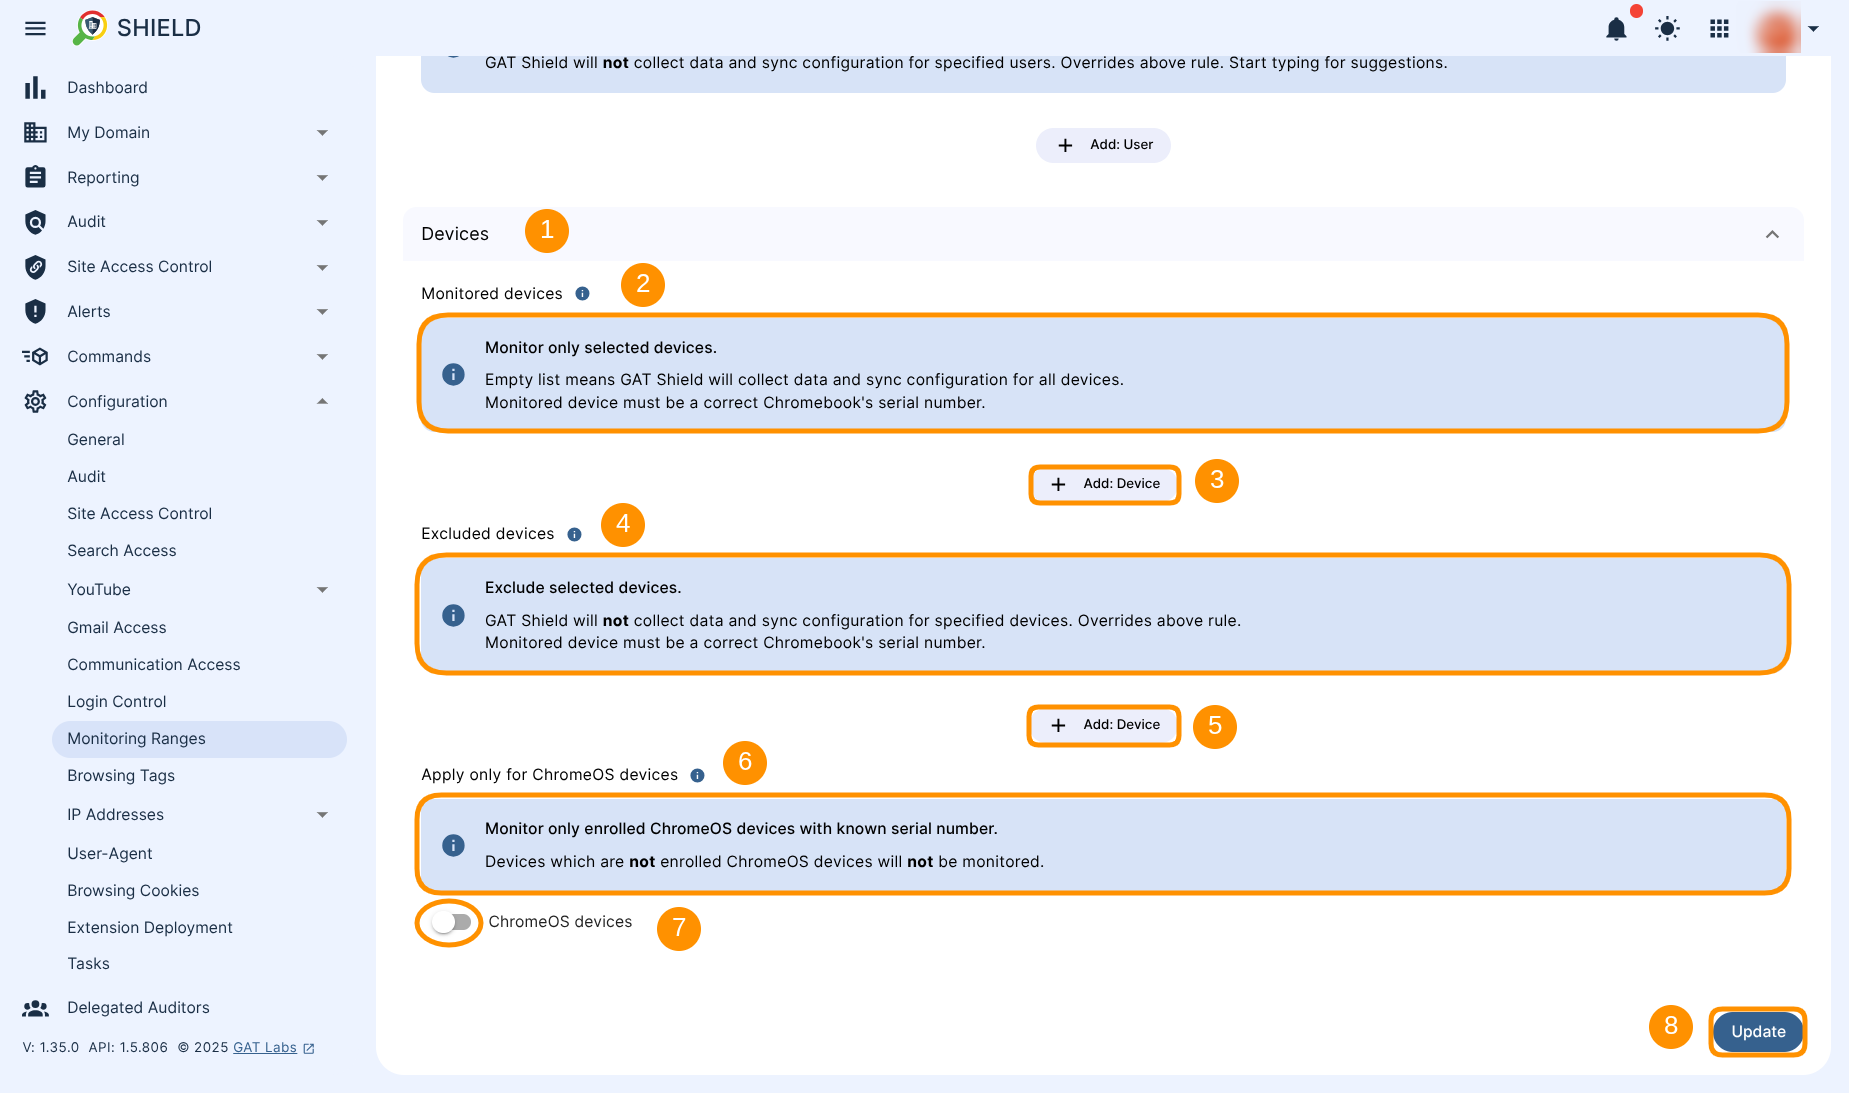
Click on the Update button (8) to save the settings.


