

How to Set GAT Shield’s Inappropriate Language Alert #
GAT Shield helps Google Workspace Admins protect their entire domain from the use of inappropriate language by their domain users by creating and setting an alert rule.
By default, the Page content inspection alert rule is pre-configured to detect the disallowed user’s typing behavior.
Thus, whenever the user types a forbidden word, either on Gmail, chat, document,/or anywhere on the visited page, the GAT Shield alert rule detects that within a second and displays a warning message to that user in question.
At the same time, an alert notification is sent to the administrator via email that notifies them of that behavior and provides insights on the event that has occurred.
That rule can be enhanced to scan throughout the entire user’s page with one mouse click, to scan and alert the entire page option in the alert’s configuration.
Configure the alert rule for Page content inspection #
Admin can set up an Alert rule for Page content inspection
This Alert rule inspects the current page the user is on and will generate an alert if the user types specific words based on the Regex in the rule.
Navigate to GAT Shield > Alerts > Rules >Add rule from template
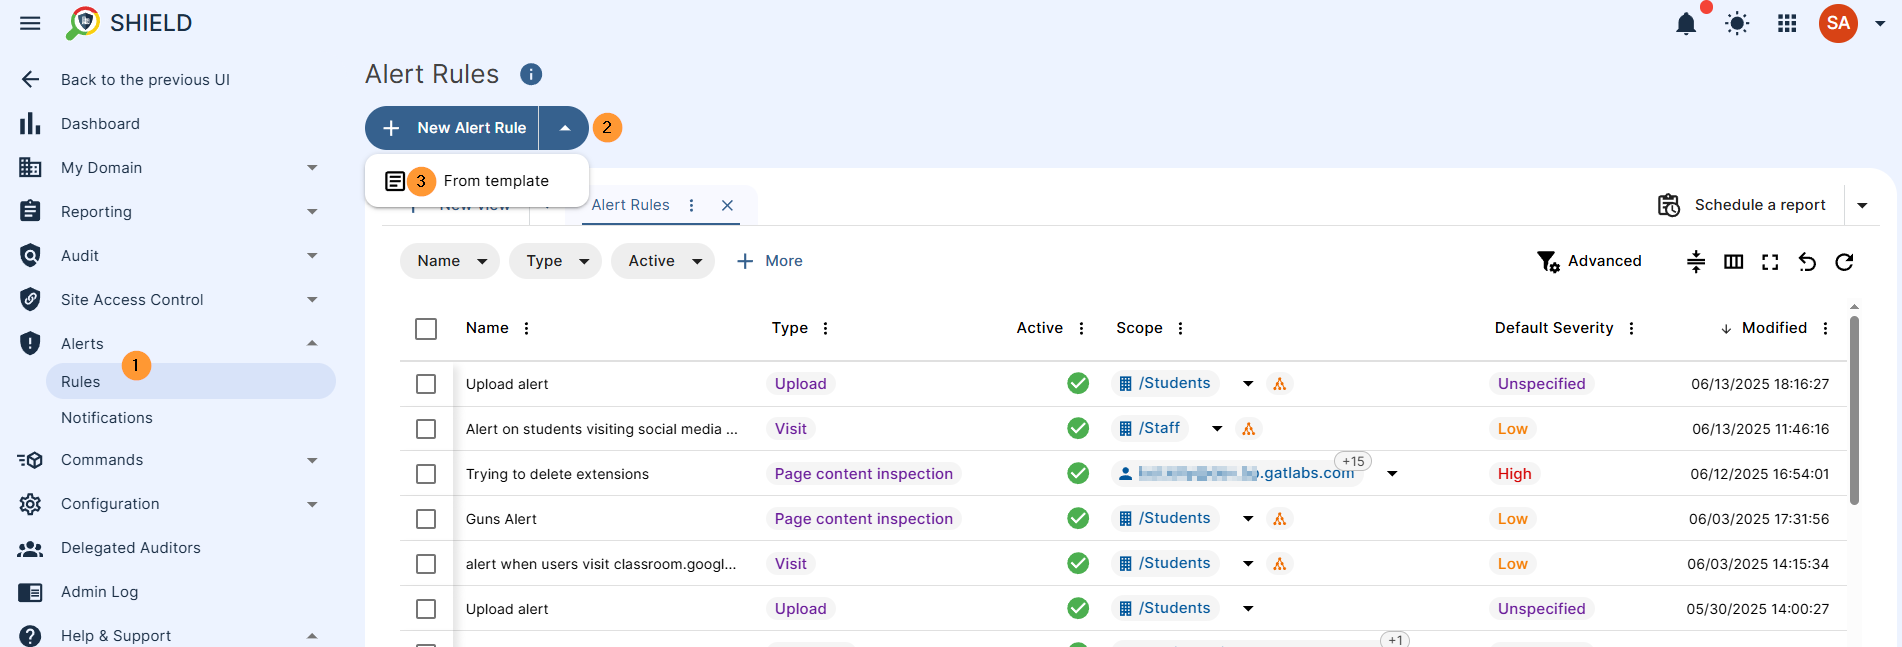
A pop-up window will be displayed. In the Type, select “page content inspection“, then click on the Template
Use a template #
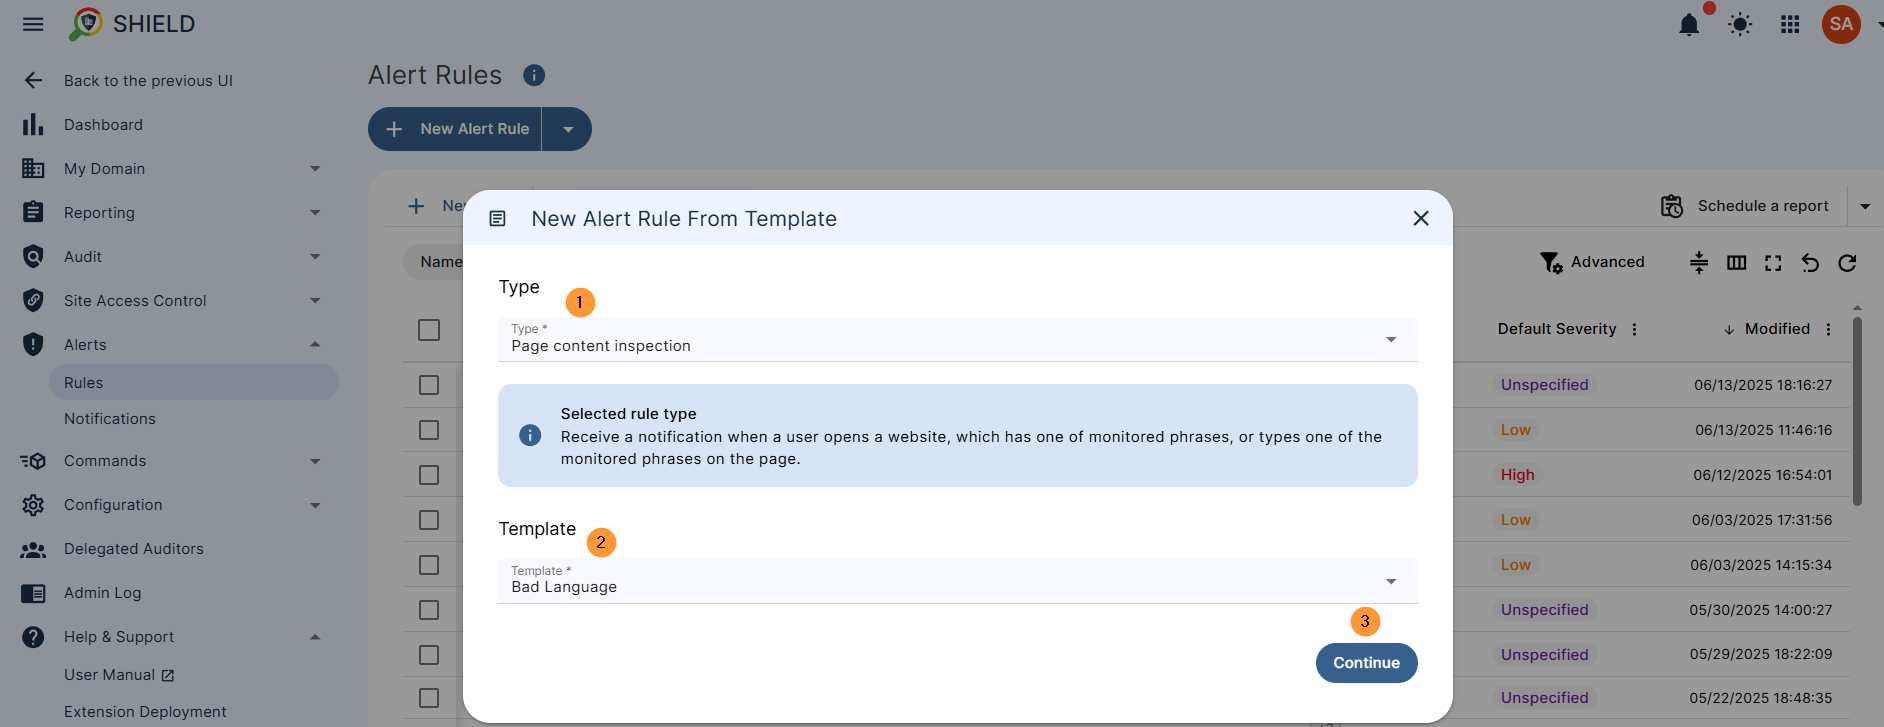
We have many templates for Page content inspection that any Admin can use.
Click on the Template button, and a menu with prepared templates will be displayed. From the options, select any of the templates you wish to use.
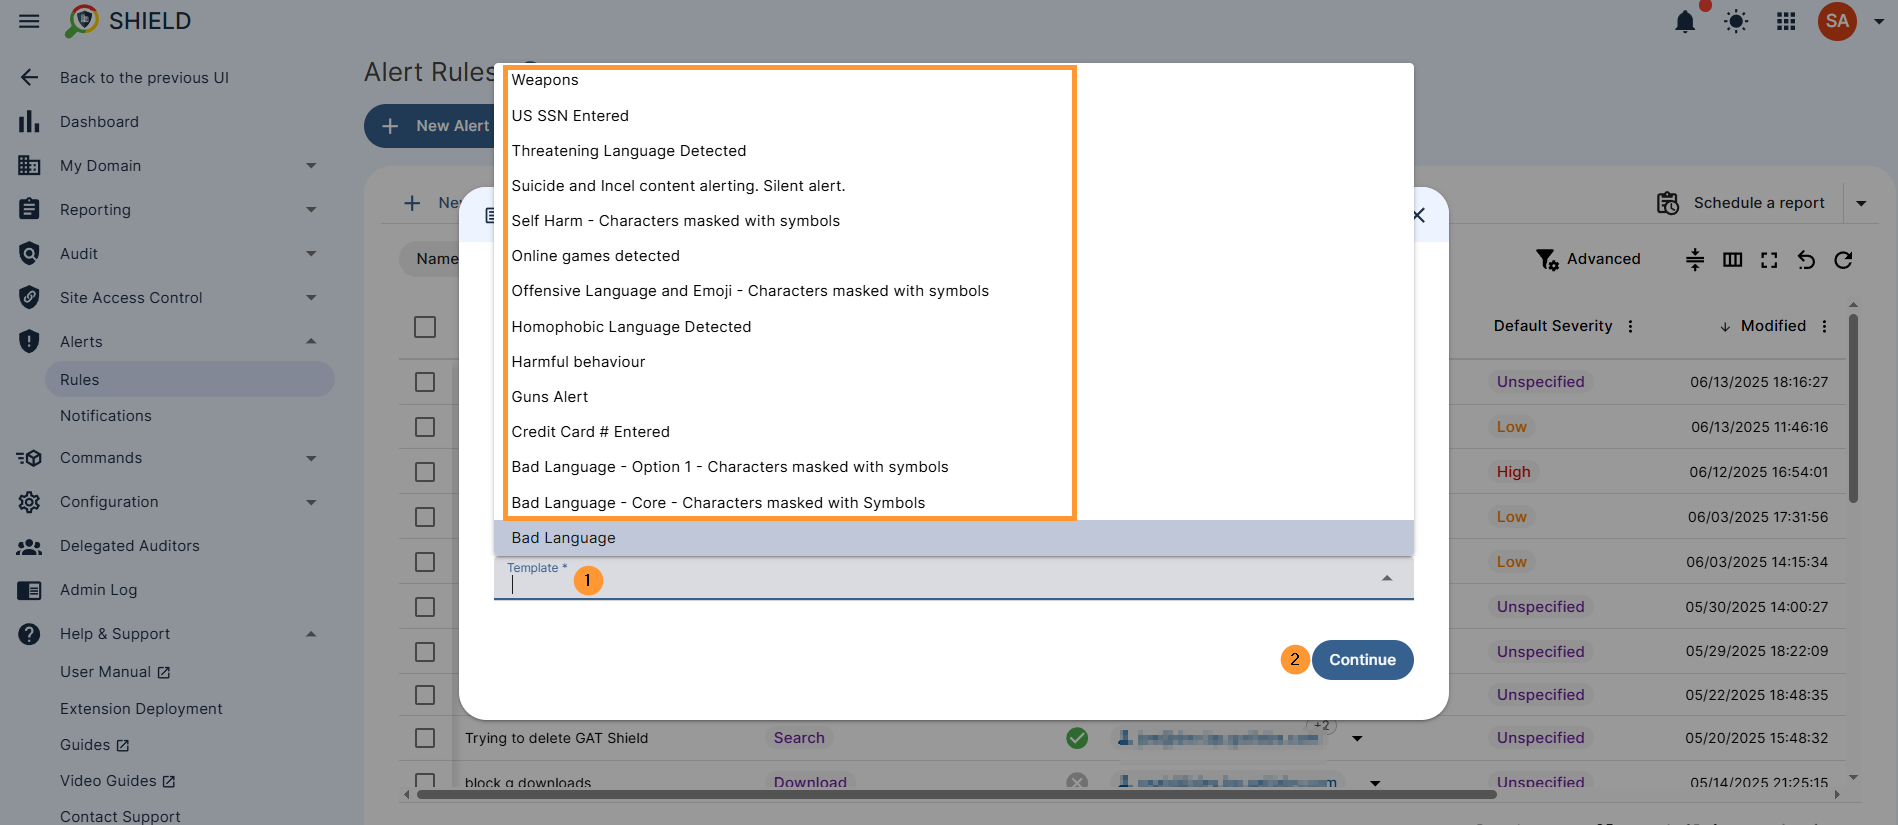
When the template is selected, select the “continue” button. A new window will be displayed, fill in all the required details.
For example: Bad language
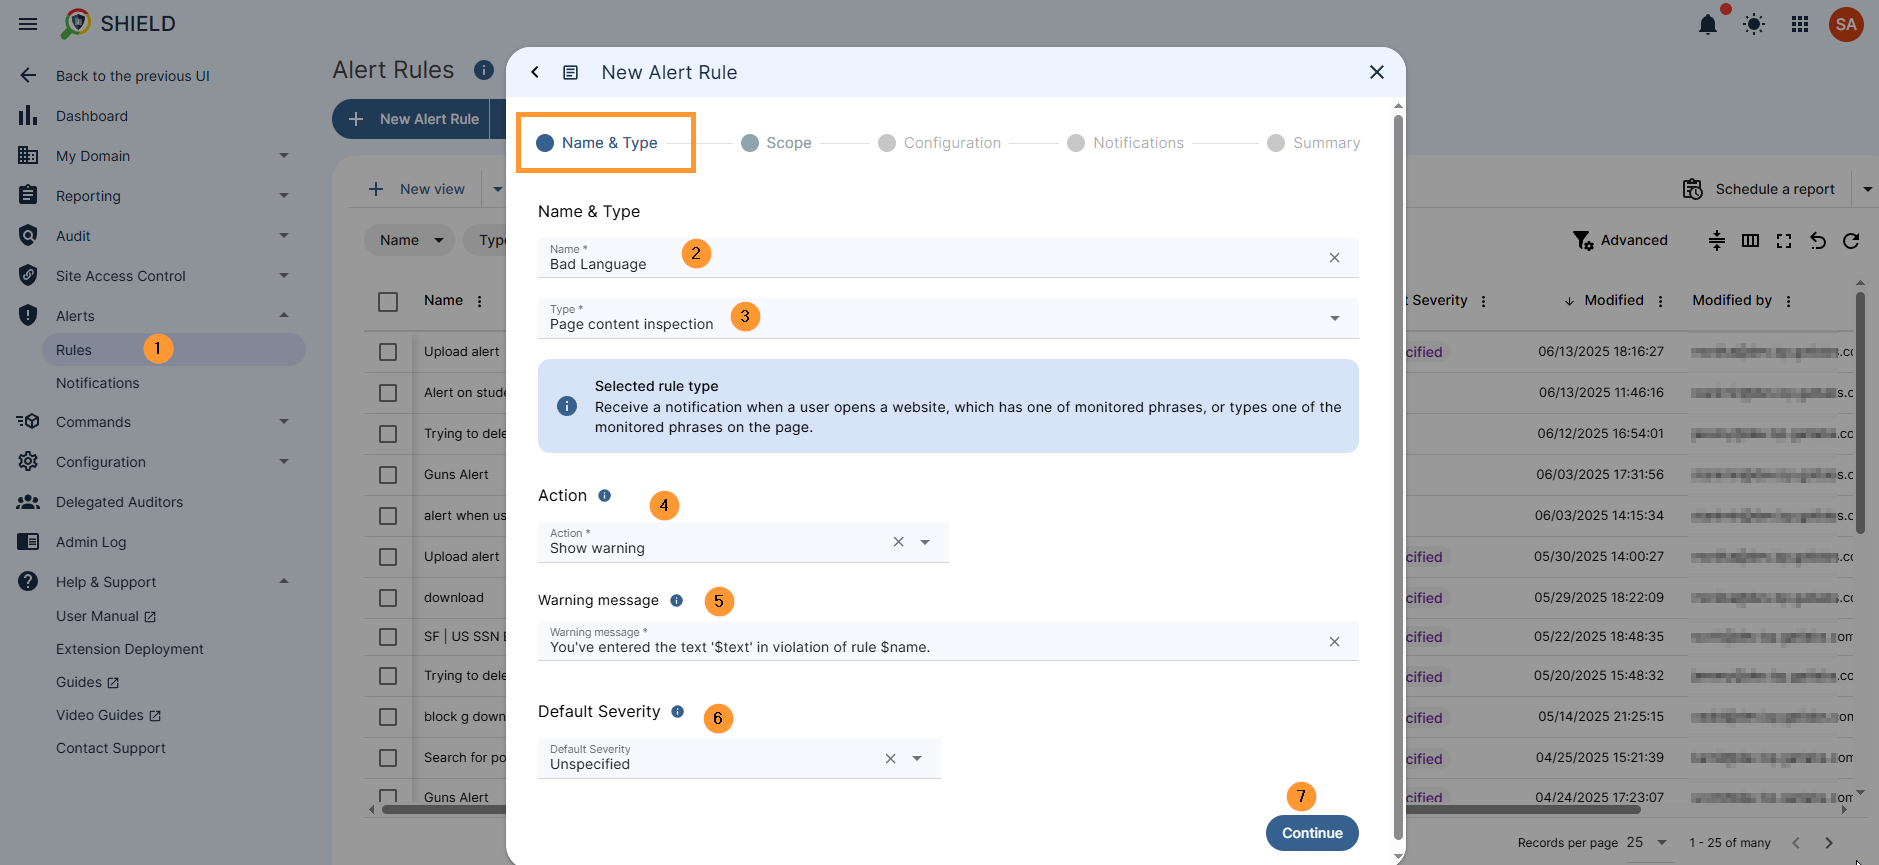
Name & Type #
Fill in the details for each of the fields
- Name – Enter a name for the alert rule
- Type – select the type – page content inspection
- Action – select what action to be taken on the end-user. This has a few different options
- Show warning – show warning message for the end-user
- Close – close the browsing tab for the end-user
- Close without warning – close the browsing tab without a warning message
- Redirect – redirect the page where the user “used” the bad word
- Enter to page the user is to be redirected to
- Redirect without warning – redirect the page where the user “used” the bad word, without a warning message
- No action – select so no end-user action will be run, just the alert triggered, the end-user will not be notified
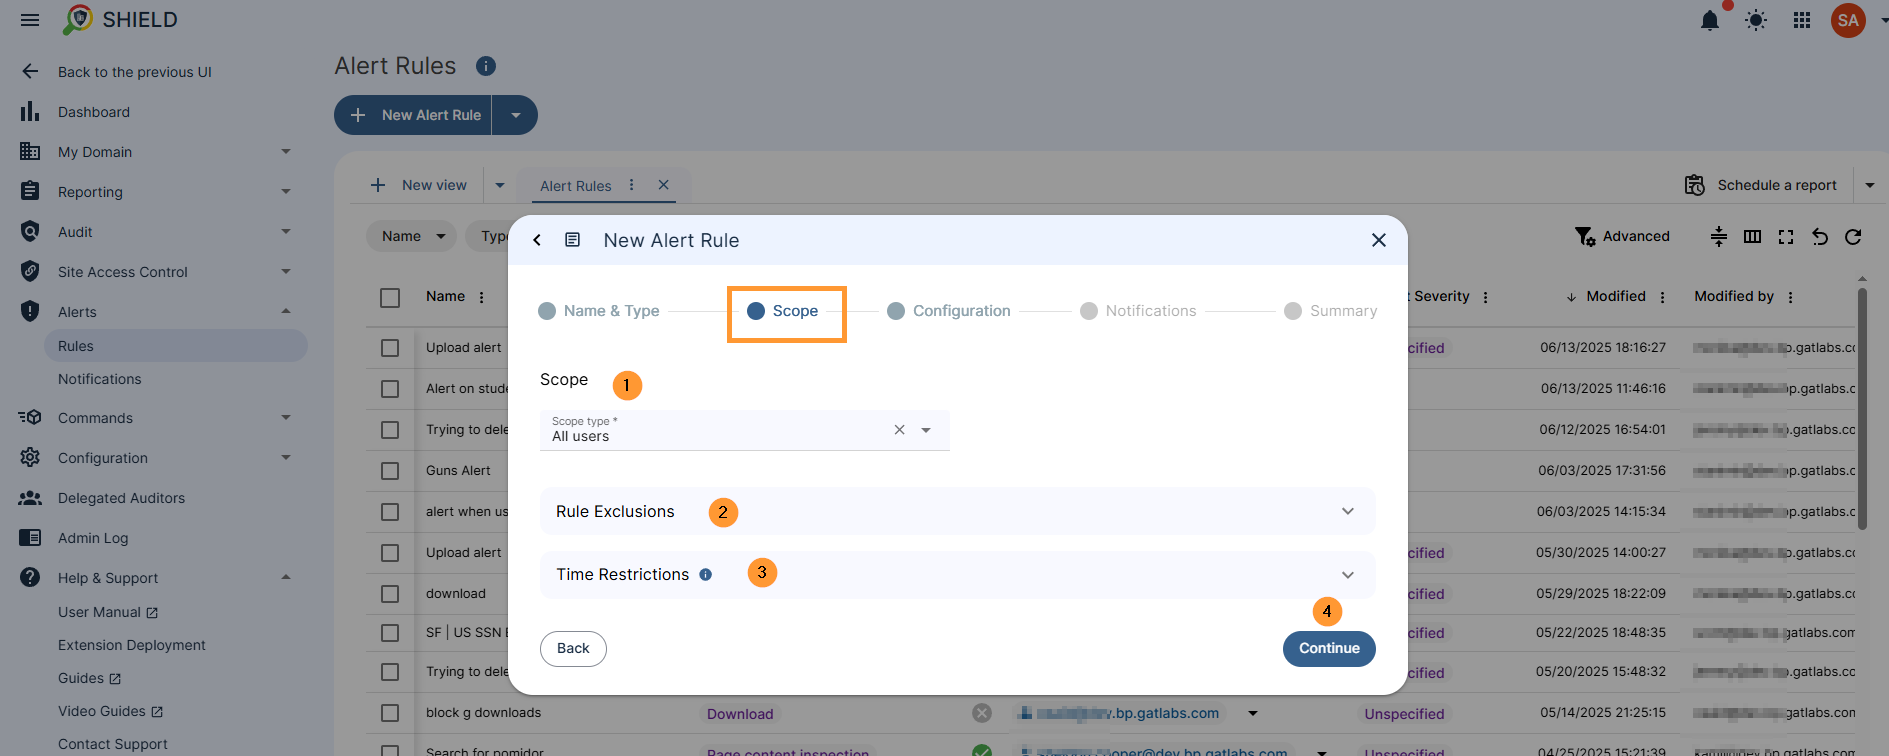
Scope #
In the Scope, select the users to whom the rule will be applied for
- Scope – Enter the scope of the rule
- Select user, group, or org. unit of users
- Rule exclusion – select a site or users to be excluded from the rule
- Time restrictions – Select when the rule should be active.
- By default, when no time restriction is added, the rule will always be active.
- To change it, select days and time ranges when the rule will be active.
- Continue – select to proceed further
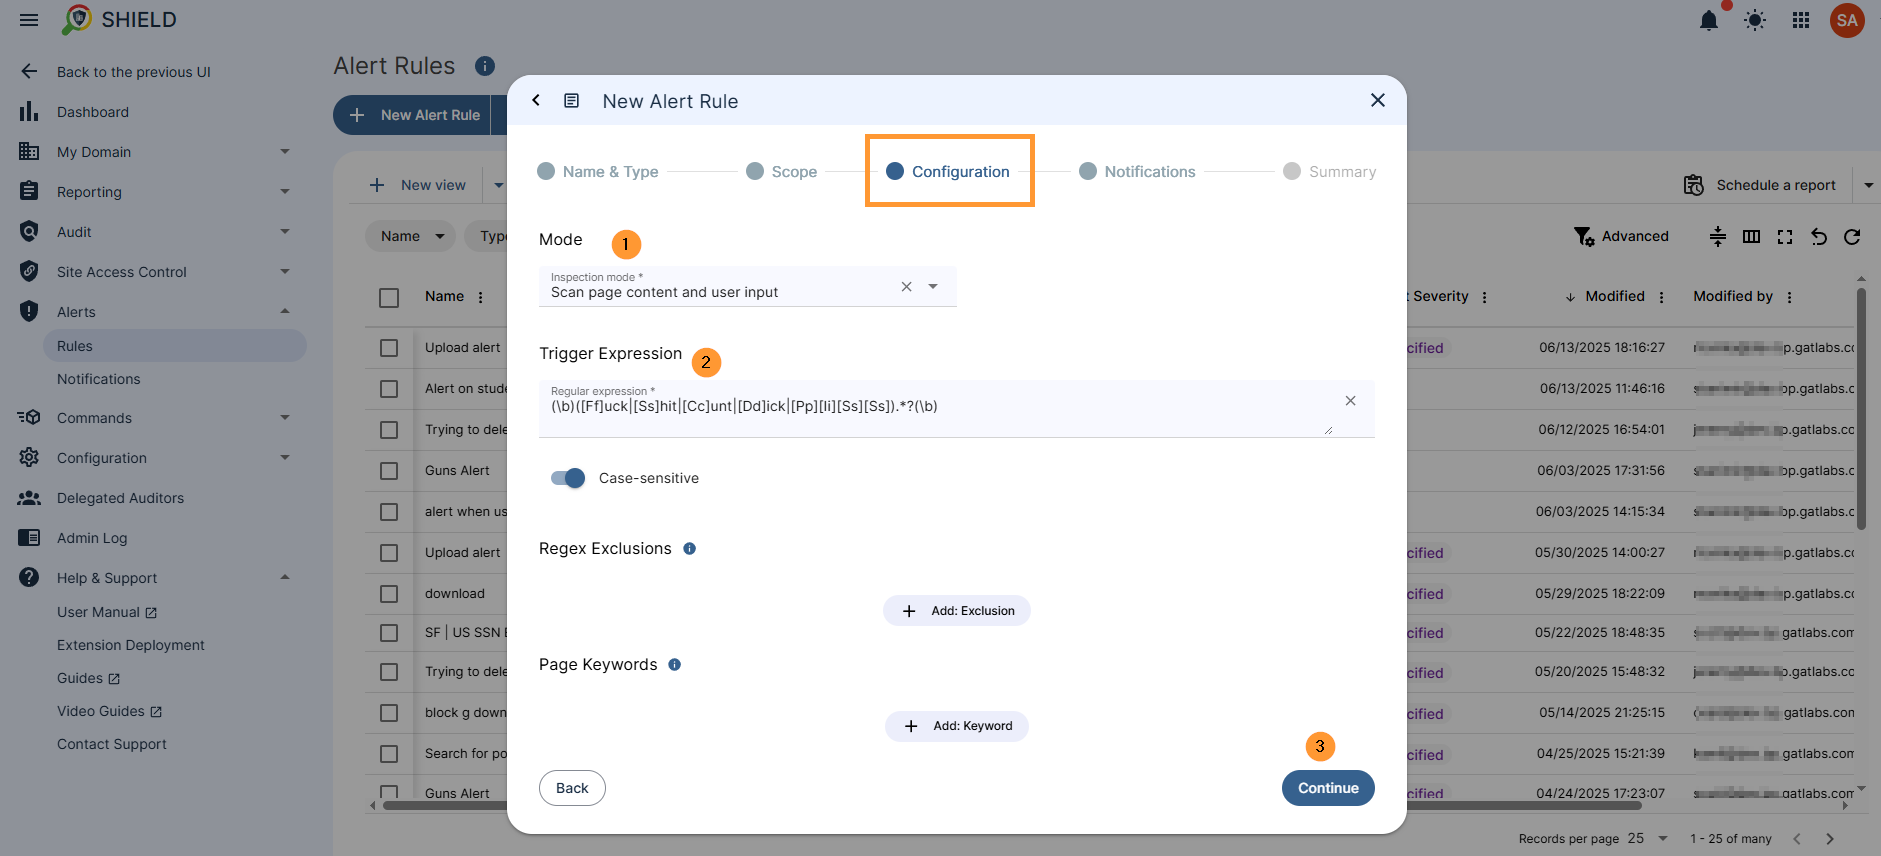
Configuration #
In the configuration window, fill in the details
- Inspection mode – select one of the two options
- Scan page content and user input – trigger the alert by scanning the page content as well as using the user input
- Only user input – trigger the alert by just reading the user’s input and not scanning the page
- Trigger expression – enter the trigger expression
- As we use the template, the trigger expression will be prefilled in
- Regex exclusion – Alert won’t be triggered if any of these words are found on the page.
-
Page keywords – Enter page keywords to reduce alert sensitivity.
-
Keywords stop the rule from being triggered unless the combined keywords’ weight on the page meets the threshold.
The weight of a keyword contributes to the score only once, even if the word occurs many times on the page.
-
- Continue – click to proceed to notifications
Notifications #
In the notifications, fill in the details for each field. Each of the options is explained below
- Alert recipients – enter the emails of the recipients of the alert
- Notification interval – enter the number of minutes between notifications
- Full alert context – Save website information and matched text, and include them in notifications
- Screen capture – select the option on what to do with the screen capture
- Send in the notification email
- Do not send
- Send in the notification email and save to the rule creator’s Drive
- Send in the notification email, save to the rule creator’s Drive and share with other alert recipients
- Webcam capture
- Do not send
- Send in the notification email
- Send in the notification email and save to the rule creator’s Drive
- Send in the notification email, save to the rule creator’s Drive and share with other alert recipients
- Continue – click to proceed

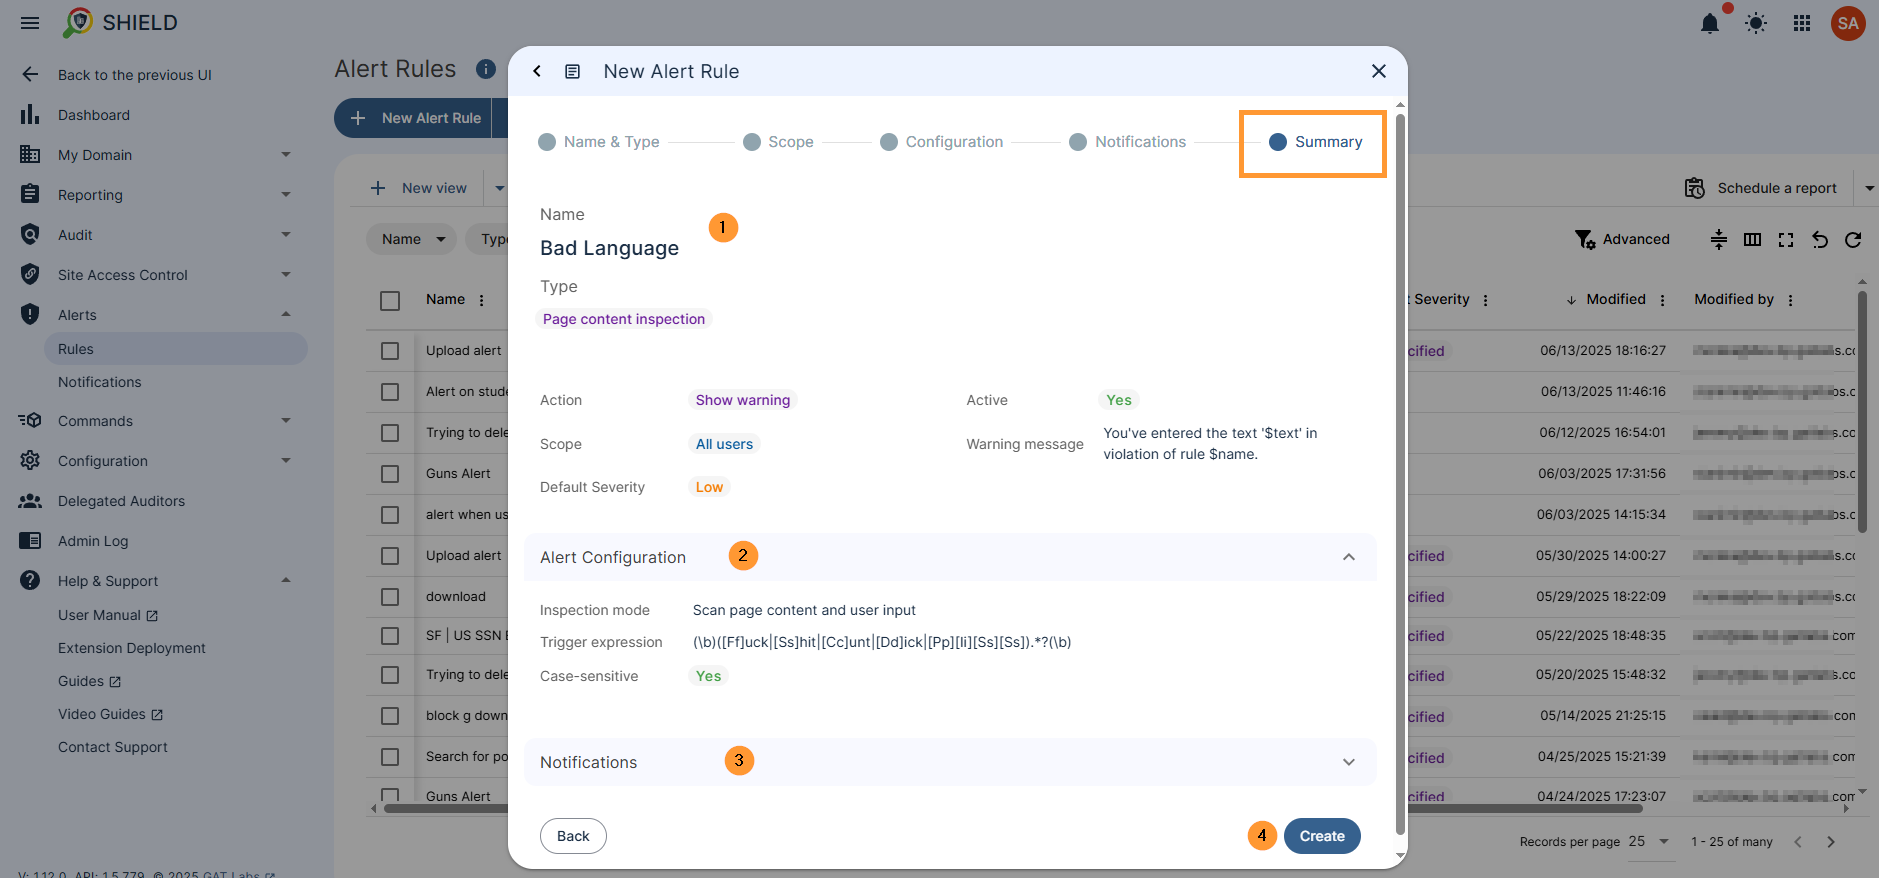
Create the rule #
In the Summary review, what was set up for the alert, and click on the Create button
Results #
Based on what is set in the End-user action, a notification will be shown to the user.
A notification will be sent to the end-user from the Chrome browser.
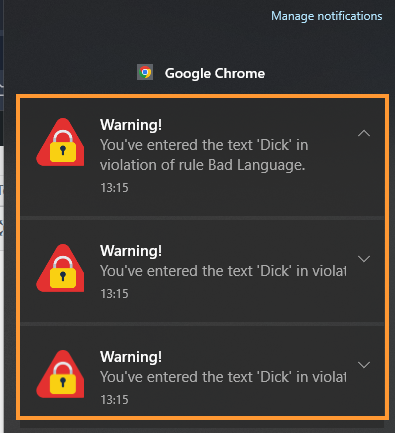
If “display a warning message and redirect” is used, the end-user will get an alert message and will be redirected to the chosen webpage URL
Email notification: GAT Shield Inappropriate Language Alert #
A notification email will also be received by Alert Recipient:

Shield alerts #
All Shield alerts will be reported in GAT Shield> Alerts > Notifications
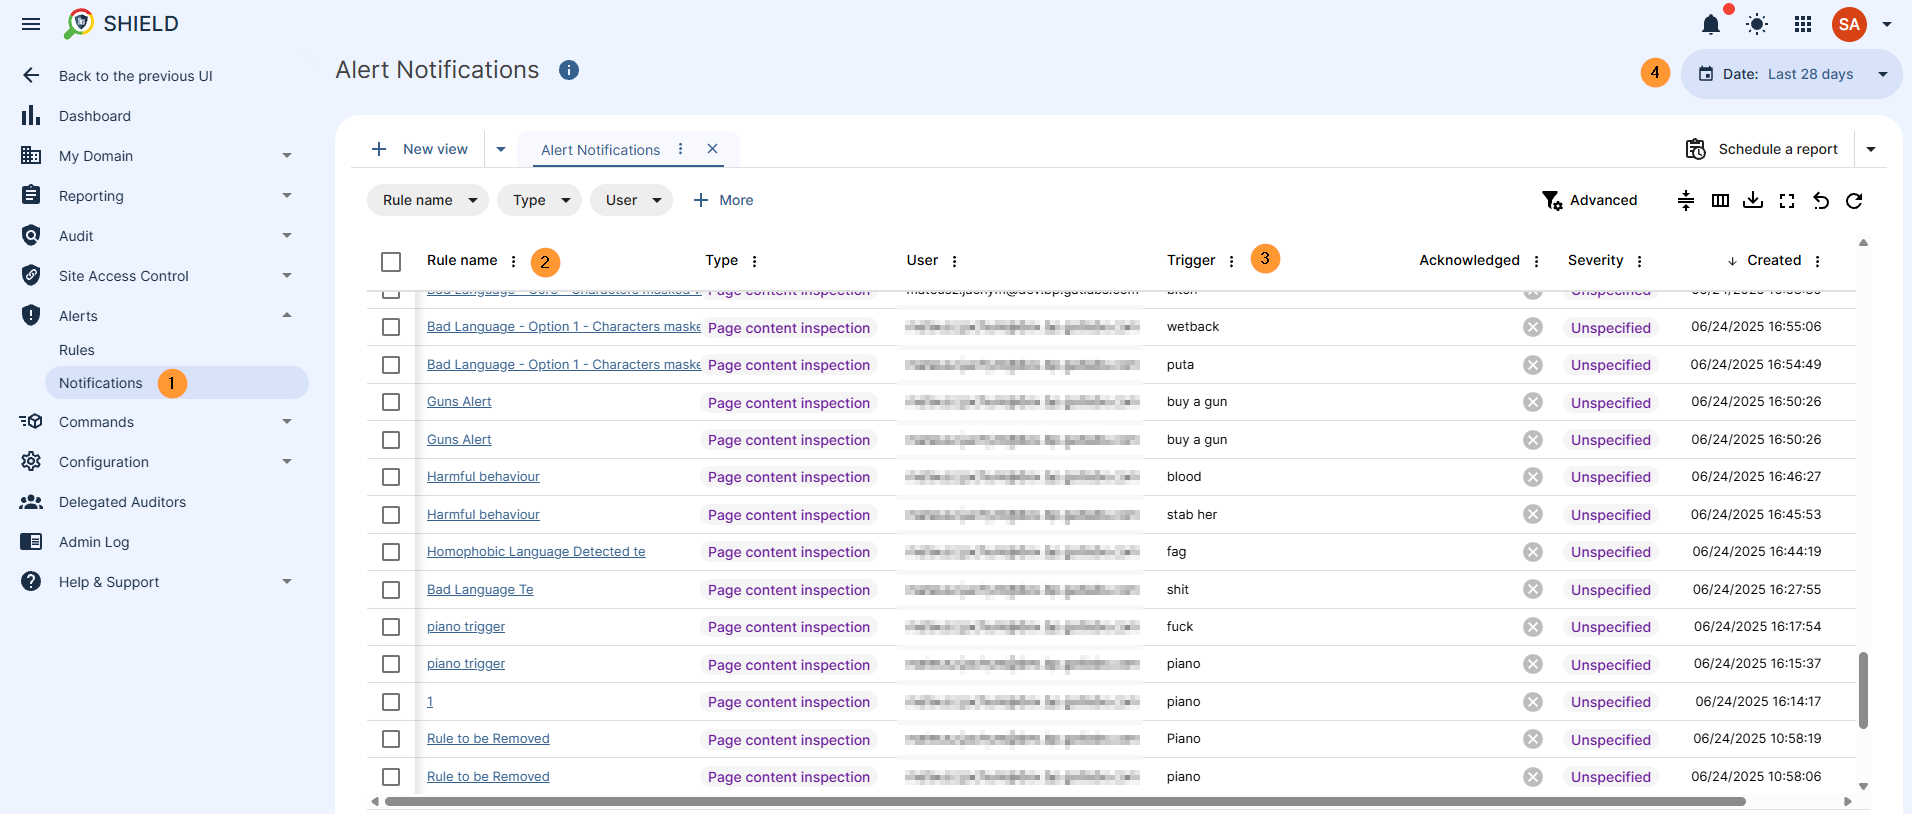
Based on the received notification, an Alert Recipient can analyze it.


