What it Is #
This guide demonstrates how to use the Site Access Control feature of GAT Shield.
The Site Access Control feature gives the Google Admins control over which websites users in the Google Workspace domain can access.
Why it Matters #
This solution gives you fine-grained control over what your users can see online. It’s like a safety net, protecting them from dangerous websites and letting you block any pages you don’t want them to visit.
Web filter with Site Access Control is globally available to all Shield users.
How to Implement #
Rules #
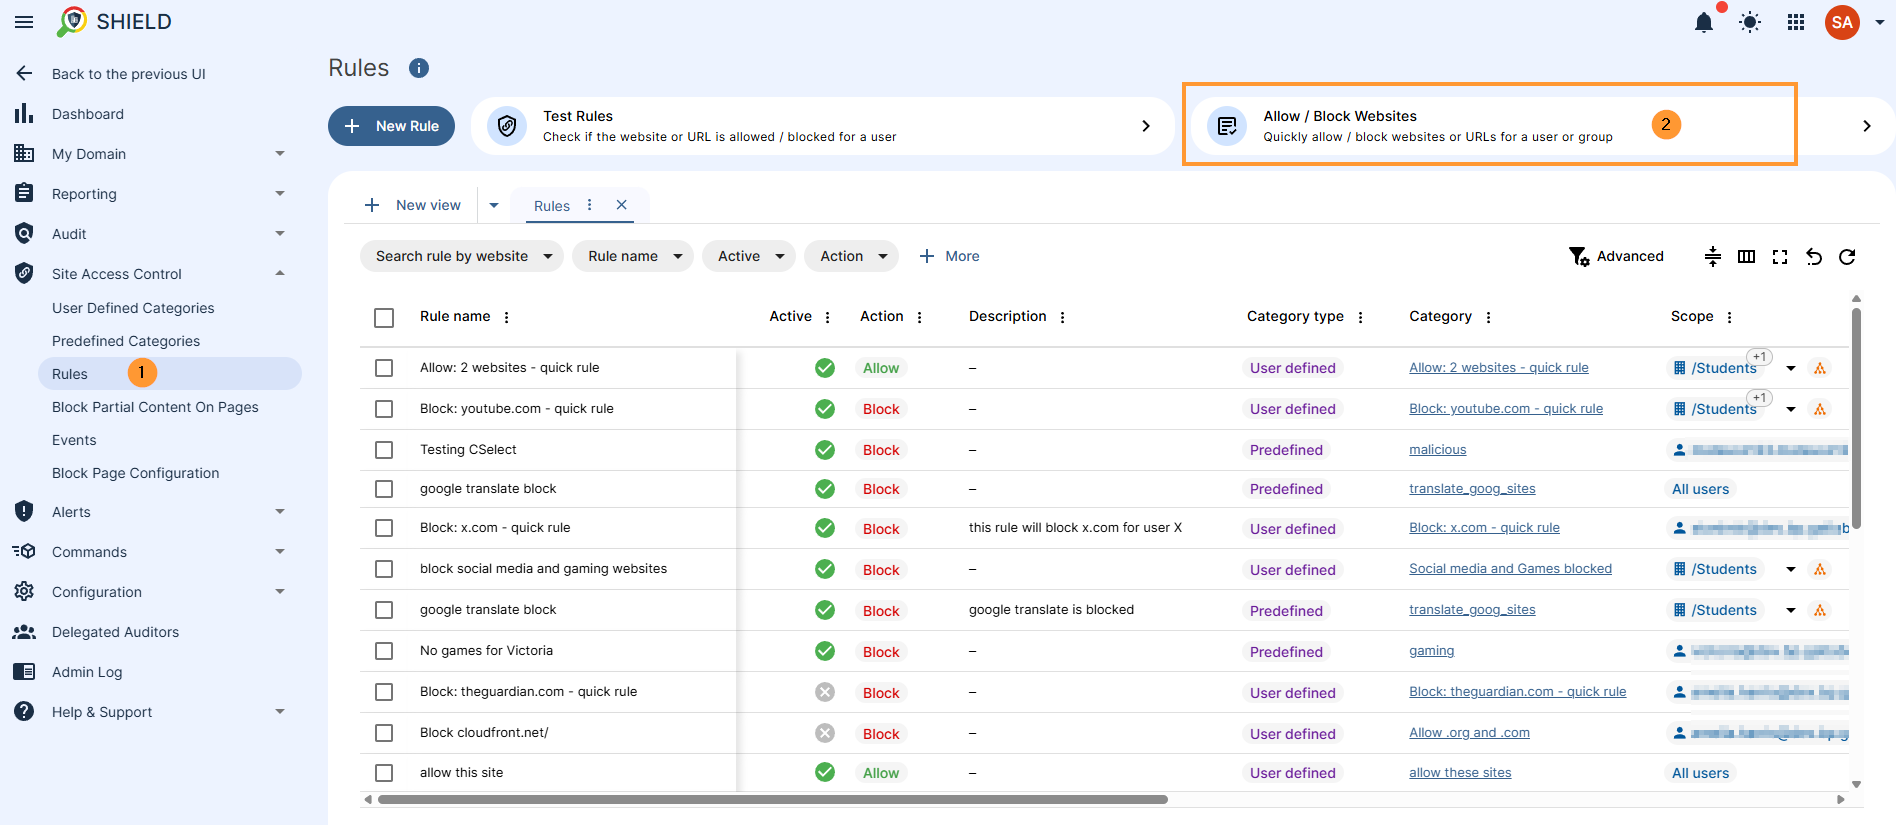
Quickly Allow or Block Sites #
The Admins can easily create a rule to block or allow (if blocked) users from visiting websites.
Navigate to Site Access Control > Rules > Allow/Block sites.
You will see a new pop-up window. Fill in the details required.
- Action – select to Block or Allow sites.
- Redirect URL – if blocking a site, you can enter a webpage to which the user will be redirected (optional).
- Scope – select the users to whom the rule applies.
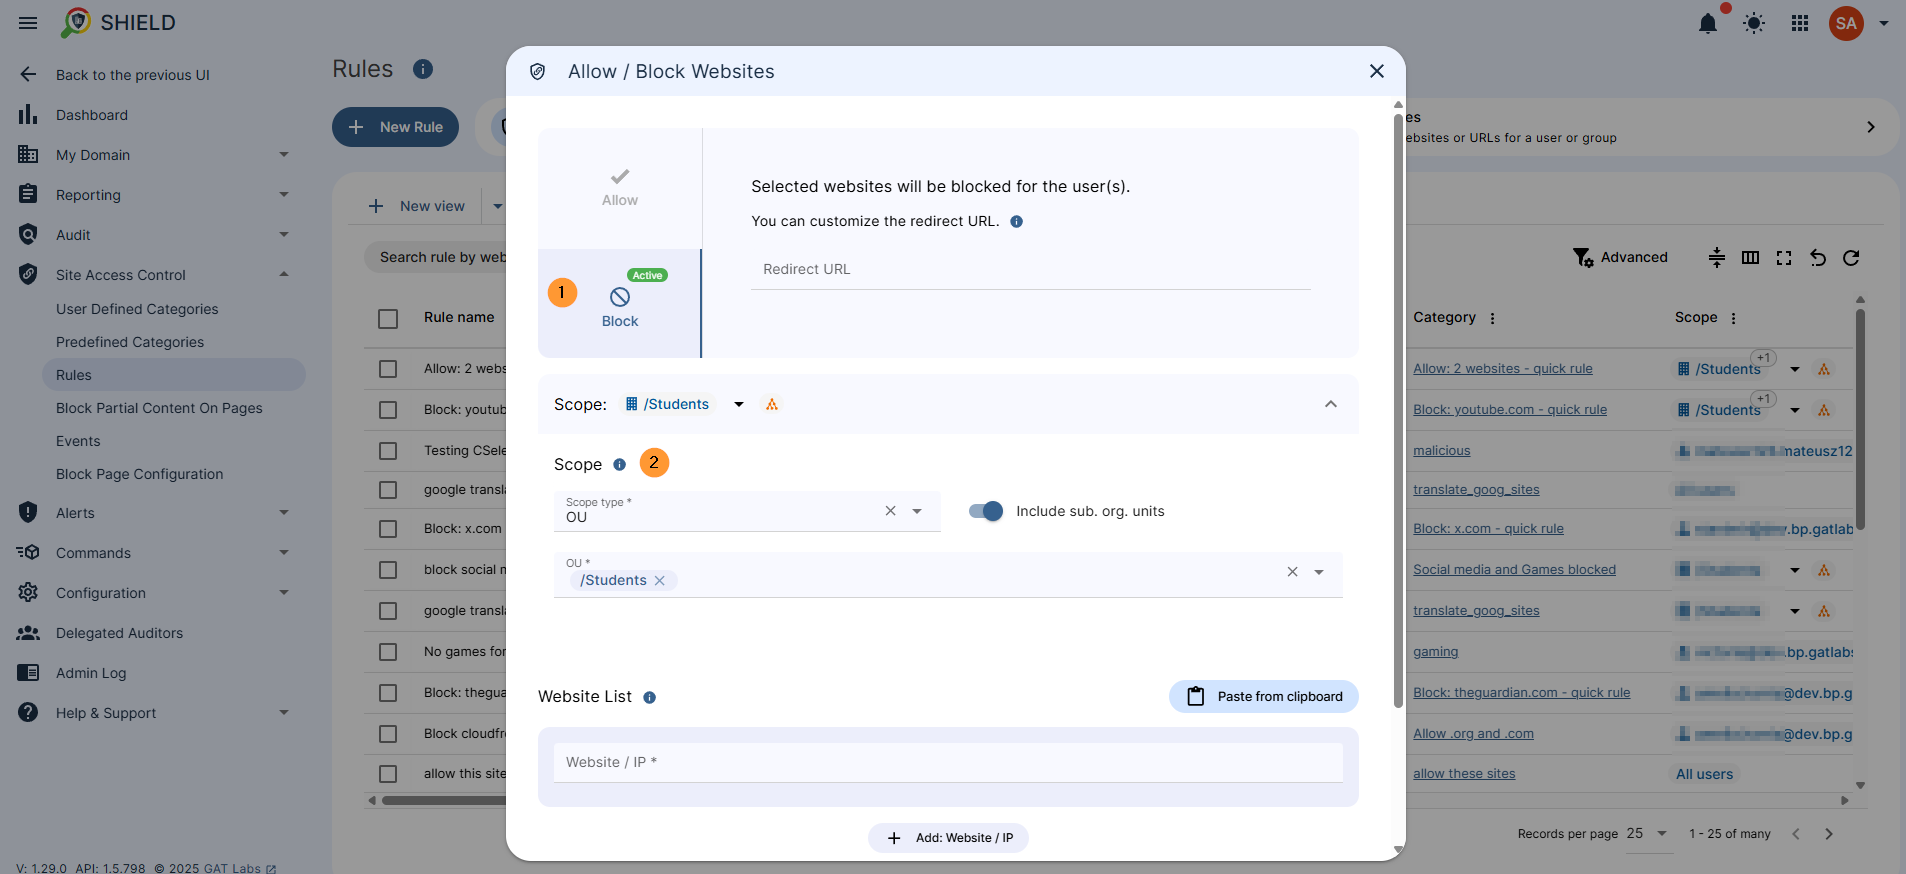
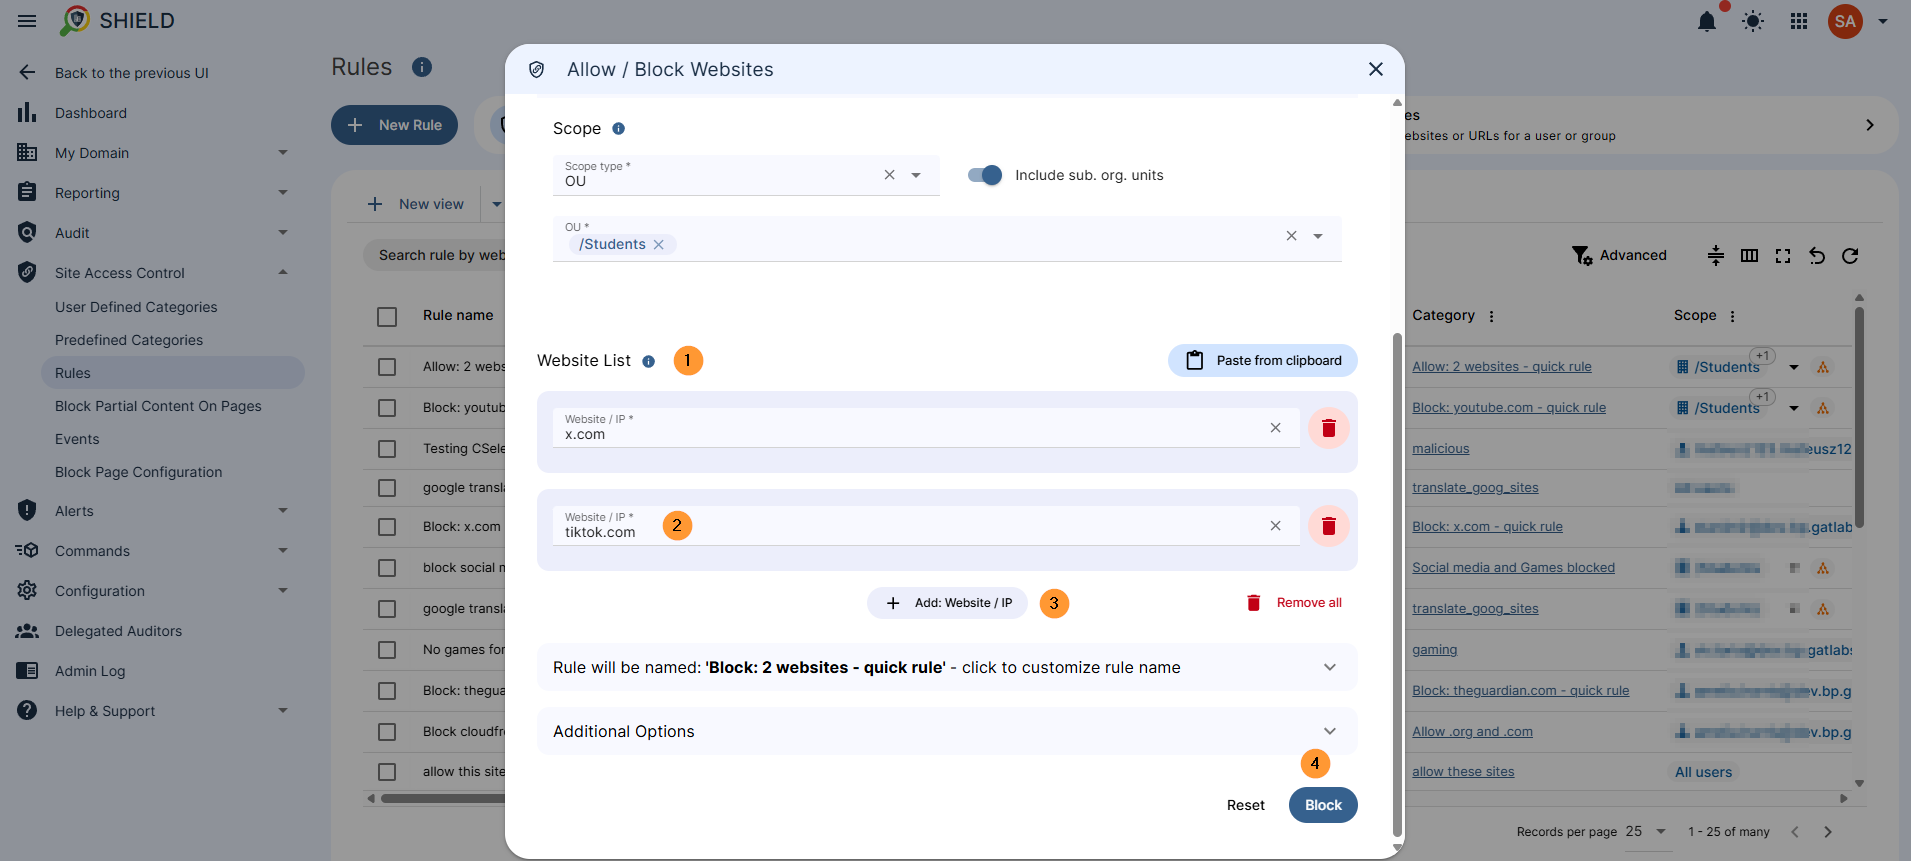
- Site List – enter the sites you want to block or allow.
- Paste from clipboard – Paste a list of sites (optional)
- Block – click to block the added sites for the selected users.
The result of the Quick Rule #
As a result of the quick rule, you block the sites you added for users in the selected scope.
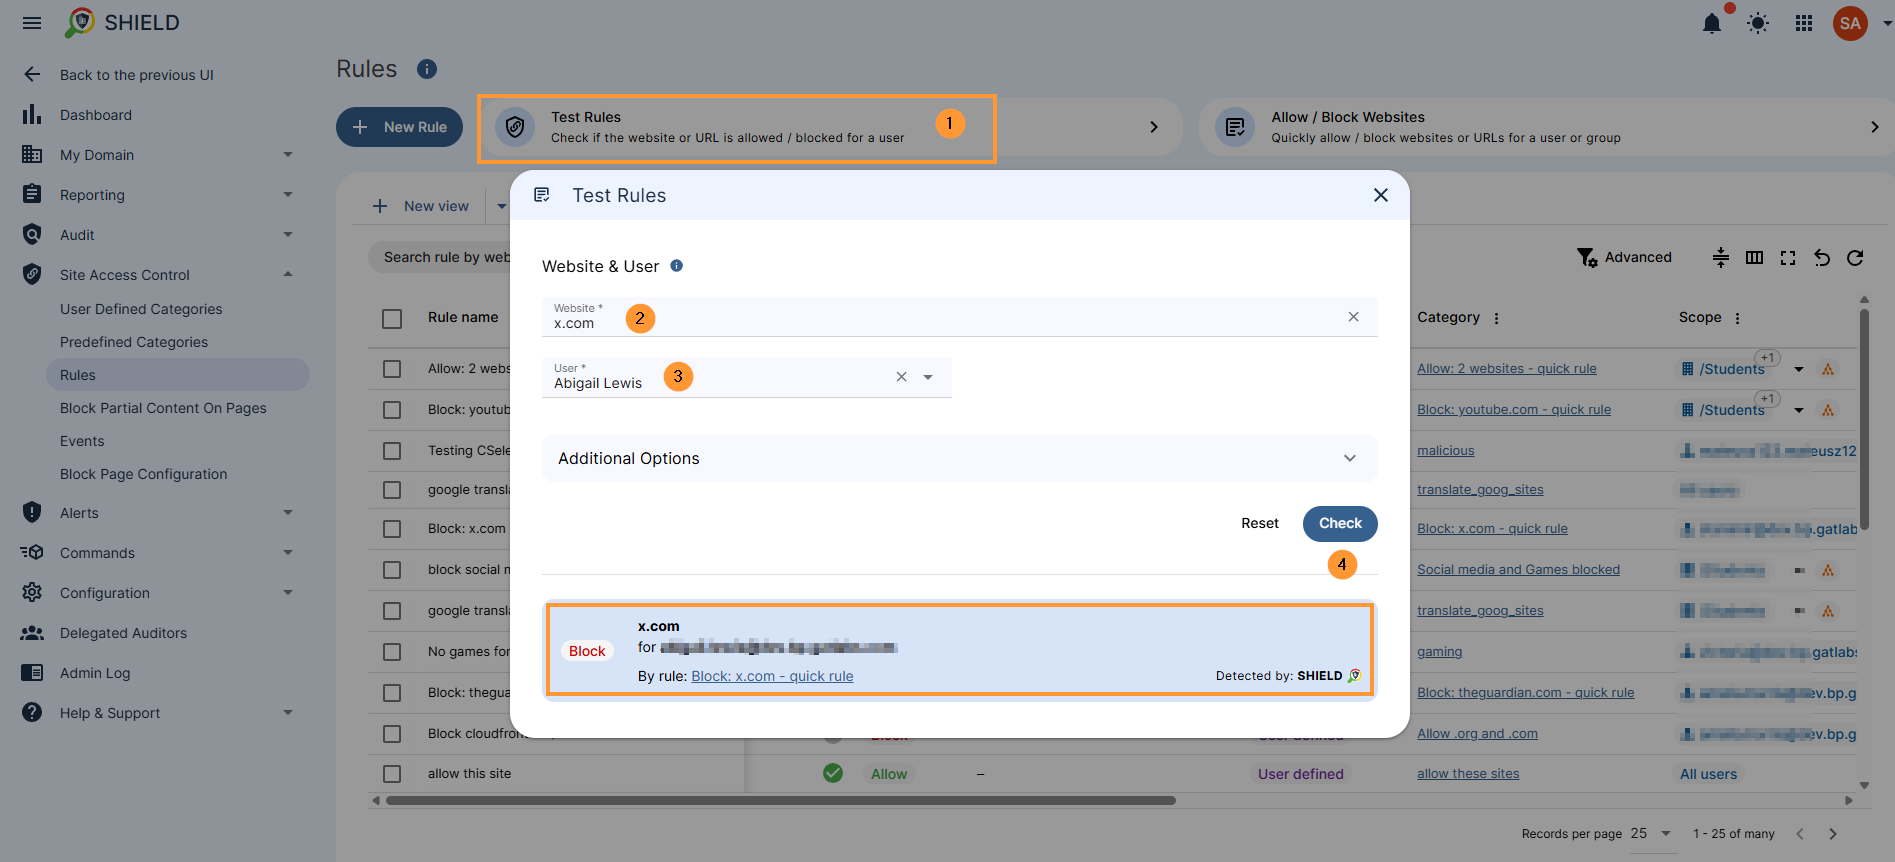
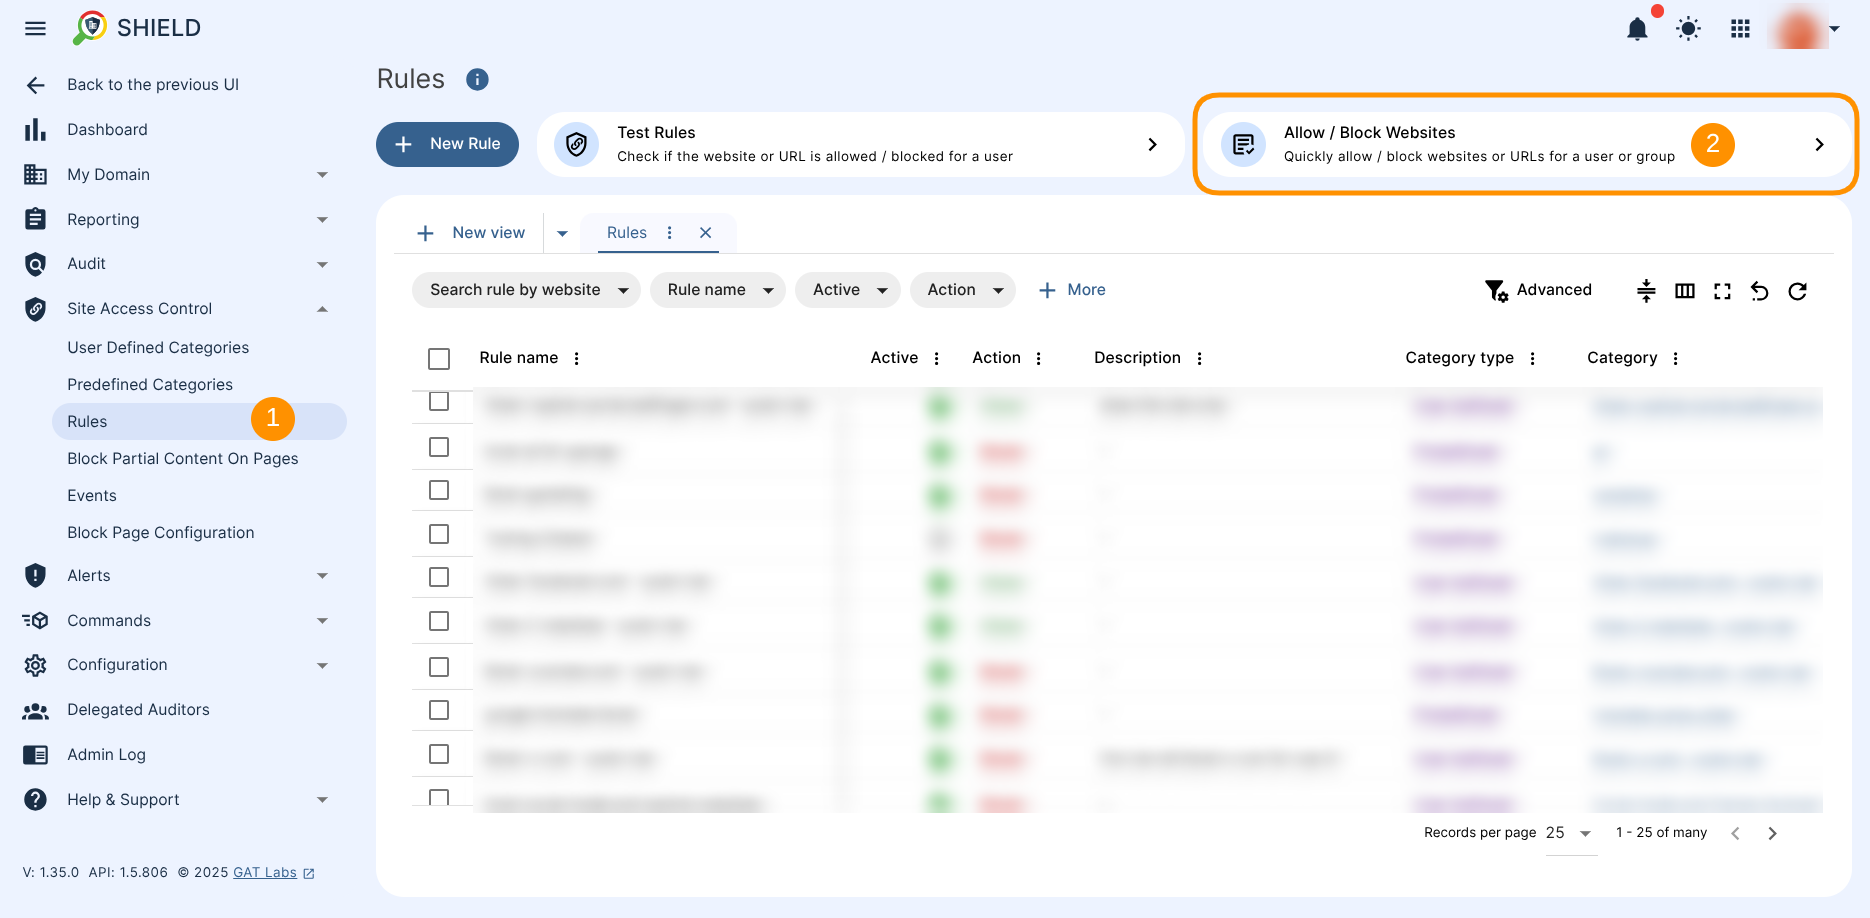
Test Rules #
The Google Admin can test and see if a page is blocked by GAT Shield, who’s blocked for, and what rule is blocking the page.
The Test rules will allow you to search for a specific URL and see if specific users can visit it or not.
Navigate to Site Access Control > Rules > Test Rules.
- URL – Enter the URL you want to check.
- User – search for the user you want to check for.
- Check – select to check the result and see if any Shield rule blocks the end-users.
User-defined Categories #
User-defined categories are manually created categories the Admins create for the users.
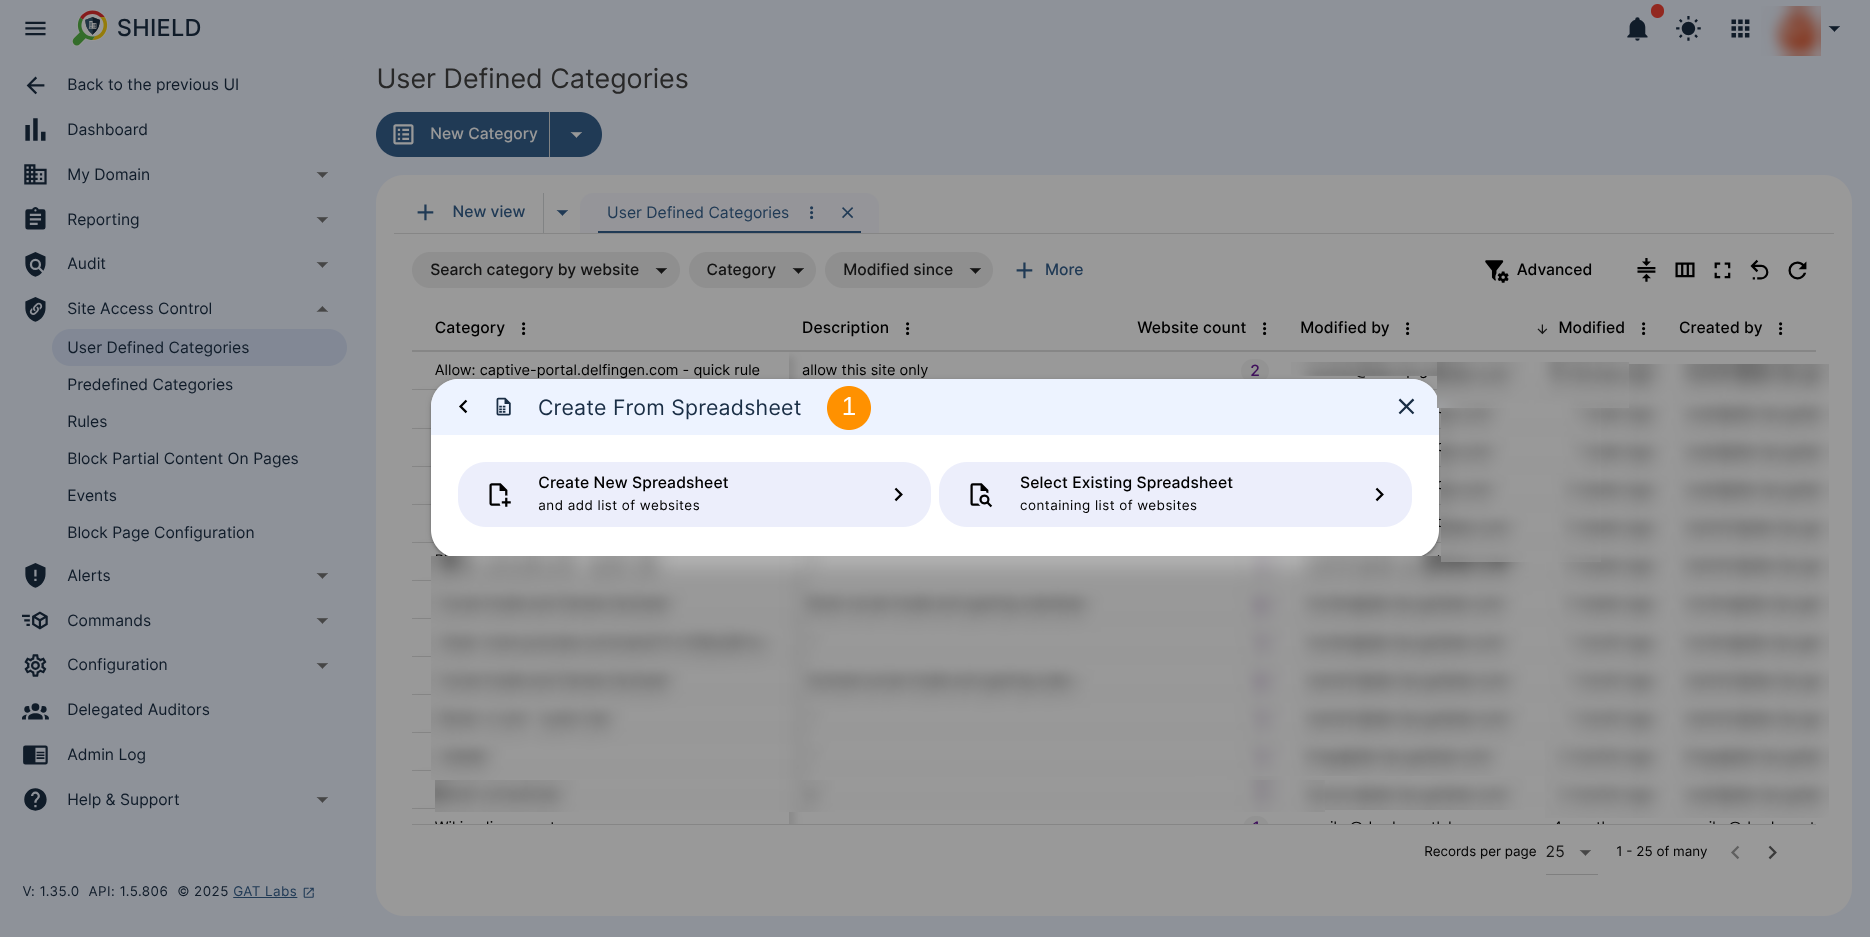
Navigate to User Defined Categories > New Category.
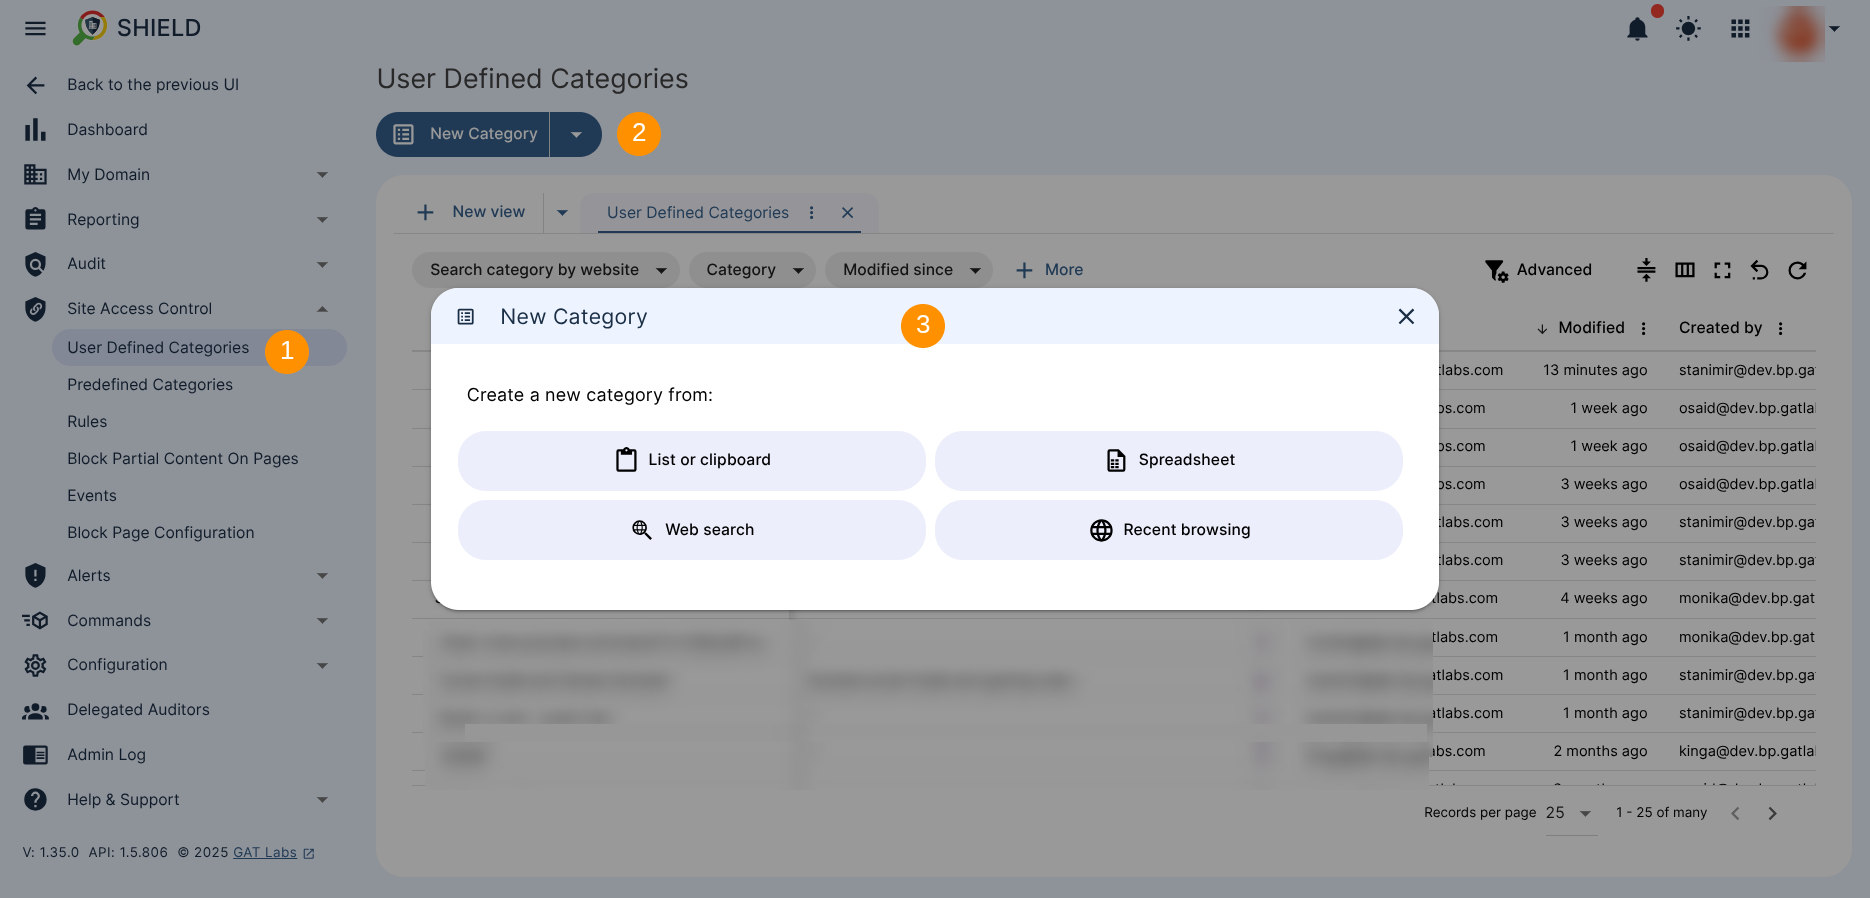
There are a few ways to add a list of web pages to the rules.
- Via List or clipboard
- Via Spreadsheet
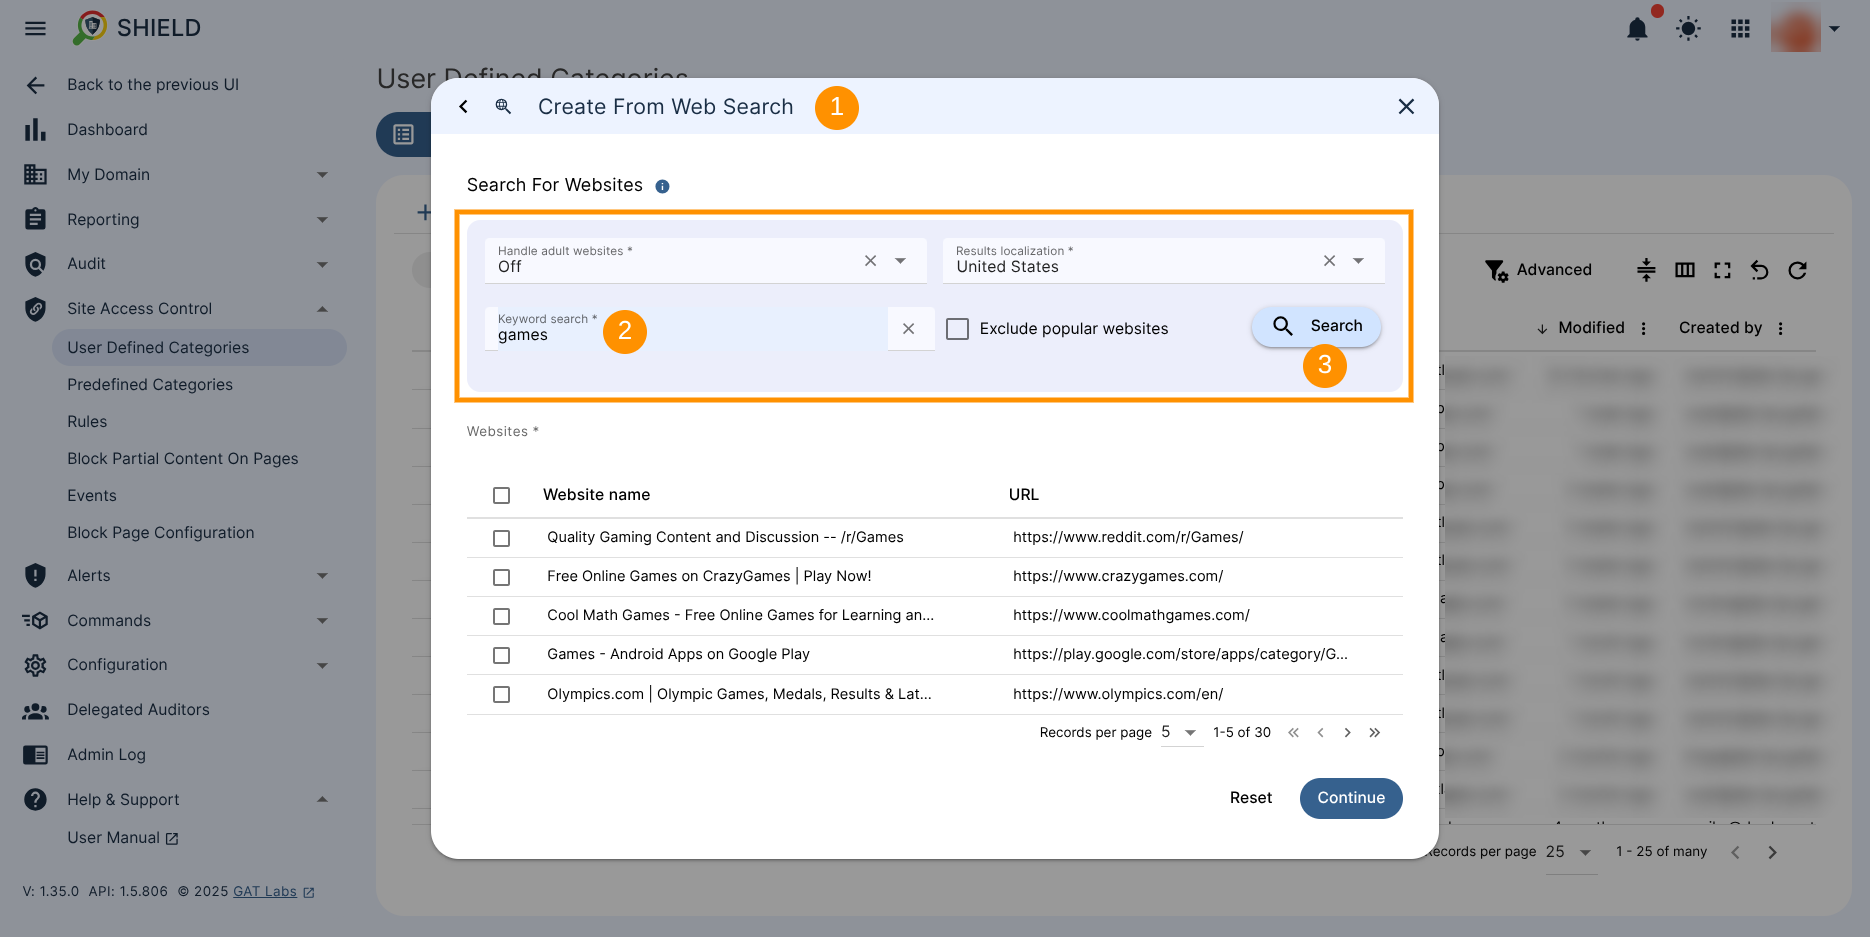
- Via Web Search
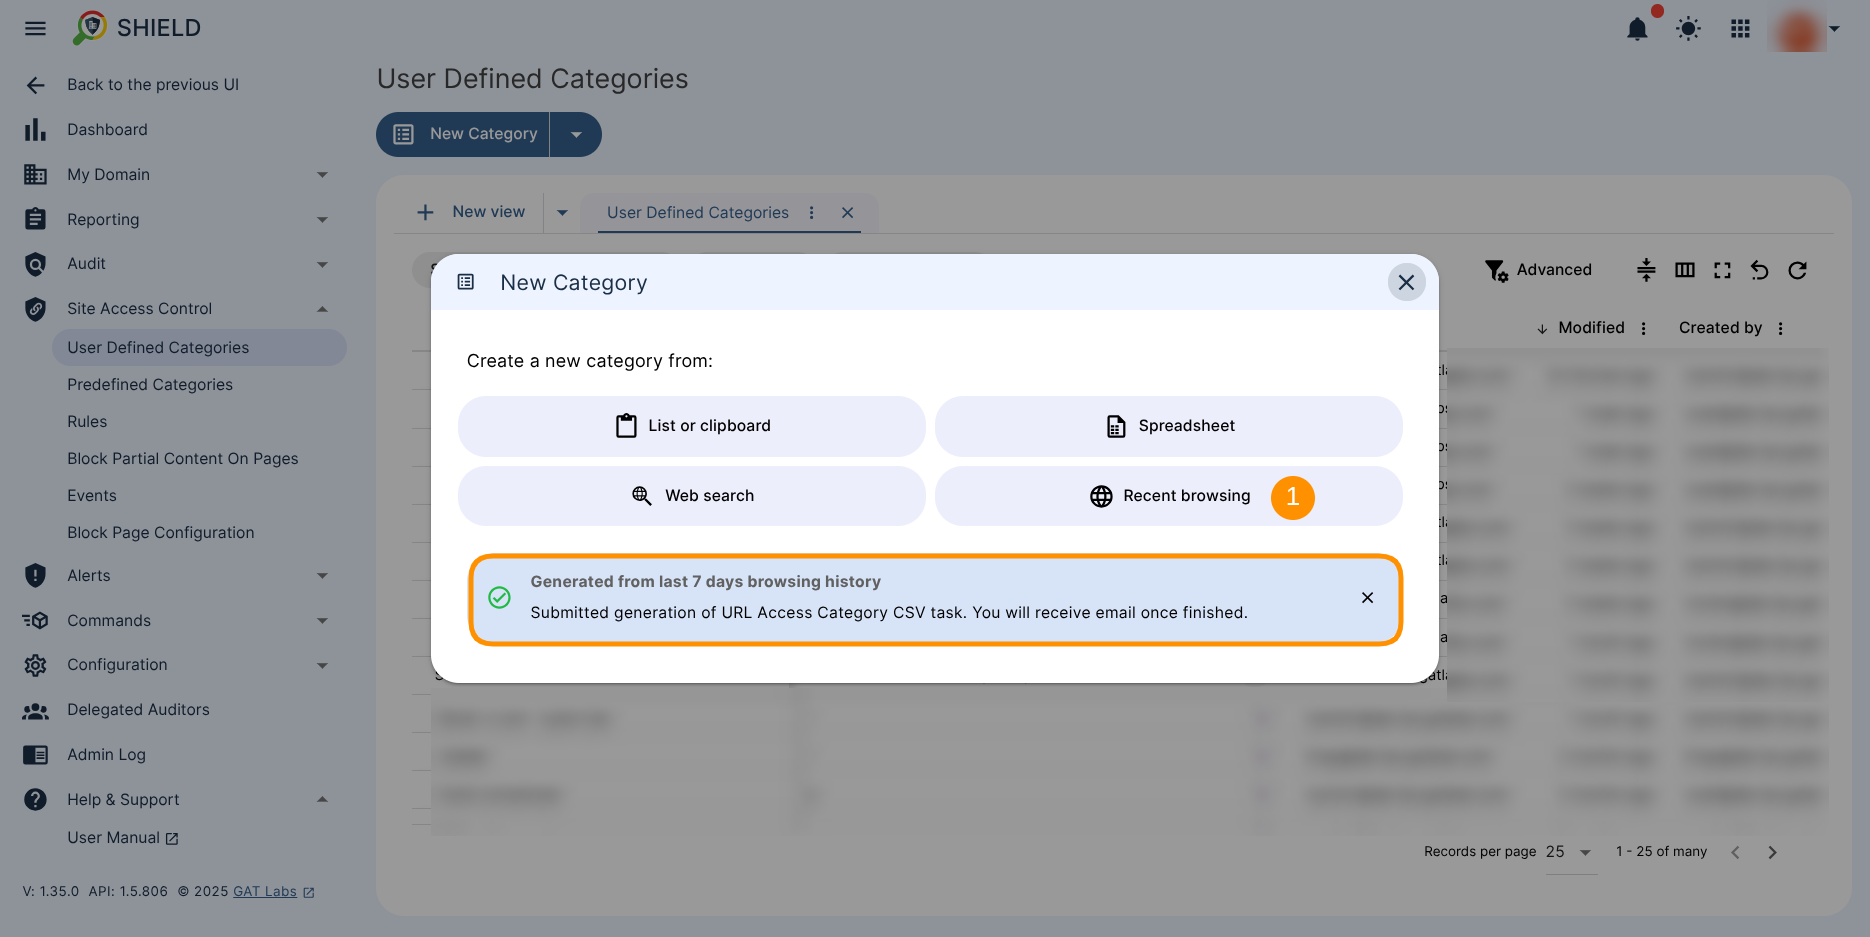
- Via Recent Browsing
Each way uses a different method to add the URLs to the rule.
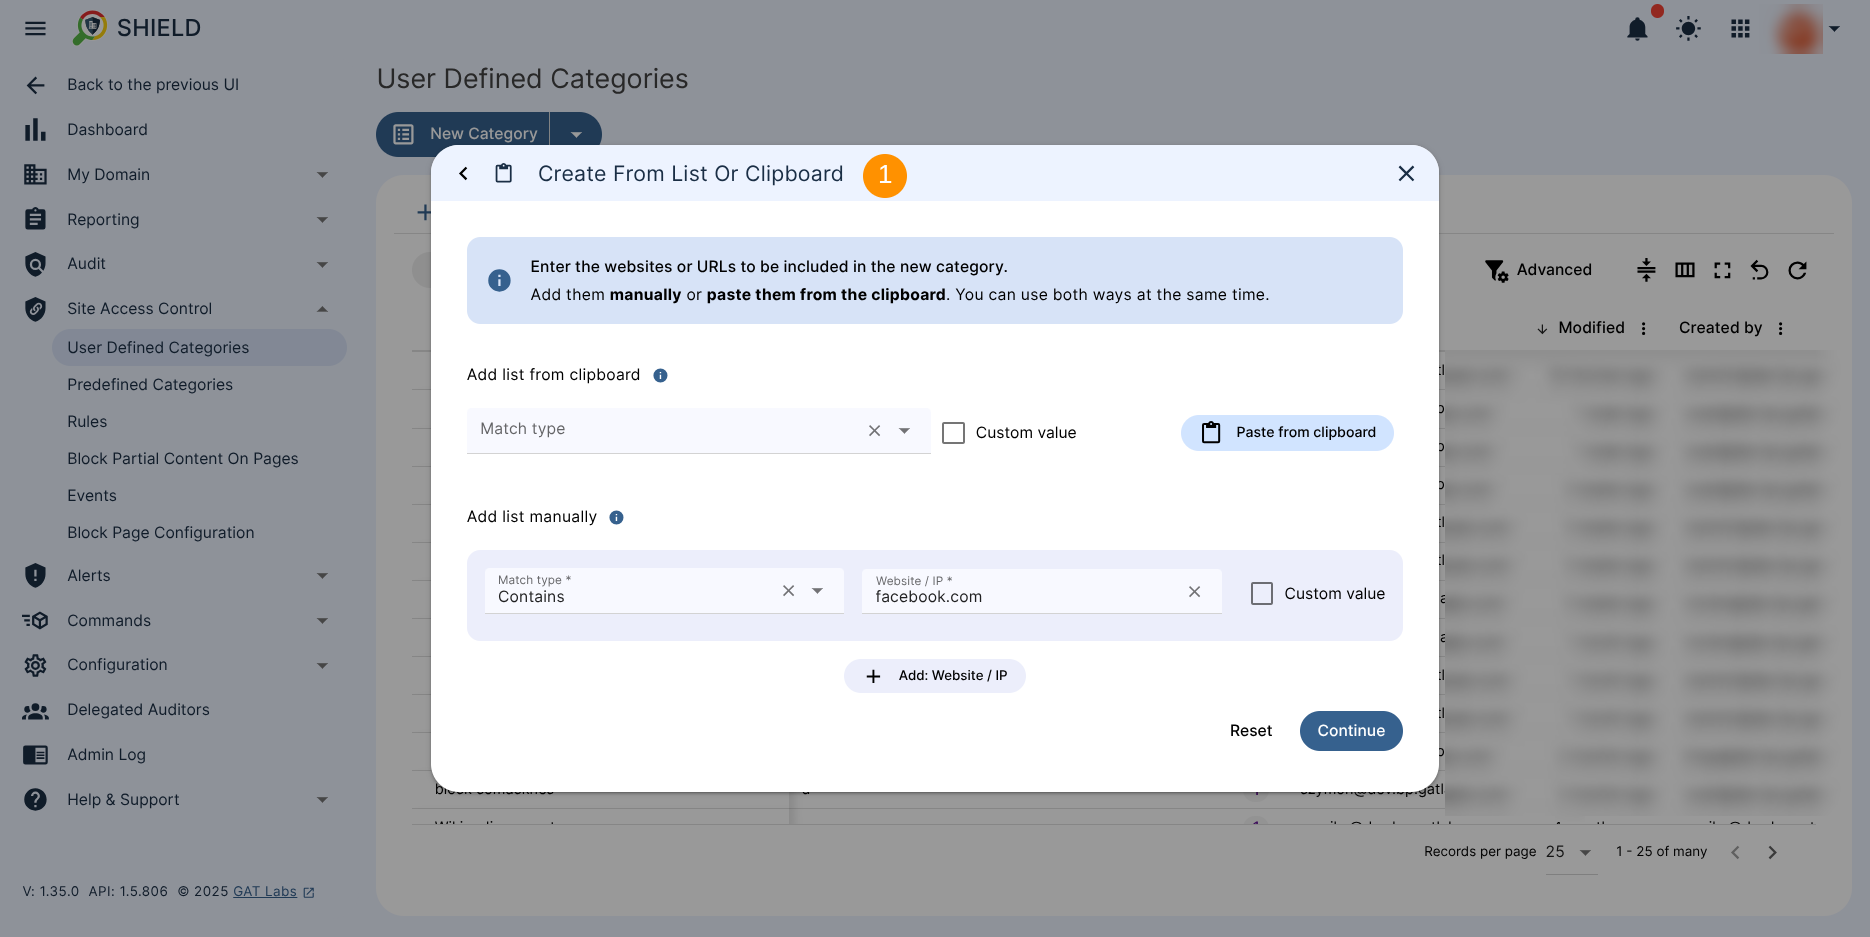
- List or Clipboard – enter the Site URLs to block it manually or via copy/paste.
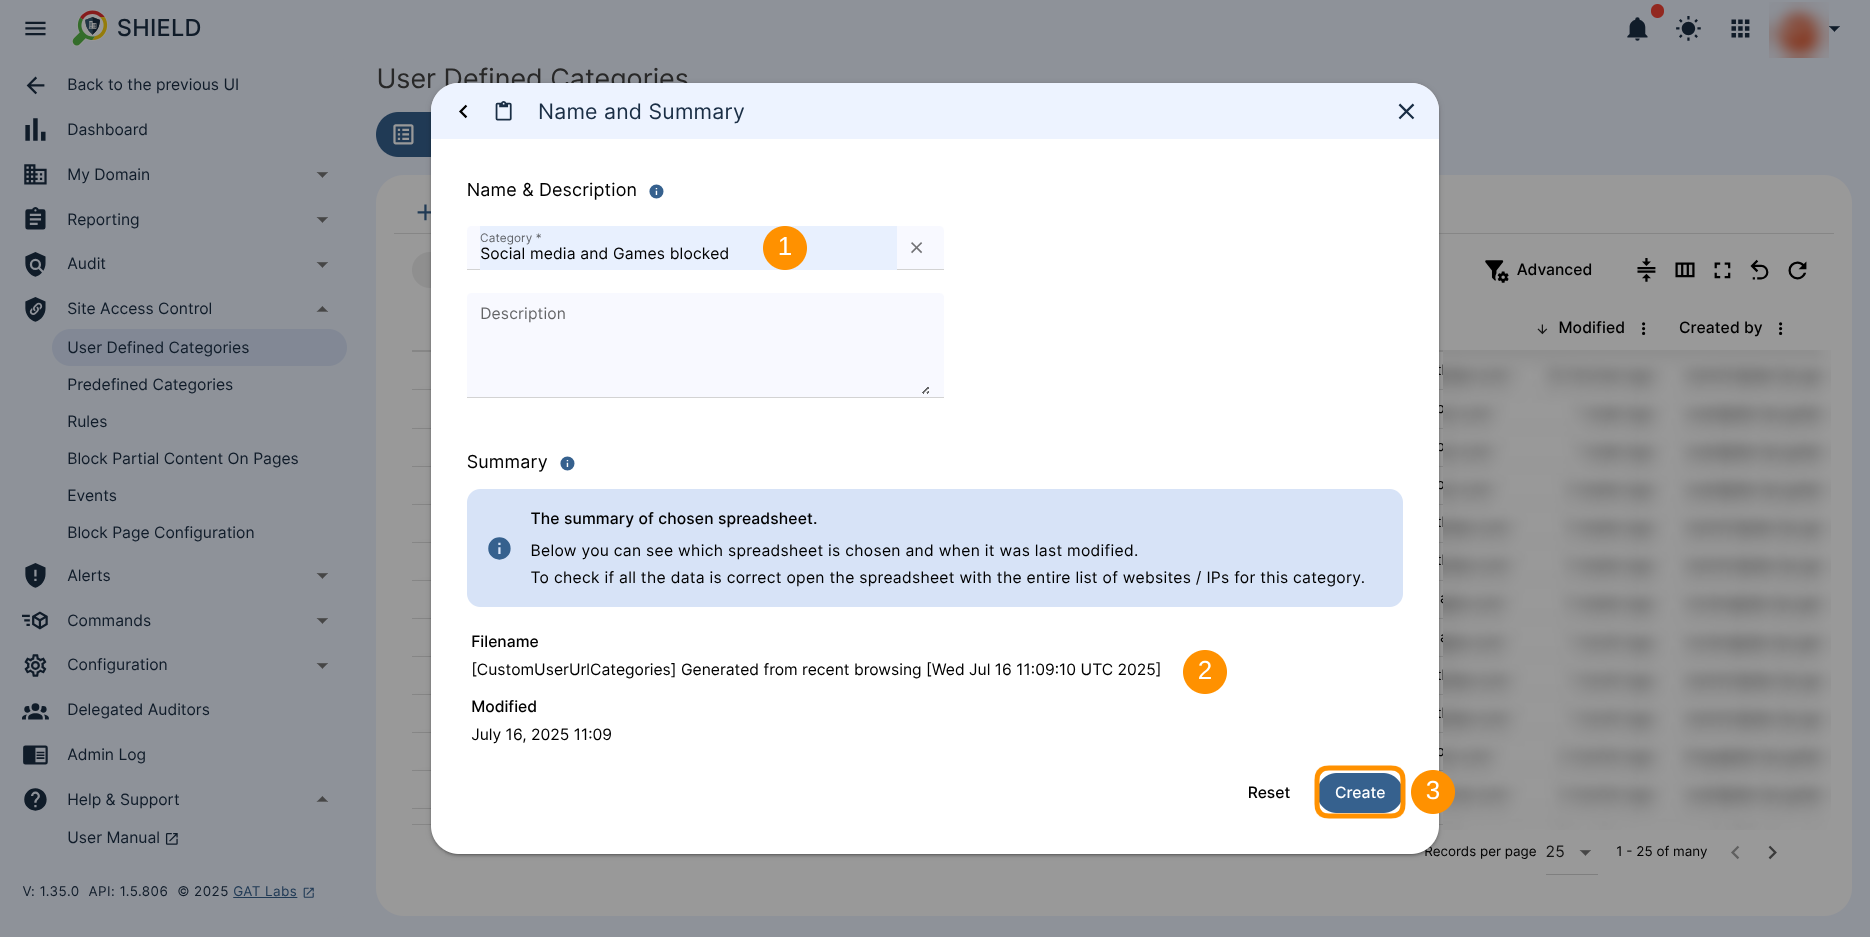
- Create from a Spreadsheet – Create a new spreadsheet and add the Sites needed, or Select an existing spreadsheet to enter the URLs.
- Web Search – Search for a keyword and block or allow all sites found by the Search.
- Recent Browsing – this is a list of URLs generated from the last 90 days’ browsing history.
- When the spreadsheet is generated, it will be sent as an email to the Admin account.
-
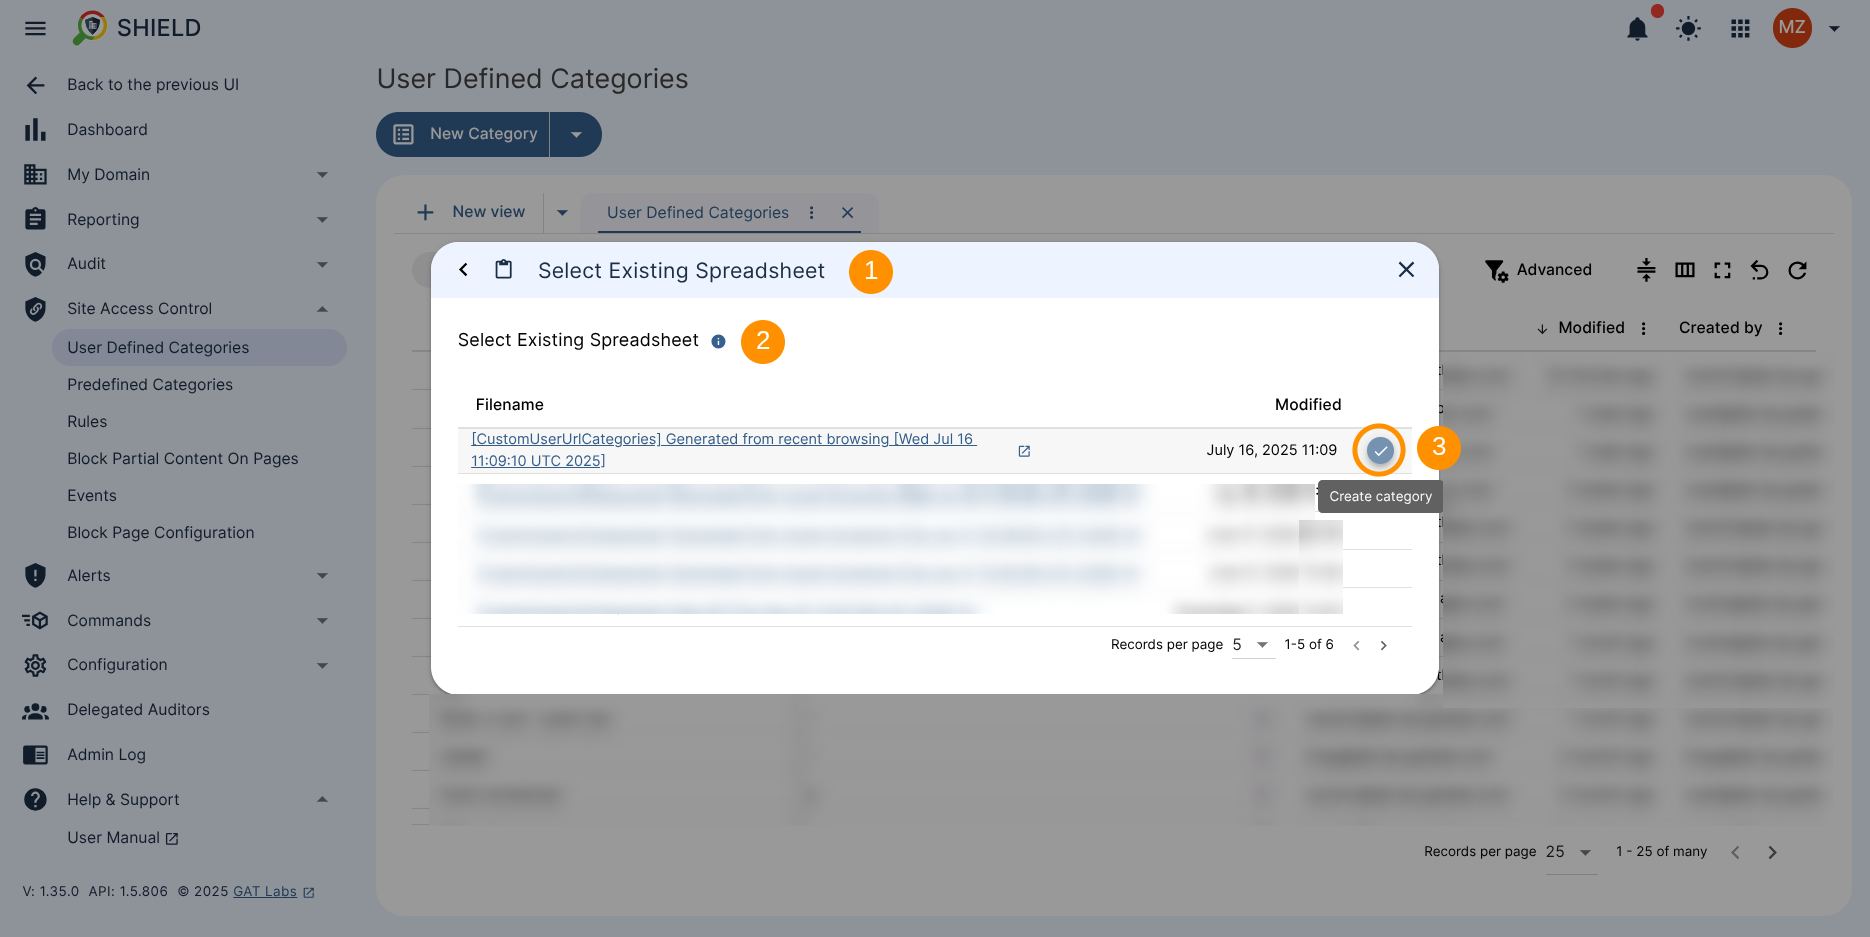
- Use the generated spreadsheet and import from Spreadsheet > Select the existing spreadsheet. The generated spreadsheet will be shown as an option to be selected.
- Select the sheet and click on the Create category button, and the URLs will be added as a category of sites.
- Use the generated spreadsheet and import from Spreadsheet > Select the existing spreadsheet. The generated spreadsheet will be shown as an option to be selected.
-
-
- Alternatively, copy and paste the URLs via the List or Clipboard option.
-
Create the Rule #
When the generated spreadsheet is selected or the URLs are added manually, the create rule wizard window will appear. Enter a name and description for the rule and click Create.
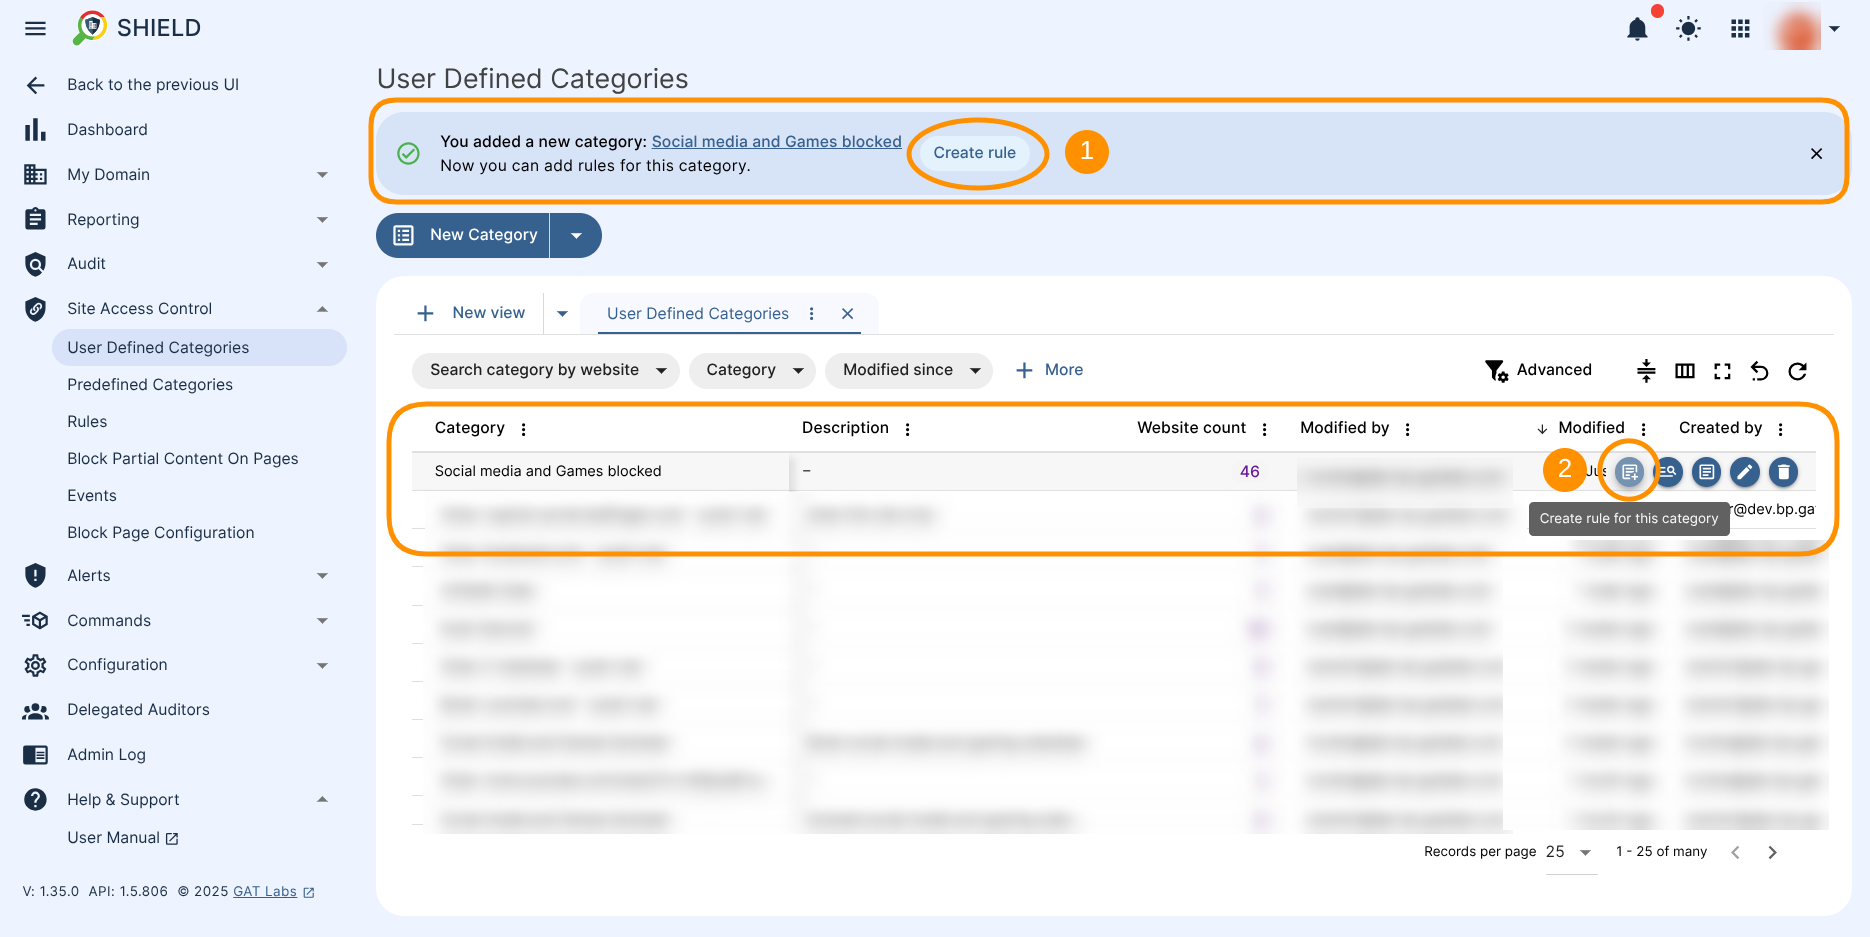
Activate the Rule #
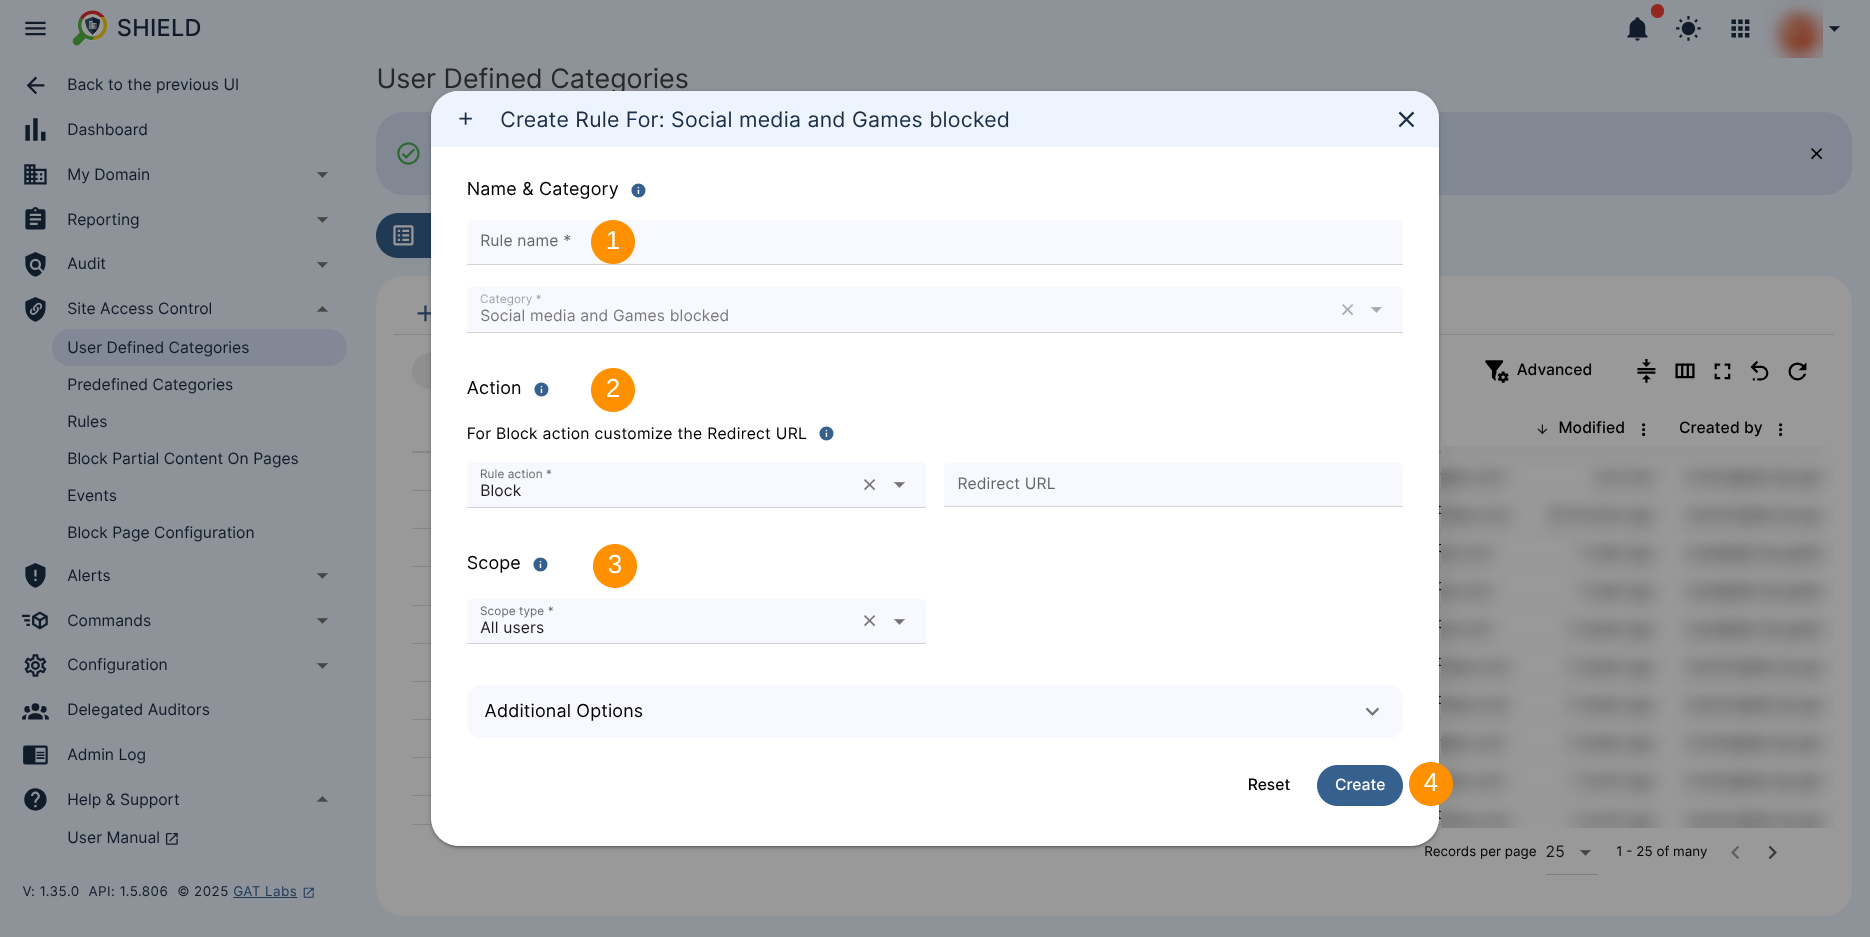
When the category is created, there will be a new button click on the Create rule.
You will see a new window. Fill in the details.
- Rule name – enter the rule name.
- Category – the newly created category name will be shown.
- Action – select the action to be done, such as blocking or allowing the URLs.
- Redirect – enter a page to where the users will be redirected if they visit the blocked site (optional).
- Scope – select the users to whom the rule applies.
- Create – click to create the block or allow the rule.
Result for the User-defined Categories #
After creating the rule, you can find it under Rules.
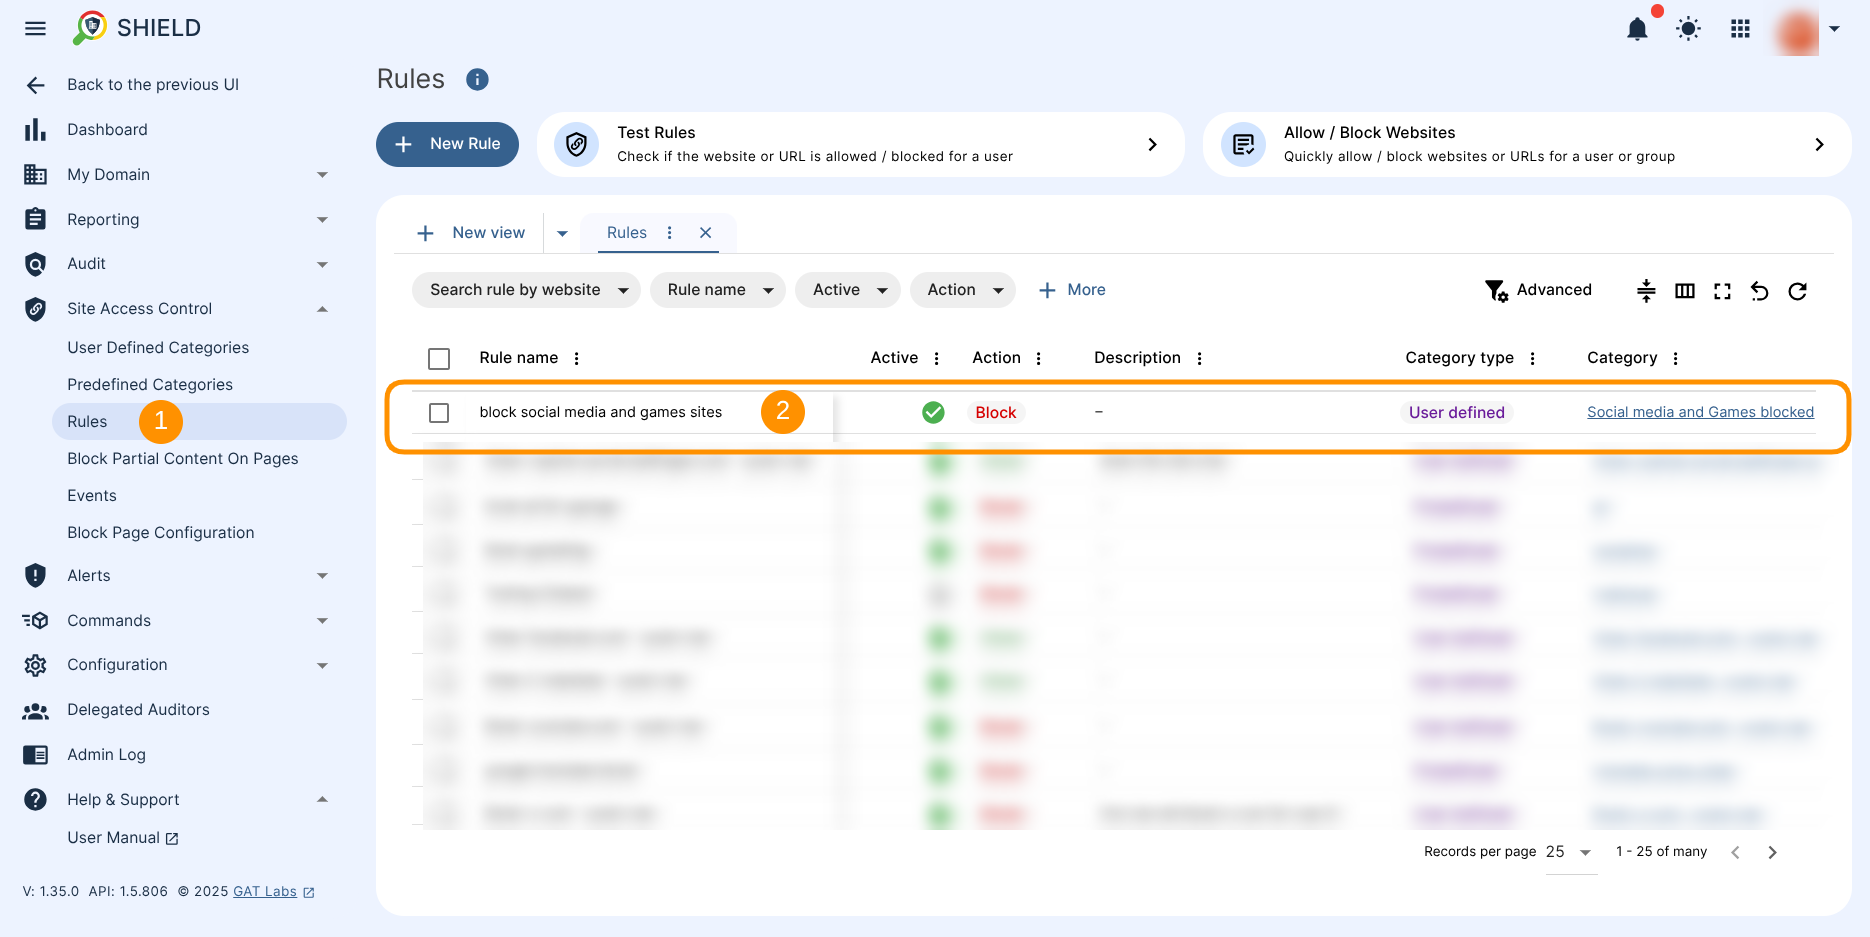
You block the user from opening the websites.
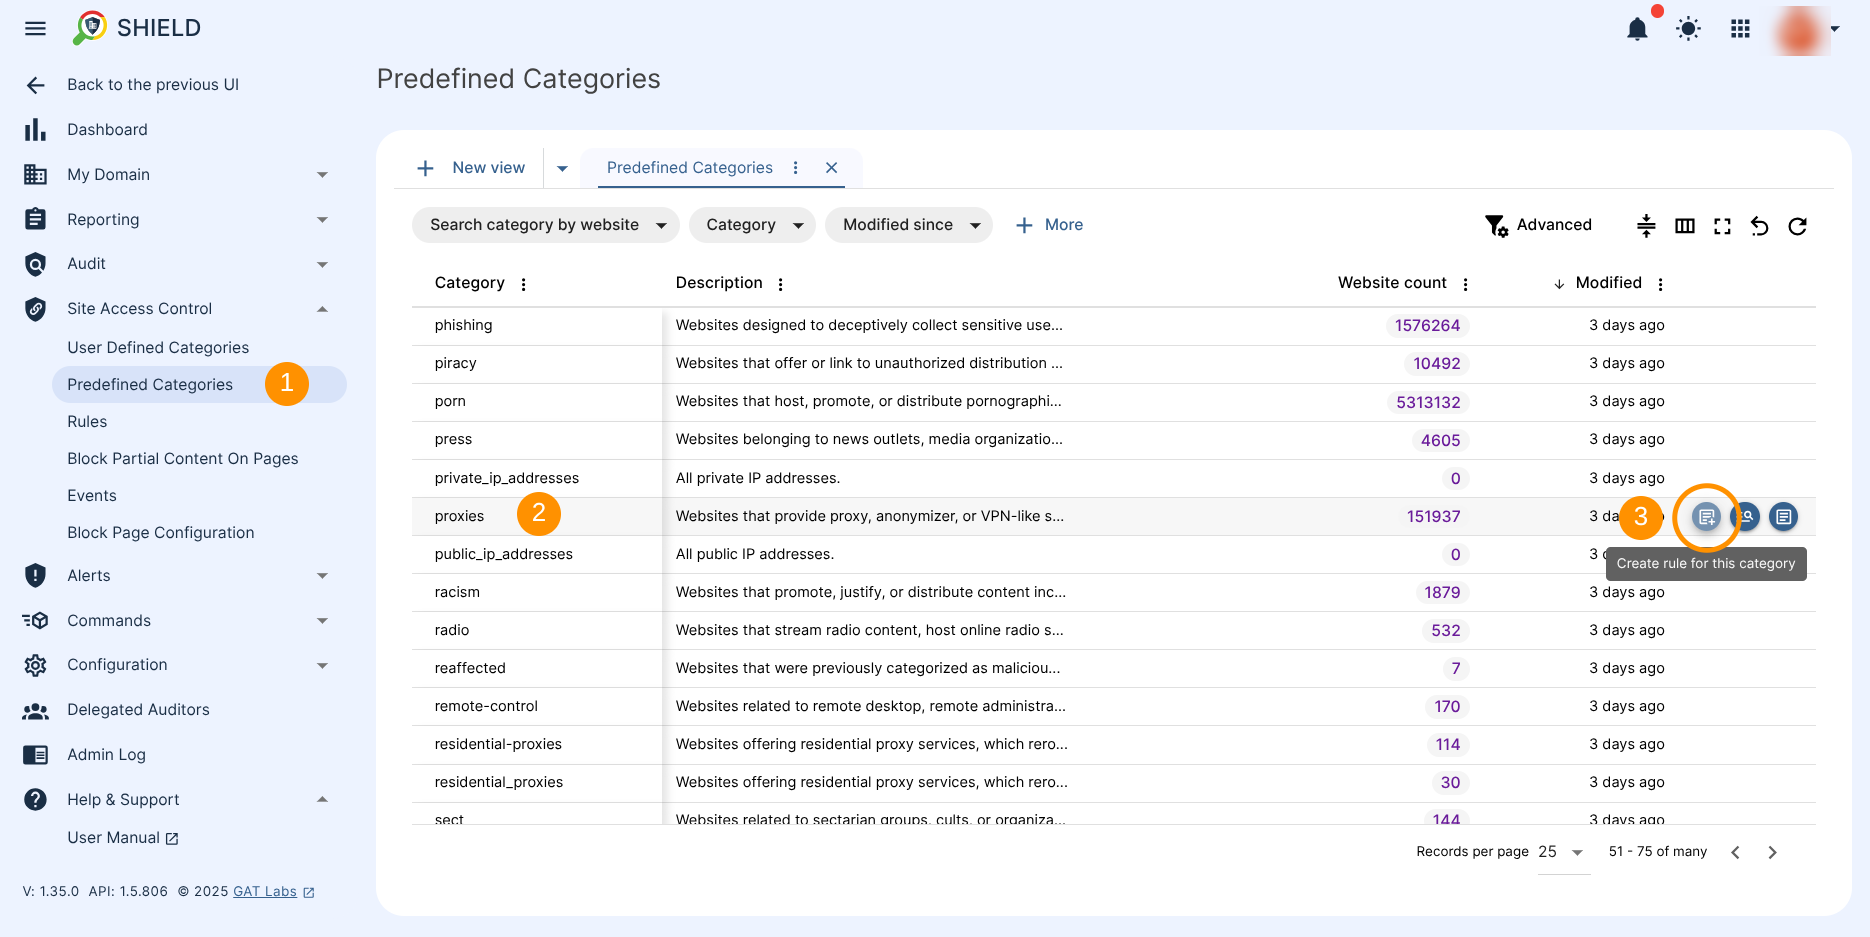
Predefined Categories #
We have predefined lists of websites, organized into various categories, from a third-party provider. Each category contains many website URLs that users can access and visit.
With GAT Shield, you can easily block all those categories of websites. The Admin can select any pre-defined category and block all sites with a few steps.
To do so, navigate to Shield > Site Access Control > Predefined categories.
Hover over any category you need and click on the (+) button Create Rule for this Category.
You will see a new pop-up window. Fill in the details and select what action and users to whom the predefined category applies.
- Rule Name – enter a name for the active category.
- Action – select to block the category list of sites.
- Redirect URL – if you select it, enter the URL to which the affected users will be redirected when visiting the blocked pages.
- Scope – select the users to whom the rule applies.
- Create – click on Create to add and activate the rule.

The Result of the Blocked Predefined Category #
You block all the pages from the predefined categories for the selected scope of users.
Allow Pages if Unexpectedly Blocked #
Even though predefined categories may block specific pages, you can easily override this by creating a simple allow list and adding those specific pages.
This allow list will take precedence over the block list, ensuring user access.
To create it, navigate to Rules > click on Allow / Block Sites.
You will see a new pop-up window.
Fill in the details and enter the sites you want to allow.
- Allow – activate the Allow rule.
- Scope – select which users can visit the site.
- Paste from clipboard – paste the list of URLs to allow (optional).
- Site list – enter the list of URLs to allow.
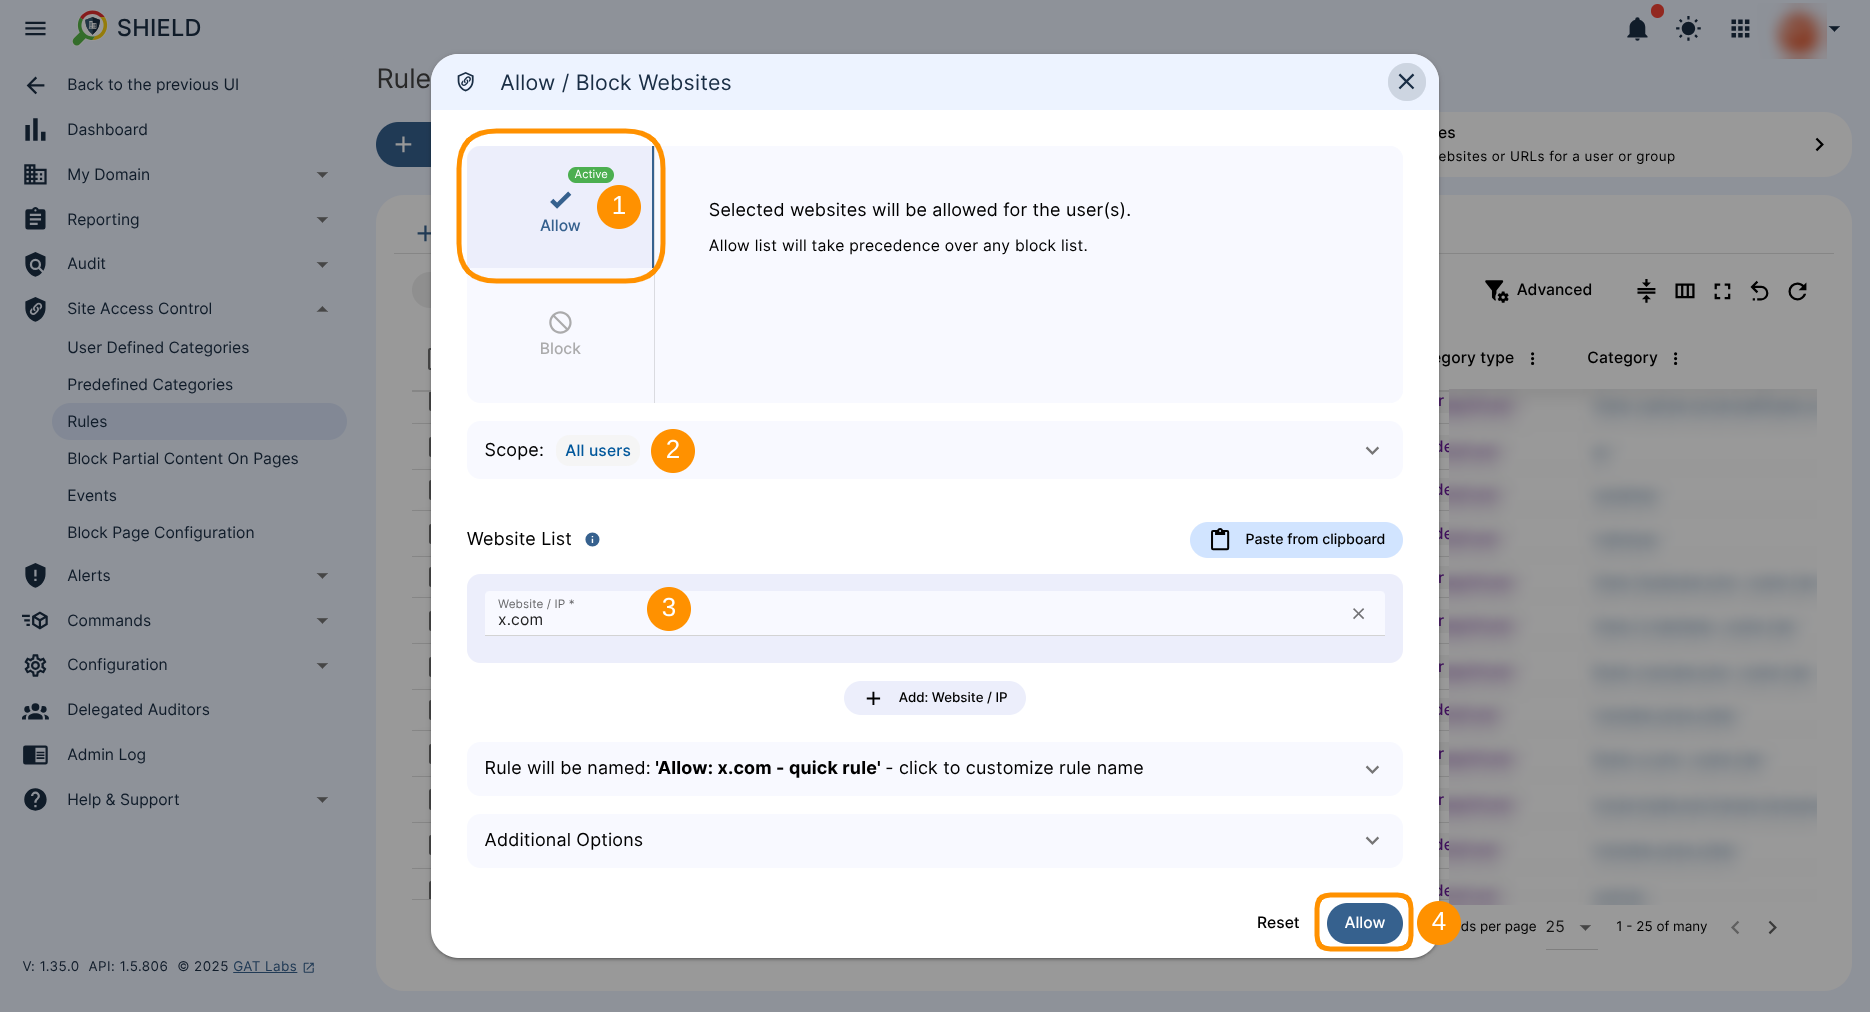
- Allow – click to enable and allow the sites.
Result #
As a result, the predefined list will block all the sites that fall under its list. However, allowed sites take precedence over the blocked list.

Predefined Categories – Special Categories #
In the Predefined categories, we have 4 special categories.
- All – you block all URLs when you create a Block Rule using this category.
The case would be to block every page the users can visit and set up an allowed list for the ones they can. In effect, it controls all the pages the users can visit.
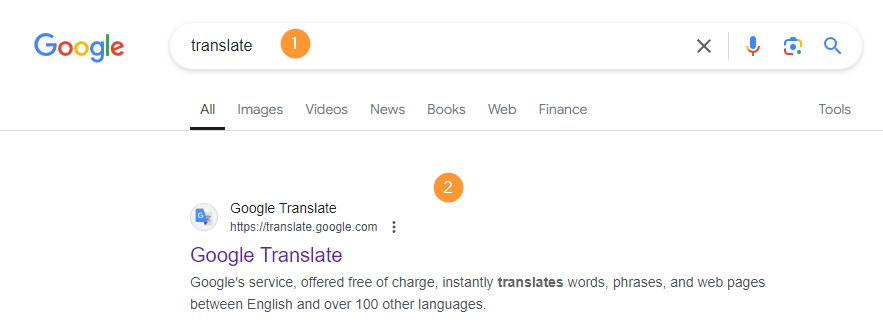
- Google Translate – you block pages accessed via Google Translate.
- Private_ip_addresses – you block all private IP addresses when you create a Block Rule using this category.
- Public_ip_addresses – you block all public IP addresses when you create a Block Rule using this category.
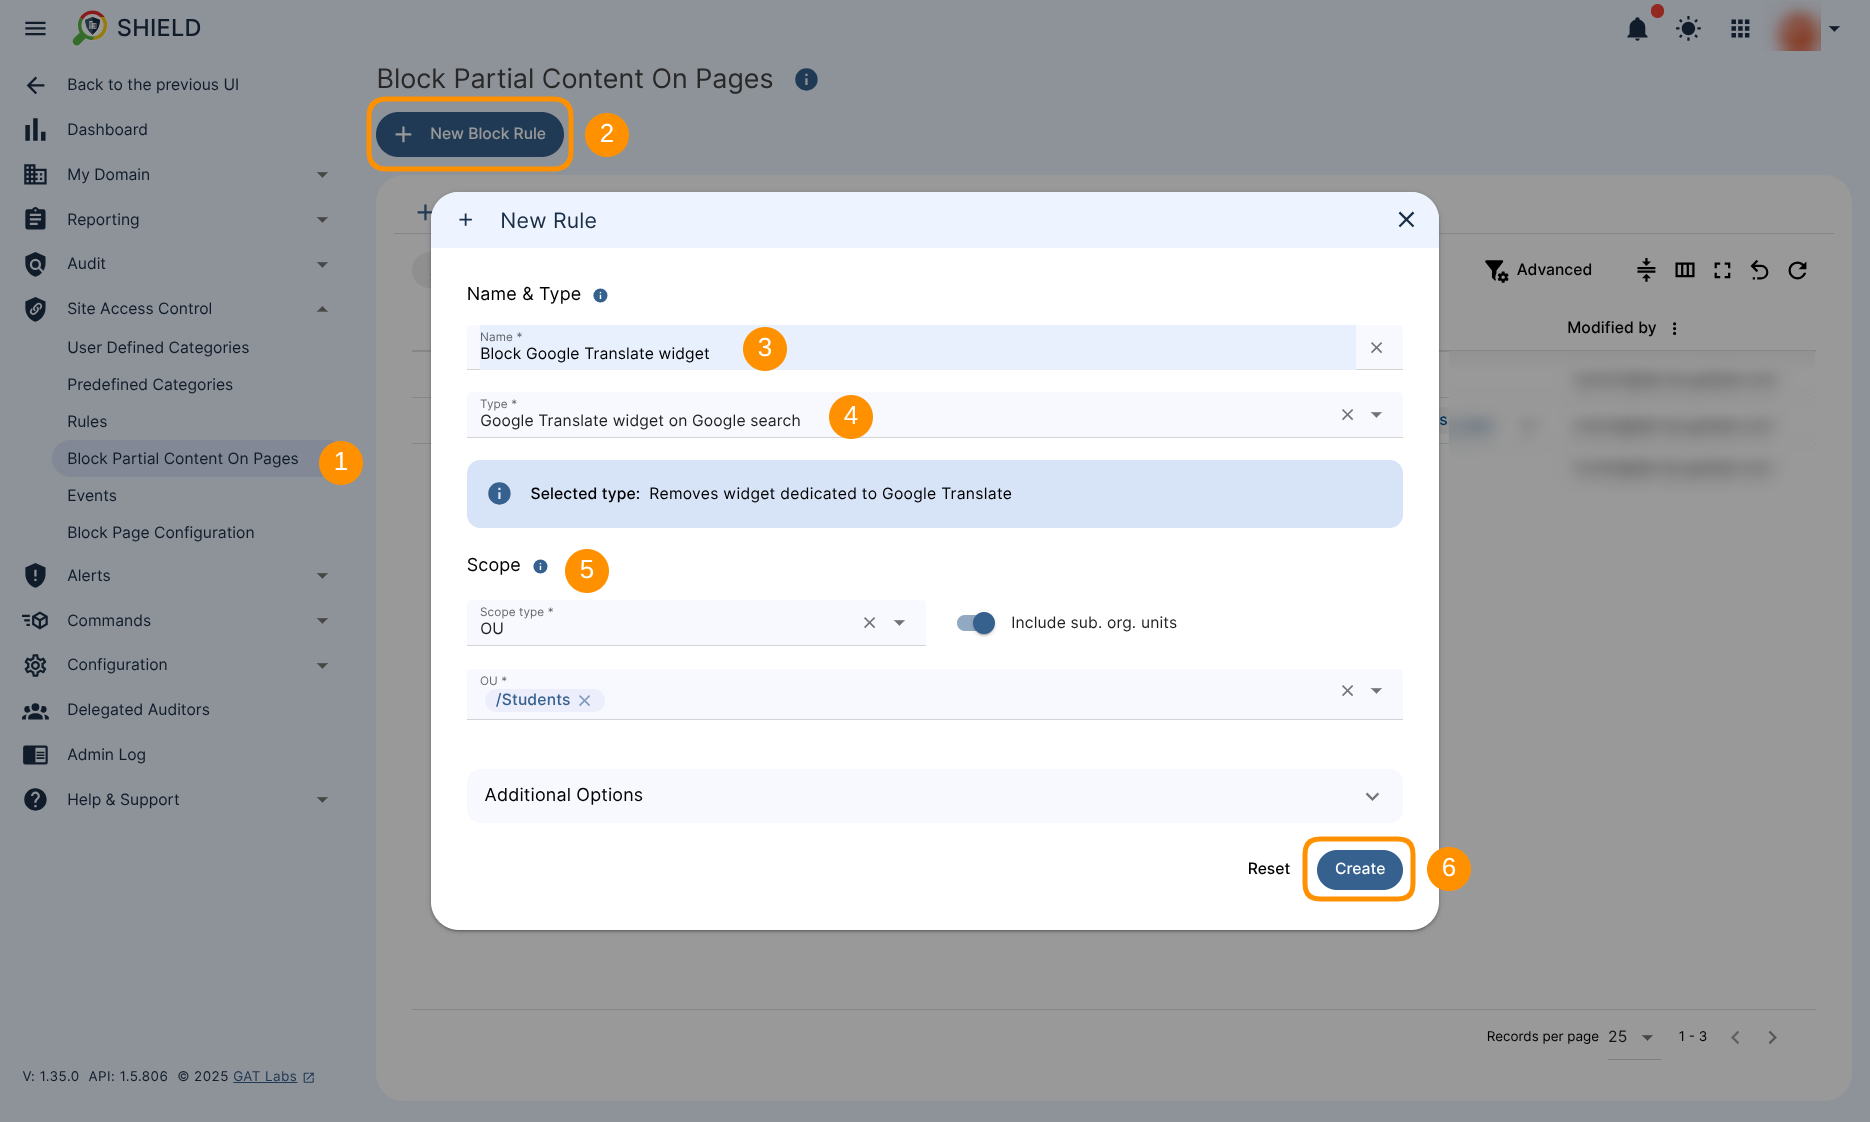
Block Partial Content on Pages #
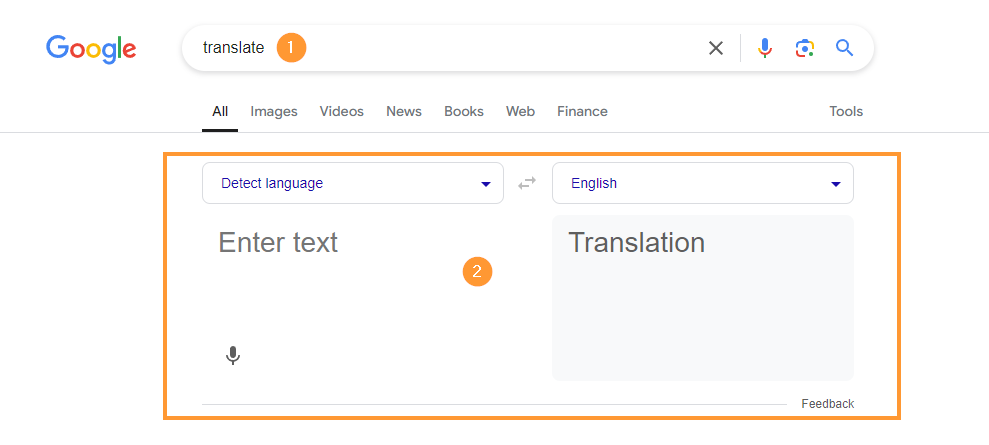
This will allow the Admins to block partial content on a webpage, it blocks the Google Translate widget on Google search.
To set this filter, navigate to Site Access Control > Block Partial Content on pages > New Block Rule.
- Name – enter a name for the rule.
- Type – select the Google Translate widget on Google Search
- Scope – select the scope of users to whom the block applies.
- Create – create the rule.
Result of Blocked Google Translate Widget #
When you enable the block:
When you don’t enable the block:
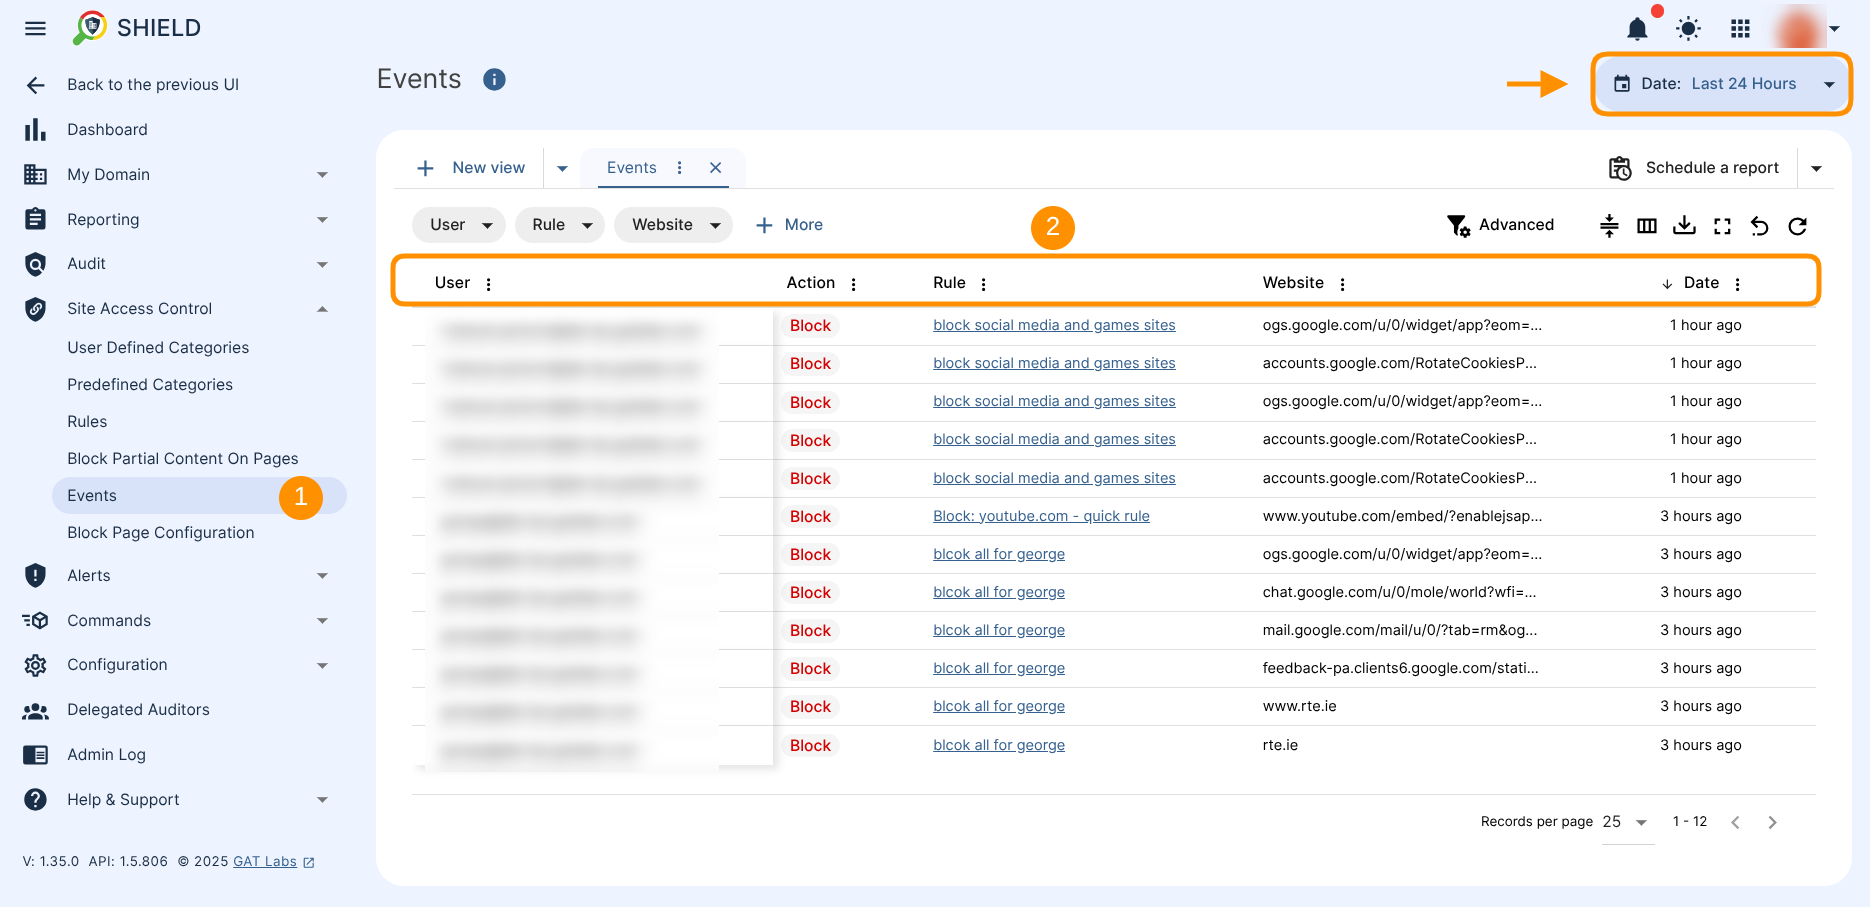
Events #
The “Events” tab provides a comprehensive overview of all events triggered by the Site Access Control feature.
You can view details about blocked users, including the time of the block and the specific URLs accessed.
Filter this data using any visible fields, export it to Google Sheets, or download it in CSV format for further analysis.
NOTE: Default Date filter is set for : Last 24 Hours
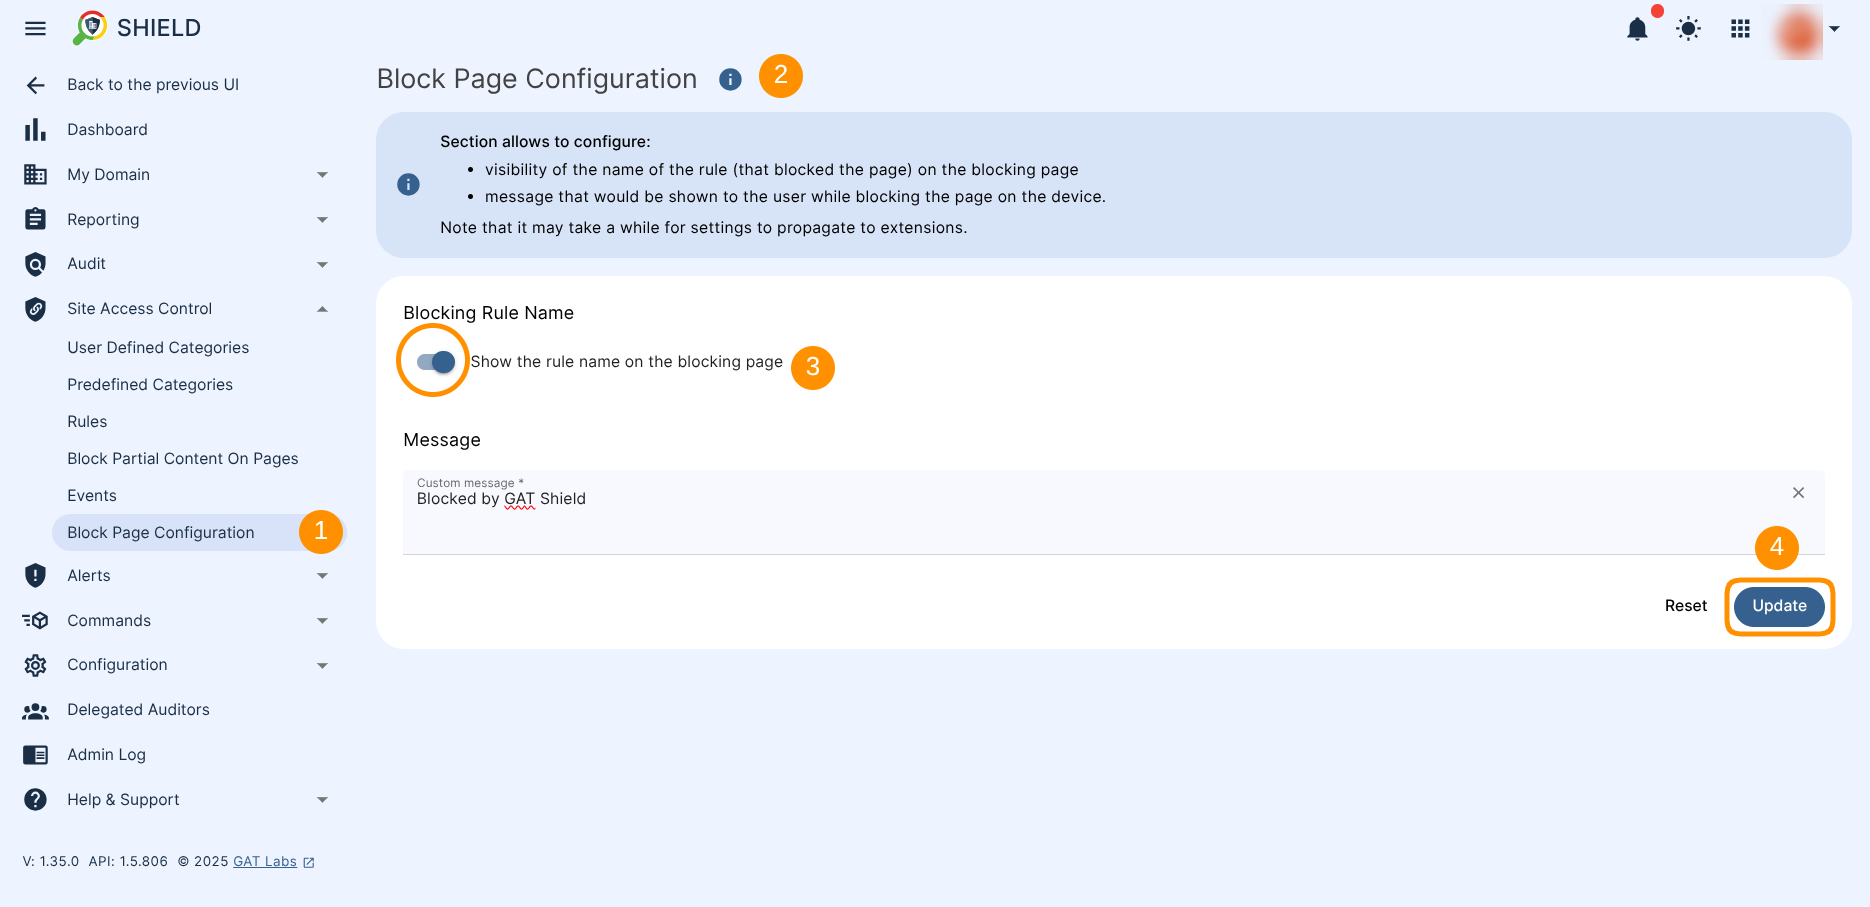
Block Page Config #
Block Page Config allows the Admins to set up a Custom message on the blocked page.