GAT+ is an audit tool designed for Google Workspace domains, allowing administrators to manage domain Google Drive data efficiently.
One of its latest features includes the management of Badged Drive labels, allowing administrators to filter and update these labels across their domain’s drive files.
This guide will walk you through the process of managing Badged Drive labels using GAT+.
Important note: Owners or Managers of the Files must have permission to set labels for this to work.
Before you begin:
Update Google Drive Labels #
Badged labels help categorize and manage your Google Drive files.
Here’s how to update them using GAT+.
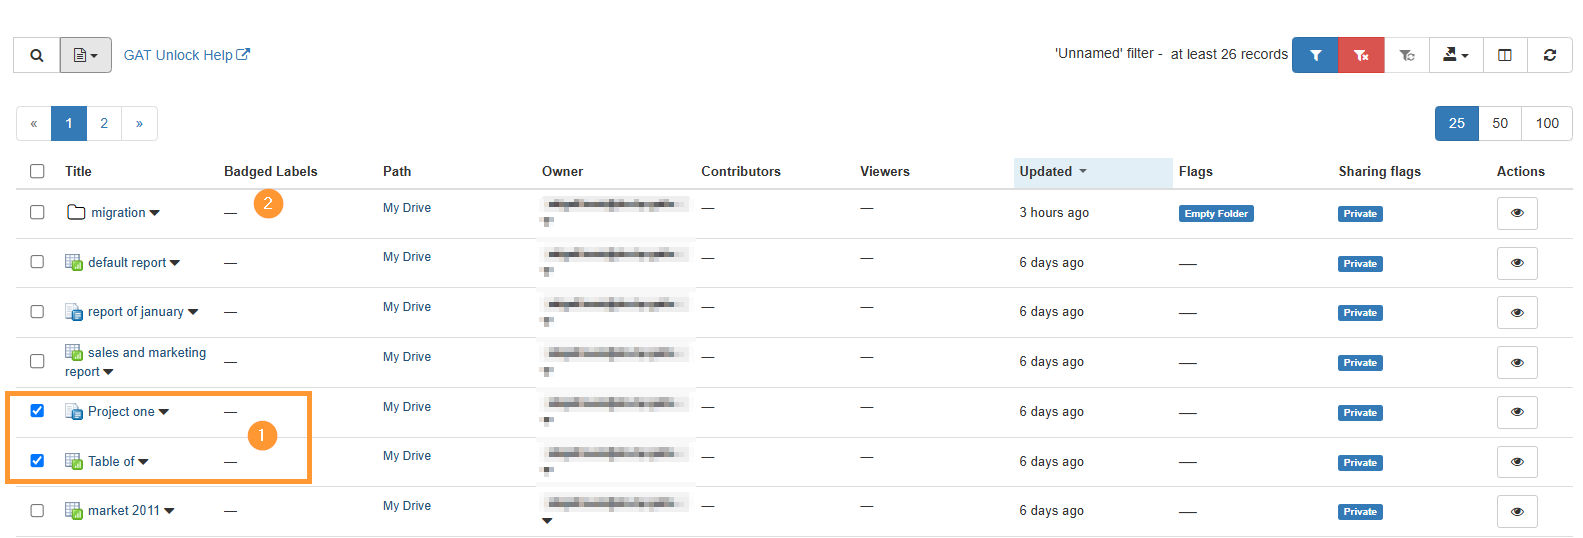
- Find the Files:
- Go to GAT+ > Drive > Apply filter.
- Search for the files you want to update the labels for. Remember, only files (not folders) can have badged labels.
- Select and Initiate Update:
- Check the boxes next to the files you want to modify.
- Click the “File Operations” button.
- Choose “Update Drive Labels”.
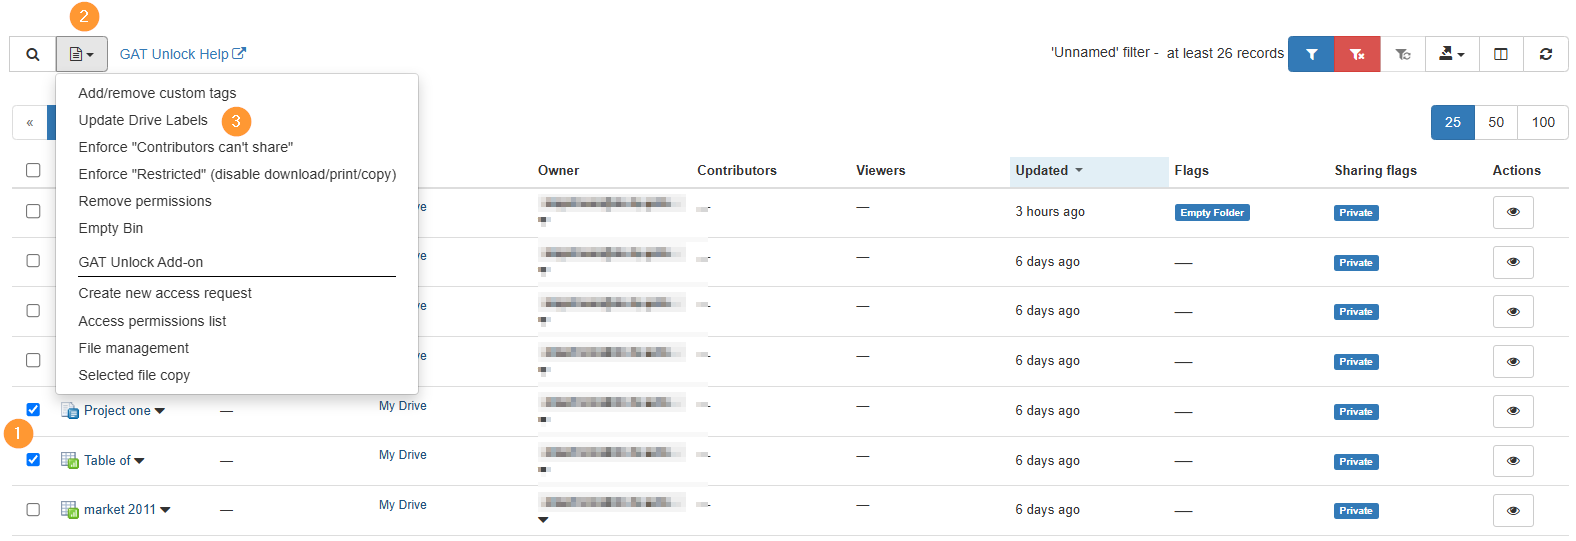
- Set the New Label:
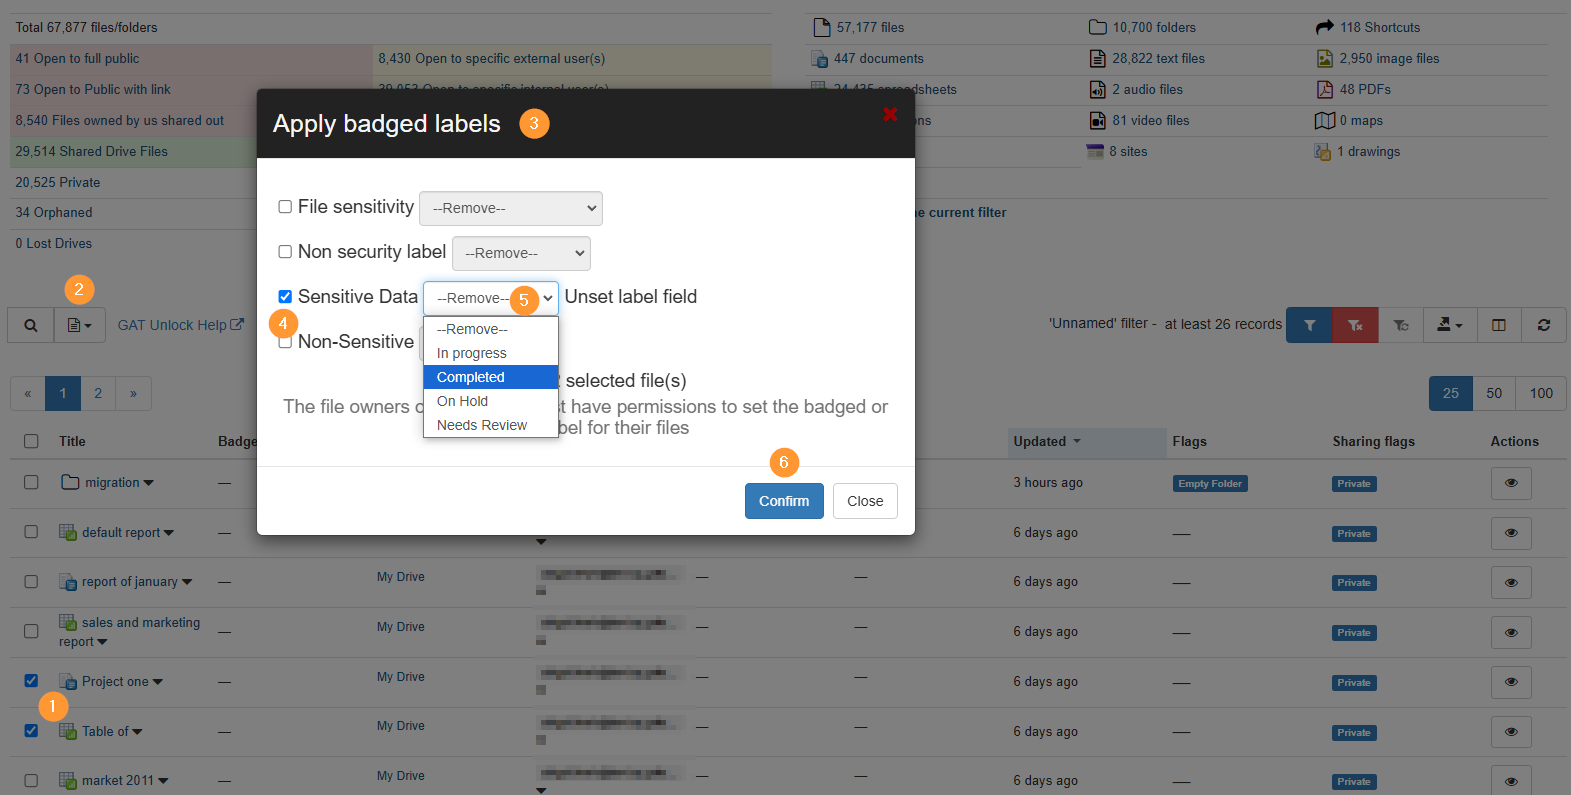
- A pop-up window will appear.
- From the dropdown menu, select the new badged label you want to apply.
- Note: You will see the Badged Labels existing on your domain
- Select the “checkmark” beside the Label.
- Remove – select “unset label field”
- Select – any of the labels you want to apply
- Click “Confirm” to start the update process.
When confirmed, the job will be requested to run.
Check the Results #
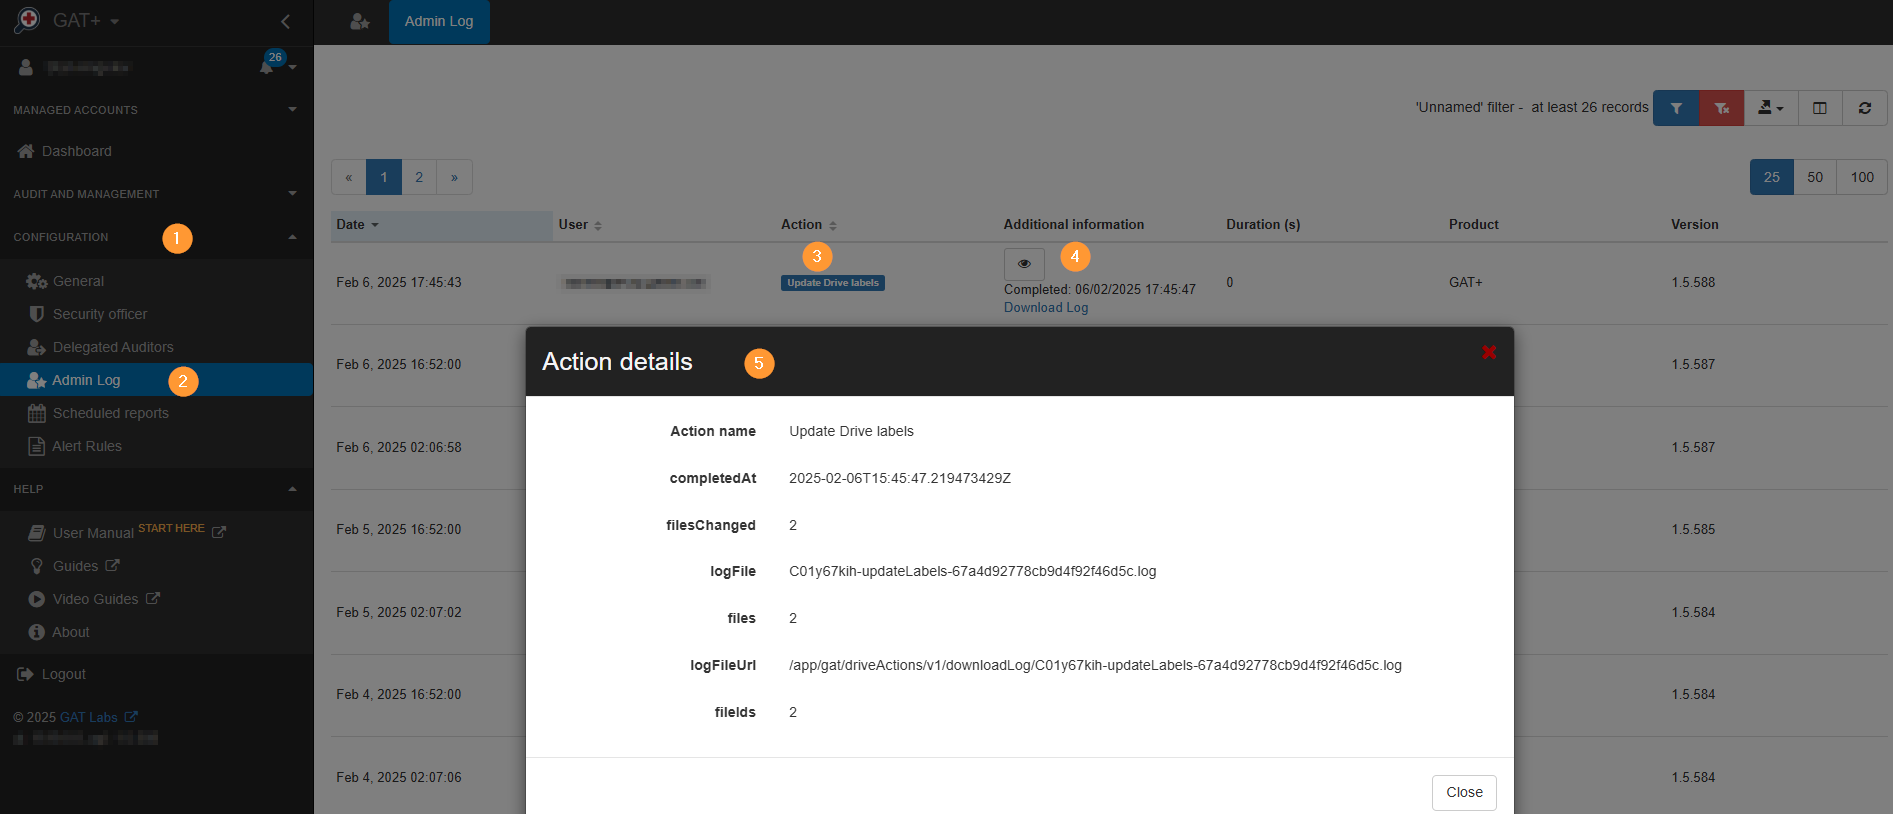
Monitor the progress and details of the update in the Admin log.
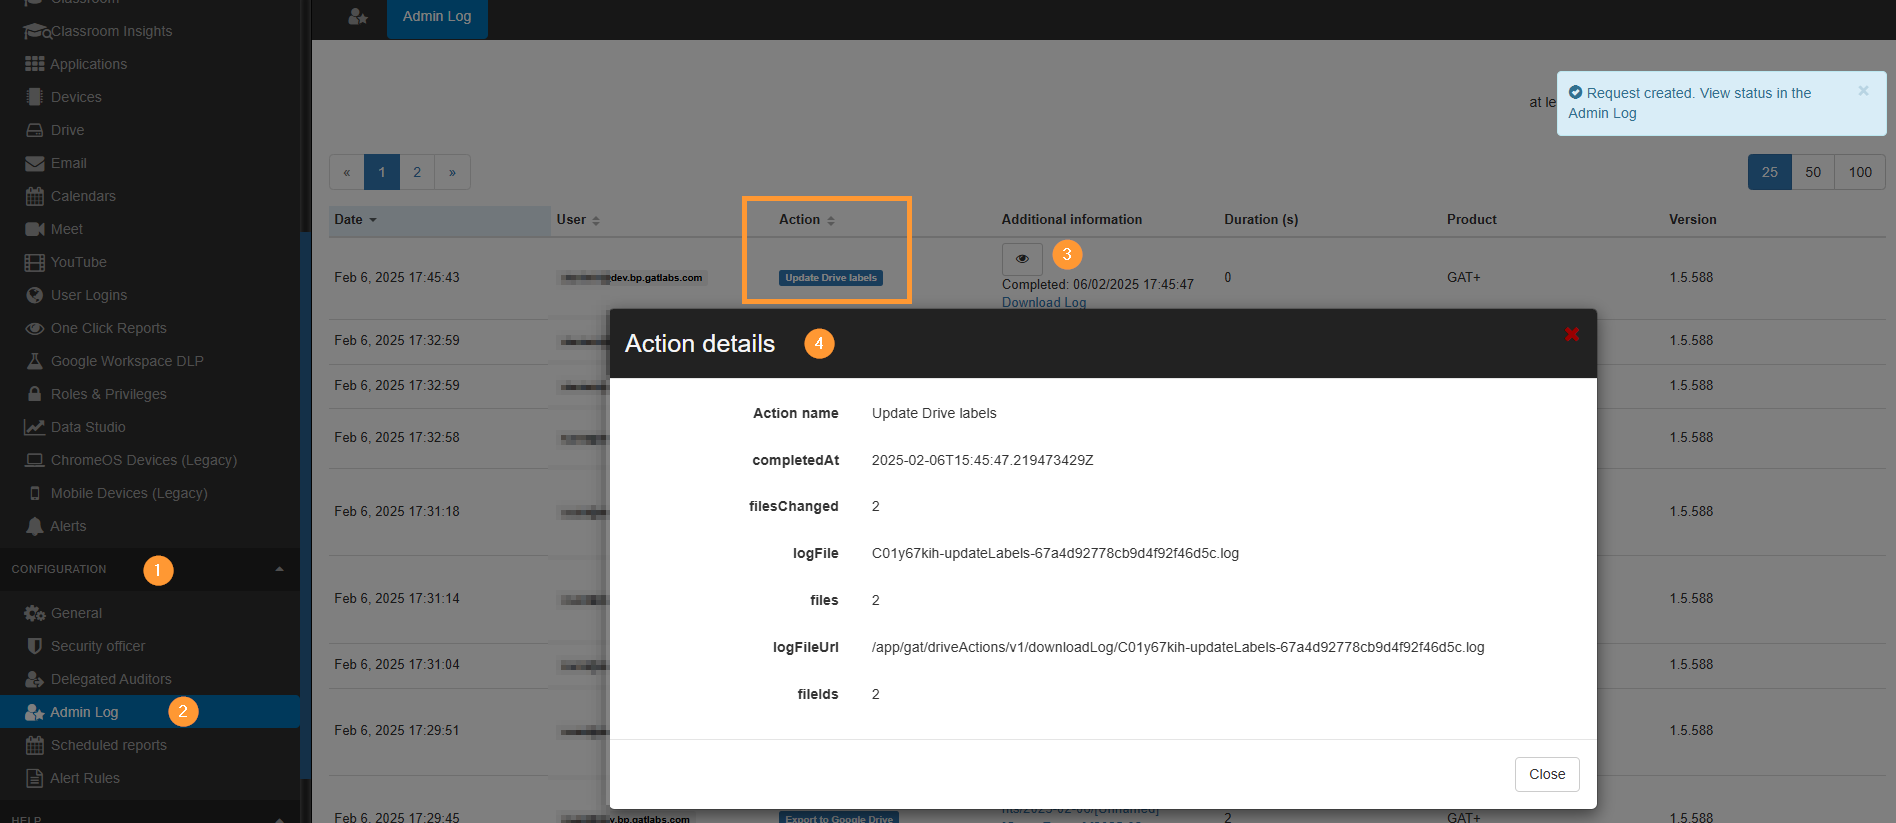
Once completed, you can view the new badged labels in GAT+ (Drive > Files tab).

(Optional) Make Labels Visible in Google Drive:
- In the Drive interface, click “Column visibility”.
- Find “Badged Labels” and select “Apply” to display the labels in your regular Drive view.
- Note: If some files already have a different Drive Label applied, it will automatically change to the newly selected one.

Important Notes:
- By default, this process only works on Google Drive files, not folders.
- Ensure the badged labels you want to use are already created in your Google Workspace.
Update Google Drive Labels with Scheduled Reports #
- Go to Drive audit.
- Filter for the specific files you want included in the report.
- Set up a scheduled report under the “Scheduled” tab.
- Apply and schedule the report.

Set up label updates automatically based on the Scheduled report results:
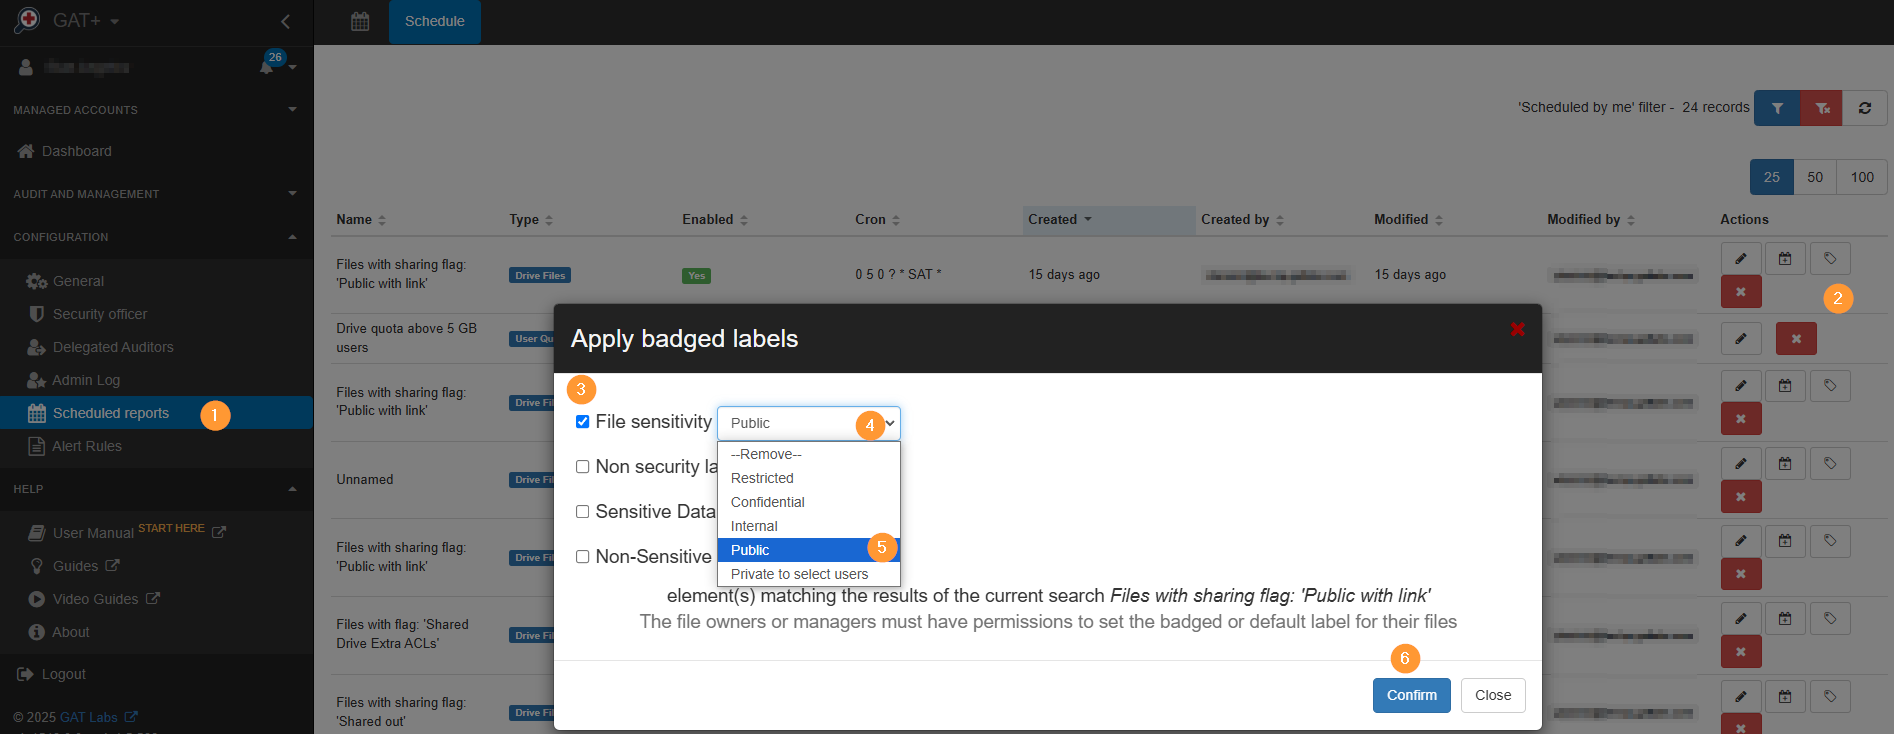
- Navigate to GAT+ > Configuration > Scheduled reports.
- On the right side, click “Update Labels.”
- A pop-up window will appear.
- Select the default label you want to apply to the files found in the report.
- Click “Confirm.”
Important Note: Owners or Managers of the files must have permission to set labels for this to work.
Following these steps, the scheduled report will run at the specified time and automatically update Google Drive labels for all matching files.
This can help streamline file organization and ensure consistent labeling within your Google Drive.
Results of the Scheduled Report Running #
See the result in the GAT+ Admin log every time the scheduled report runs.
Label Update Behavior:
- Empty Labels: The selected label will be added if a file has no existing label.
- Existing Labels: If a file already has a different label, it will be updated to the selected label.
Automatically remove share on files based on Drive Label #
The above can be used to automatically remove shares on files based on the Google Drive Label.
For example:
- Apply filter for all files Shared Out with Badged Label as Confidential.
- Schedule as weekly report

- Automatically remove the shares on the files in the Scheduled report actions.

This guide has demonstrated how to effectively manage Badged Drive labels using GAT+.
By leveraging this powerful tool, Google Workspace administrators can streamline the process of filtering, updating, and maintaining these labels across their domain’s Drive files.
Remember: For successful label management, it’s crucial that the owners or managers of the files have the necessary permissions to set labels.
GAT+ is a valuable asset for any Google Workspace domain, offering a comprehensive solution for auditing and managing Drive data. By incorporating this feature into your workflow, you can ensure that your domain’s sensitive information is properly classified and protected.
If you have any further questions or need assistance, please don’t hesitate to reach out to our support team. We are here to help you make the most of GAT+ and optimize your Google Workspace environment.


