

Cookies, more properly called HTTP cookies, are small bits of data stored as text files on a browser.Websites use those small bits of data to keep track of users and enable user-specific features. Using Shield an Admin can add Browsing Cookie to their website (domain) and child sub-domains Using cookies the server can obtain particular information about the browser:
For instance:
- that this is not your first visit to the site
- that you are logged in to the service and many more
Additional information regarding Cookies can be found here:
Enable Cookies #
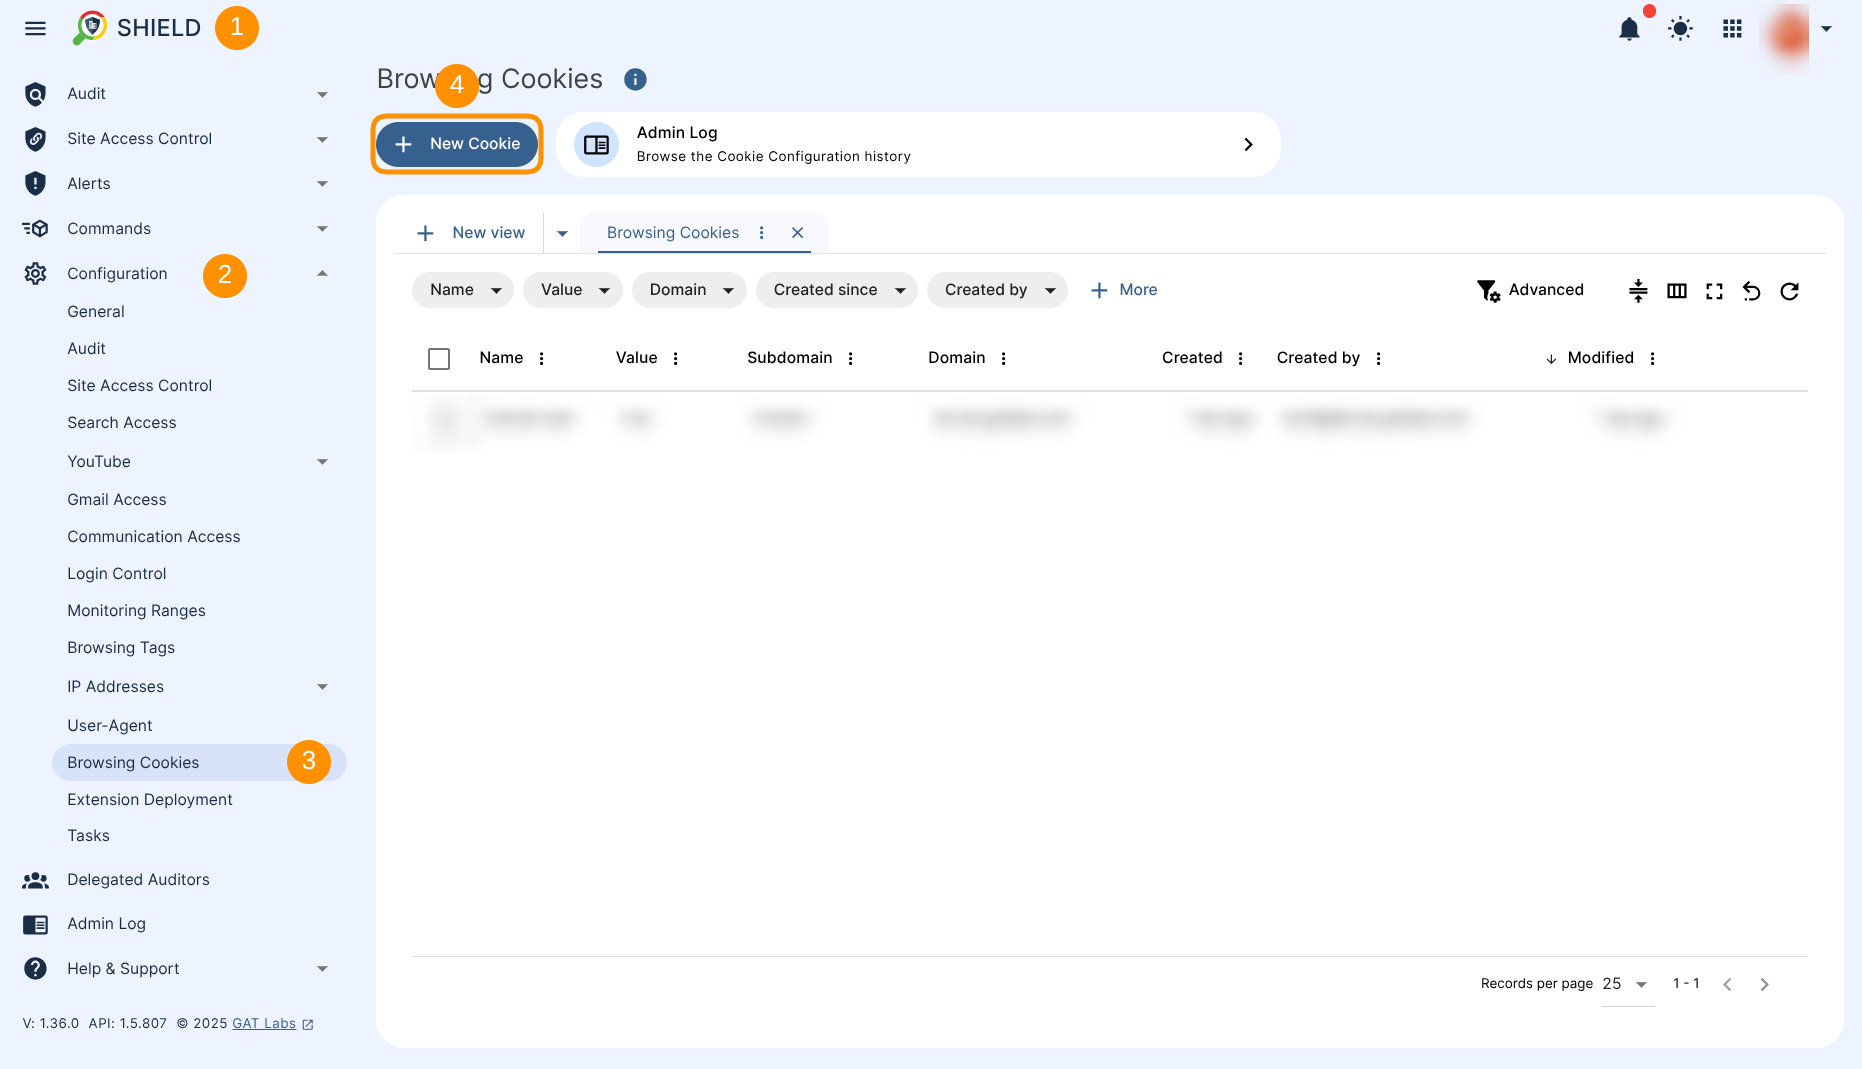
Navigate to GAT Shield (1)→ Configuration (2)→ Browsing Cookies (3)→ New Cookie (4)
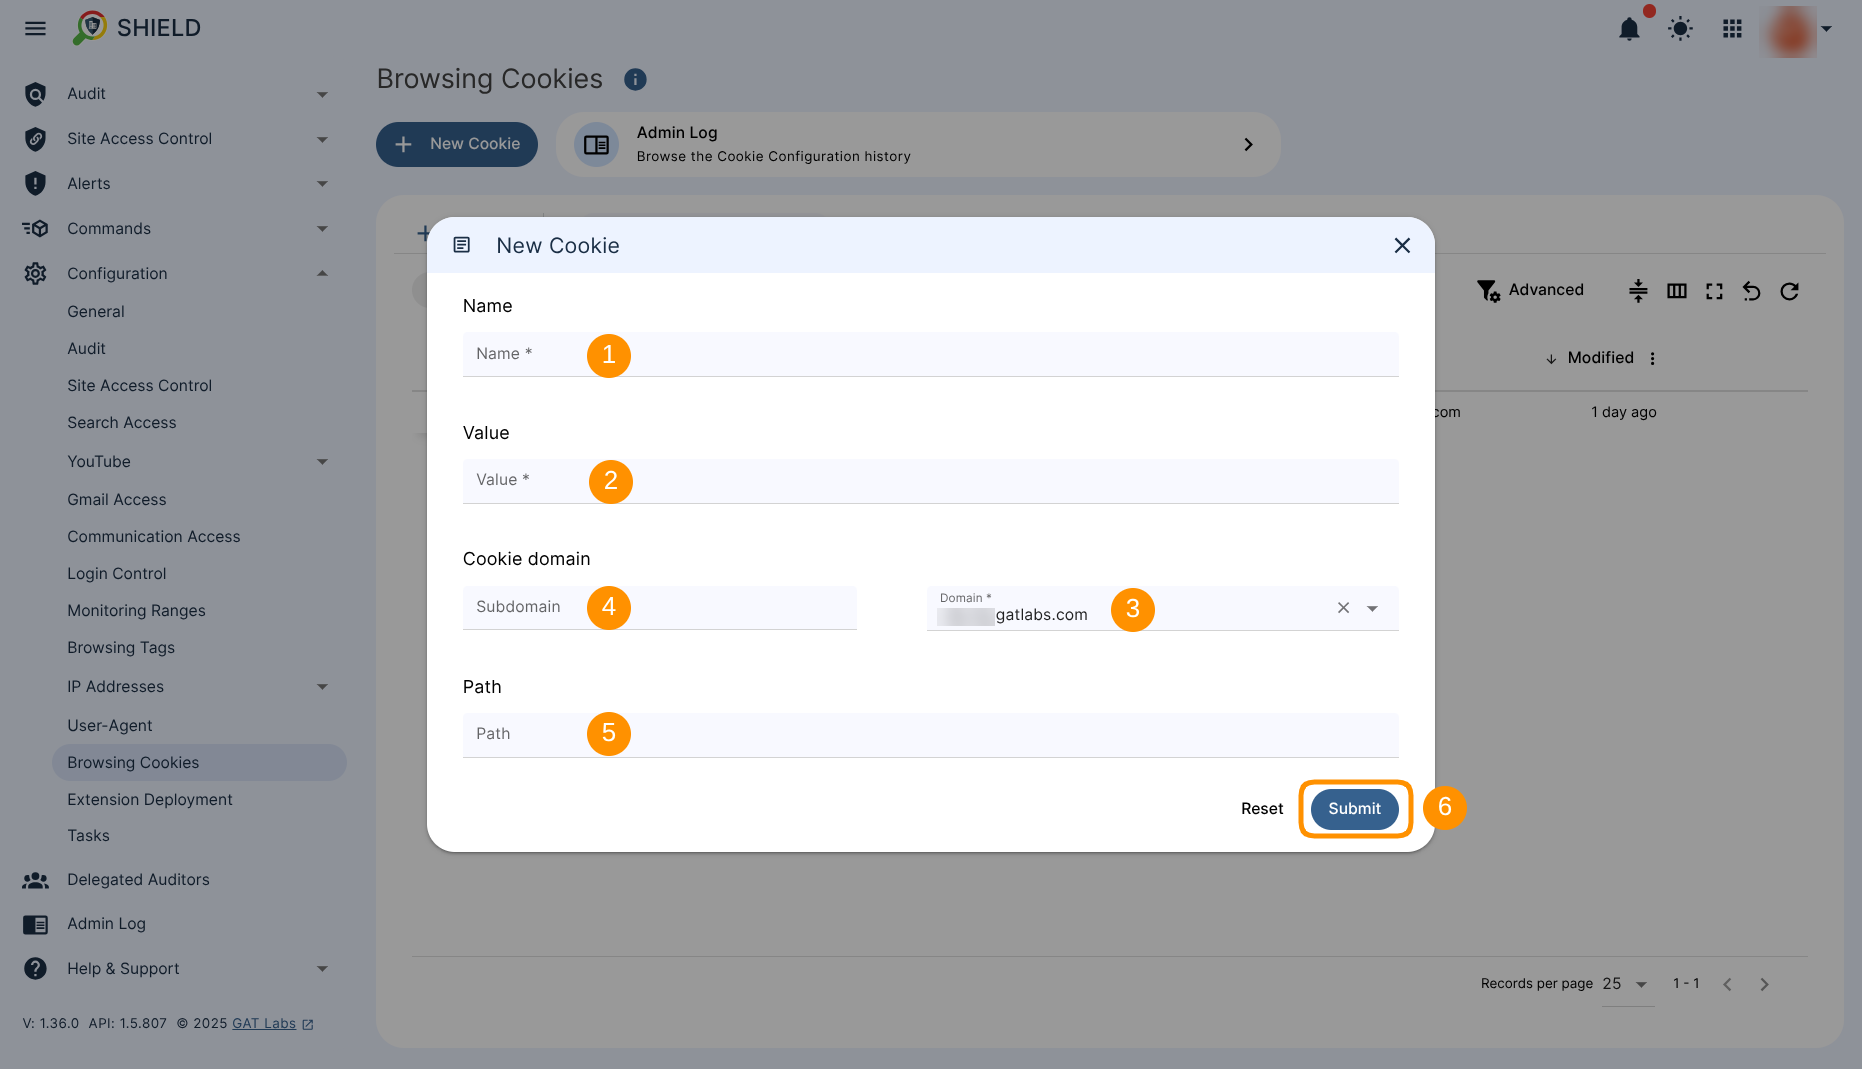
A new menu will pop-up, fill in the details required.
- Name – Enter the Cookie name (1)
- Value – Enter the Cookie value (2)
- Cookie domain – Select the main domain (3) (from the drop-down menu) and pick the subdomain (4) (optional)
- Path – Enter Path (5) (optional)
- Submit – Click on the button to save the cookie (6)
Result #
When the Cookie is saved, it will be set and assigned to the selected domain (site).
The Cookies gathered by the user’s browser are displayed in Shield (1)→ Audit (2) → Cookies (3)
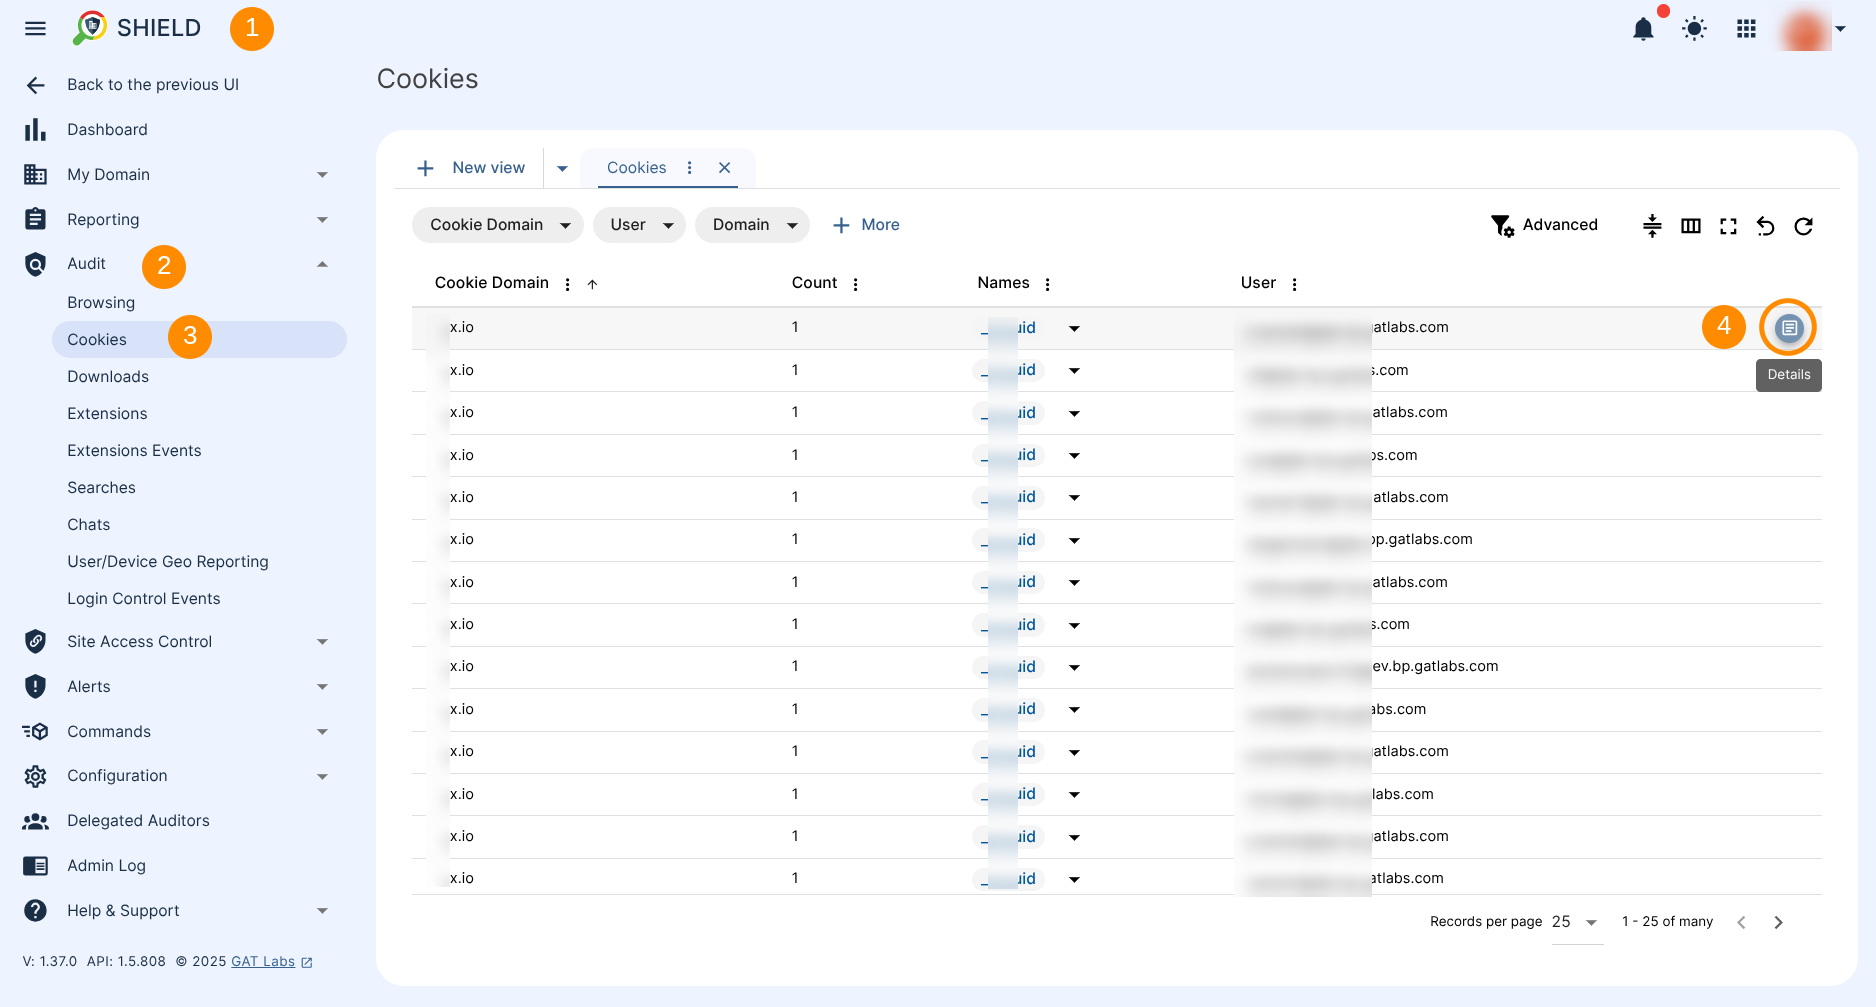
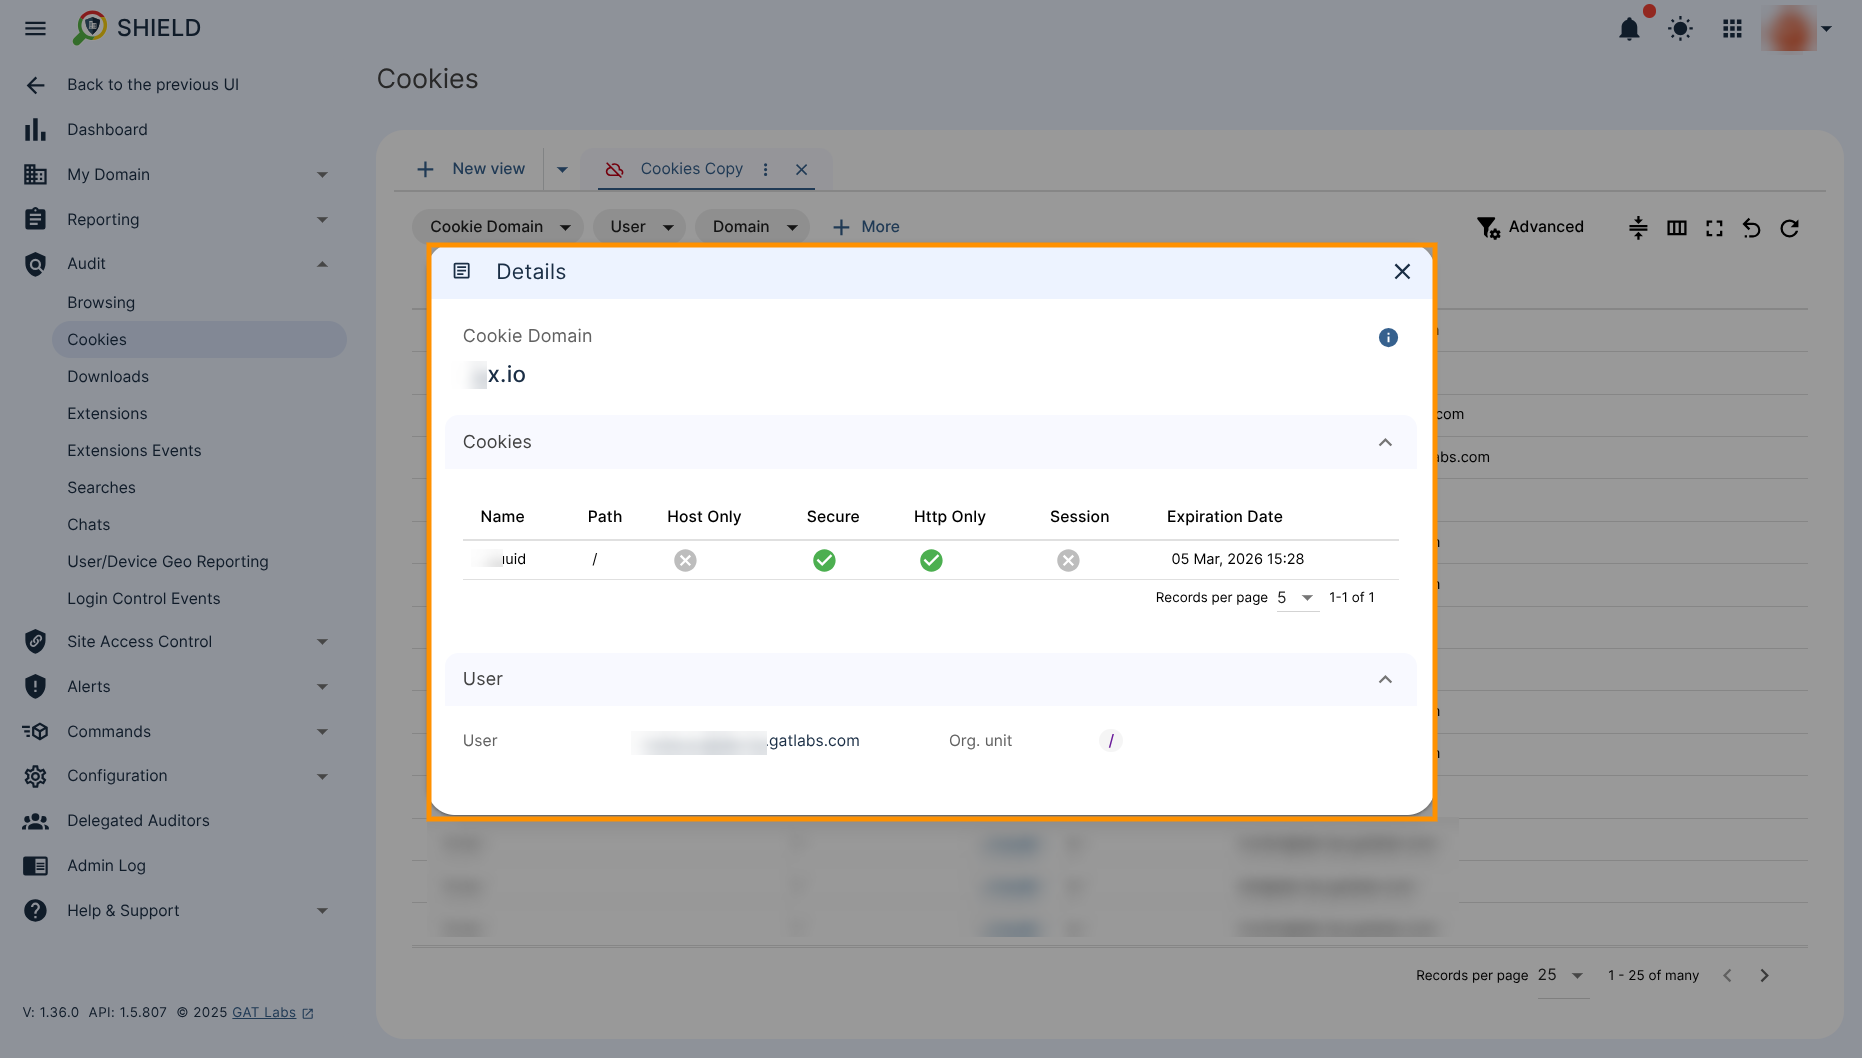
To review each Cookies record, hover over its right side until the Details button appears. Click on the Details button (4) displayed to review additional information about the Cookies in question.
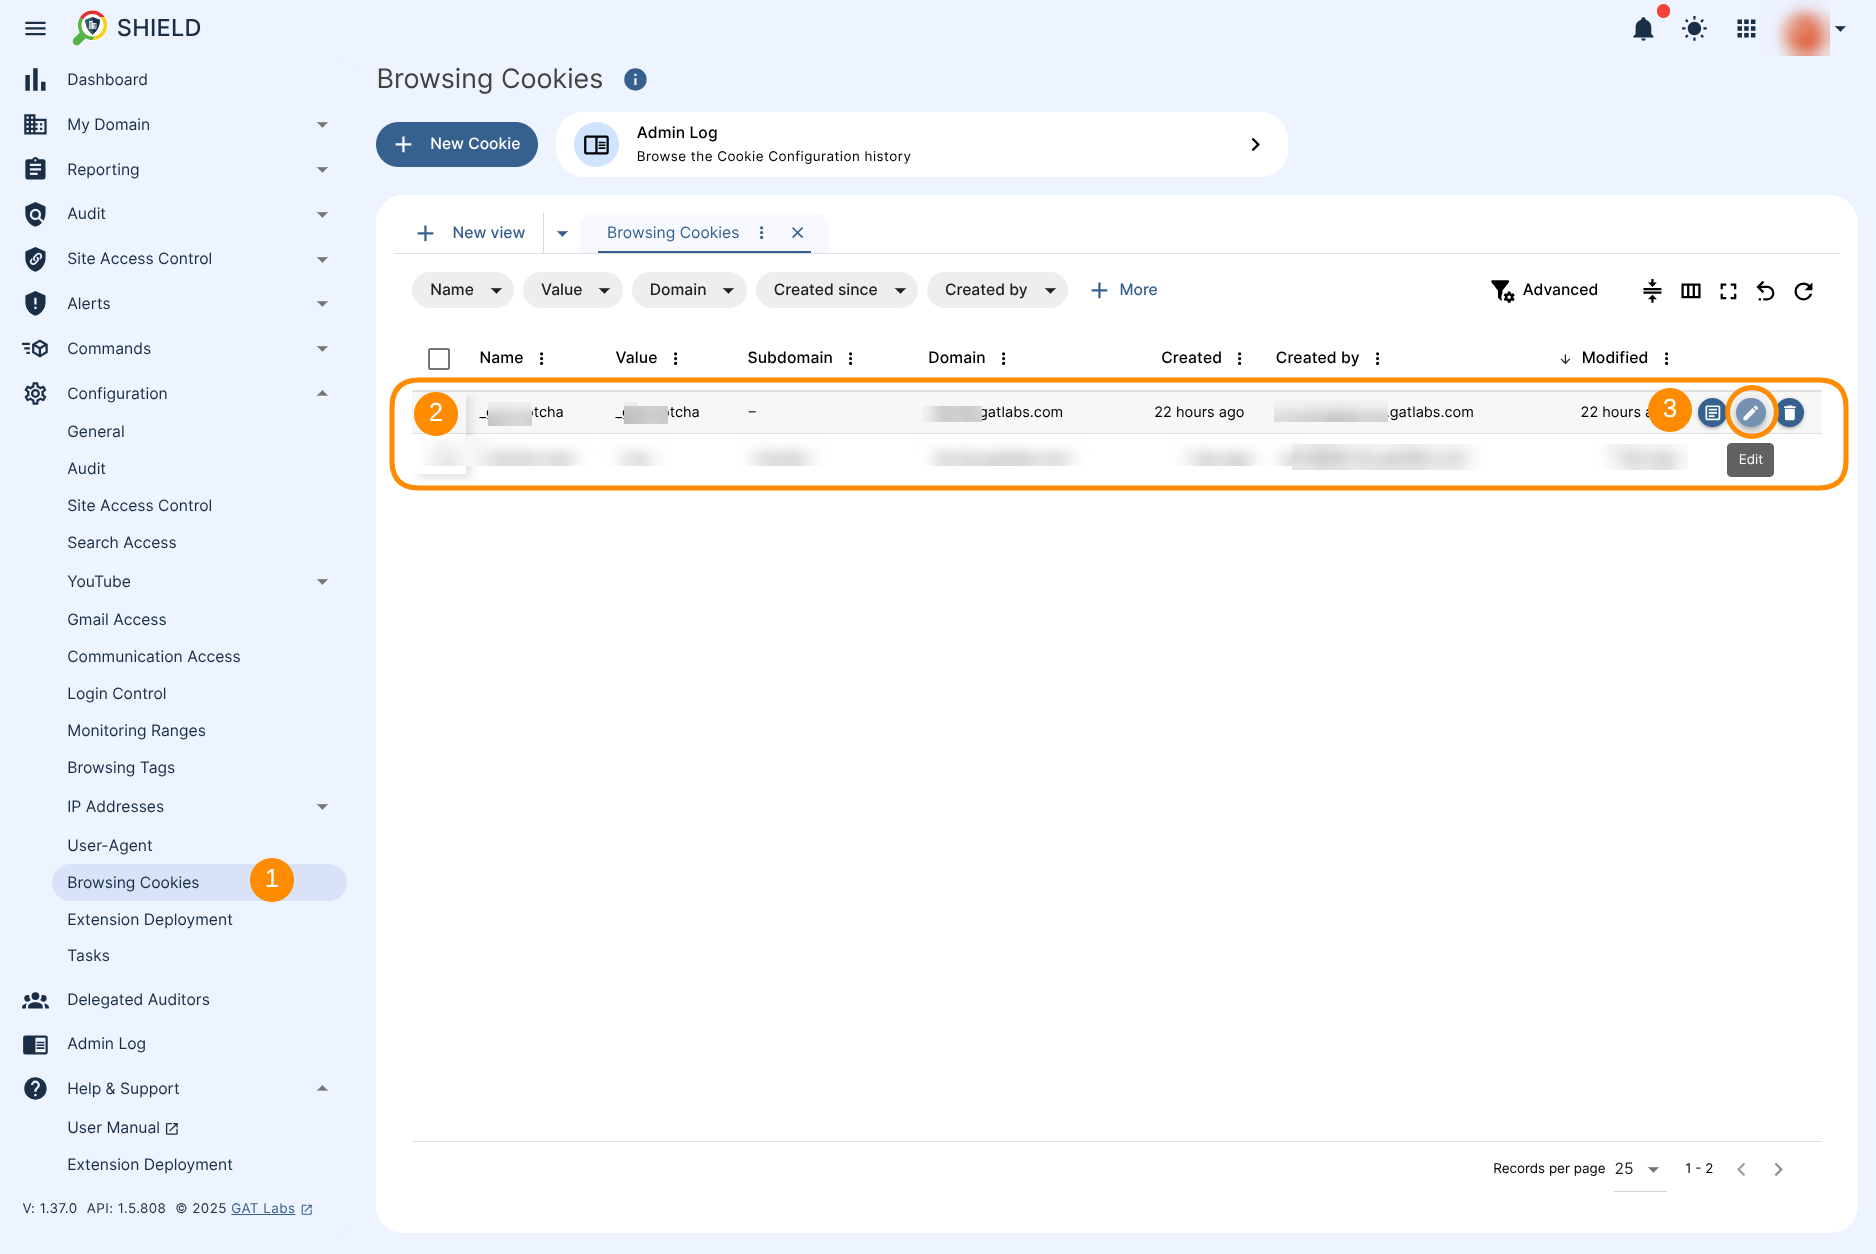
Edit Cookie #
The saved Cookie can be Edited (“pen” icon) or Deleted (“trash” icon). These functional icons appear when you hover your cursor over the right side of a Cookie record.
Navigate again to Configuration → Browsing Cookies
Cookie Audit Log #
The Audit log allows browsing the Cookie configuration history.
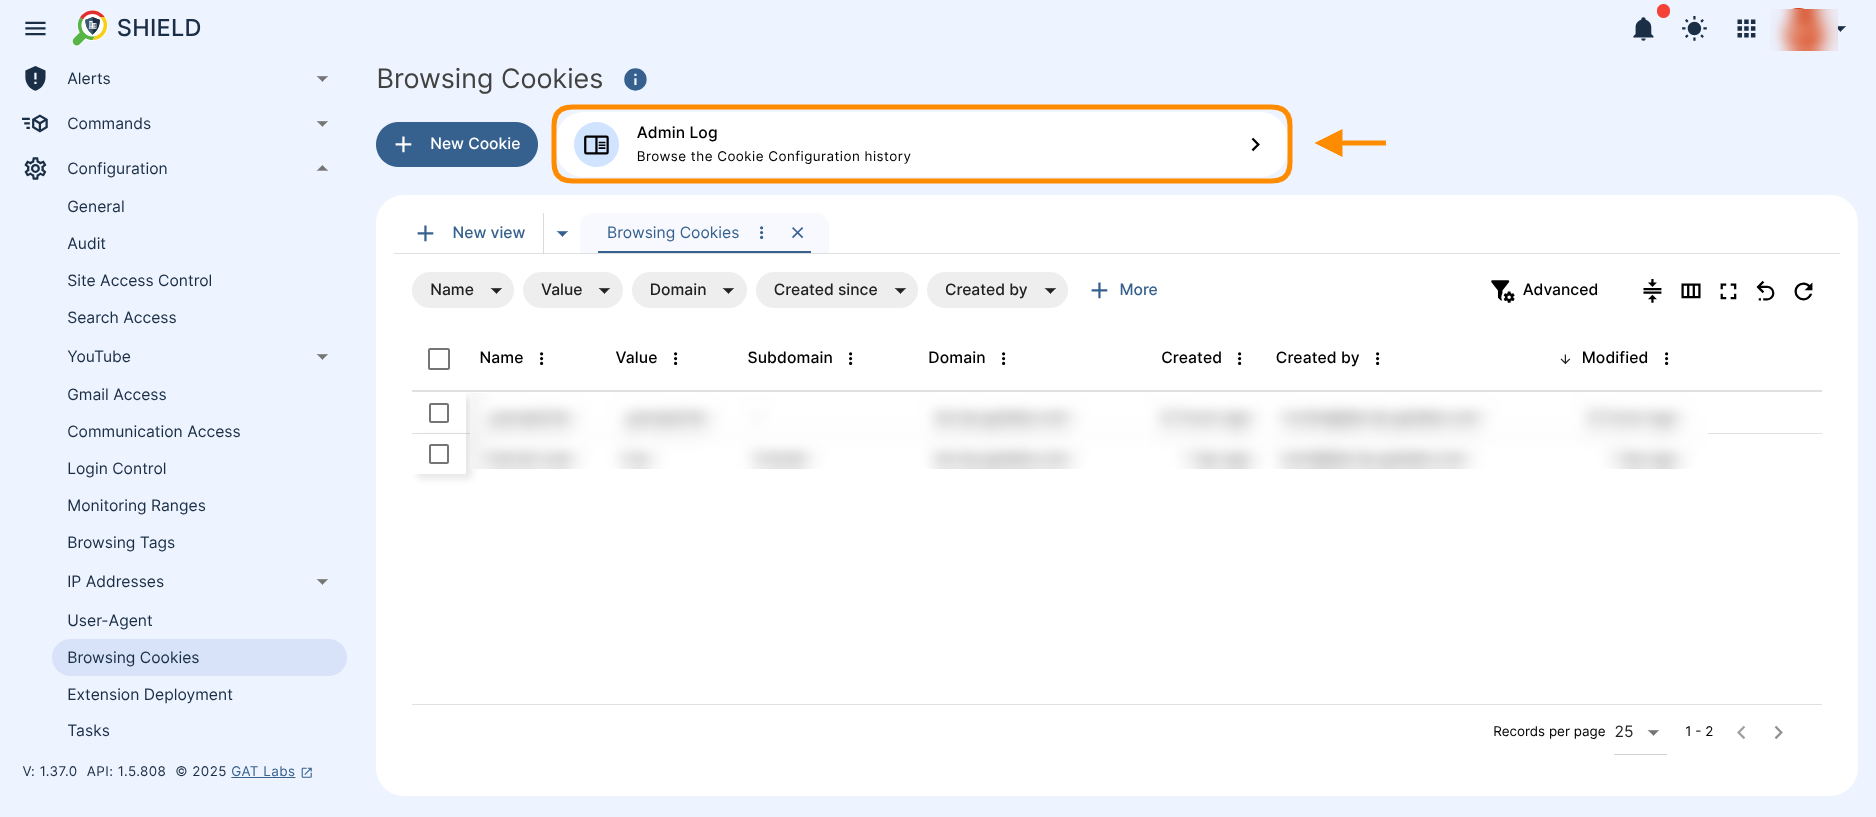
The “Admin Log” button displayed in the “Browsing Cookies” section redirects to the “Admin Log” section in GAT Shield, which includes a predefined filter that returns all related logs. This filter shows all administrator activity related to Cookies—regardless of whether they were created, modified, or deleted.
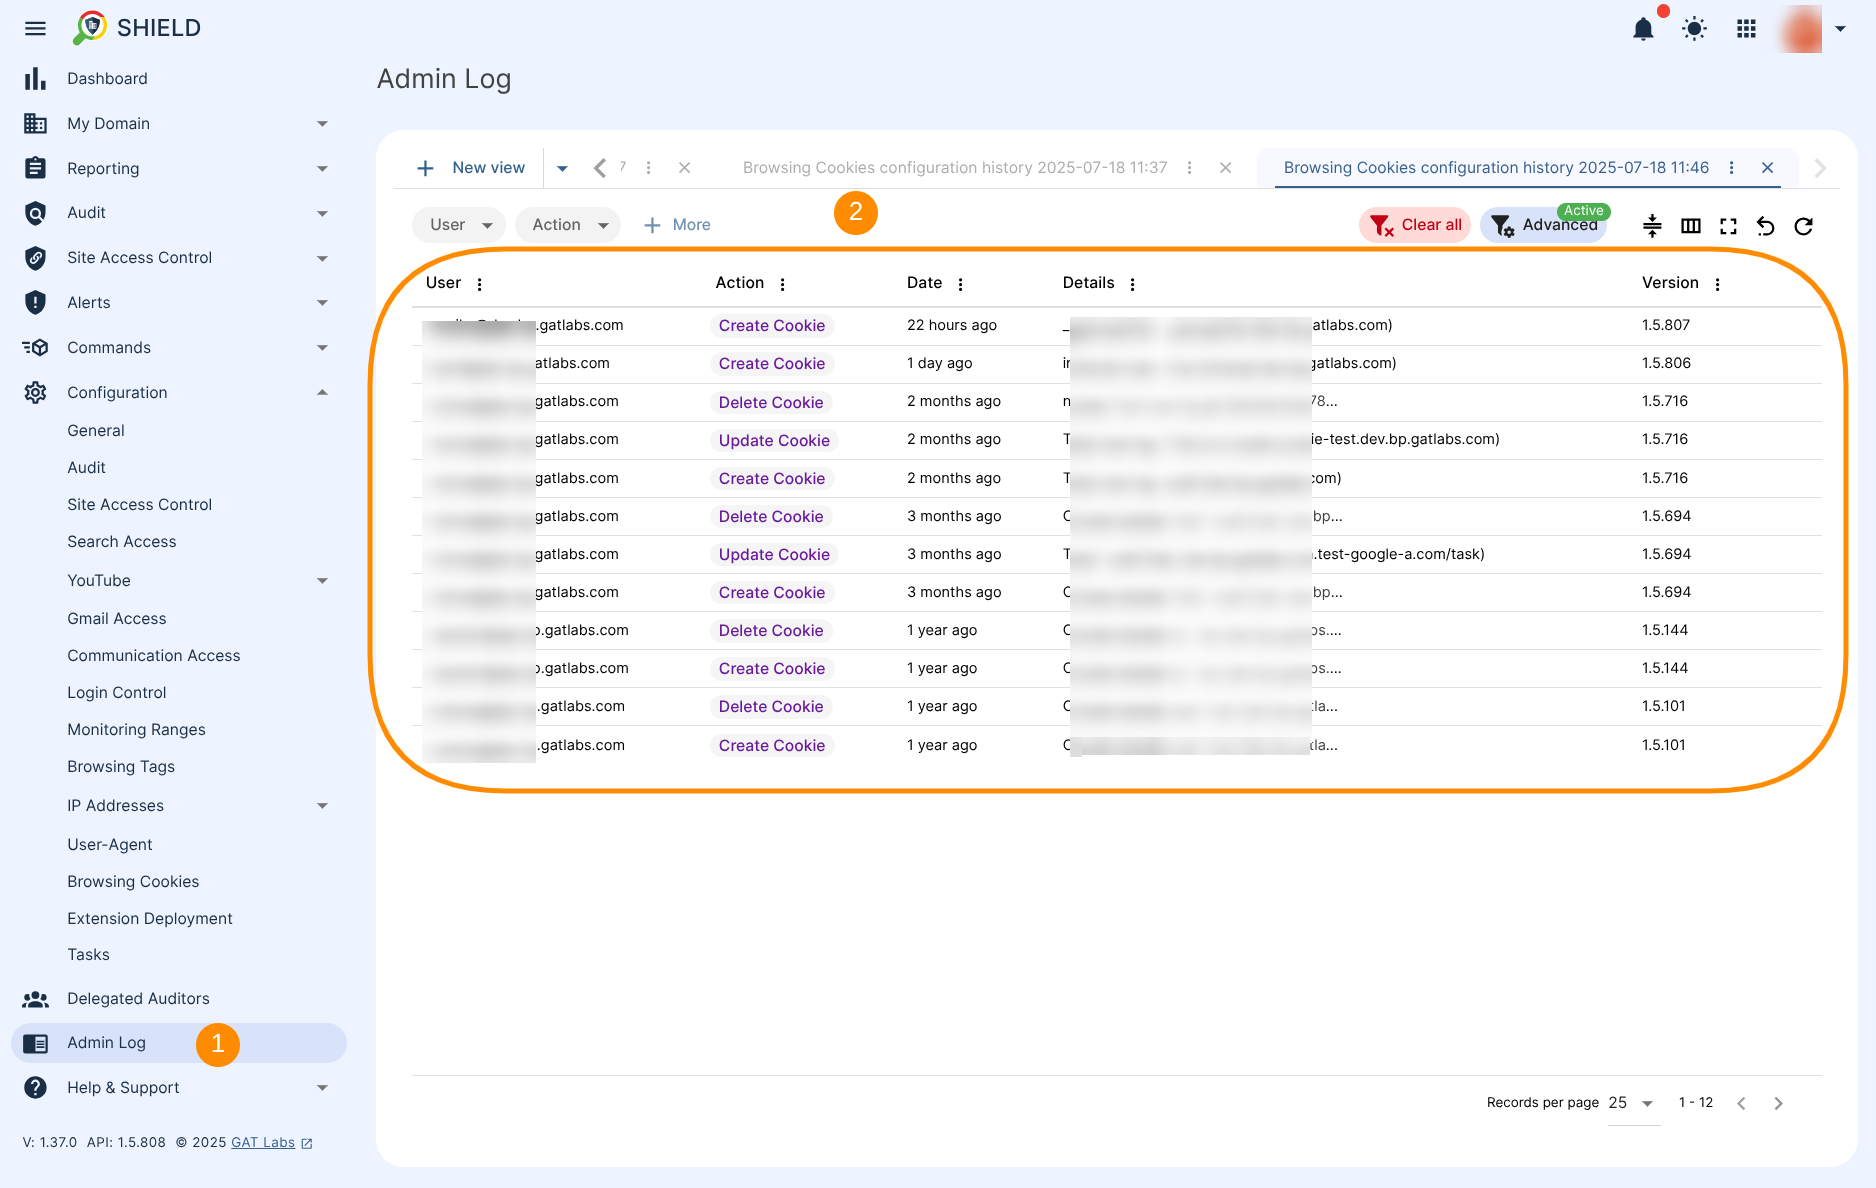
Entries in the audit log are immutable.


