

How to create Scheduled Reports in Drive Audit #
The scheduling mechanism is built into the query filter button.
In any audit in GAT+, we can apply a filter and schedule a report to run automatically based on occurrence times
Scheduled report in Drive #
Navigate to GAT+ > Drive > Files and apply any filter you want.
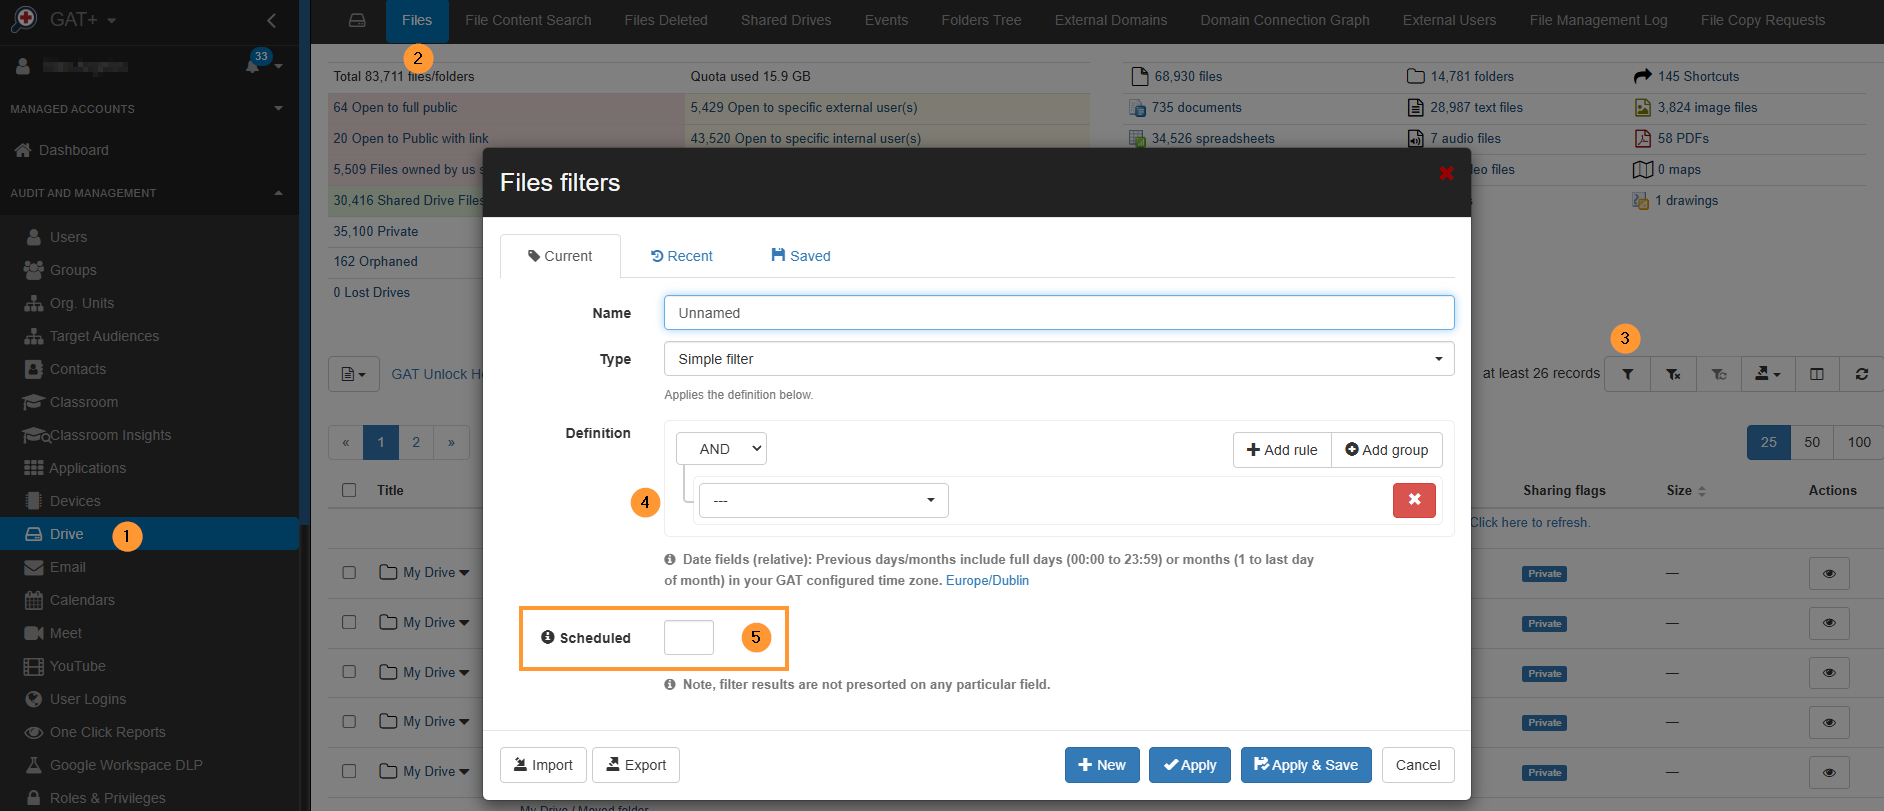
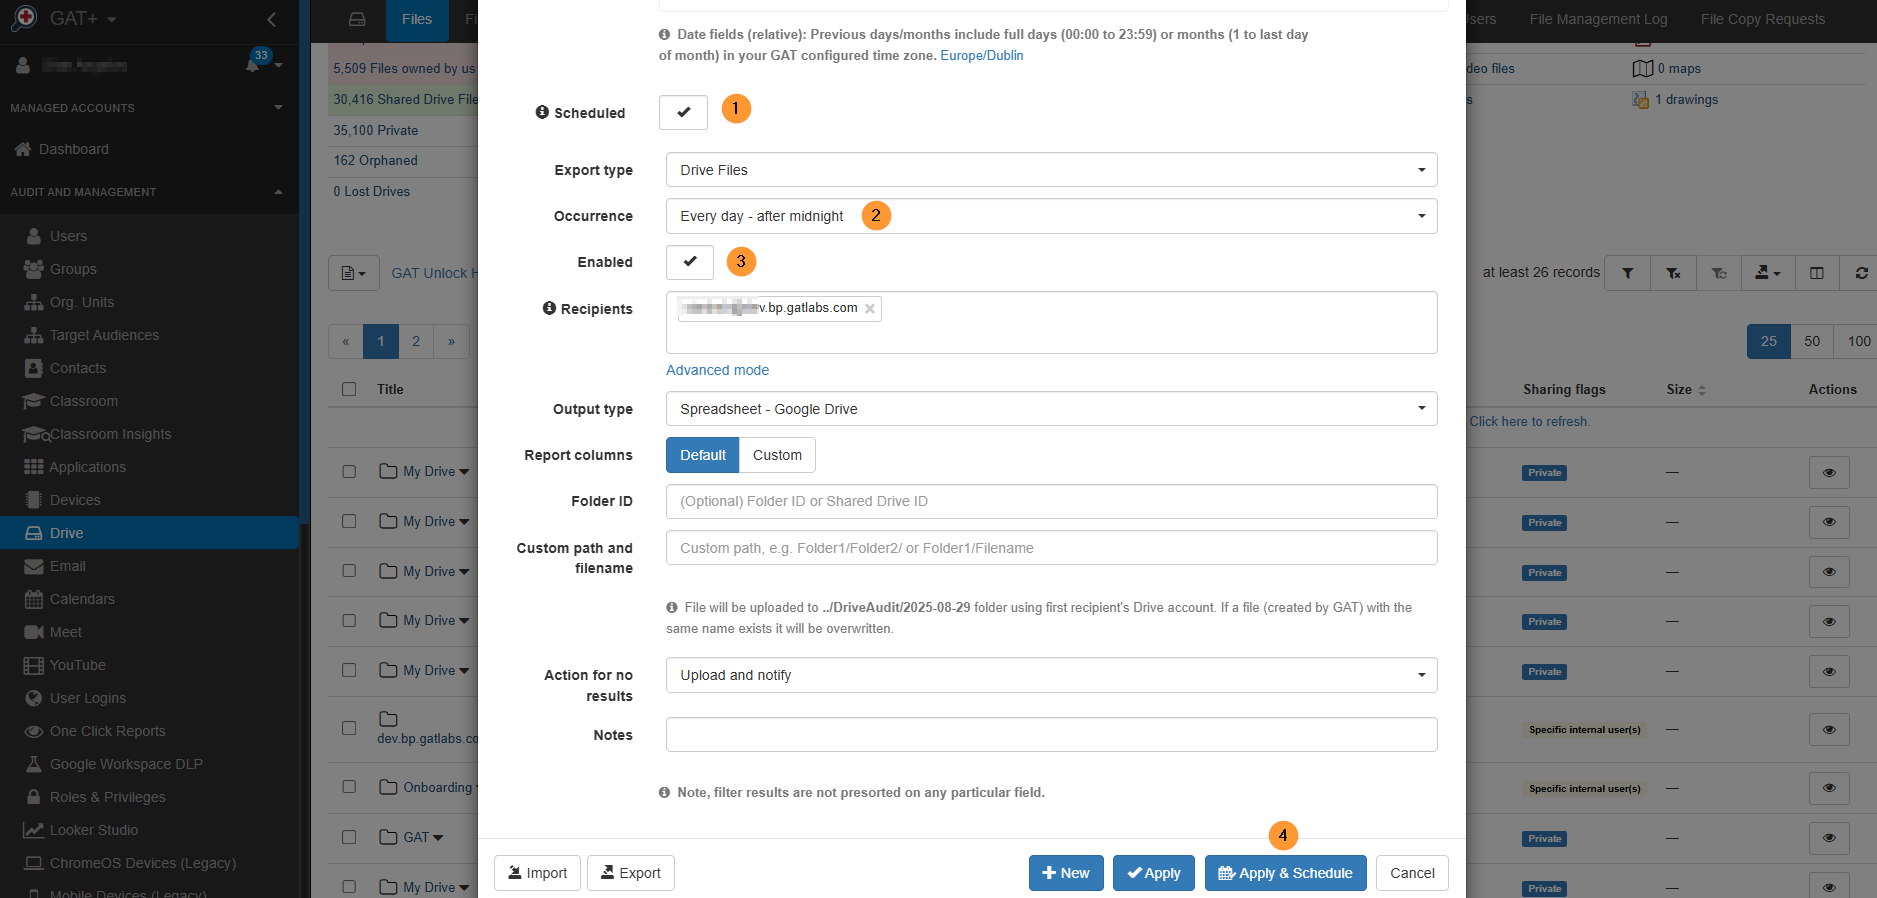
Select Scheduled to schedule the report. Fill in and select any fields you want
- Export type – select export type
- Occurrence – select when the report to automatically run
- Enabled – enable or disable the report
- Recipients – add emails for the recipients of the report
- Output type – select how the report is to be exported into CSV or a Google spreadsheet
- Report columns – select the default or select custom fields to be in the exported sheet.
- Folder ID – select the folder ID where the report is to be placed.
- Custom path and filename – select a custom path for the report and filename for it
- Action for no result – select what action to happen if no result/data is found by the scheduled report
- Note – add an extra note for the report
- Apply and Schedule – click on the button to schedule the report
View the scheduled reports #
On the left side menu, scroll down to Configuration > Scheduled reports
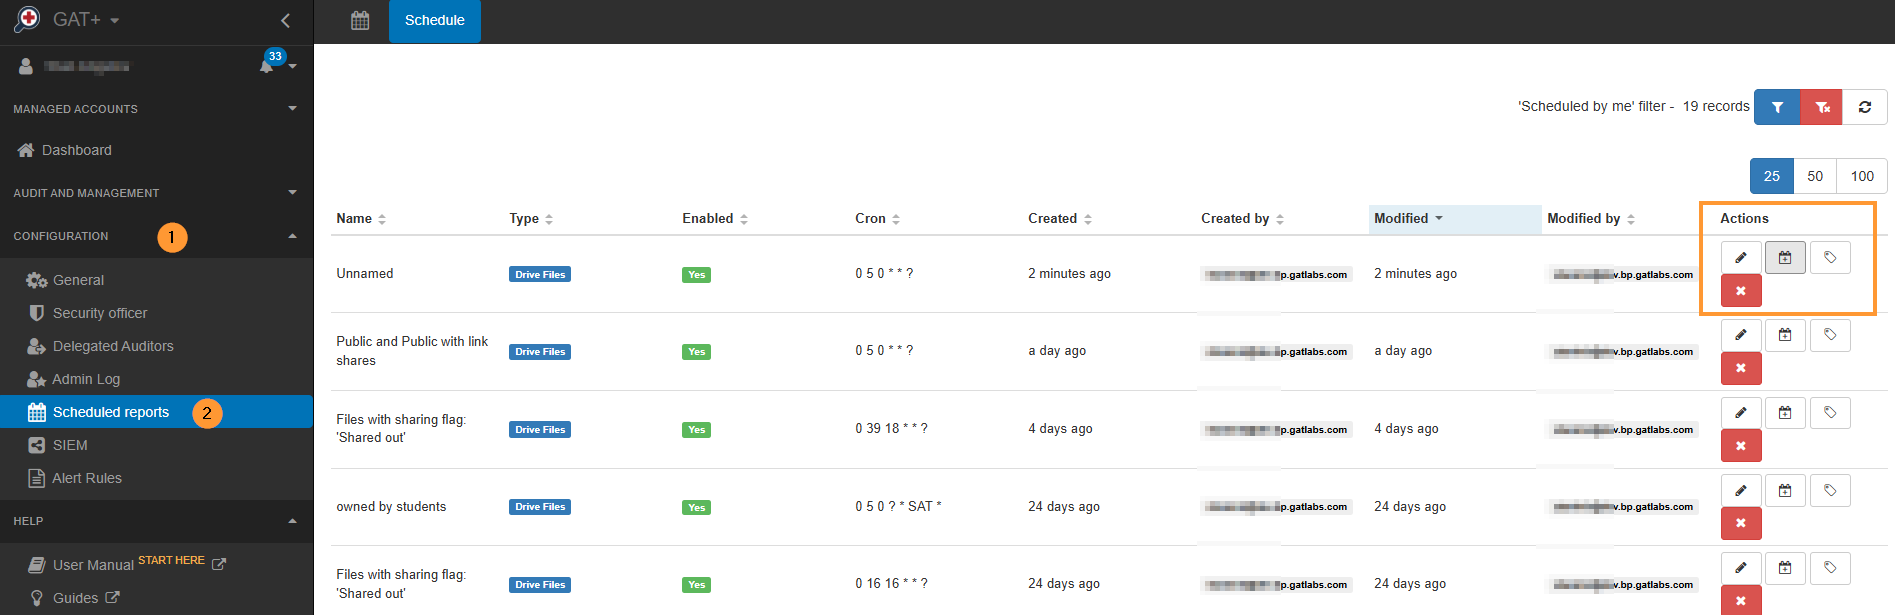
In this section, you can modify the existing scheduled reports with the pencil icon.
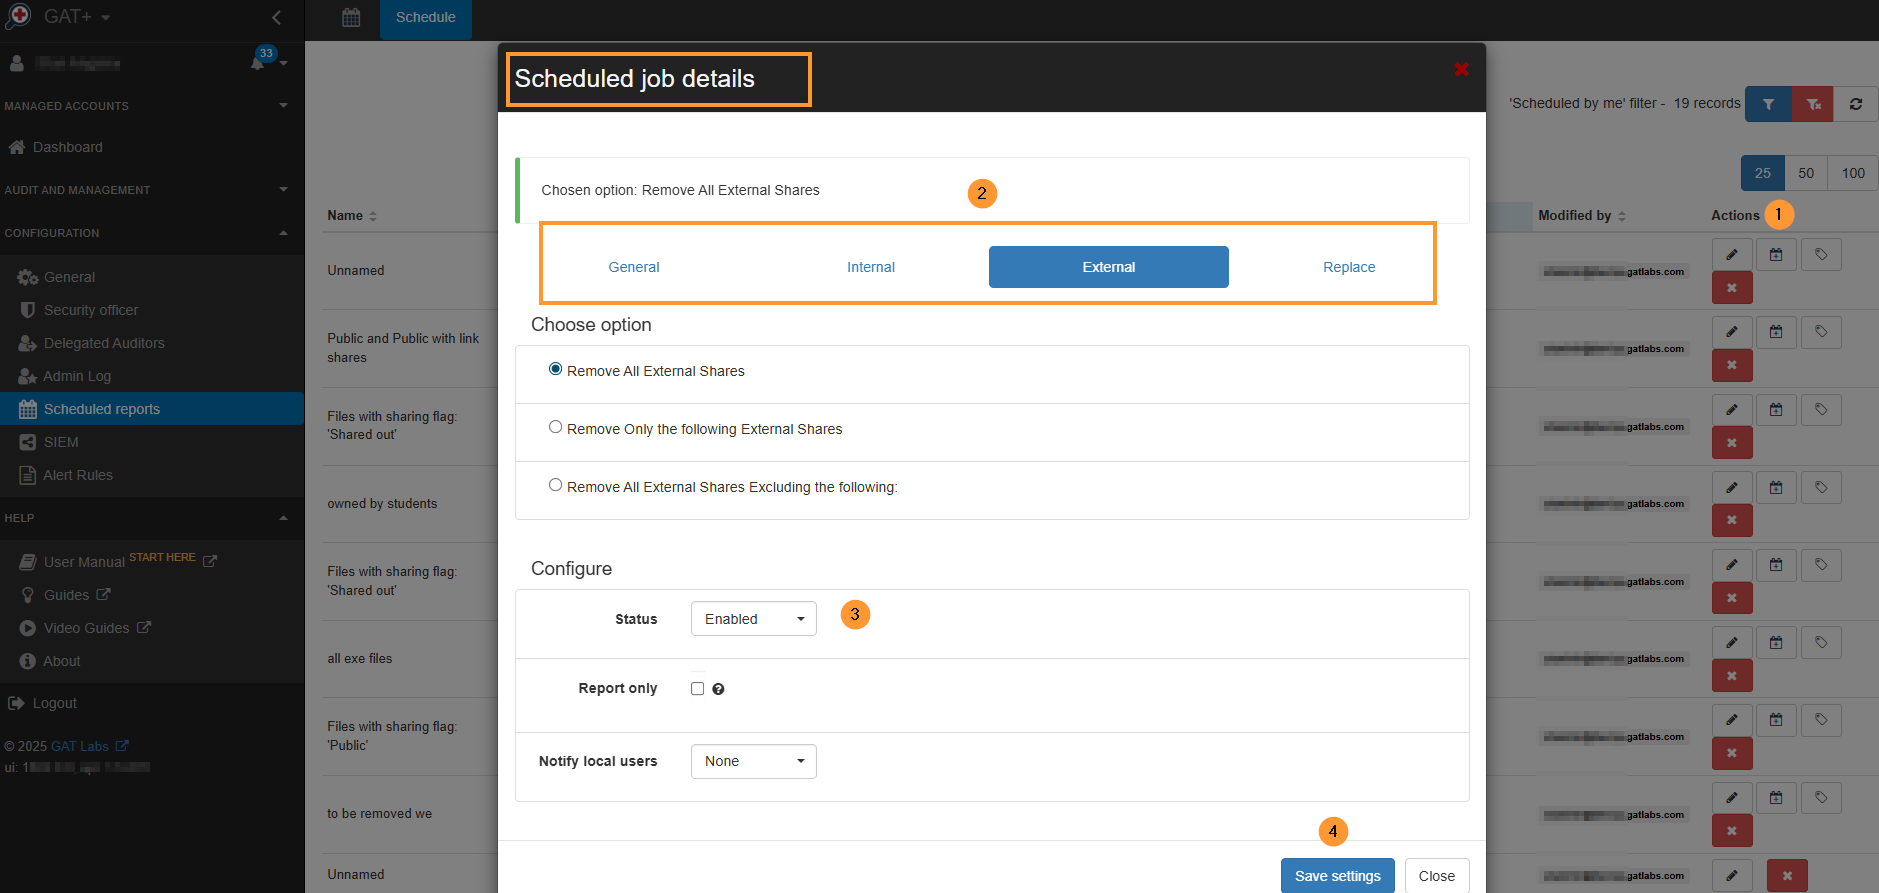
Automated action #
The + button called Job Action edit will allow you to set up actions to be automatically done on the result of the scheduled report.
The actions allowed here are to automatically remove the shares.
- General – Remove All Internal and External Shares
- Internal
- Remove all internal shares
- Remove only the following internal shares
- Remove group memebers
- External
- Remove All External Shares
- Remove Only the following External Shares
- Remove All External Shares Excluding the following:
- Replace
- Replace “Public” with “Public at domain.com”
- Replace “Public at domain.com” with “Public at domain.com with link”
- Replace “Public with link” with “Public at domain.com with link”
- Replace “Public” with “Public with link”
FAQ #
Q: How do I create a scheduled report in Drive Audit?
A: To create a scheduled report, you first navigate to GAT+ > Drive > Files, apply any filter you want, and then click on the “Scheduled” option. From there, you fill in the necessary fields and click “Apply and Schedule.”
Q: Where can I view and modify my existing scheduled reports?
A: You can view and modify your scheduled reports by going to the left-side menu and navigating to Configuration > Scheduled reports. You can then use the pencil icon to edit them.
Q: Can the reports automatically perform actions on the files?
A: Yes. By clicking the “+ button” called “Job Action edit,” you can set up automated actions to be performed on the results of the scheduled report, such as automatically removing shares (both internal and external).


