Using GAT Flow allows the admin to use multiple Actions when onboarding a user.
Below are the steps required to OnBoard Google Workspace users and a list of all the additional actions that can be taken.
Open GAT+ and select Flow
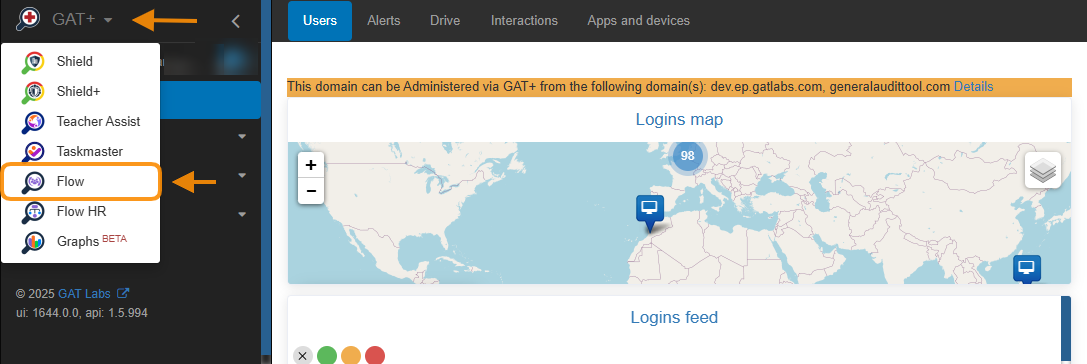
A new Flow tab will be opened on your browser.
Create Workflow Type #
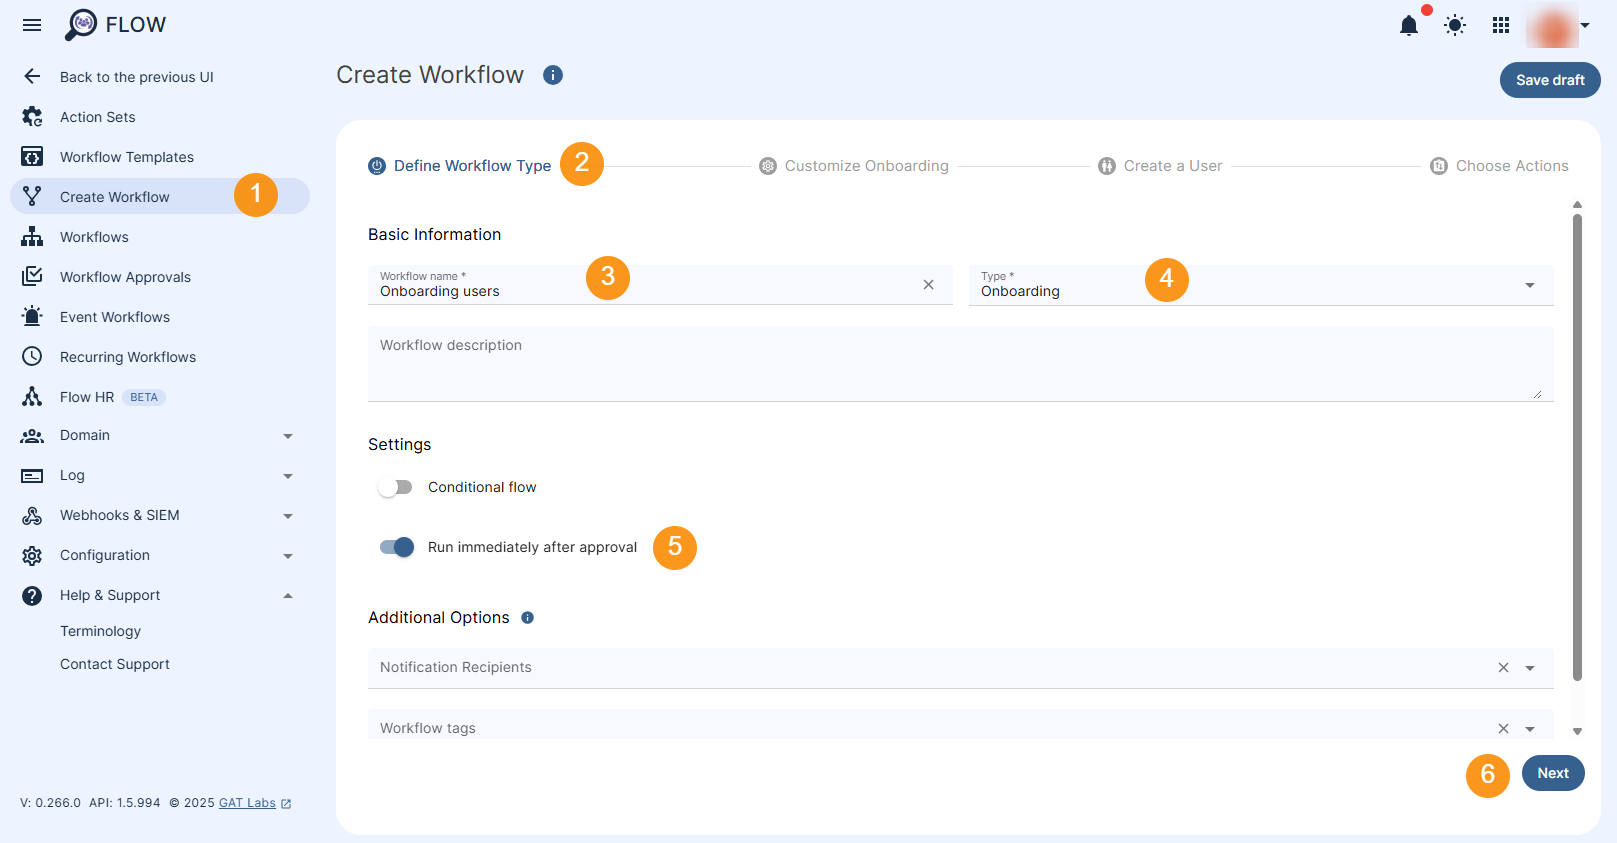
From the menu on the left click on Create workflow.
Create workflow window will be displayed.
- Workflow name – enter a name for the workflow
- Workflow description (optional)- enter a description of the workflow
- Type – select the workflow type
- Onboarding – Onboard users
- Run immediately after approval (selected by default) – pick up a date when the workflow is to run if applicable. More details here
- Next – click on the button to proceed
Customize Onboarding #
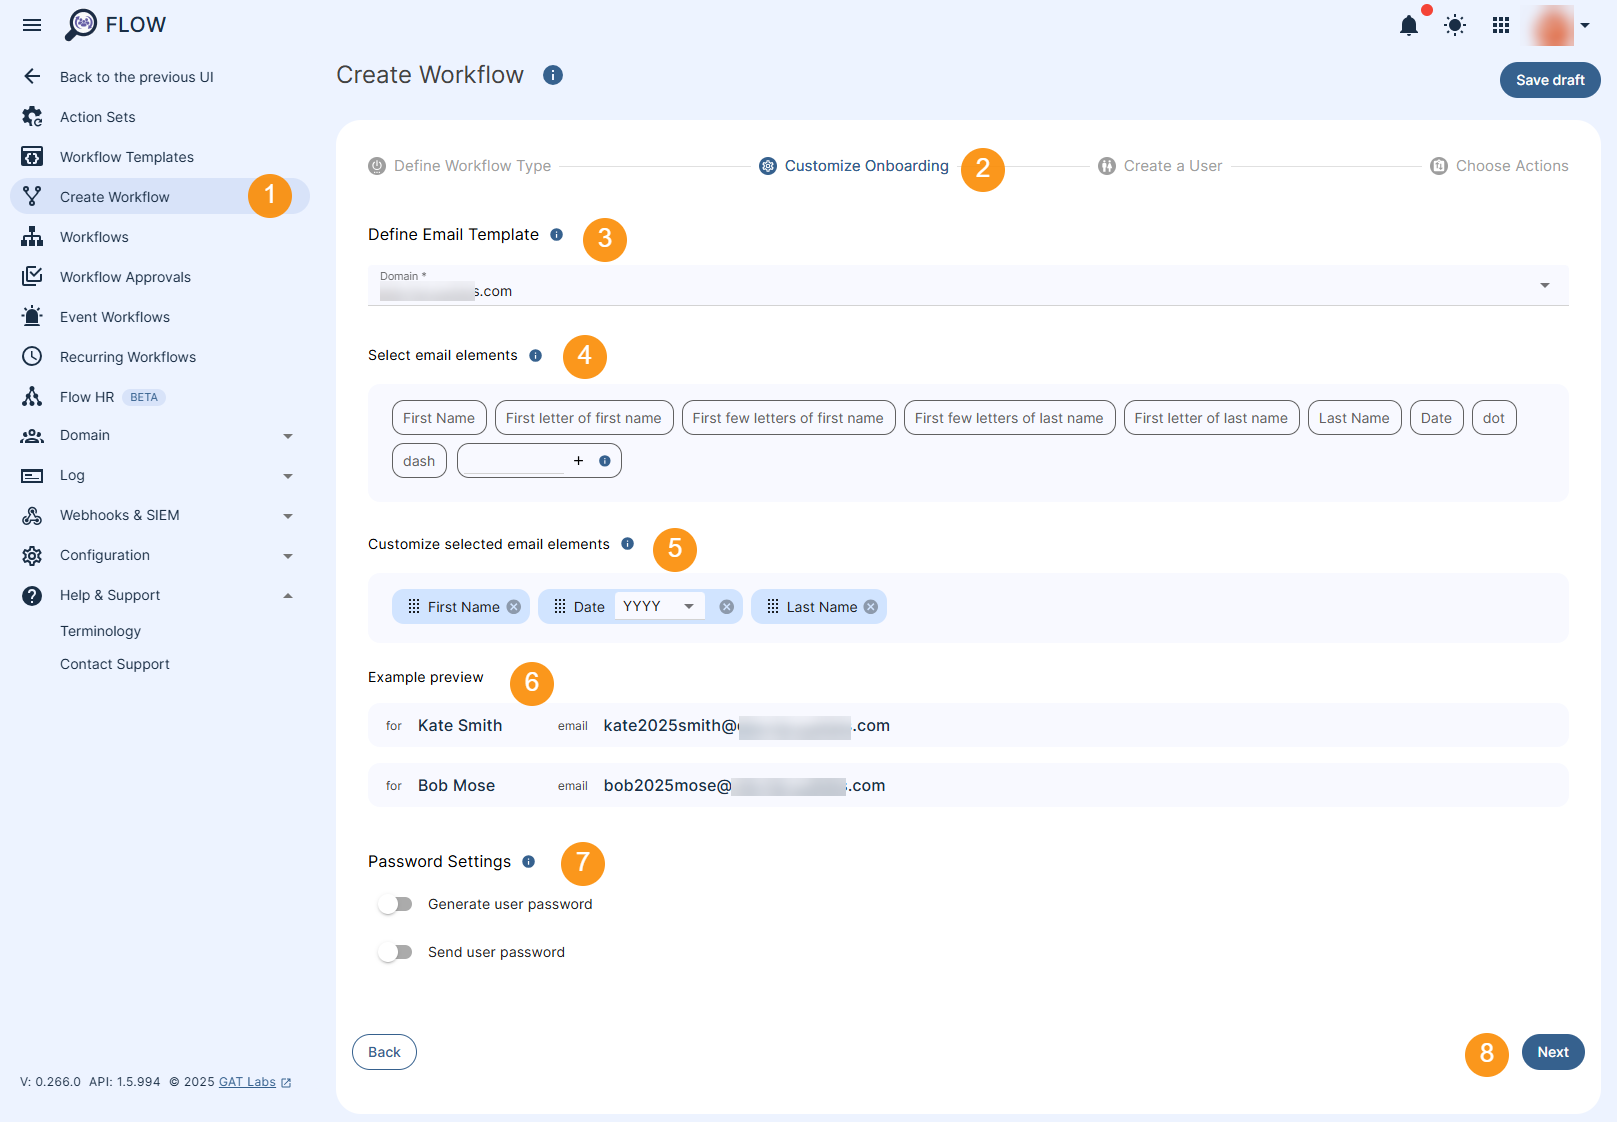
In Customized Onboarding section pick the following:
- Define Email Template – The provided template will be used to automatically generate email addresses in the next step:
- Select Domain
- Select email elements – this allows you to customize email of the onboarding users. Pick the prefix for the user email from the pre-defines variables, or create a custom one of your choice:
- First Name, Last Name, First letter of the first name, Date, dot, etc
- Customized selected email elements – Drag the selected email elements to change their order
- Example preview – see the preview of the customized email
- Password Settings – You can enable automatic password generation for new users here. Passwords can be sent to the specified email address.
- Generate user password – enable it to automatically generate the user’s password
- Send user password – enable it to send the generated password to the specific user:
- Workflow creator
- Manager
- User private email
- Specified emails
- Click Next once ready to move to the next stage of the workflow.
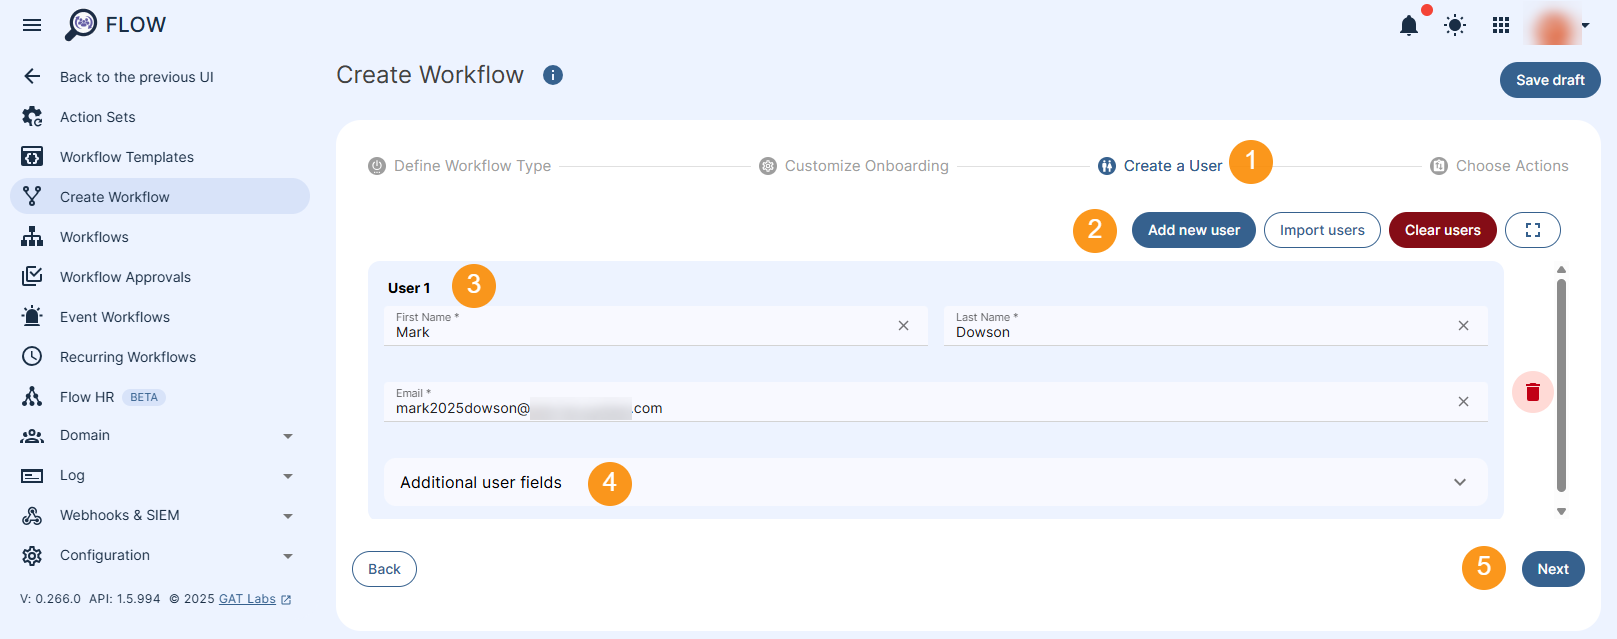
Create a User #
This section allows to create users accounts by selecting to import users or adding new users (via Flow UI):
-
- Add new user – fill in the details of the new user, as follows:
- User1: First Name, Last Name, Email address will be automatically generated.
- Additional users fields (optional):
- Display Name
- Alias
- Recovery email
- Private email
- Department
- Job title
- Cost center
- Work address
- Work phone
- Mobile phone
- Import users – click to import users via spreadsheet
- Add new user – fill in the details of the new user, as follows:
Once ready, click on Next button to proceed.
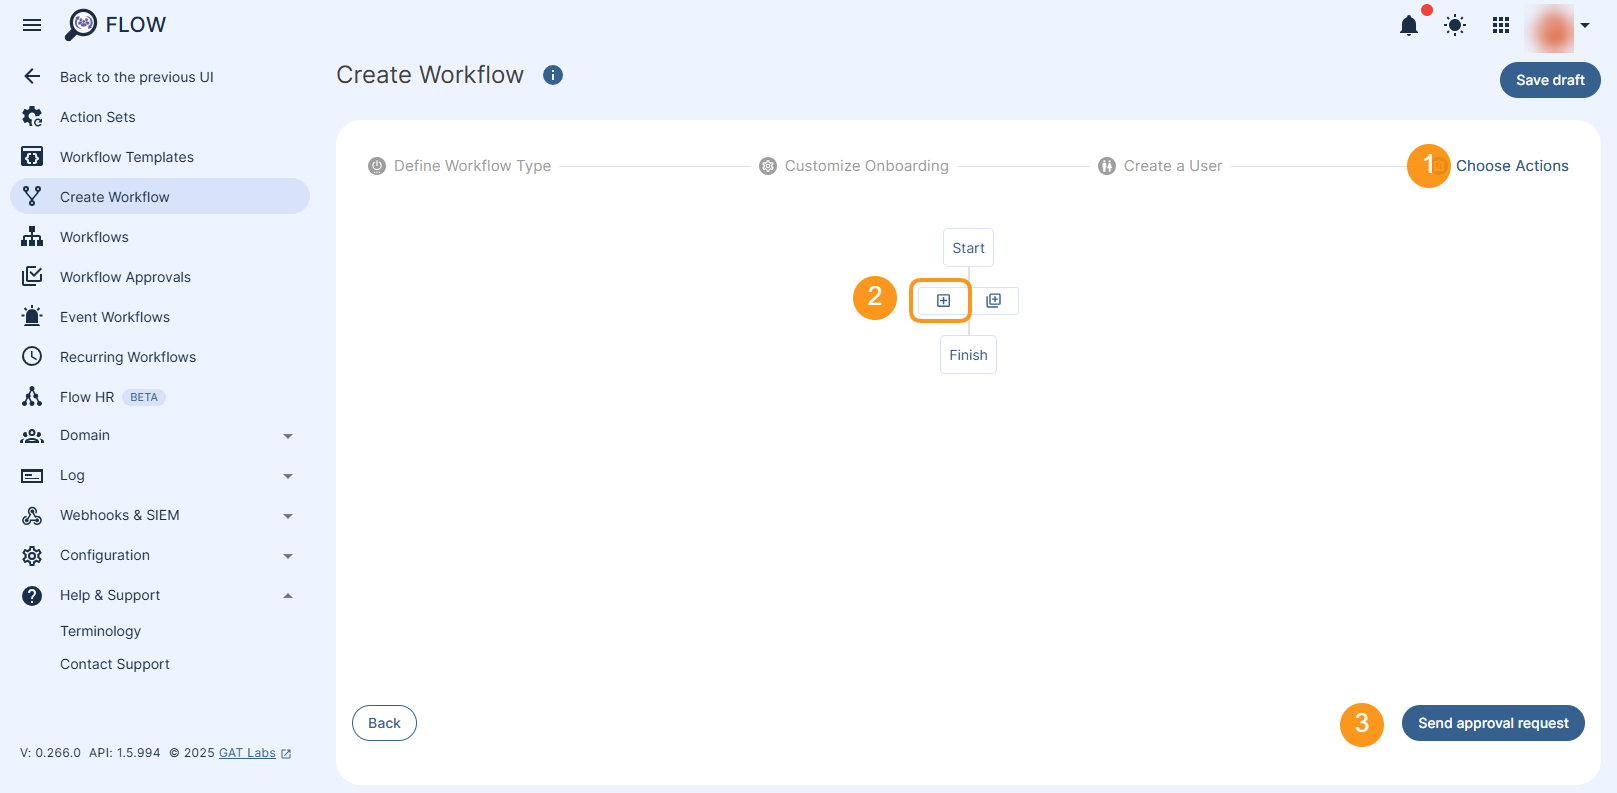
Choose Actions #
Choose Actions – set up the workflow actions by clicking on the “+” button on the left side of the workflow diagram to Add action
You pick and enter any of the actions available to be performed on the newly created user.
List of Onboard actions #
The list of actions that can be taken while offboarding is as follows:
- Email – actions for Google Email
- Create email filter
- Create gmail label
- Send email
- Set IMAP
- Set POP
- Set email auto-forwarding
- Set email delegation
- Set up auto-reply
- Drive – actions for Google Drive
- Copy folder to selected users
- Folder, Shared Drive permission change
- Calendar
- Add user to calendars
- Remove user from calendars
- Share user primary calendar
- User – actions for users
- Add user email Send as
- Add user email alias
- Change global directory visibility
- Change user organization unit
- Change user password
- Change user password at next login
- Change user’s employee information
- Copy user contacts
- Manage Flow user delegation
- Remove user manager
- Set address me as
- Set as super admin
- Set email signature
- Set recovery email
- Set recovery phone
- Set time zone
- Set user custom attribute
- Set user manager
- Set user role
- Set user’s preferred language
- Suspend or unsuspend user
- Sync contacts
- Group – actions for groups
- Add user to Groups
- Classroom – actions for Google classrooms
- Add users as a Co-teacher to existing Google Classrooms
- Add users as students to Google Classrooms
- Create classroom
- Devices – actions for devices
- Change google license assignment
- Actions – actions for workflow
- Approve workflow – extra layer of security (second verification enforcement); it will work even if pre-approval is already configured for the workflow requester.
- Broadcast flow event – an action that allows workflows connection
- Delay workflow – delay actions for the workflow to run the way an Admin arranges it timewise; this option is to be used when the jobs set don’t have to or shouldn’t run at the same time
- Send webhook calls
- Chats – actions for Google Chat Spaces
When the actions are selected and filled in, click on Send approval request below the action list.
A pop-up window will be displayed where it can be confirmed to proceed with the request.
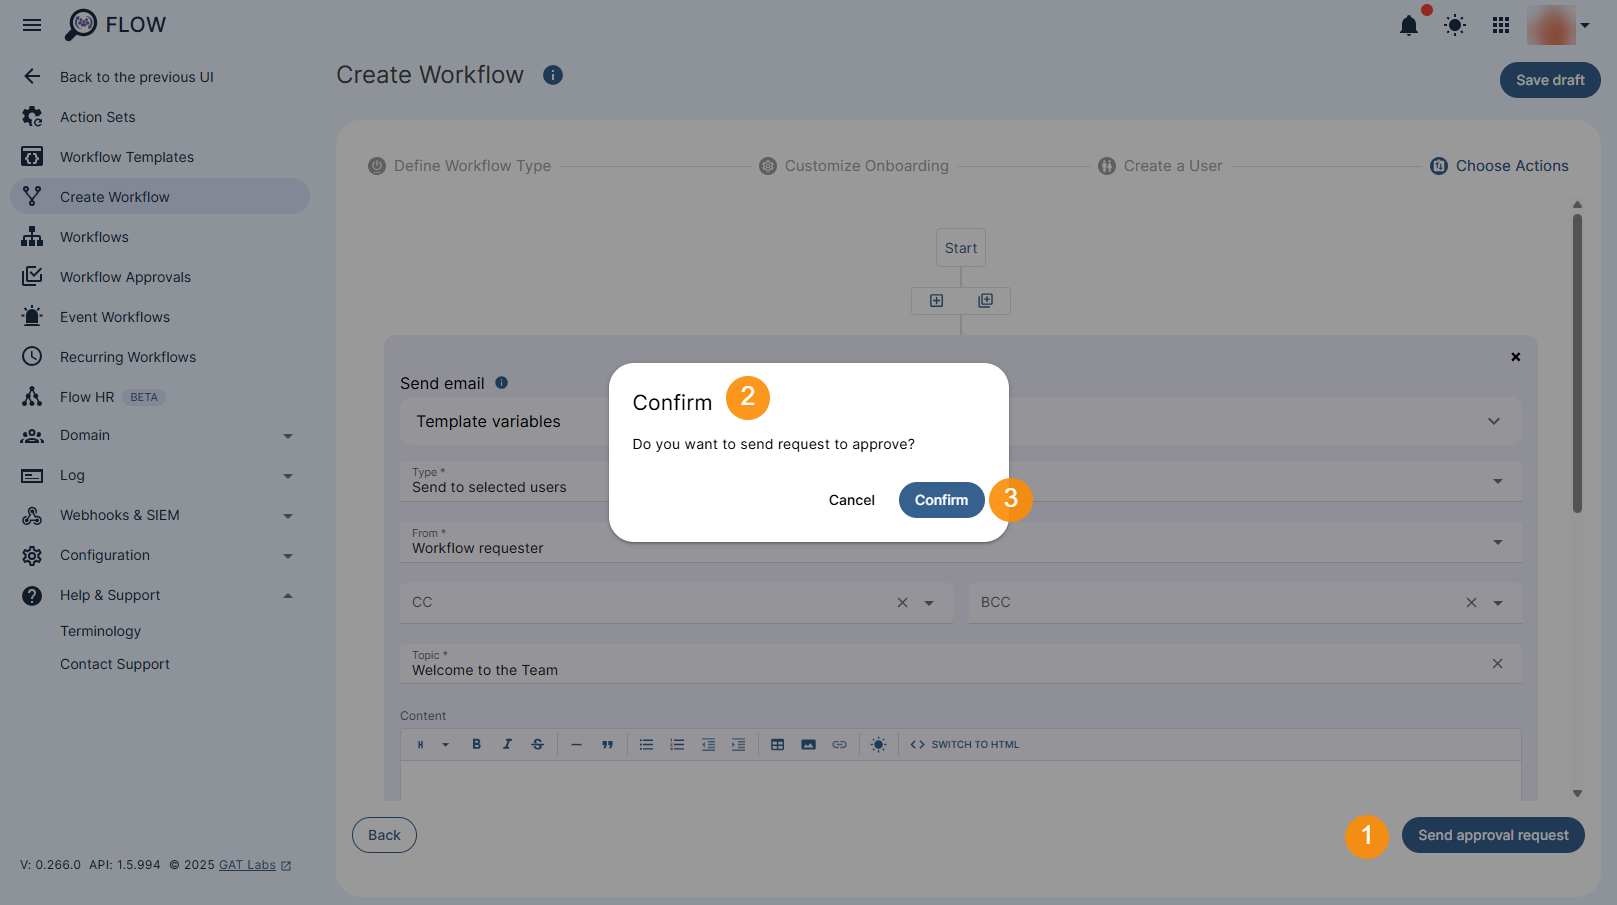
Note: If you have pre-approval enabled you can proceed without an approval email. More details can be found here
The request will be sent to the Security officer for approval.
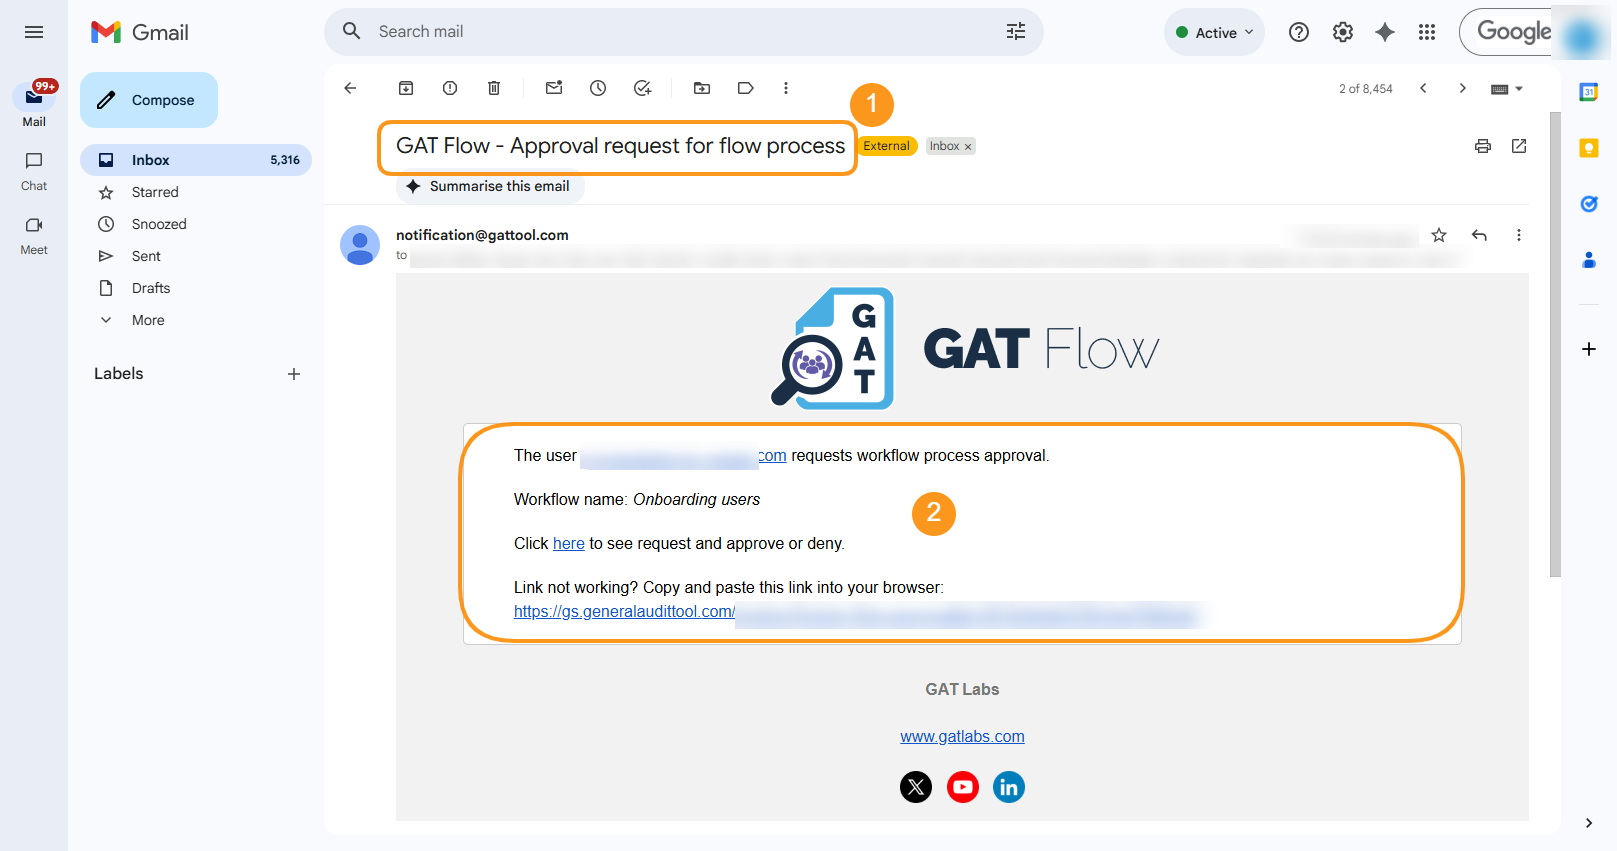
Result #
Once Security Officer approves the request, the workflow will be initiated and the new user account will be created. Additionally, all selected onboarding actions will be executed.
To review the status of the workflow, navigate to GAT Flow > Workflows tab to see all the details.
The Status of the request can be as follows:
- Requested – send to Security officer for approval
- Approved – the Security Officer has approved the request
- Job status – will show the status of the current workflow job
- Scheduled – when is set to run
- Done – when the workflow has been completed
- Partially done – when completed partially
- Detail icon – the icon on the right side will show all details for the Flow request
- Save as action set – save the Workflow as an action set for easy later use
- Edit – edit the workflow and apply changes
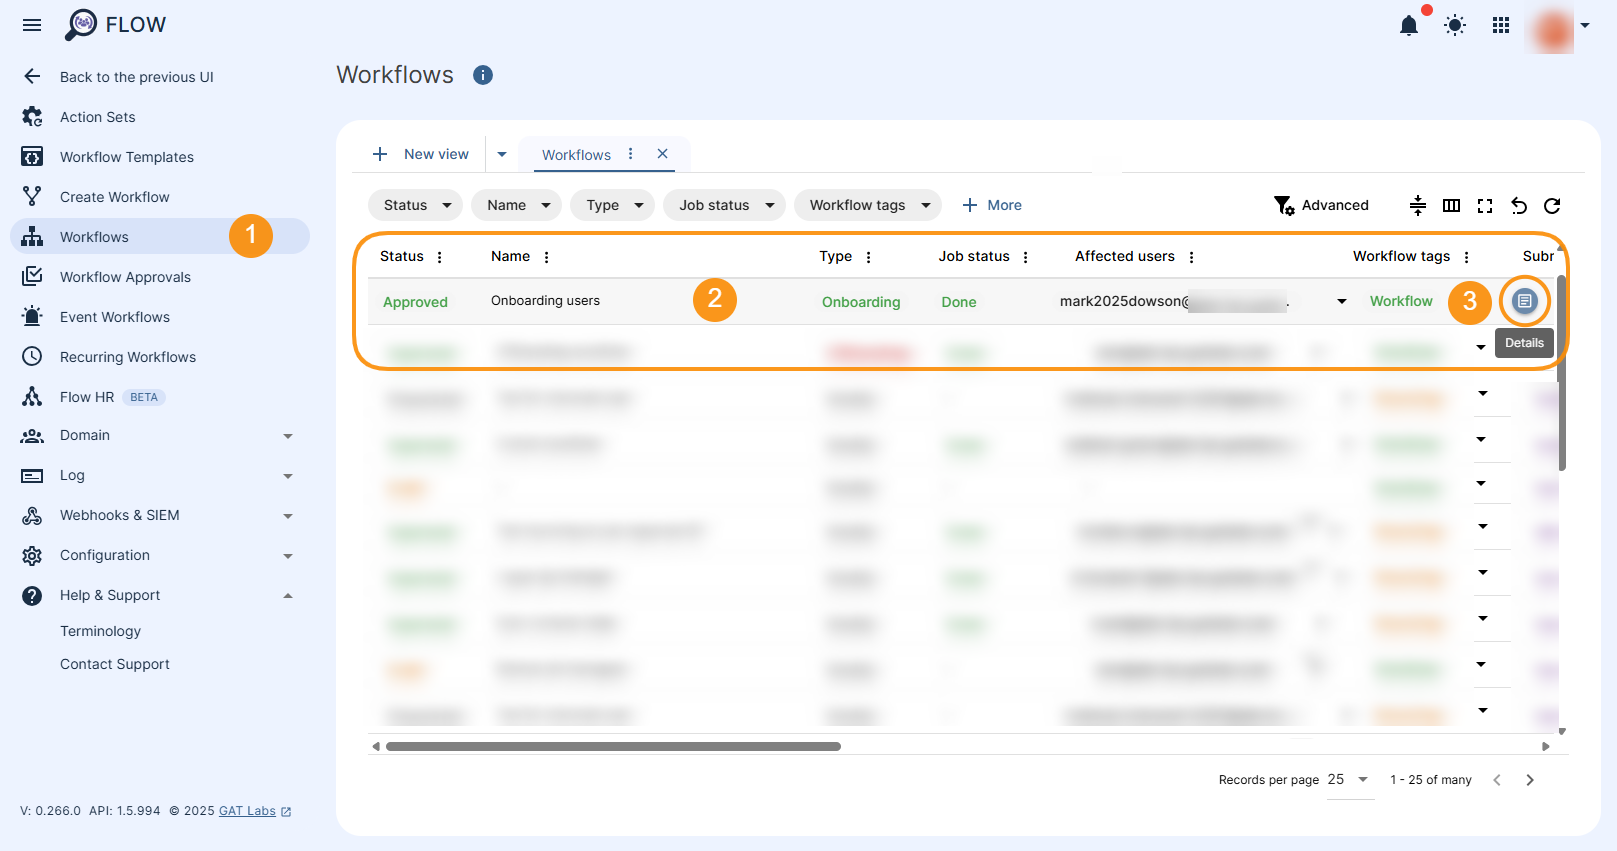
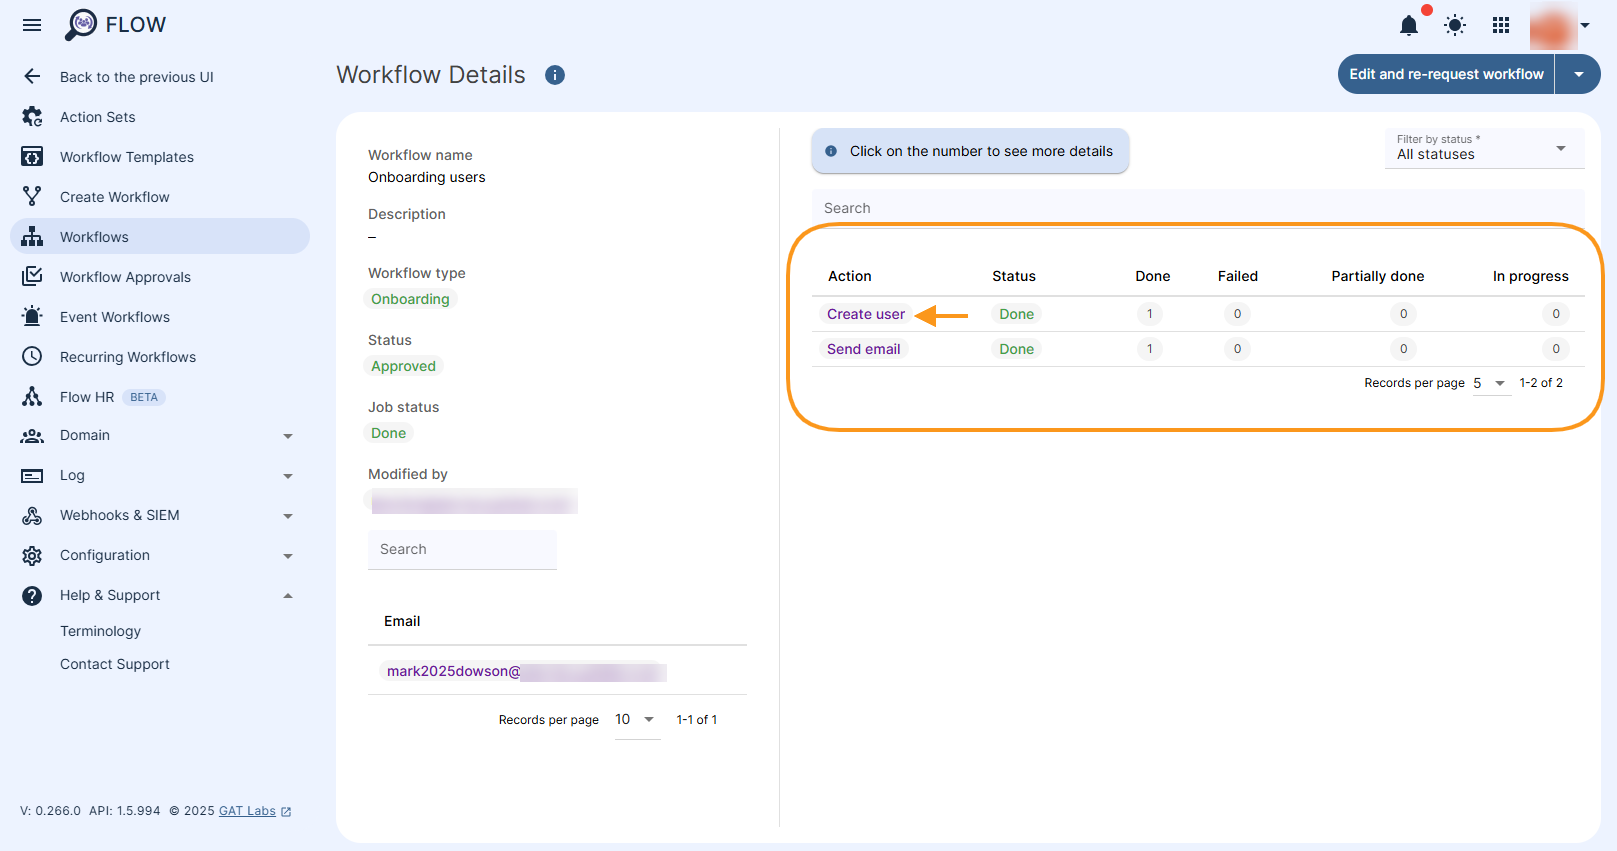
When selecting the Details icon the new window with more information about the workflow is displayed.
The Results examples are showing below:
- Create user – as a result of Onboarding workflow
- Send email – email is sent to the newly created user’s account