GAT Flow is a user management tool. Allowing the Admins to perform multiple and varied actions on the Domain User accounts.
One of the options available for the Admins to perform is Creating Email filters for any user of the domain.
Follow the steps below to use this feature.
Automated workflow #
This can be done by:
- Creating a simple workflow (as below example)
- Creating automated Event workflow
- Creating automated Recurring workflow
Create workflow #
Navigate to Flow > Create workflow and fill in the required details.

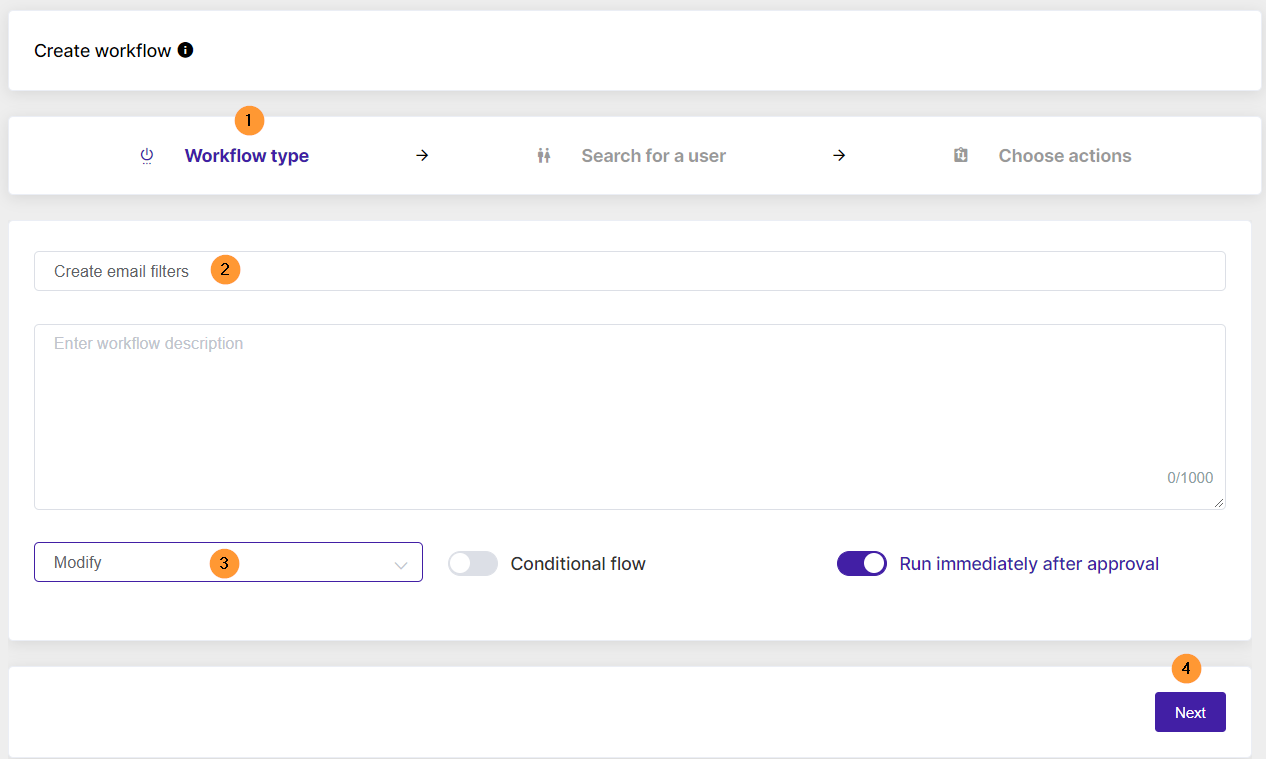
In the Workflow type fill in the details required
- Name – enter a name for the workflow
- Type – select the Modify type (or onboarding)
- Next – click on to proceed
Select users #
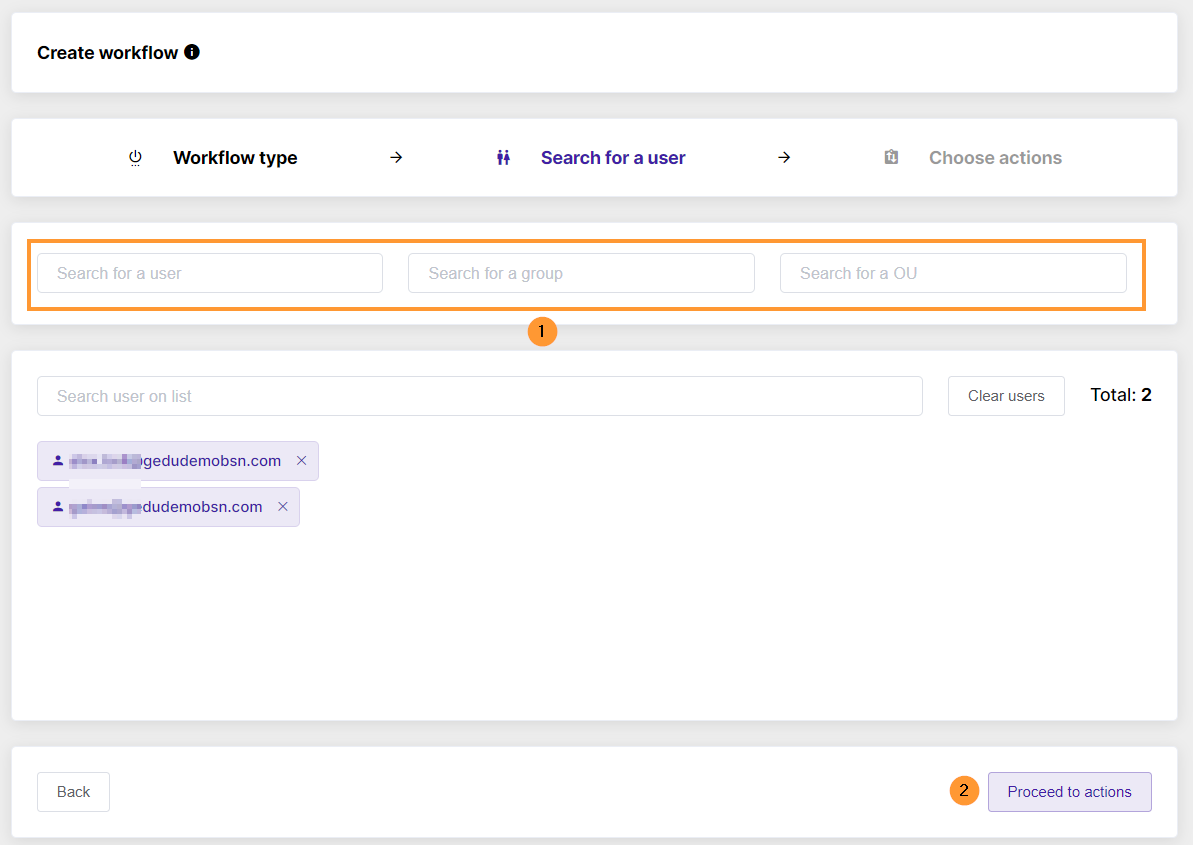
In Search for a user select the users who you want to “Create the Email filtering” for.
- Search for a user – select individual user
- Search for a group of users – select all users from a selected group
- Search for an OU of users – select all users from the selected Org. Unit
- Proceed to actions – when the users are selected click to proceed
Action – Create an Email filter #
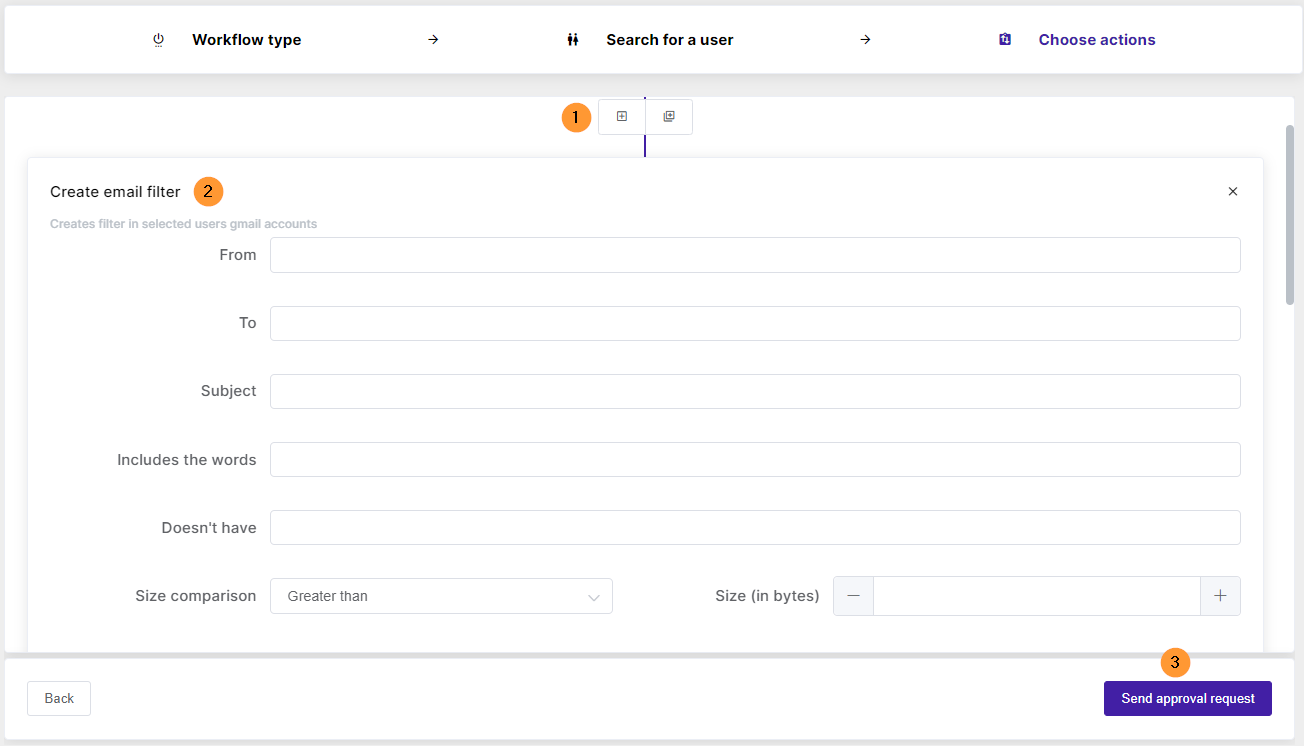
To “Add action (2)” or “Add action set (3)”, please select the plus + button shown in the screenshot below.

If the process hasn’t been set before (no action set created), please use Add action button and create the node.
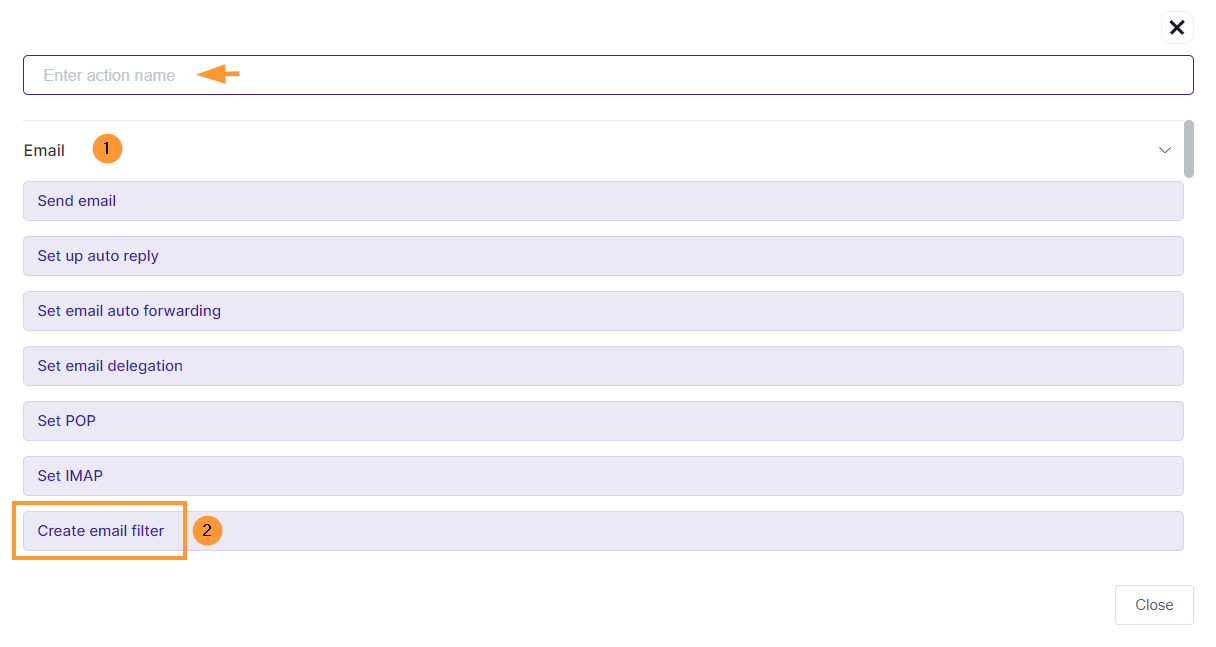
Search for the action using the search field and select the action “Create email filter” under the Email tab
Once the action is selected fill in the required details.
The “Create email filter” will be added to the screen, create the email filter as you like.
Fill in the info required for the filter:
Note: At least one criteria needs to be provided
- From – enter email “From”
- To – enter email “To”
- Subject – enter the subject of the email
- Includes the words – the email includes words
- Doesn’t have – the email does not have what words
- Size comparison – enter the size of the email
- Greater than – size (in bytes) – enter the bytes
- Less than – size (in bytes) – enter the bytes
- Has attachment – the email has an attachment
- Exclude chats – the email excludes chat messages
Action-based on the filter. Pick an action to be taken based on the filter.
Note: At least one criteria needs to be provided
- Skip the inbox (archive it) – archive the email directly
- Mark as read – mark the email as read
- Star it – set up the email as “starred”
- Apply the label – enter a label
- Forward it to – Select to who to auto-forward the email. Select any user or pick Manager (person who is added as Manager to the selected users will be selected)
- Delete it – delete the email
- Never send it to spam – never sent the email to spam
- Always mark it as important – mark the email as important always
- Never mark it as important – never mark the email as important
- Categorize as -pick any of the categories
- Primary
- Social
- Updates
- Forums
- Promotions
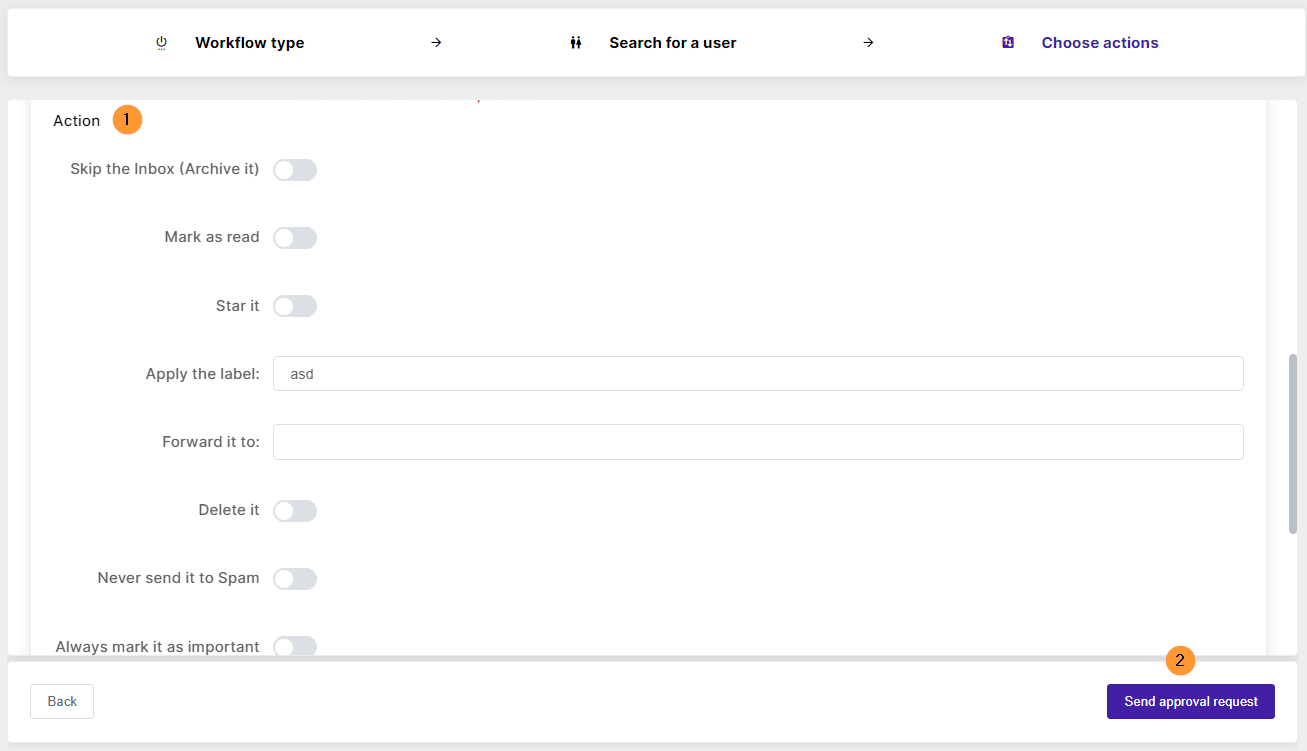
When ready click on the “Send approval request” button.
An email will be sent to the Security Officer for approval.

The Security officer will be able to see view all the details of the request.
The workflow type (1), the users affected (3), the actions to be taken, and to be approval (4).
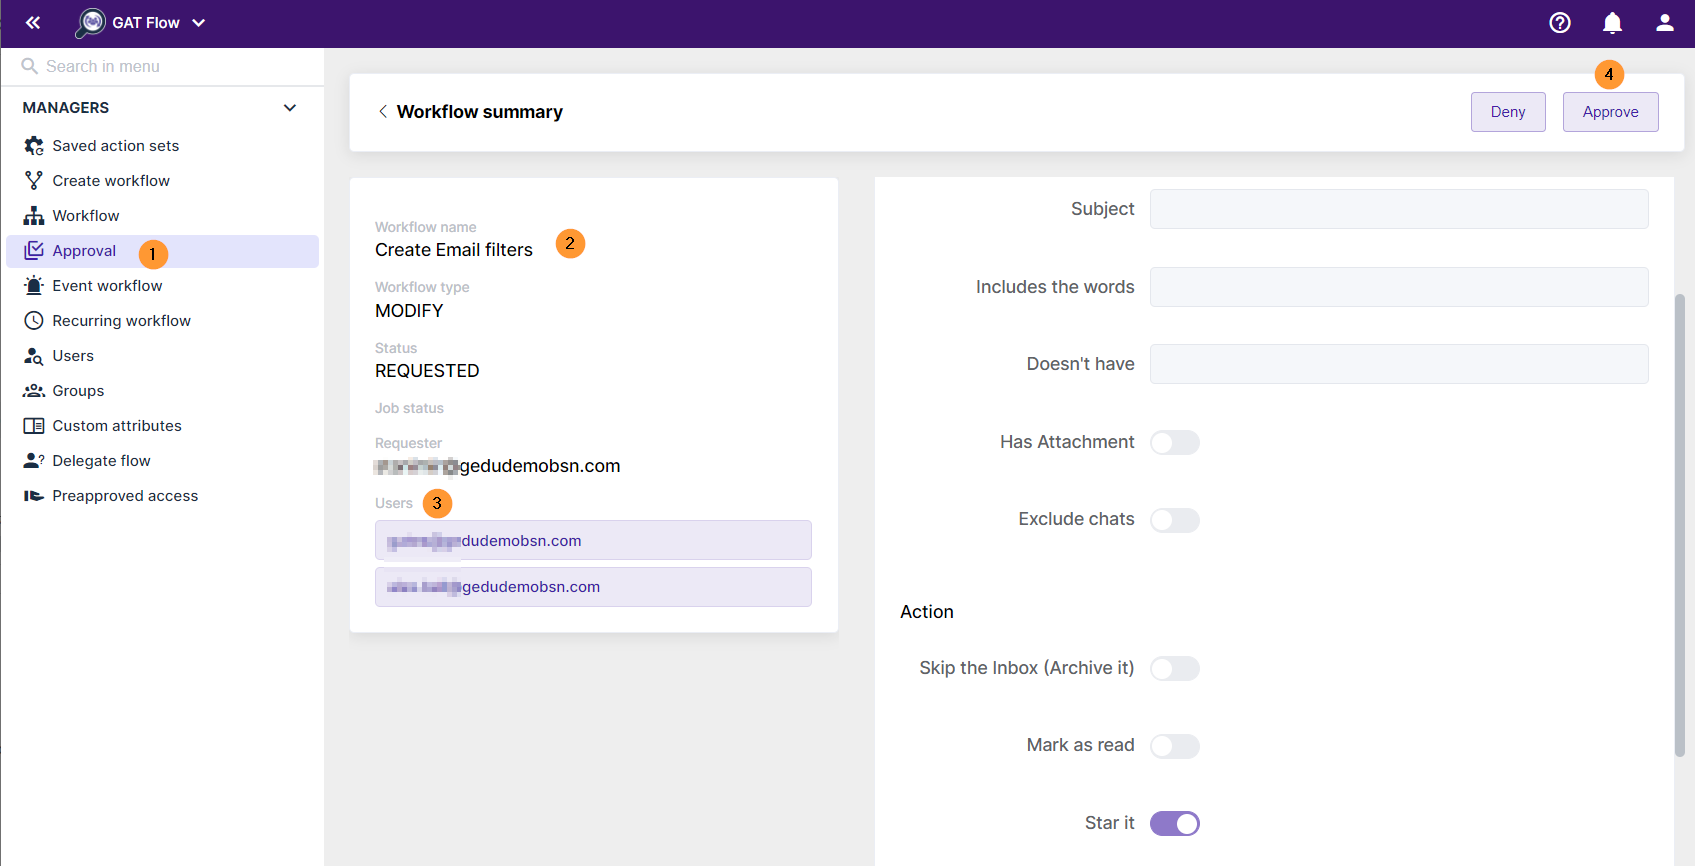
Once approved the workflow will be set to run
Result in Flow #
The result of the job completed can be seen in the Workflow tab in Flow
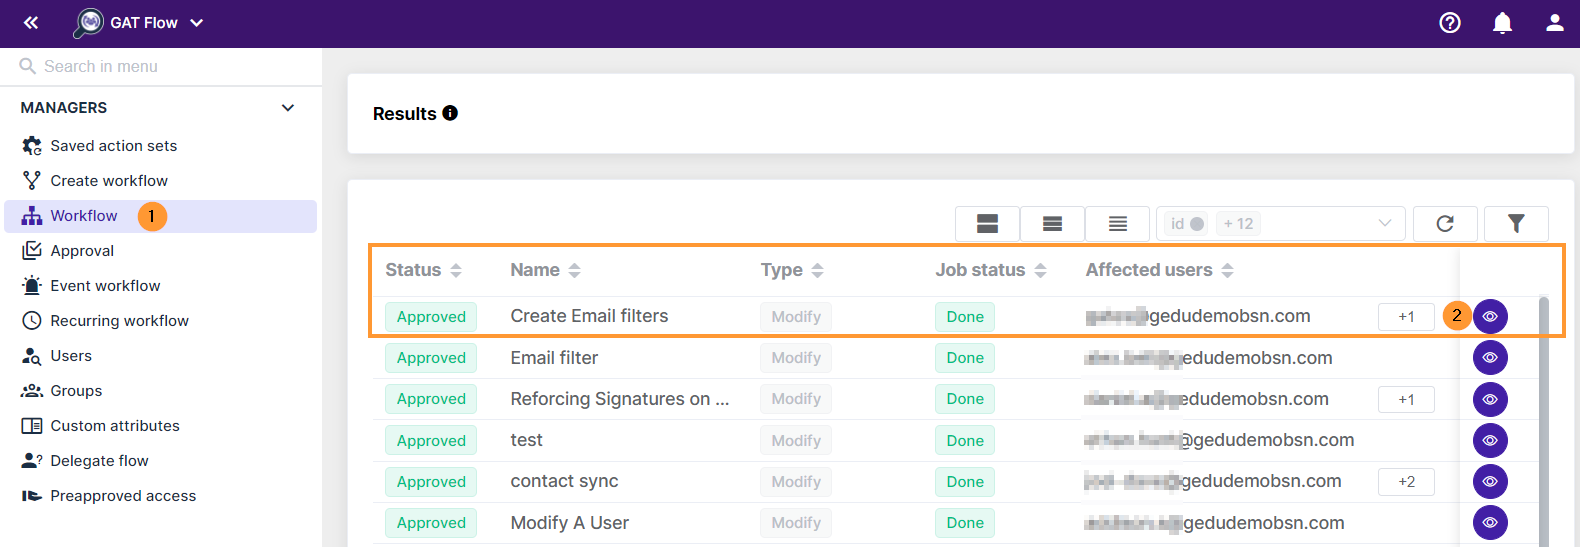
Result on end-users #
The result for the end-users will be as follows.
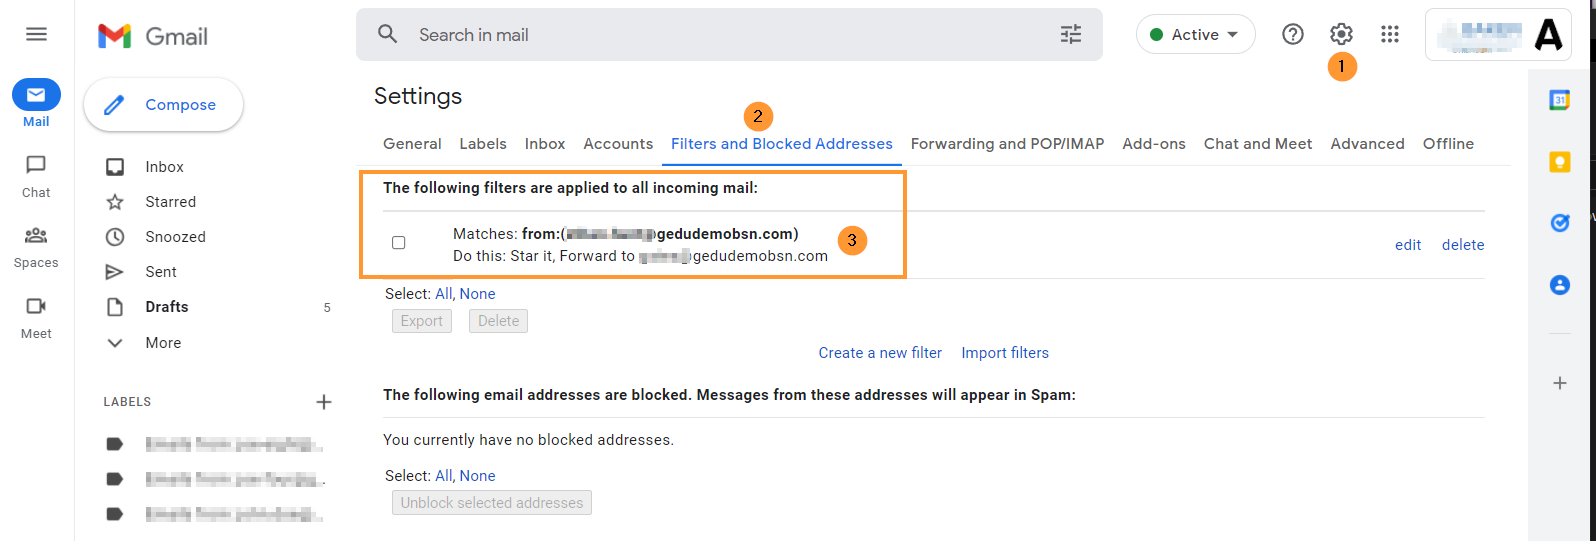
The users selected in the “Search for a user” tab will have the Email filters applied to their Email accounts.
The users will have the filter applied to their accounts.
Navigate to Gmail > Settings > Filters and Blocked addresses
- Matches: From (selected email address).
- Do this: Star it
- Forward to: Email address of (selected user or person added as Manager to the user)
