

GAT Flow is a comprehensive tool that enables process automation, allowing every administrator to perform tasks more easily and in a planned manner in Google Workspace.
The administrator can add or remove users managers in bulk from selected users or a group.
Define Workflow Type #
To create a workflow that removes users managers, navigate to the left menu and click Flow > Create workflow.
You will see the Create workflow window. Under the Define Workflow Type section, enter the workflow Basic Information as follows:
- Workflow name – enter a name for the workflow
- Workflow description (optional) – enter a description of the workflow
- Type – select the workflow type:
- Modify – Modify users
- Run immediately after approval (selected by default) – pick up a date when the workflow is to run, if applicable. More details here.
- Next – click on the button to proceed

Search for a User #
Search for a User – select the users to add to the workflow. Under the Add user section, there are the following options to use:
Select user by:
- User – Search and select individual user(s)
- Group – Search and select a Group of users
- Org. unit – Search and select Org. Unit of users
- Classroom – Search and select Classroom
- Import users – add users through import
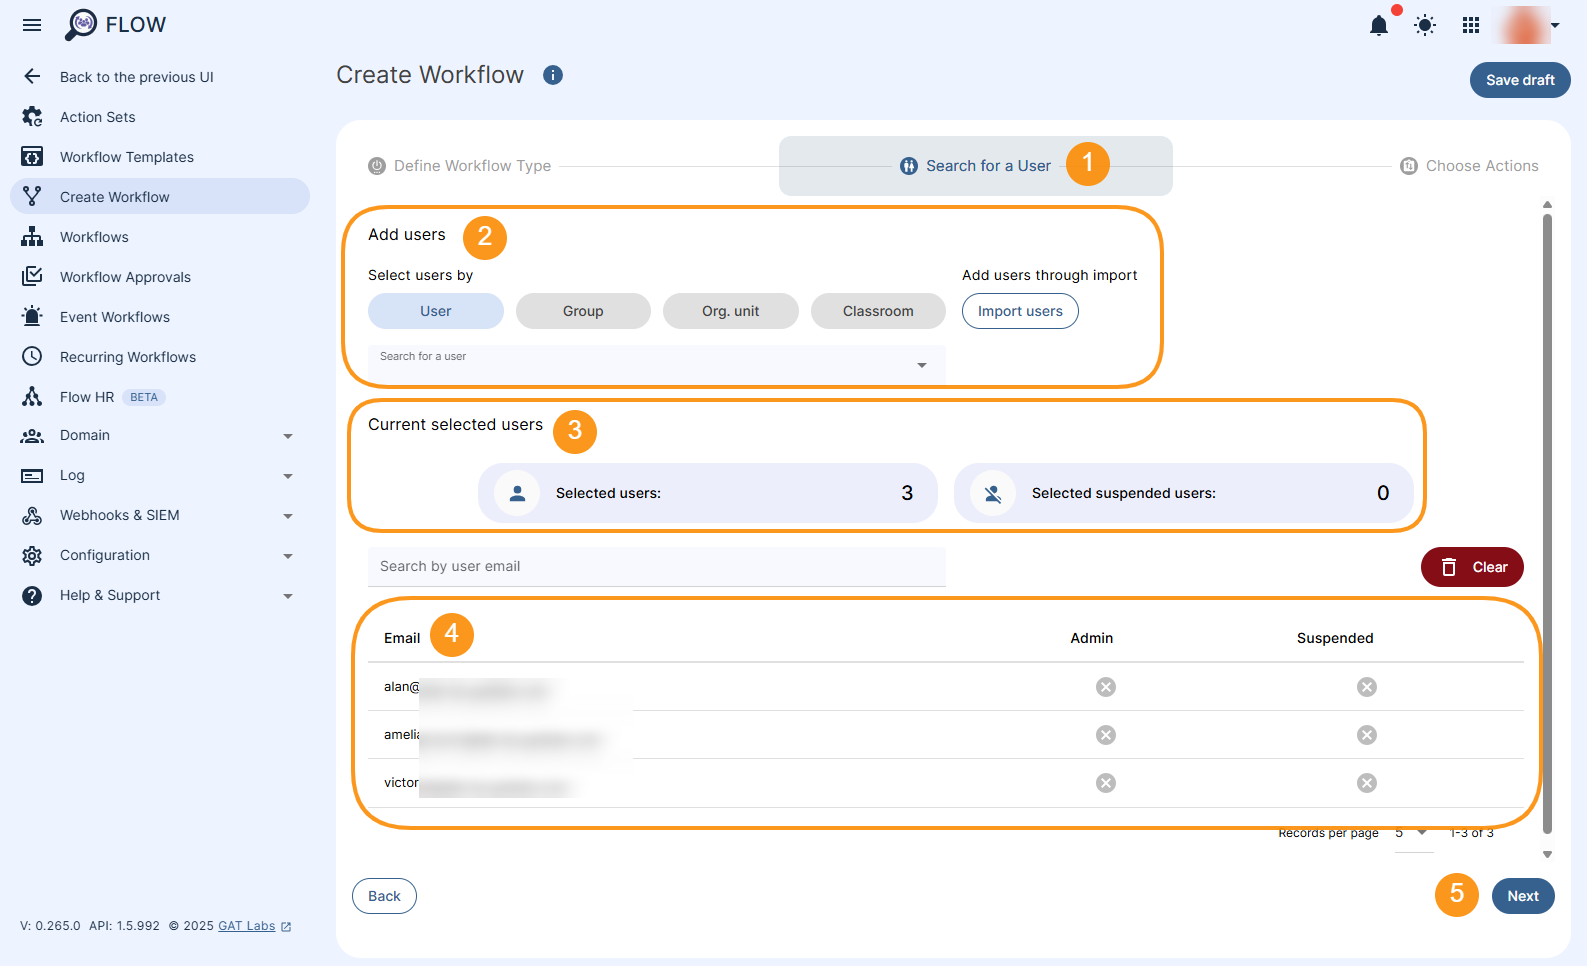
After adding users, click Next.
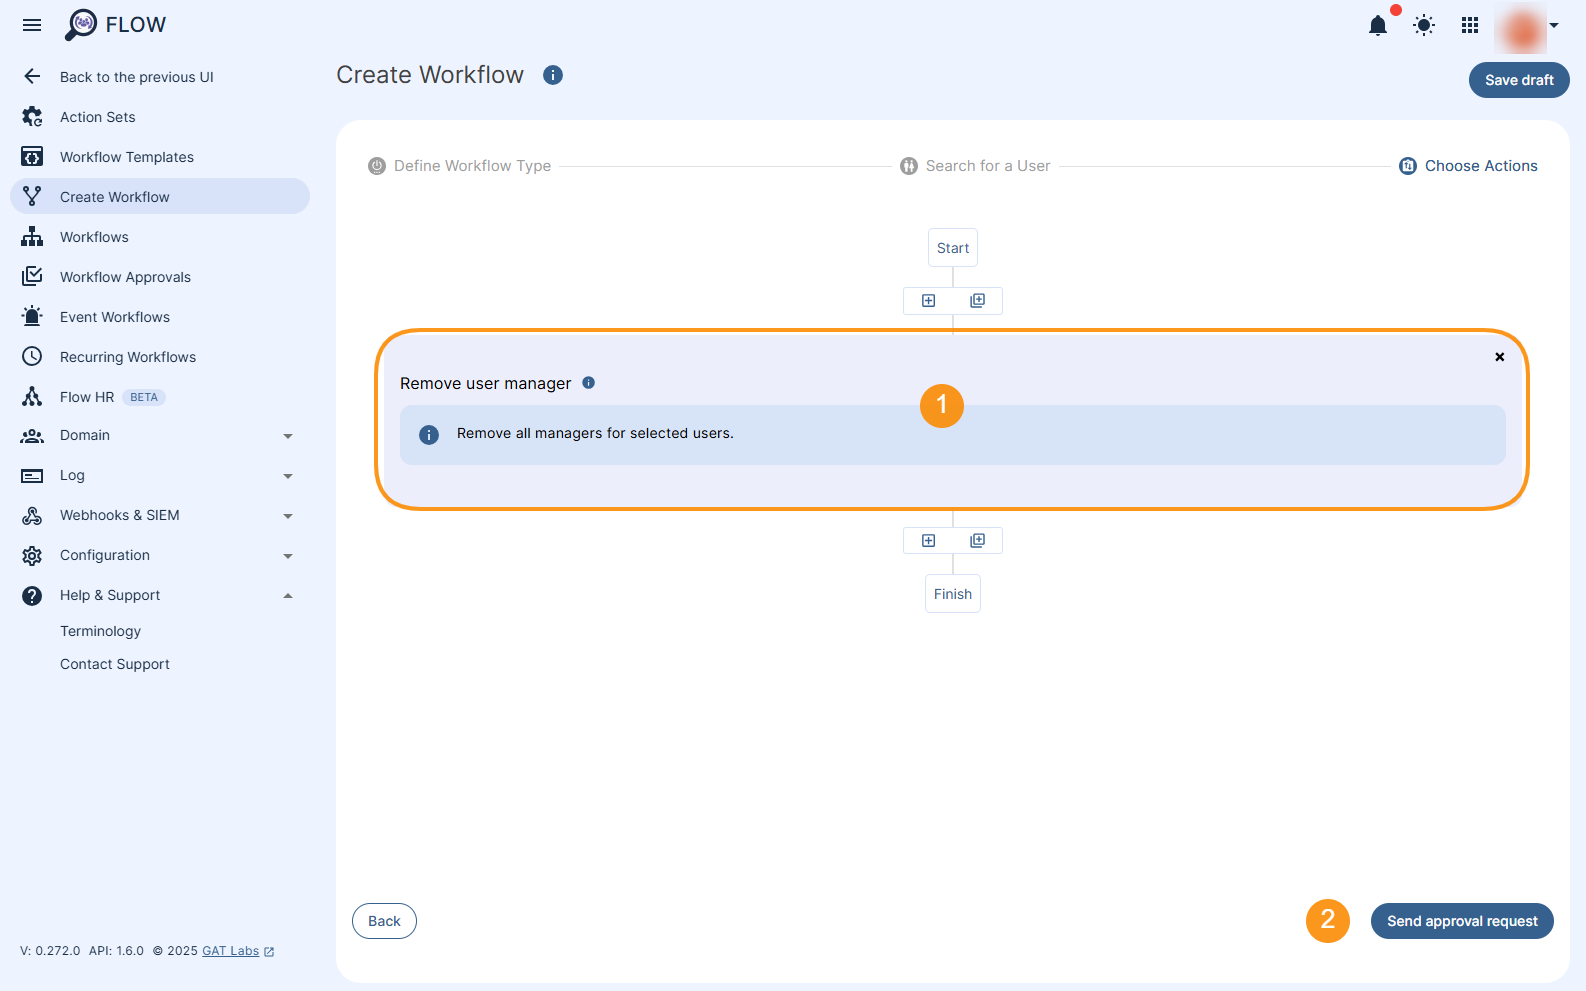
Choose Actions #
Set up the workflow actions by clicking on the “+” button on the left side of the workflow diagram to Add action.
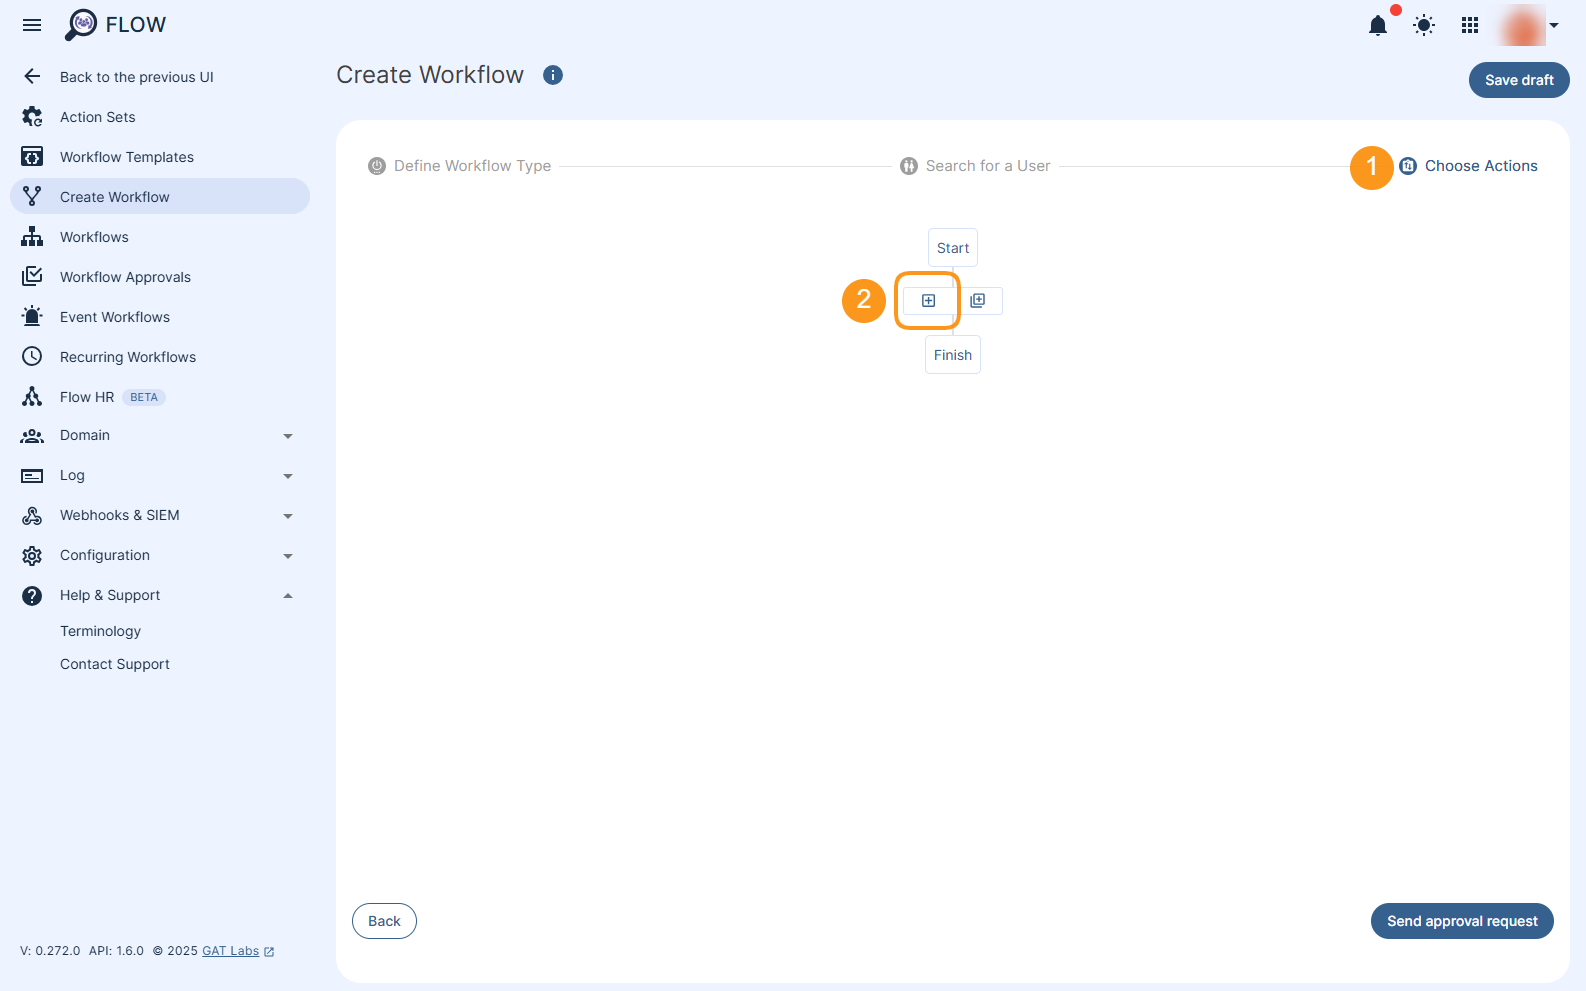
All available options for the Modify type of workflow action will be displayed.
Utilize a quick search option and type the keyword that allows for quick action return, e.g., “manager”, assisting in the process to Remove Managers in Bulk.
Select the Remove user manager action.
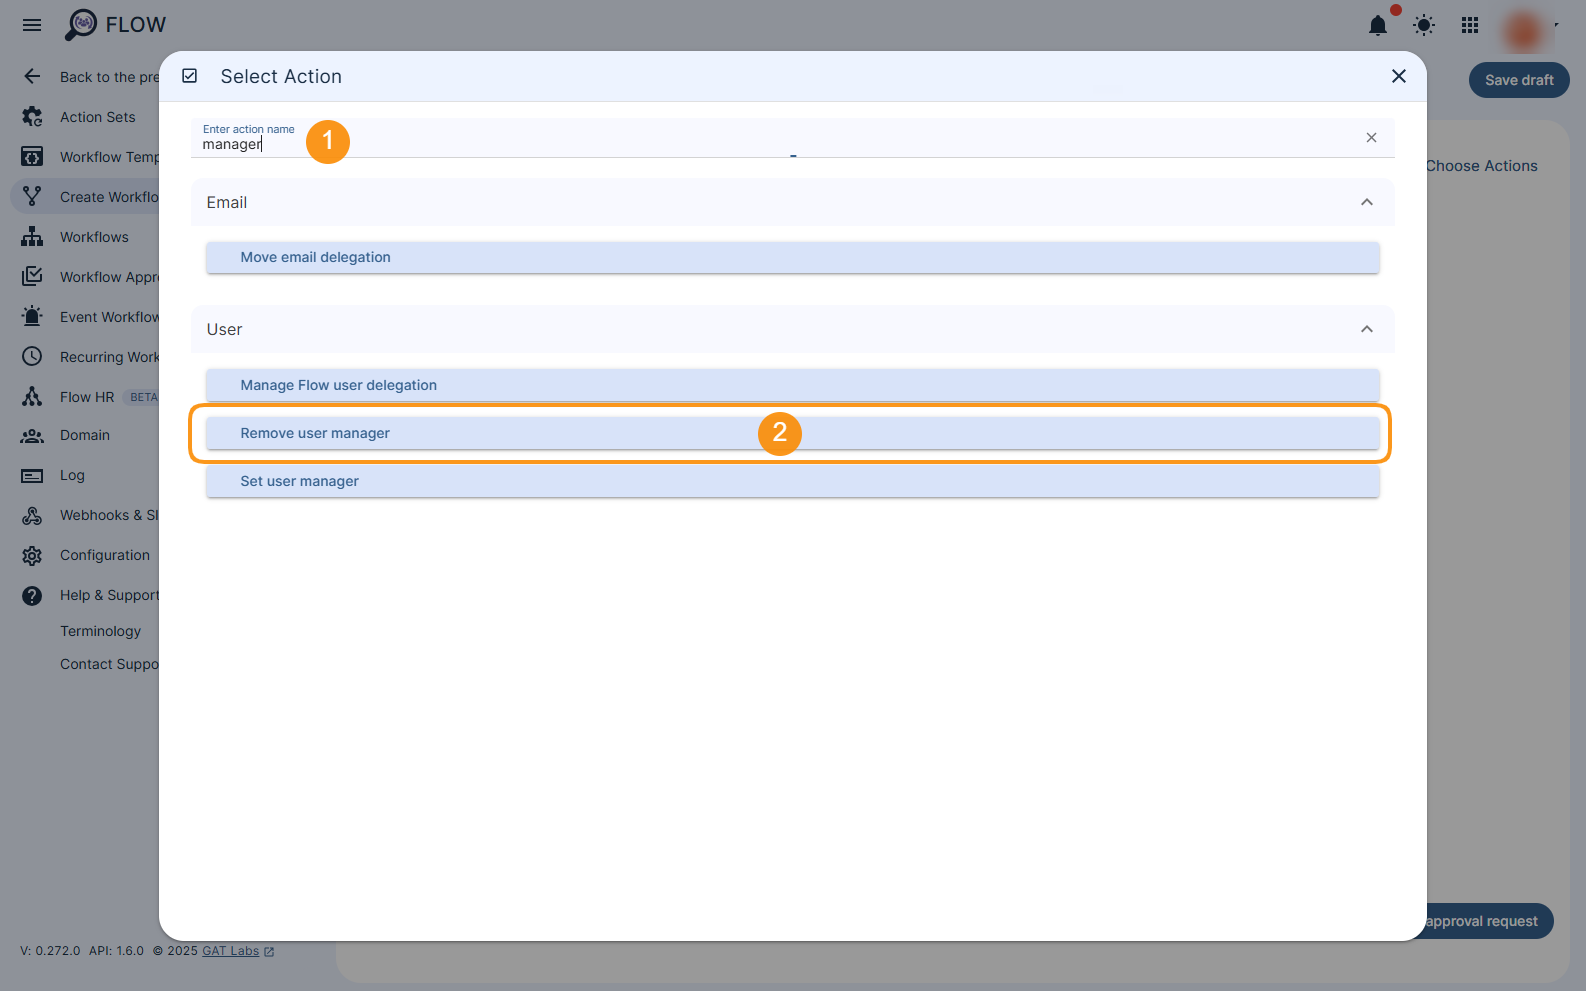
The action is added to the workflow.
Once ready, click on the Send approval request button to send the workflow to the Security Officer for verification.
You will see a pop-up window that requires confirmation to proceed with the request.

Note: If you have pre-approval enabled, you can proceed without an approval email. You can find more details here.
The request will be sent to the Security officer for approval.
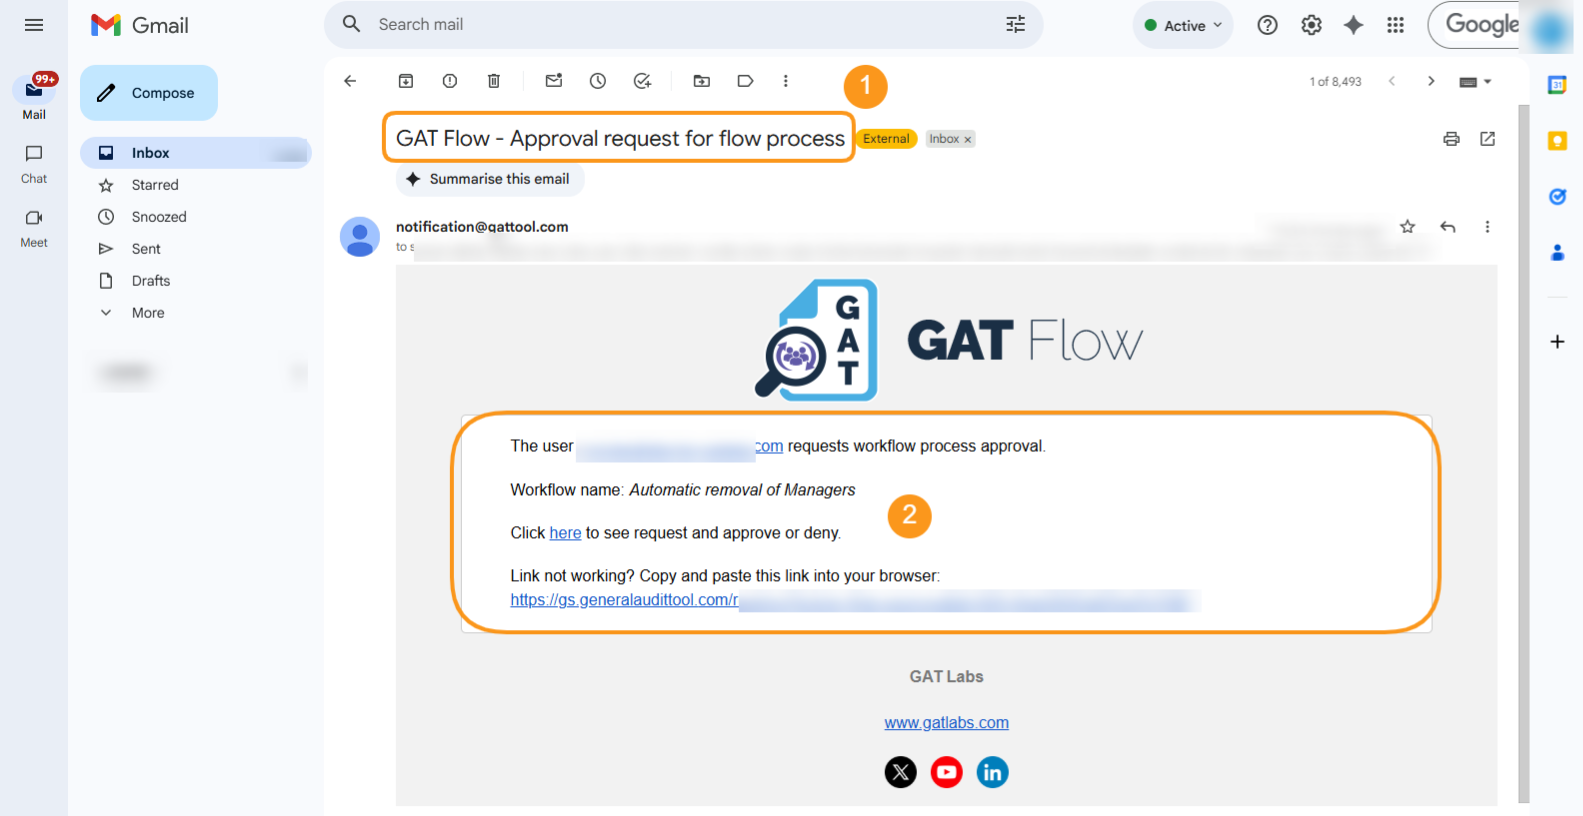
The Security Officer can review and approve or deny the workflow.
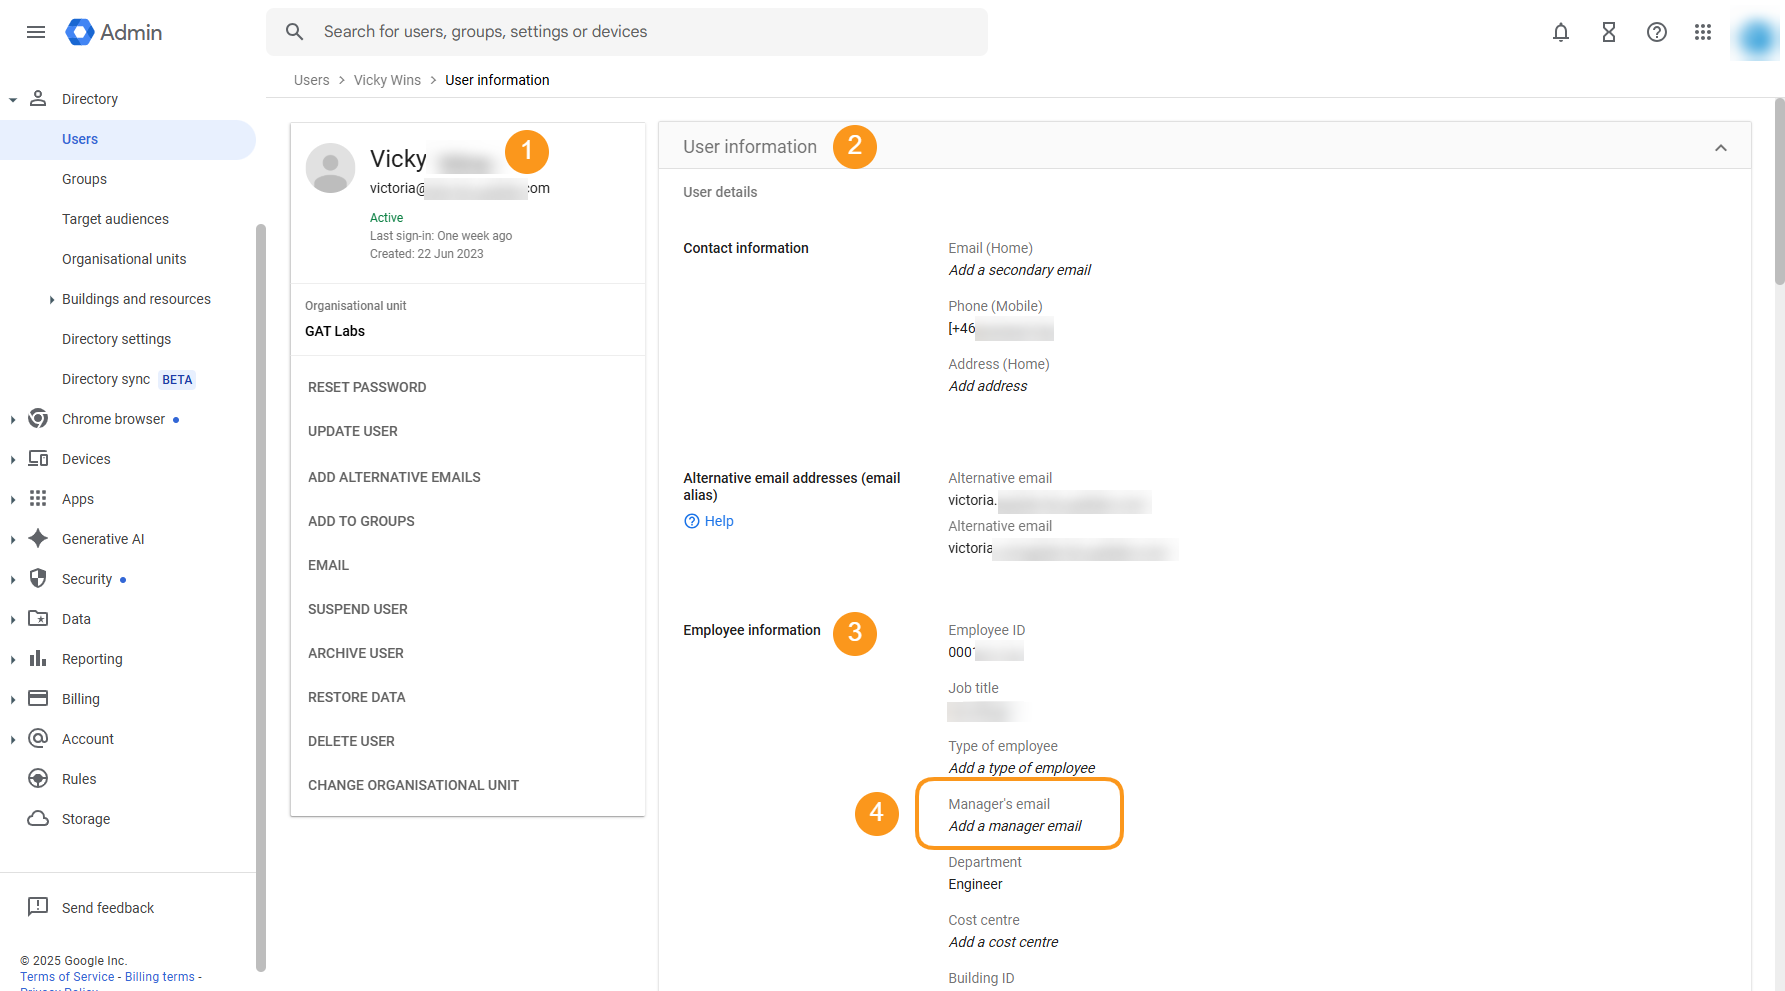
Once approved, the workflow will run, and all assigned Managers will be removed from all users selected for this workflow.
Results #
To review the workflow status and view its details, navigate to Workflows and find the relevant workflow in the table.
Click on the Detail icon to see more details.

The Status of the request can be as follows:
- Requested – send to the Security officer for approval
- Approved – the Security Officer has approved the request
- Job status – will show the status of the current workflow job
- Scheduled – when is set to run
- Done – when the workflow has been completed
- Partially done – when completed partially
- Eye icon – click on the eye icon to view more details
- Details icon – the icon on the right side of the workflow will show all details for the Flow request
- Save as action set – save the Workflow as an action set for easy later use
- Edit – edit the workflow and apply changes
The Workflow Details section allows you to drill down into the workflow by clicking the number under each status column, such as “Done” (shown below), to view more details.

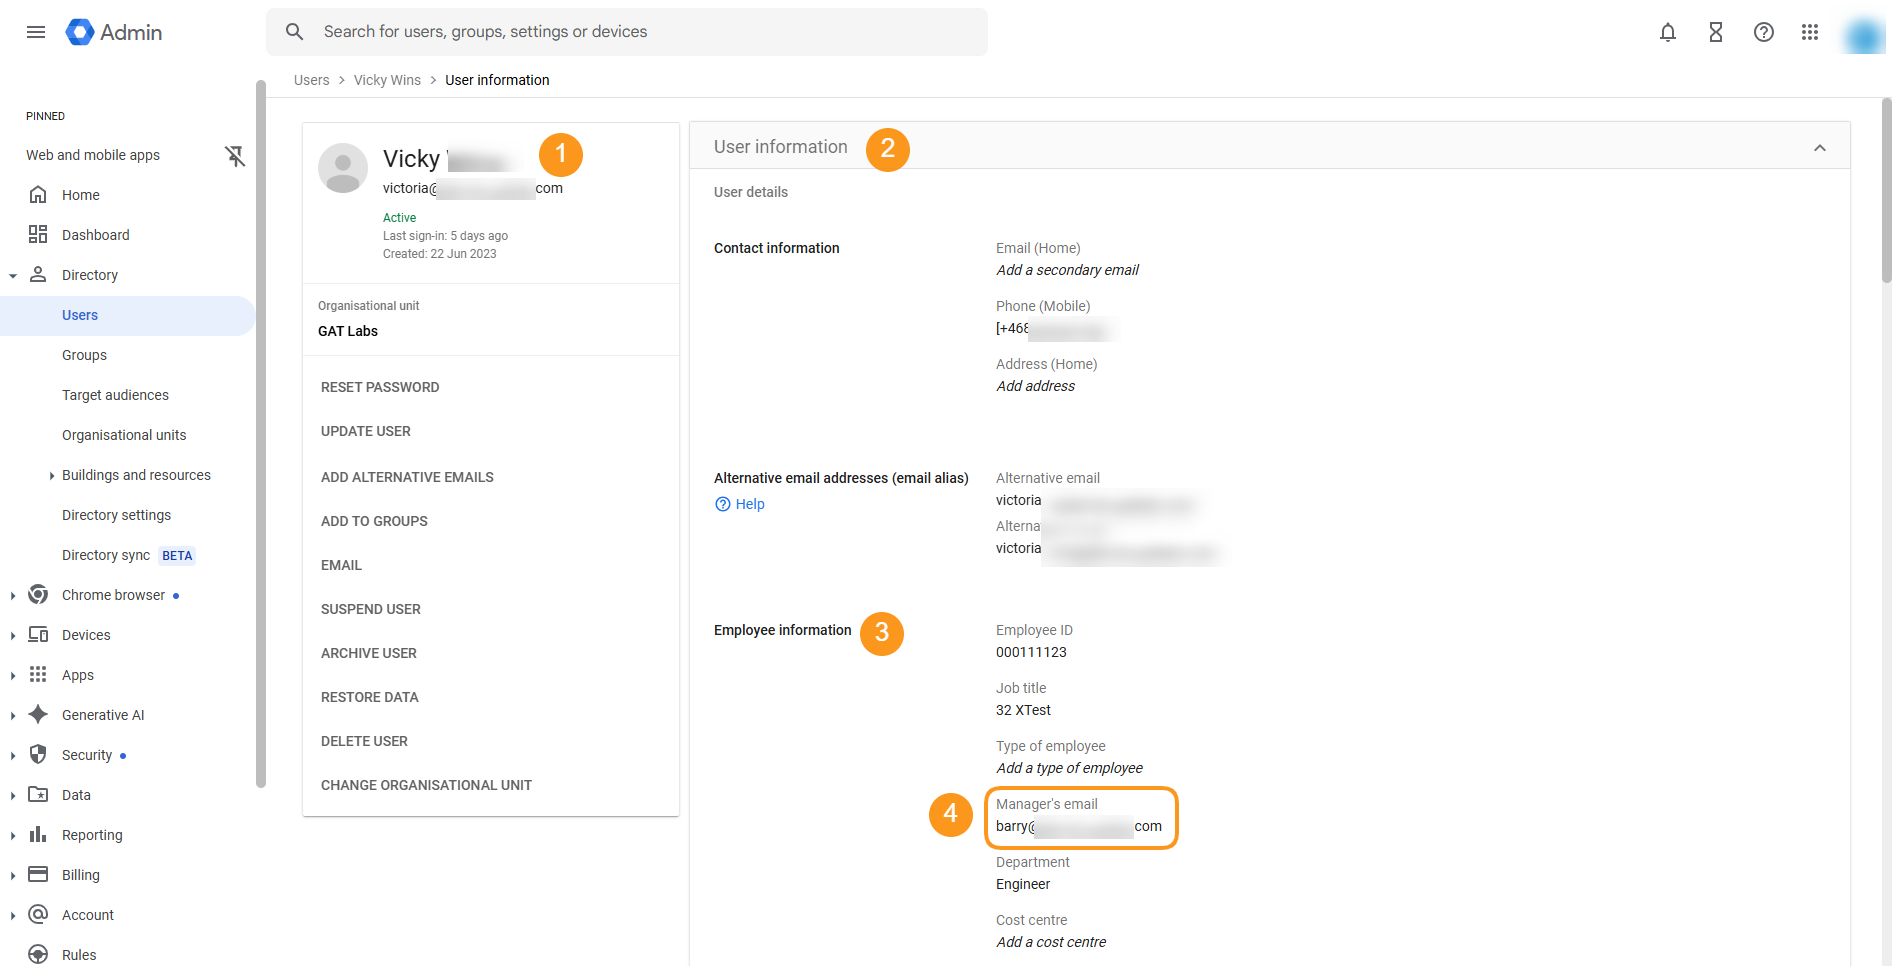
You removed the Manager from the User Information section in the Google Admin console.
Related Posts #
- Set Users Manager in Bulk
- Actions Available when Offboarding Users
- Shared Drive Membership Management


