

Drive Clean Up – Duplicated files shared out #
GAT+ audit tool can help admins identify files using all sorts of criteria using the ‘Filtering‘ feature available throughout every audit.
In this example, we are looking to identify all of the video files that are duplicated and shared with external users and then manage their access and ownership.
The scenario is to find the duplicate files, remove the external shares, and then delete the duplicate files.
To achieve this, we can break down the task into steps.
Step 1. Identify duplicated video files that are shared externally #
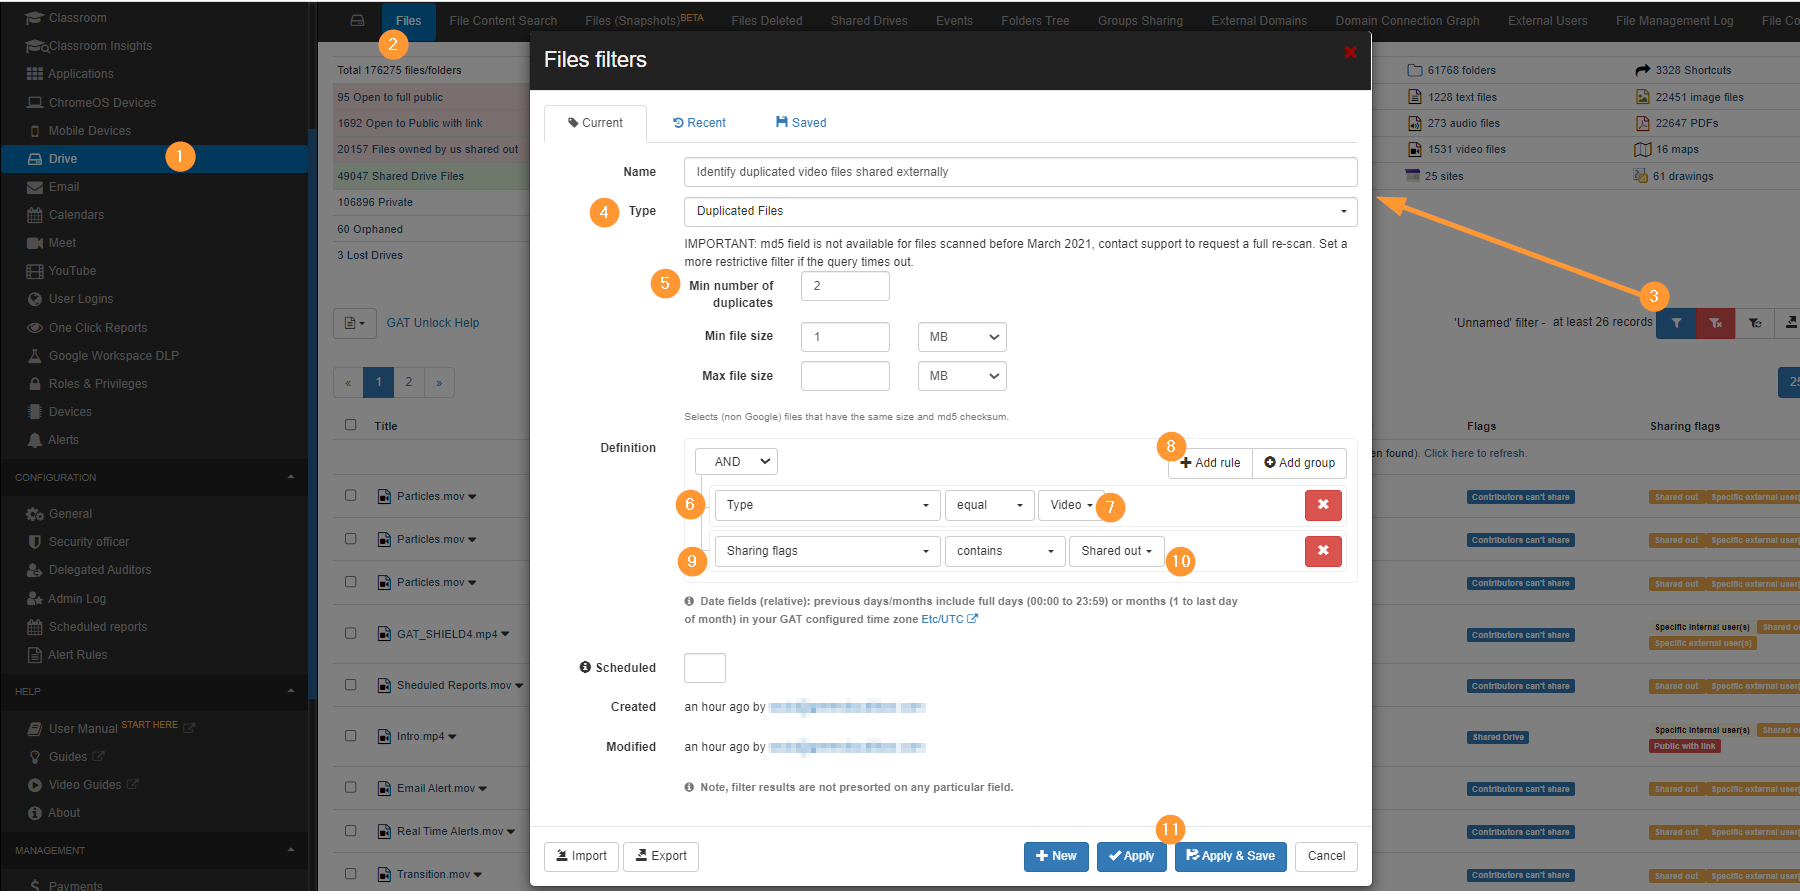
Starting the Drive Clean Up: #
- First, navigate to the Drive audit (1)
- And then to the Files tab (2).
- Next, run the filter to find files, select the filter icon (3).
- Now the filter needs to be defined, select the Type to be Duplicated Files. (4)
- Select the minimum number of duplicates you are looking for, so ideally this is 2 and cannot be anything under, because at least 2 files are duplicates.(5)
- Now we can add more criteria to the definition of the filter to target the files we want.
- Select the field to be ‘Type’ (6)
- Select the type to be video (7)
- Add a rule to the rule definition block (8)
- Now we want to find these files that are externally shared, select the field to be ‘Sharing flags’ (9)
- Select the ‘Sharing flags’ to be ‘Shared out’ (10)
- Apply the filter (11)
Result of filter #
As a result, all the video files that are duplicates and shared externally will be displayed.

Shared Drive result #
Some files might be part of Shared Drives, where you cannot change ownership, as Shared Drives do not have owners.
You can exclude Shared Drive files by adding a simple additional filter.
- Flags – “doesn’t contain” – Shared Drive

Step 2. Take action to change ownership and delete duplicates #
As an Admin or Delegated auditor, you can now change the ownership of those files and then delete them from the Google Drive UI.
For example, remove the permissions of all external shares on the files and transfer ownership to delete the duplicate files.
- Select all files to be deleted and leave the copies you want to remain
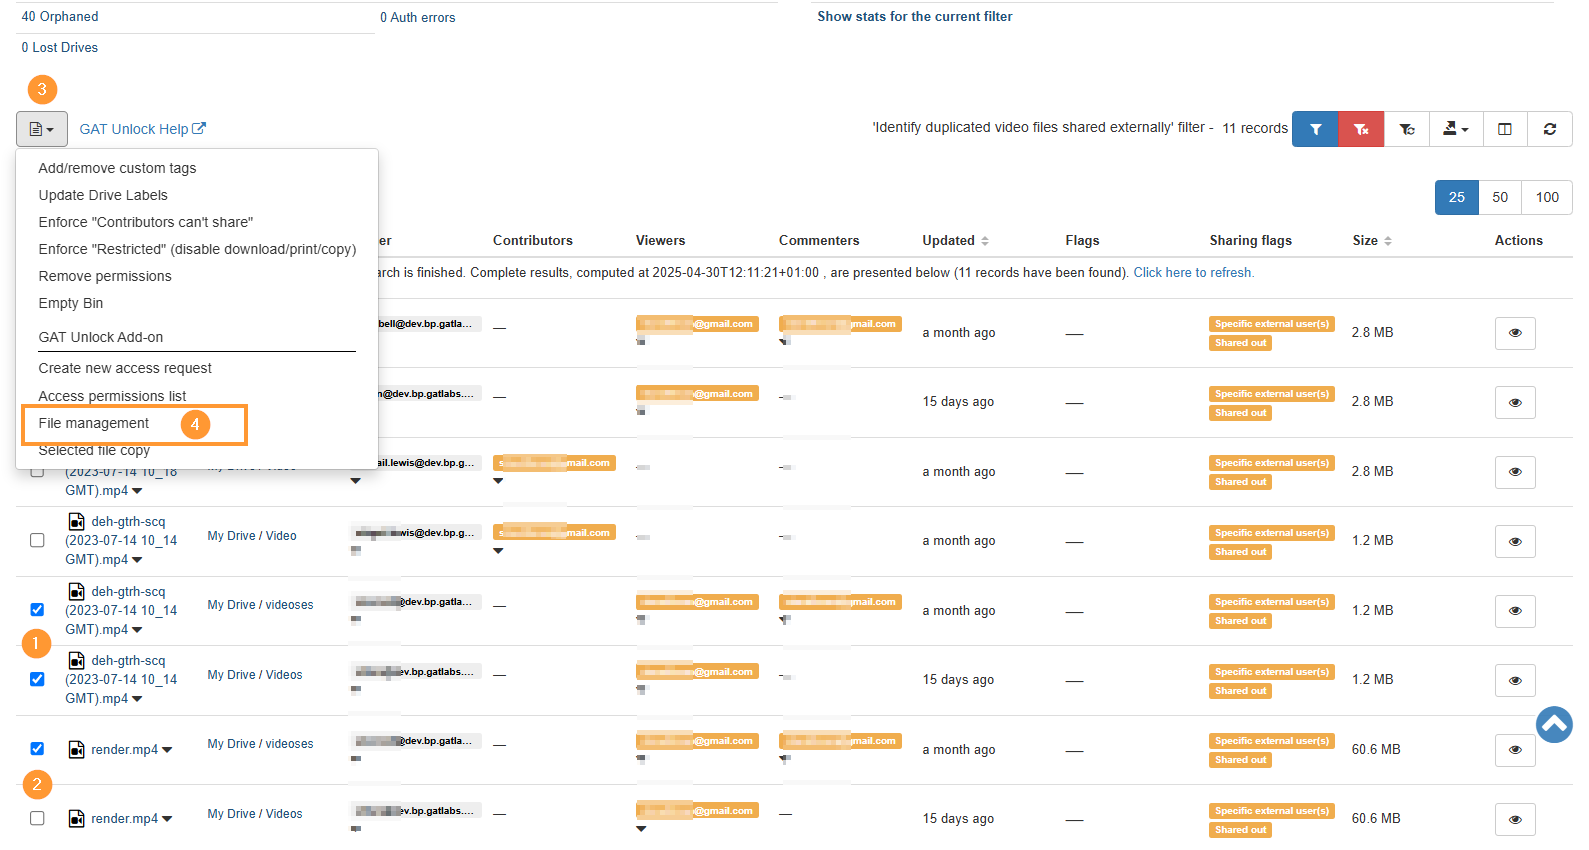
- Select ‘File management‘. This operation will allow us to change ownership of the files and remove their permissions in the same File management Job.
- A new window will be displayed with the actions that can be taken
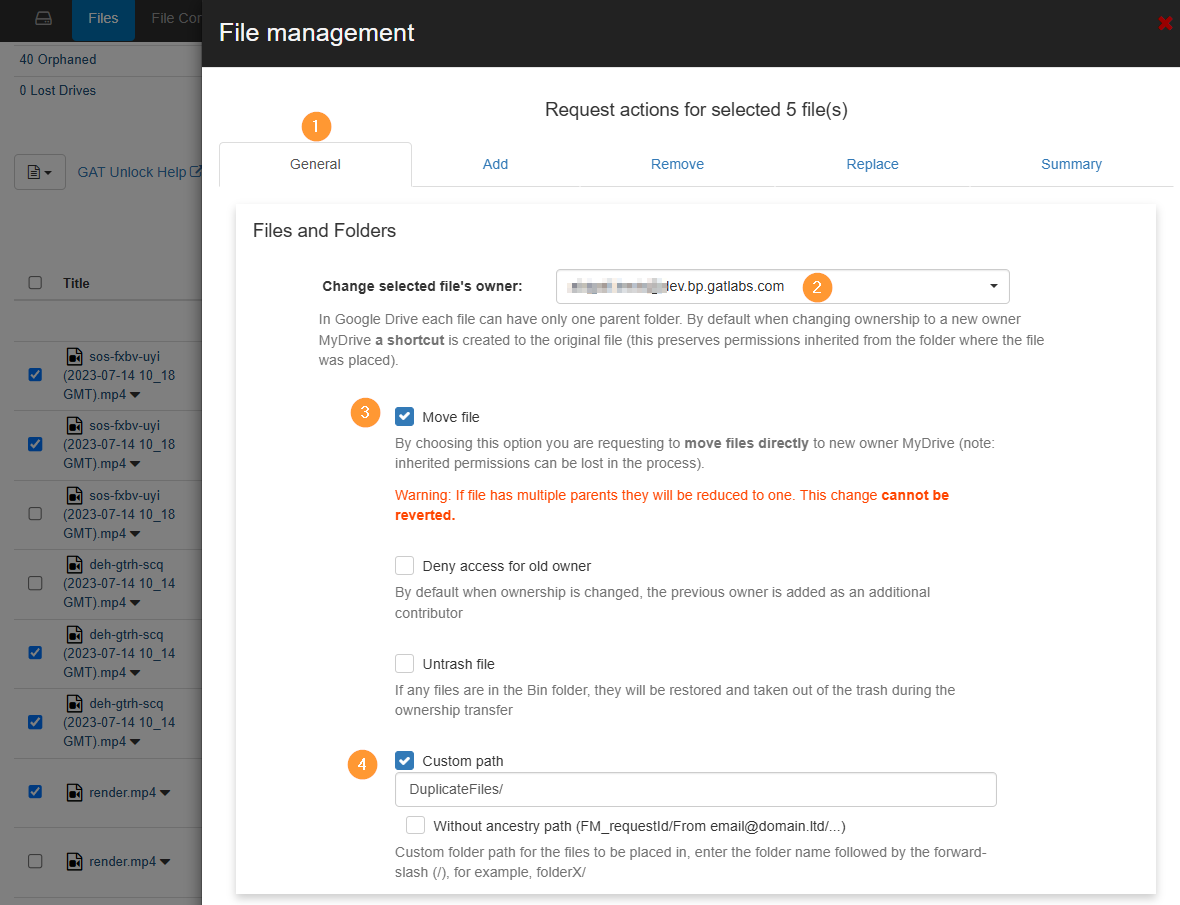
- Fill in the details for the ownership change
- General –
- Change the selected files’ owner – enter the new owner’s email
- Move file – select to move the files directly, rather than creating shortcuts
- Custom path – select location where the files will be placed when ownership change occur
- General –
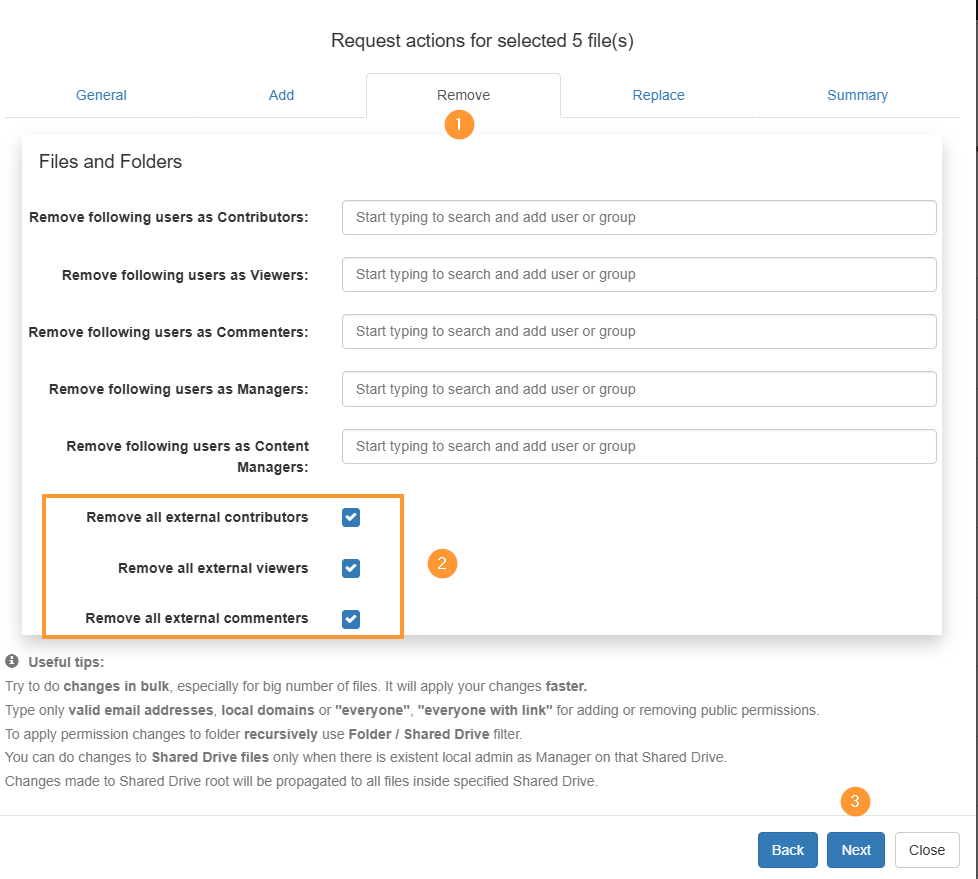
- Next, proceed to the ‘remove permissions‘ tab and choose the option to Remove all external permissions.
- Next, go to the summary tab and select ‘send request’

Approval of action #
The security officer will receive an email to approve the Unlock request.
The email will lead them to GAT+ > Security Officer > File Management

Result in the File management log #
When the job is finished, it’s possible to check the status of every file where action was taken by checking the job in the File Management Log tab in the Drive audit.

Step 3. Drive Clean Up- Delete duplicate files #
When the change of ownership has finished, as part of the File management, we selected where the files will be located when the ownership change happens.
Because of the change, the files will be located in the new owner’s My Drive under the added folder.
From there, the new owner can delete the duplicate files.

Related Posts #
How to find any duplicate files in Google Drive


