GAT Flow allows a Google Workspace Admin or Delegated Auditor to set up an existing user’s details via a simple workflow.
You can set up set user’s Job title, cost center, department, and employee type at once and many more when selecting the action: Change user employee information.
You can set the below details individually or at once in a single workflow:
- First Name
- Last Name
- Display Name
- Organization name
- Job title
- Cost center
- Department
- Employee type
- Employee ID
- Building ID
- Area
- Building ID
- Floor name
- Floor section
Step 1. #
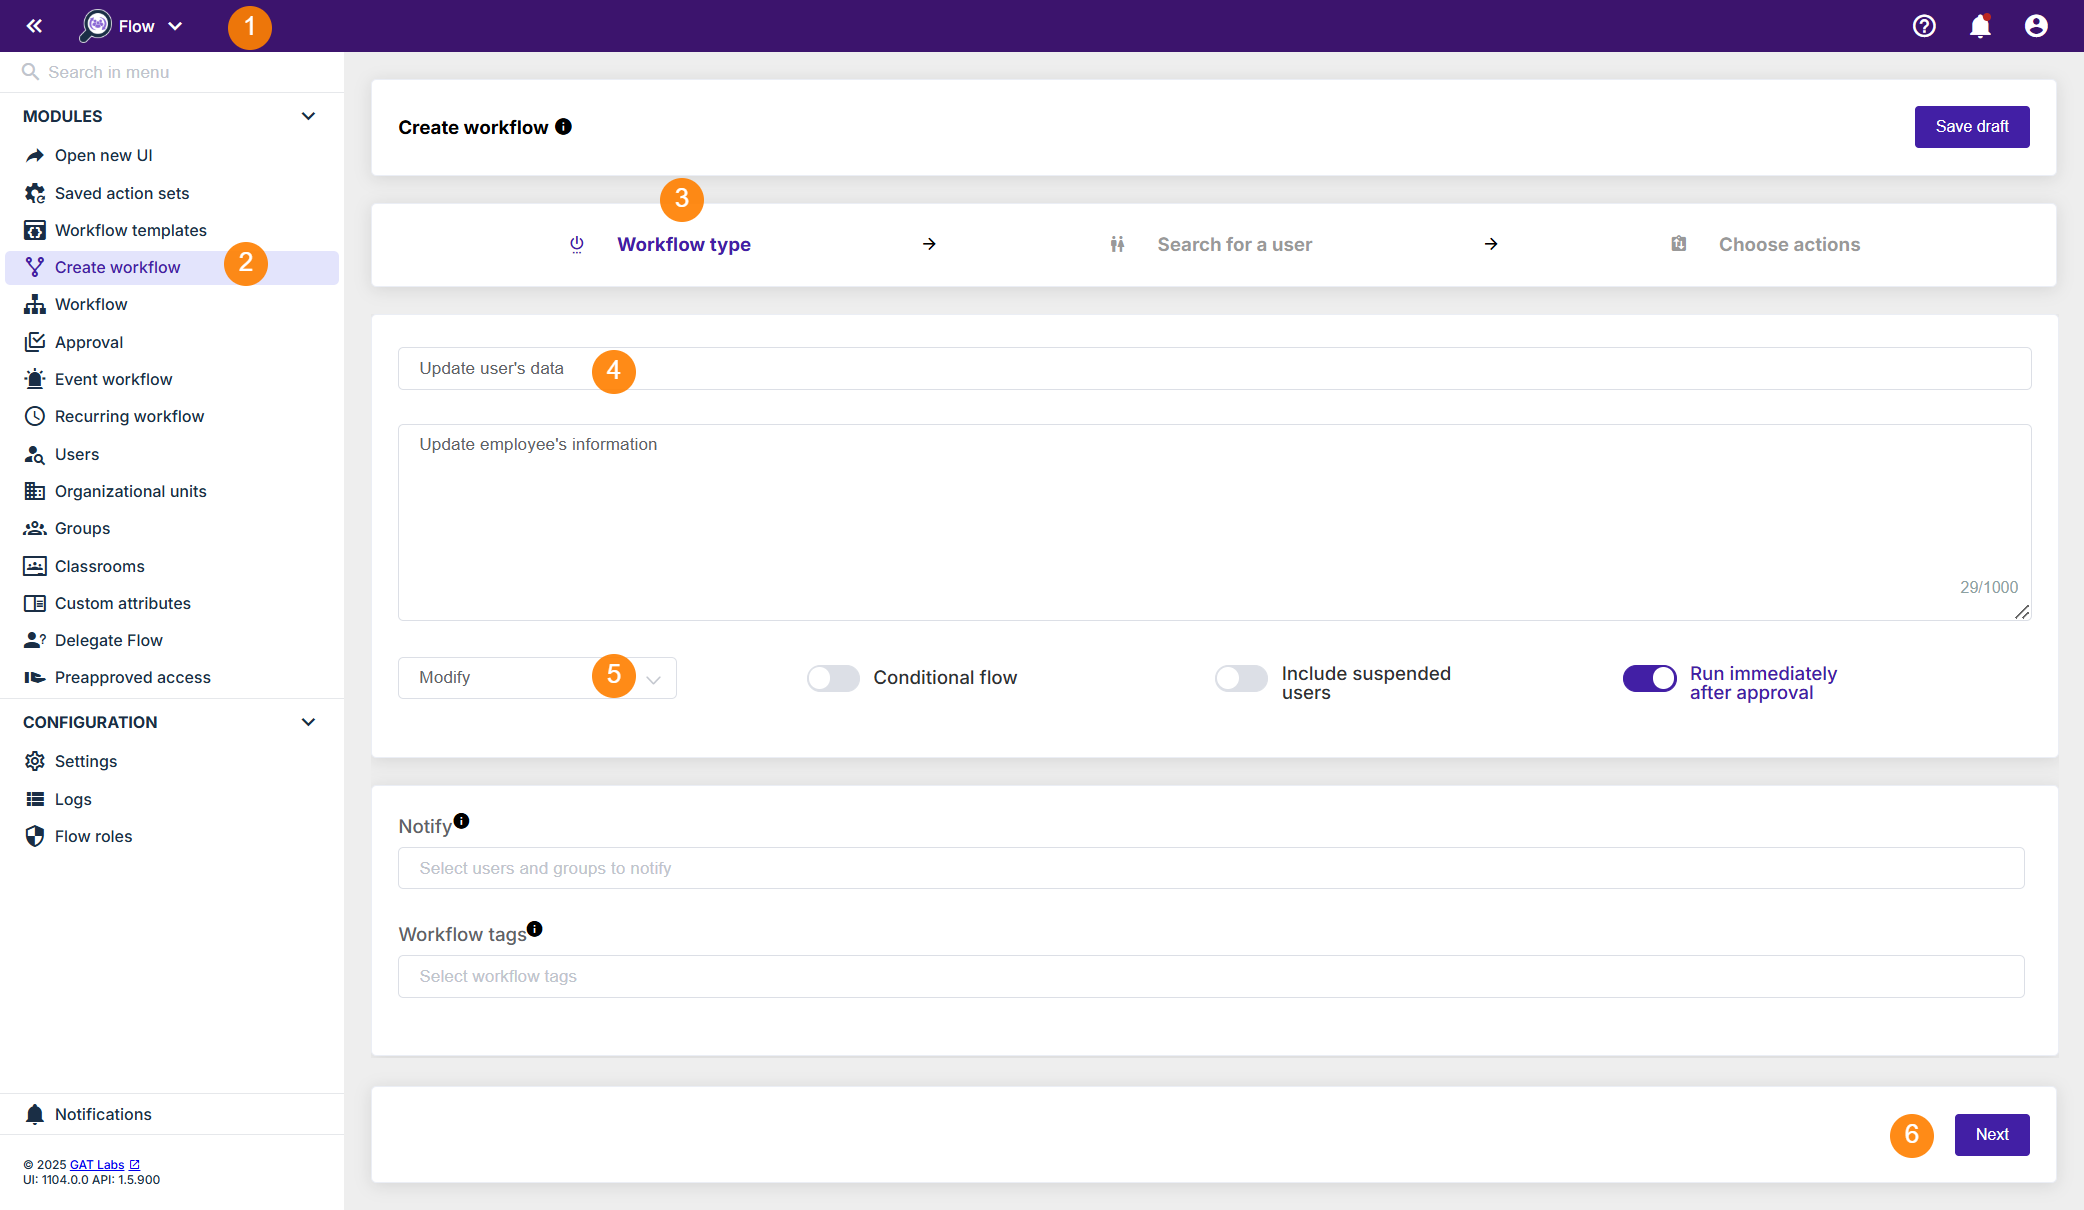
First, to create a workflow, navigate to Flow (1)> Create workflow (2).
Next, fill in the details under the Workflow type section (3):
- Name (4)– enter a name for the workflow
- Type – select the type of workflow you want to use (Modify in this example) (5)
- Next (6) – click to proceed
Step 2. #
In the next step, Search for a user (1). Select a single user or multiple users’ accounts where the actions will be applied. Search and add the users via Search for a user, group, org. unit, or classroom or import users (2). Once selected, the list of users will be displayed (3).
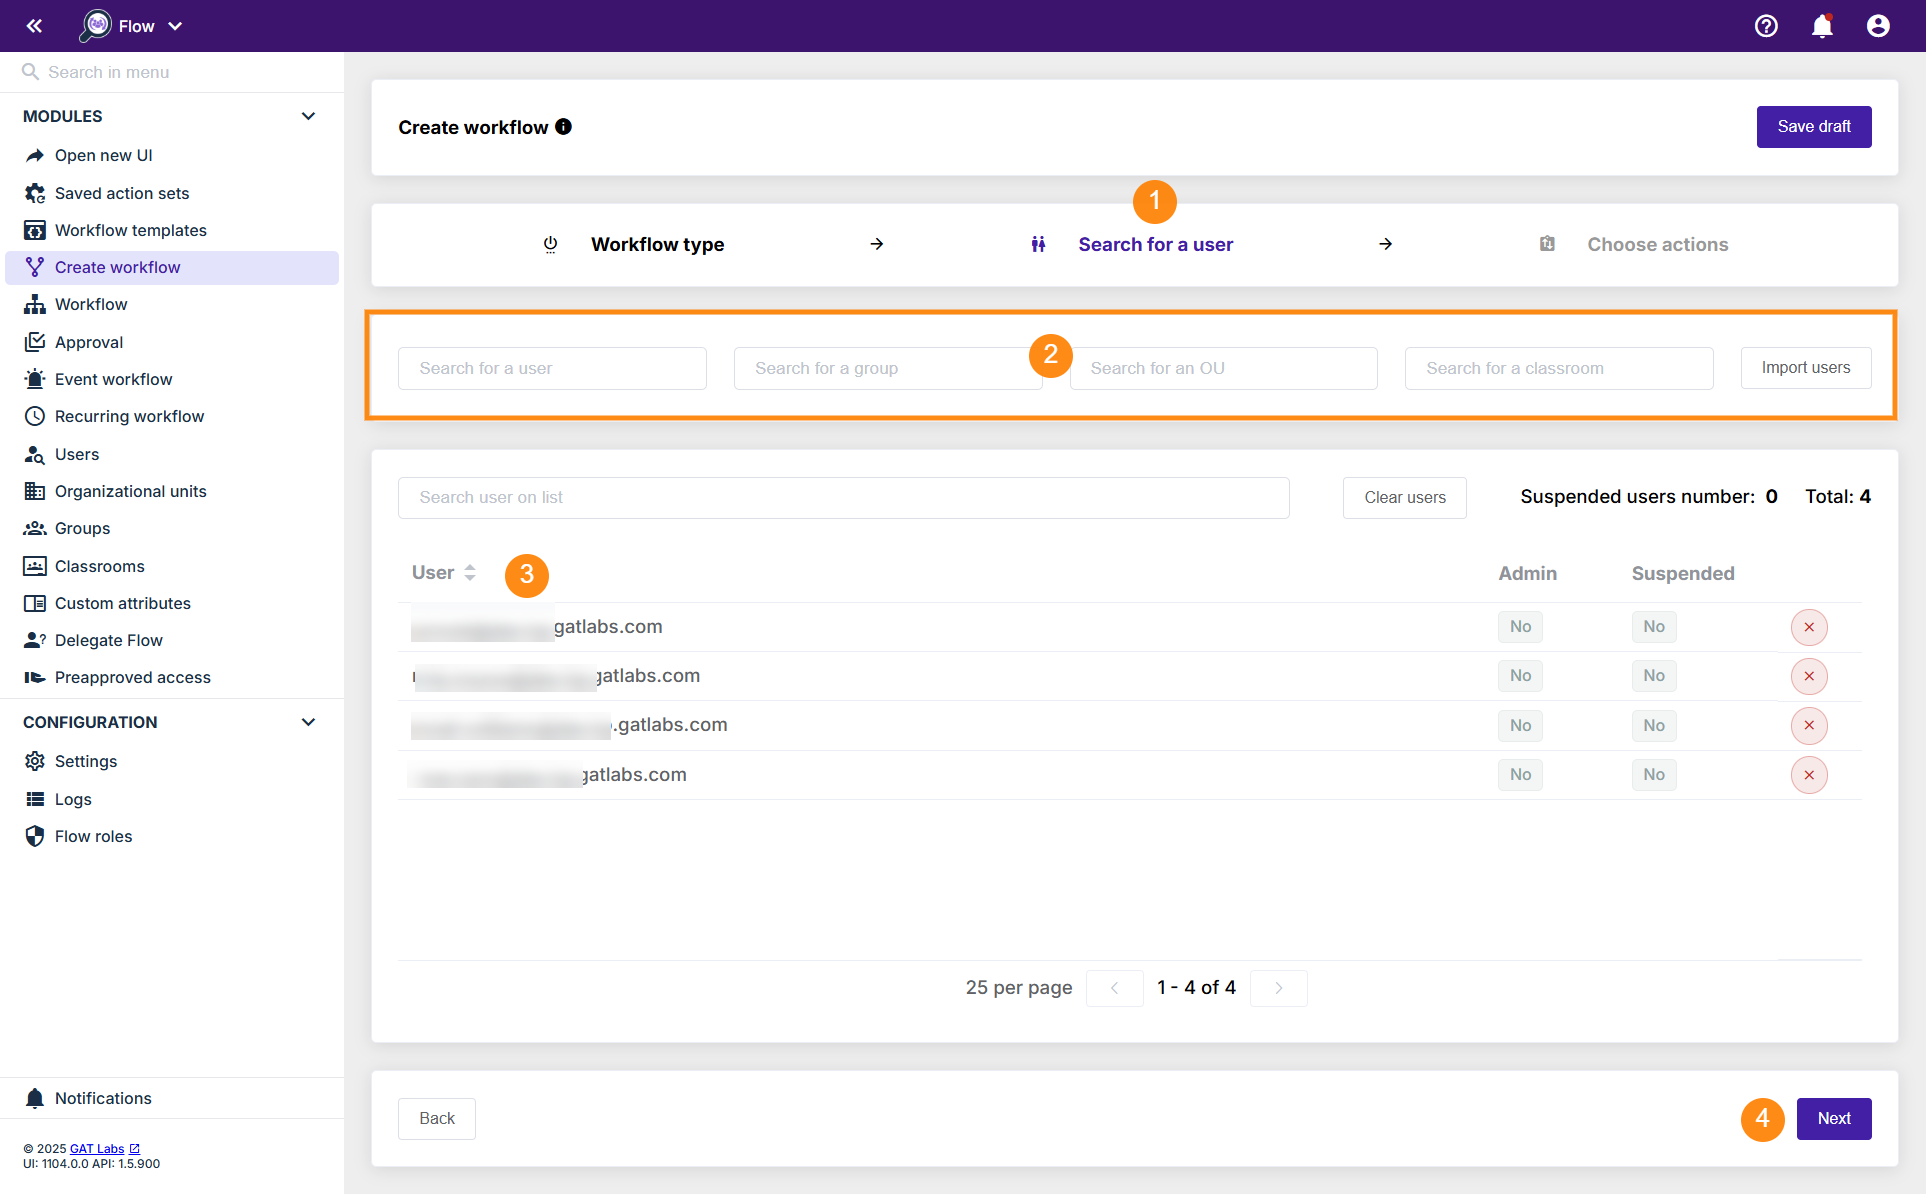
Once users are selected, click on Next (4) to proceed to the next step.
Step 3. #
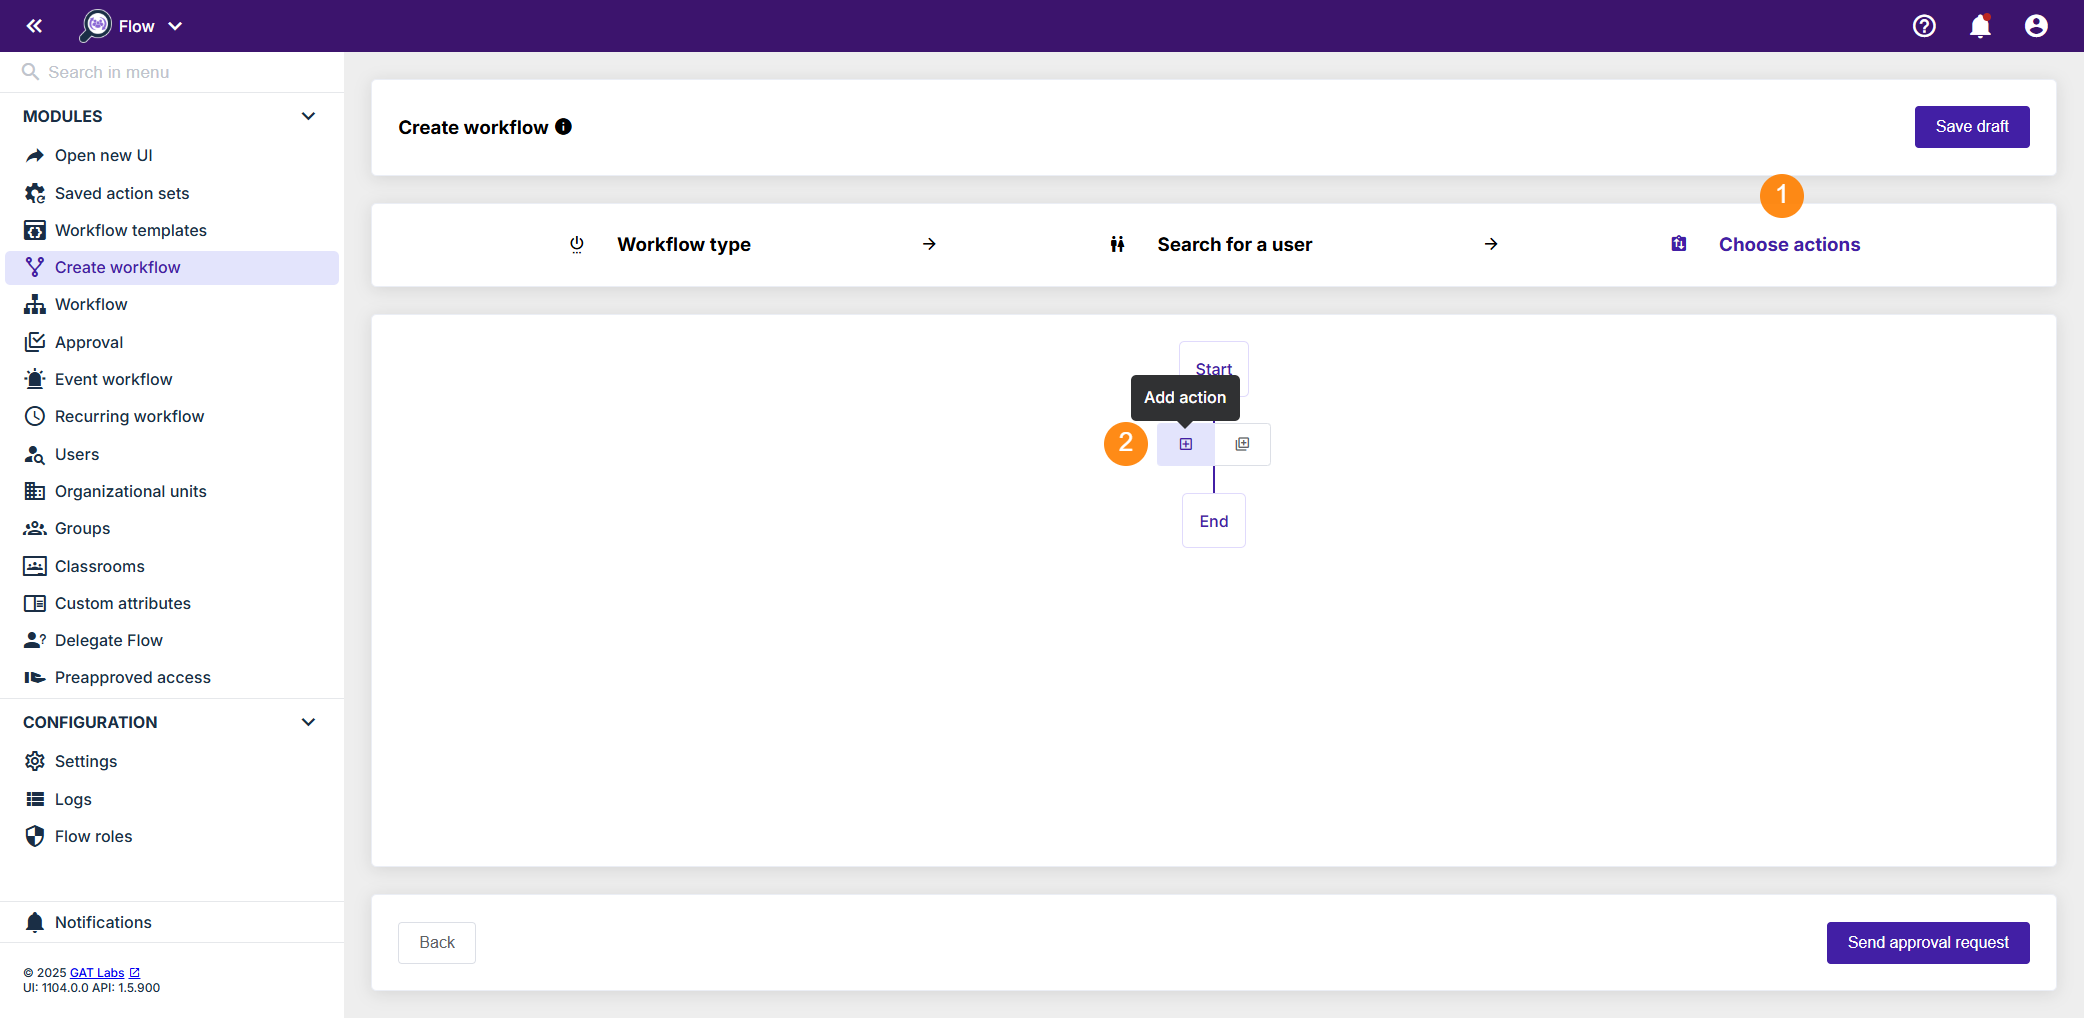
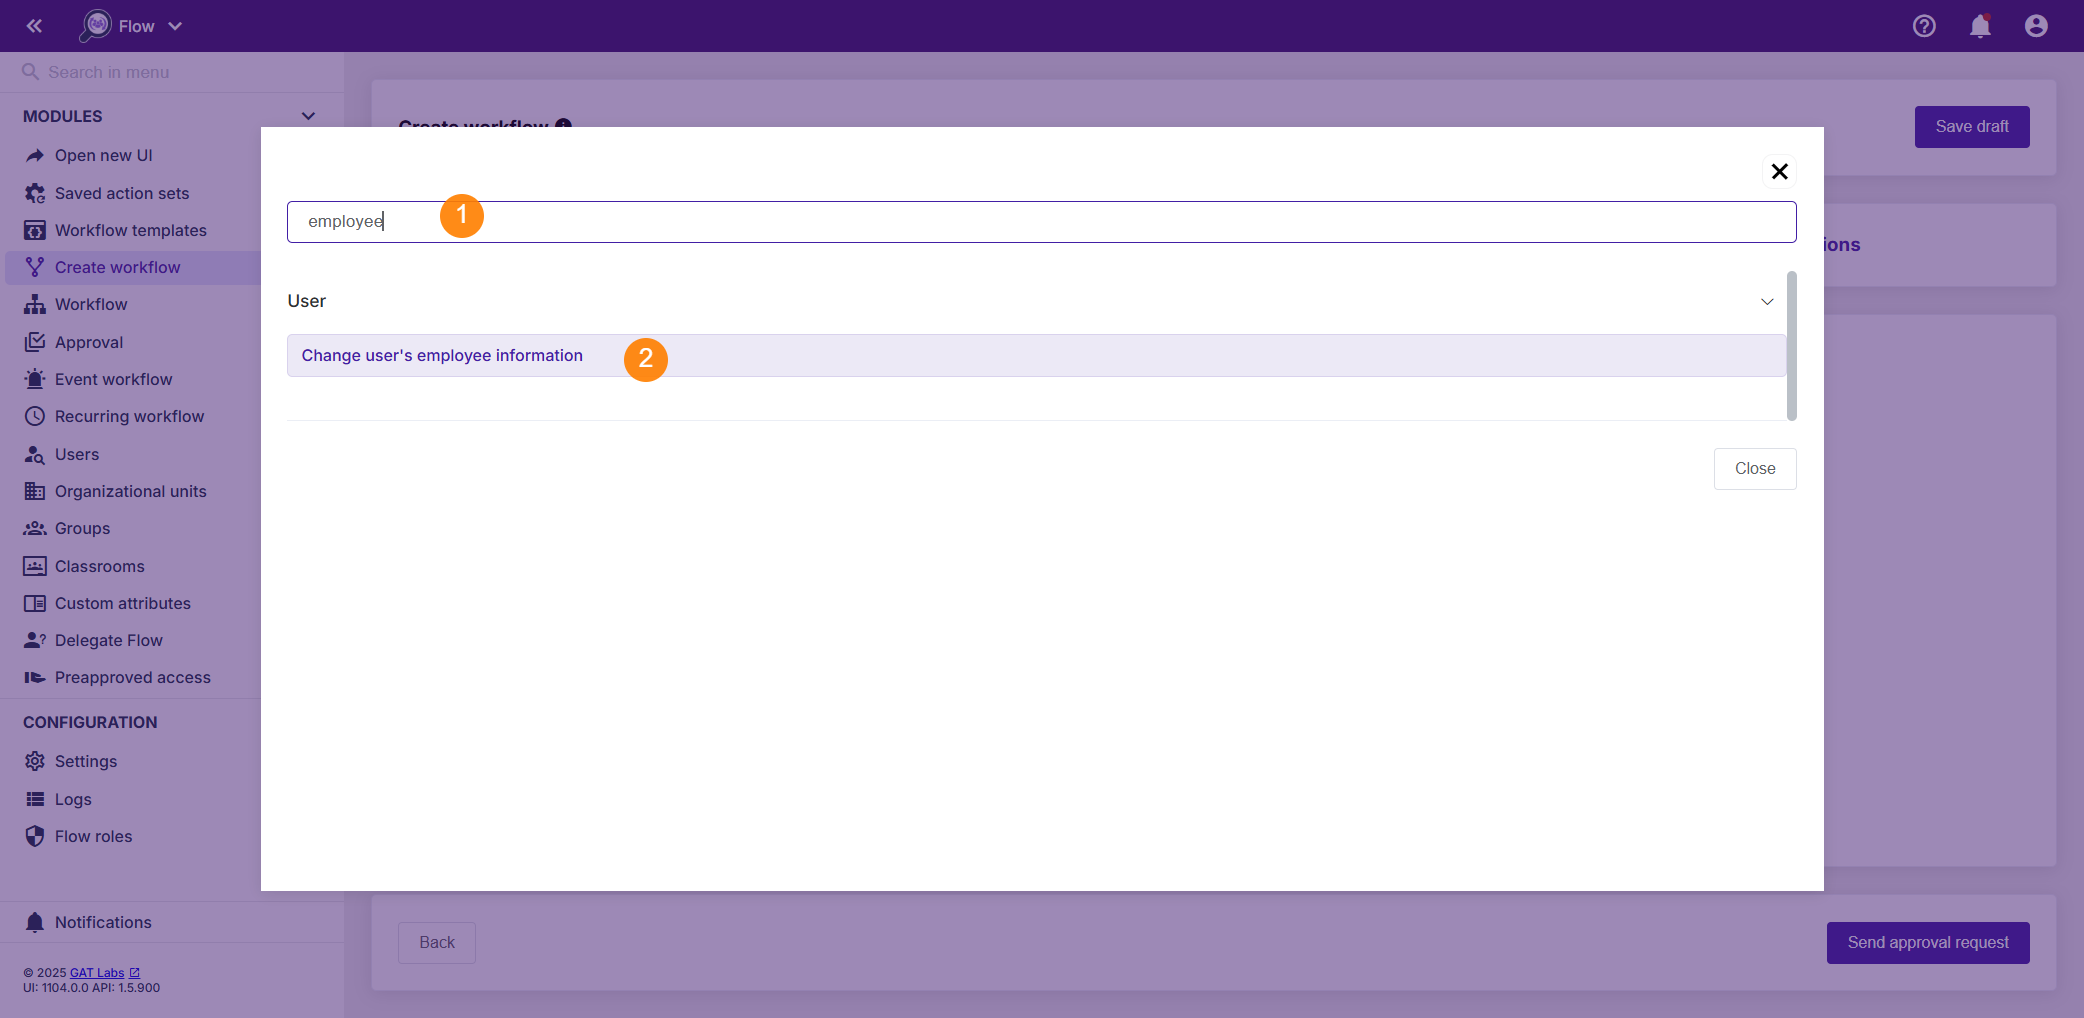
Then, to Choose actions (1), click on the (+) button (2) and search for the action.
You will see all the options available, search (1) and select (2) the below action – “Change user’s employee information“:
Once the “Change user’s employee information” action node is added in Choose actions section (1), select the information that needs to be added/modified into the relevant field and type the relevant employee information (2). Each field can be selected/deselect as needed.
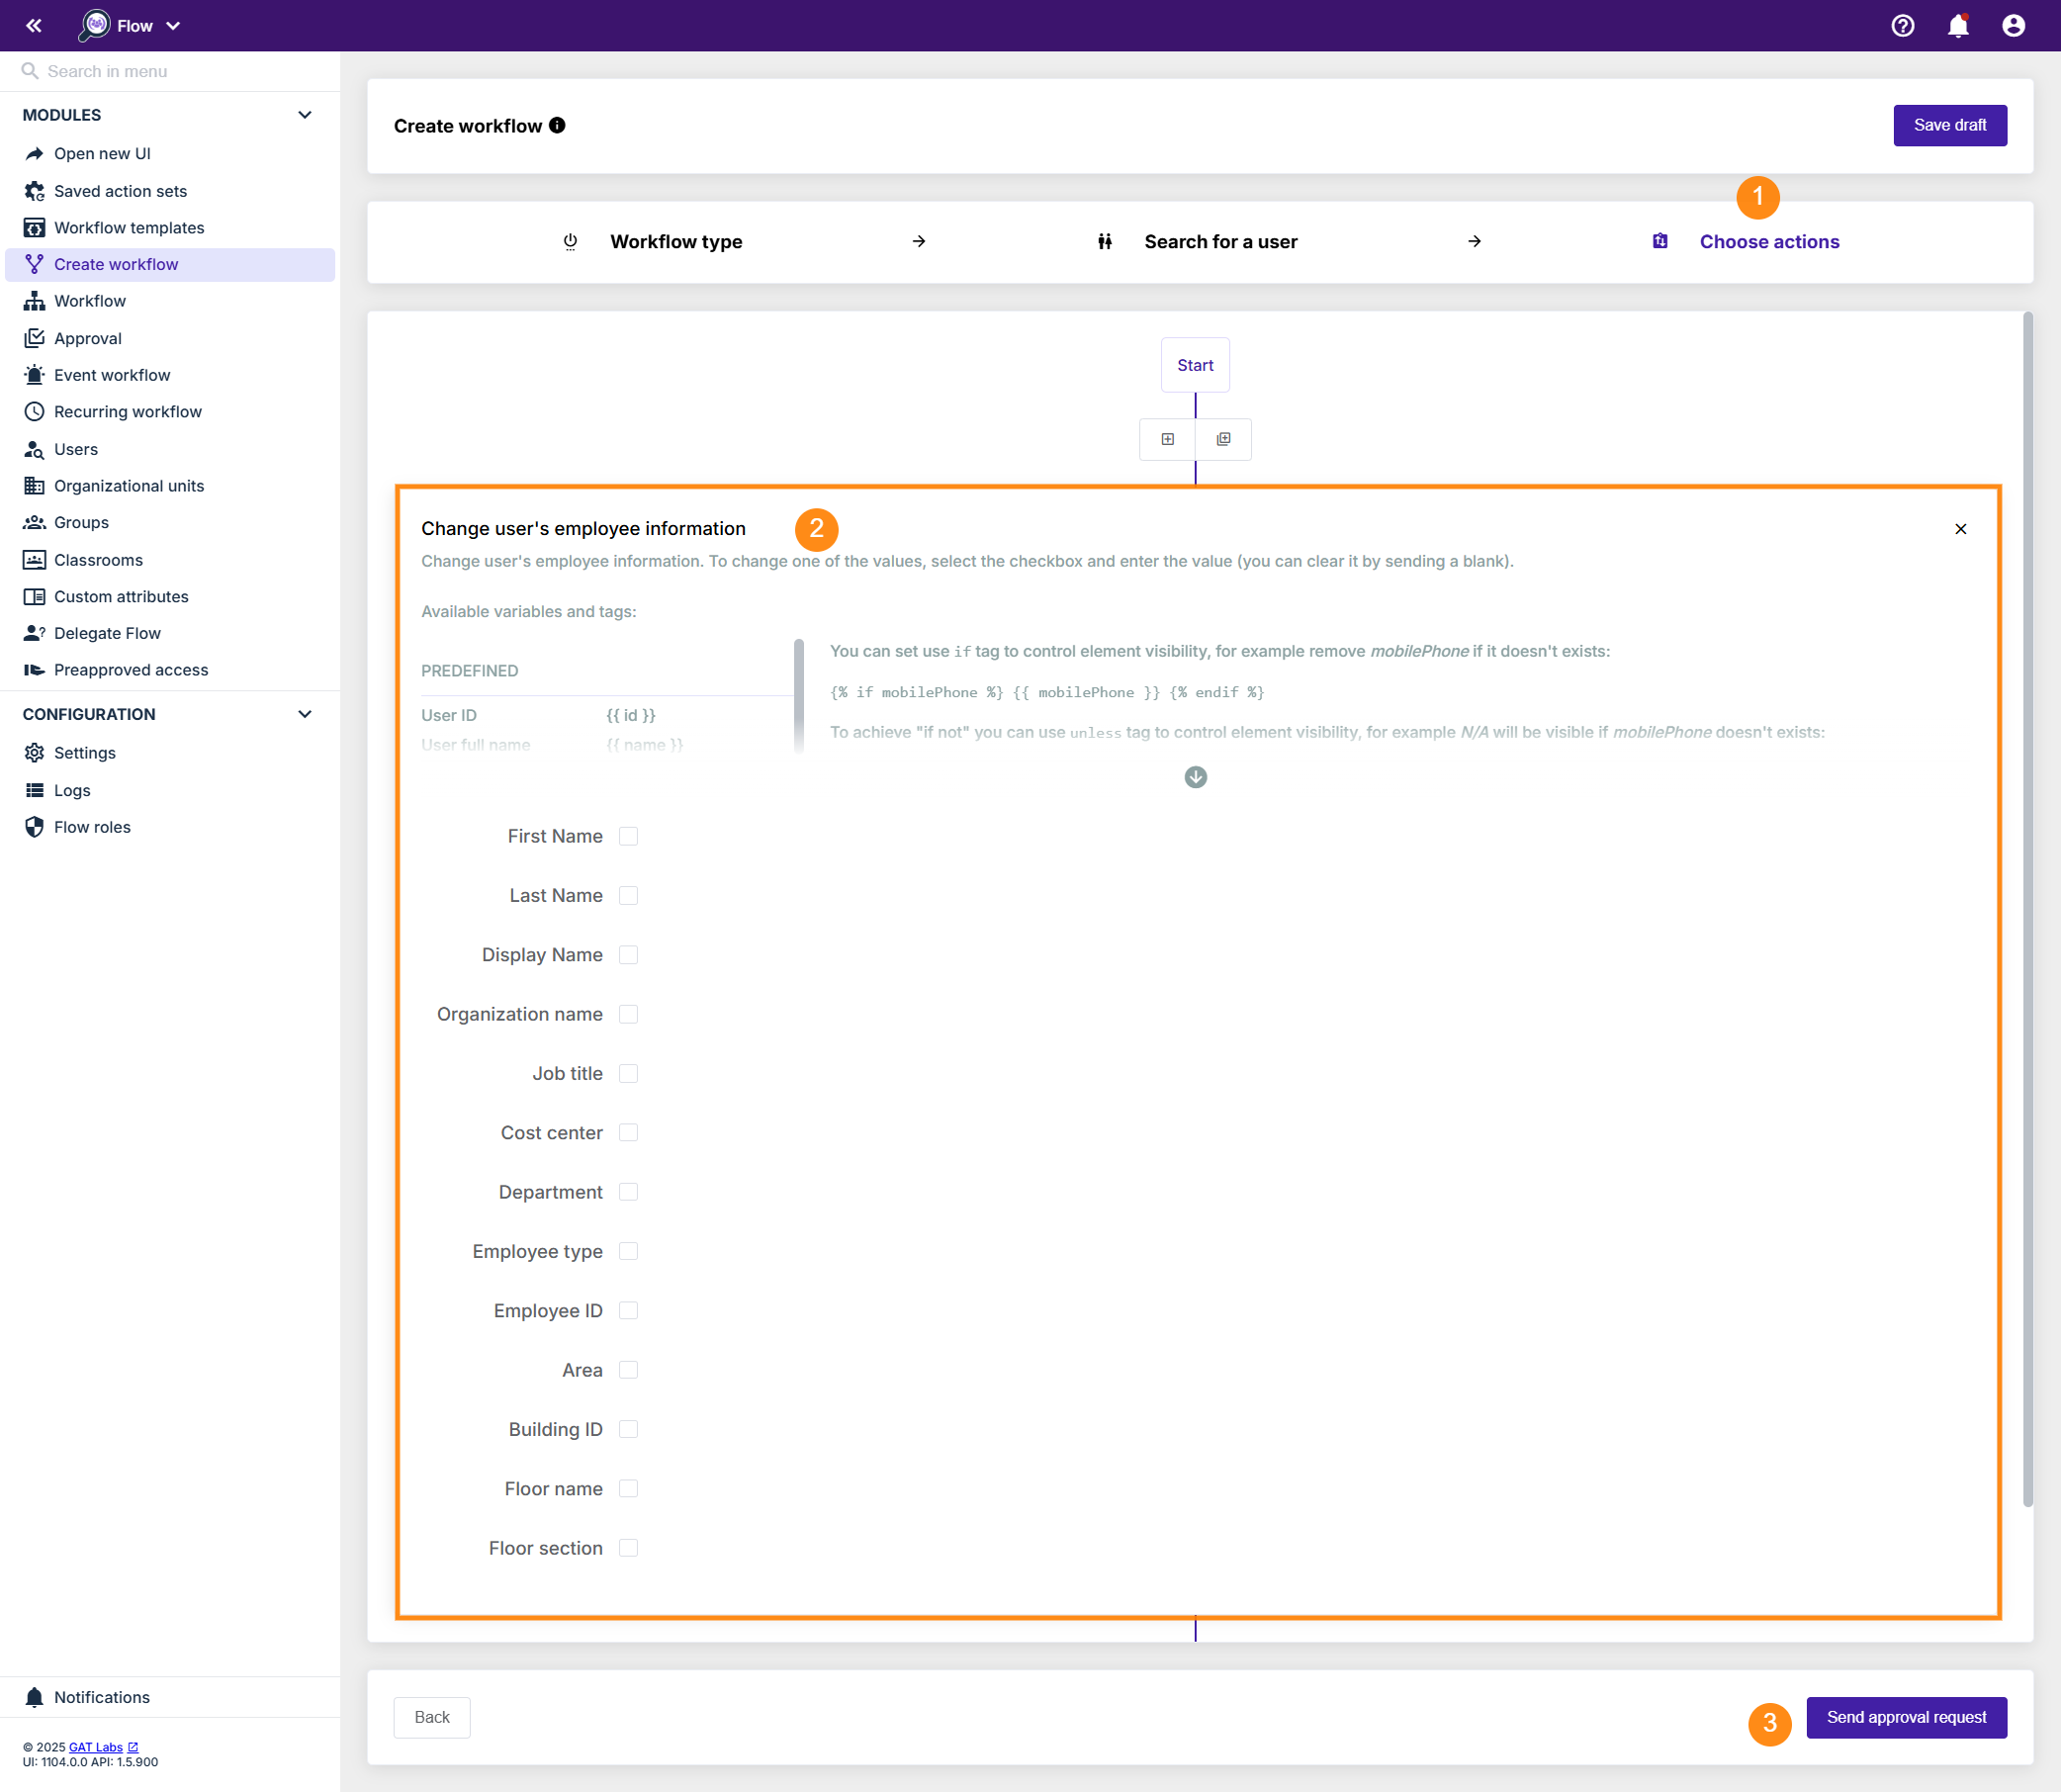
After filling the details in, click on the Send approval request (3).
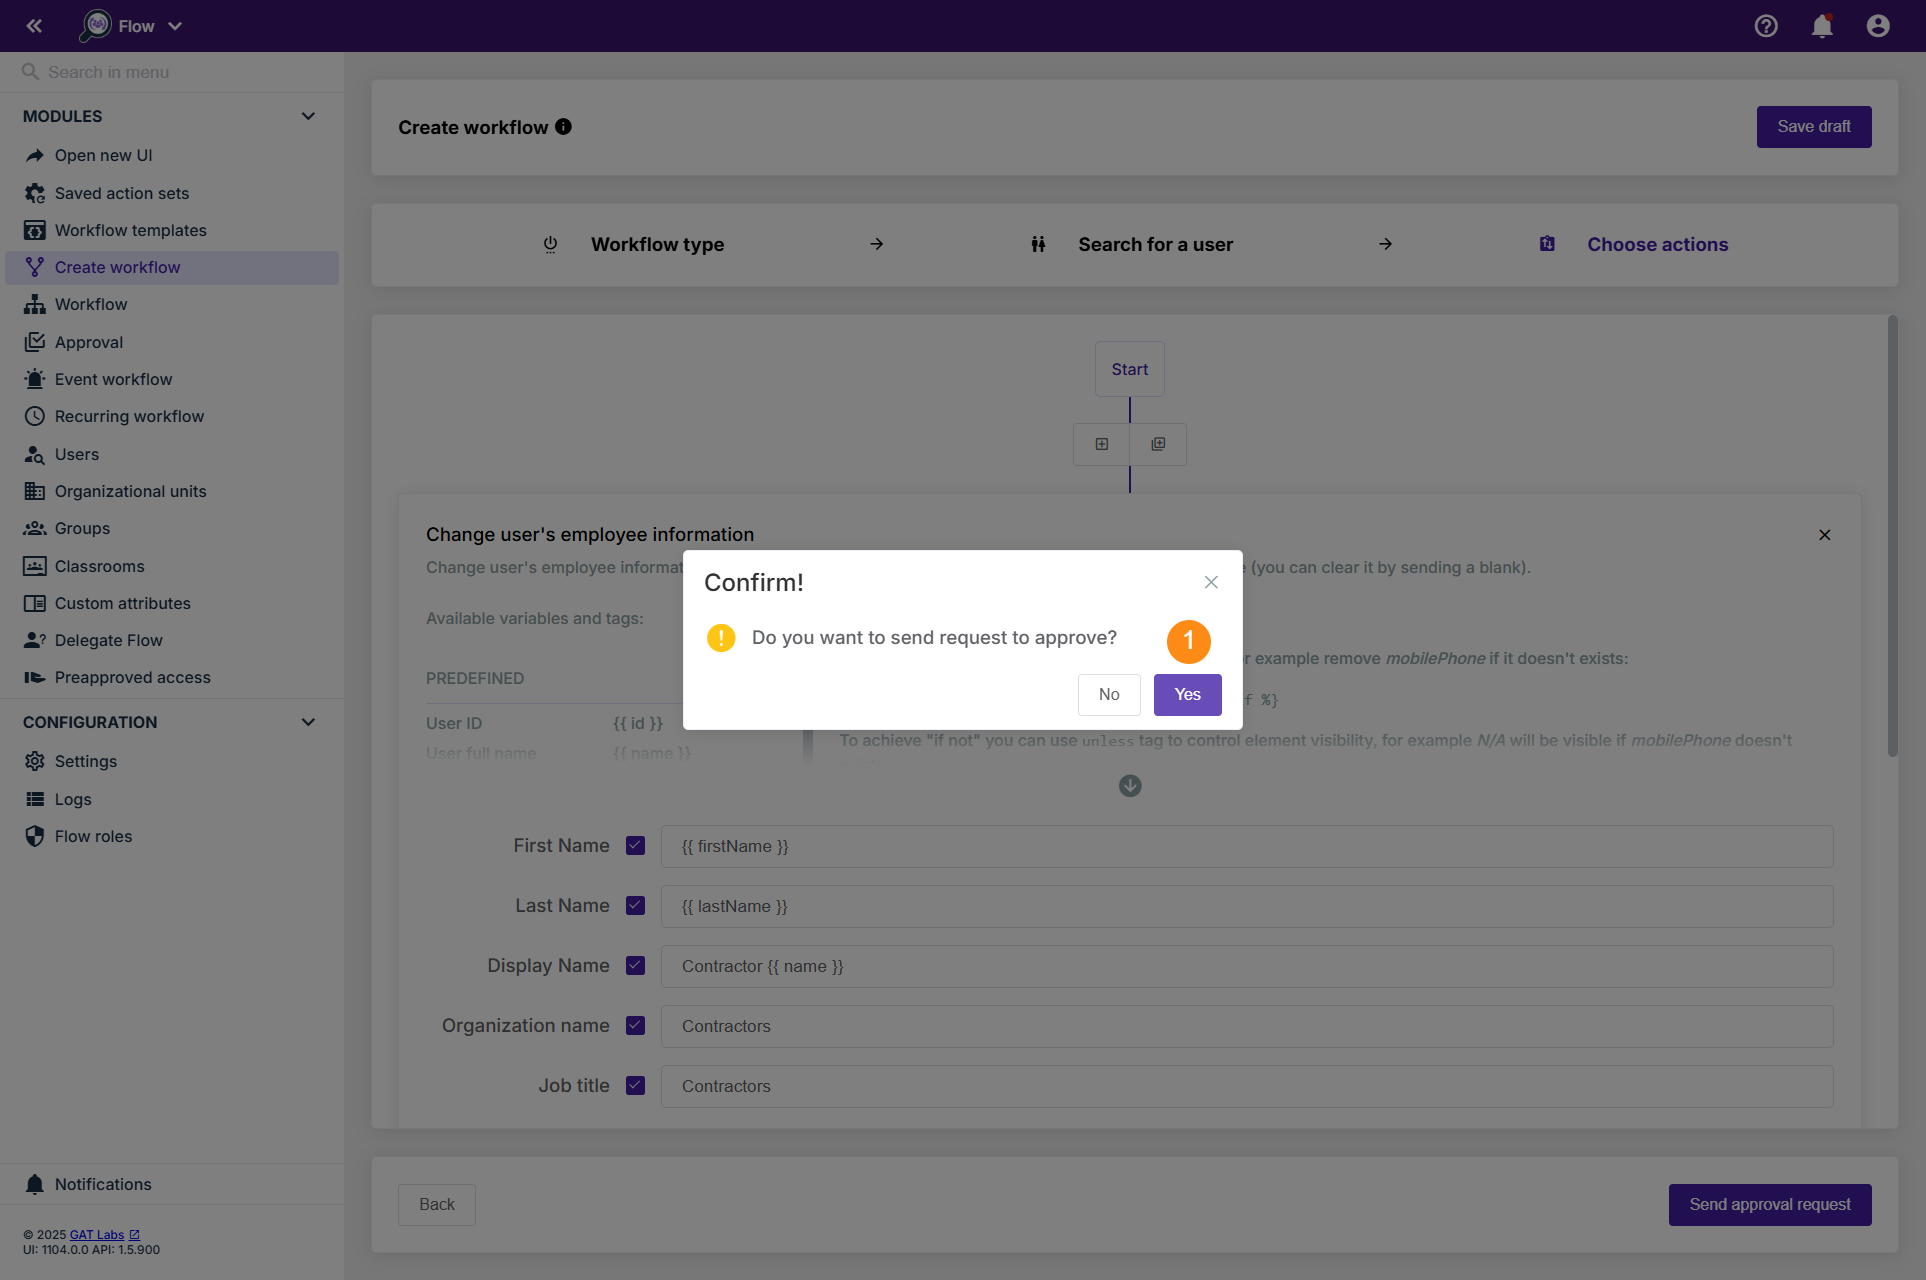
A new message will be displayed to confirm whether you are ready to send the workflow for approval. Click on “Yes” (1) to proceed. The notification is now sent to Security Officer requesting verification of the workflow.
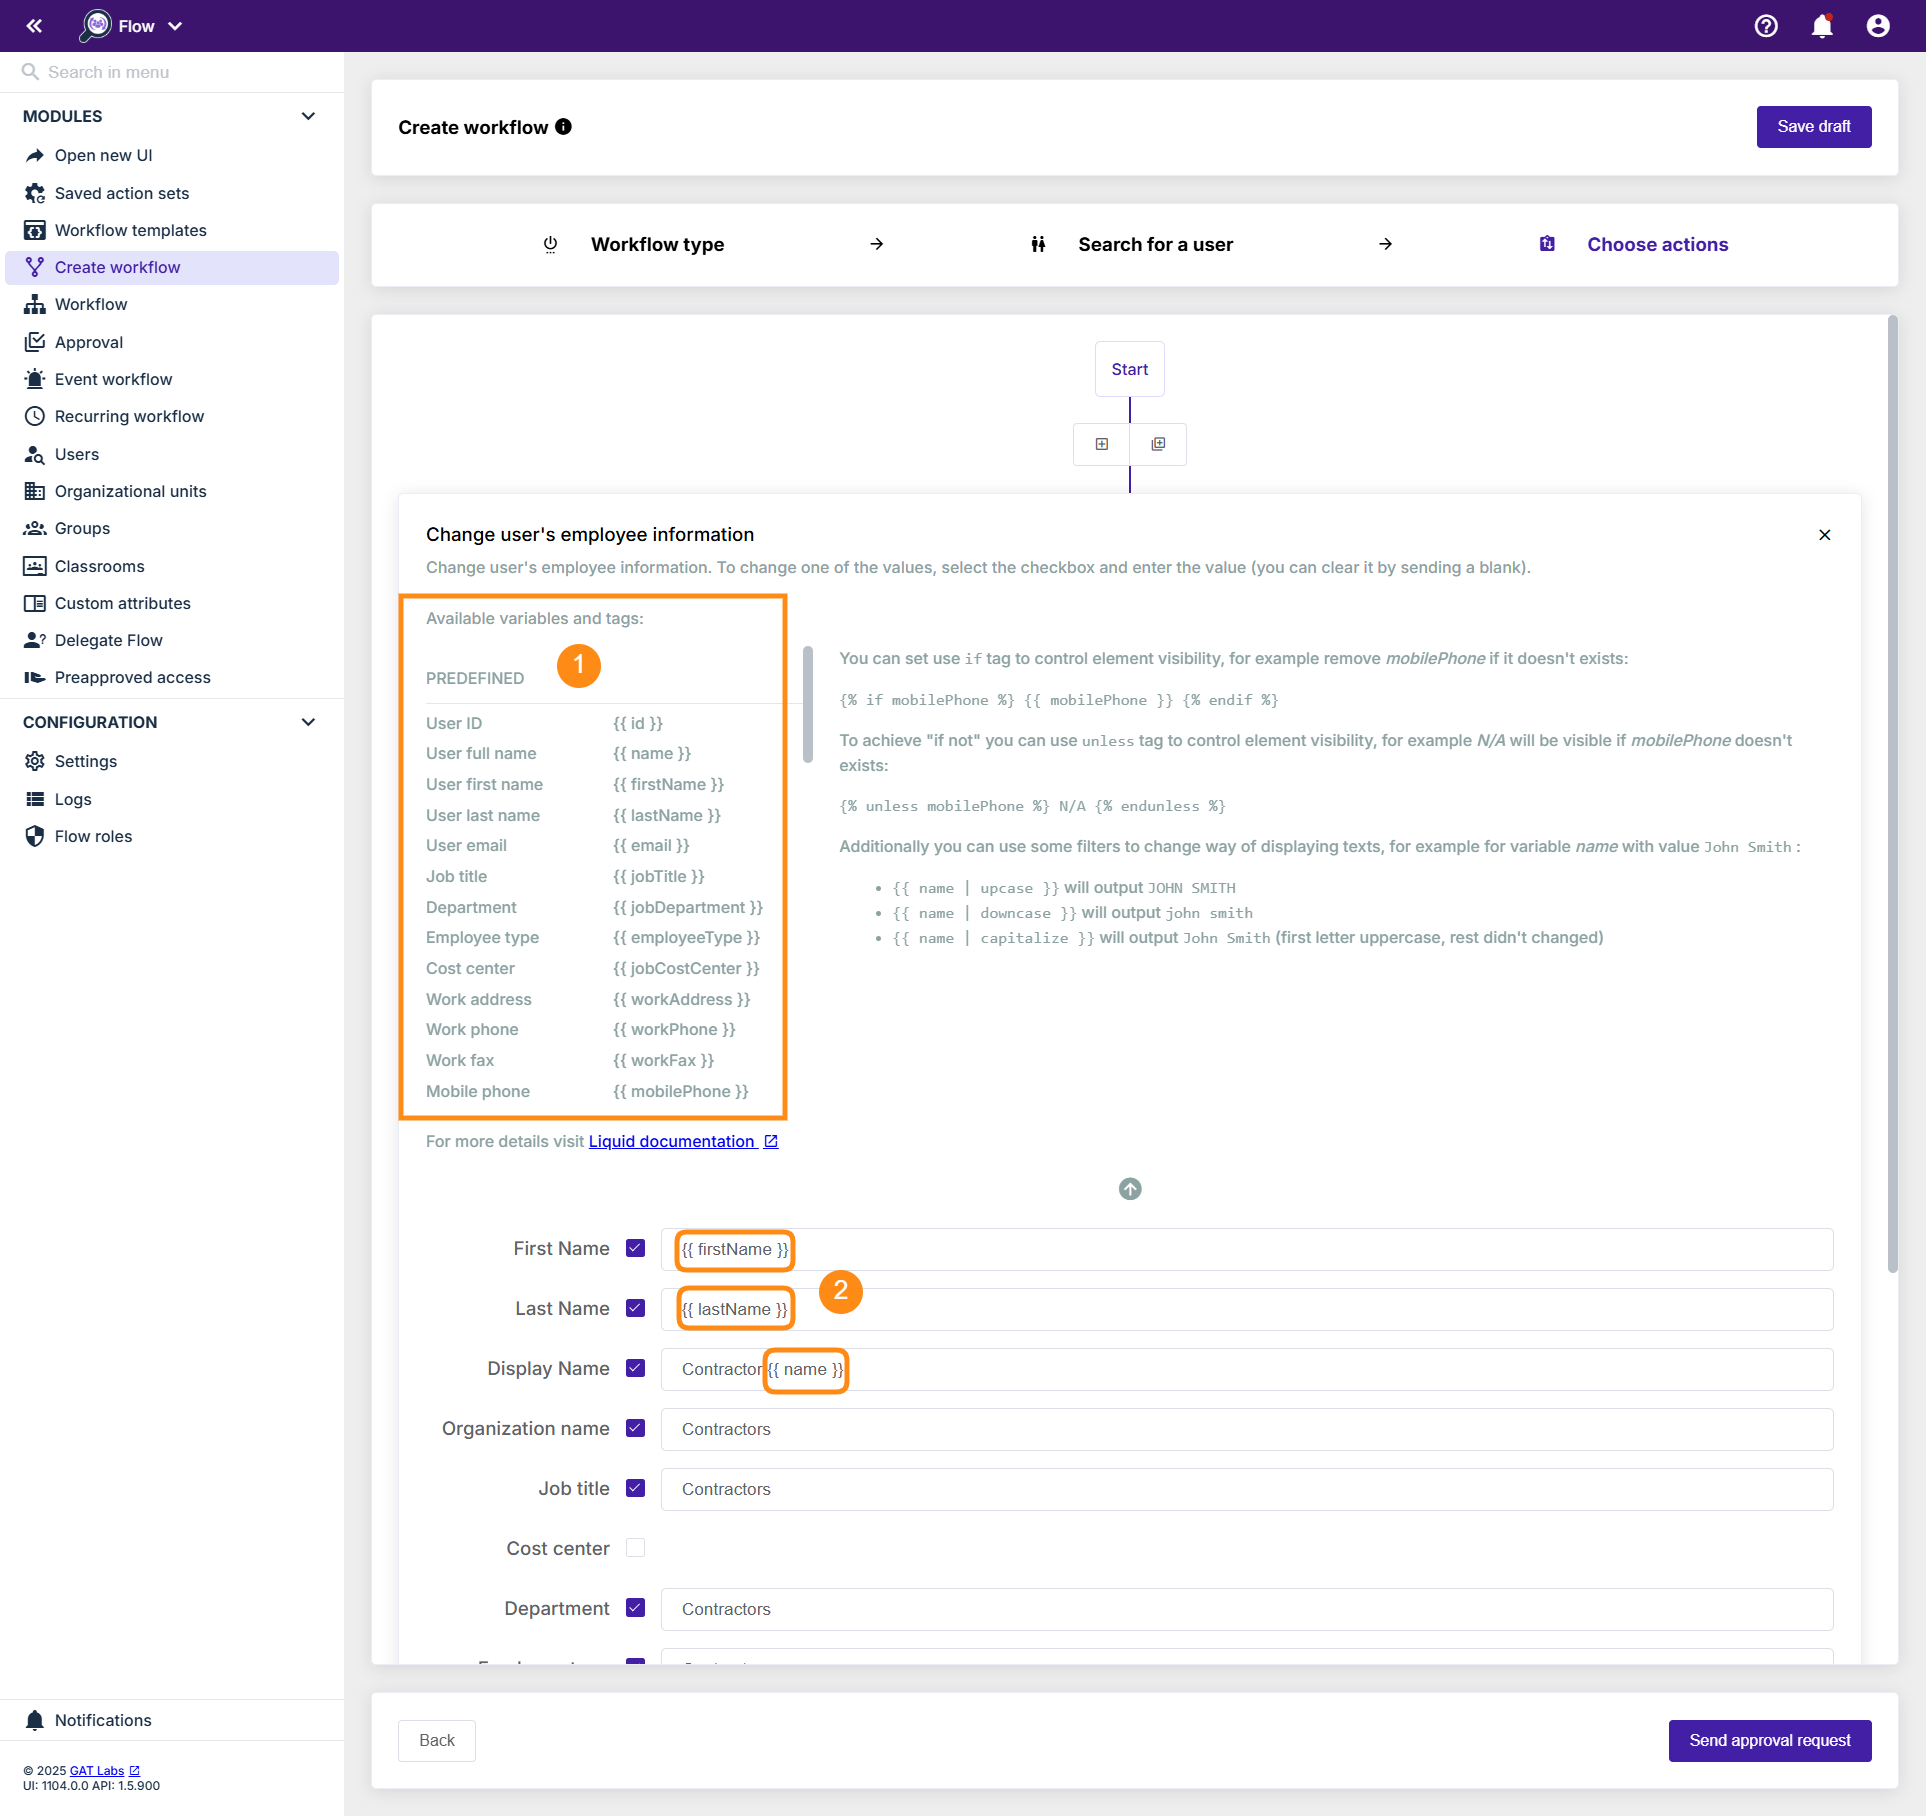
Note: This action has Predefined variables that can be used to seamlessly perform bulk updates across multiple accounts.
Step 4. #
Last, after sending, the Security Officer has to approve the request. They will receive an email that will lead them to the approval page.

Note: If the pre-approval option is enabled for the workflow requester, an email is not being sent to Security Officer. The workflow creator can confirm the preapproval option to run the workflow right away.
Result #
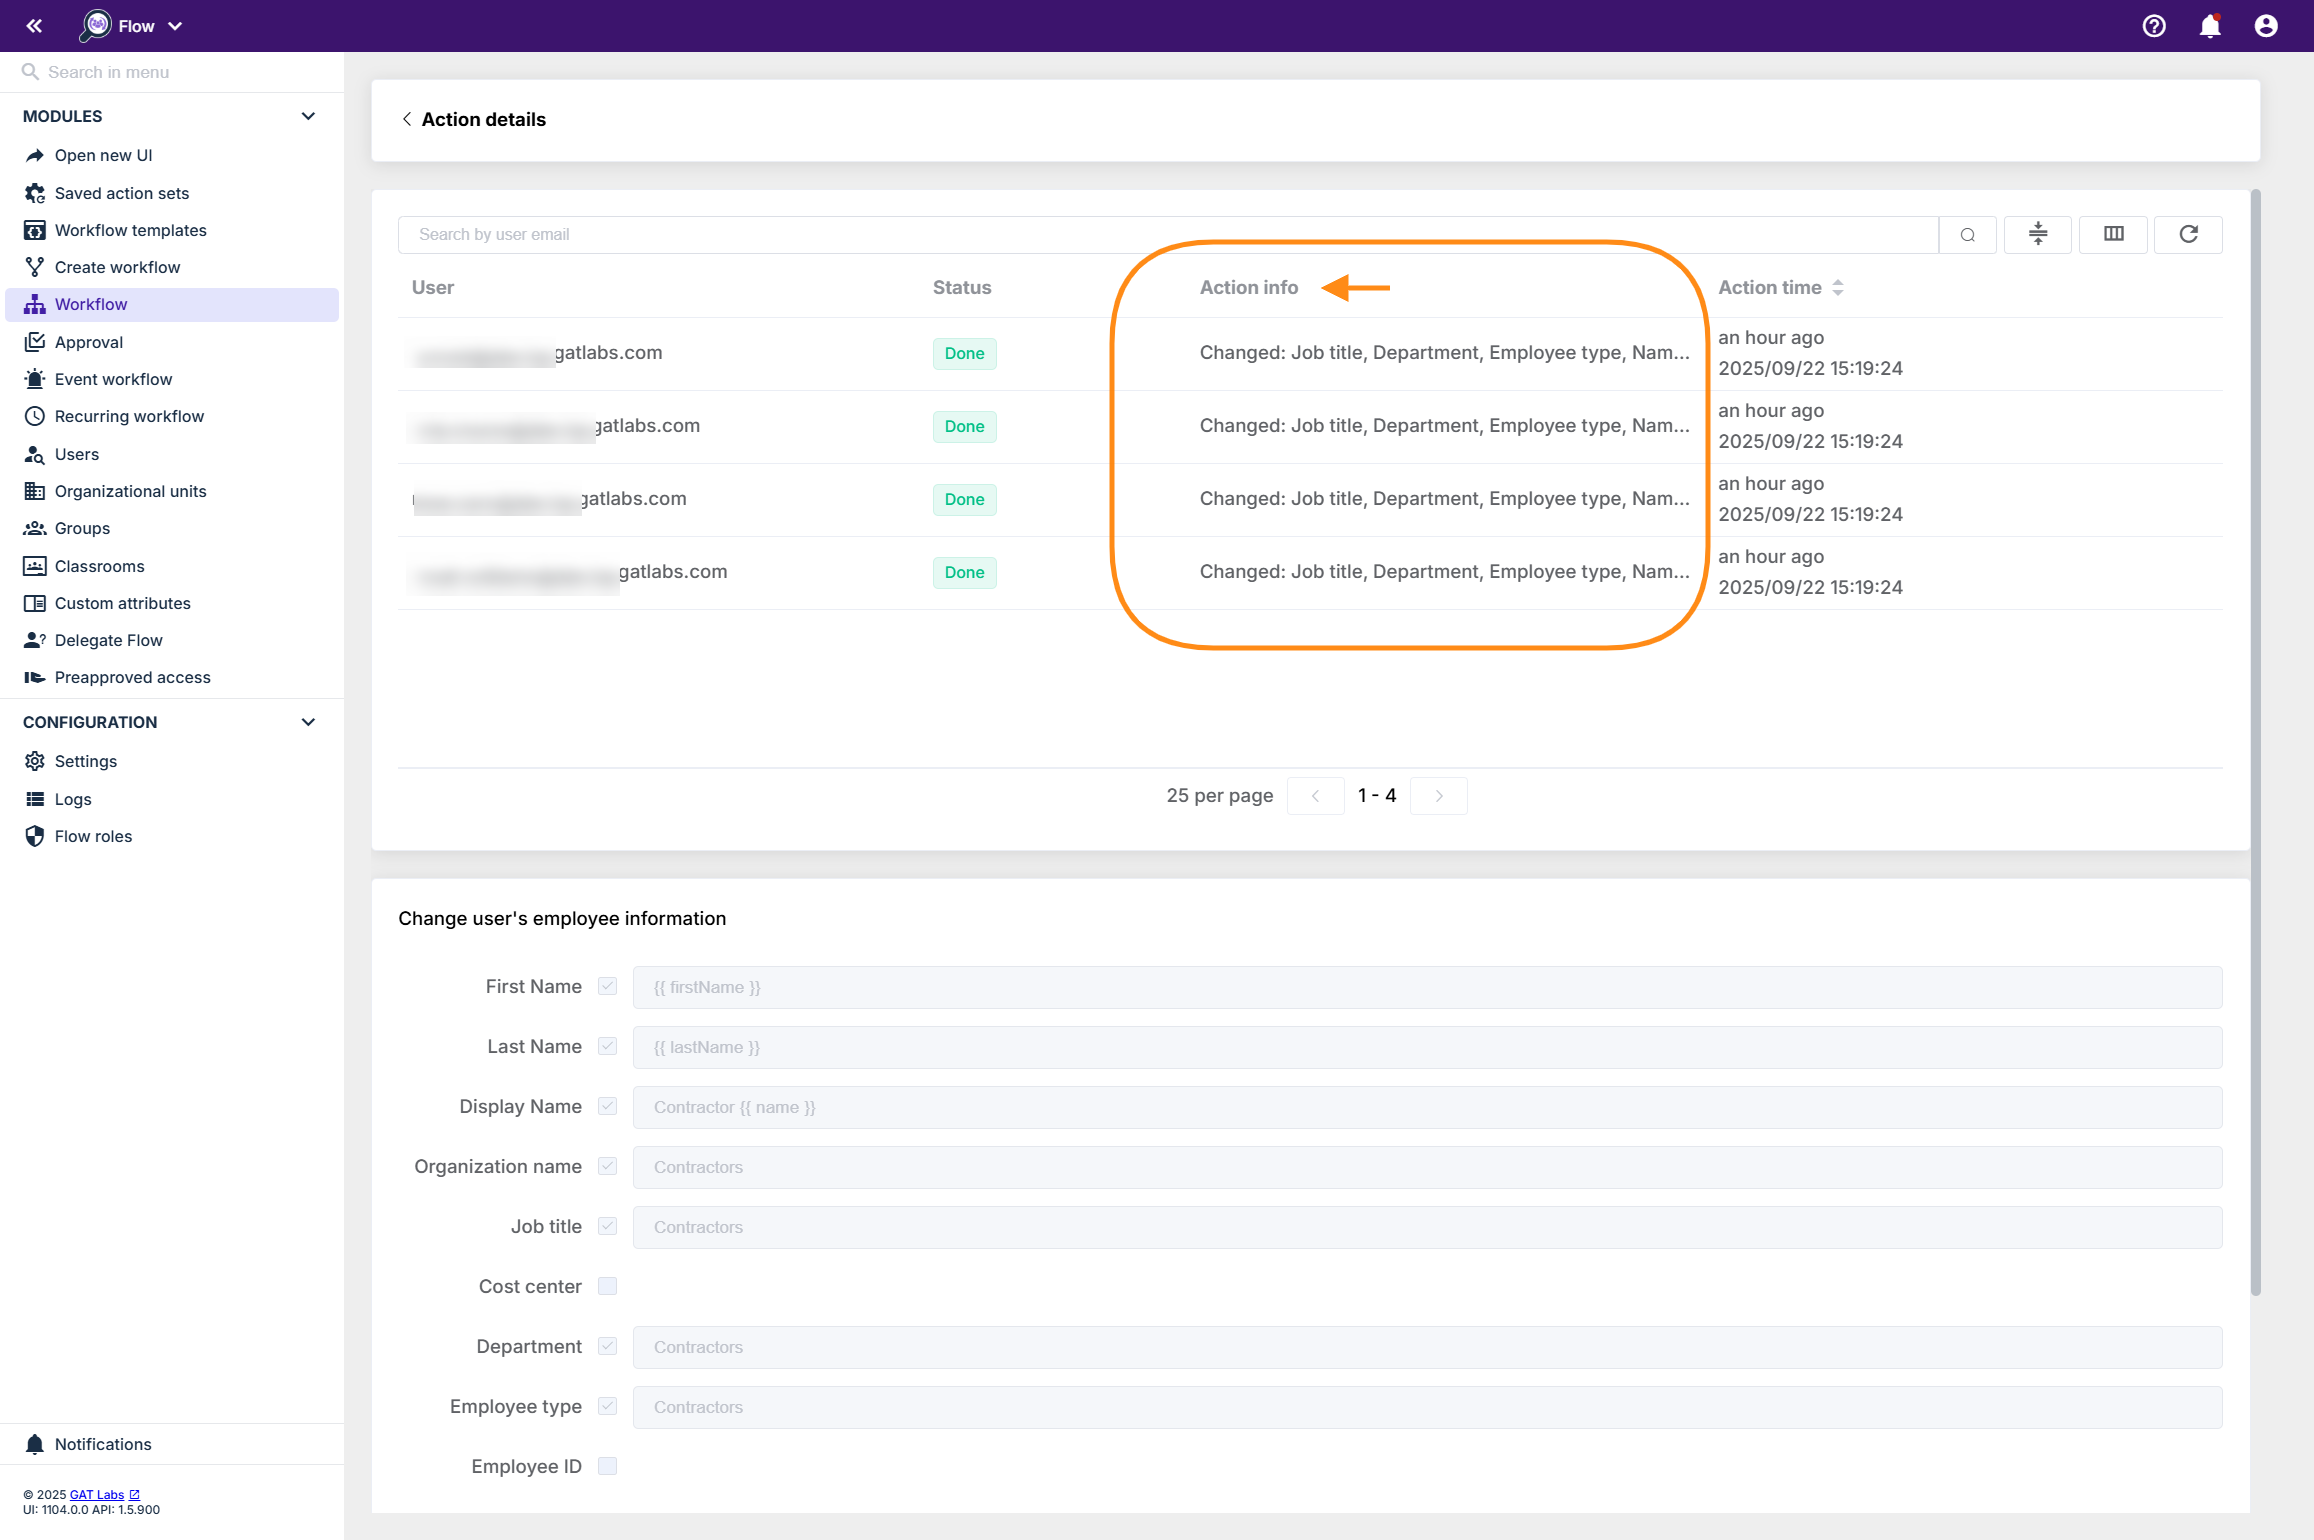
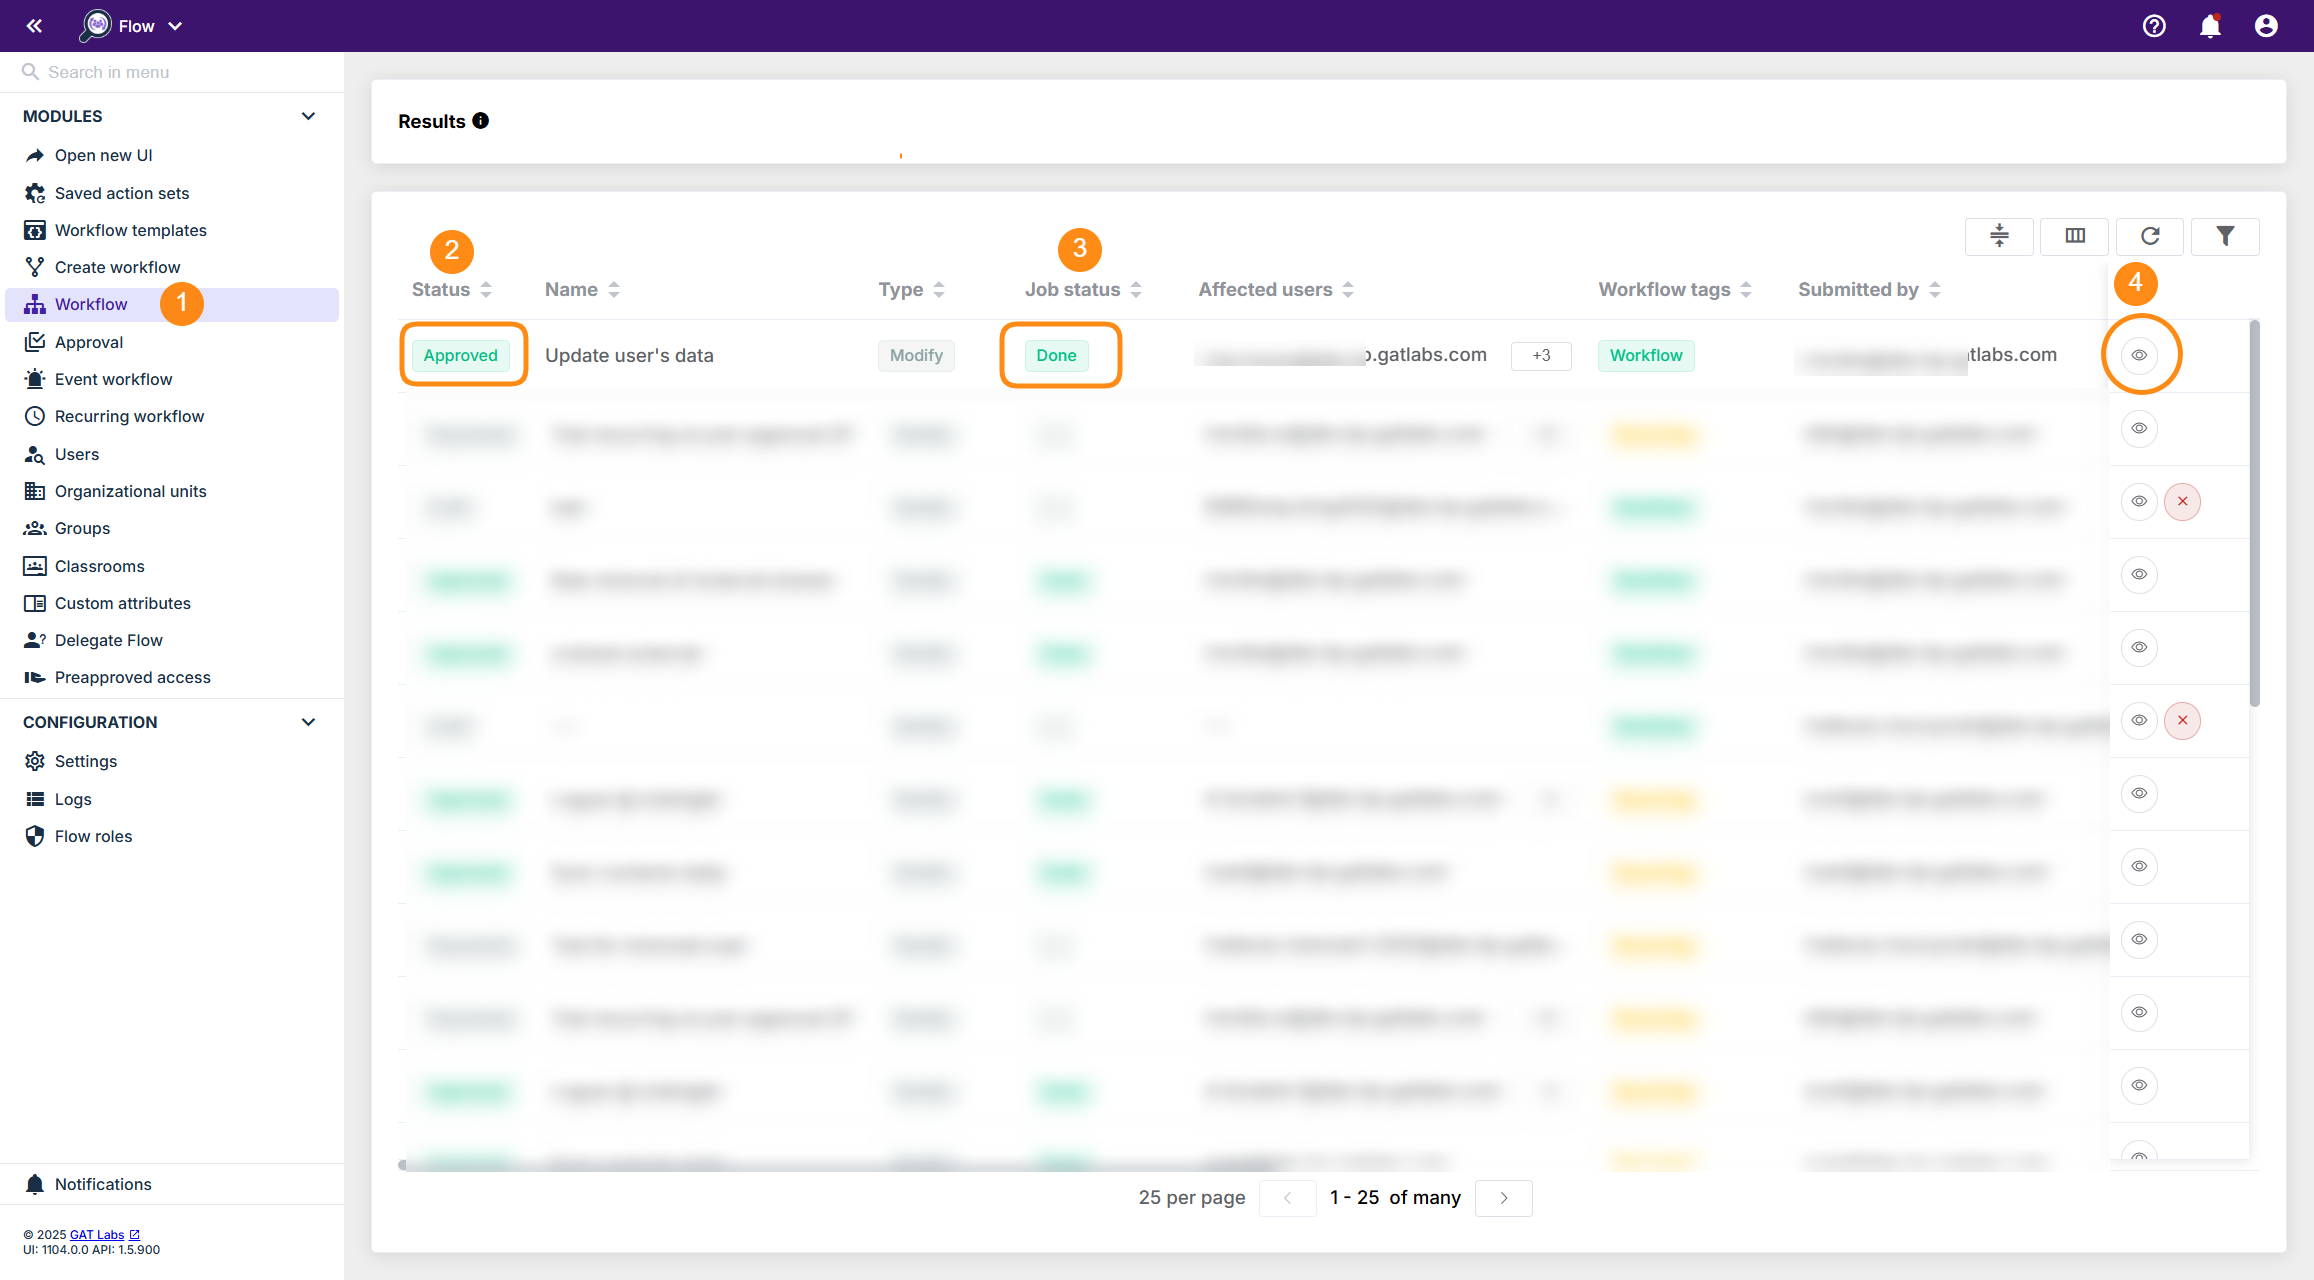
Once the workflow is approved by Officer, the job will be executed and actions will be completed. All those statuses can be verified under Workflow section (1), where the workflow Status (2) and Job status (3) are displayed. By clicking on the “eye” icon (4), more information can be reviewed.
As a result of the workflow, the updated information is applied to the users’ accounts.
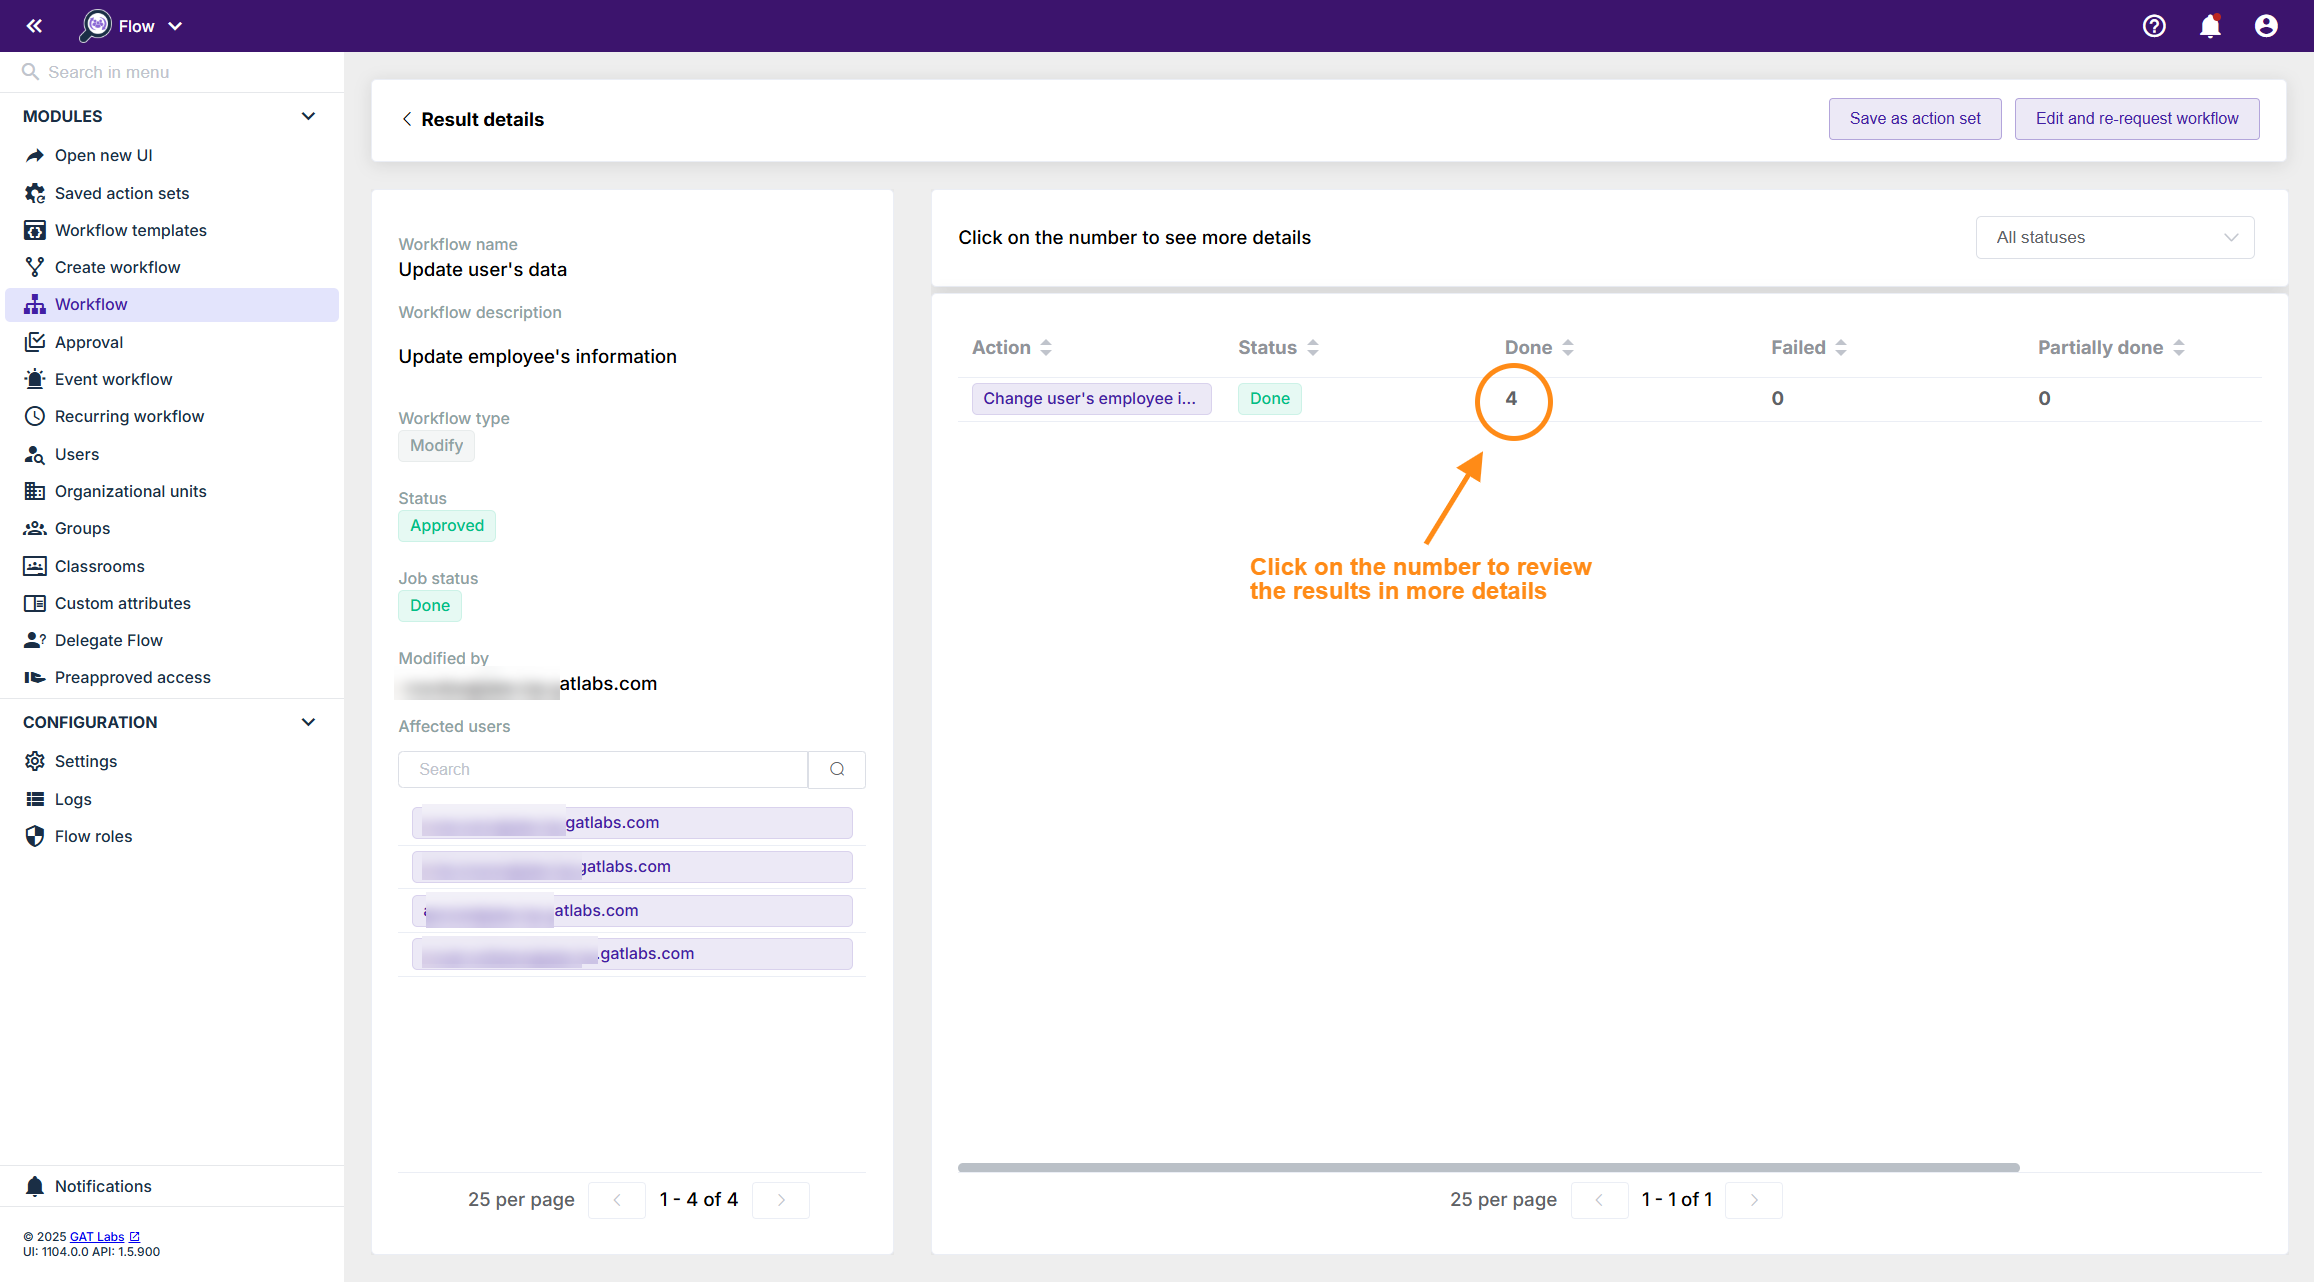
The results will be displayed, and each information will be shown: