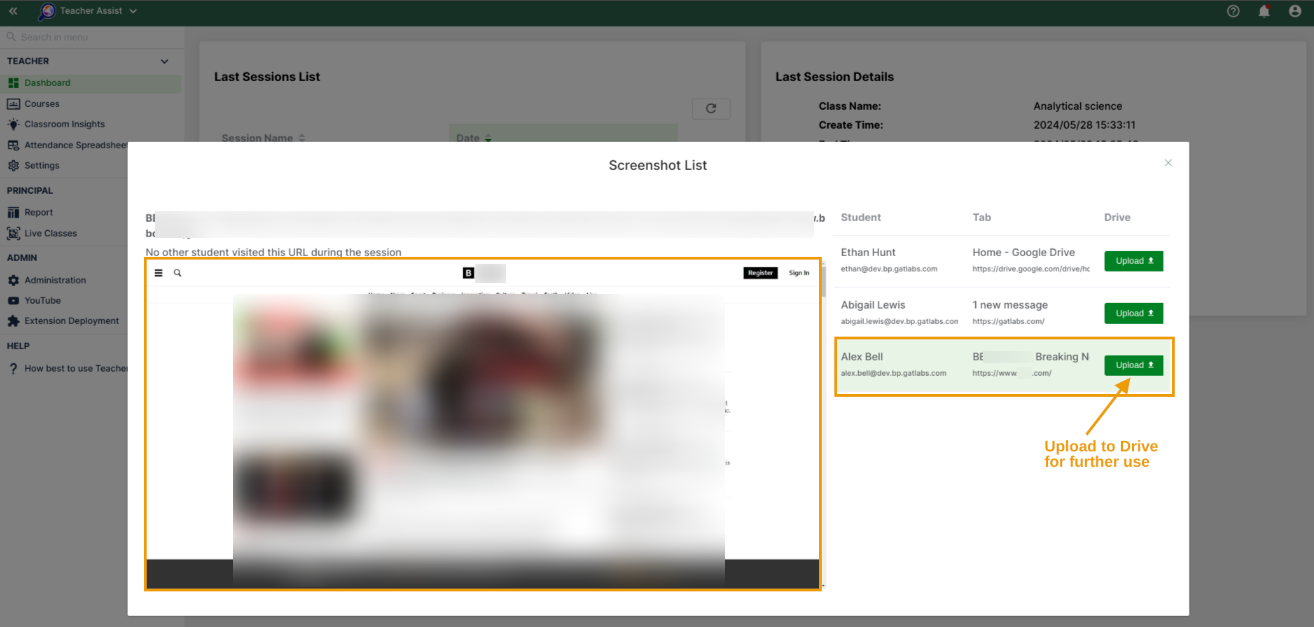
Teacher Assist helps the teachers using Google Workspace for Education classrooms to manage the sessions accordingly. If needed, the teacher who runs the session can take a screenshot of a student’s current browsing activity. The screenshot is being saved in Teacher Assist under the name of the classroom in question in the Dashboard for further analysis.
Step 1. #
To take a screenshot of a student’s current browsing activity, the teacher initiates the session by navigating to Courses (1), identify your class (2), and clicking on ‘Start session‘ icon displayed on the bottom right corner of the Course card (3) as shown below:

When the classroom is running, the teacher can take a screenshot of the active student’s browser.
Step 2. #
To be able to take a screenshot, go to the particular active user display card in the Teacher Assist app and click on the green box with a down arrow that displays a drop-down menu (shown below):

Under the drop-down menu, select Screenshot to take one.

The screenshot is taken automatically. The message confirming it appears in the top right corner of the Teacher Assist dashboard.

Step 3. #
To review the screenshots taken during the session, navigate to the Dashboard (1), find the session in question (2) and select ‘Show screenshot List’ icon that appears next to the session log (3).
The icon only appears if any screenshots were taken during the session. In case there were no screenshots taken you can’t see the icon.

When clicking on ‘Show Screenshot List‘ icon, the new window opens, and the list of all screenshots taken during this session appears.
If there are more screenshots taken during the sessions, all are displayed and can be reviewed by clicking on each of them individually.

If necessary, an Admin or a Teacher can use the Upload button to upload the screenshot to their Drive to be able to better evaluate this browsing activity and use it for further investigation or exploitation.


