Below are instructions on how this can be done using GAT Flow
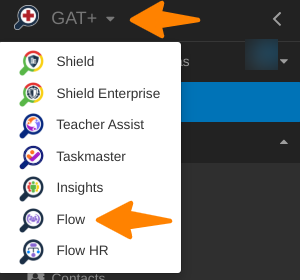
Open GAT+ and navigate to Flow
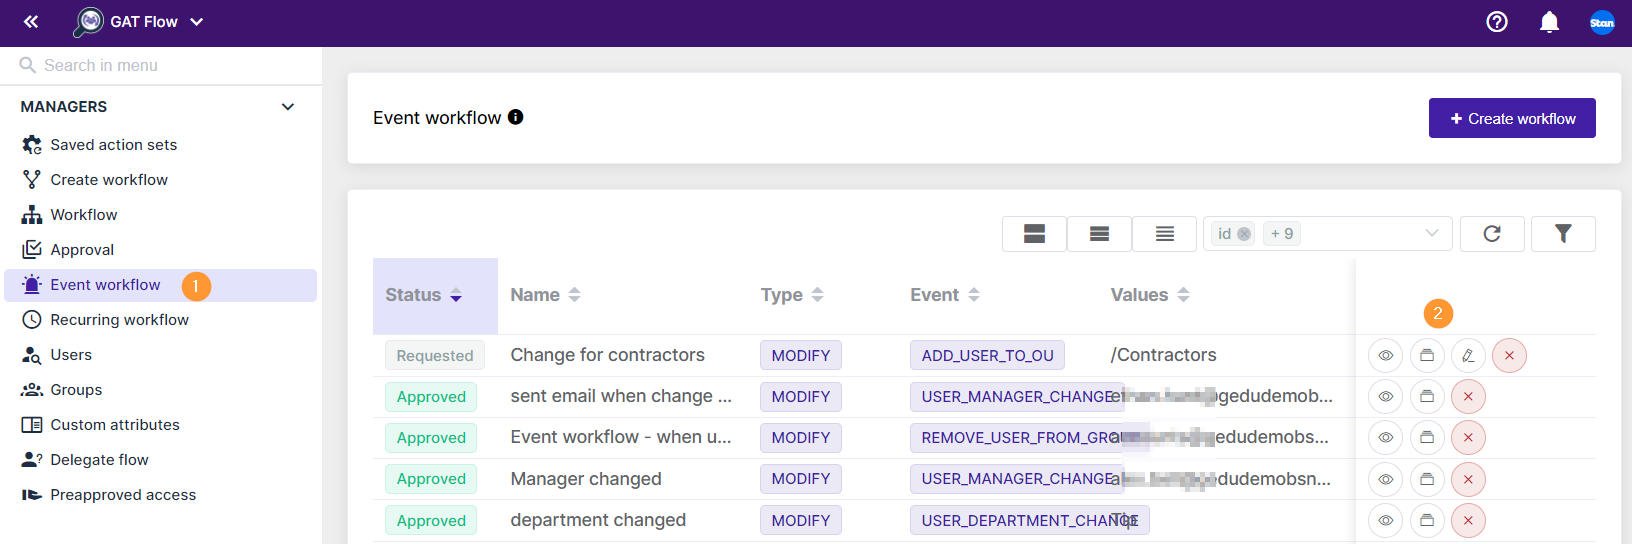
Navigate to Event workflow > Add new workflow
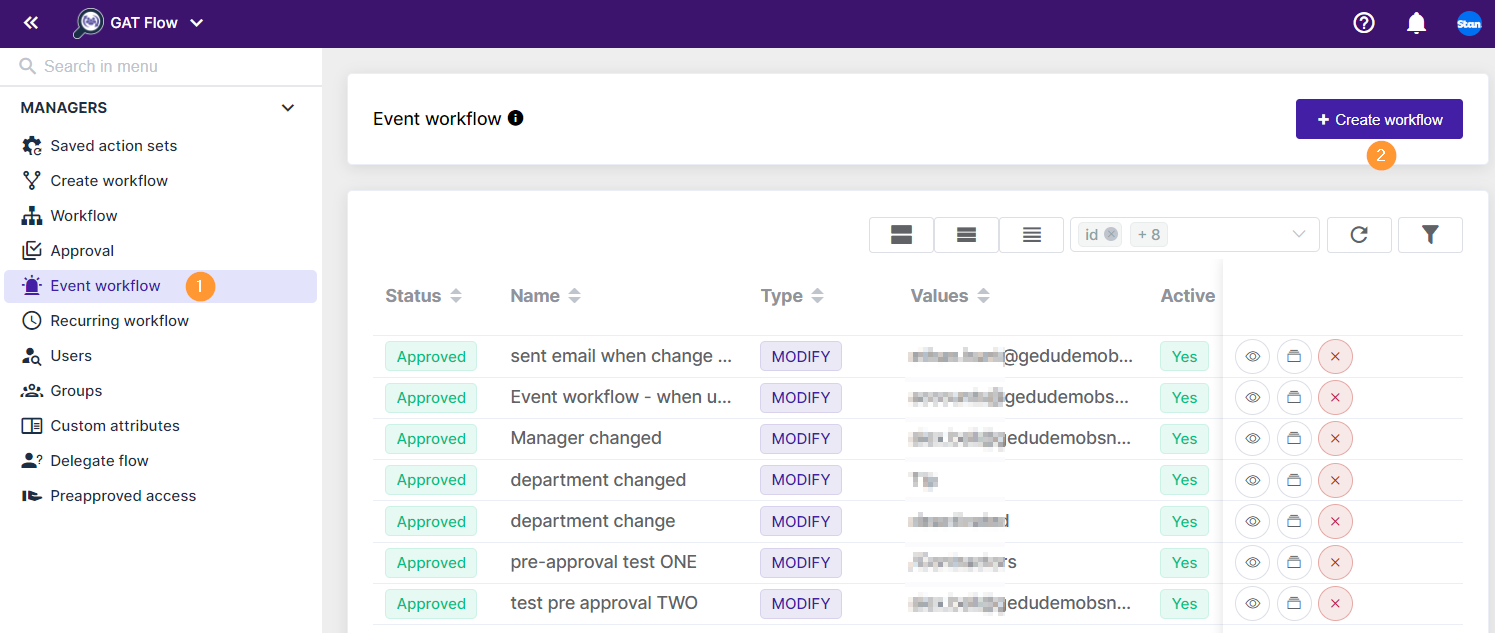
When the “Add new workflow” button is clicked, a new window will be displayed.
Events to trigger automatical workflow #
There are a few different Events that can be used for the Event workflow.
- Start when a user is added to Google Group
- Start when a user is moved to an Org. Unit
- Start when a user is removed from Org. Unit
- Start when a user is removed from Google Group
- Start when user is created
- Start when user is suspended
- Start when the user’s manager is changed
- Start when user title is changed
- Start when user enables 2FA
- Start when user disables 2FA
- Start when user department is changed
- GAT+ alert
- Start when user employee type is changed
- Start when user cost center is changed
- Start when flow event is broadcast
- Start when email with specific subject is detected
- Start when a custom attribute data is reached
In Workflow type fill in the empty fields
- Name – enter a workflow name
- Description – enter a description for the workflow (optional)
- Type – Select the type Modify or Offboarding
- Event – select any of the events options available (view events above)
- Active – activate or deactivate the Event workflow
- Notify – designate a specific person or group of users to be notified when the workflow is completed
- Workflow tags – apply your customized tags for easier workflow identification. How to Create Workflow Tags in GAT Flow
- Pre-approved – When on the workflow does not need to be approved, when off the workflow (action after the user is moved to Group or Org unit) has to be approved again.
-
The Workflow (Event workflow) must be approved by default, for the actual events (actions selected) to run, enable pre-approved to run the job without needing approval, disable pre-approval and the job itself must be approved again.
-
- Conditional flow – enable the Conditional flow option
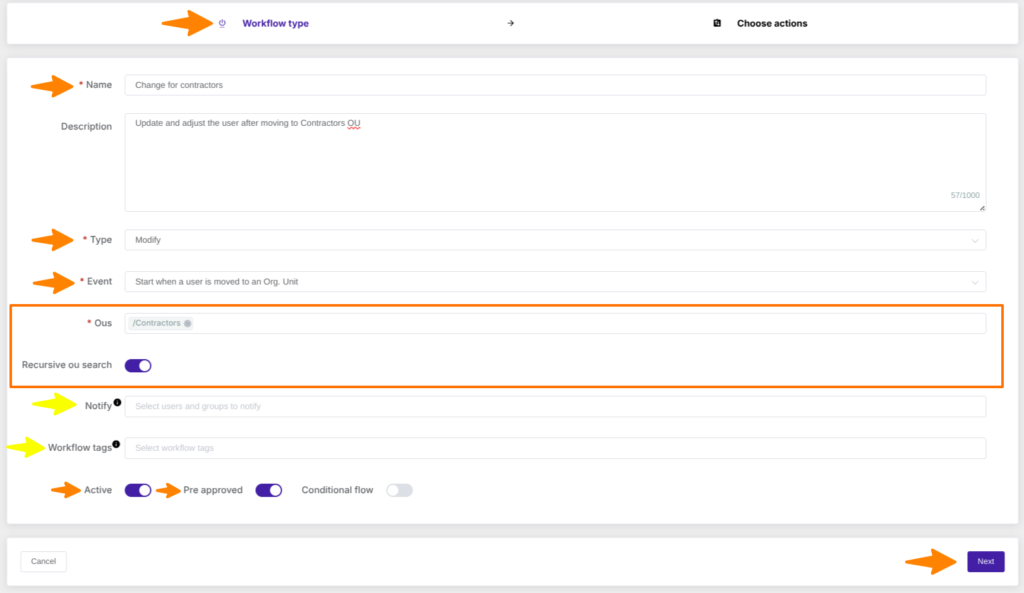
When the details are filled in click on Next.
Event workflow – actions #
In the “Choose Actions” tab click on “Add action” and select any of the actions available

Depending on the Workflow type, different options will be available.
- Modify – modify actions will be available to be selected
- Offboarding – offboarding actions will be available to be selected
- Note: The last action of offboarding will delete the users
Select the action from the list.
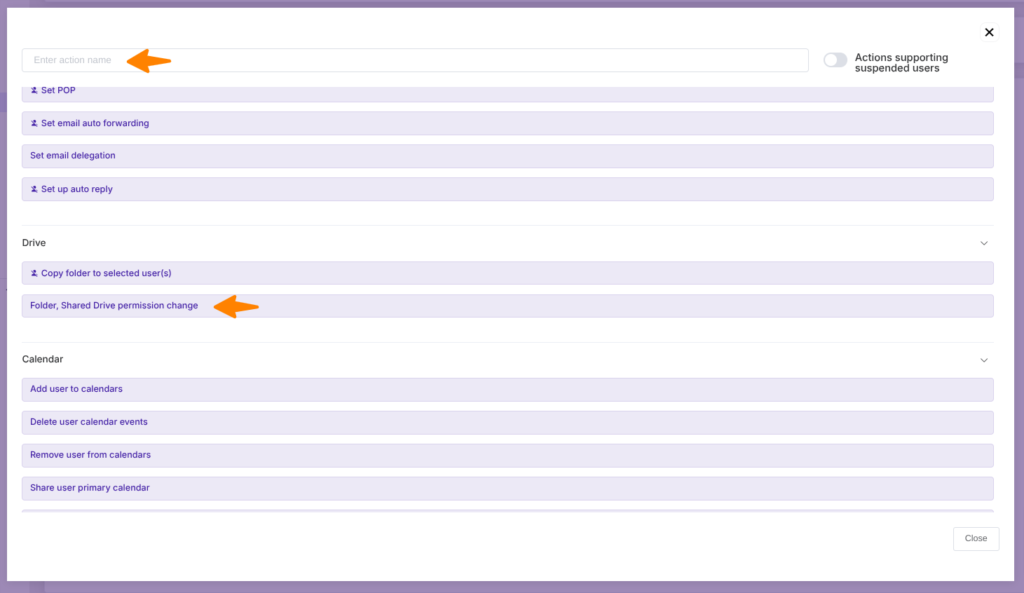
In this example:
“Enter action name” to search for any actions
- Groups > Add users to groups
- Folder, Shared Drive permission change > Add as “viewer” to Shared Drive
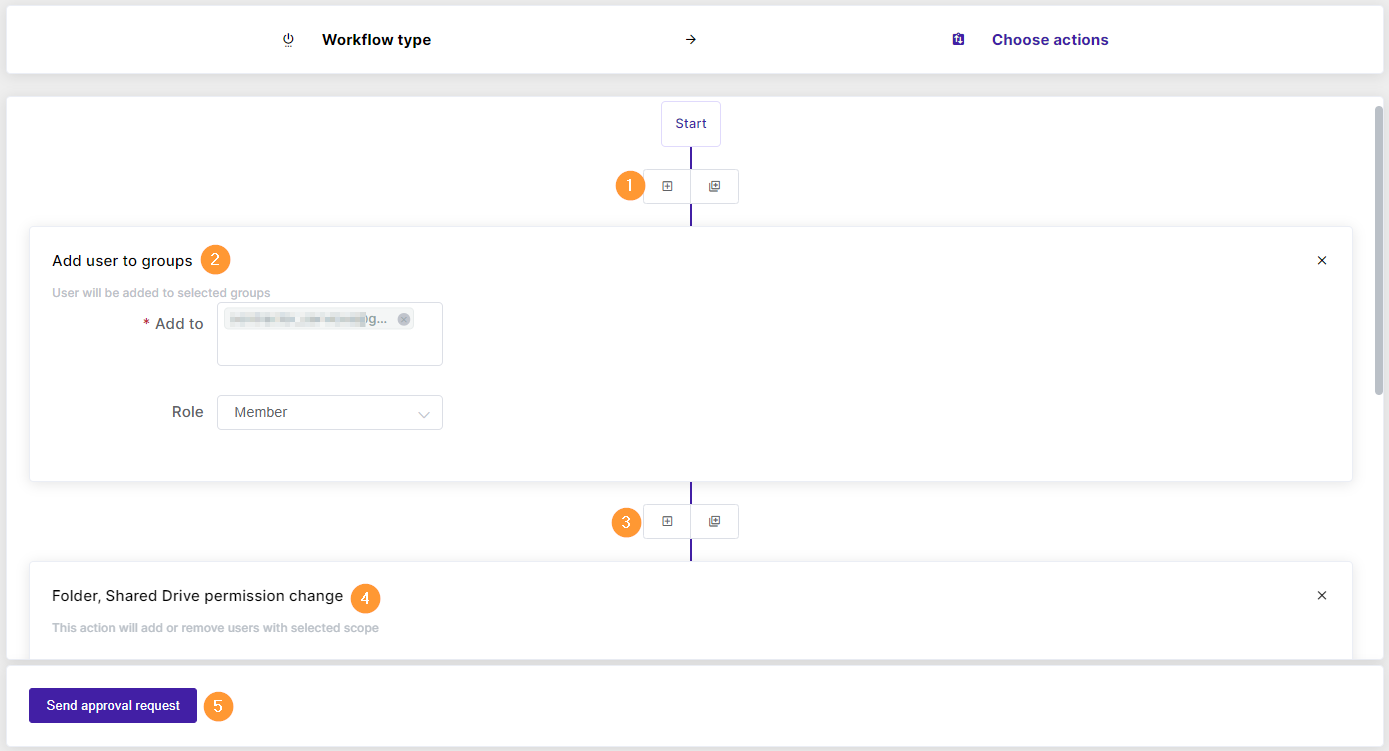
When ready with the actions click on Send approval request.
The Event workflow can be:
- Eye icon – view details for the workflow
- File icon – view the results of the Event workflow
- Pen icon – edit the actions before the workflow is approved
- X button – delete the Event workflow
Security officer #
NOTE: For Event and Recurring workflow – by default Security Officer must approve the request. The “pre-approved” (selected above) is for the Actions on the workflow to run without approval, the Event workflow itself must be approved.
When the request is sent an automatic email will be sent to the Security officers of your domain.
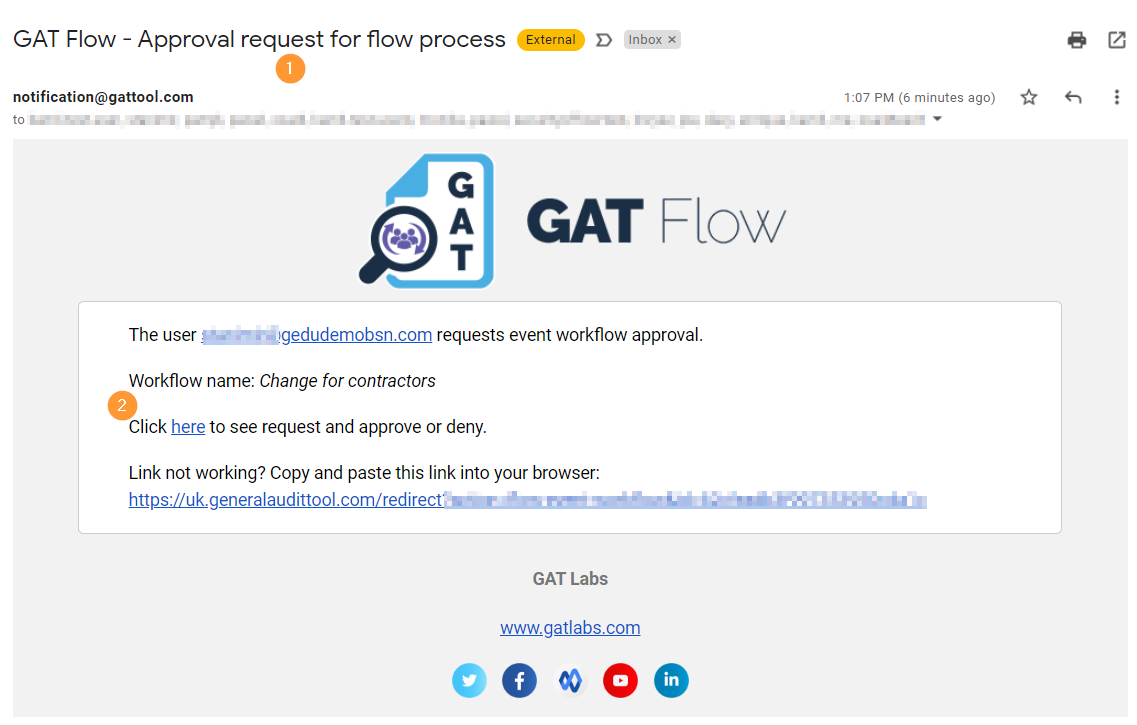
This will lead the Security Officer to the approval page – Flow > Event workflow.

Result #
When the Event workflow is approved.
- The workflow will be triggered when the event occurs
- In this case when a user is moved to Org. Unit (contractors)
- The actions selected will run automatically – every time the event occurs
The result can be seen in Flow > Event workflow > Results

It will lead to the Workflow tab, where all the workflows triggered by the selected Event workflow happen.


