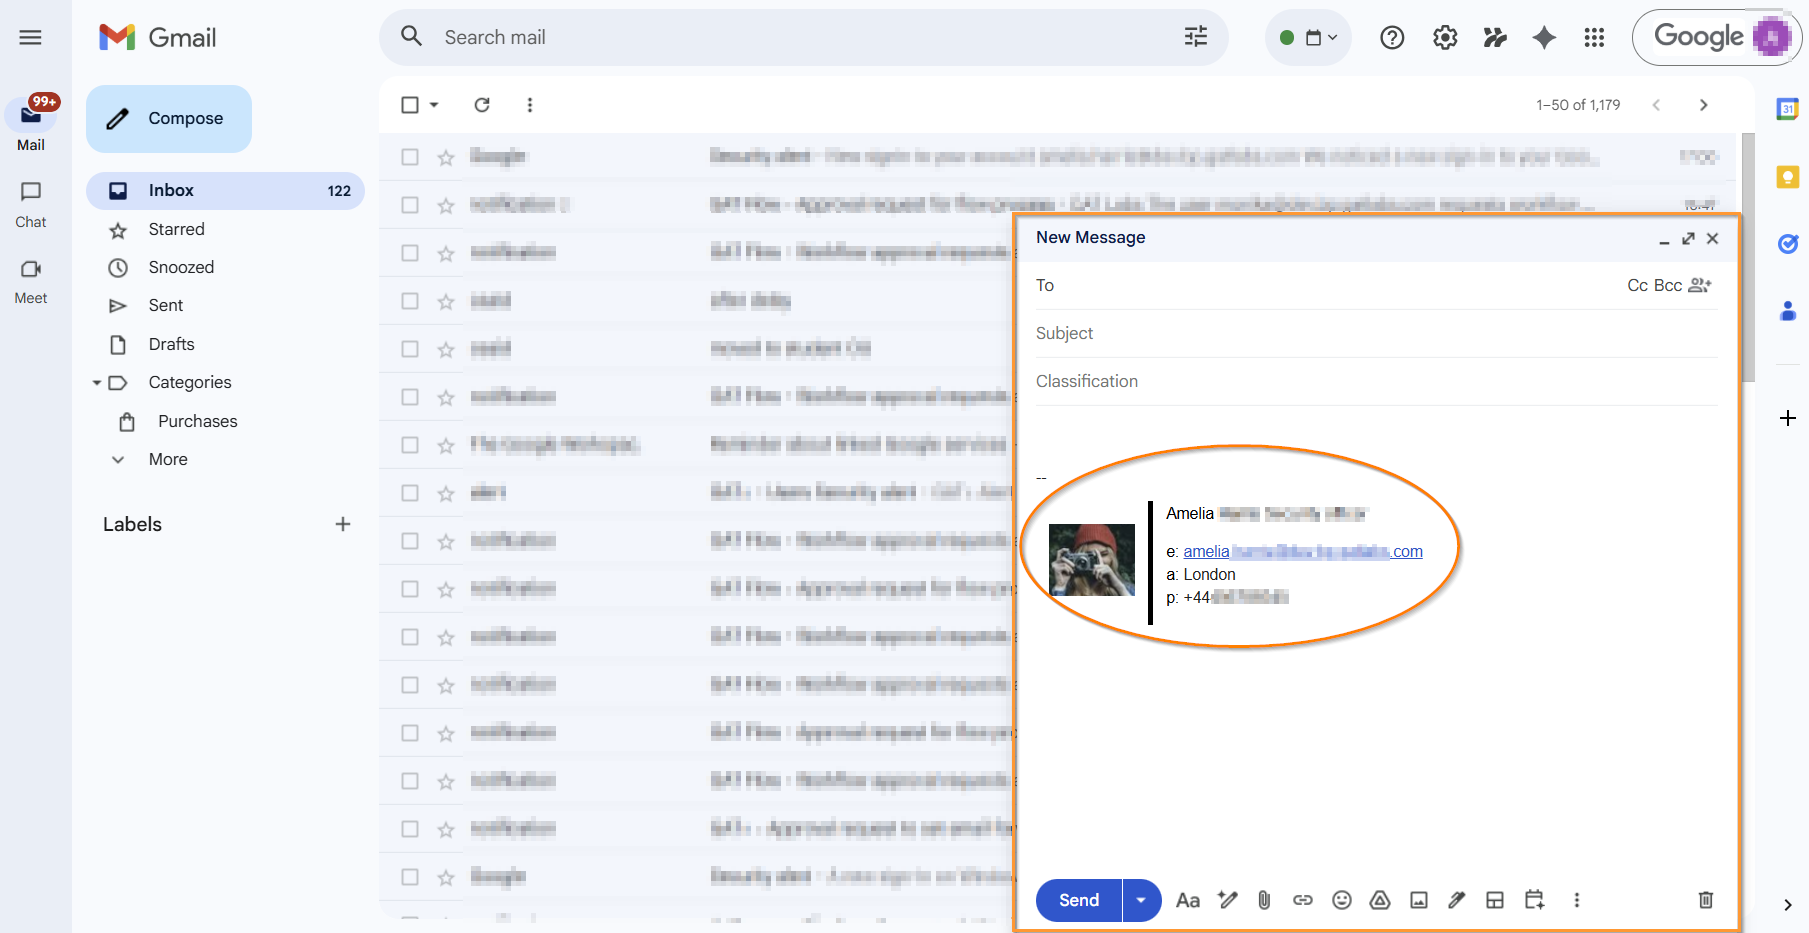

Modify Gmail Signature to Google Workspace Users in Bulk #
This article answers the question of how To Modify Gmail signatures for Google Workspace Users in Bulk.
Introduction #
Modify and change the Gmail signature of all your users within the Google Workspace domain.
With GAT Flow, you can edit and set up a new Gmail signature for a group of users in bulk.
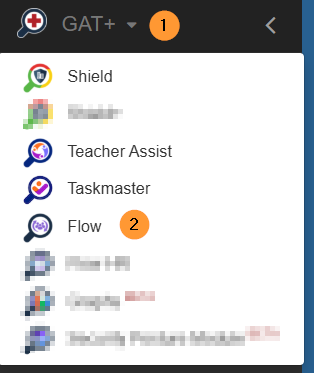
Open GAT+ (1) and select Flow (2) from the pop-up menu.
Create Workflow #
GAT Flow will be open in a new tab.
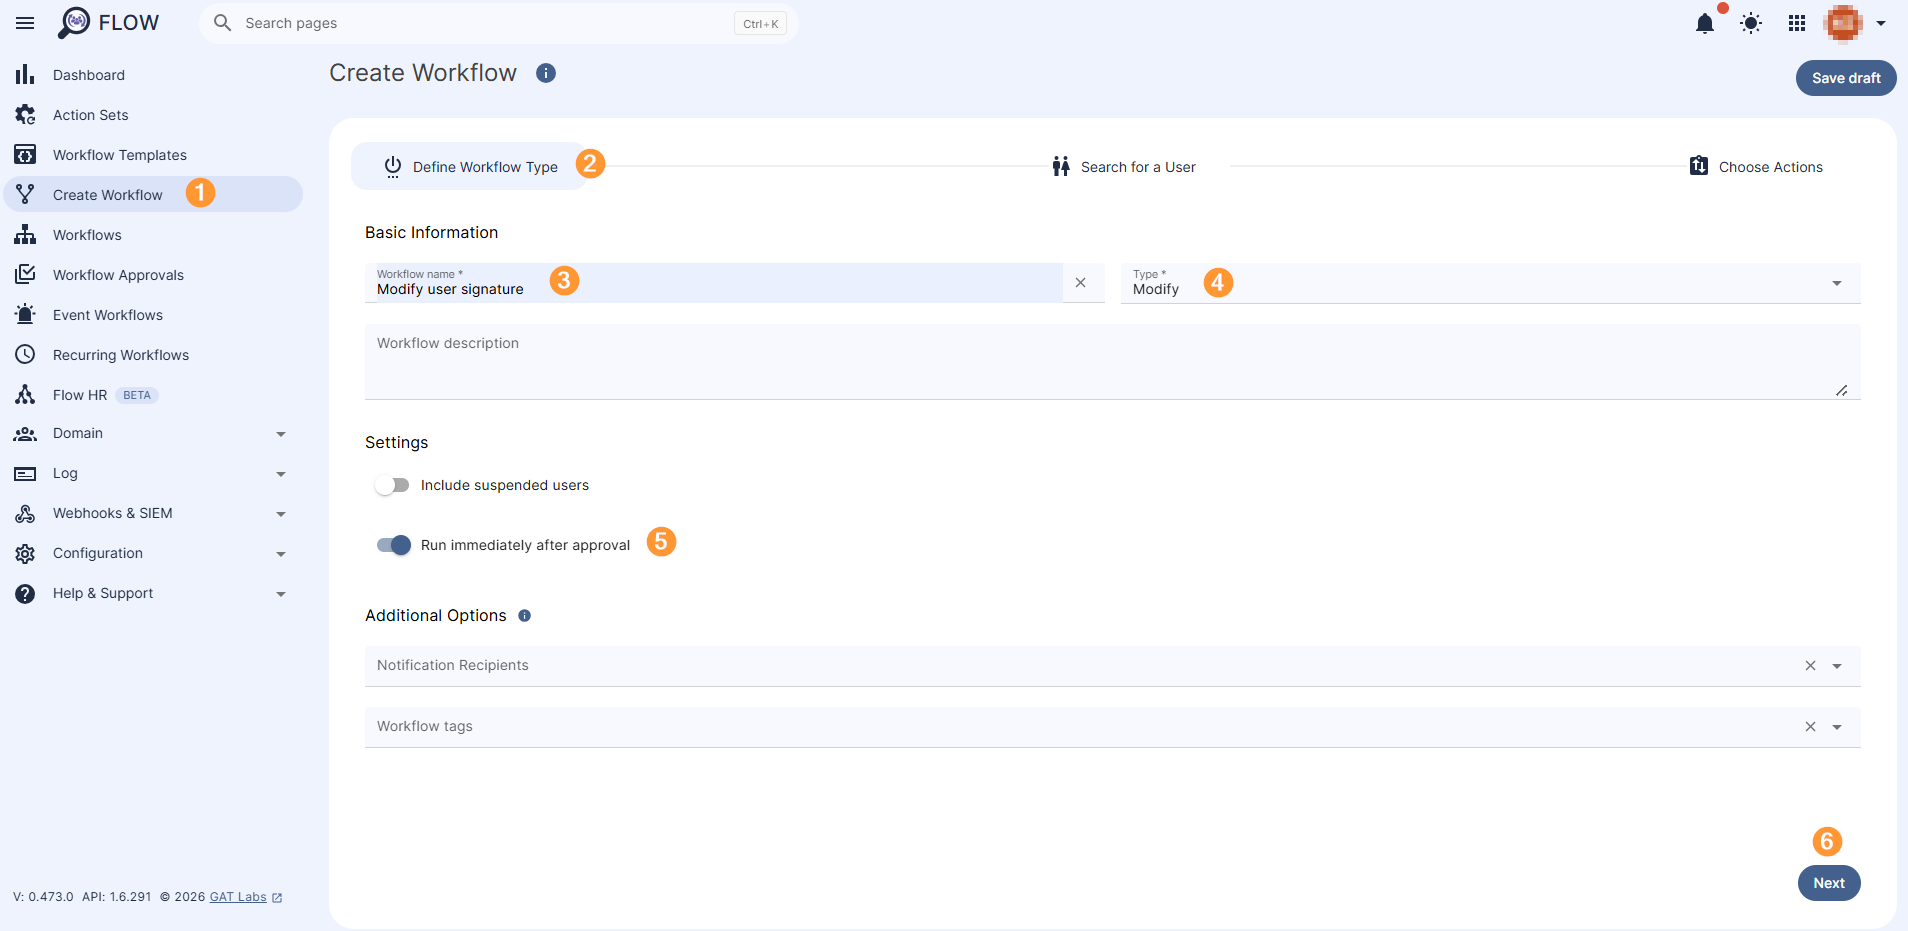
From the menu on the left, click on Create workflow.
Note: The Email signature can also be used in
- Event Workflows
- Recurring Workflows
- Domain > Users management section (applicable only to Super Admins)
- Domain > Groups management section (applicable only to Super Admins)
Workflow type #
A workflow type window will be displayed.
- Name – enter a name for the workflow
- Description – a description of the workflow can be added
- Type – select the workflow type
- Onboard – onboard and add new users to the domain
- Modify – modify and update existing users of the domain
- Run immediately after approval
- Next – click on the button to proceed
Search For A User #
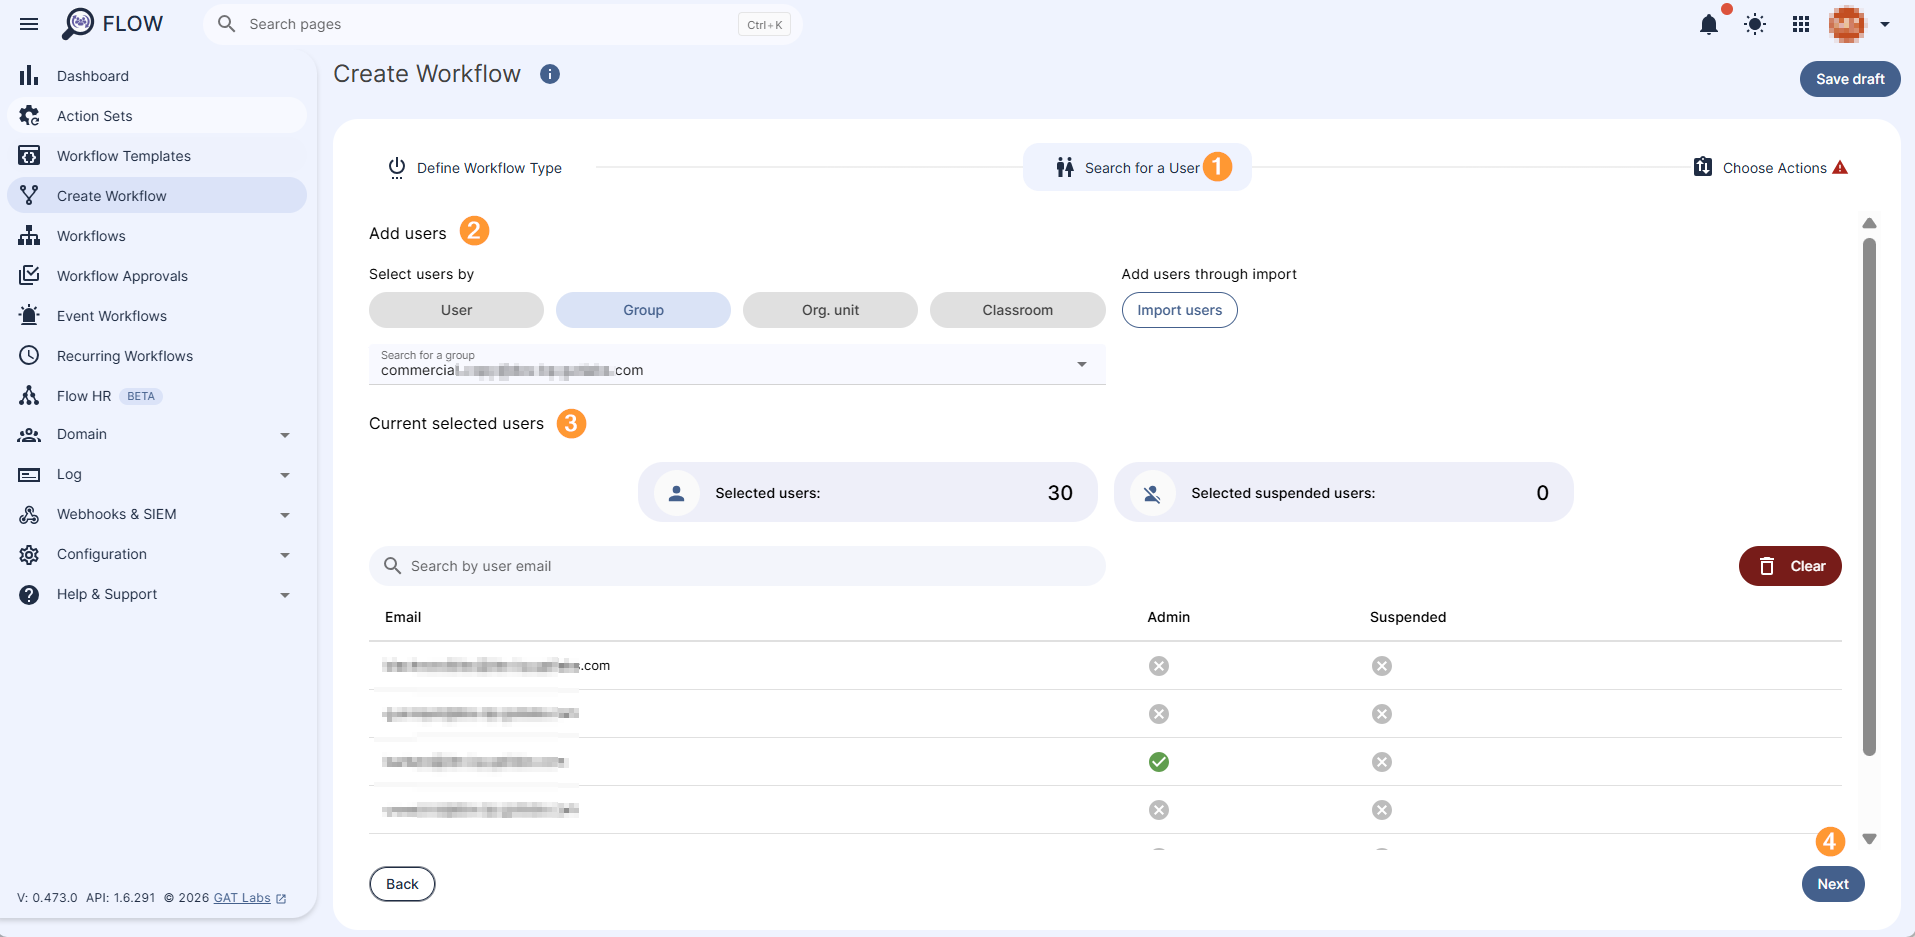
In Search for a User (1-2), pick any of the options
- Search for a User – select individual users
- Search for a Group – select a group of users
- Search for an Org. Unit – select Org. Unit of users
- Classroom
- Import users – import used via Google spreadsheet
Check the list of selected users under the Current selected users section (3), and click Next (4) to move on to the next step.
Choose Actions #
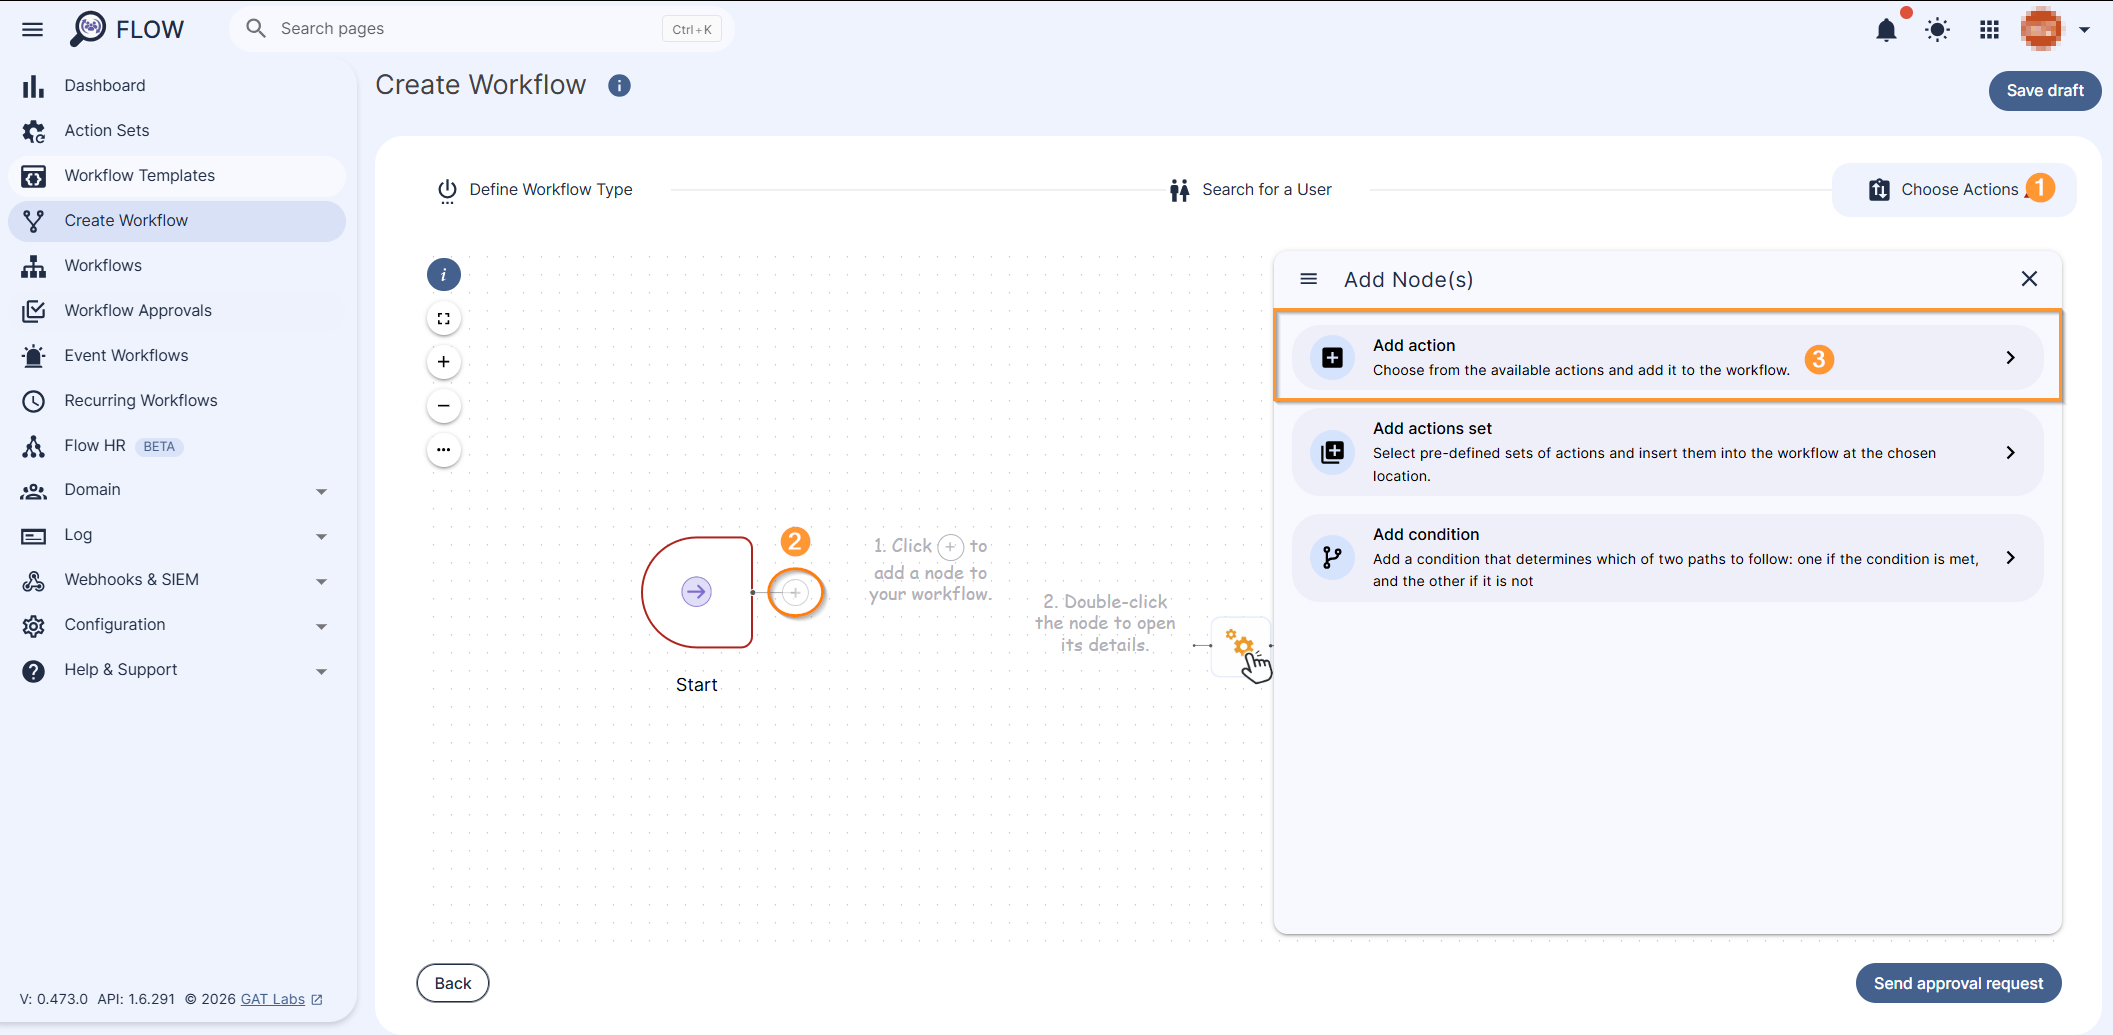
Under the Choose Actions section (1), click on the + button (2) and Add action (3). A pop-up menu with all the available actions will be displayed.
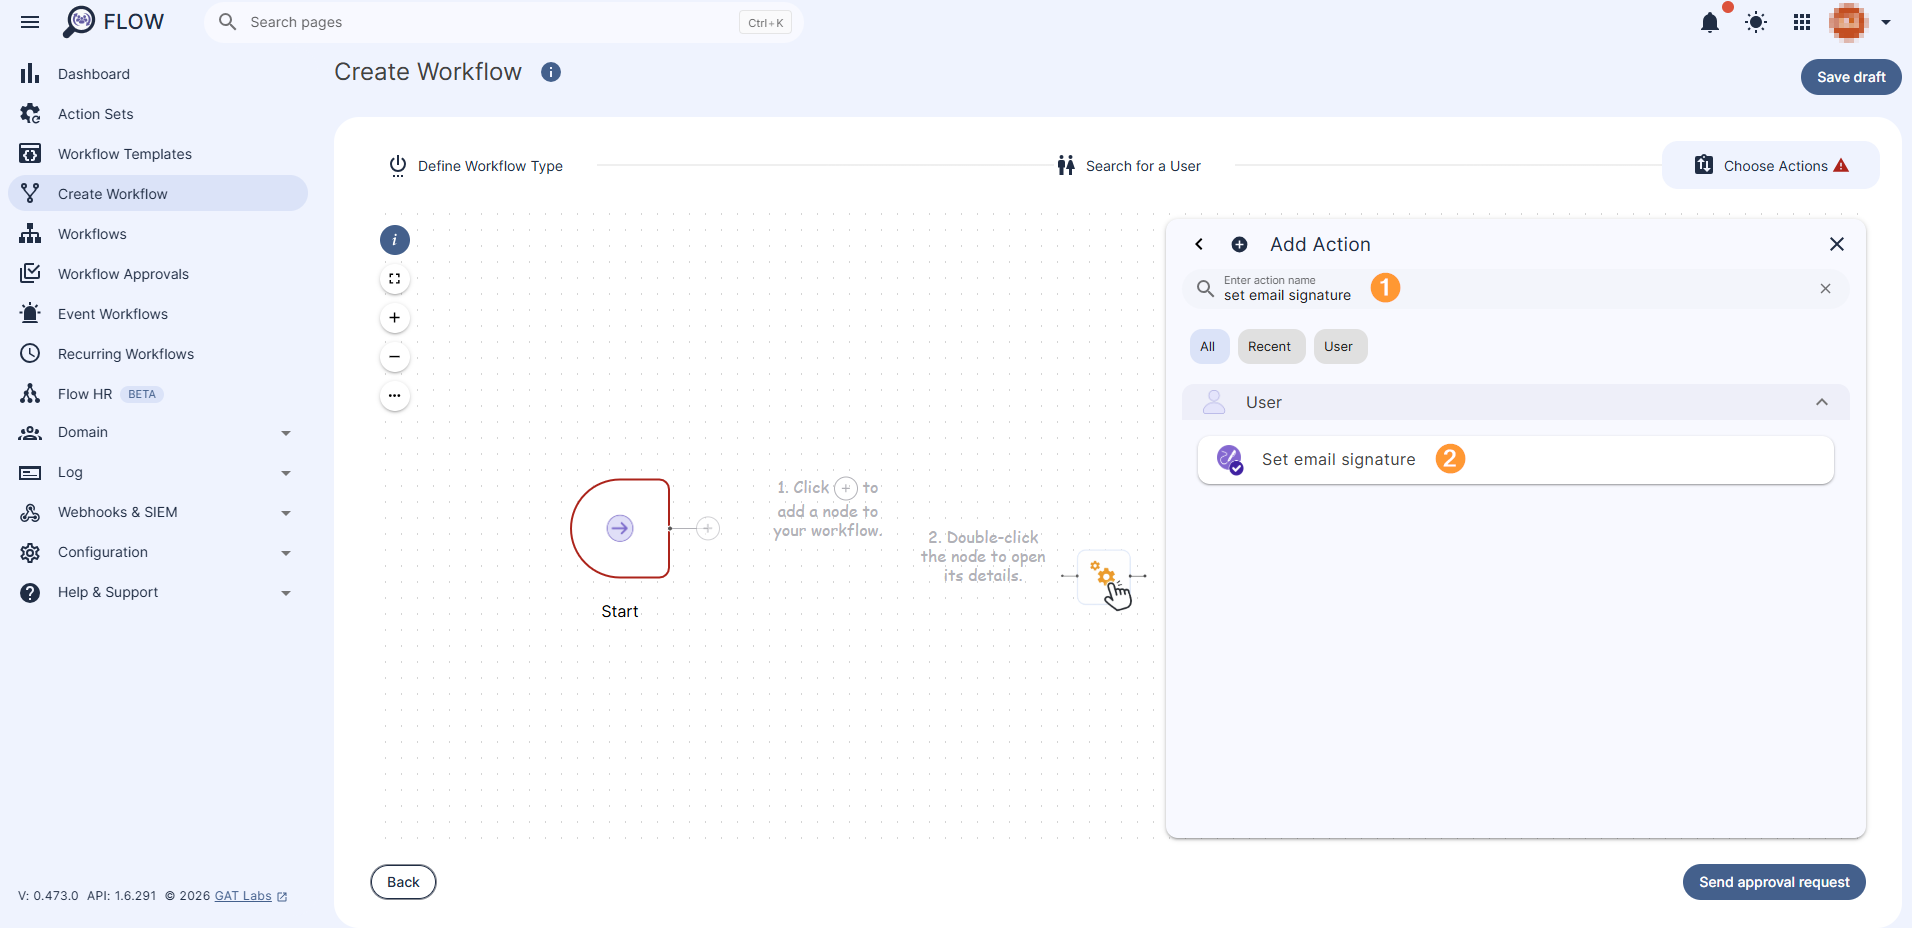
From all available actions, search for (1) and select Set email signature (2) under the Users tab.
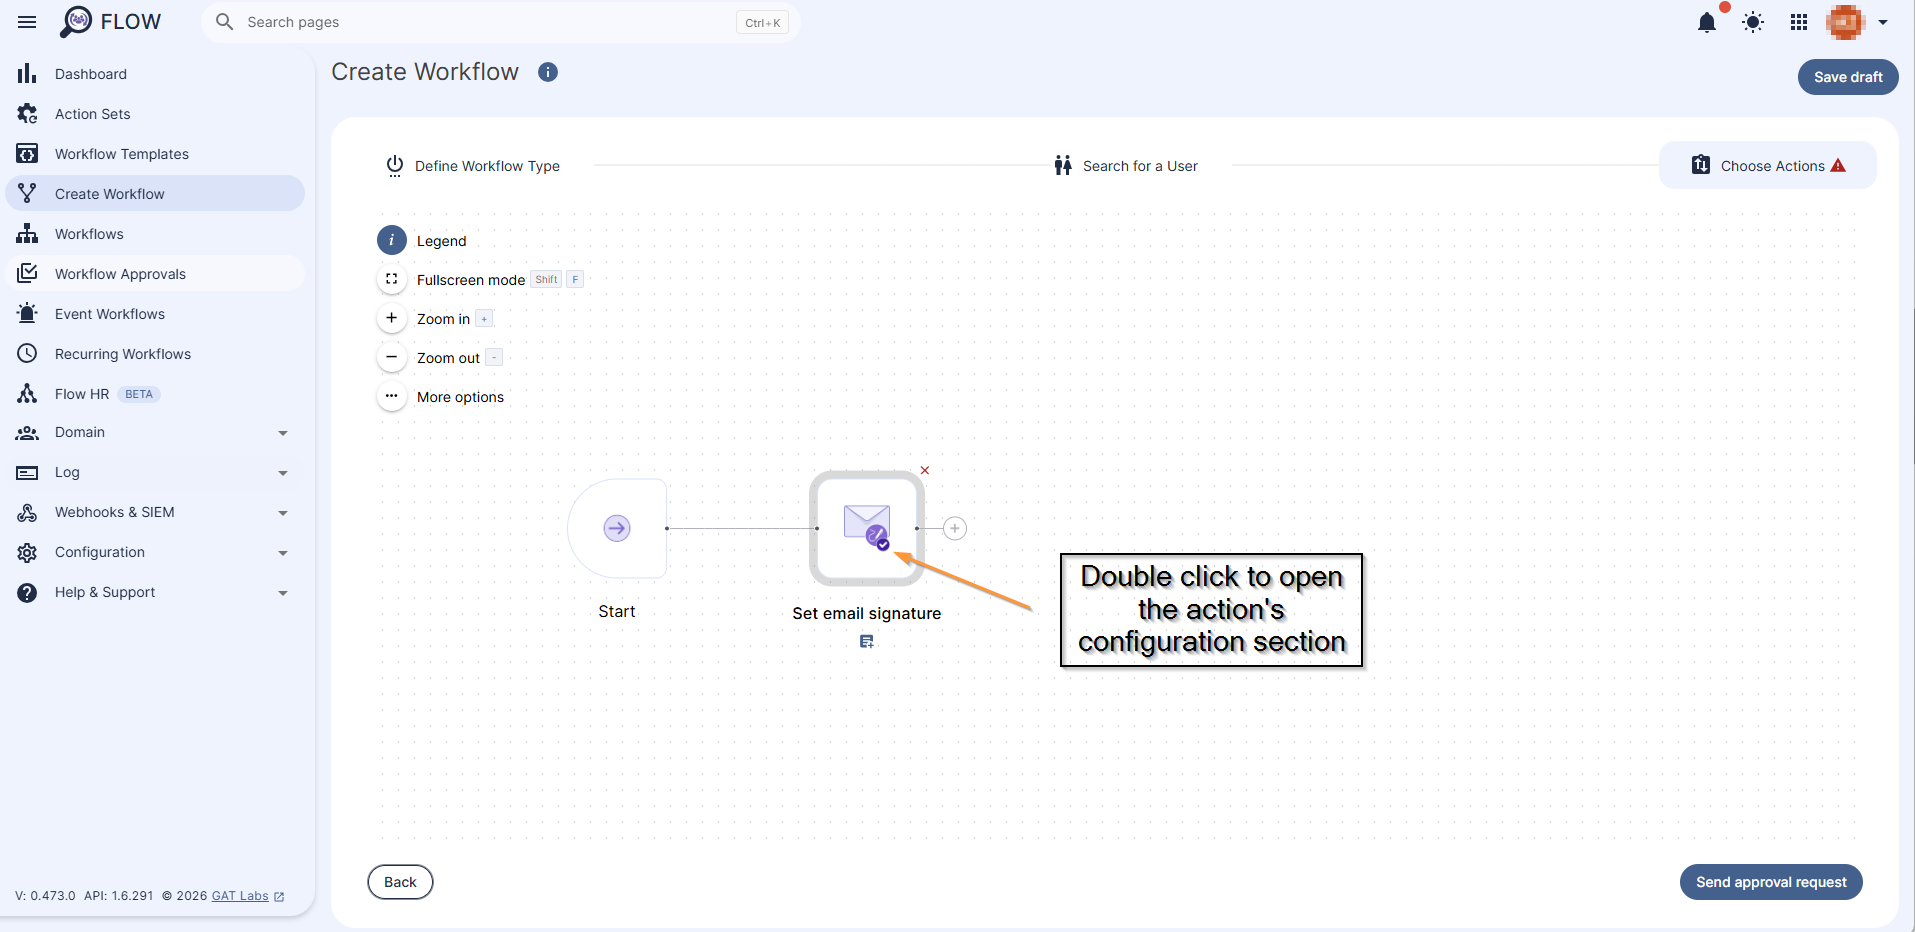
The Set email signature option will be added to the node section. Double-click on the action node to open the action’s configuration section.
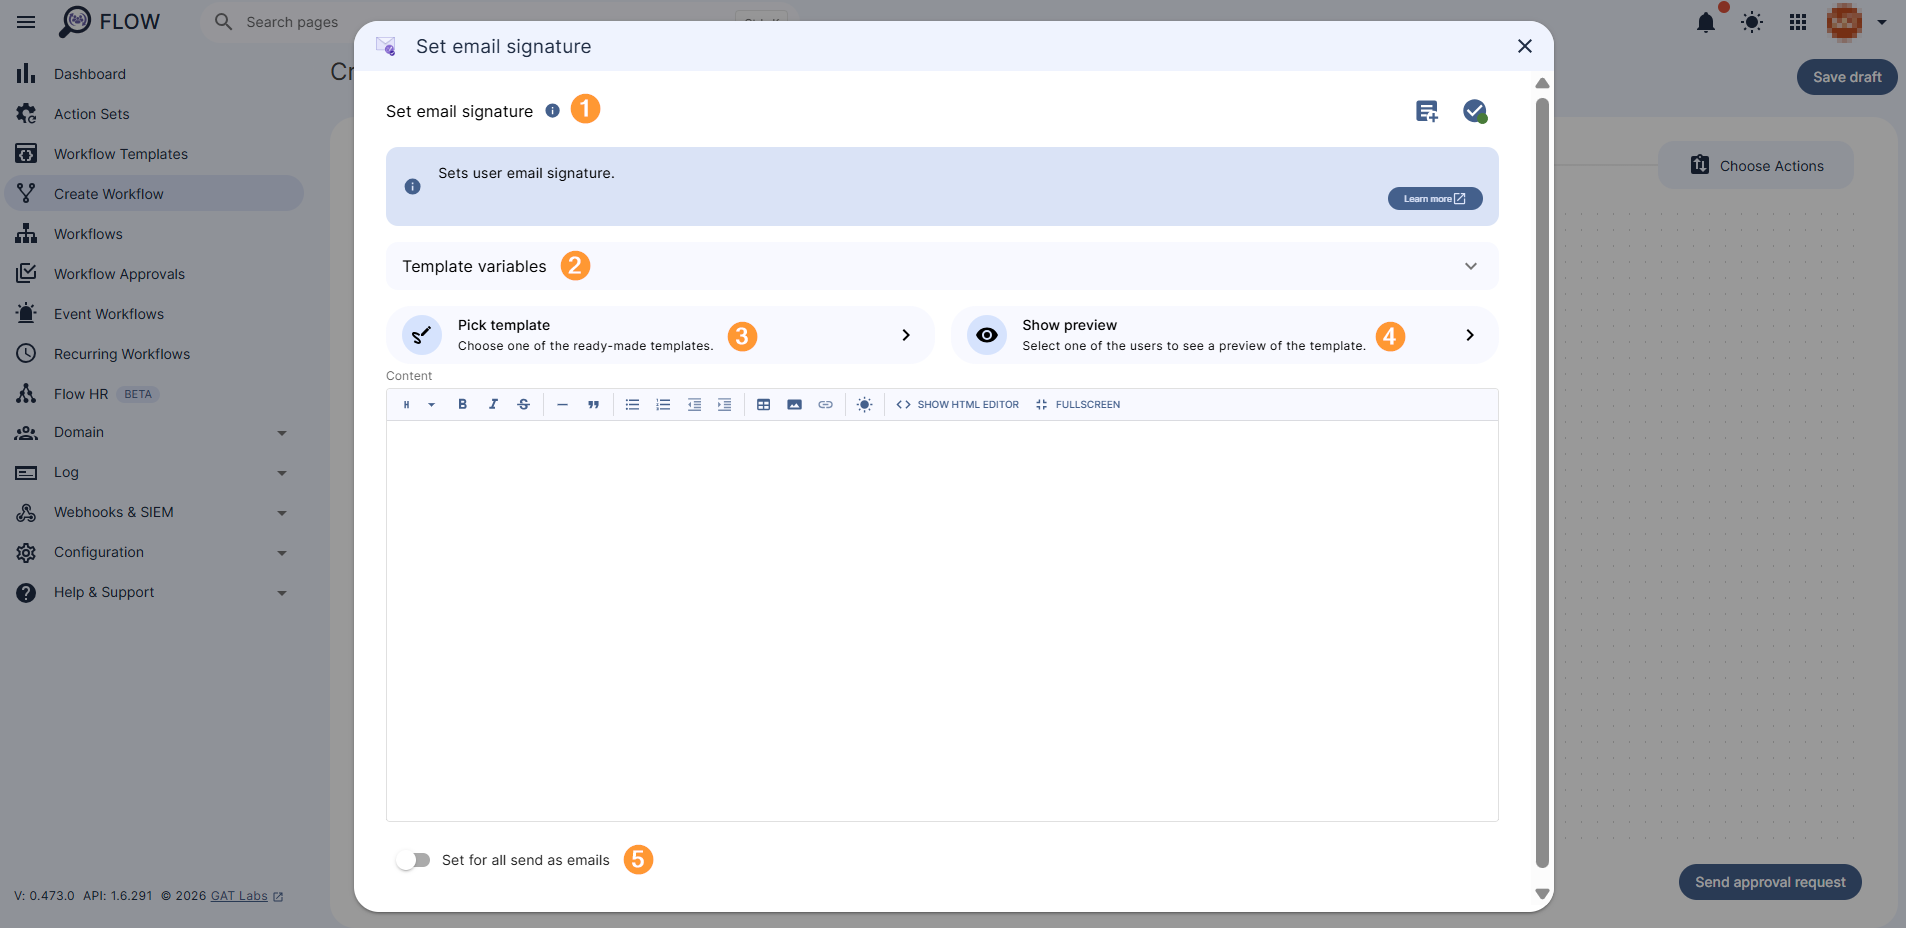
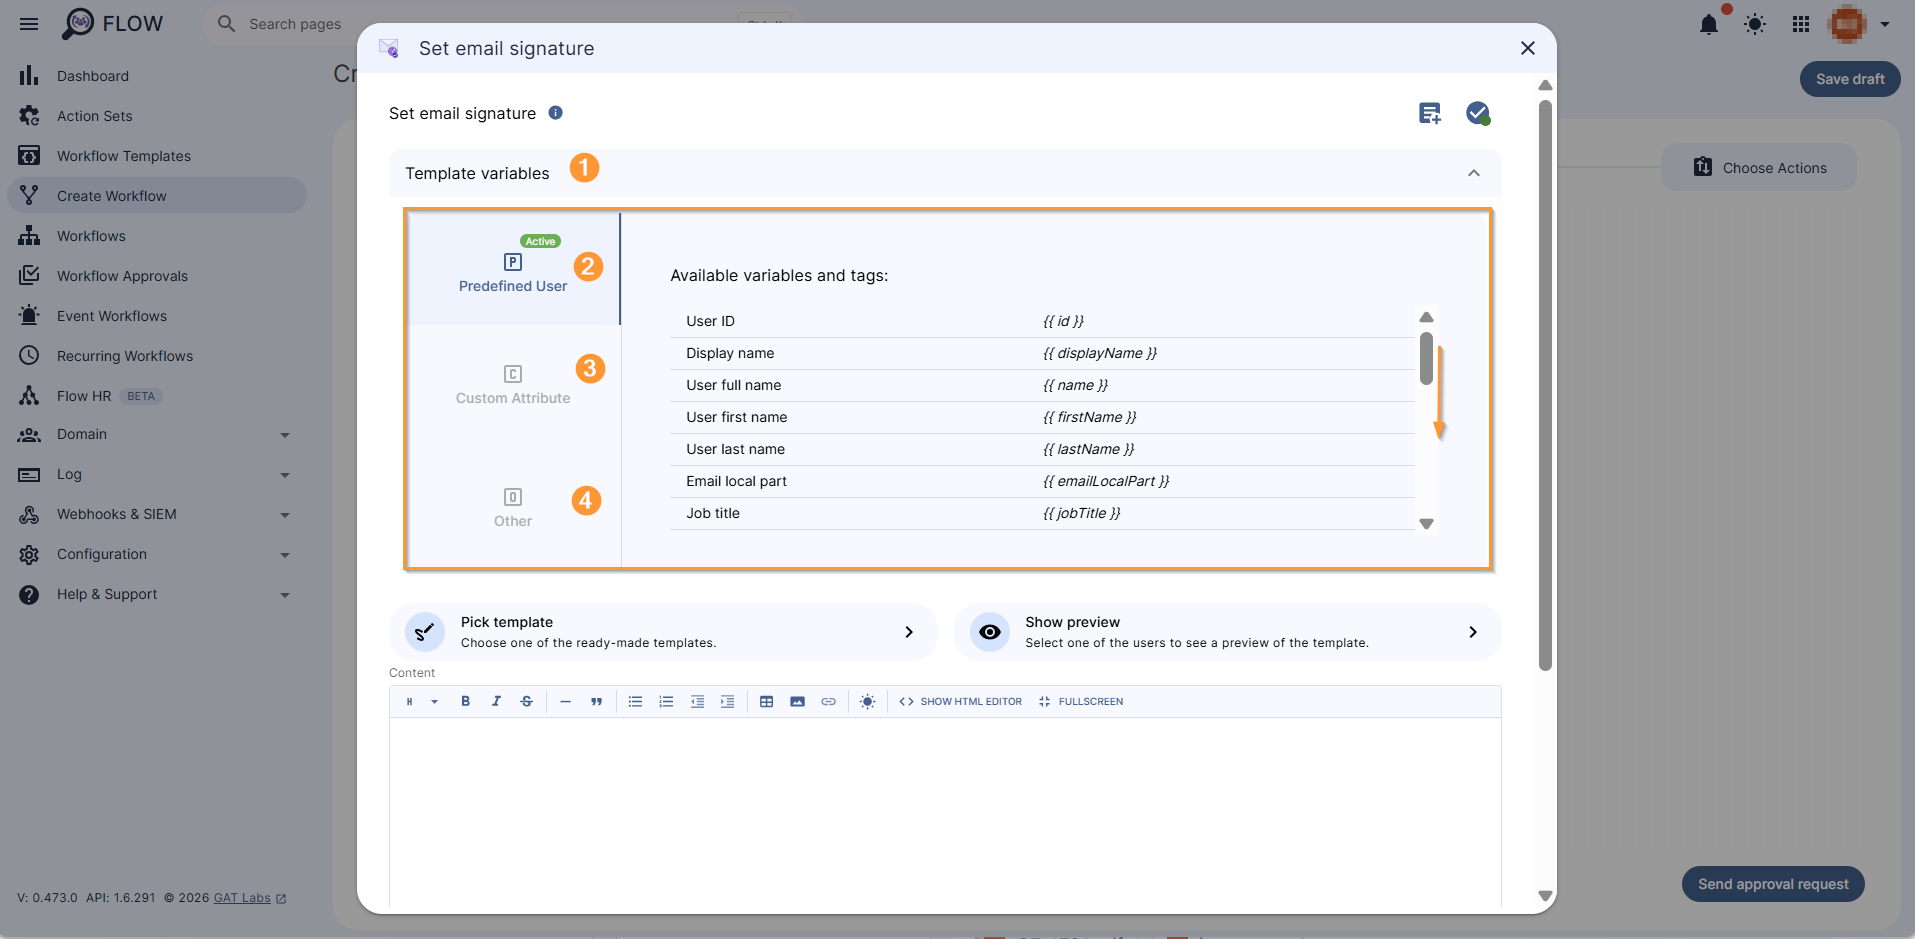
The set email signature (1) configuration window is displayed, where you can use Template variables (2), Pick template (3), and Show preview (4).
Under the Template variables (1), there are Predefined User variables (2), Custom attributes (3), and Others (3) that can be used.
Predefined User and Custom attributes #
A list of Predefined User and Custom attribute variables you can use in your email signatures are:
- Predefined User variables:
- User ID {{ id }}
- Display name {{ displayName }}
- User full name {{ name }}
- User first name {{ firstName }}
- User last name {{ lastName }}
- Email local part {{ emailLocalPart }}
- User email {{ email }}
- Job title {{ jobTitle }}
- Department {{ jobDepartment }}
- Employee type {{ employeeType }}
- Cost centre {{ jobCostCenter }}
- Work address {{ workAddress }}
- Work phone {{ workPhone }}
- Work fax {{ workFax }}
- Mobile phone {{ mobilePhone }}
- Home phone {{ homePhone }}
- Manager {{ manager }} – variable returns Manager’s email address
- Manager first name {{ managerFirstName }}
- Manager last name {{ managerLastName }}
- Manager title {{ managerTitle }}
- Employee ID {{ employeeId }}
- Building ID {{ buildingId }}
- Gender {{ gender }}
- Address me as {{ addressMeAs }}
- User photo URL {{ userPhotoUrl }}
- Custom attributes – If you have any custom attributes created, they will also be displayed.
Other variables and IF statements #
IF statements can also be used. You can set use “if” tag to control element visibility, for example, remove mobilePhone if it doesn’t exist:
- {% if mobilePhone %} {{ mobilePhone }} {% endif %} – If the mobile phone number is not available, the placeholder will not be shown
- {% unless mobilePhone %} N/A {% endunless %} – If the mobile phone number doesn’t exist, a placeholder will be shown, for example N/A
Additionally, you can use some filters to change the way of displaying texts, for example, for a variable name with value John Smith :
- {{ name | upcase }} – eg. John Smith = JOHN SMITH
- {{ name | downcase }} – eg. John Smith = john smith
- {{ name | downcase | capitalize }} = eg. John Smith = John smith
HTML editor #
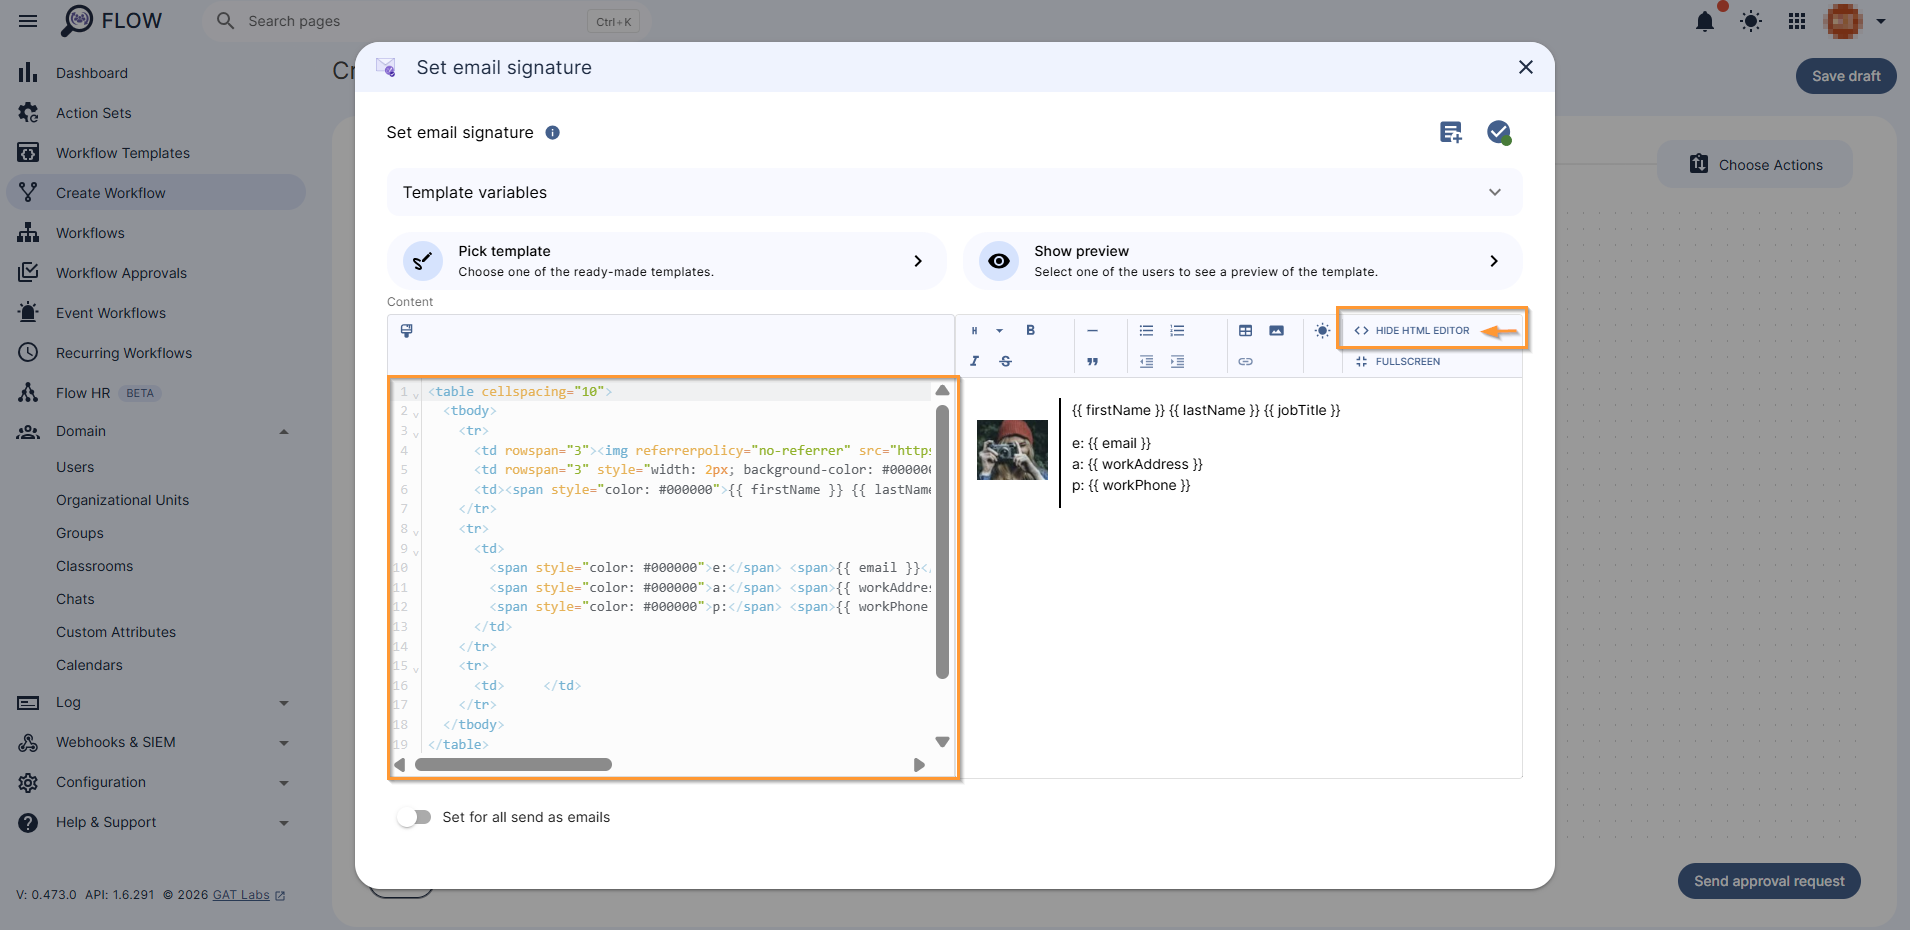
Switch to HTML editor – turn on and enter an HTML code. You can copy and paste the prepared HTML code for signature.
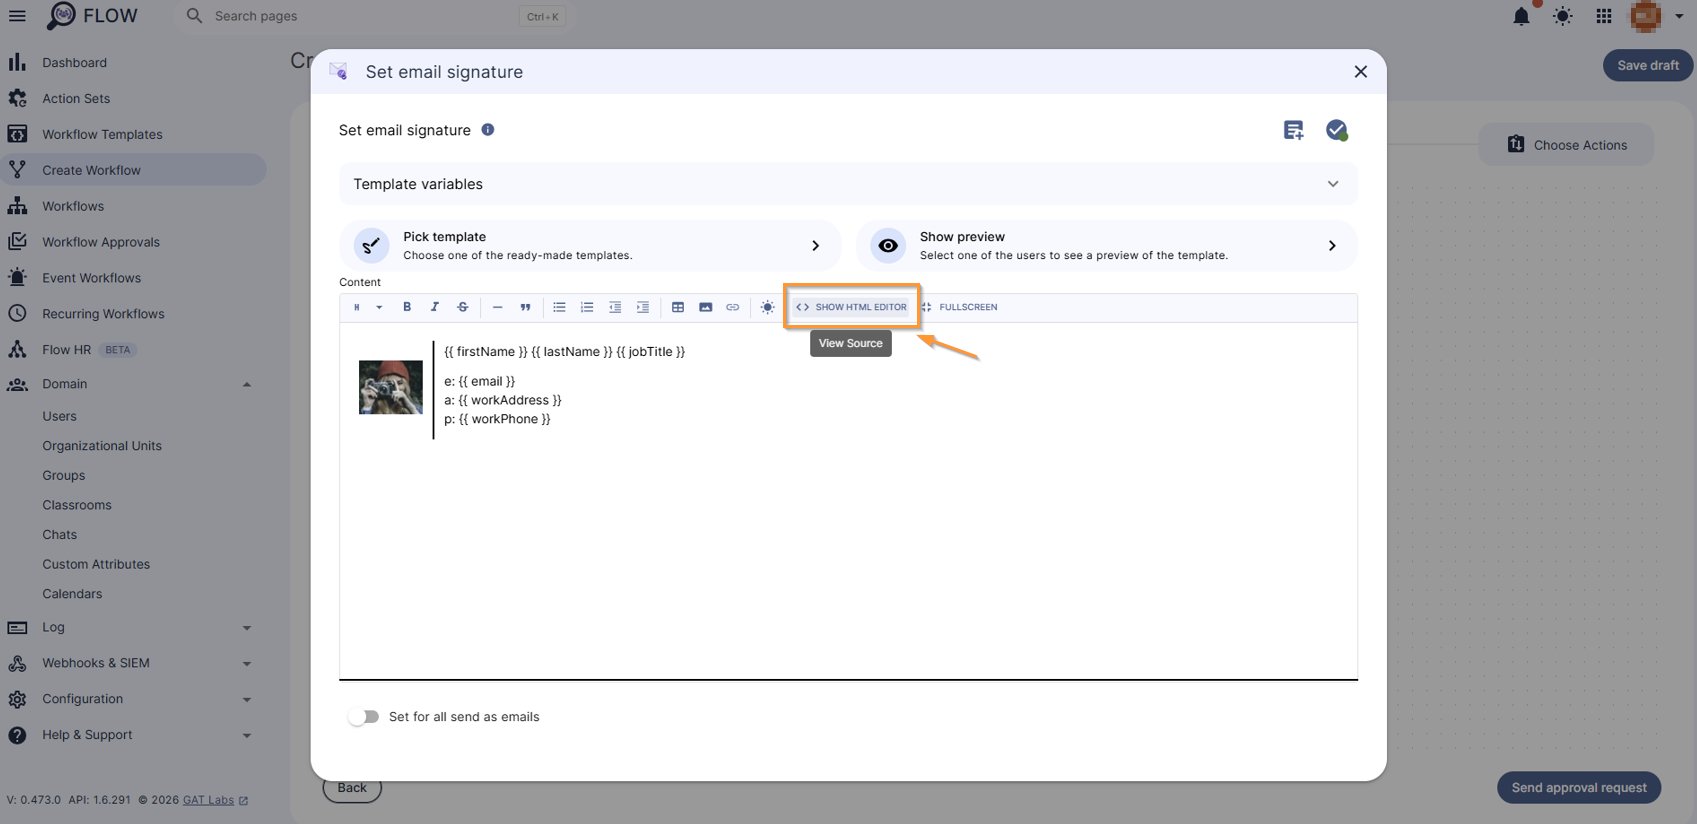
A view of the HTML output will be displayed. You can HIDE HTML EDITOR at any time.
Signature template #
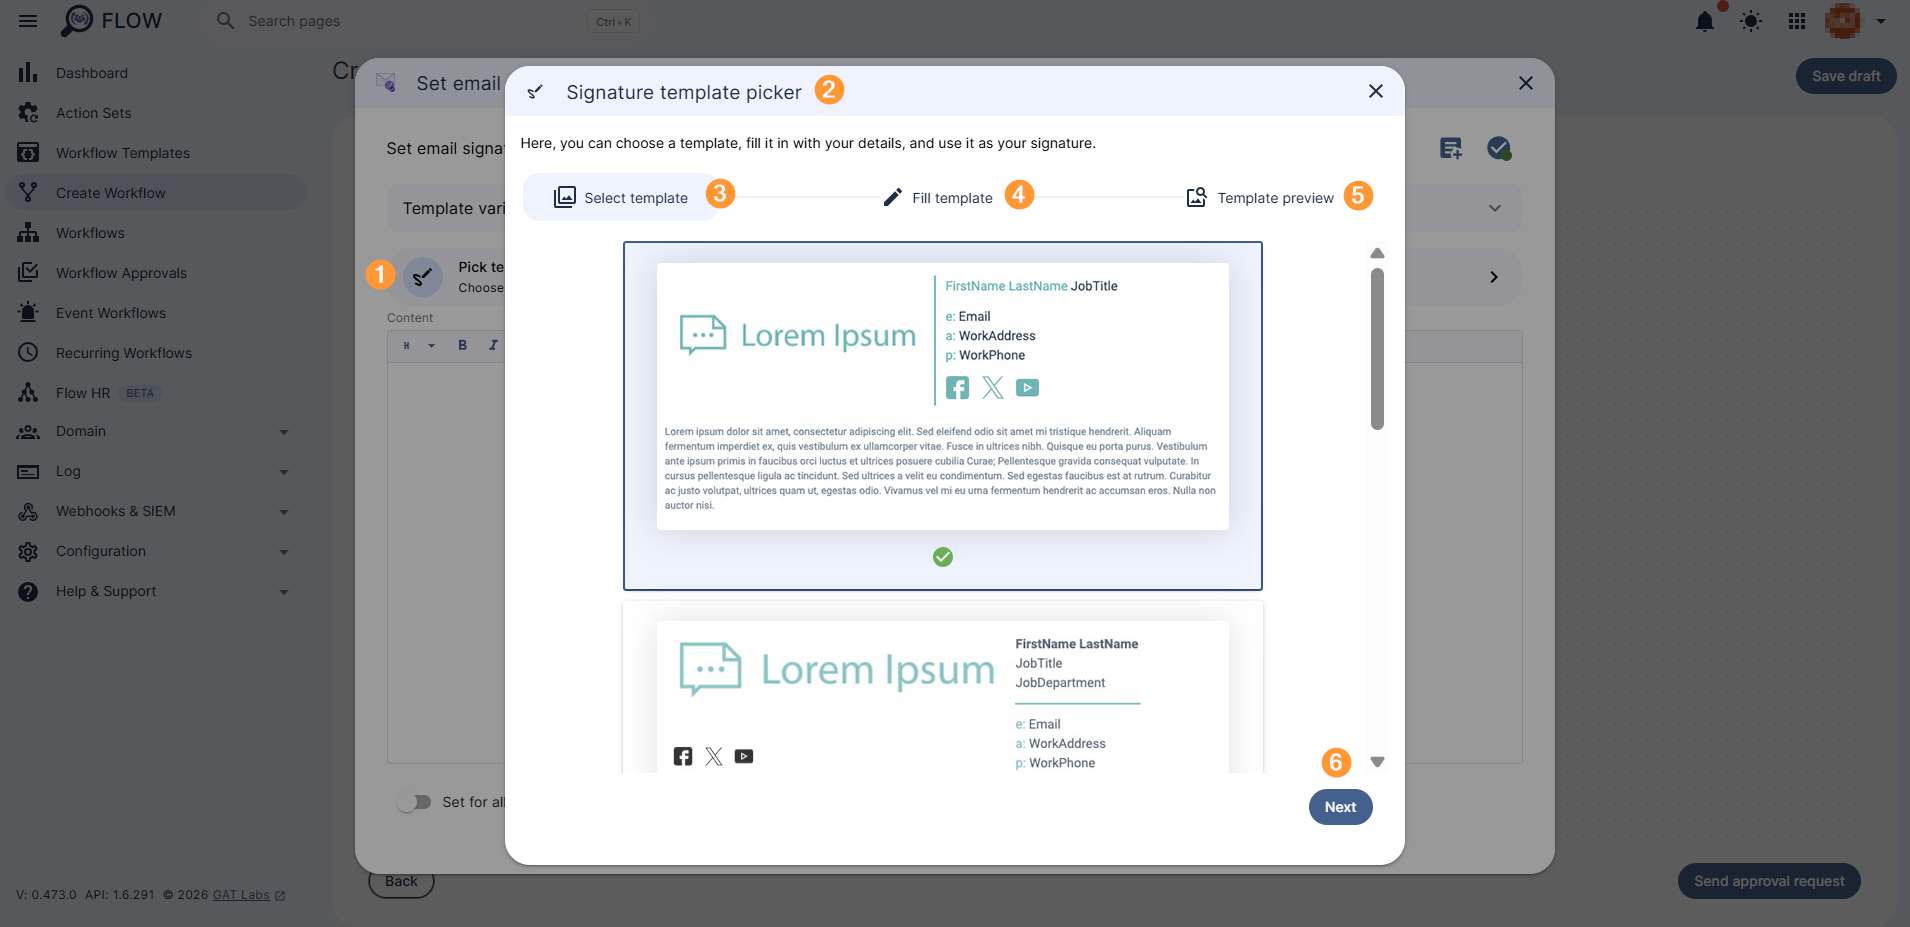
Pick a template – select any of the suggested templates for an Email Signature.
Select any of the options and click on the Next button.
Fill in the signature details #
- Company image – provide the company logo by entering the image URL, use one from the recently used list, or upload the image
- Use user photo – select to populate the user’s account photo, which will use the photo added to the user’s Google Workspace account
- Company colour – select the company colour
- Social media links – enter social media links
- Facebook link – enter the Facebook link
- X link – enter X link
- Instagram link – enter the Instagram link
- LinkedIn link – enter LinkedIn link
- YouTube link – enter YouTube link
- WWW – enter your Website link
- Bottom text – enter the bottom text for the signature
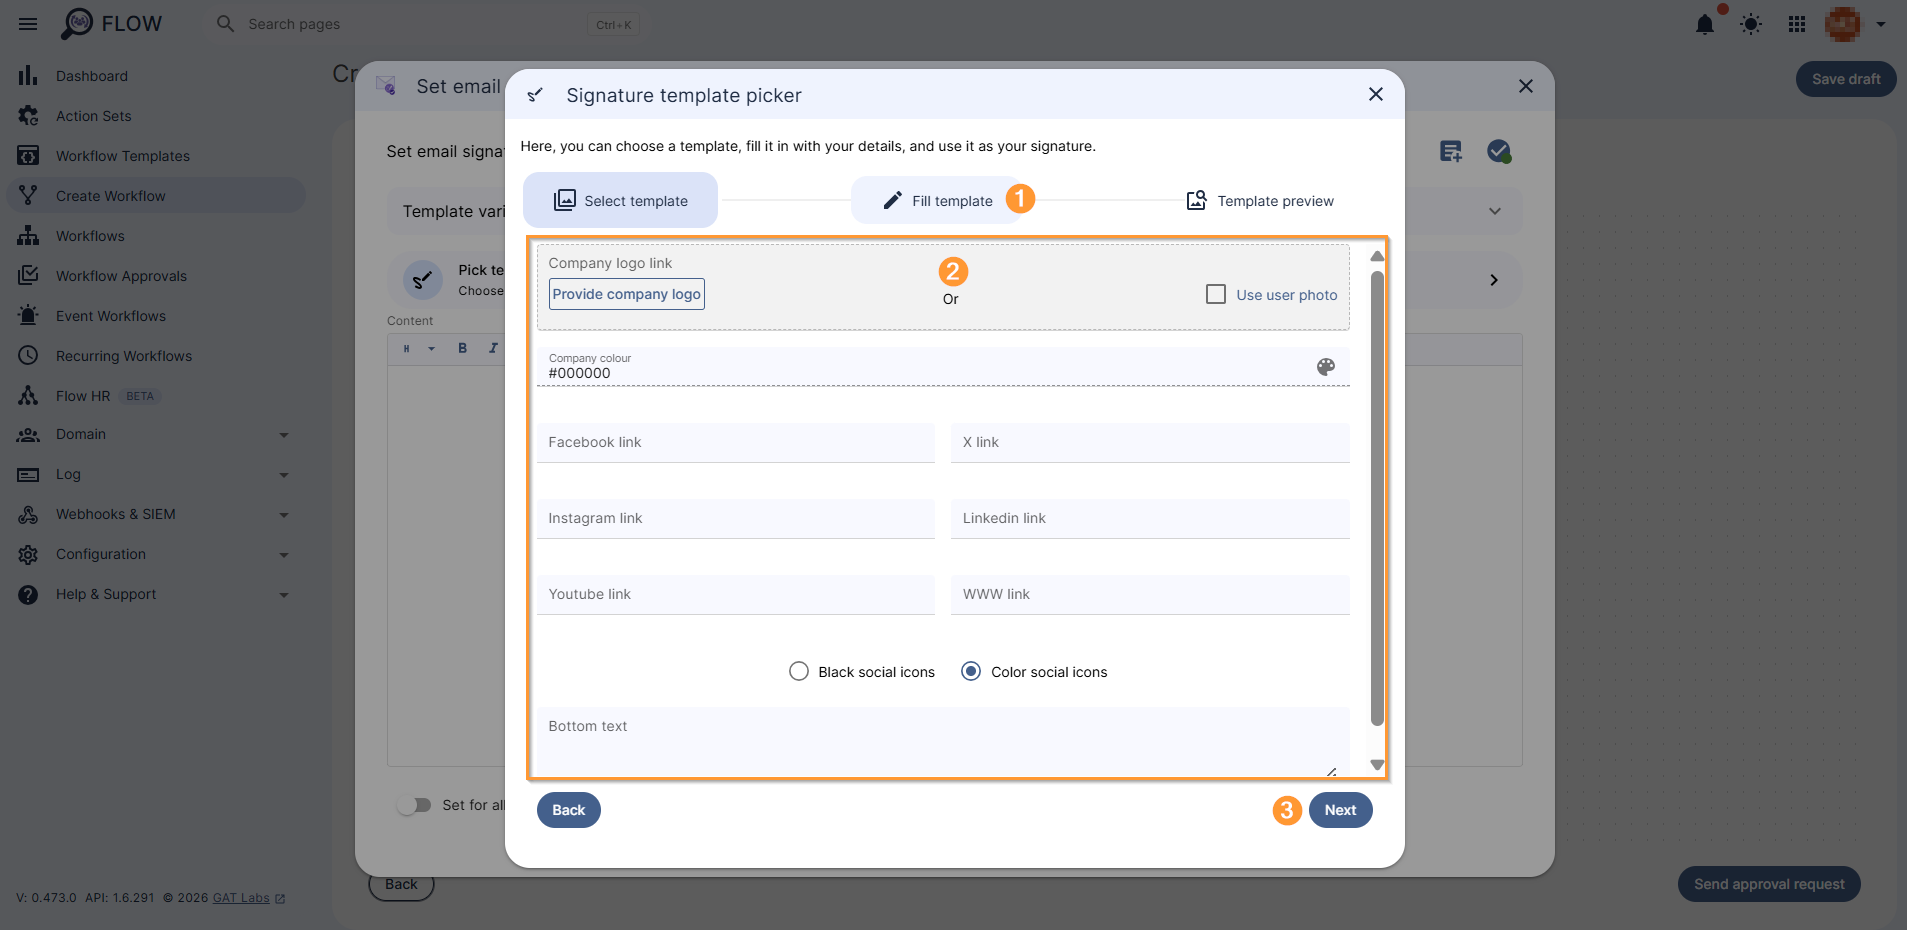
Click on the Next button to proceed.
Provide company logo #
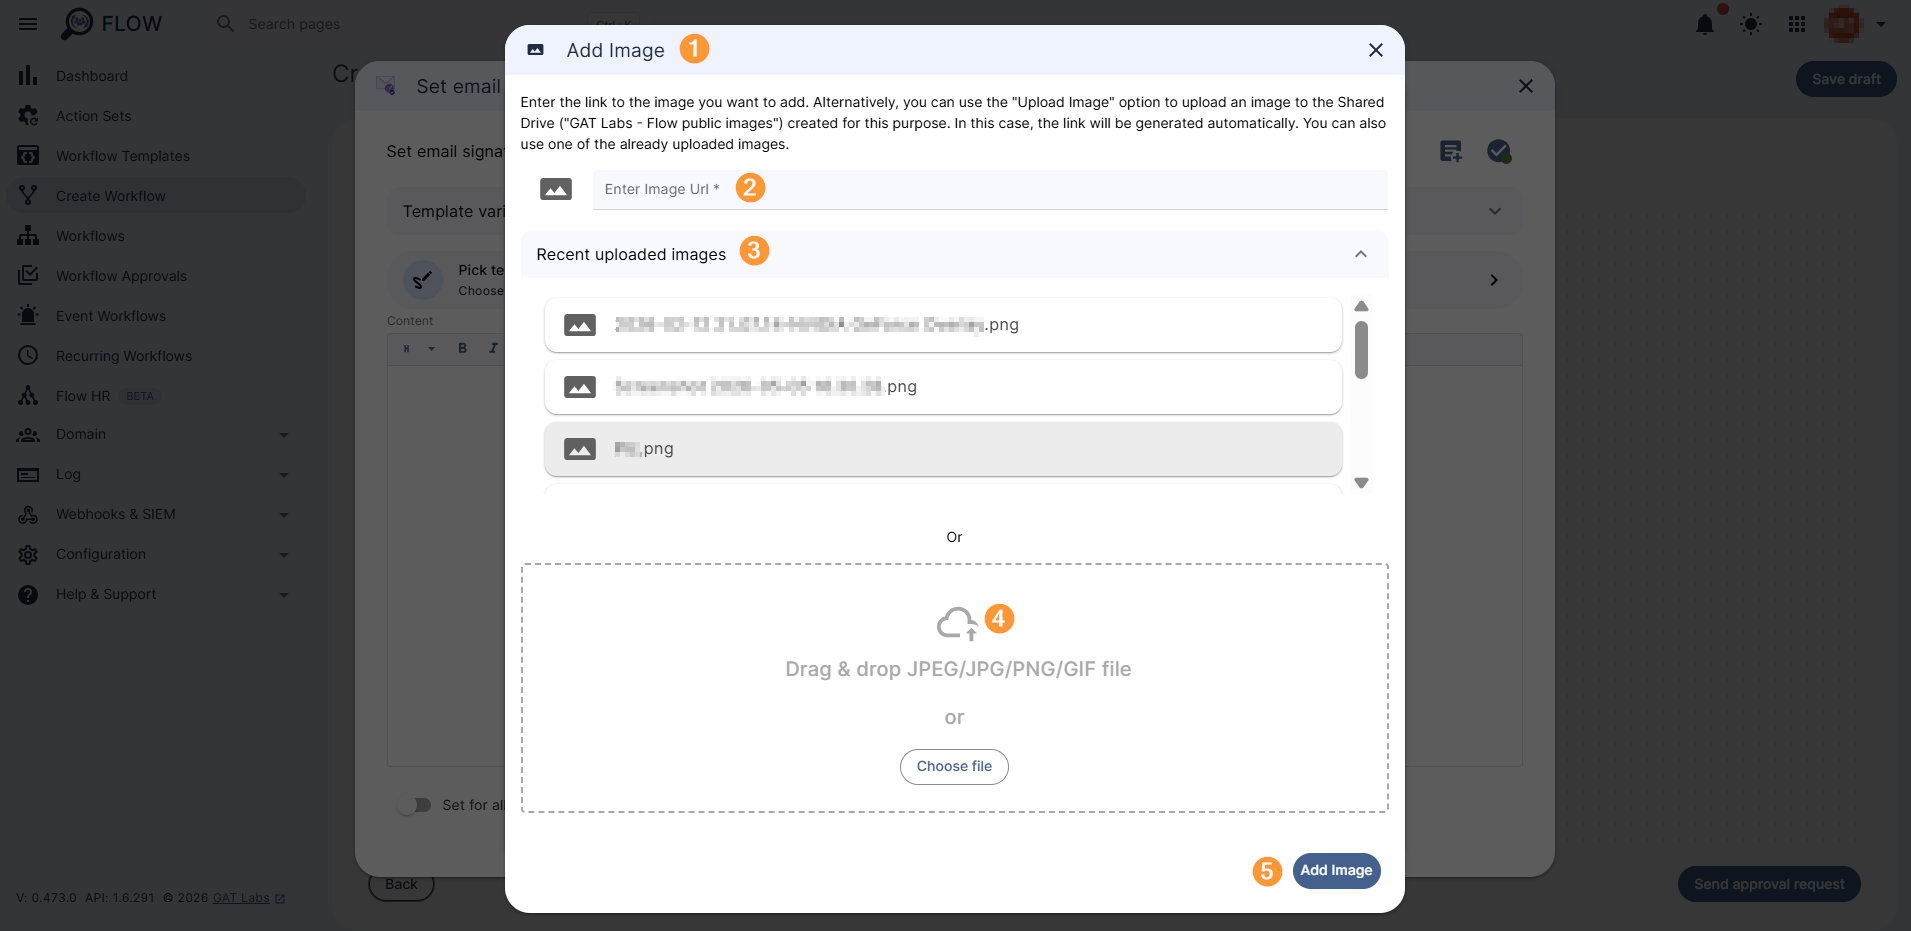
The company logo option allows adding an image (1) by entering an image URL (2), utilising recently uploaded Images (3) (the latest 20 are listed), or Drag & Drop or Choose file from local device (4). Add Image (5) once all is configured.
A preview of the signature will show what the Email signature will look like.
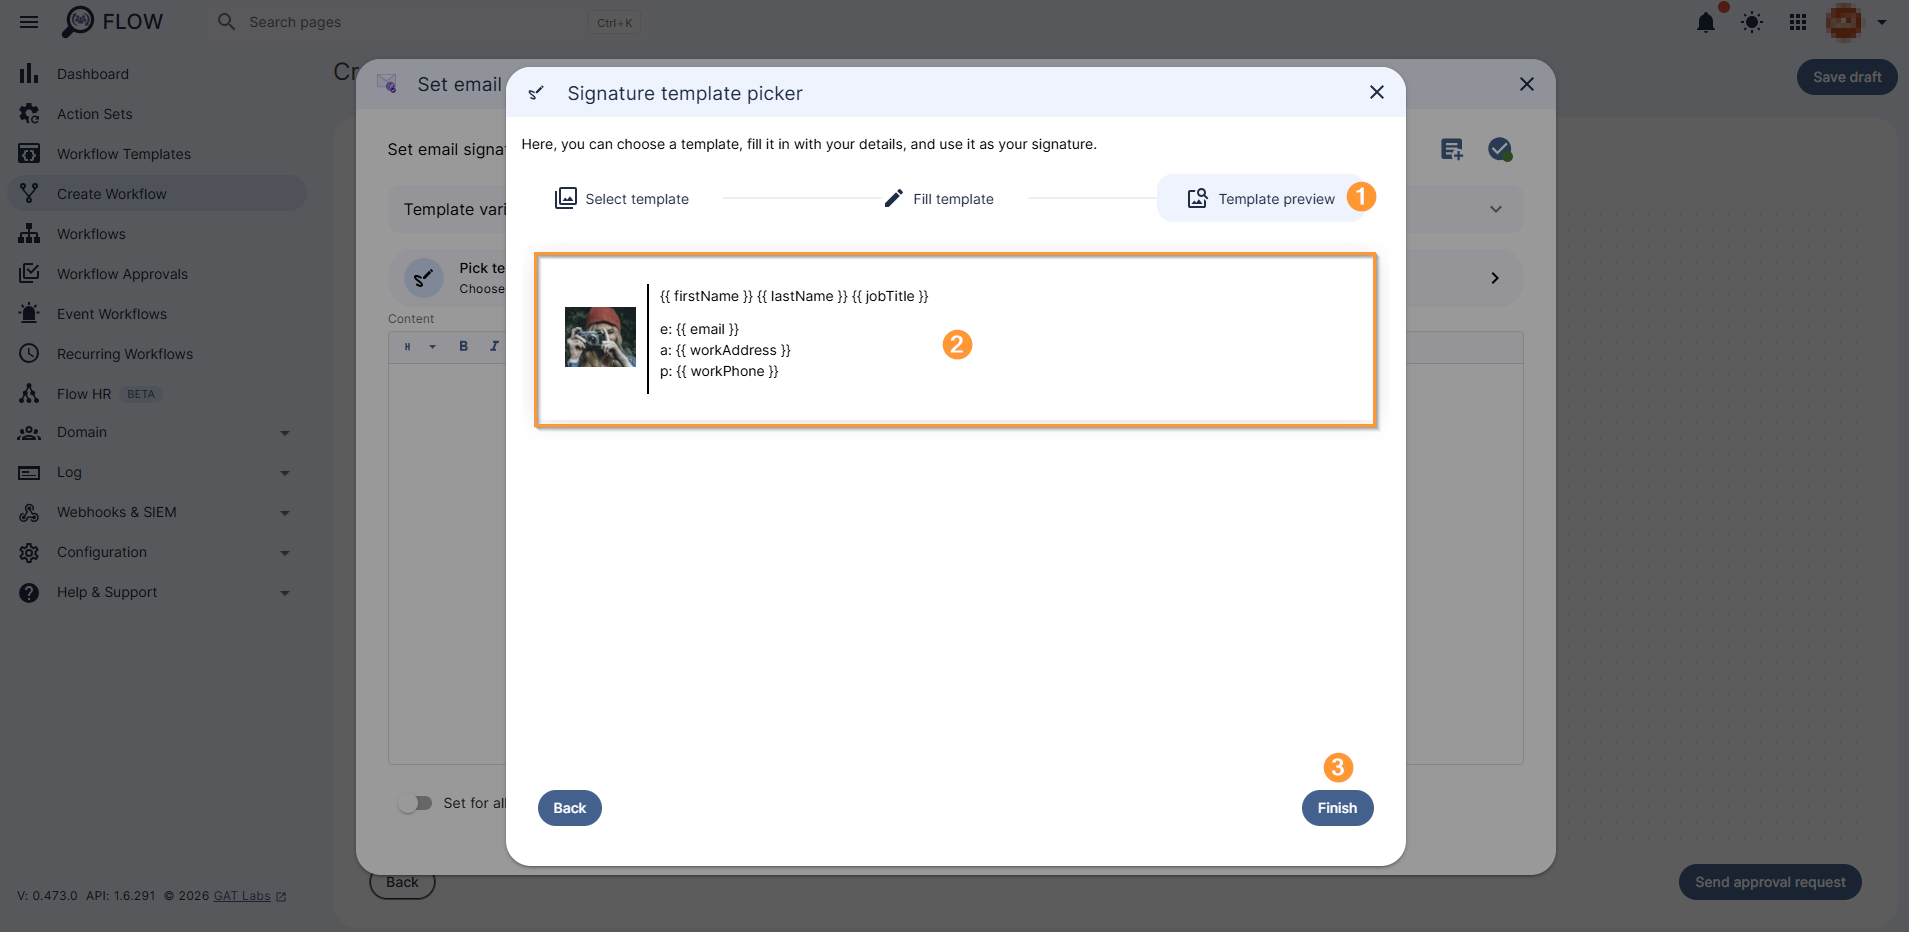
Finish – click on the button to view the overview of the signature.
Show preview #
Show preview – allows visualizing the configured signature on a real example by selecting one of the domain users.
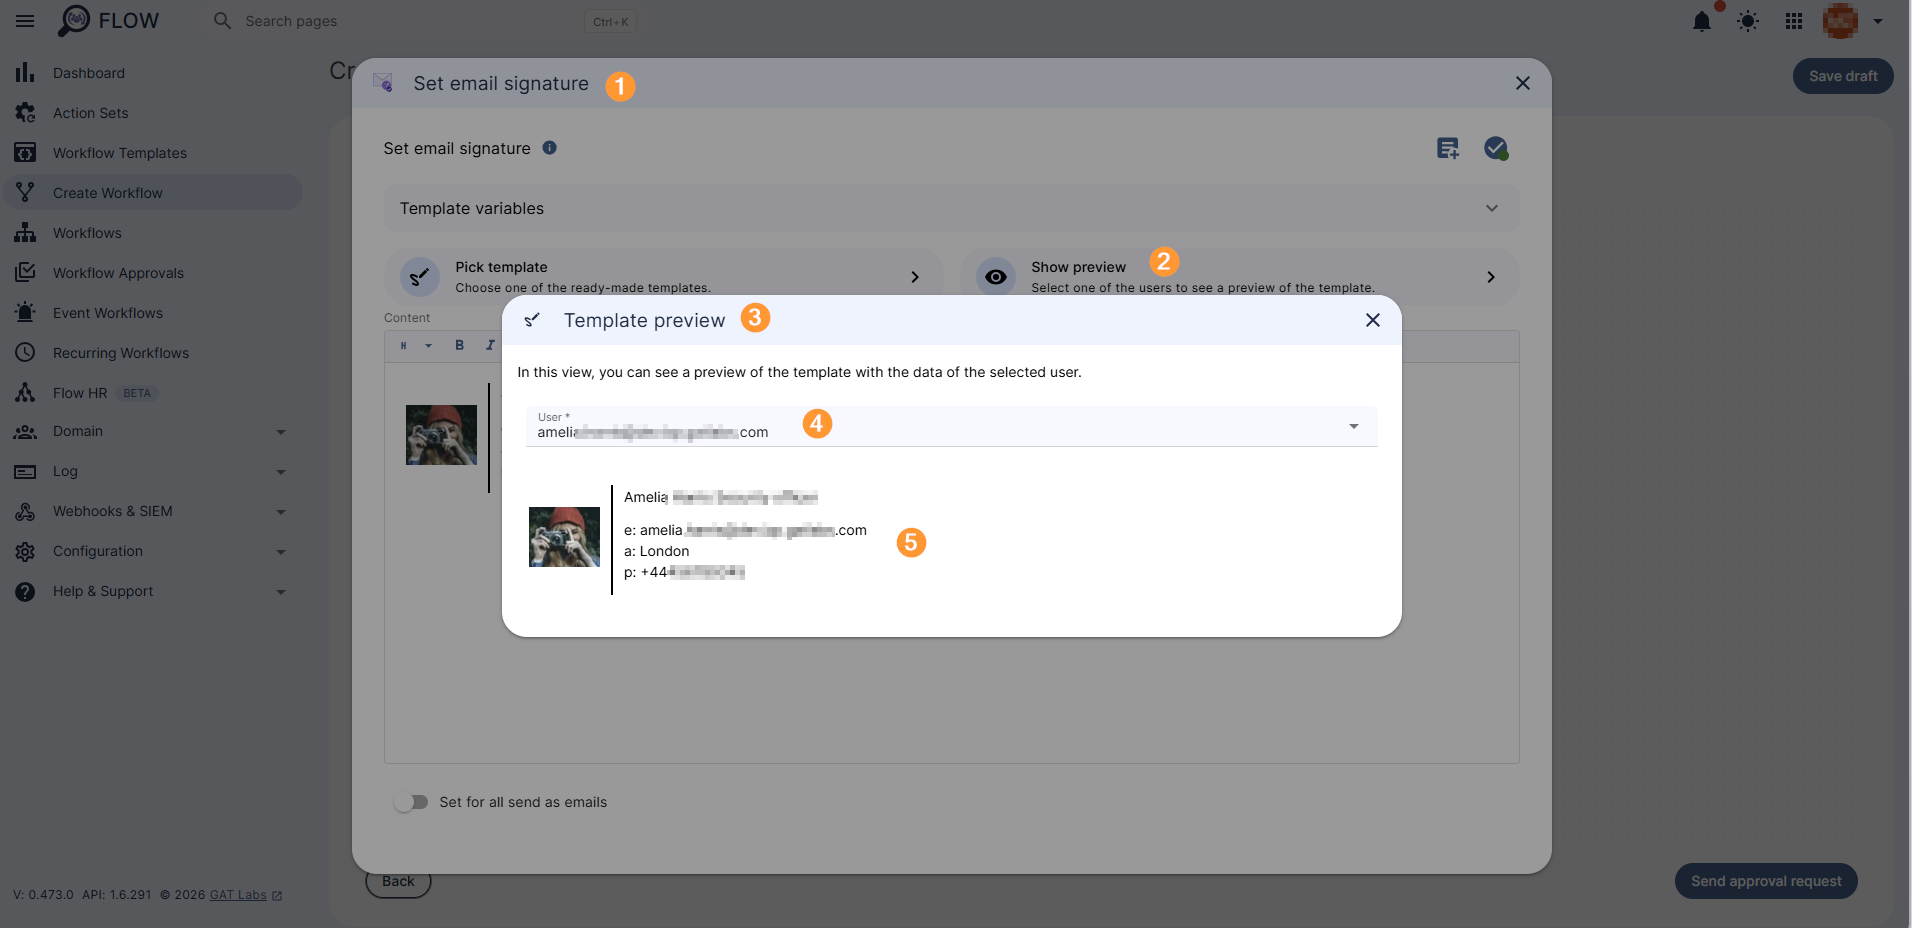
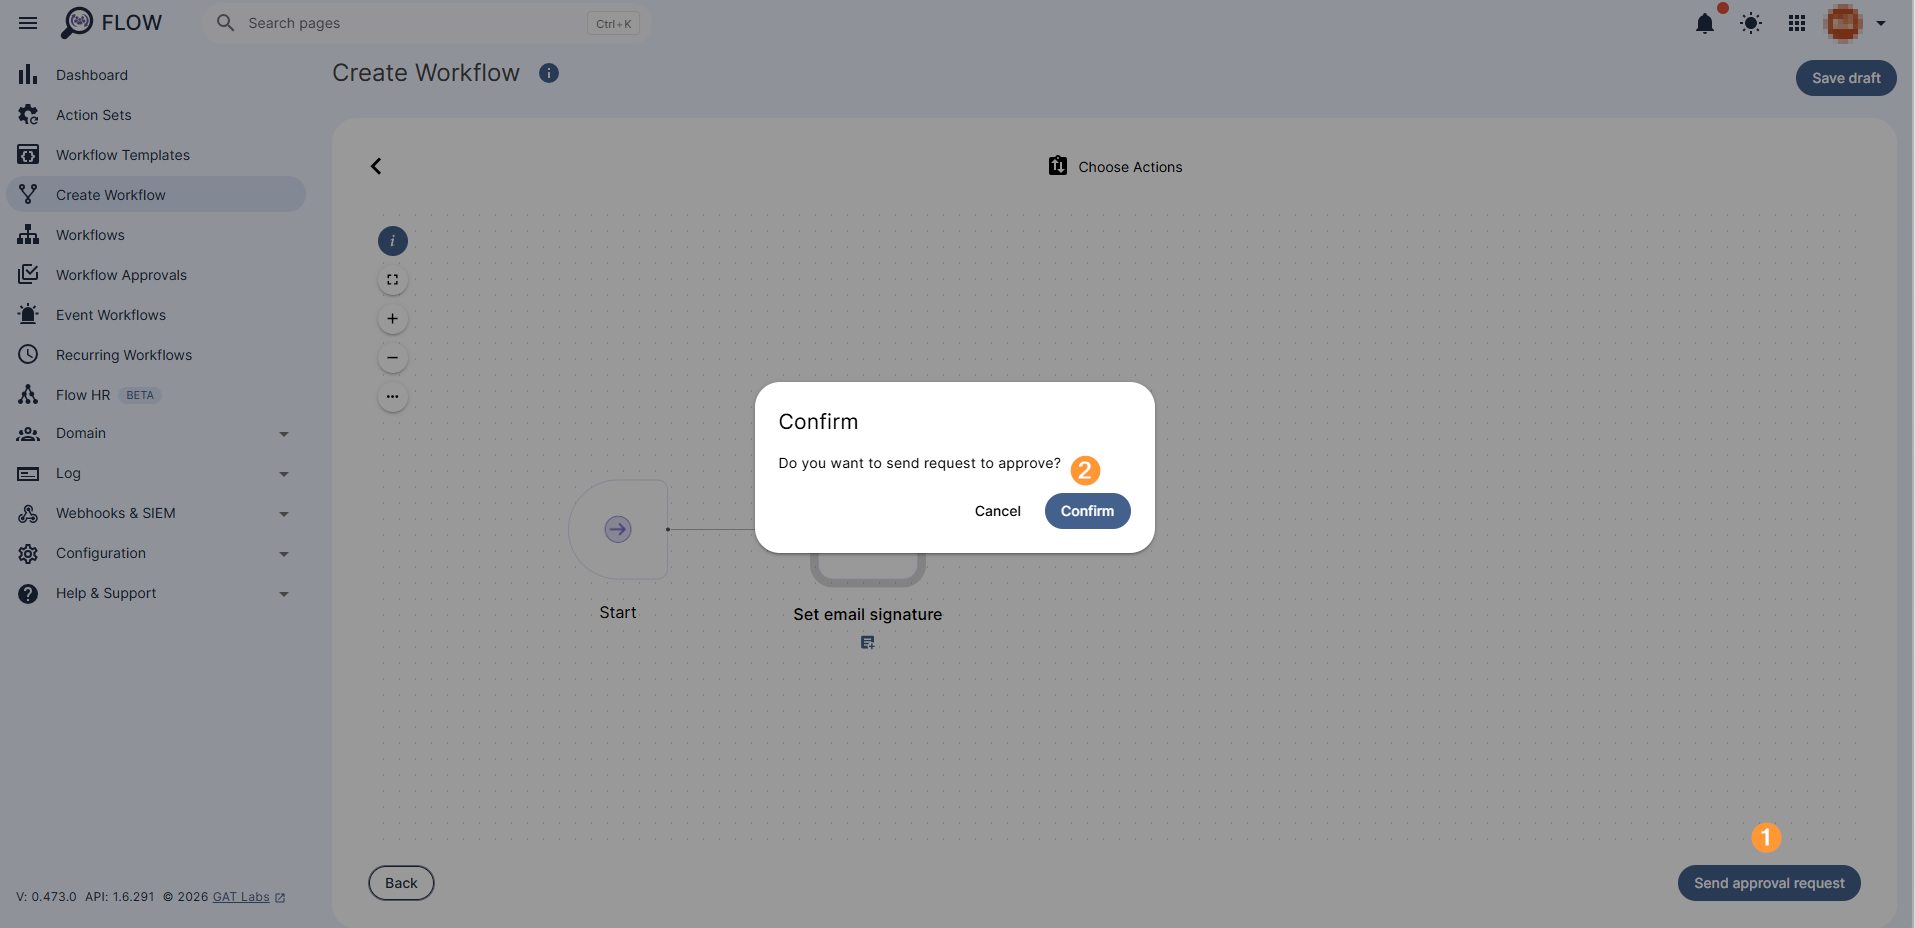
When all is ready, “send approval request” – click on the button to send the request for approval
Security Officer approval #
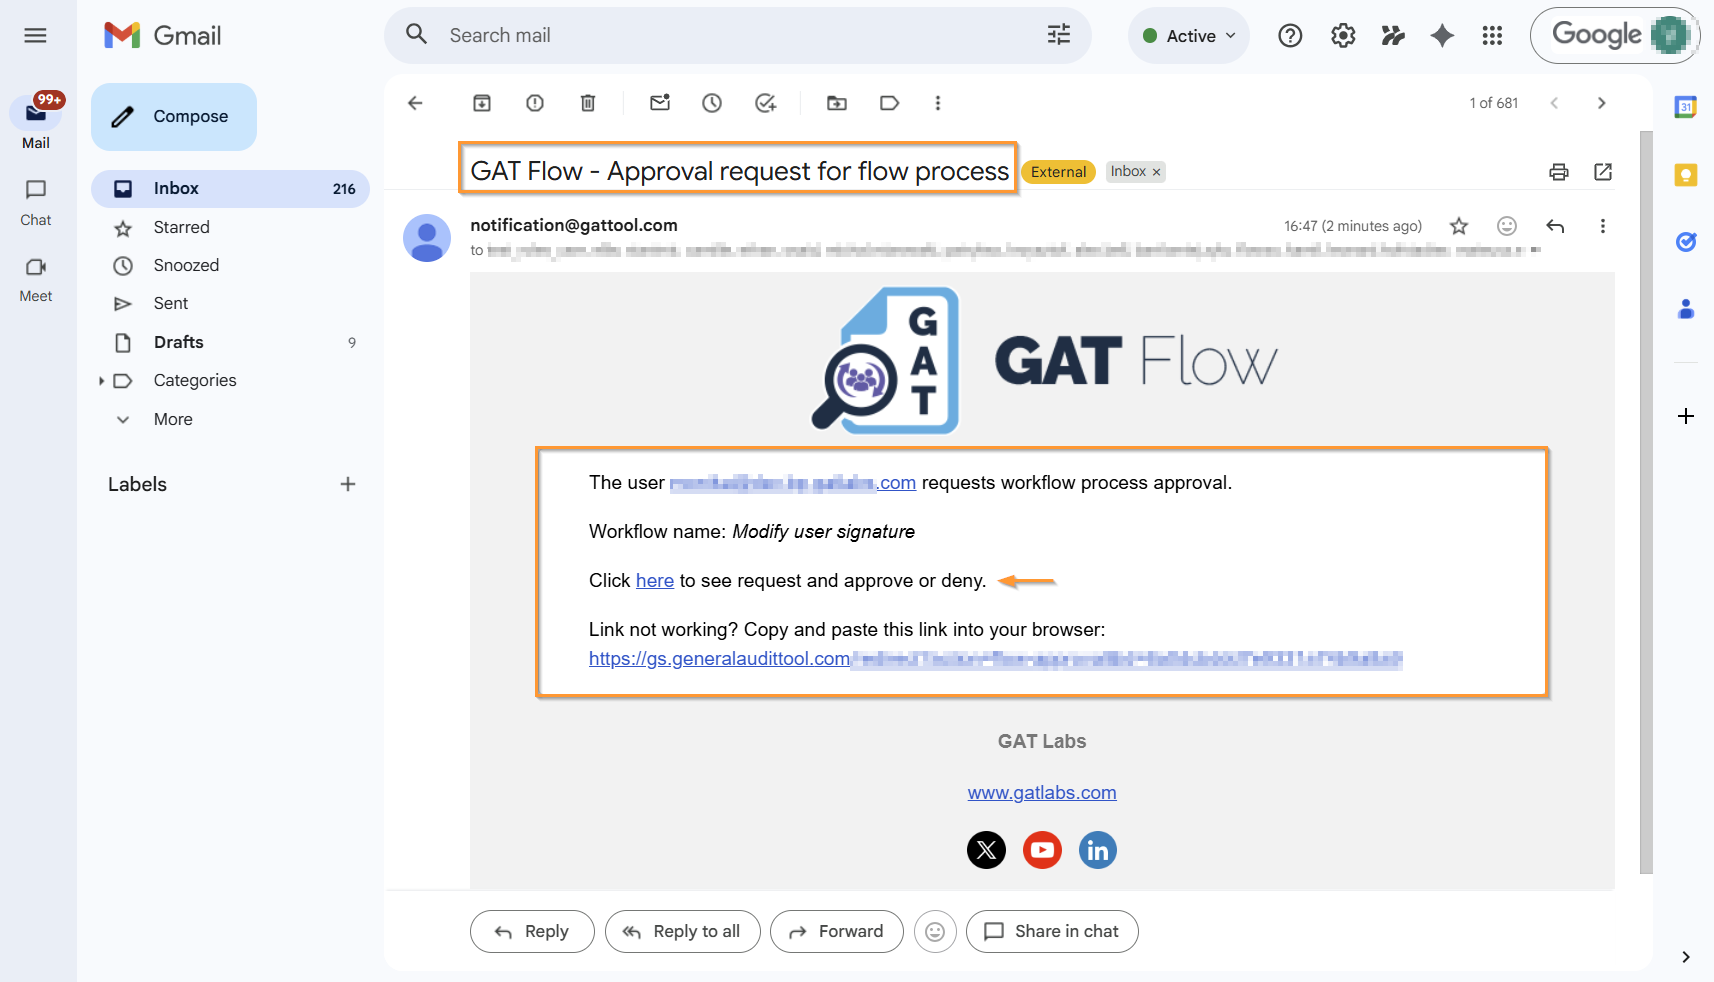
An email will be sent to the Security Officer for approval.
Note: If there is a pre-approval set, the Workflow can be executed without Officer approval
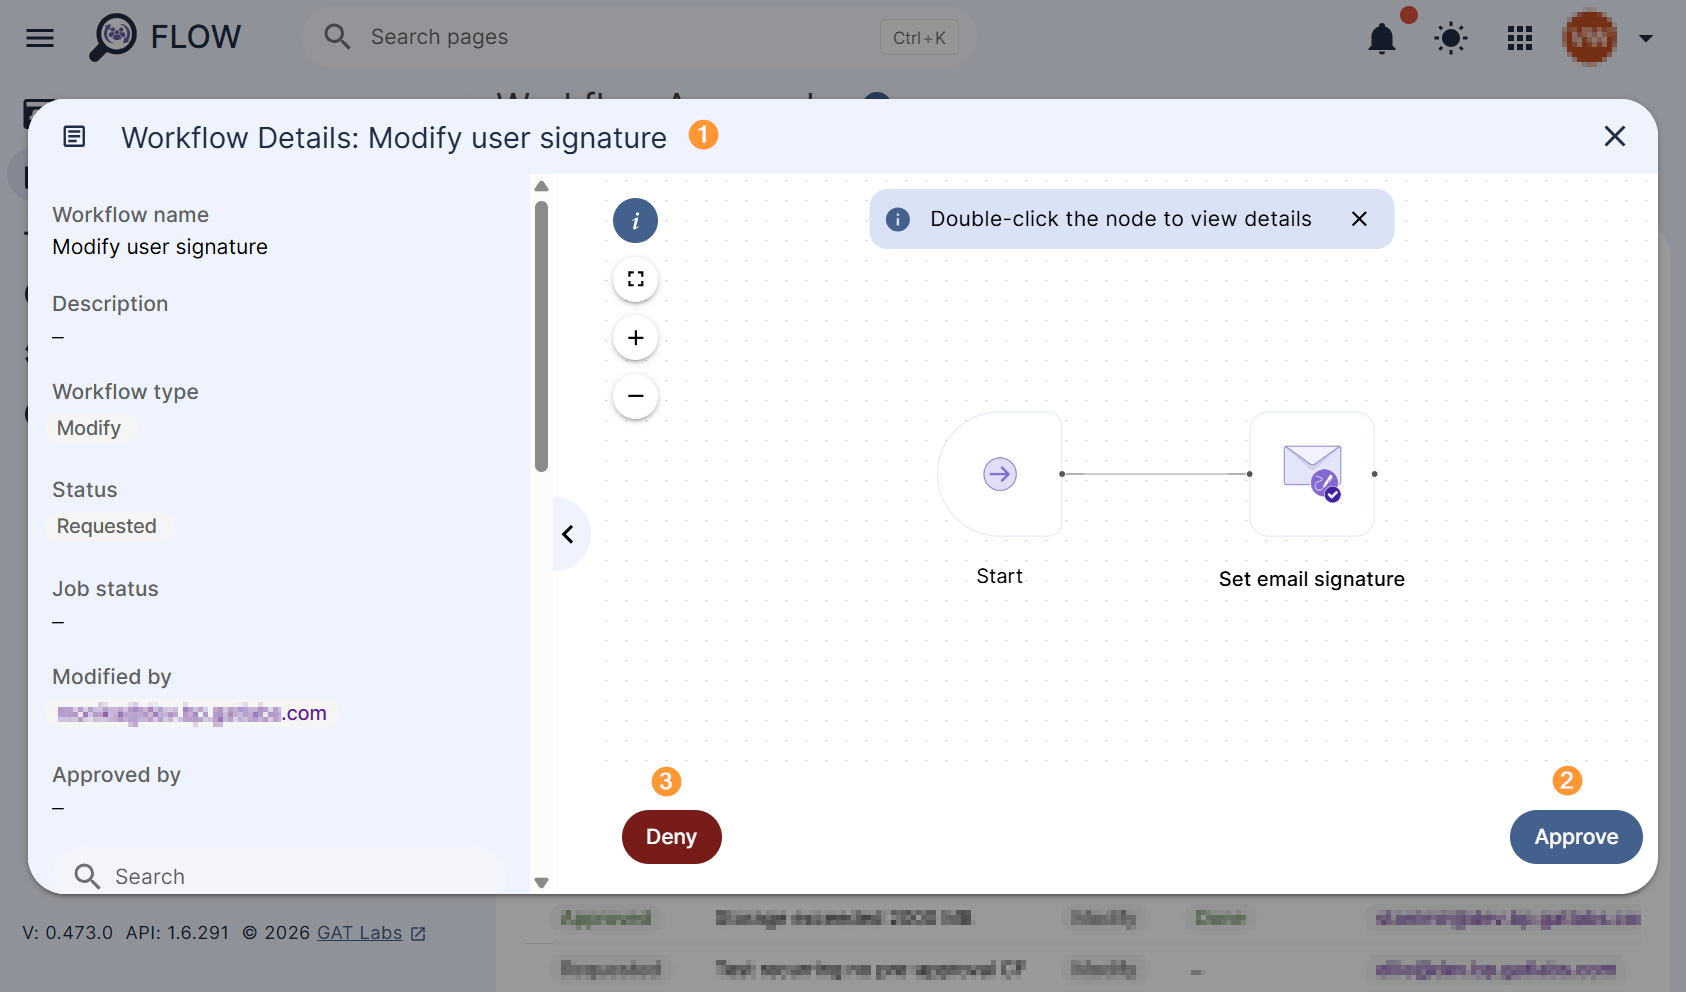
Security Officer approval – can view the changes that will be applied and approve or deny the request
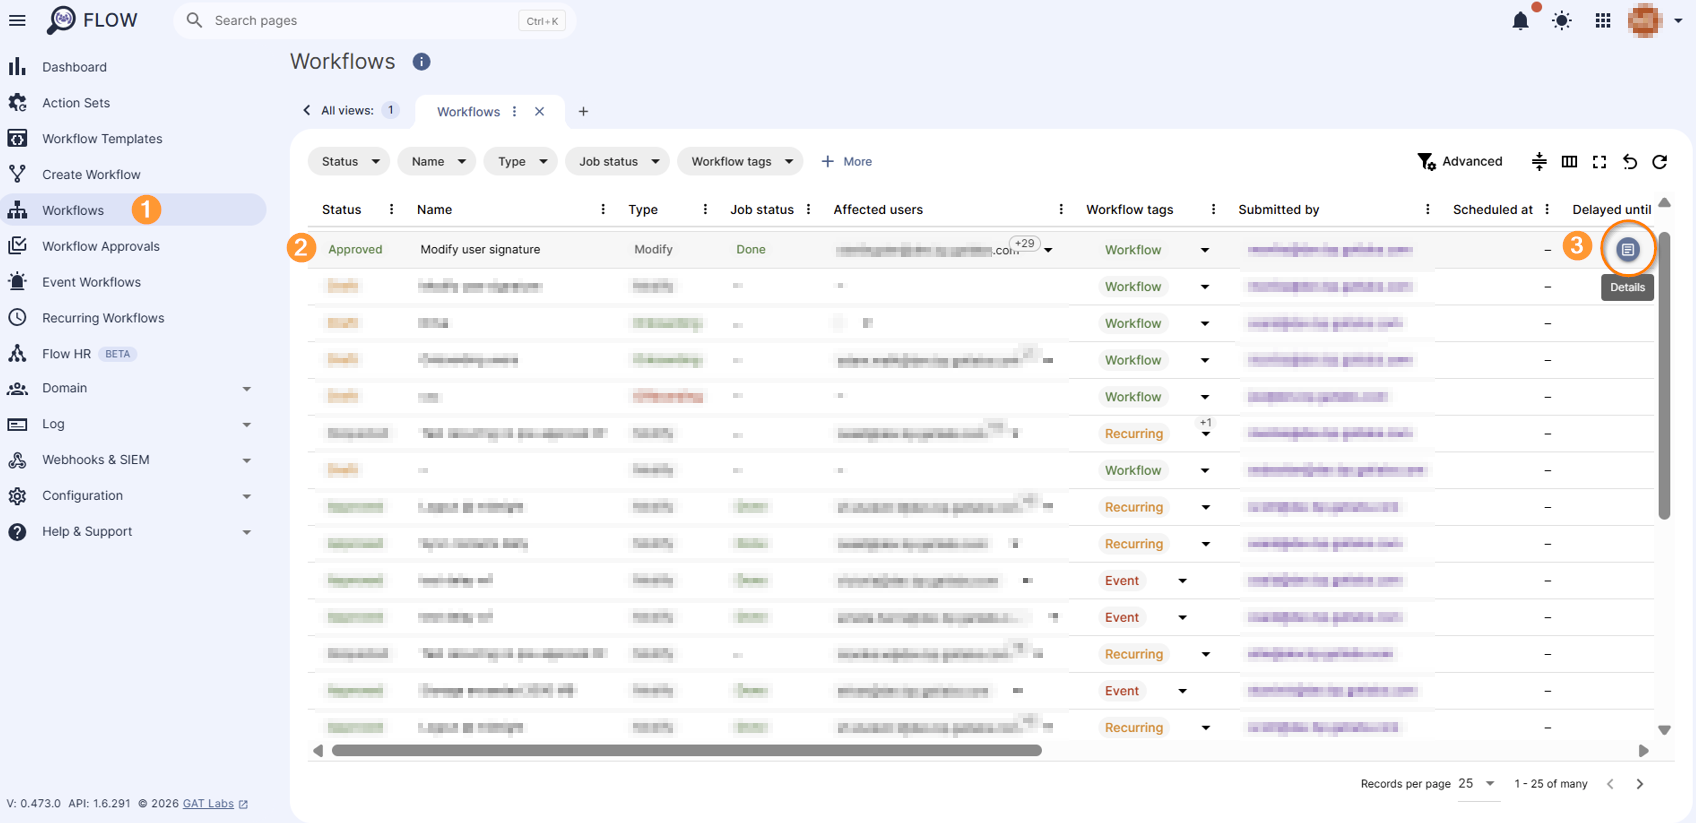
The progress of the request can be seen in the ‘Workflow’ tab in the left menu.
Workflow details
The status of the request can be viewed in detail under Workflow (1 -2). The Details (3) icon on the right side of the workflow record allows viewing it in detail.
Result #
When the request is approved and the workflow is completed, the Email signatures will be changed for all users selected in the workflow.