GAT Flow requires Unlock functionality enabled. Unlock requires Security Officer enabled.
Security Officer is required when Admin uses Flow, Drive, and Email audit for certain Unlock functionalities.
We also allow action via Unlock to be taken with no approval by Security Officer, this is called Pre-approval access.
In this post, you will learn how to set up pre-approved access in GAT Flow.
- Note: To have access to GAT Flow you must have configured GAT Unlock, this product requires a paid subscription.
- Please follow these configuration instructions to enable GAT Unlock in your domain
The Pre-approved access can be granted ONLY by the Security Officer.
This can be done using:
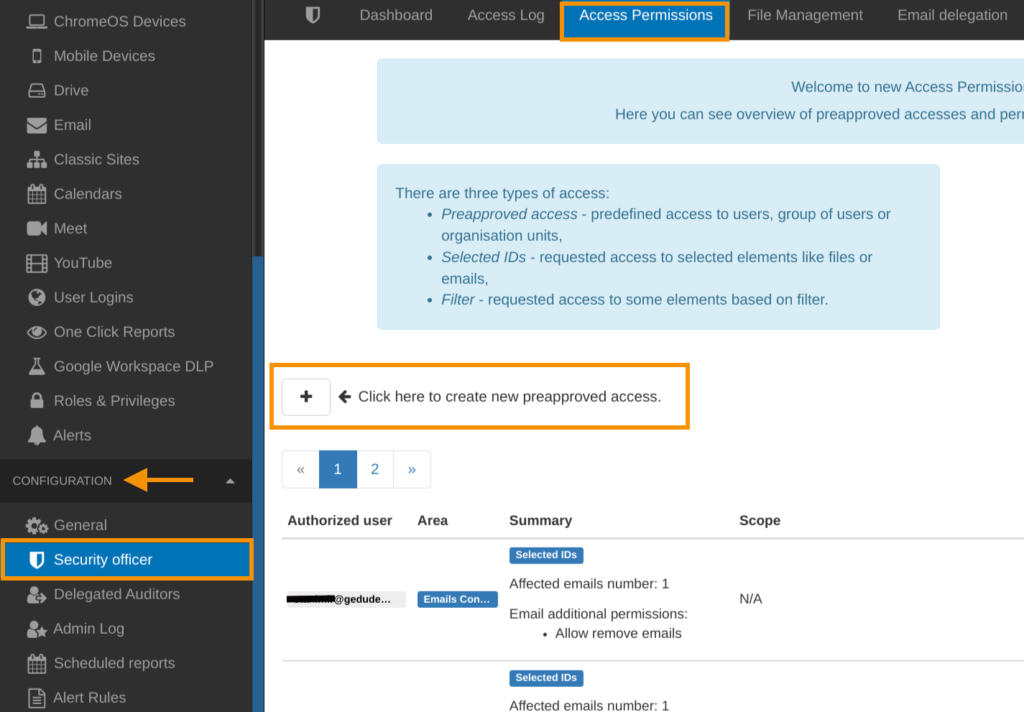
- GAT+ > Security officer > Access permissions
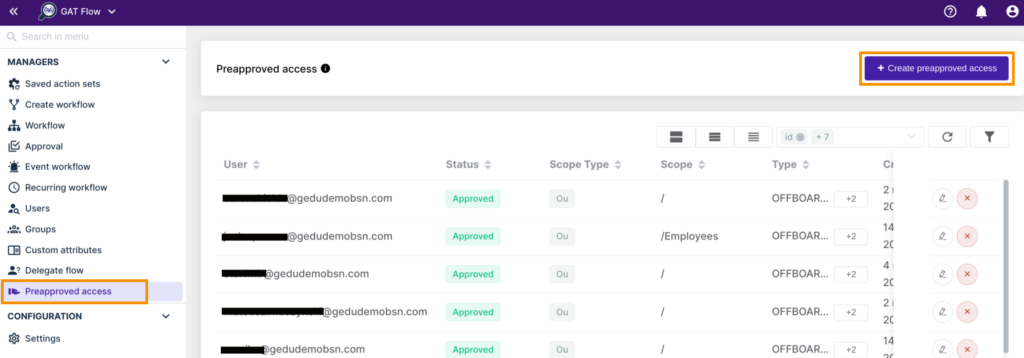
- Flow > Pre-approved access
GAT+ setup #
GAT+ > Configuration > Security Officer > Access permissions

In Access Permissions click on the + button <- Click here to create new preapproved access
A new window will be displayed fill in the details required:
- Authorized user – select the user to who you want to set pre-approved access to
- Type – select any type of Unlock required functionality
- Flow – create pre-approval access for Flow
- Flow types – select the type of workflow where the pre-approval will be enabled.
- Onboarding
- Offboarding
- Modify
- Flow types – select the type of workflow where the pre-approval will be enabled.
- Drive Files – create pre-approval access for Google Drive files access
- Email – create pre-approval access for Google Emails access
- Can remove emails – if enabled, the Admin (person who has pre-approval enabled, can delete emails right away, without needing approval.
- Can add email delegation – if enabled, the Admin (person who has pre-approval enabled, can grant Email delegation access to any account of the domain (scope given).
- Flow – create pre-approval access for Flow
- Scope – User, Group, Org.Unit
- If Organization units are used, you can click on the “check box” to include sub. org. units also.
- Valid until – set the time until pre-approved access will be granted

Click on Save
Result #
The Pre-approved access will be granted to the selected user
Flow setup #
Flow > Preapproved access > Add new preapproved access

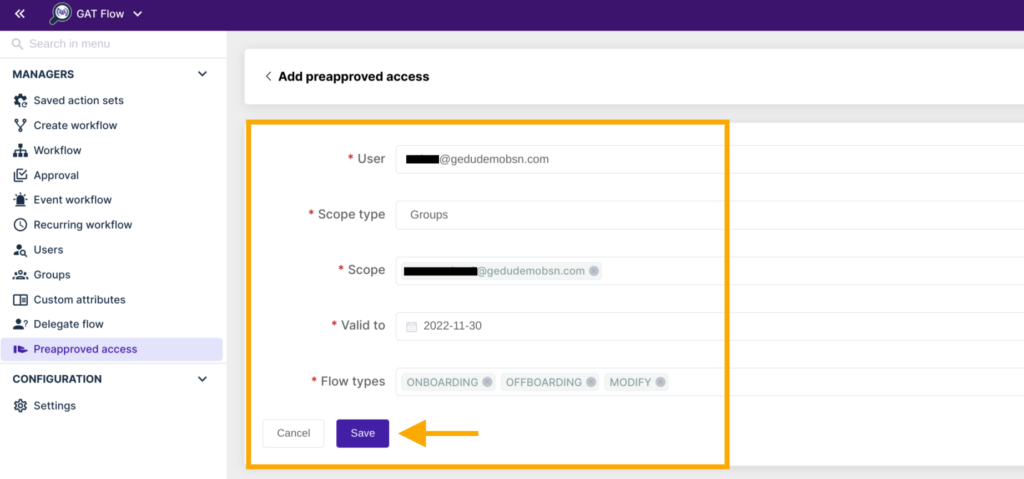
A new window will be displayed fill in the details required:
- User – select the user to who you want to set pre-approved access to
- Scope type – User, Group, Org.Unit
- Scope – enter the user/group/org.unit
- Valid to – set the time until pre-approved access will be granted
- Flow types – select the type of workflow Onboarding, Offboarding, Modify

Click on Save
Result #
The Pre-approved access will be granted to the selected user
Create workflow result #
When the Admin “Create workflow”, they will receive a pop-up message as below.

Event and Recurring workflow result #
When Event or Recurring workflow is used:
- The Event and Recurring workflow need to be approved separately from the Pre-approval
- The “pre-approval” option must be selected

Edit preapproval #
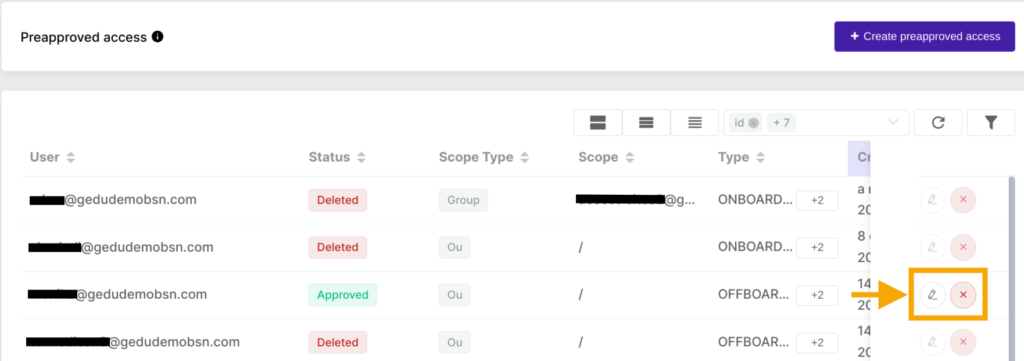
Edit existing pre-approved access.
In Flow view all the users who have Pre-approved access setup.

- Click on the “pen” icon to edit existing preapproved access.
- Click on the (x) to delete the preapproved access.


