GAT Flow addresses the lack of criteria for categorization by allowing the Google Workspace Admins to create their own users’ custom attributes.
Many companies and schools may have certain criteria for categorizing employees, managers, teachers, and students.
Google Admin Console has many options to allow an admin to input user data so that it can be manipulated in certain ways.
However, Google Admin Console data fields are set in stone, and many of these categories fall short of what is required when an Admin wants to enter a specific characteristic that might only be relevant to their organization.
Below we explain how to solve this problem using GAT Flow.
How to use the custom attributes in the signature #
One use case for the users’ custom attributes might be in setting the user’s signature.
If you would like to add specific information to the users’ signature, for example, their location, you can add it to the signature if that data has been entered in the Users section of GAT Flow.
Step 1. #
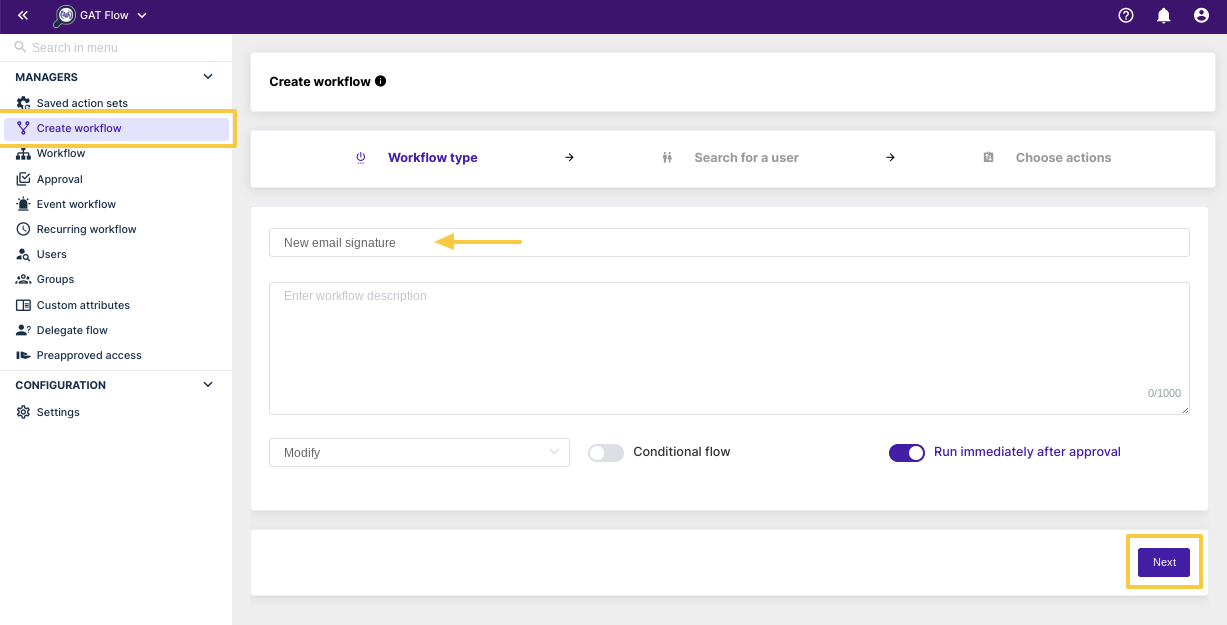
To begin, Create a workflow, and set the type to Modify. Click Next to continue.

Step 2. #
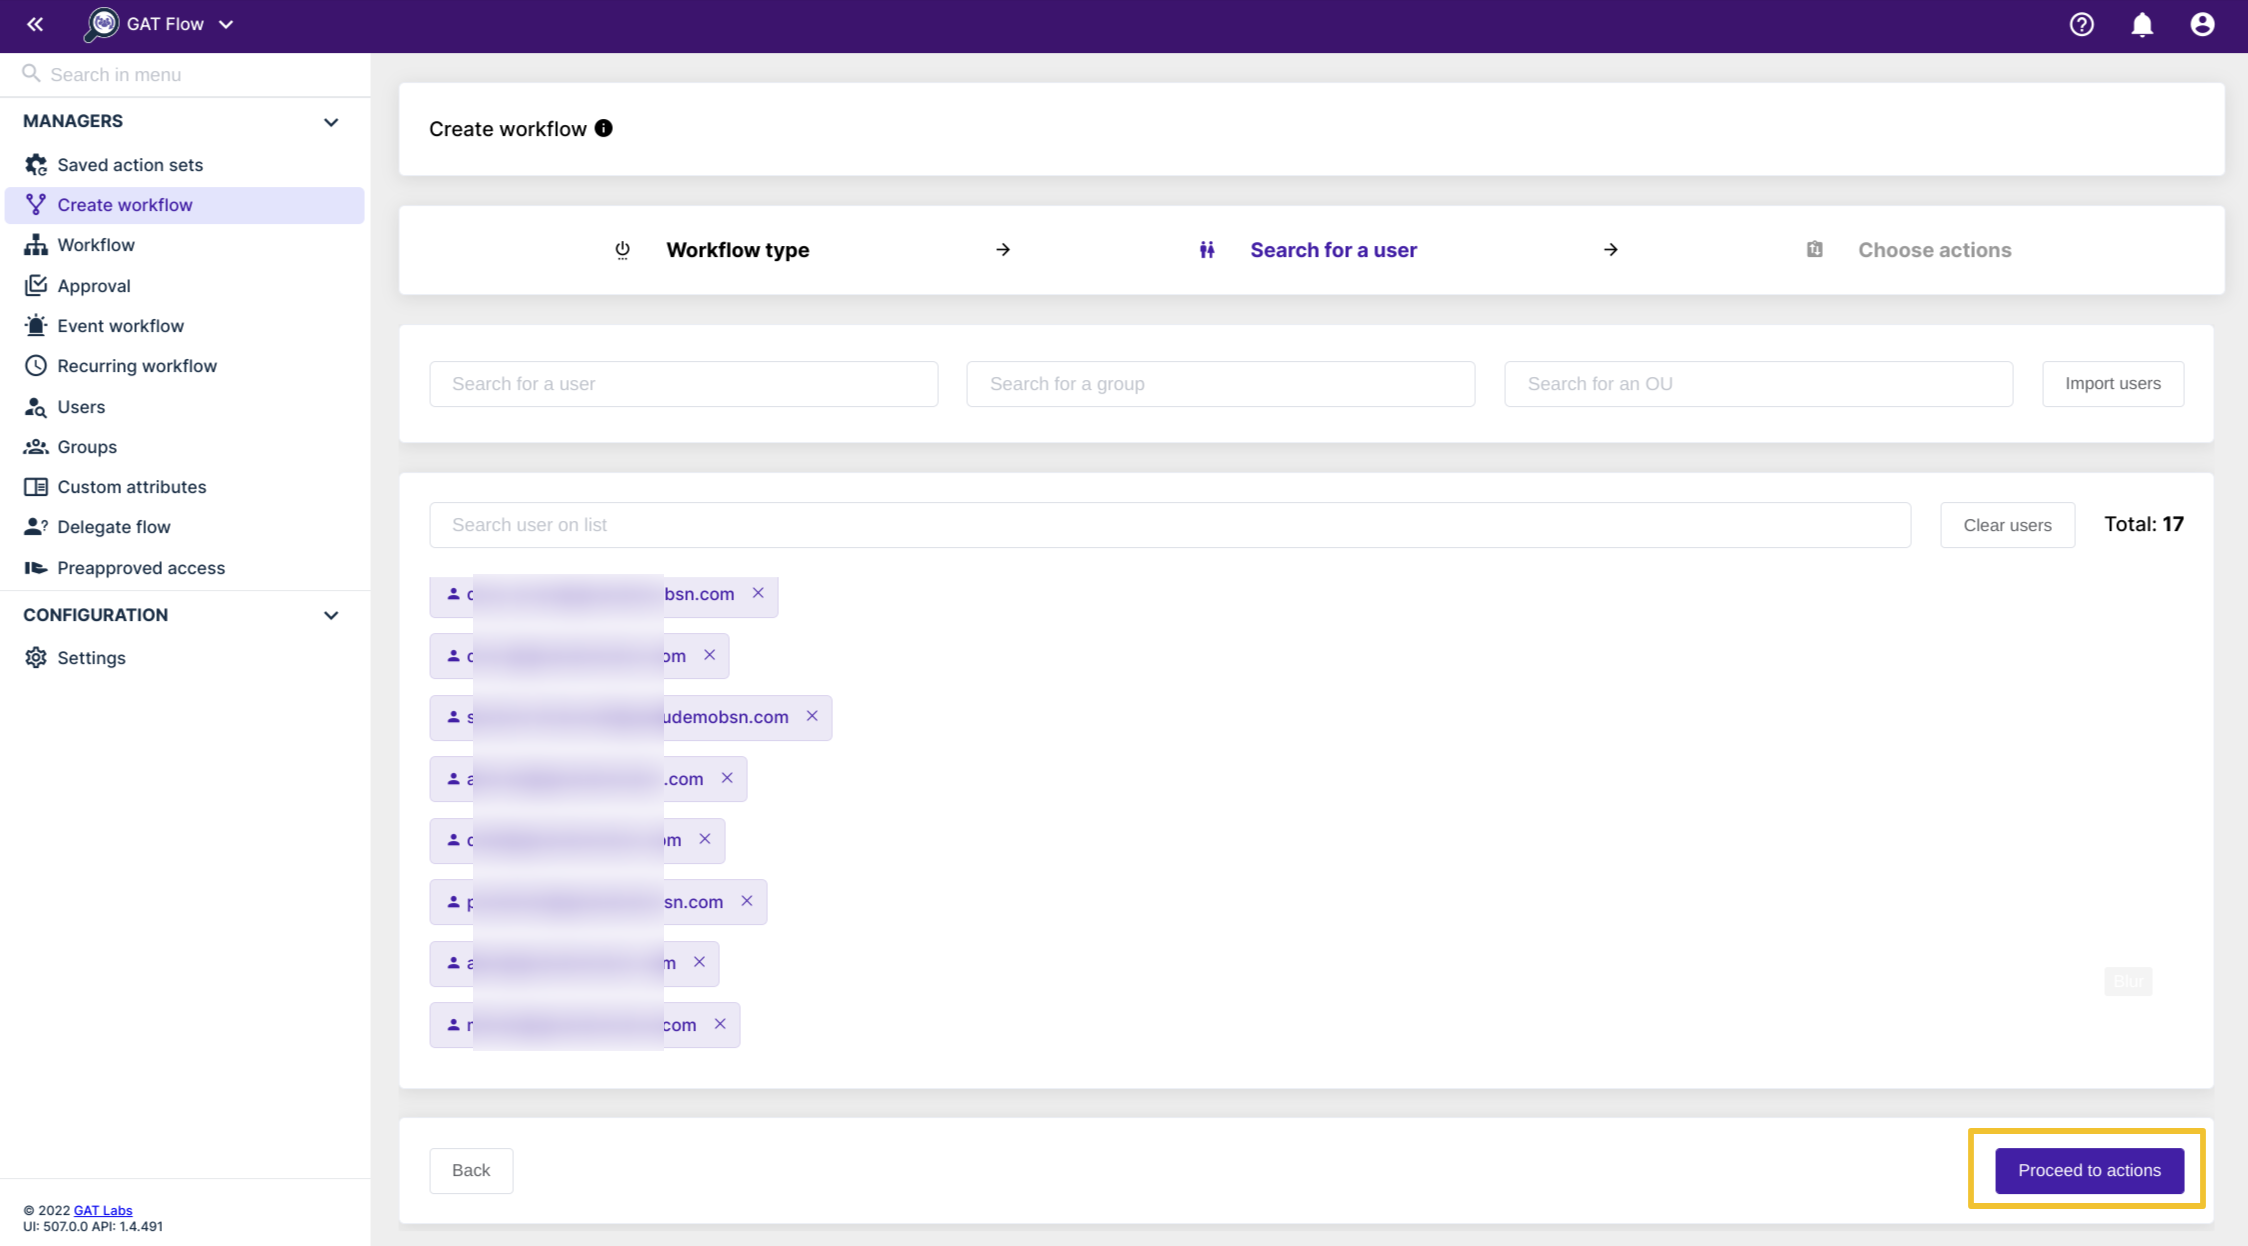
On the Search for user screen, select the users you want the workflow to run on, and click Proceed to actions.

Step 3. #
On the Choose actions screen, for this example, we will choose to Add an action by using the (+) button on the left.

Step 4. #
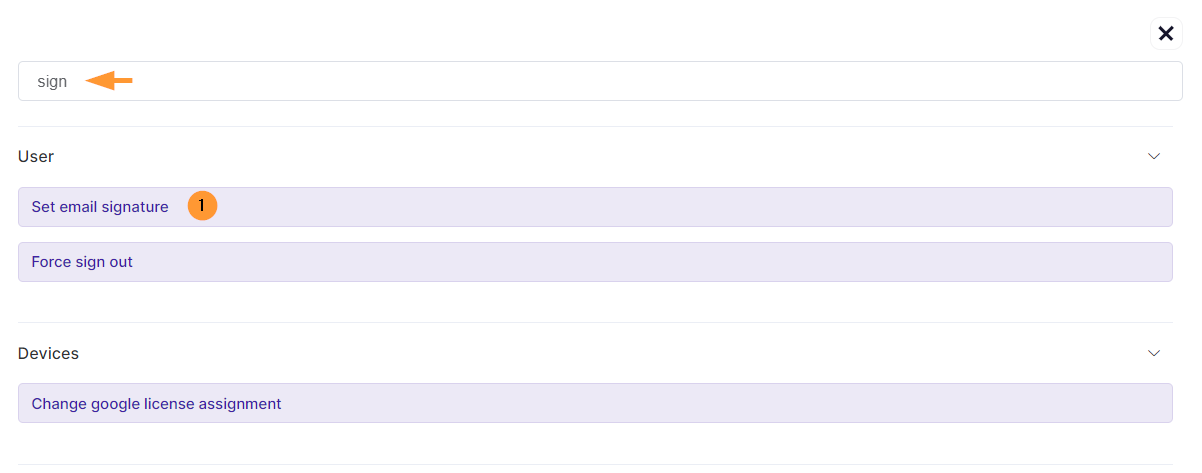
Navigate to Set email signature.

Step 5. #
Here you can select custom attributes you have previously created in the user’s signature. Simply click on the attribute in the top pane and it will appear in the bottom pane.

Step 6. #
When you are finished editing the signature, click Send approval request to finish.
Conditional Workflows with Custom Attributes #
You can also use these custom attributes in a conditional workflow.
Using the same custom attribute, we will create a workflow that will only be triggered if a user is in a specific part of the world.
In our hypothetical scenario, there are folders that our US-based accountants need to have in their myDrive. Though if the accounts team members are not from the US, they should not have the folder as it doesn’t apply to them.
To automate this process, we will start the workflow after moving the user to the Accounts Department OU. And have GAT Flow decide if the user needs the folder.
Step 1. #
To begin, create a workflow of any type. For this example, we are going to make use of some automation by creating an event workflow.
Step 2. #
Choose Event workflow from the left-hand side and click Create workflow on the top right-hand side.
Name the workflow and use Modify for the Type of workflow.
For the Event, field select Start when a user is moved to an Org Unit.
As we are going to have this run on the Accounts Department, select that in the Ous field.
Switch on the Conditional flow slider, and click Next.

Step 3. #
On the next screen, select the Add condition button from the start menu. In the box that appears, select the Advanced dropdown menu, scroll to the bottom and select the Employee data – Location.
The next option is Equal meaning ‘exactly the same’, so the Employee data – Location will need to be ‘exactly the same’ as what you entered in the field below.
For this use case, we will leave it as is.
In the bottom field, we will enter US.
NOTE: If an employee’s data had ‘USA’ entered for location data, GAT Flow would not see this as equal, as ‘US’ and ‘USA’ are not exactly the same. If we wanted this workflow to run on the users from the USA, we could select Starts with instead of Equal to select users with USA entered in their location data.
Step 4. #
On the right-hand side of the conditional box, select the option Add action in case of yes > Copy folder to selected user(s).
Choose the user that has the folder, and then select the folder(s) you want to copy. In this case, we will select all folders.

On the Copy folder to selected user(s) box, click the down arrow to End graph here and end the Yes side of the condition.
We aren’t going to do anything within this workflow if the users are not from the US. On the No side of the conditional box, select the down arrow to End graph here.
On the left side of the workflow, if the user is not in a specific location, we will choose to do nothing, so select End graph here.
Step 5. #
Now click Send approval request to finish.
Result #
We can also check what happens when this workflow is triggered.
We created the workflow to move a couple of users to the Accounts Department OU. One user is based in the US and the other is not. The screenshot below indicates that the operation was completed successfully and both users moved to the Accounts Department OU.

We can see on the next screenshot below that our event workflow has triggered, though we can only see for one of the users.

Clicking the number 1 in the Done column shows more details about what happened.
And finally, in the screenshot below, we can see on which of the two users the workflow was run and that the folders were successfully copied.
In moving two users to the Accounts Department, one based in the US and one not, we can see that the event workflow worked as expected and copied the folders to that user only.


